How do I use Zmanda with Wasabi?
Zmanda has been validated for use with Wasabi. Zmanda is an Enterprise Cloud Backup and Recovery product for customers with on-prem data and hybrid cloud infrastructure. This knowledge base article details the steps for integrating Zmanda with Wasabi's object storage. To learn more about the Zmanda - Wasabi joint solution, please refer to our joint solution brief.
1. Pre-requisites:
Zmanda backup server with a minimum of release 3.6 installed.
To use Immutable backups, Zmanda version 4.2 or later is required.
Zmanda clients are installed.
Wasabi storage add-on.
Active Wasabi account.
2. Reference Architecture
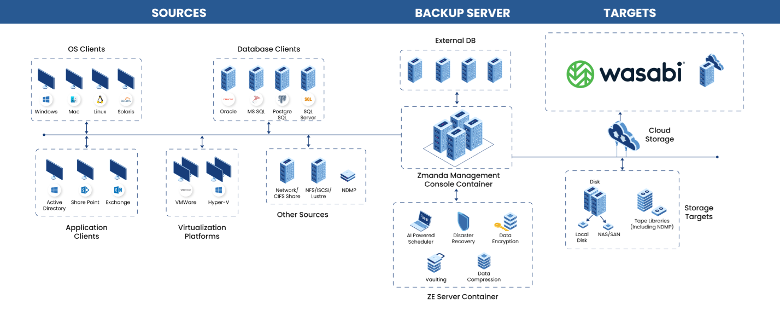
The diagram below shows Wasabi as a cloud storage target for Zmanda backups to store data securely in the Wasabi cloud.
3. Creating a Wasabi Storage Device on ZMC:
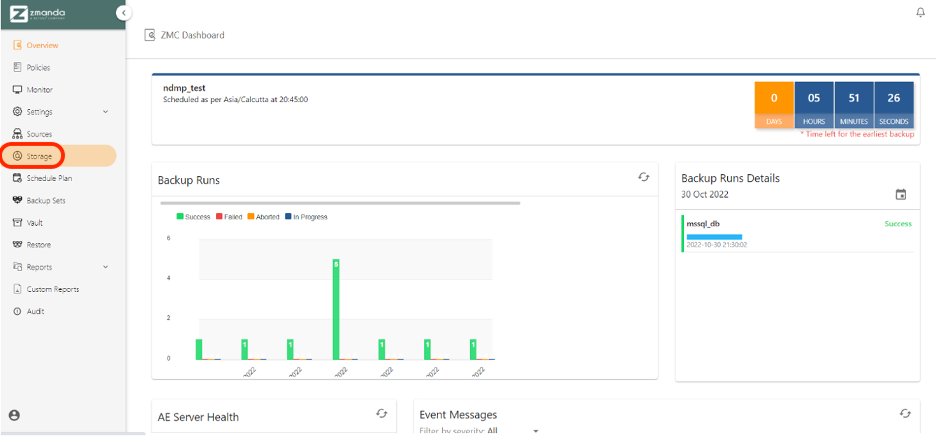
3.1. Login to the Zmanda Management Console (ZMC) using your credentials. Select "Storage" on the navigation bar on the left.
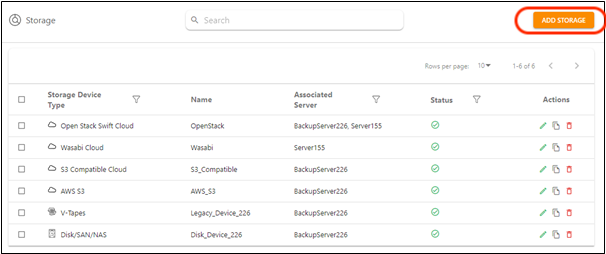
3.2 Click on the "ADD STORAGE" button at the top right end of the screen.
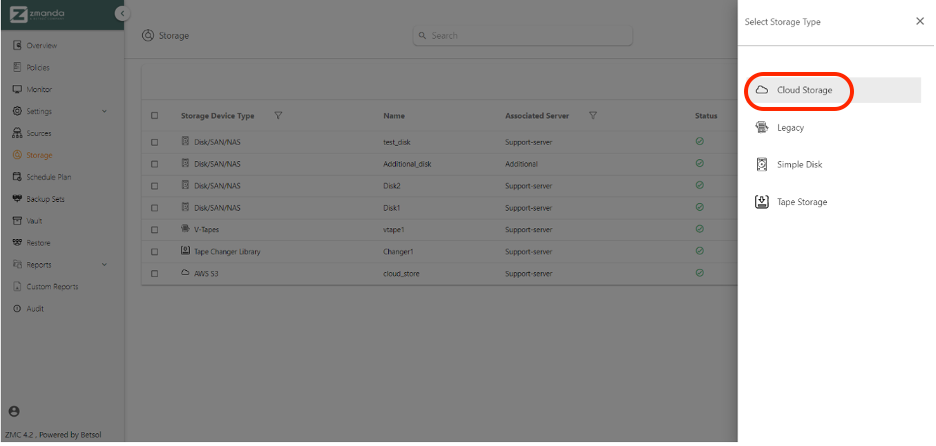
3.3 Select "Cloud Storage" as the Storage Type.
3.4 Select "Wasabi Cloud" from the Type dropdown.
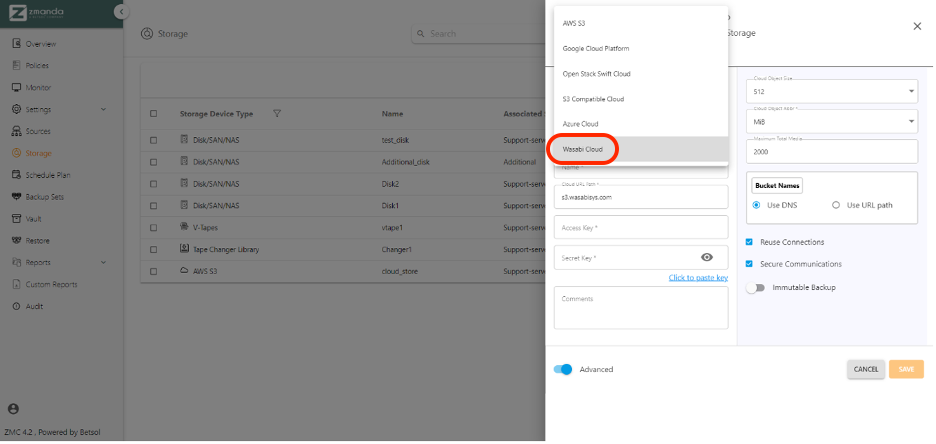
3.5 Enter the following details-
Select the backup server from the AE Server dropdown.
Enter a new name for the Wasabi storage you are creating in the Name field.
The cloud URL path should be "s3.wasabisys.com" by default. If it is not, please change it to the default value.
Enter the Access Key and Secret Key in the relevant fields.
Configure the Advanced options as applicable to you and click on the SAVE button once you are done.
The newly created Wasabi storage target should be visible on the Storage screen. Under the Status column, a green tick mark should appear, which indicates that the target is ready for use.
4. Creating a Backup Set on ZMC
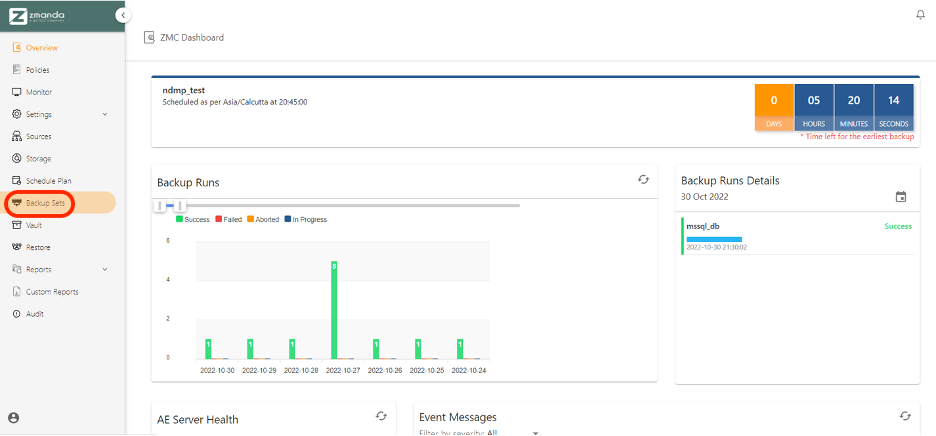
4.1 Select "Backup" Sets on the left side navigation bar.
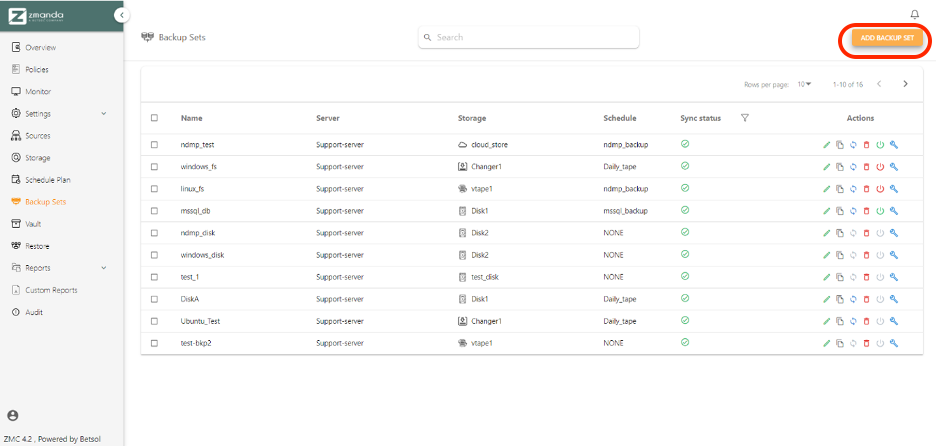
4.2 Click on the "ADD BACKUP SET" button at the top right corner of the screen.
4.3 Enter the following details In the Add Backup Set window.
Select the Wasabi storage device created by you from the Select Storage dropdown.
Enter a new name for the backup set you are creating in the Name field.
You can select a schedule from the available options in the Select Schedule dropdown. This is not mandatory.
Filling in the Description (optional) and Comments textbox (optional) if needed.
Click on the "SAVE" button.
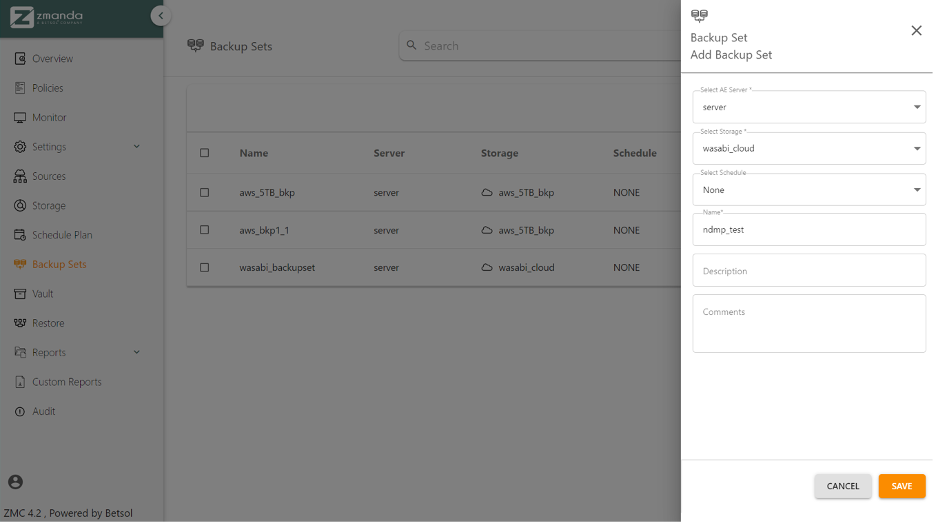
The newly created backup set should be visible on the Backup Sets screen. Under the Sync status column, a green tick mark should appear, which indicates that the backup set is ready for use.
5. Creating a Source to be backed up
5.1 Select "Sources" on the left side navigation bar.
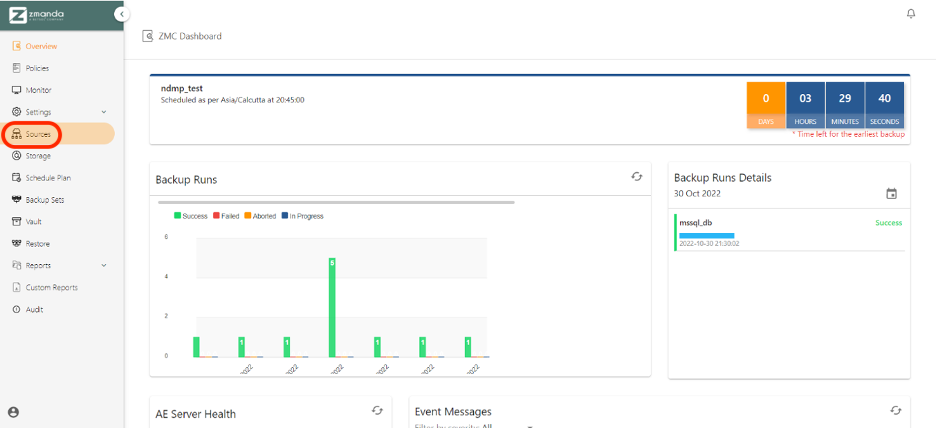
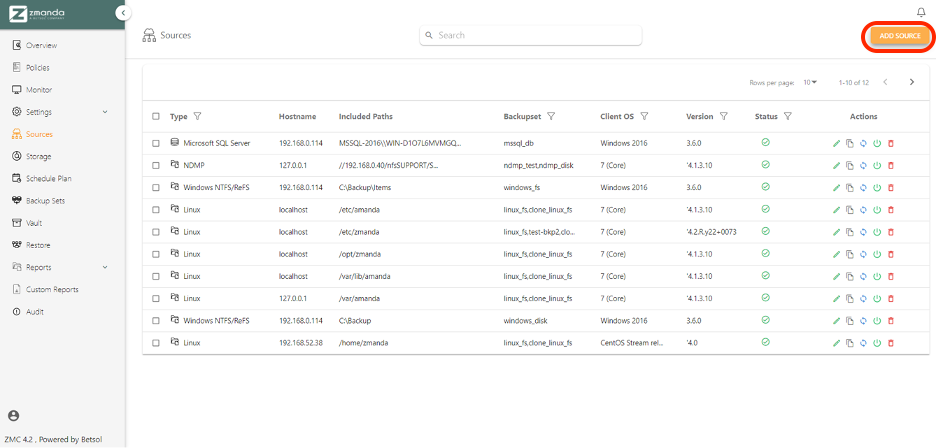
5.2 Click on the "ADD SOURCE" button at the top right end of the screen.
5.3 Select the applicable "Source Type".
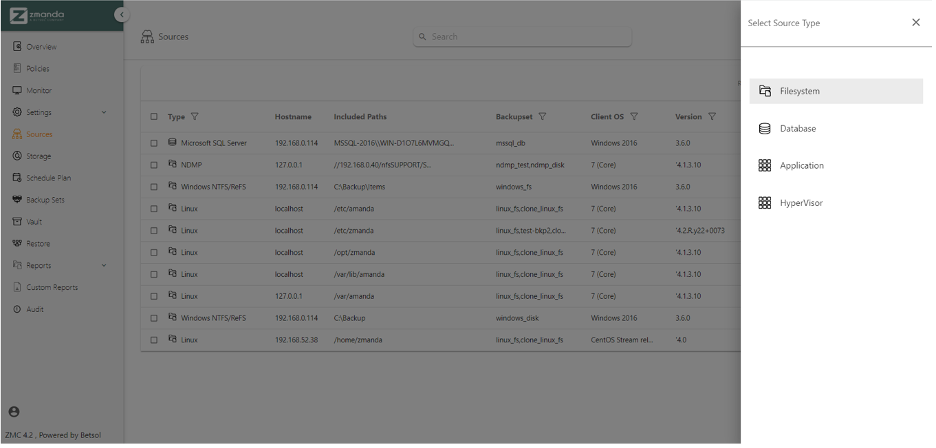
5.4 Select the type of source from the Type dropdown. Enter the details for the selected source type-
Enter the Hostname in the relevant field.
Enter the absolute path of the directory or file you want to backup in the Directory Path field.
Select the backup set from the Backup Sets dropdown.
Enter the other required options on the Add New Source pane.
Click on the SAVE button once you are done.
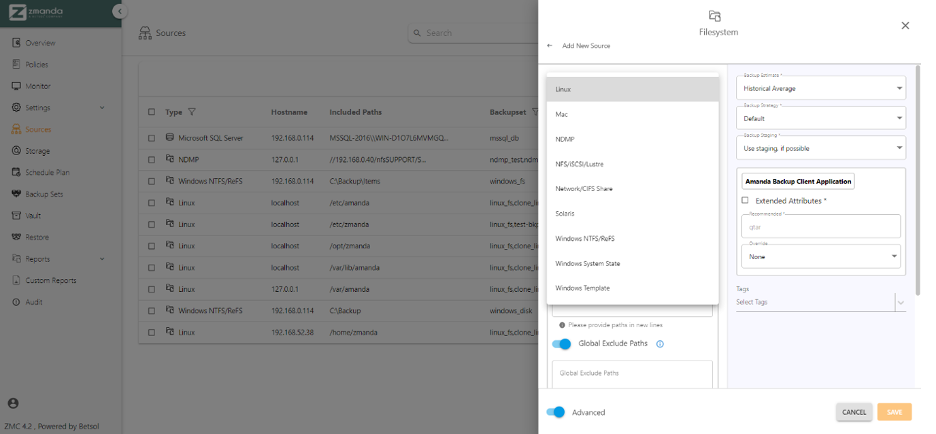
The newly created source should be visible on the Sources screen. Under the Status column, a green tick mark should appear, which indicates that the device is ready for use.
6. Running a backup job via configuring the backup set
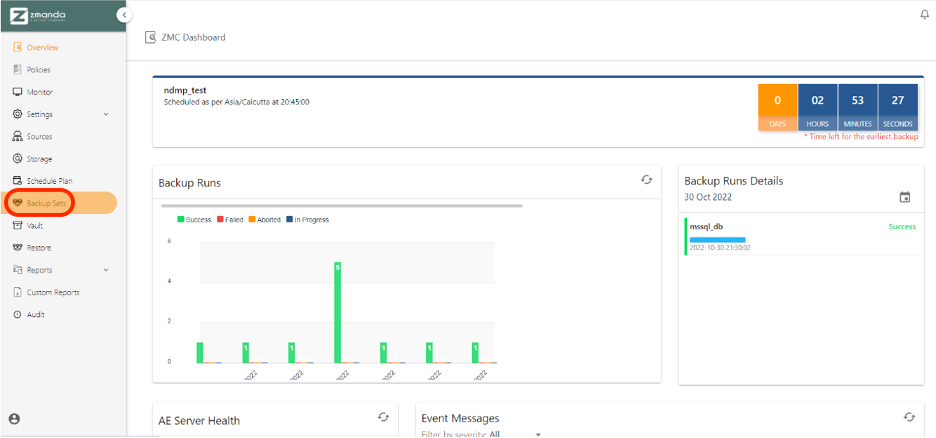
6.1 Select Backup Sets on the left side navigation bar.
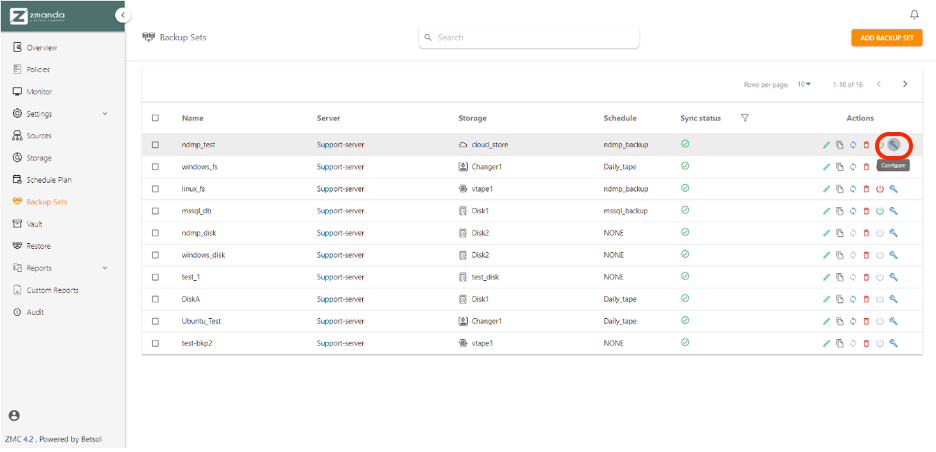
6.2 Click on the Configure icon (blue spanner)under the Actions column of the backup set you want to configure.
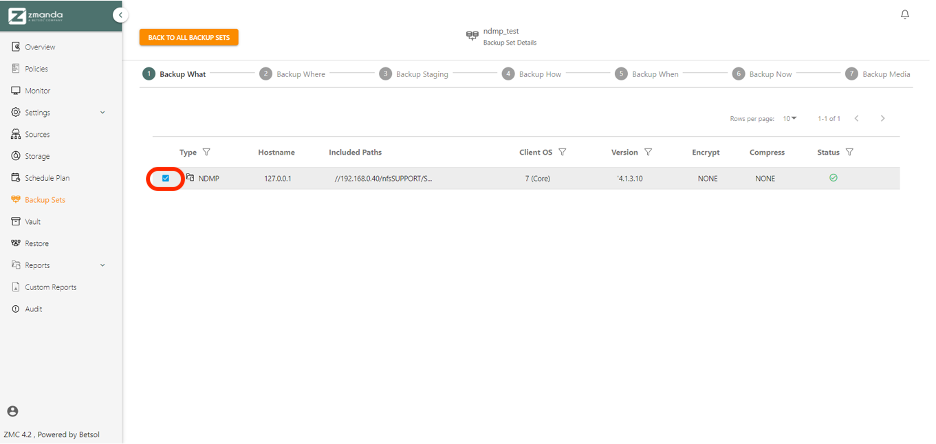
6.3 Check the checkbox of the source(s) you want to backup. Next, select "Backup Where" under the header.
6.4 Select the region of Wasabi you want to backup to from the Location Restriction dropdown.
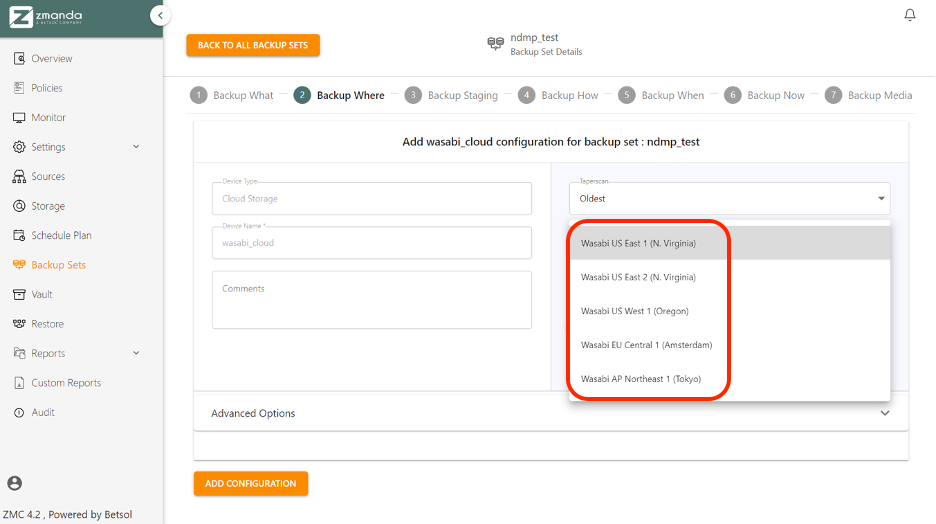
6.5 Configure the other options as applicable to you, and click on the "ADD CONFIGURATION" button once you are done. Once the "Backup Where" task is created successfully, a notification is displayed up top. Next, select "Backup Now" under the header.
Note: The name of the bucket created on Wasabi is the same as the text displayed in the "Backups stored at" field. The bucket is created as soon as you add the configuration.
Below is a view of the bucket created in the Wasabi Console

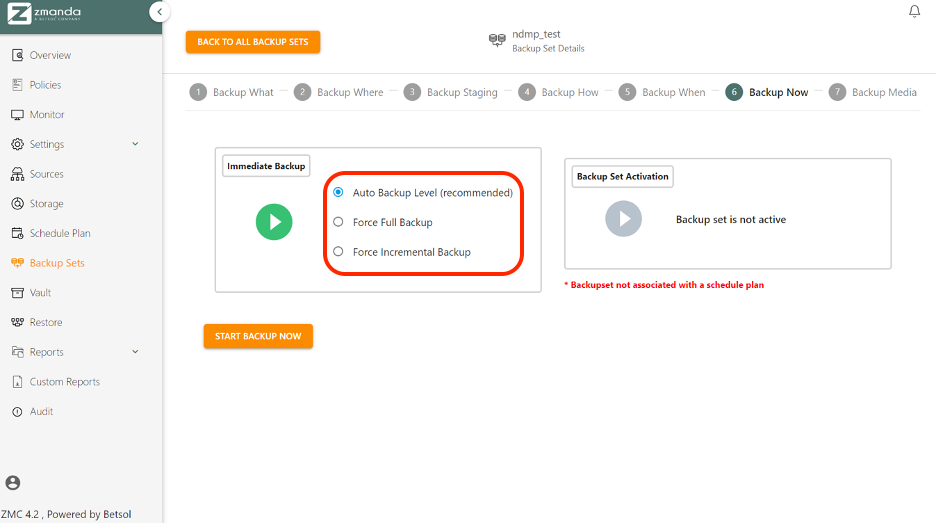
6.6 On the Backup Now screen, select the type of backup you need via the radio buttons available under the "Immediate Backup" section. Click on the green play button under the Immediate Backup section to start the backup process.
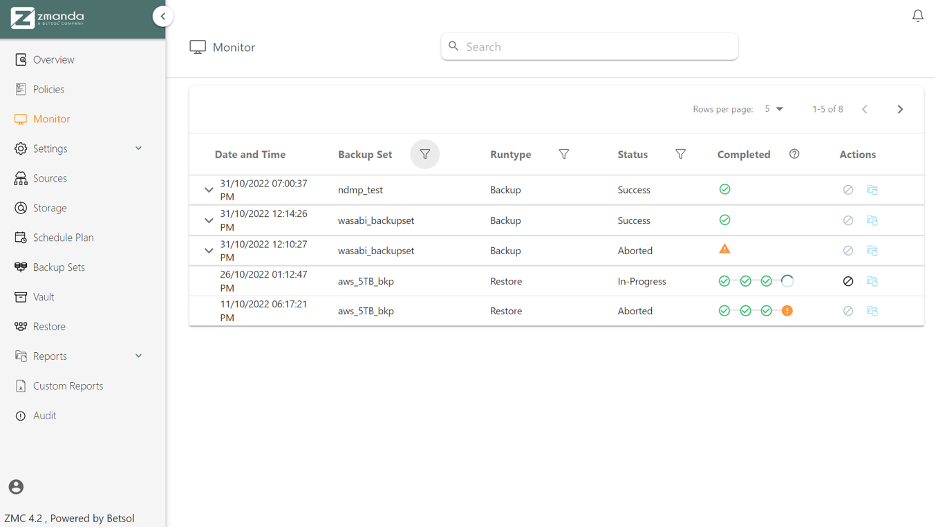
6.7 Once the backup is triggered, you will automatically be redirected to the Monitor screen. You can observe the progress of your backup under the Status column for the current date and time.
When the backup is complete, the Status column will display Success, and the Complete column will display a green tick mark as shown.
7. Object Lock Configuration For Immutable Backups
Zmanda leverages the object lock feature in Wasabi cloud storage to achieve immutable backup functionality. To make object lock management seamless, configuring immutable backups can be done from Zmanda. Zmanda supports both modes for immutable backups"
Compliance mode: In compliance mode, users cannot edit or delete the backup data. Even the storage period remains fixed until it expires.
Governance mode: In governance mode, users with special privileges (such as the root user) may reduce the storage period.
Immutable backup feature can be enabled or disabled at two levels on Zmanda-
Storage tier level- Configuring immutability at this level applies to all the backup sets for that storage device. Refer to 7.1 Enabling immutable backup from the Storage page for configuration instructions.
Backup set level- Configuring immutability at this level applies to that particular backup set only. Refer to 7.2 Enabling immutable backup from the backup set page for configuration instructions. It is recommended to enable object-lock at this level as it provides more control at a granular level.
7.1 Enabling immutable backup from the Storage page.
Follow the steps below to enable immutability at the storage tier level.
7.1.1. Login to the Zmanda Management Console (ZMC) using your credentials. Select "Storage" on the navigation bar on the left.

7.1.2 To add a new storage, click on the "ADD STORAGE" button at the top right end of the screen and goto Step 7.1.4.

7.1.3 To Edit an existing storage device, select the Wasabi storage device on the left and click on edit icon under the "Actions" column on right for that storage device.
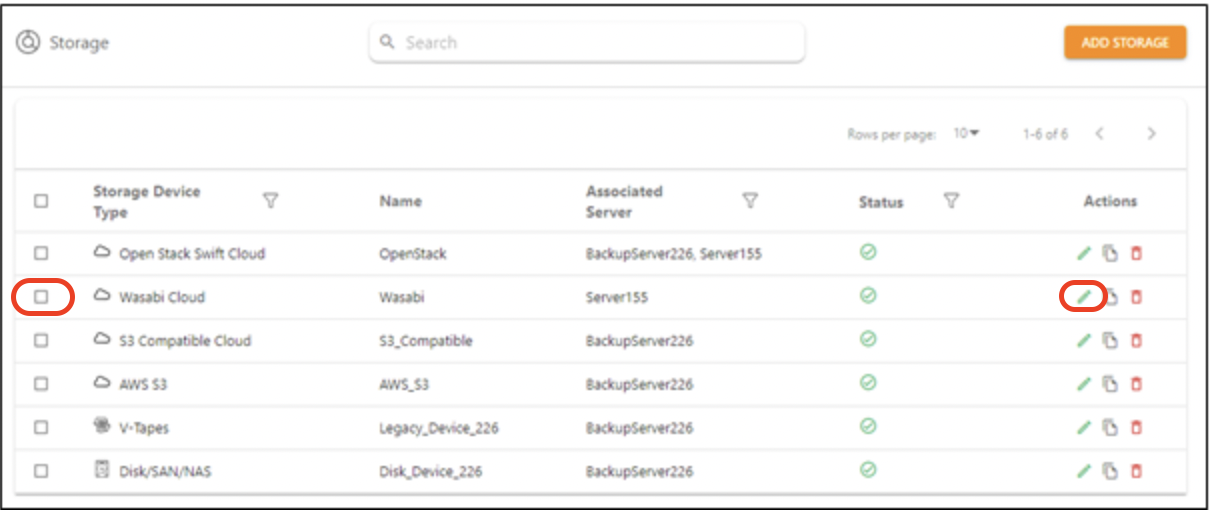
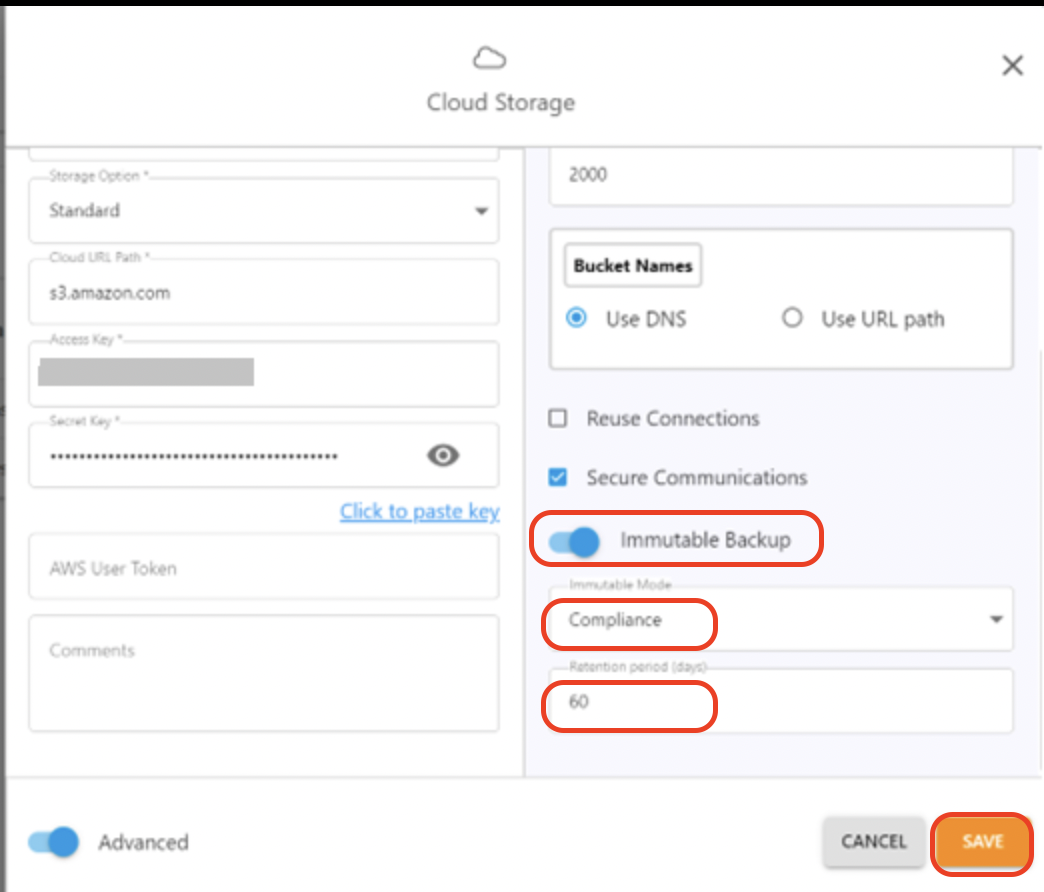
7.1.4 On the Add Storage and Edit storage page, configure the following:
Enable the "Immutable Backup" toggle to enable immutability for the Wasabi storage device.
Select the desired "Immutable mode"- either Compliance or Governance.
Enter the "retention period" in days.
Click on "Save".
The settings on this page will be applied to all the backup sets mapped to the storage.
7.2 Enabling immutable backup from the backup set page.
Follow the steps below to enable immutability for a backup set.
7.2.1 Login to Zmanda Management Console (ZMC) and select Backup Sets on the left side navigation bar.

7.2.2 Click on the Configure icon (blue spanner)under the Actions column of the backup set you want to configure.

7.2.3 Check the checkbox of the source(s) you want to backup. Next, select "Backup Where" under the header.

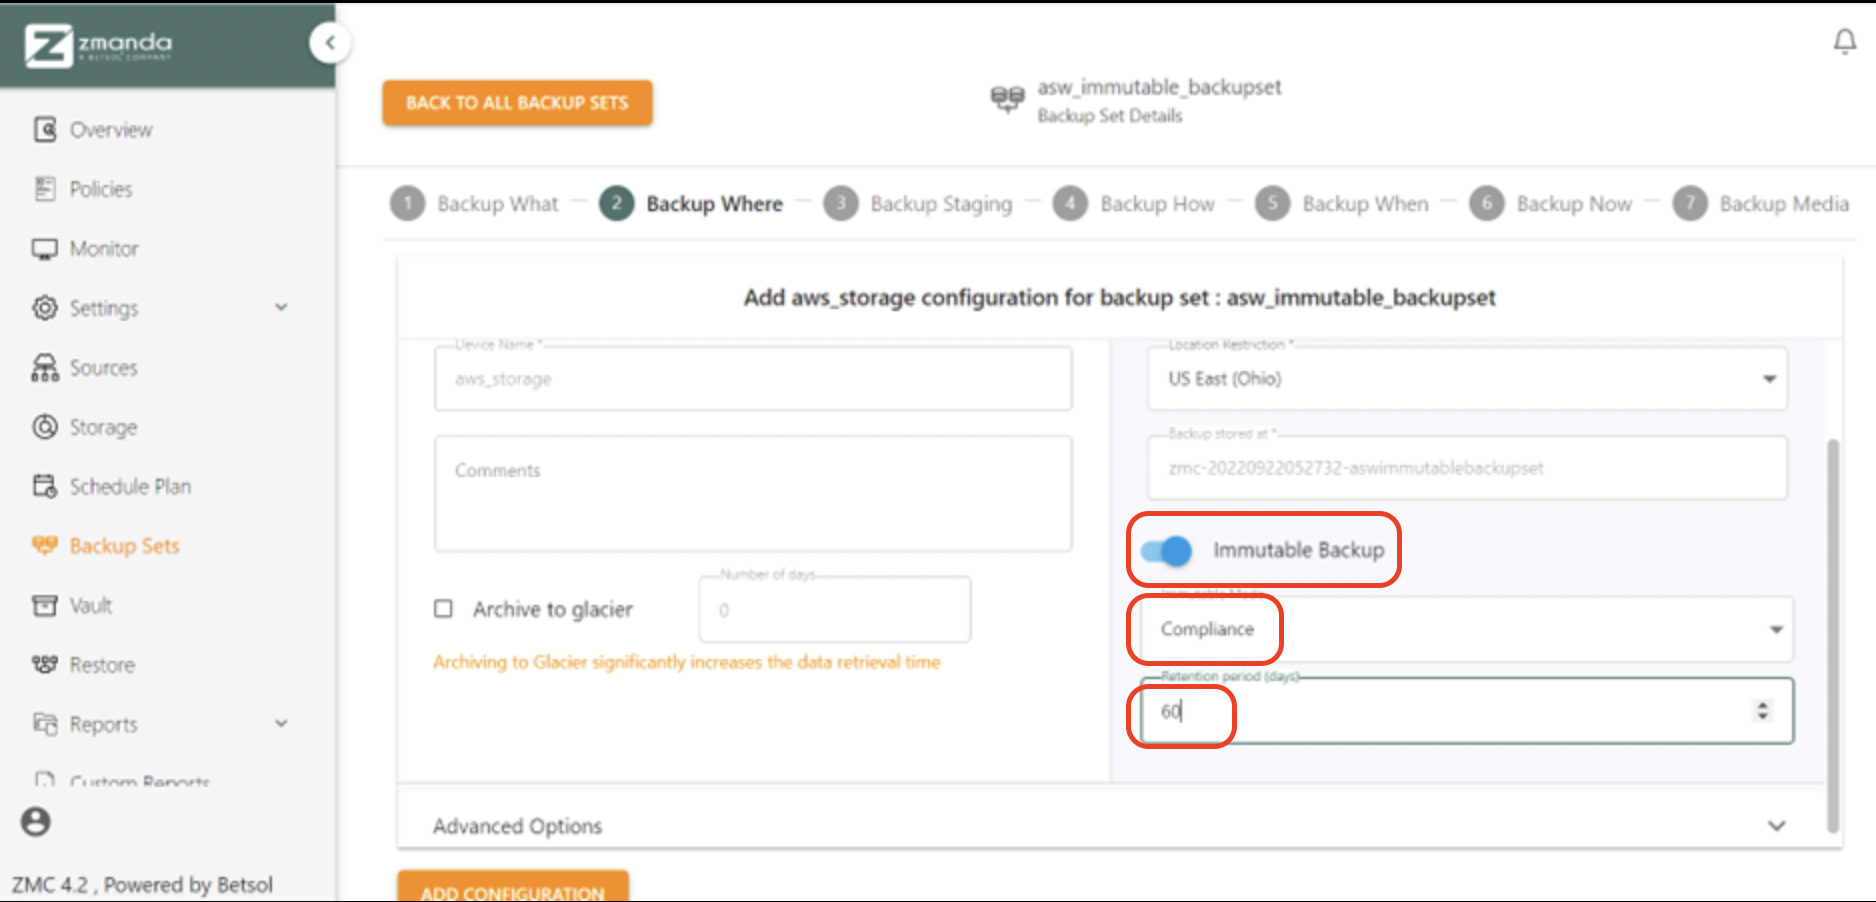
7.2.4 On the "Backup Where" page, configure the following:
Enable the "Immutable Backup" toggle to enable immutability for the backup set.
Select the desired "Immutable mode" from the dropdown list- either Compliance or Governance.
Enter the "retention period" in days.
Click on "Add Configuration" to save the configuration.
By default, the immutable setting will be inherited from the storage i.e.
If immutable is disabled at storage Level, the “Backup Where” page will have the immutable backup toggle as disabled.
If immutable backup is enabled at the Storage level, the “Backup Where” page will have the immutable backup toggle as enabled with the configuration set at the storage level.
You can overwrite the default setting while adding the configuration. Modification of this setting is not allowed once the setting is applied.
