CloudSoda has been validated for use with Wasabi to move, copy, or sync data between Dell PowerScale and Wasabi for long-term retention or to maintain an additional copy. CloudSoda is a premier provider of data management solutions, offering secure data access and mobility. Dell PowerScale (formerly Isilon) is a flexible and secure scale-out NAS (network attached storage) solution.
This article describes the procedures for configuring CloudSoda to enable data movement of cold or archival data to Wasabi’s Hot Cloud Storage. There are two use cases when integrating CloudSoda with PowerScale and Wasabi-
Long Term Retention: Move older data to Wasabi
Copy in Cloud: To create and maintain a second/third copy of data in Wasabi’s Cloud Object Storage
Requirements
PowerScale is installed and licensed. Existing SMB/NFS shares with data.
PowerScale user with read/write access to the NAS file shares
An active Wasabi Object Storage account. A Wasabi bucket and user keys are available to be used.
An active CloudSoda console with agent(s) licensed as per requirement.
CloudSoda Controller is deployed in the customer environment (CloudSoda Server) or as a CloudSoda SaaS application.
Note: The data restoration process is handled by your specific data transfer software application/service. As there are many potential variables that will affect your unique environment, it is strongly recommended that you seek the guidance of your backup software/service’s technical support team in the event that you encounter difficulty or have application-specific inquiries.
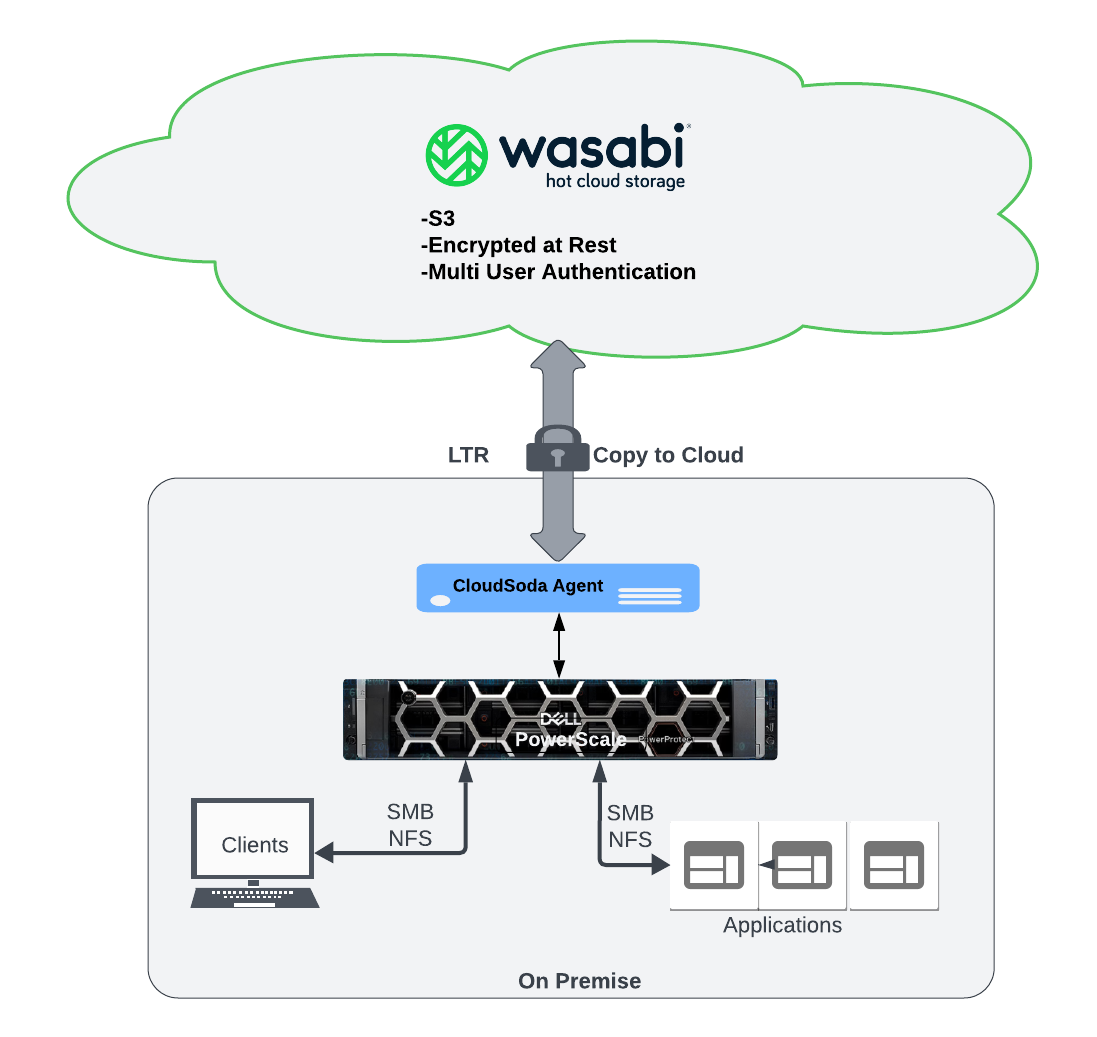
Solution Architecture
There are two main components to of the CloudSoda architecture:
The Cloud Management Console (or Soda controller)
Local Agents
The diagram below depicts the CloudSoda architecture to integrate and facilitate data movement between Dell PowerScale and Wasabi:
CloudSoda Configuration
The CloudSoda configuration consists of configuring the CloudSoda local agent and the ClodSoda console.
CloudSoda Agent
CloudSoda Agents enable users to access storage data locally. An agent software can be installed on Linux, MacOS or Windows. Please review agent configuration in the below section to configure agents.
Note: Agents communicate with the CloudSoda Controller on UDP ports 7498 and 7499. Ensure that these ports are open on your firewall for the agents.CloudSoda Console/Controller
The CloudSoda Controller can be deployed in the customer environment (CloudSoda Server) or in cloud (CloudSoda SaaS). This article assumes that the CloudSoda controller is deployed and ready to be used.
Storage Targets
The first step is to create your storage targets on the CloudSoda console for your PowerScale NAS share as well as the Wasabi bucket. CloudSoda supports SMB, NFS, and local File Storage, along with Custom S3 as a supported storage target.
Create Storage target for PowerScale NAS share
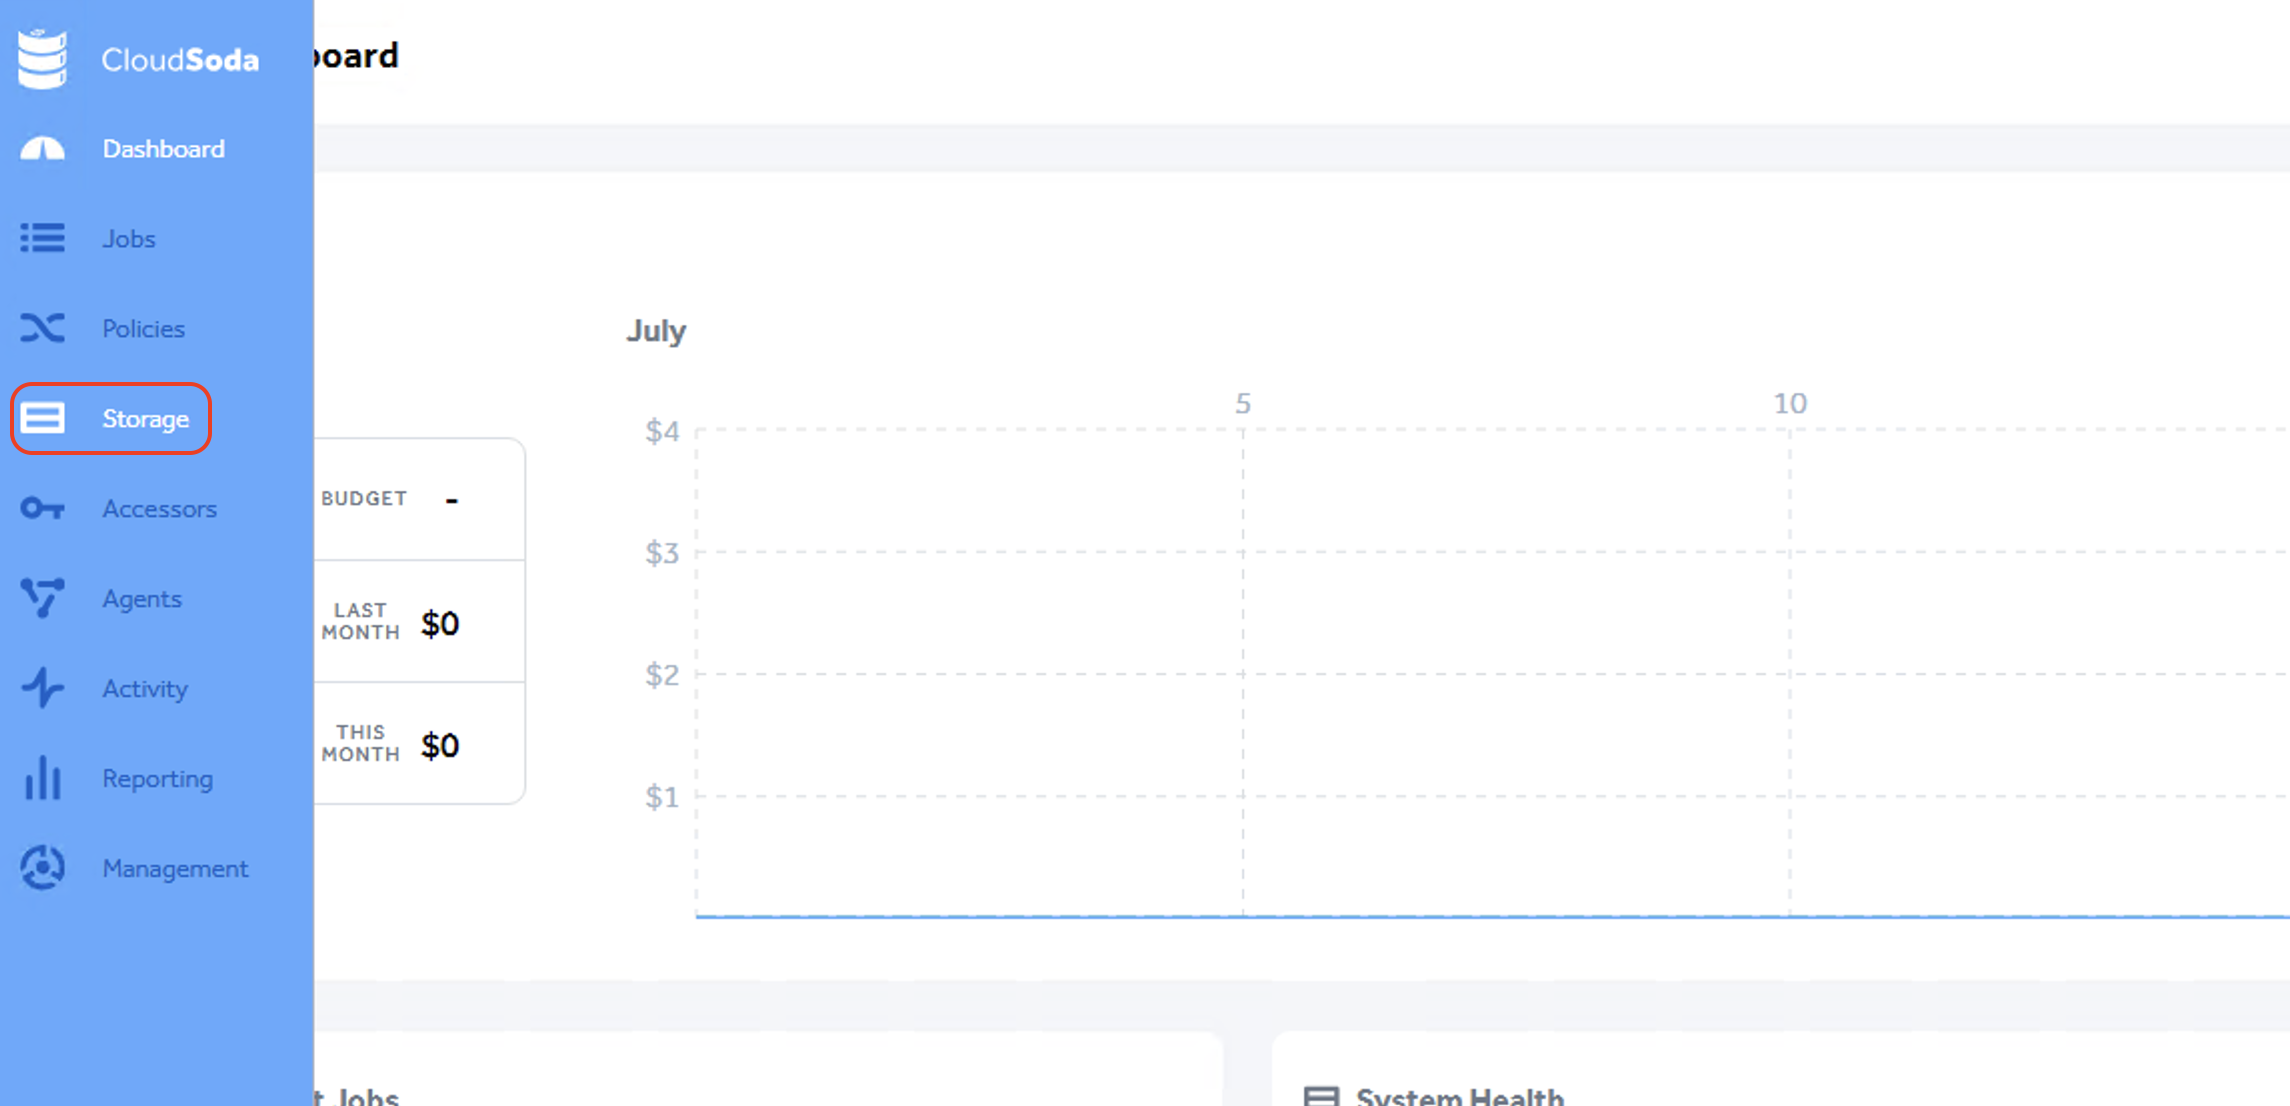
Hover on the left pane of the page and click on Storage.
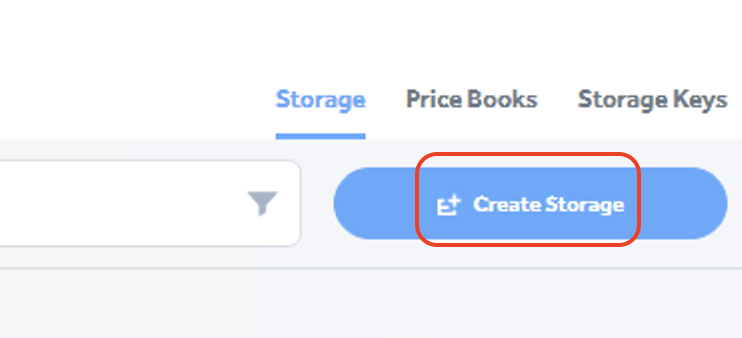
Click on Create storage button located towards the top-right of the page.
Input the details to create the Storage as below and then click Save to create the storage.
Name: Enter a name for the file storage
Account: Select the CloudSoda account from the dropdown list
Scope: From the dropdown list, select the default scope or a specific one if previously created
Storage Type: Select File.
.png)
Once you click Save in the above step, the storage card will be created and listed on the Storage page as below.
.png)
Create Storage target for Wasabi bucket
Hover on the left pane of the page and click on Storage.
Click on "Create storage" button located towards the top-right of the page.
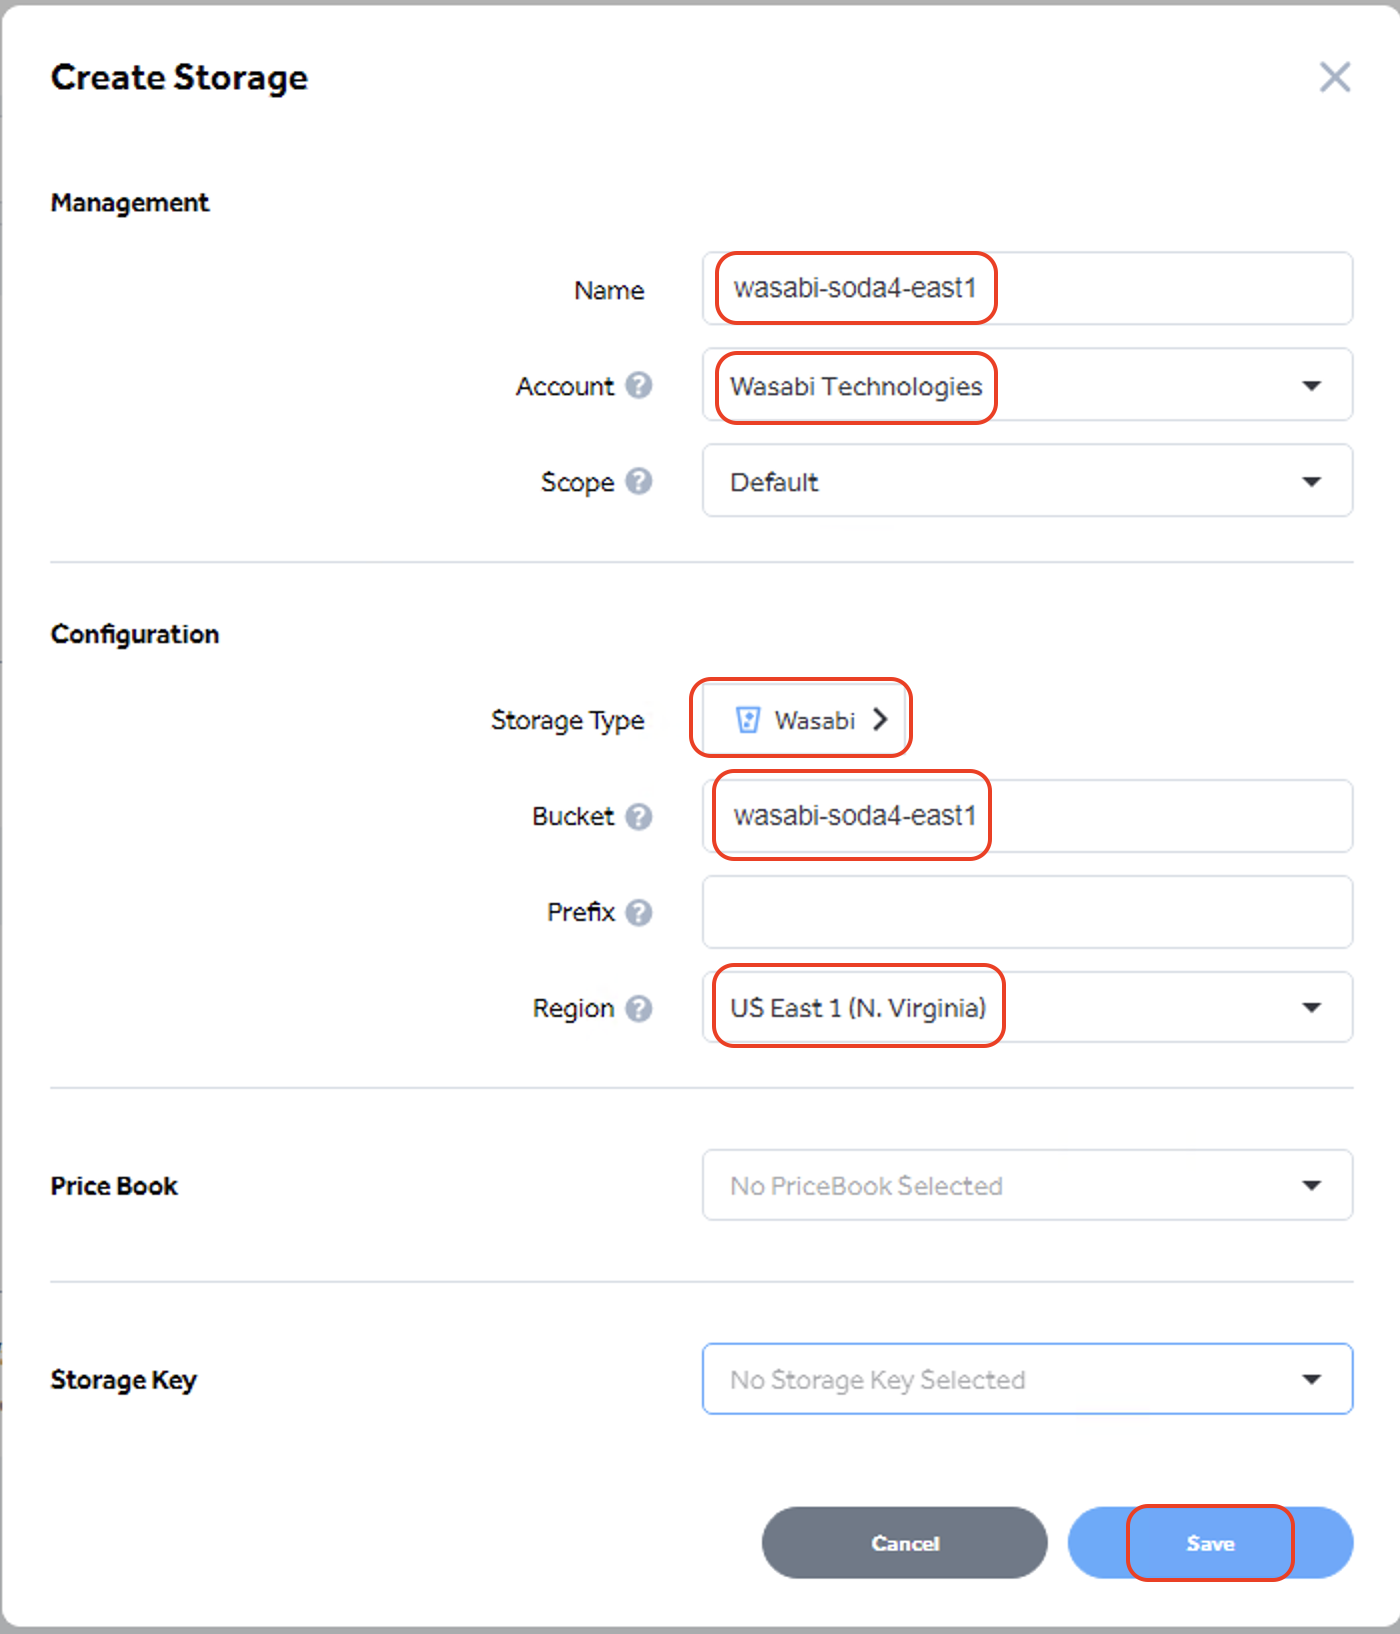
Input the details to create the Storage as below and then click "Save" to create the storage.
Name: Enter a name for the Wasabi storage
Account: Select the CloudSoda account from the dropdown list
Scope: From the dropdown list, select the default scope or a specific one if previously created
Storage Type: Select Wasabi
Bucket: Input the name of the Wasabi bucket to be used
Region: Select the region where the Wasabi bucket was created in. This example uses US East1.
Agents
Agents are computers that are connected to the storage targets and are responsible for the data movement between the storages. Follow the steps in this section to configure and install a CloudSoda agent. In our example, we will use a single agent to connect to the source that is the SMB share on Dell PowerScale and the destination Wasabi bucket.
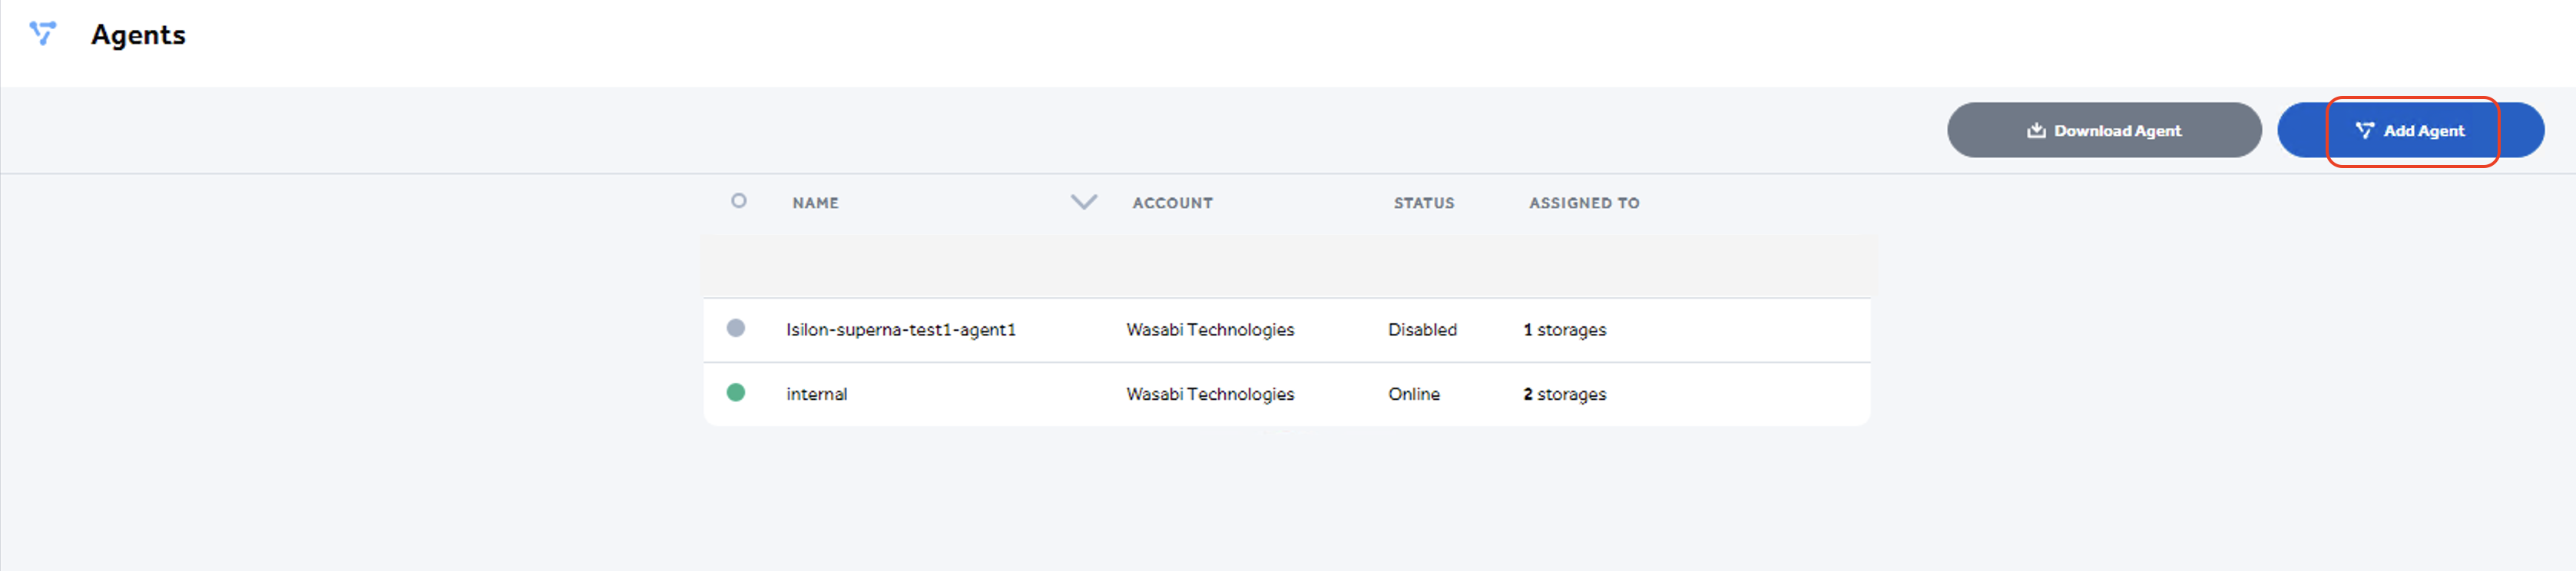
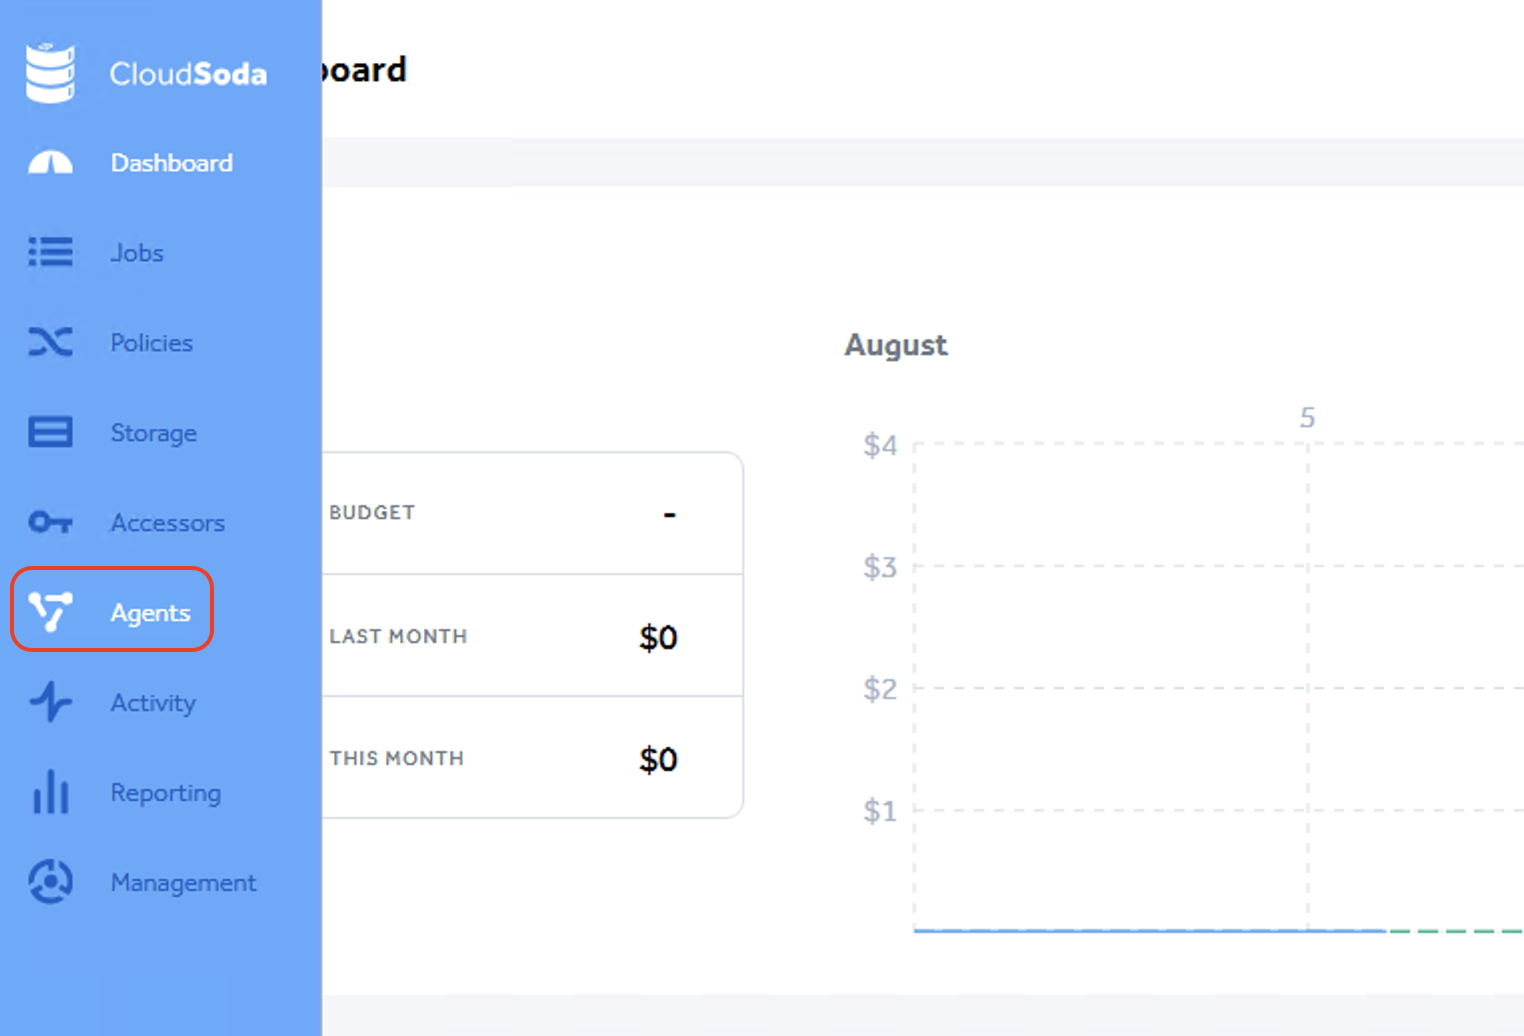
From the Dashboard, click on Agents.

Click Add Agent.
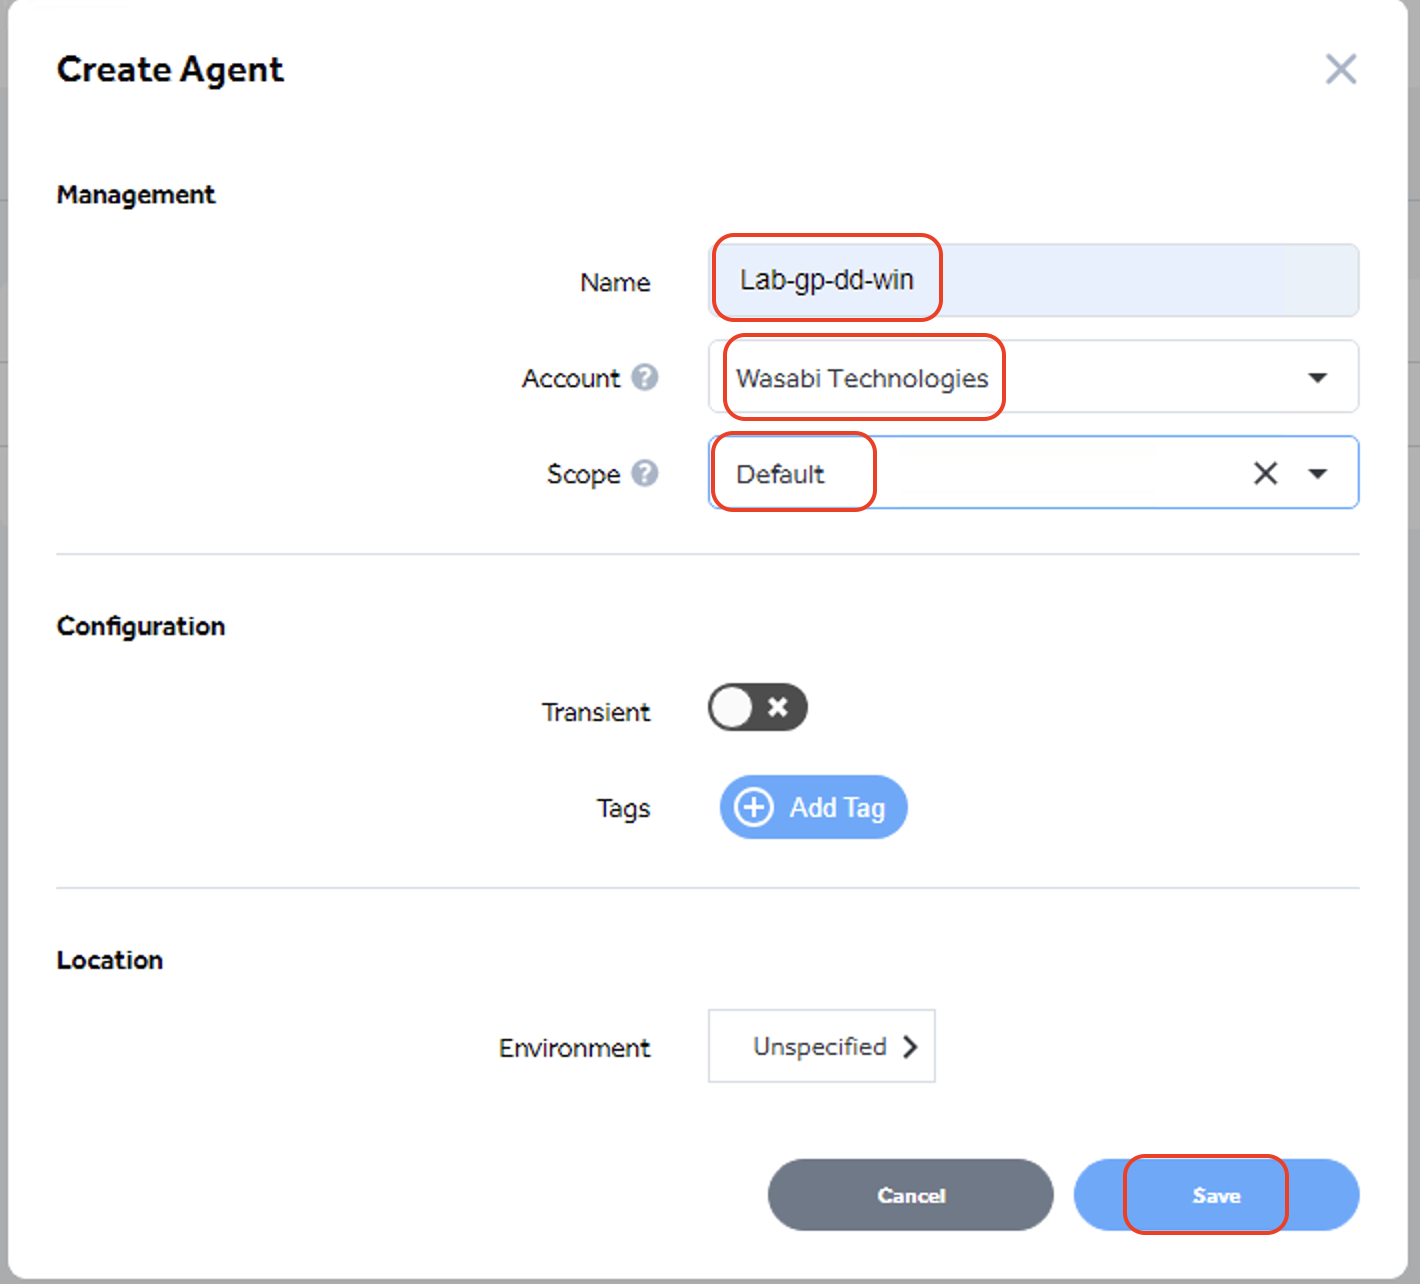
In the Create Agent window, enter the below details and click "Save"
Name: Enter a suitable name for the agent
Account: Select the appropriate account/organizational unit from the dropdown list
Scope: Select the appropriate scope to provide the correct access control
Tags: Optionally add tags if you want to tag the objects moved with this agent
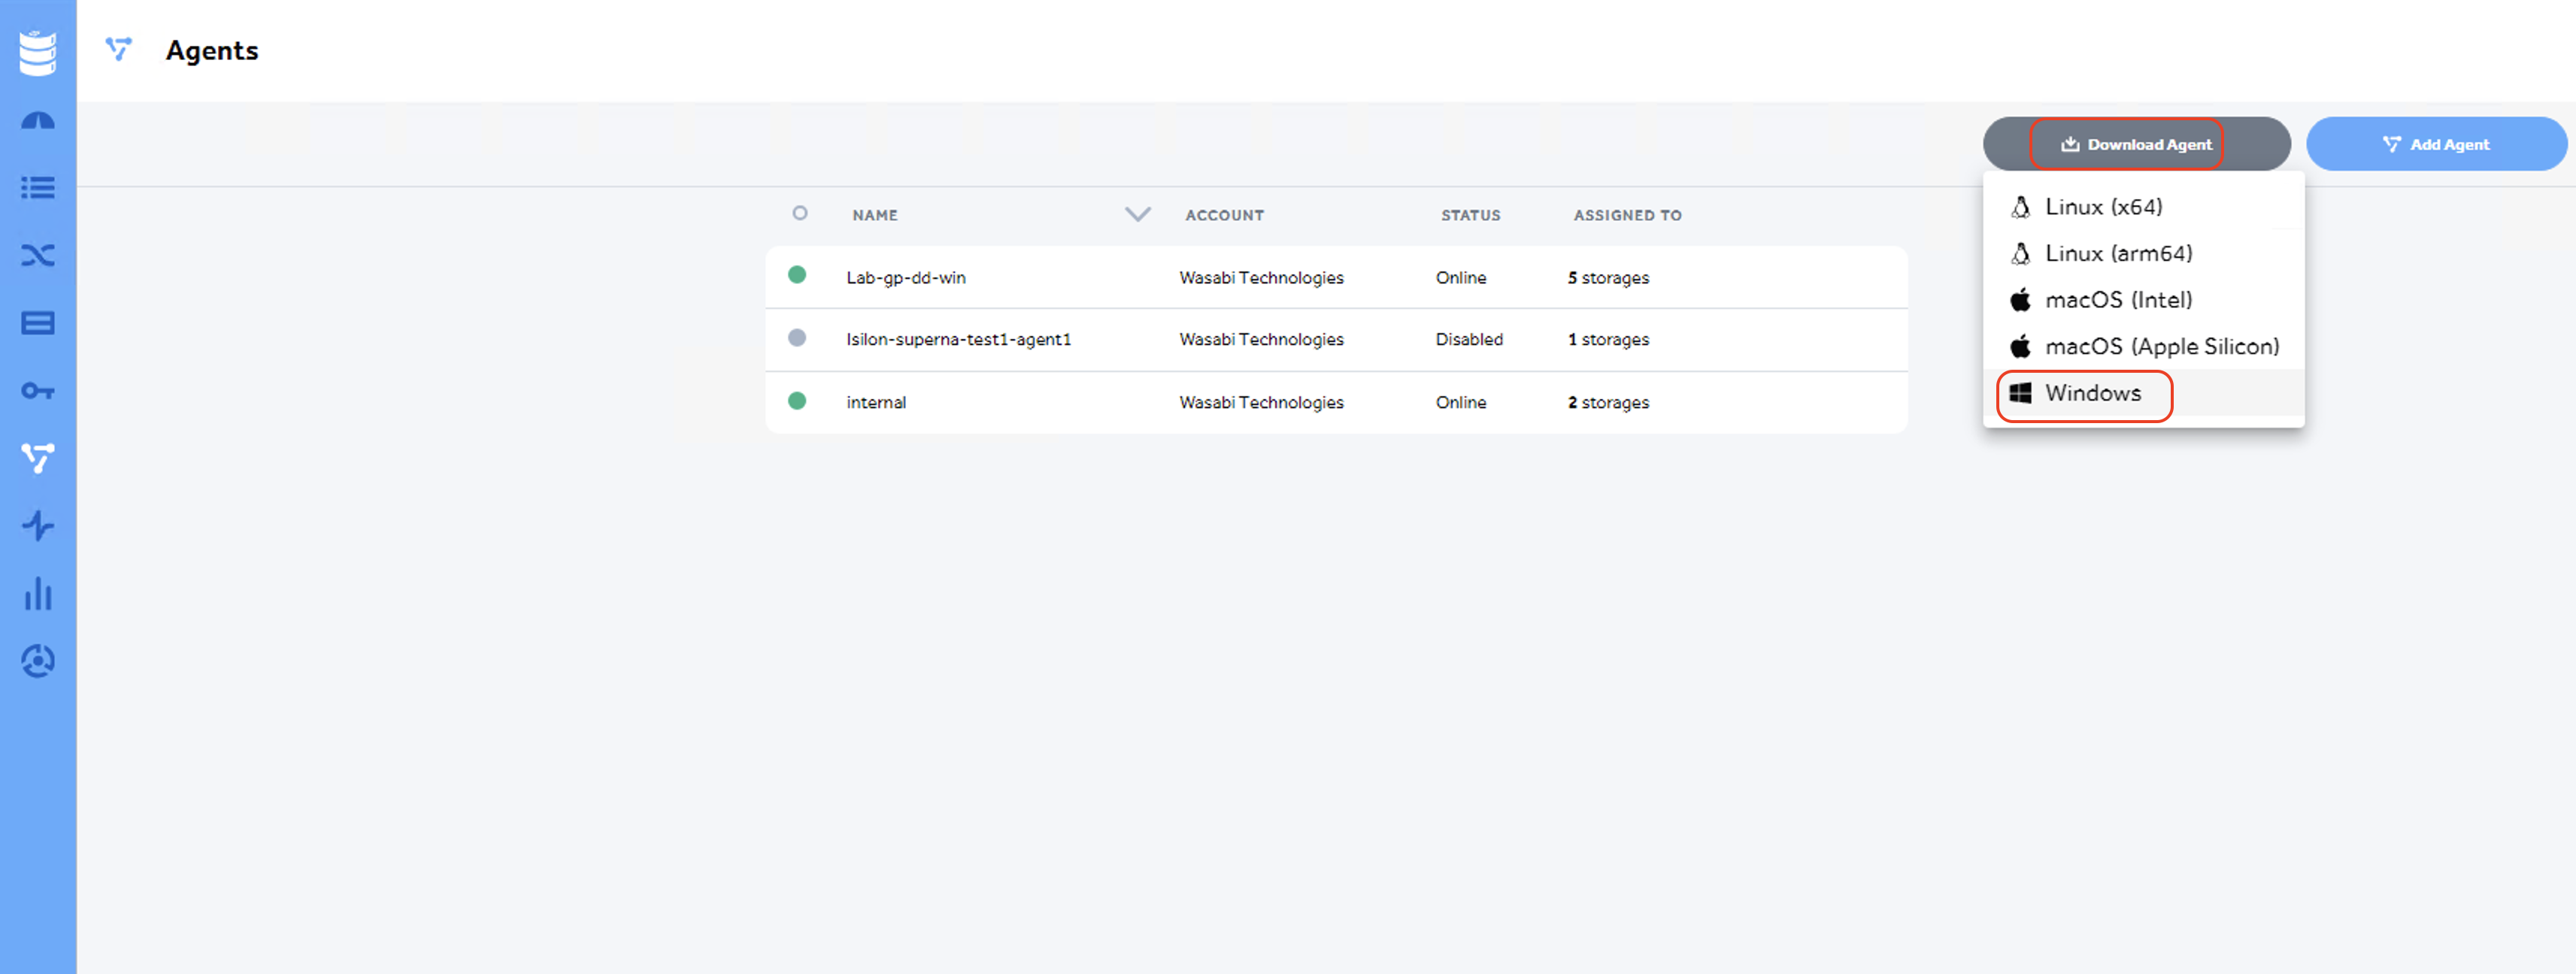
After the agent is saved, click Download Agent and select the operating system where you want to install the agent.
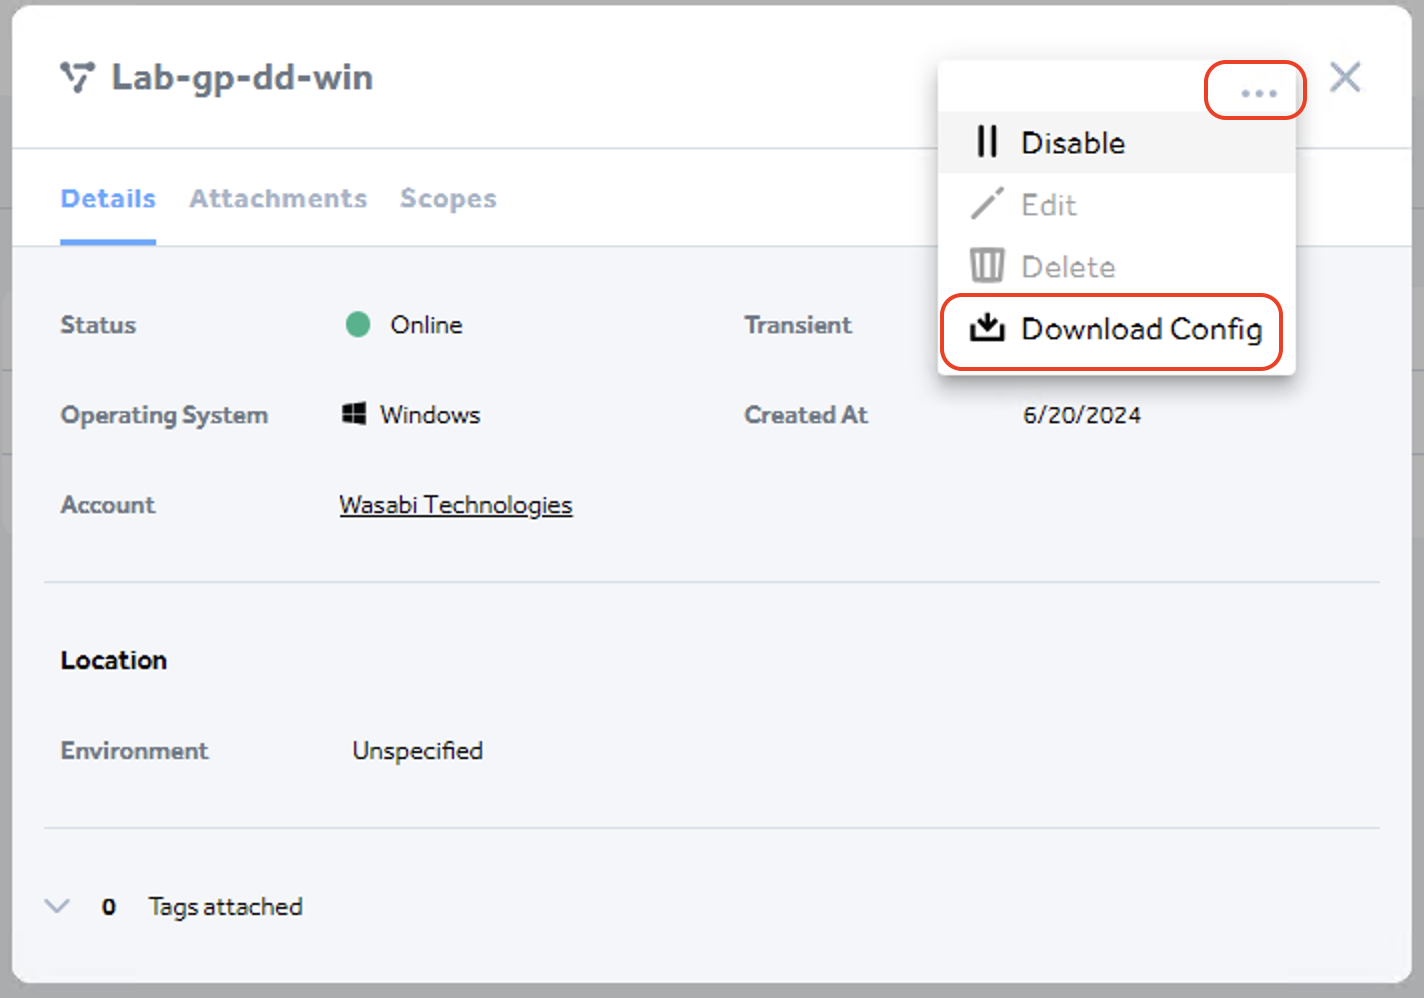
On the agent page, click on the Agent that you created. Then click on the ellipsis (three dots), and click Download Config.
Transfer the downloaded agent installation and the agent config files to the machine where you want to run the agent on.
Note: Make sure the agent config file is in the same directory as the Agent installation file.
Follow the instructions in Installing the Agent section of CloudSoda documentation.
Accessors
An accessor defines how an agent connects and authenticates to a storage target. Follow the steps in this section to create accessors to connect to the two storages- PowerScale and the Wasabi bucket.
Create Accessor for PowerScale
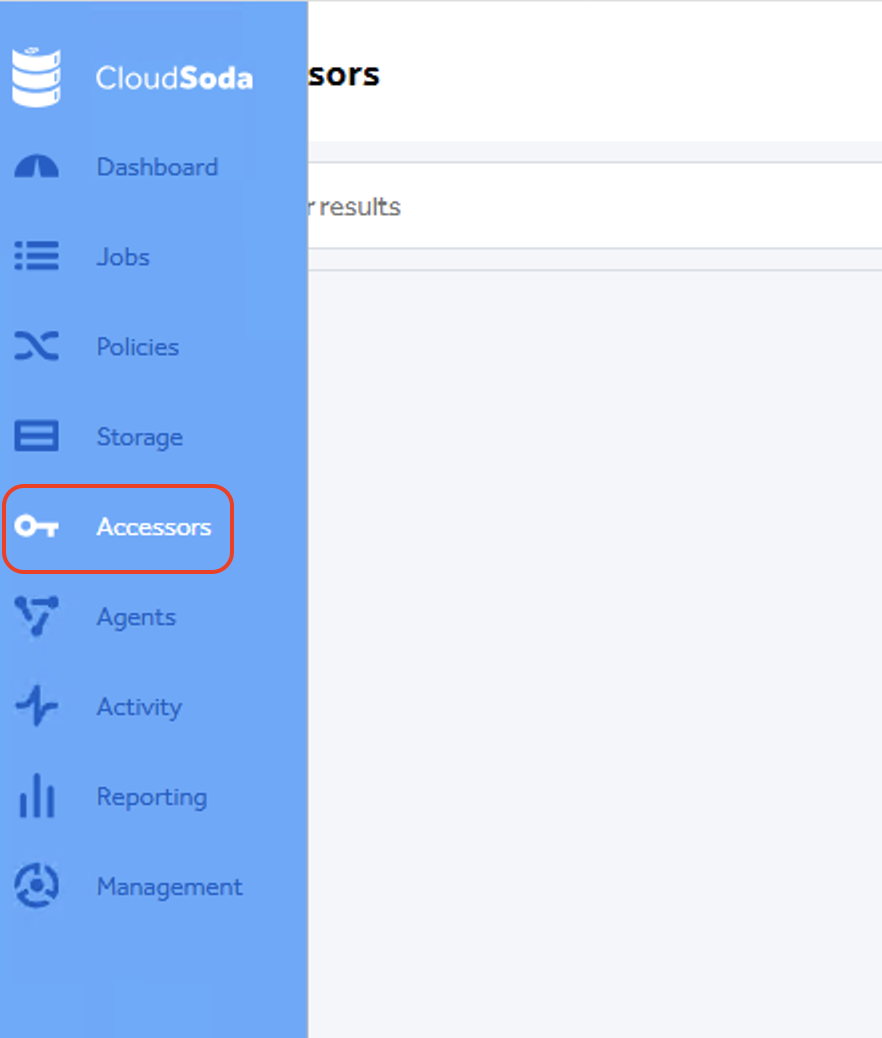
On the Dashboard, click Accessors to display the list of configured accessors.
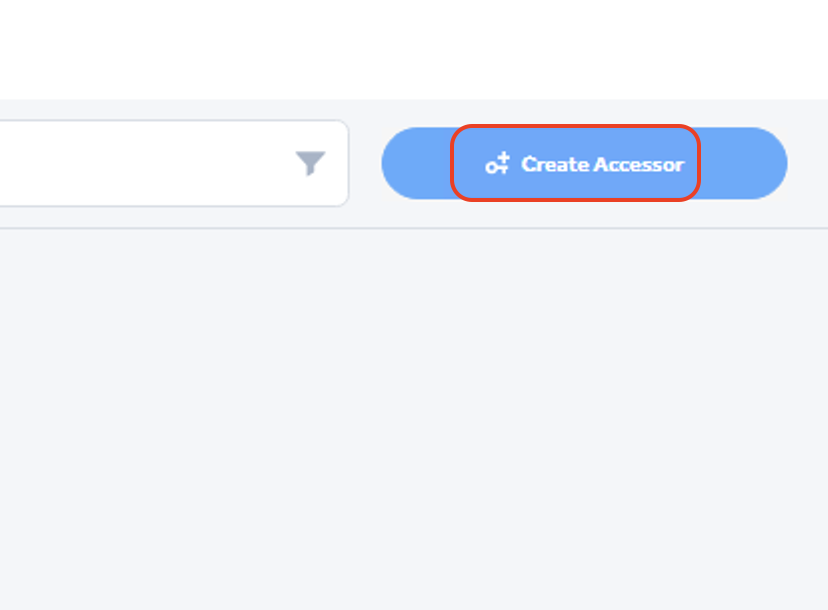
Click on Create Accessor to create a new accessor.
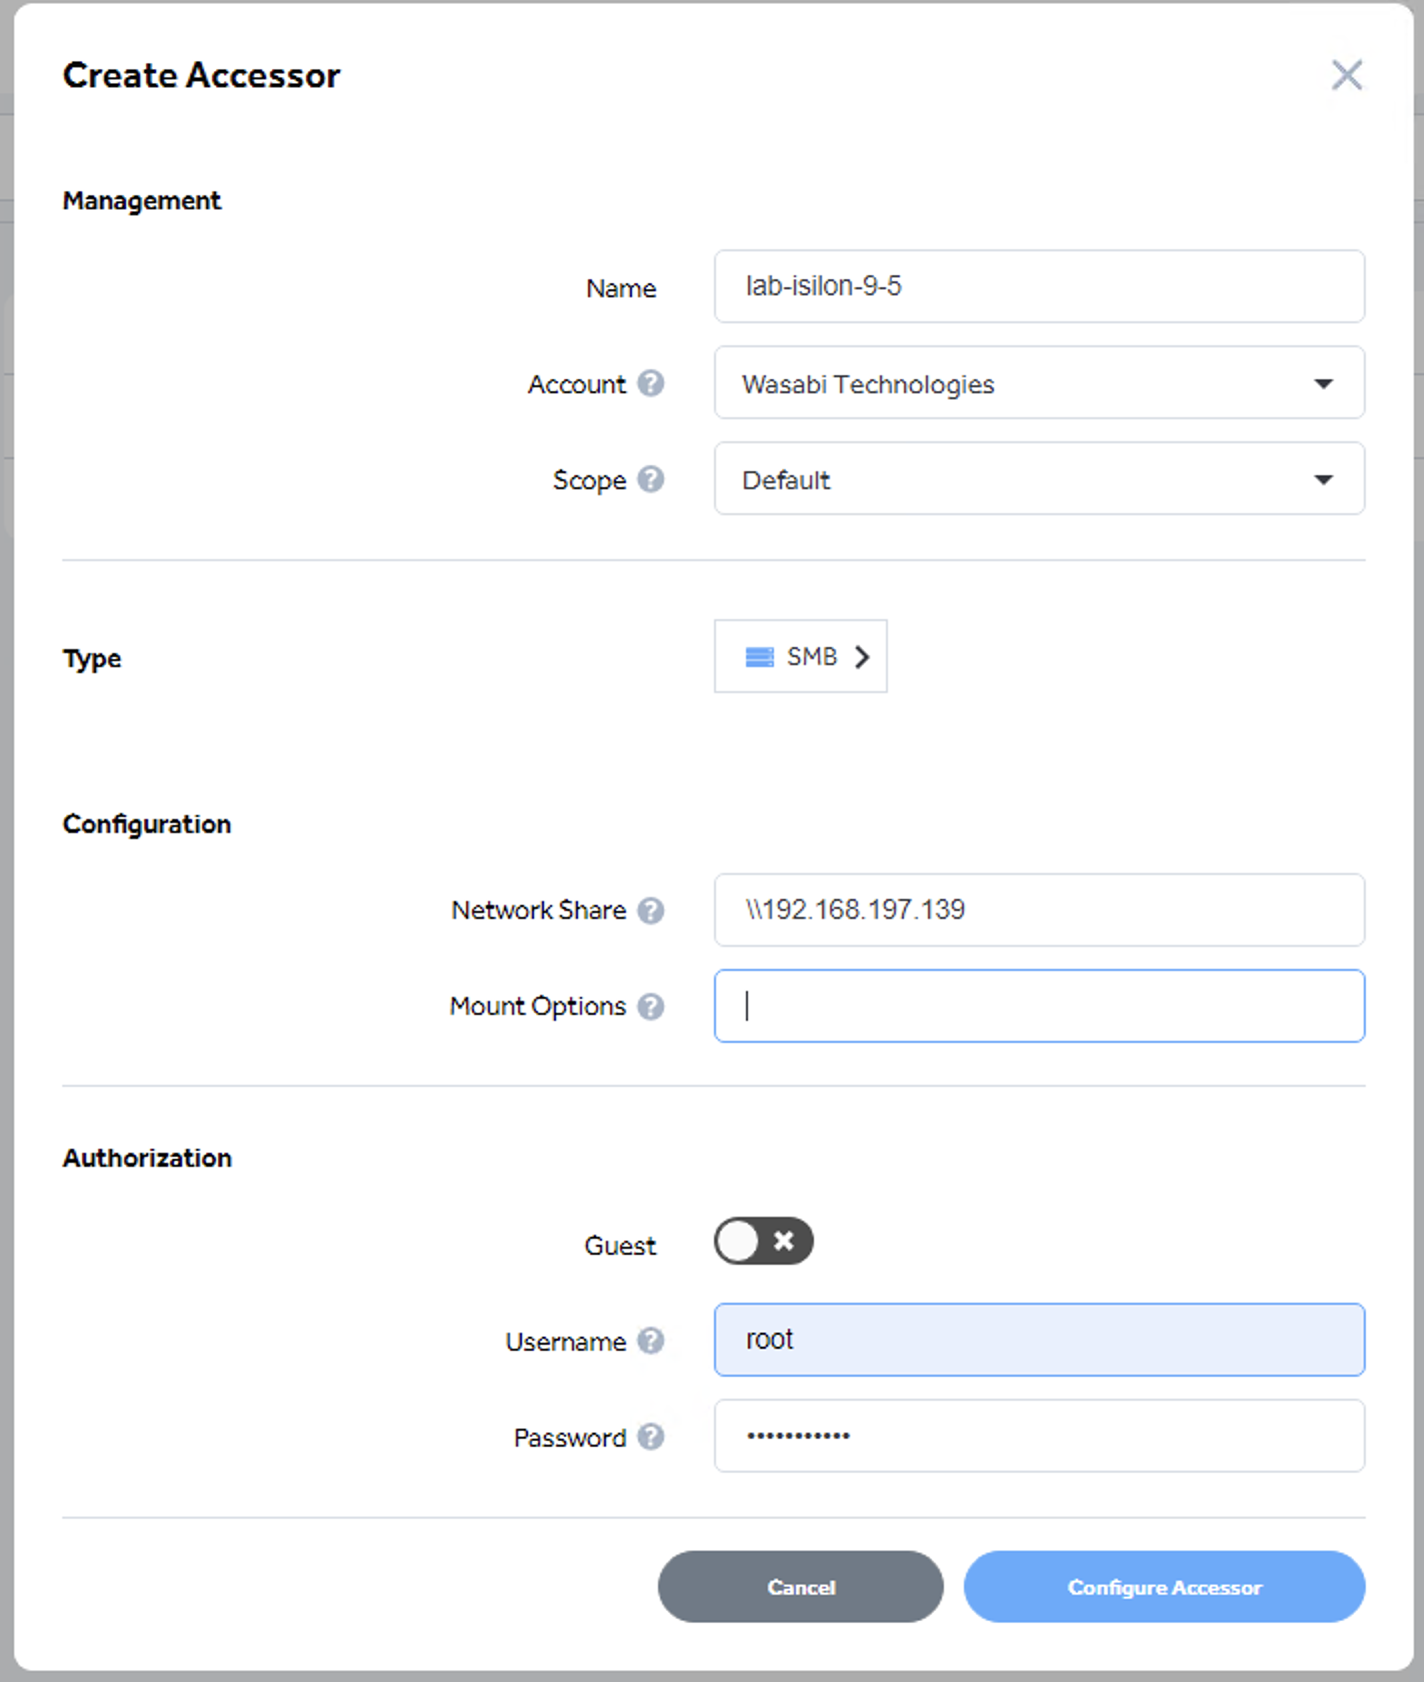
Enter the details below in the Create Accessor window and click on Configure Accessor.
Name: Name for the accessor
Account: Select the appropriate account/organizational unit from the dropdown list
Scope: Select the appropriate scope to provide the correct access control
Type: SMB
Network Share: The path specifying the location of the share
User: Username to access the SMB share on PowerScale
Password: Password to access the SMB share on PowerScale
Create Accessor for the Wasabi bucket
On the Dashboard, click Accessors to display the list of configured accessors
Click on Create Accessor to create a new accessor.
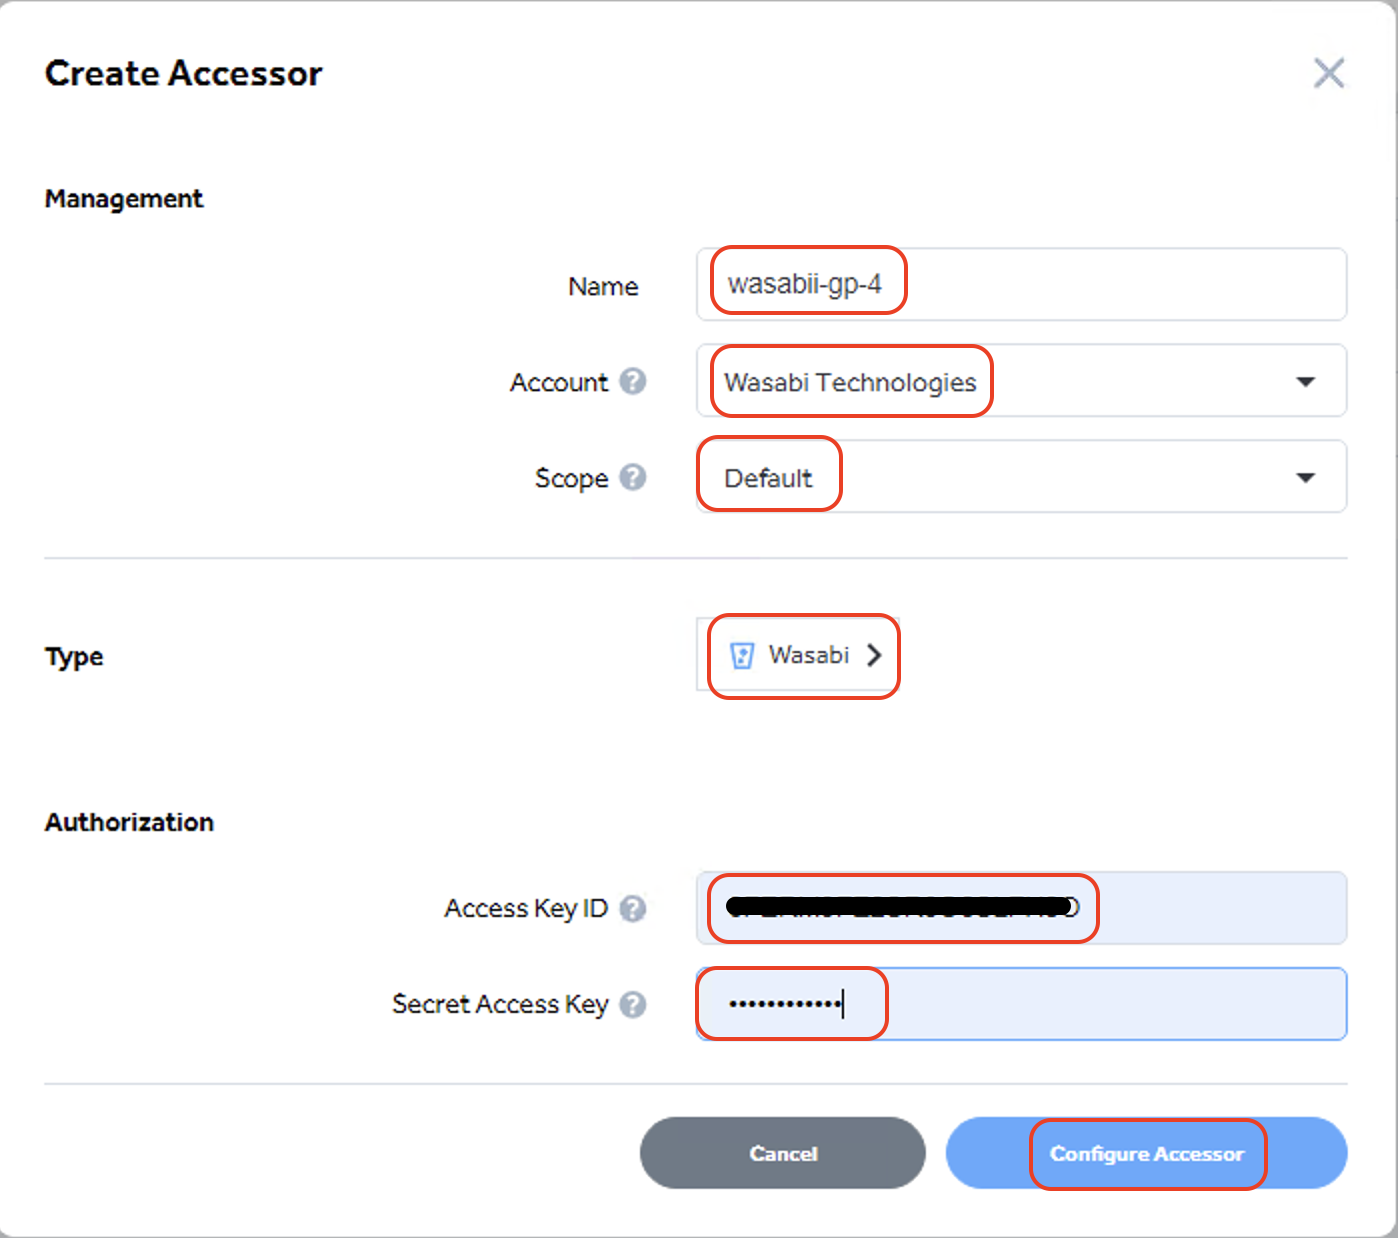
Enter the details below in the Create Accessor window and click on Configure Accessor.
Name: Name for the accessor
Account: Select the appropriate account/organizational unit from the dropdown list
Scope: Select the appropriate scope to provide the correct access control
Type: Wasabi
Access Key ID: Access key to access your Wasabi bucket.
Secret Access Key: Secret key to access your Wasabi bucket
Attaching the storages and accessors to the agent
You will need to connect the two storage defined above- PowerScale SMB share and the Wasabi bucket, as well as the accessors to the agent, so that the agent can access the data for data movement.
Attach the PowerScale file share Storage and its Accessor to the agent
From the Dashboard, click Agents to return to the agent list.
Click on the agent you want to use. Click Attachments.
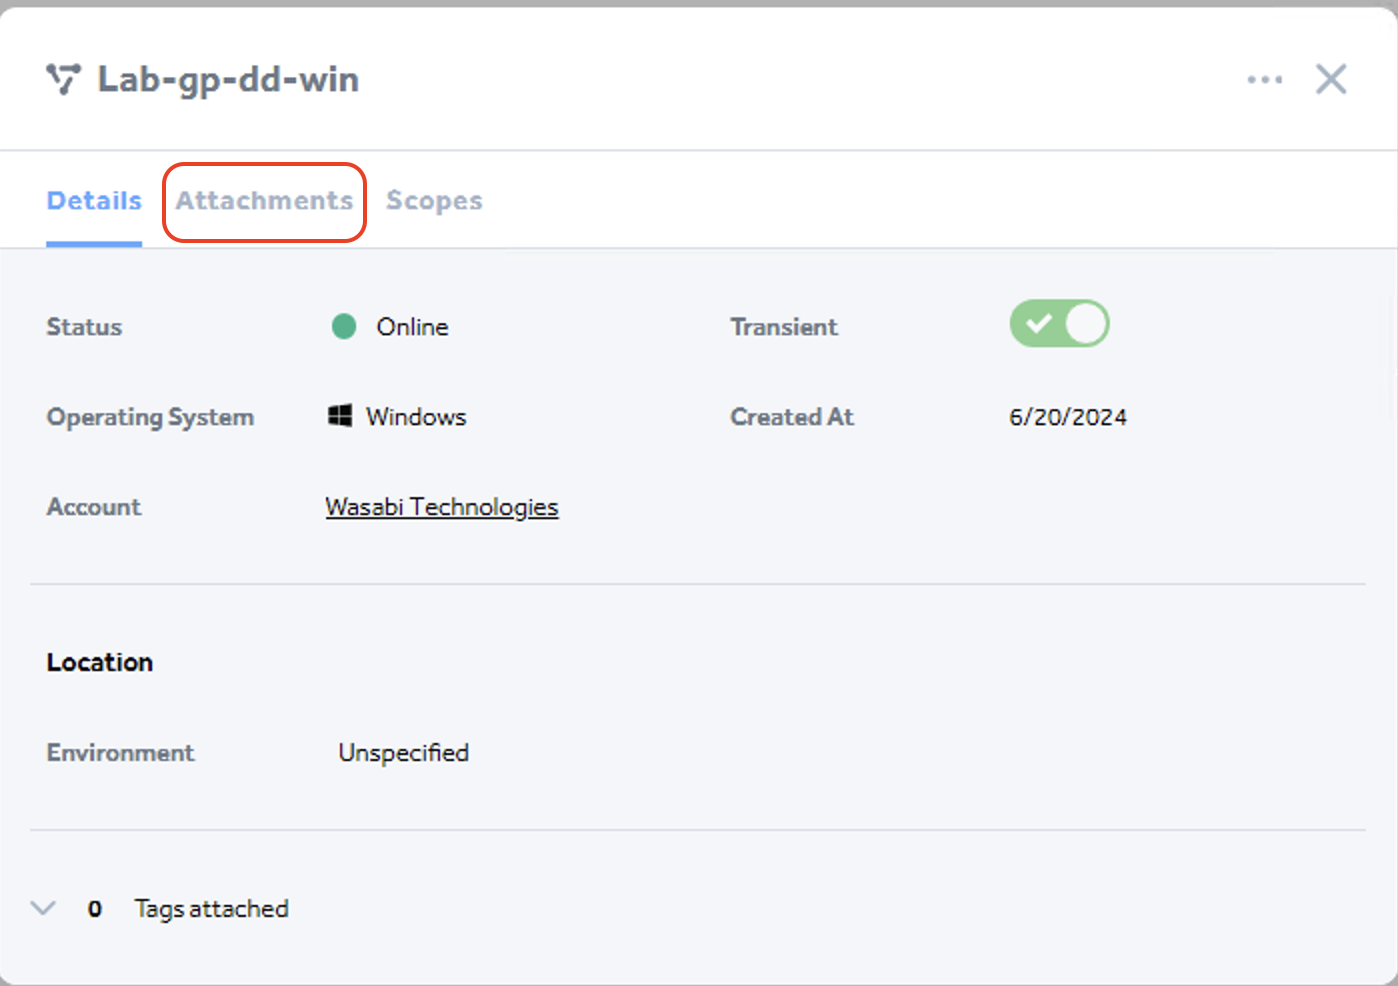
Click + to add a storage
(1).png)
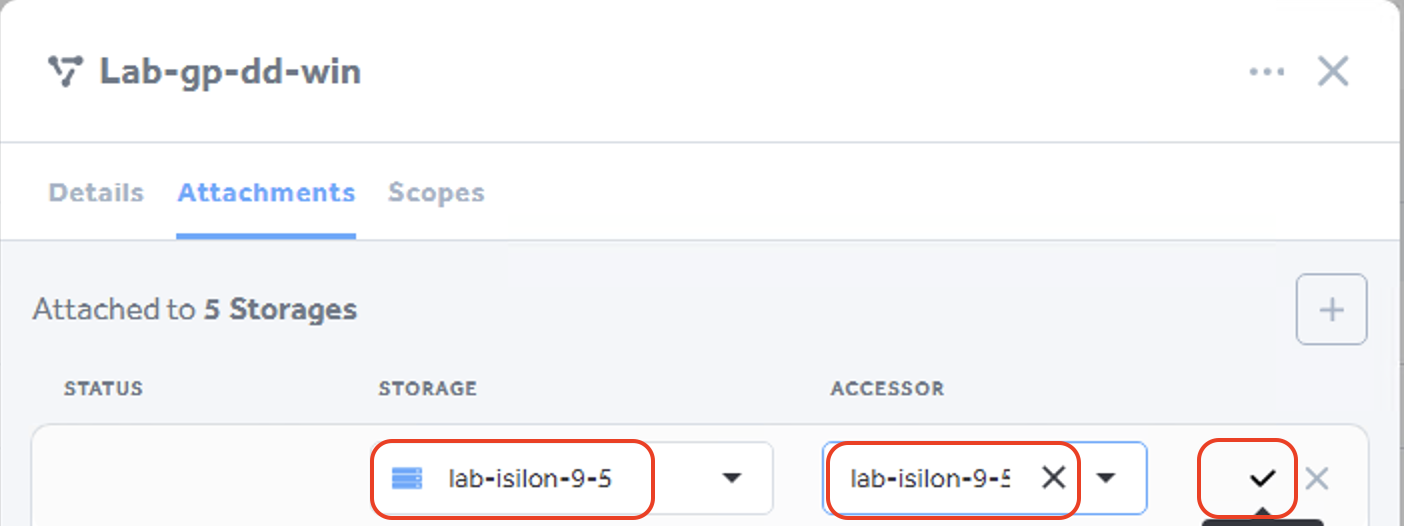
Select the PowerScale SMB share storage that you created above. Select the Accessor for the SMB share and click the check mark to save.
Attach the Wasabi bucket Storage and its Accessor to the agent
From the agent list. Click on the agent you want to use. Click Attachments.
Click on + to add a storage
(2).png)
Select the PowerScale SMB share storage that you created above. Select the Accessor for the SMB share and click the check mark to save.
.png)
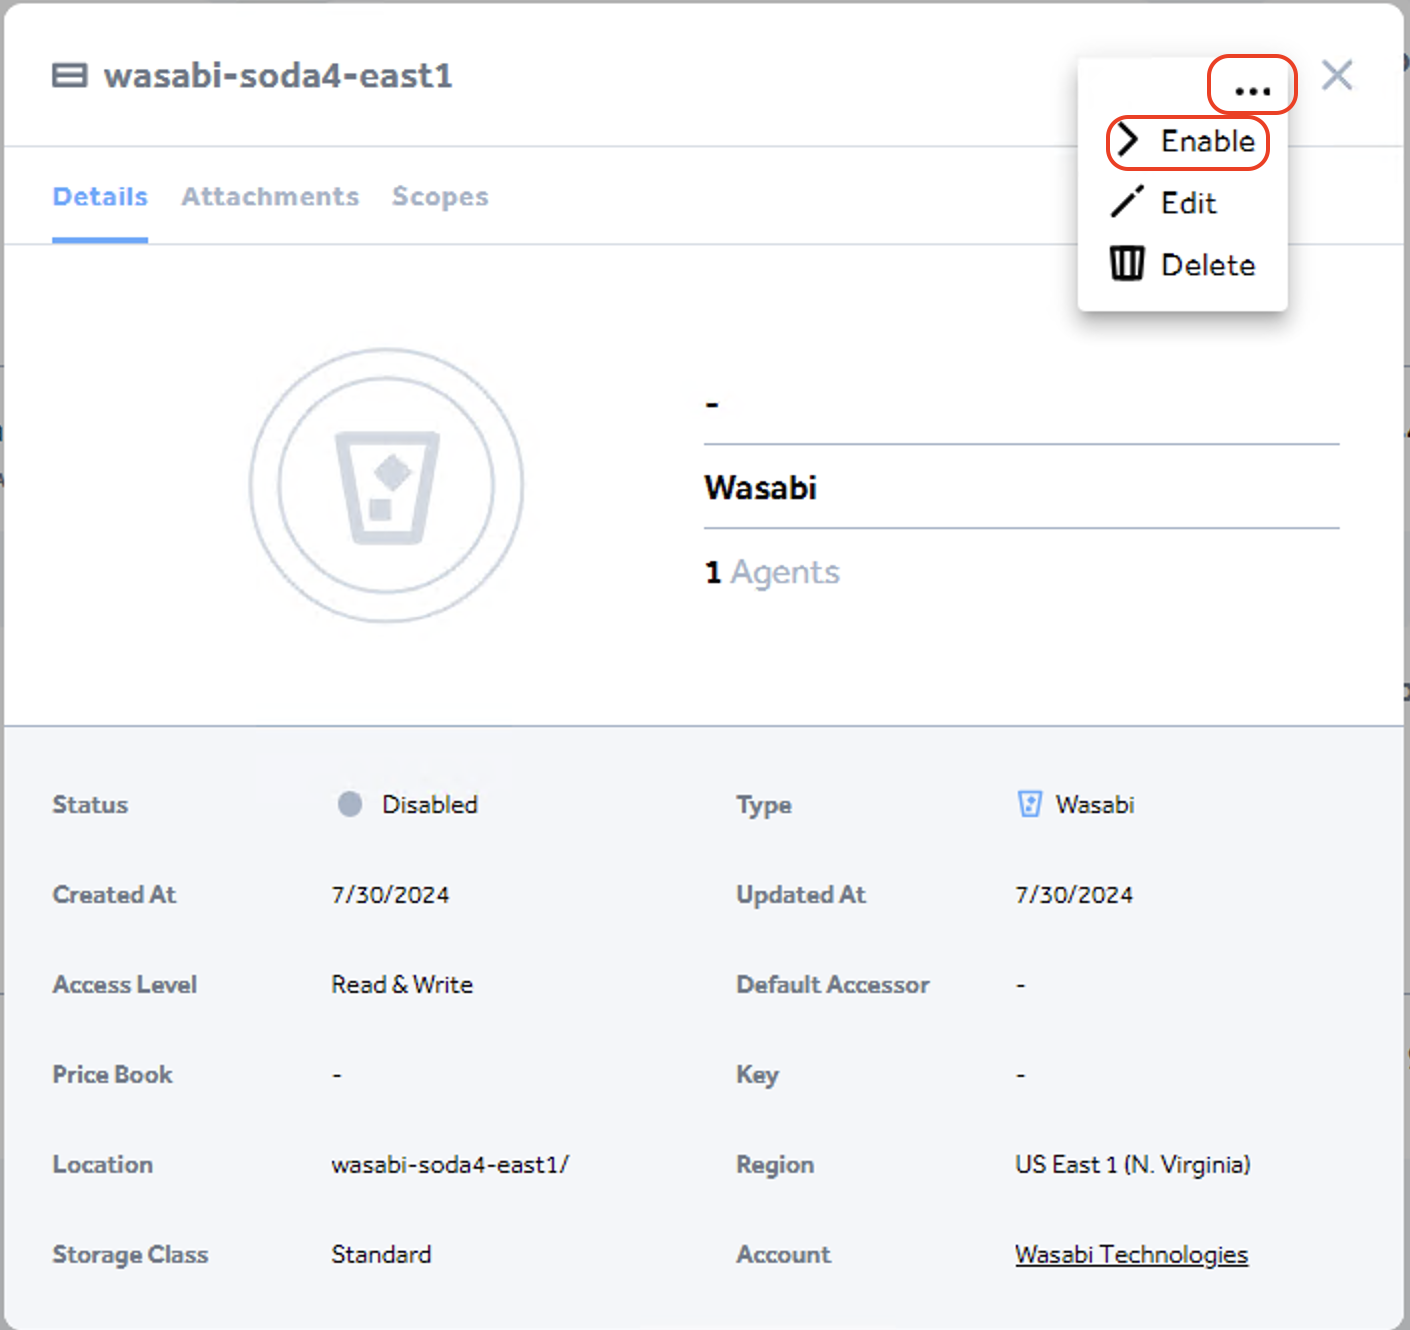
Enable the storages
Before we can use the storage created above, we have to enable it. Repeat the below steps for both storage targets for- PowerScale fileshare and the Wasabi bucket.
Click on Storage.
Click on the storage that you want to enable. In the storage window, click the ellipsis (three dots), then click Enable to enable Enable to enable the storage.
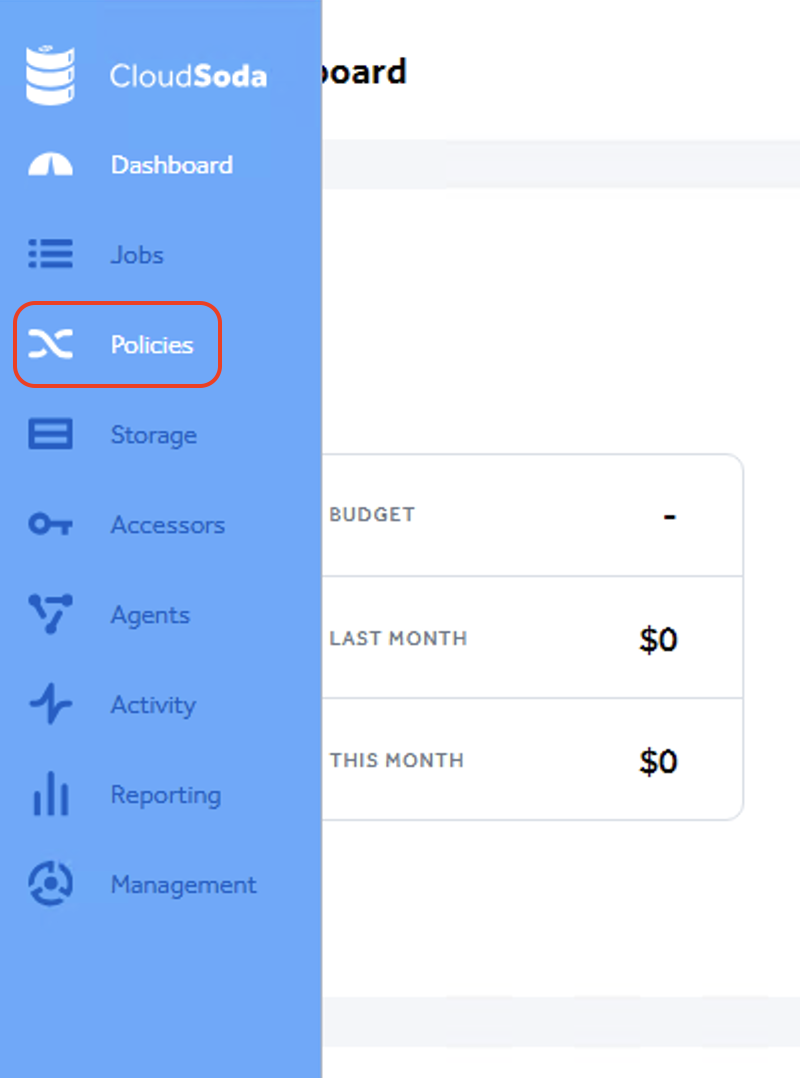
Data Movement Policies
Users can create Policies to configure a scheduled data transfer from the PowerScale file share storage to the Wasabi bucket as the destination.The steps below outline the procedure for creating a data movement policy. For additional details, please refer to the “Creating a New Policy” section on the CloudSoda documentation website.
Another way to transfer data on CloudSoda is to use Quick Transfers. Refer to Creating a Quick Transfer on the CloudSoda documentation website.
Click on Storage.
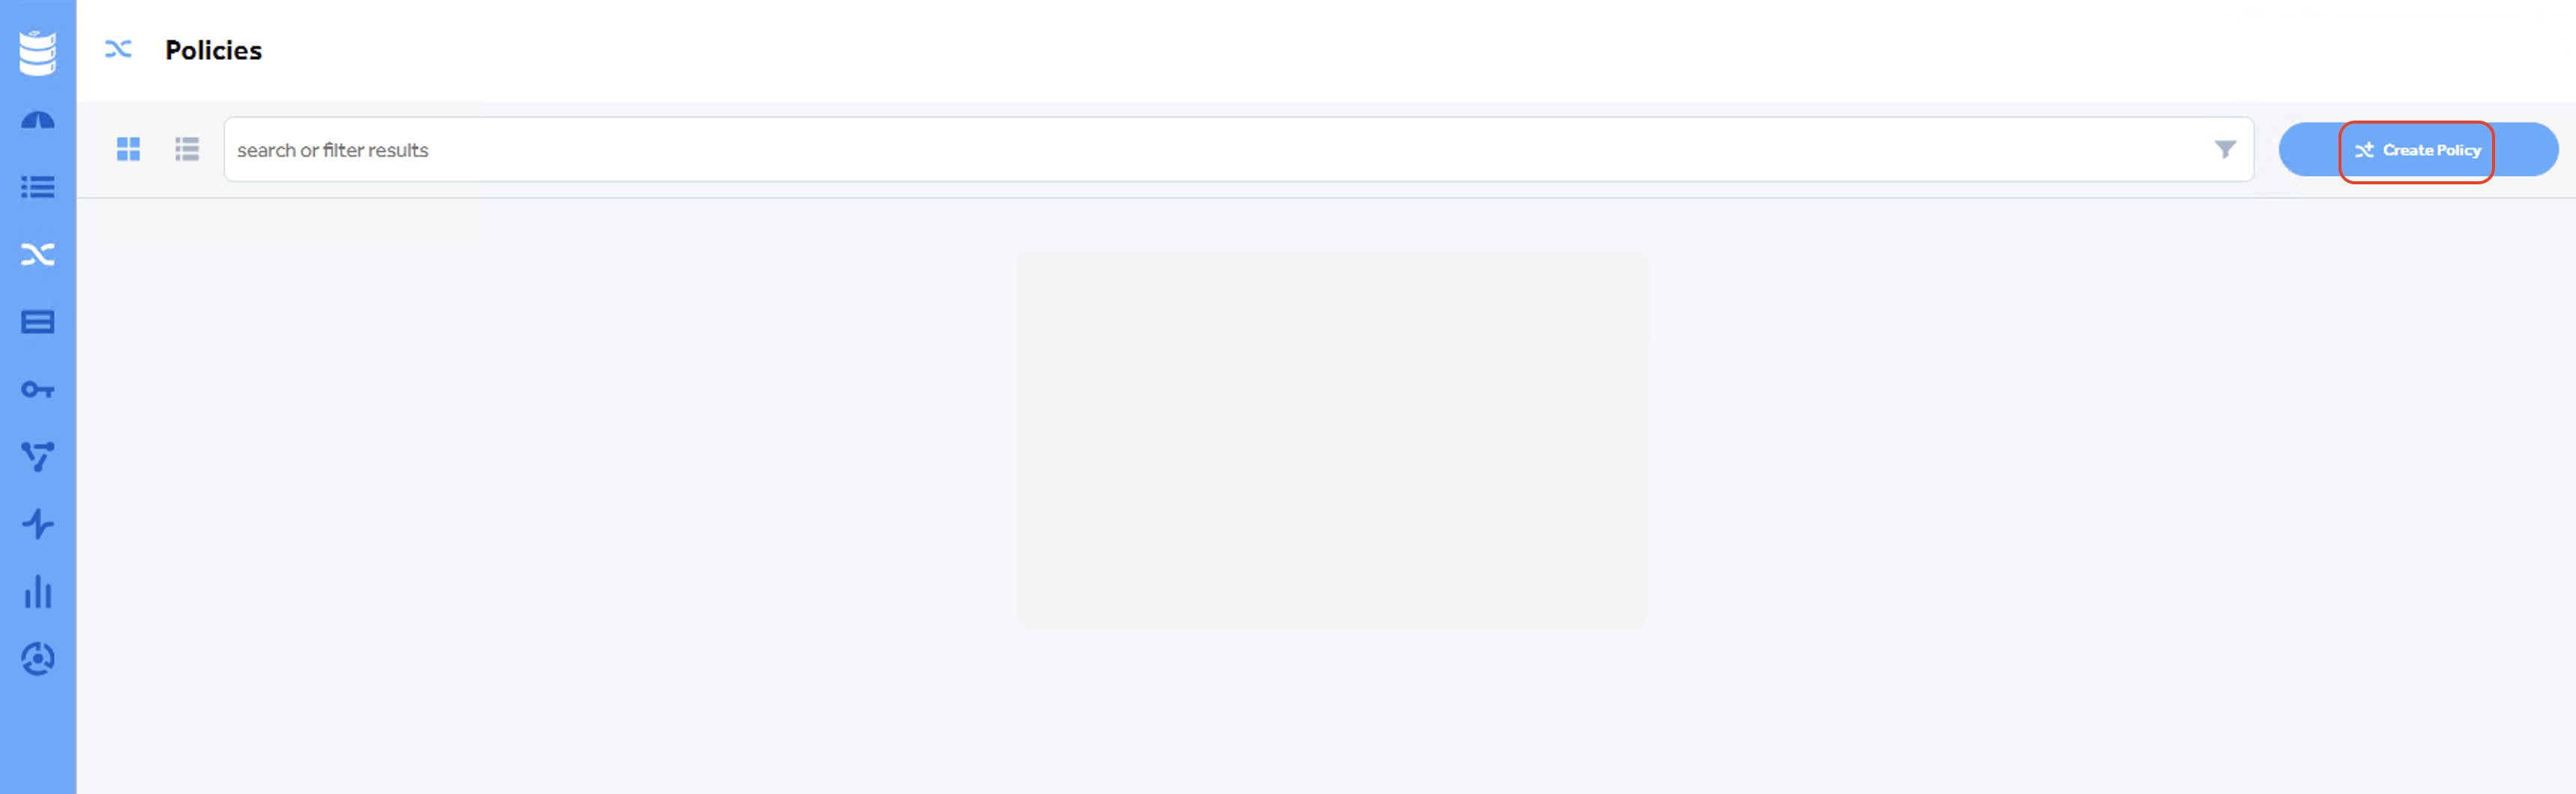
Click Create Policy to create a new one.
Configure the data movement policy as follows:
Name: Enter an appropriate name for the policy
Select the PowerScale file share storage as the source for data movement on the left. You can also select specific folders in the source.
Select the Wasabi bucket storage as the destination on the right. You can select specific folders in the destination bucket to transfer data to.
Select the type of data transfer method from the dropdown list. In this example, we are using copy to create a Sync of the PowerScale data in the Wasabi bucket. Below are the different data transfer types-
Copy – Copies files from the data source to the target, but does not delete files on the target
Move – Moves files from the data source to the target
Sync – Copies files from the data source to the target and deletes files on the target so it matches the data source exactly
Click on the Conflicts tab to define how identically named files on the source and destination will be handled. Three options are available: Overwrite, Rename transferred file, and Skip Source File. Select the appropriate one as needed. For more information, please refer to the "Define Conflict Handling" section in the CloudSoda documentation.
Optionally, rules can be defined to specify criteria for a data transfer. Refer to Define Rules on the CloudSoda documentation for more details.
The policy can be scheduled to run at a particular time of the day- either hourly, daily, or weekly. Refer to Define Rules on the CloudSoda documentation for more details.
Once the policy is configured, you can run a dry run to test the policy.
Click on the Active switch to turn it green to activate the policy after deployment, and click Deploy to save and deploy the policy.
.png)
Managing Jobs
The Jobs page lists the data transfer jobs initiated by either Quick Runs or policies. It shows additional details for each job, such as status, duration, and size.
You can access the Jobs page by clicking on Jobs.

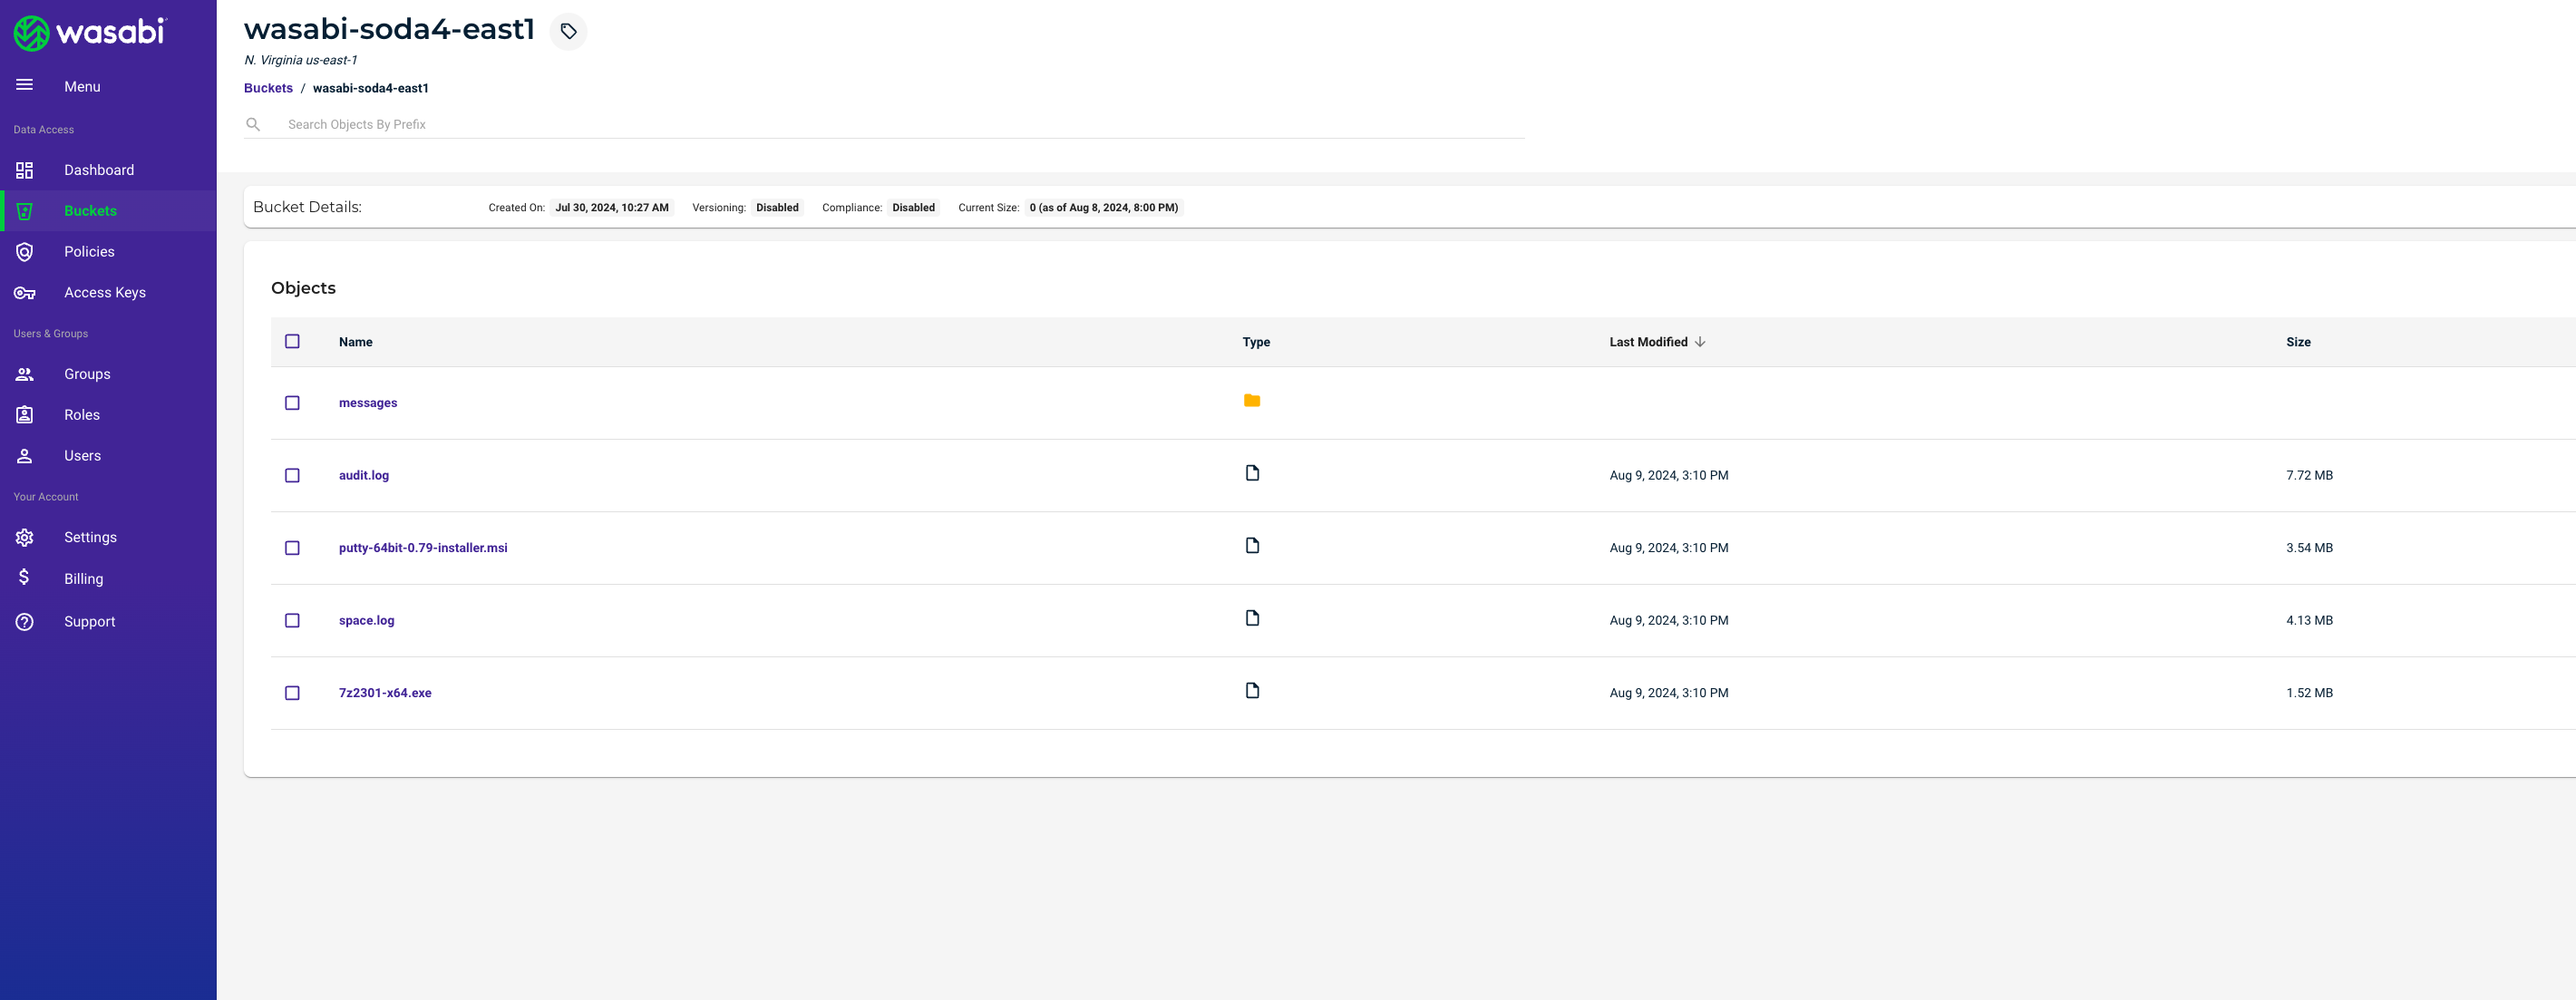
Accessing Data in Wasabi
CloudSoda copies and moves data to Wasabi in the native format. To access data on Wasabi, customers can either move the data back to PowerScale using CloudSoda or access it directly from Wasabi using the Wasabi console or any third-party S3 application.
Below is a screenshot of the Wasabi bucket showing objects copied from PowerScale using CloudSoda.