How do I create a Backup Copy to Wasabi on Veeam Backup for Microsoft 365 v8?
Veeam Backup for Microsoft 365 v8 empowers customers to securely back up Microsoft 365 to on-premises or cloud object storage. Wasabi has been validated to work with Veeam Backup for Microsoft 365 v8.
Version 8 of Veeam Backup for Microsoft 365 introduces immutability support for normal backup jobs, so using backup copy jobs to gain immutability is no longer required. Backup copy jobs do allow customers to have a secondary copy of their backups, however. This article provides steps to create a backup copy job.
For more details about specific features, refer to Veeam's Documentation.
The data restoration process is handled by your specific backup software application. As there are many potential variables that will affect your unique environment, Wasabi strongly recommends that you seek the guidance of your backup software's technical support team in the event that you encounter difficulty or have application-specific inquiries.
Prerequisites
Veeam Backup for Microsoft 365 v8 installed and licensed.
Active Microsoft 365 account with two-step authentication turned On.
Active Wasabi Cloud Storage account.
A standard or Object Locked (immutable) Wasabi bucket created, along with access and secret keys.
Adding an Organization
Refer to the Adding an Organization section in the Create a Backup to Wasabi on Veeam Backup for Microsoft 365 v8 article for details.
Adding a Wasabi Repository
Refer to the Adding a Wasabi Repository section in the Create a Backup to Wasabi on Veeam Backup for Microsoft 365 v8 article for details. This will be a new, separate repository from the "Wasabi Repo" created in that article.
Creating a Backup Copy Job
To create a Backup copy job on Veeam Backup for Microsoft 365 v8:
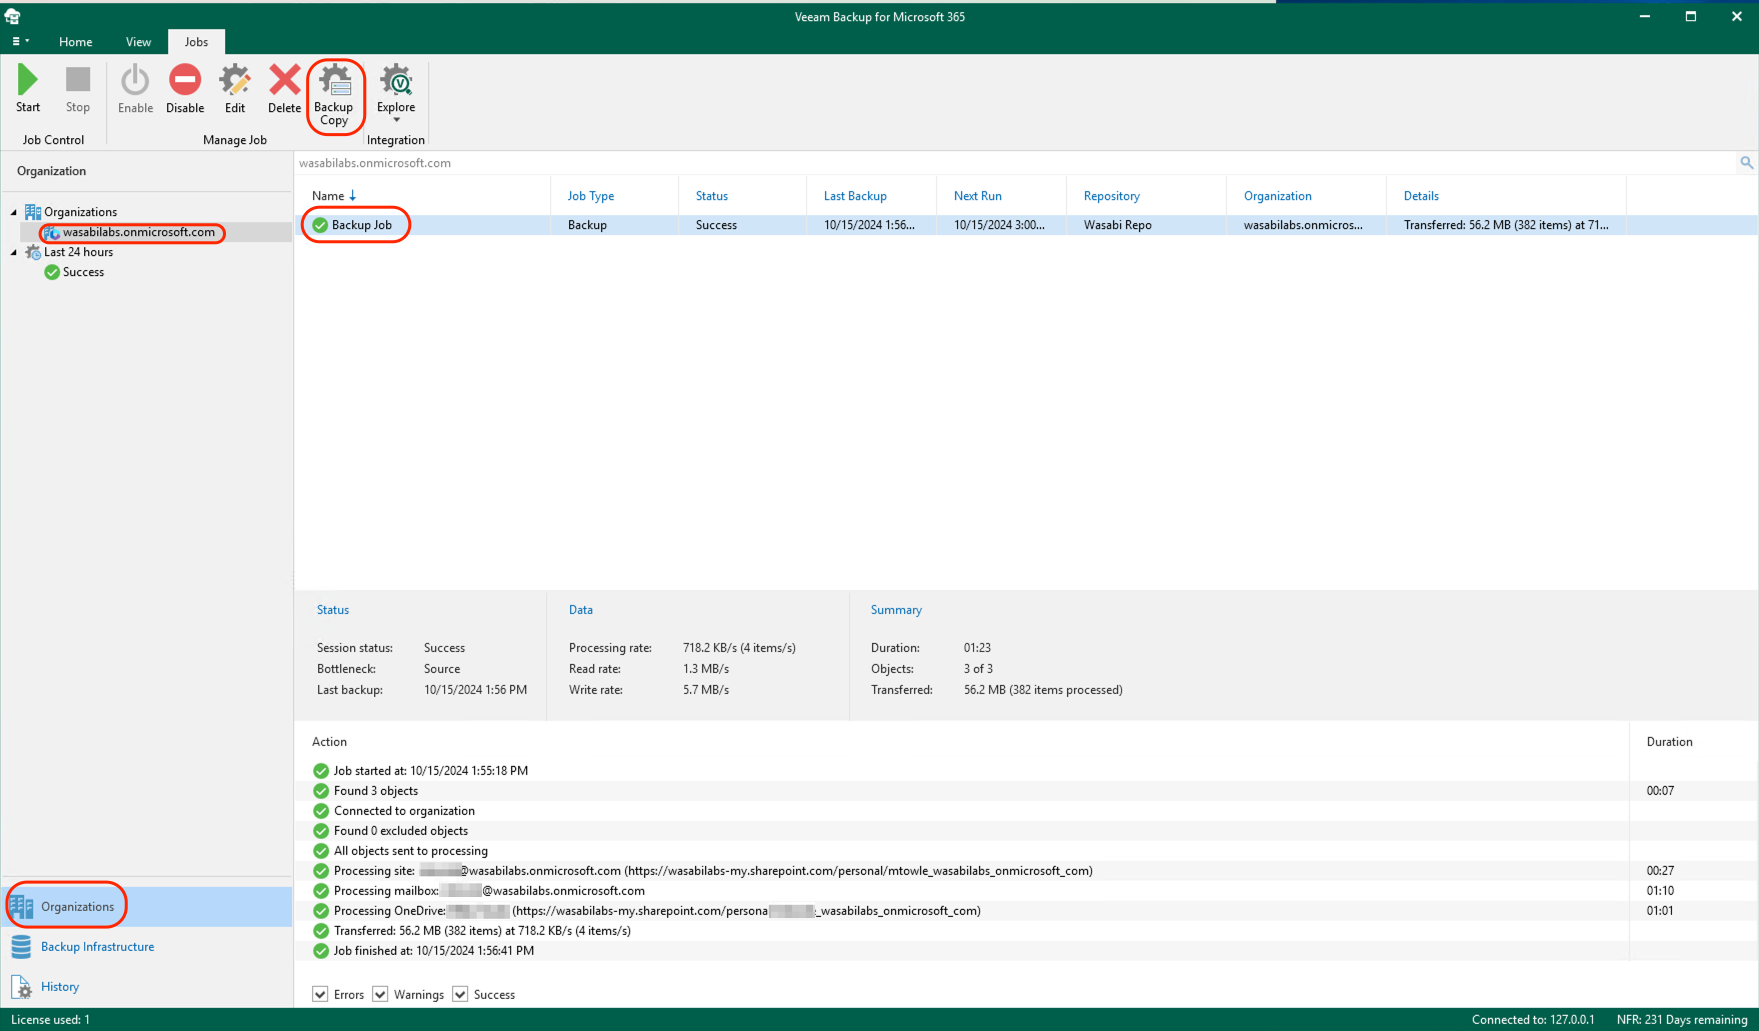
From the Organizations tab, select the organization that needs to be backed up. Select the backup job to be copied and click Backup Copy.
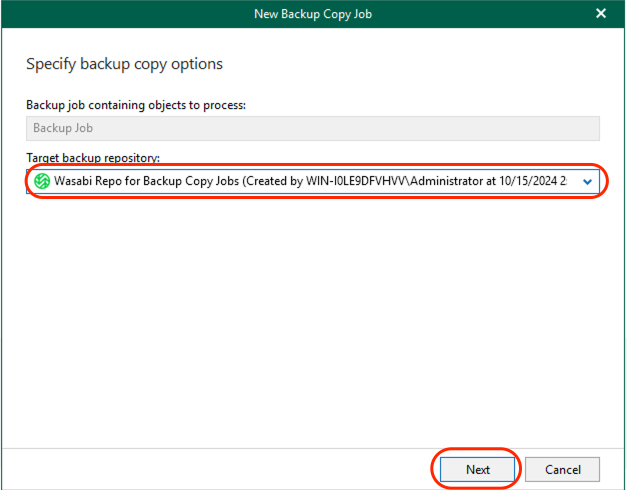
Select the new object repository (created above in Adding a Wasabi Repository) as the target backup repository. Click Next to continue.
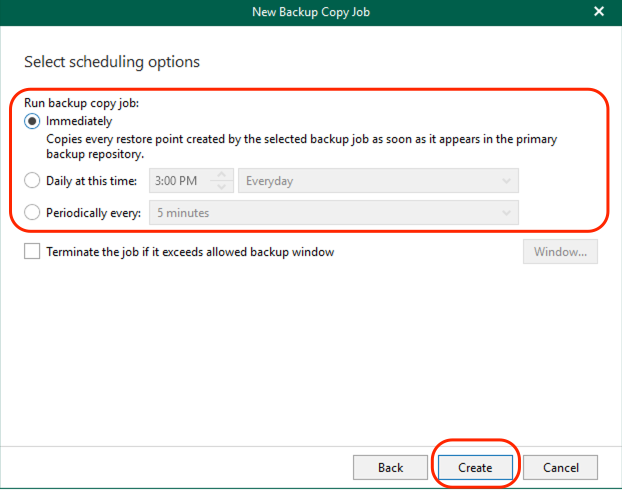
Select when to run the backup copy job and click Create. In this example, we chose to run the backup copy job immediately. You can schedule the job to run at different times.
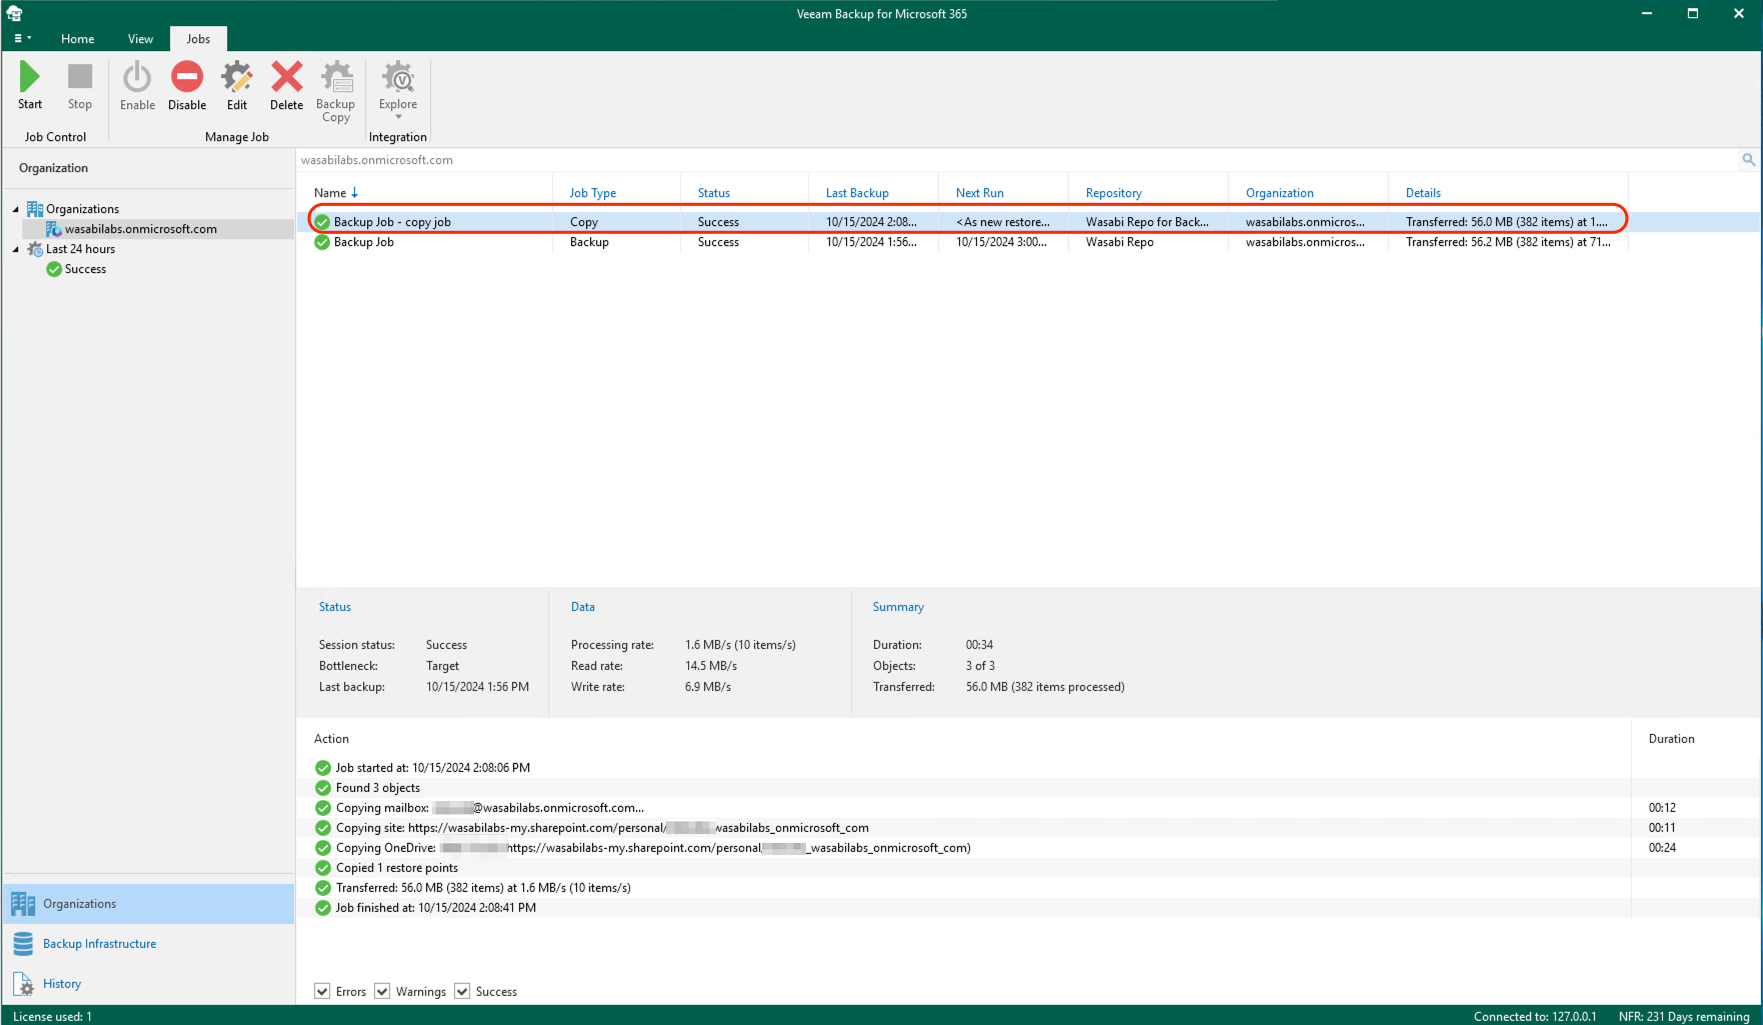
You will see the backup copy job created when you select your organization. When you click on the backup copy job, you can see the detailed status for the job. Ensure the status shows Success.
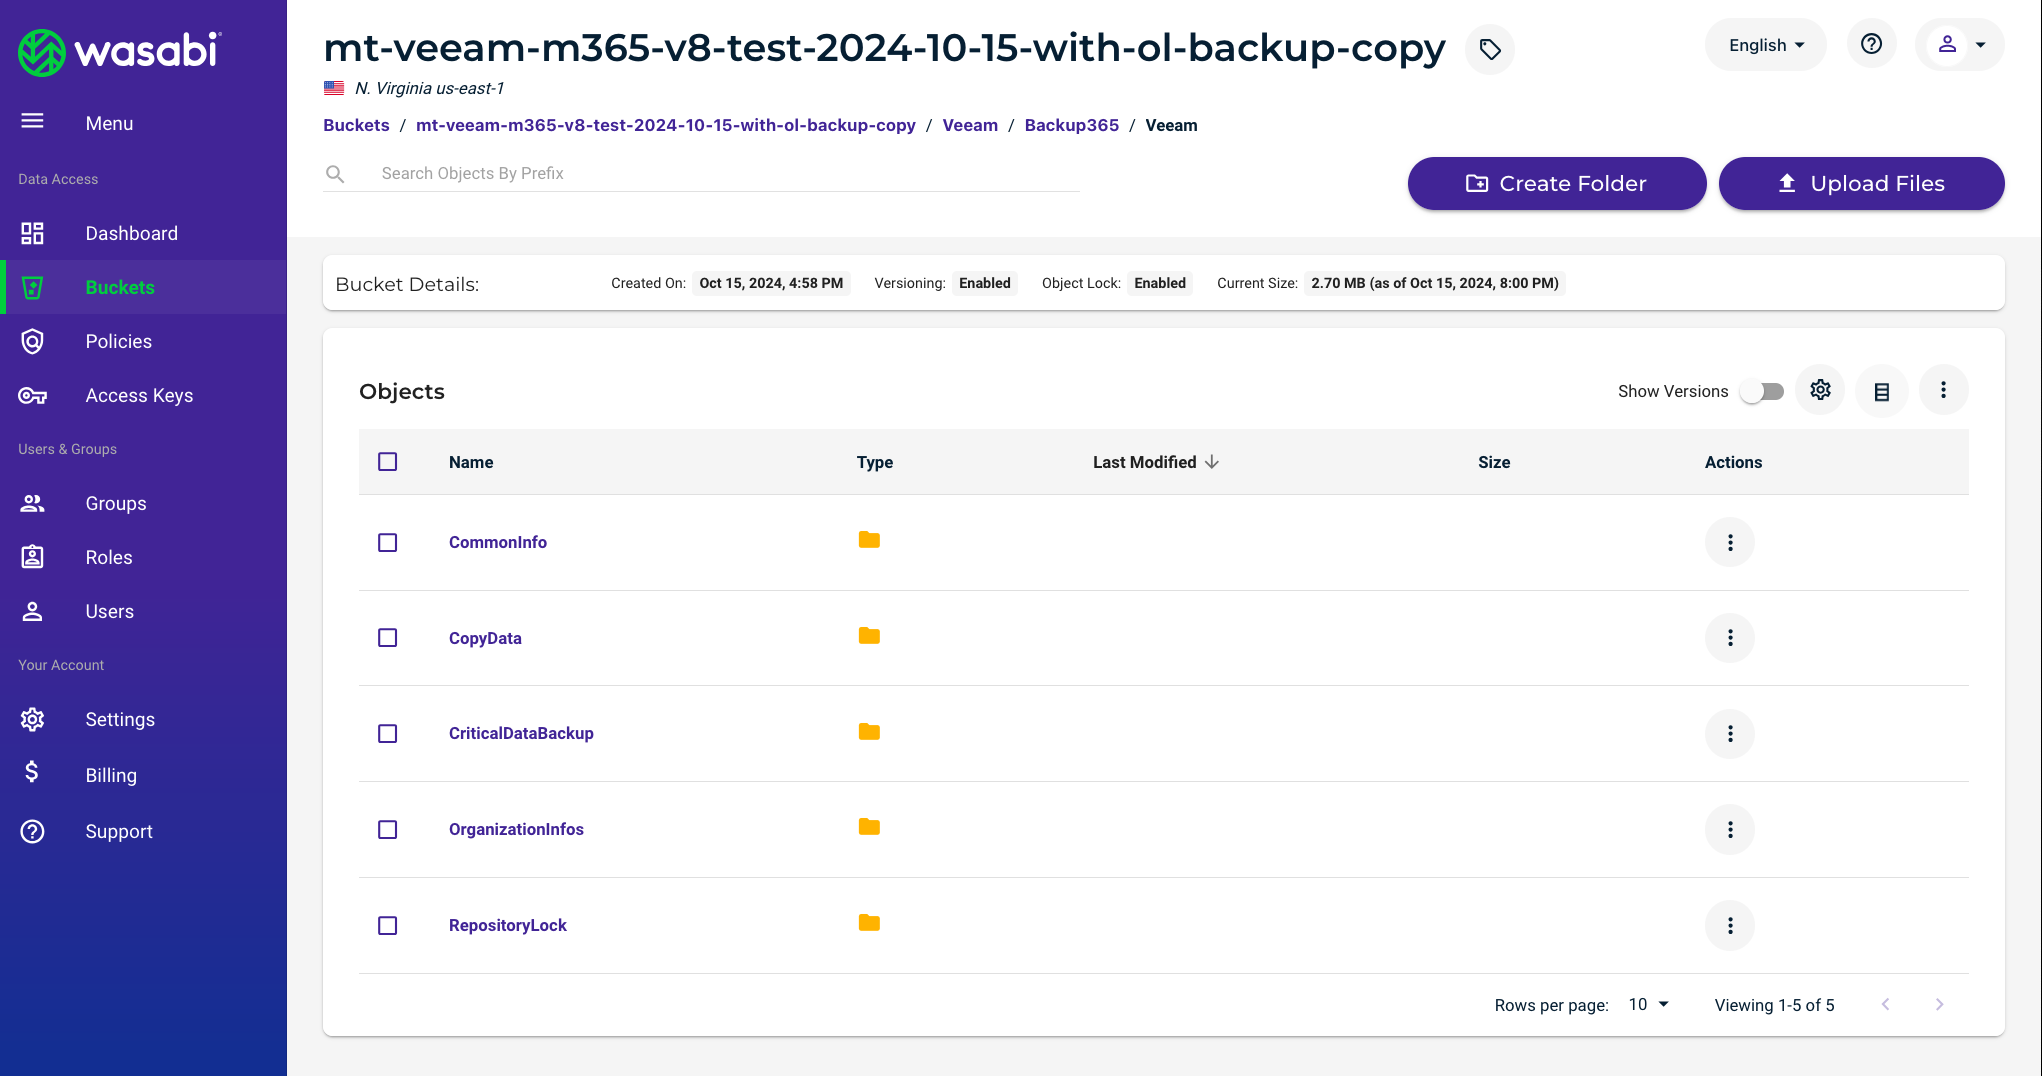
Verify you see the backup copy data in your Wasabi bucket by logging into the Wasabi Console. The following is an example of going several levels into the bucket's folder structure.
