How do I use Dell PowerScale(formerly Isilon) with Wasabi?
Dell PowerScale is validated for use with Wasabi. Wasabi is integrated with PowerScale using the CloudPools feature. CloudPools provides policy-based automated tiering that lets you seamlessly integrate with Wasabi as an additional storage tier for the PowerScale cluster. To utilize PowerScale with Wasabi, please follow the instructions in this article.
Use case: Long term retention in cloud
Prerequisites:
PowerScale’s external network is publicly routable
Select the appropriate Wasabi service URL depending on your Region
Minimum PowerScale software release 8.0. and above. Please check with your Dell representative on recommended release for CloudPools.
CloudPool license for your PowerScale OneFS.
An active Wasabi account
A Wasabi bucket created along with a user for accessing the bucket. The access and secret keys for the user to be available.
PowerScale OneFS Configuration:
Once you login to the PowerScale cluster, click on "File System -> Storage Pools".
.png "Screenshot 2024-05-16 at 3.00.14 PM(1).png")
Click on the CloudPools tab.

Click on "Create a Cloud Storage Account".

In the “Create a cloud storage account” window, input the required fields as follows-
Name or alias - Enter a name for the cloud storage account to be used within the PowerScale Cluster
Type- Choose "Type" to be "Dell EMC ECS Appliance"
URI- Set to "https://s3.wasabisys.com" for us-east-1. To use a different Wasabi storage region please use appropriate service URL.
Username- Set your Wasabi's Access key as your username
Key (password)- Set your Wasabi's Secret key as your Key/password
Proxy- Leave default “no value” for Proxy or select a proxy if you are using one
Click "Skip SSL certificate validation"
Click "Connect Account"

To create a CloudPool to point to Wasabi, click on “Create a CloudPool”

In the Create a CloudPool window, enter the following details-
Name: Enter a name for the CloudPool
Type: Select Dell EMC ECS Appliance from the list
Vendor: Enter Wasabi
Description: Enter a description for the CloudPool
Accounts in CloudPool: Select the Cloud Storage account that was created above

Once the cloud pool account is created, we create a file pool policy to move the desired files to Wasabi.
Click on “File pool policies” and click on create a "File Policy"

Enter the details for creating the file pool policy-
Policy name- Name for the policy
Description- Enter an appropriate description
Create a file matching criteria- In the example below - the criteria is applied to a specific path and files accessed older than 30 days.- essentially any file in the given path which has not been accessed for last 30 days will be moved to the CloudPool
Scroll all the way the bottom of the File policy screen and choose "Move to cloud storage" and set the value to "wasabi"
Optionally you can choose to encrypt or compress the data before transfer - please refer to your PowerScale OneFS guide for more information about these features
Click on "Create Policy"

.png "Screenshot 2024-06-26 at 10.58.38 AM(1).png")
PowerScale OneFS, by default, is configured to run the smart pools job every day at 10PM. To manually invoke a data transfer to the CloudPool follow the steps below.
Navigate to "Cluster Management -> Job Operations"

Click on "Job Types"

Scroll down to "Smart Pools" and click on "Start Job" to manually invoke an upload to Wasabi

To edit the CloudPool job schedule, click on “View/Edit”, and configure the schedule.

Viewing CloudPool data on Wasabi and PowerScale:
Below are two ways to confirm PowerScale CloudPool data been uploaded to Wasabi:
From Wasabi Console, PowerScale creates two buckets, bucket for metadata and second bucket for data, bucket which starts with name "d" contains the data and bucket with starts with name "m" contains metadata
Metadata bucket:

Data bucket:

Contents from the "Data bucket"

From the PowerScale command line:"wasabi-98-1# isi get -DD /ifs/home/cp-test2 | more”
Expected Output:
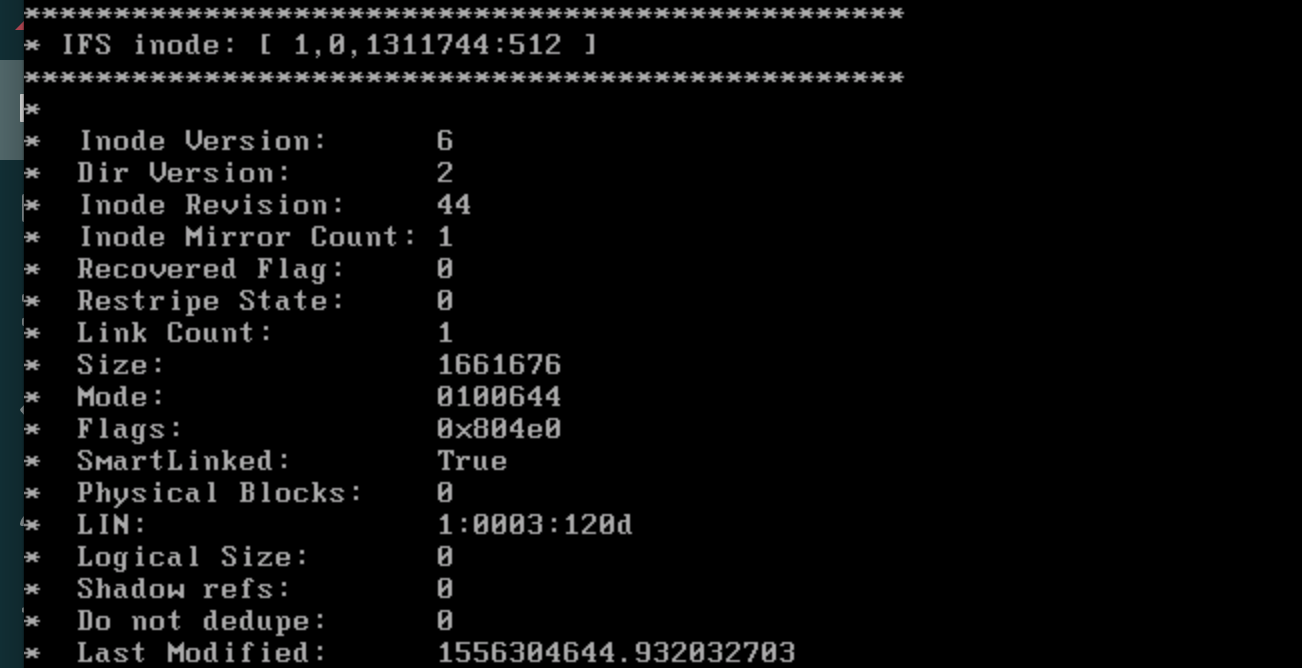
If the value is set to "True" in "SmartLinked" - the file data has been stubbed and uploaded to Wasabi.