Dell PowerScale SmartSync is a data replication and mobility solution integrated into Dell’s OneFS operating system. It facilitates efficient and secure data movement between PowerScale clusters and Wasabi cloud object storage. SmartSync is beneficial for organizations aiming to implement hybrid cloud strategies, enhance disaster recovery, or streamline data archiving processes.
Requirements
You have an active Wasabi With Dell Object Storage account.
A Wasabi bucket was created in the appropriate Wasabi With Dell ObjectScale Storage Vault, along with a user with available access/secret keys.
Minimum PowerScale software release 9.11 and above is needed. Check with your Dell representative on the recommended release for SmartSync.
PowerScale’s external network is publicly routable.
Port 9021 (HTTPS) for S3 API is needed.
You have a SyncIQ license for your PowerScale OneFS.
There is a Certificate Authority configured on the cluster.
Reference Architecture Diagram

Configuring SmartSync
To use the SmartSync feature, you will need to activate the SmartSync Daemon and then configure a Certificate Authority on the PowerScale cluster, following the steps documented in Dell PowerScale SmartSync KB Configuration Encryption.
If a Certificate Authority is not correctly installed, you will get an error as described in Troubleshooting Unconfigured CA.
After your Certificate Authority is correctly configured, as per Dell’s documentation, enable the Datamover service on your PowerScale cluster.
isi services -a isi_dm_d enable
Create a SmartSync replication account. To do so, create an ECS_S3 Account type pointing to your Wasabi ObjectScale bucket.
Account Type—ECS_S3
URI—https://s3-nns-us-east-1-dell-obs.wasabisys.com:9021 or https://s3-nns.eu-west-1-dell-obs.wasabisys.com:9021
Refer to Wasabi With Dell ObjectScale Service URL Endpoints for additional information.Auth Mode—CLOUD
Access ID—Wasabi access key
Secret Key—Wasabi secret key
For the Wasabi URI, be sure to include nns in the string to indicate NoNameSpace.
isi dm accounts create ECS_S3 https://s3-nns.us-east-1-dell-obs.wasabisys.com:9021/(BUCKET NAME) --name (UNIQUE ACCOUNT NAME) --auth-mode CLOUD --access-id (ACCESS KEY) --secret-key (SECRET KEY)
isi dm accounts view (ACCOUNT NUMBER)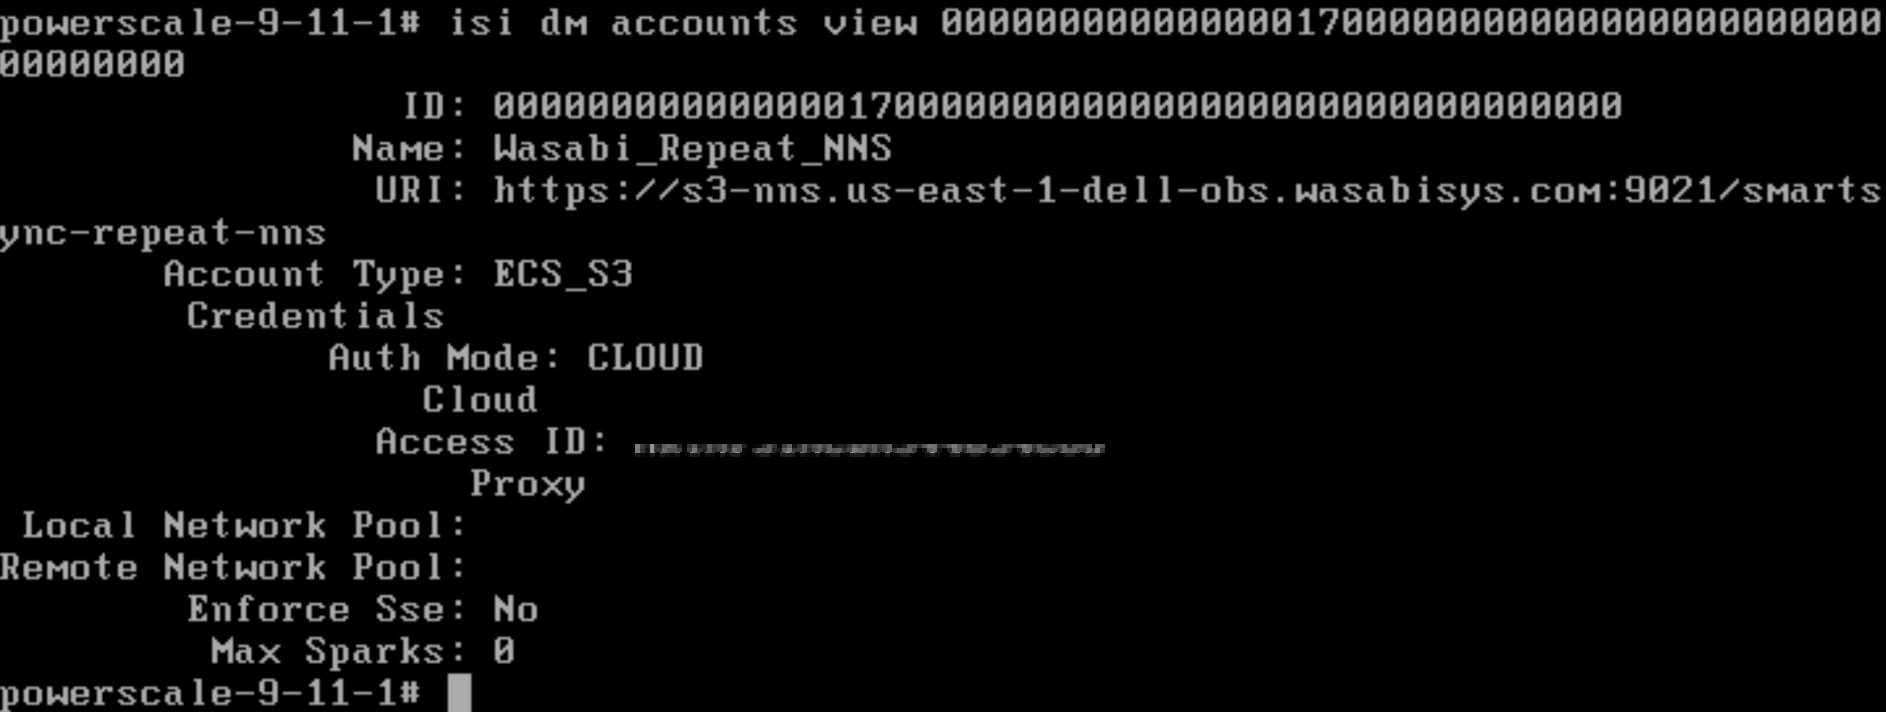
Configure the max-sparks setting per Dell recommendation. This parameter sets the limit for concurrently running tasks per node at the account level. Dell recommends that the max-sparks parameter be set to 100 per SmartSync account for initial uploads. Once the seed data has been uploaded to the Cloud account, this setting can be modified to 5 for copying incremental data sets.
isi dm accounts modify <account id> --max-sparks=100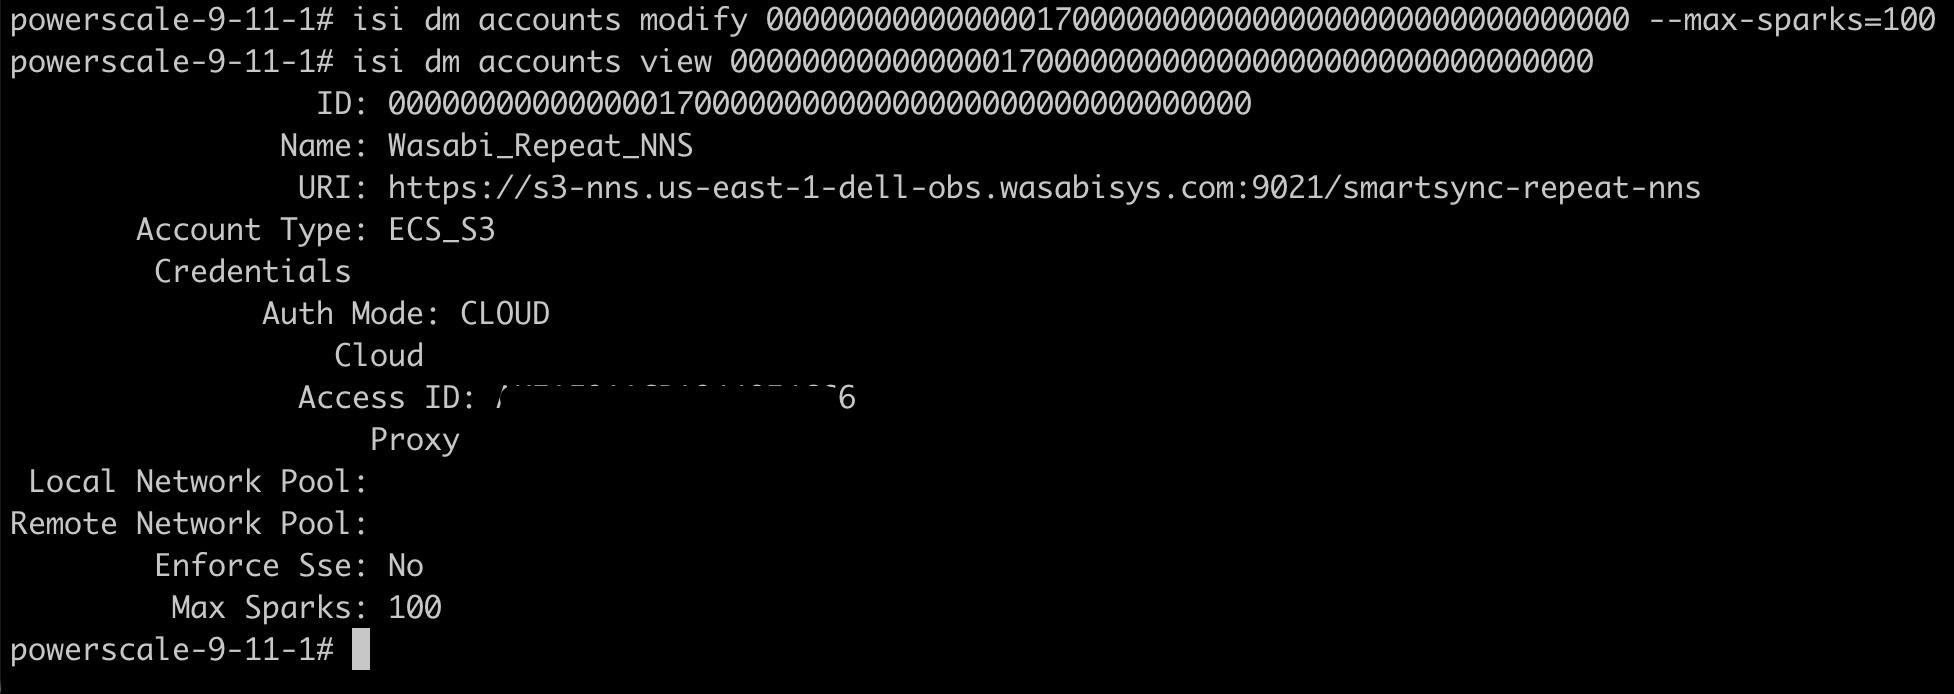
Create a Dataset Creation policy.
isi dm policies create (UNIQUE POLICY NAME) --priority='NORMAL' --enabled='true' --policy-type='CREATION' --creation-account-id=(LOCAL ACCOUNT ID) --creation-base-path=(SOURCE PATH) --creation-dataset-retention-period=600 --creation-dataset-reserve=2 --creation-dataset-expiry-action=DELETE
Create a Repeat-Copy policy.
isi dm policies create (UNIQUE POLICY NAME) --policy-type='REPEAT_COPY' --priority='NORMAL' --enabled='true' --repeat-copy-source-base-path=(SOURCE PATH) --repeat-copy-base-account-id=(LOCAL ACCOUNT ID) --repeat-copy-base-source-accont-id=(LOCAL ACCOUNT ID) --repeat-copy-base-target-account-id=(CLOUD ACCOUNT ID) --repeat-copy-base-target-base-path=(BUCKET NAME) --repeat-copy-base-target-dataset-type='FILE_ON_OBJECT_BACKUP' --repeat-copy-base-dataset-retention-period=1800 --repeat-copy-base-dataset-reserve=5 --repeat-copy-base-dataset-expiry-action=DELETE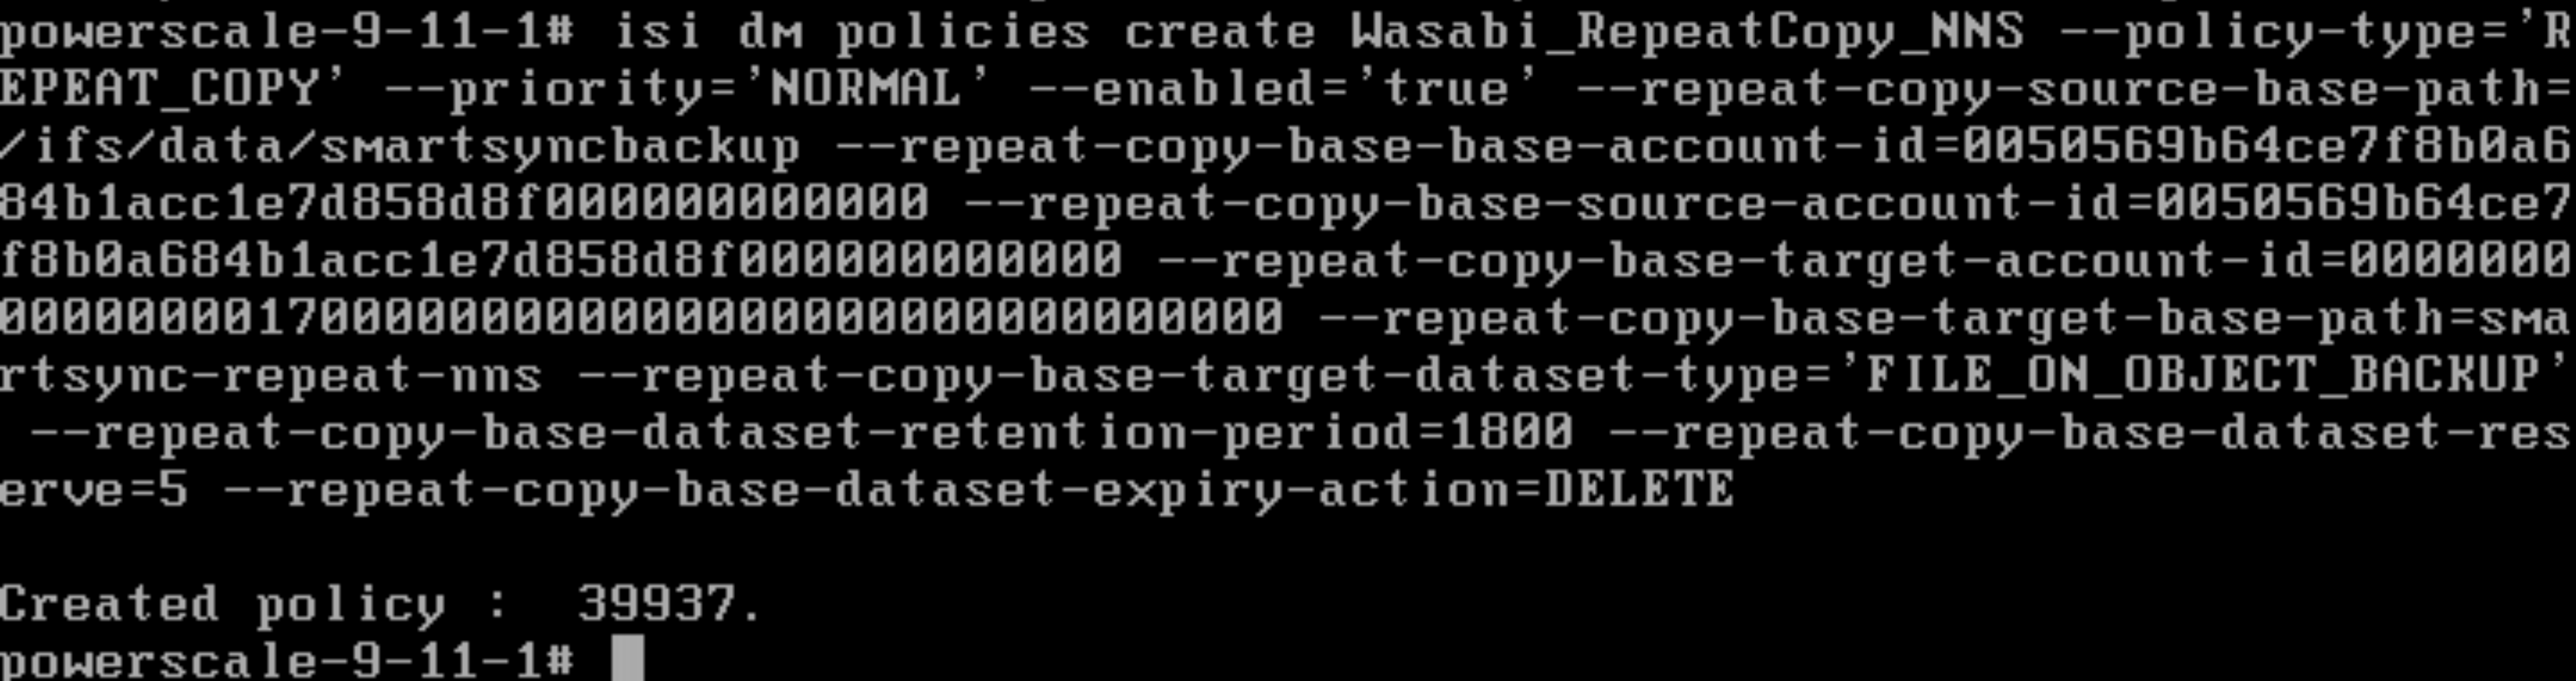
Enable the Dataset Creation policy to run now to create a dataset/snapshot.
isi dm policies modify (POLICY NUMBER) --run-now=true
                isi dm jobs list
Enable the Repeat Copy policy to run now to start a backup job to your Wasabi bucket.
isi dm policies modify (POLICY NUMBER) --run-now=true
                isi dm jobs list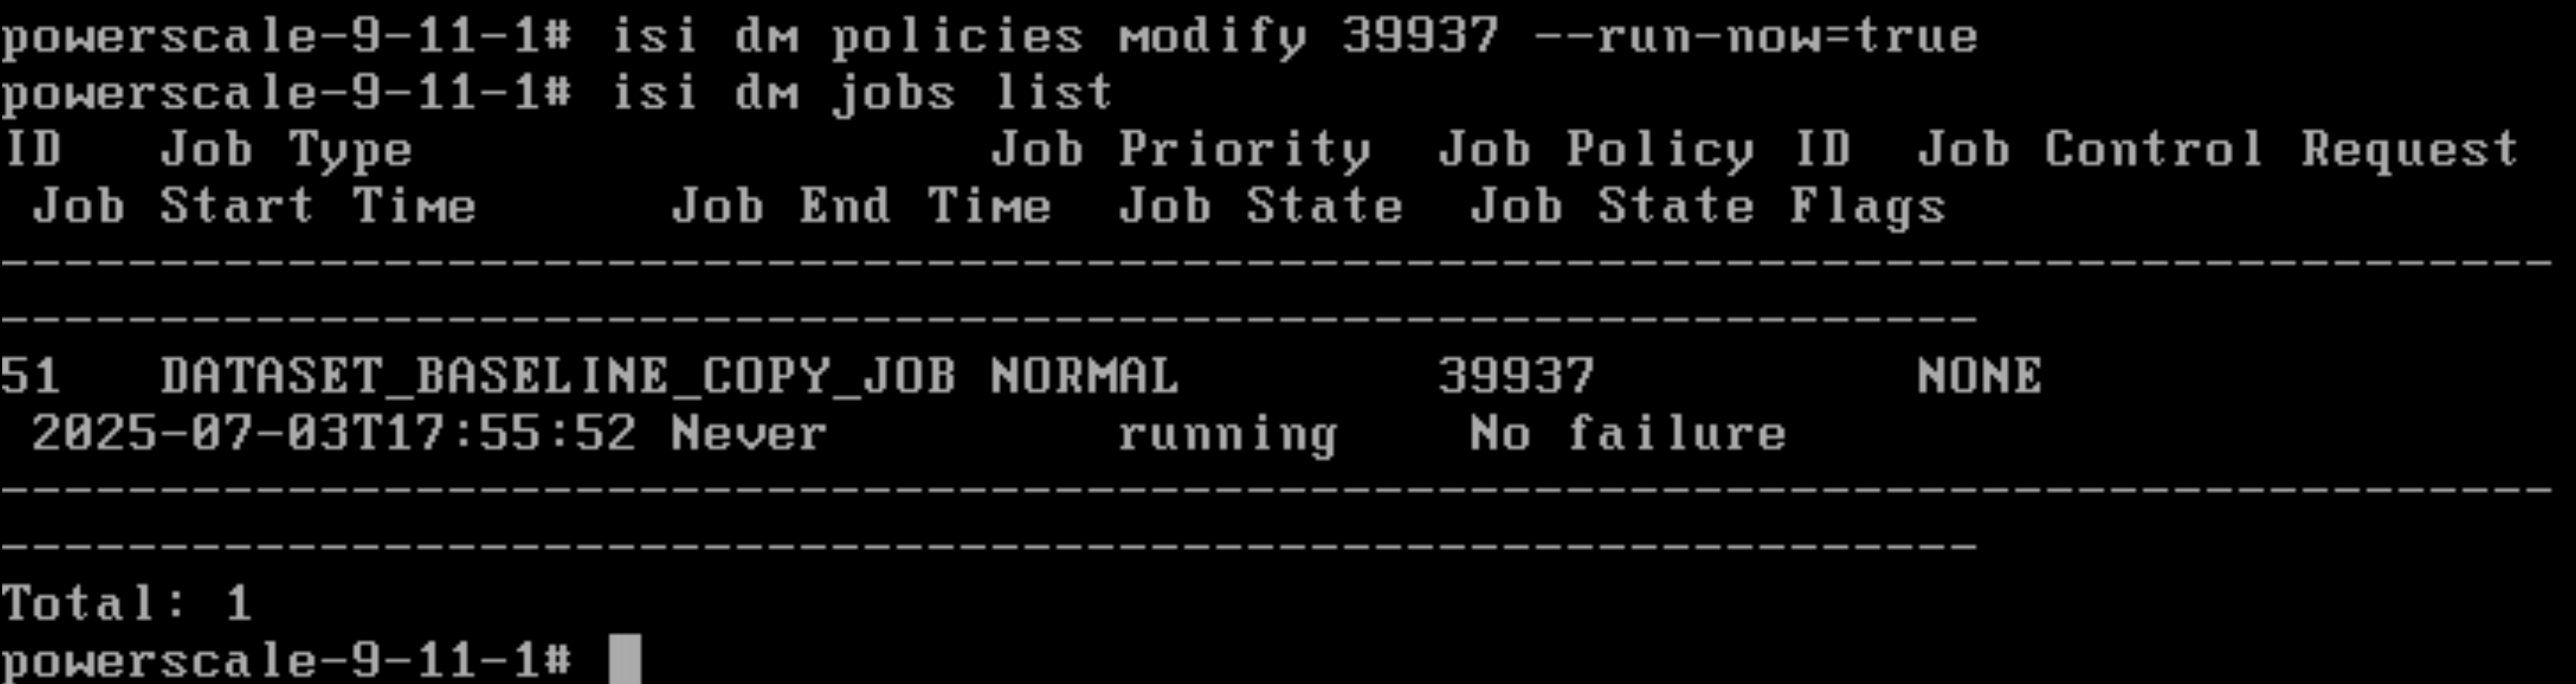
isi dm jobs list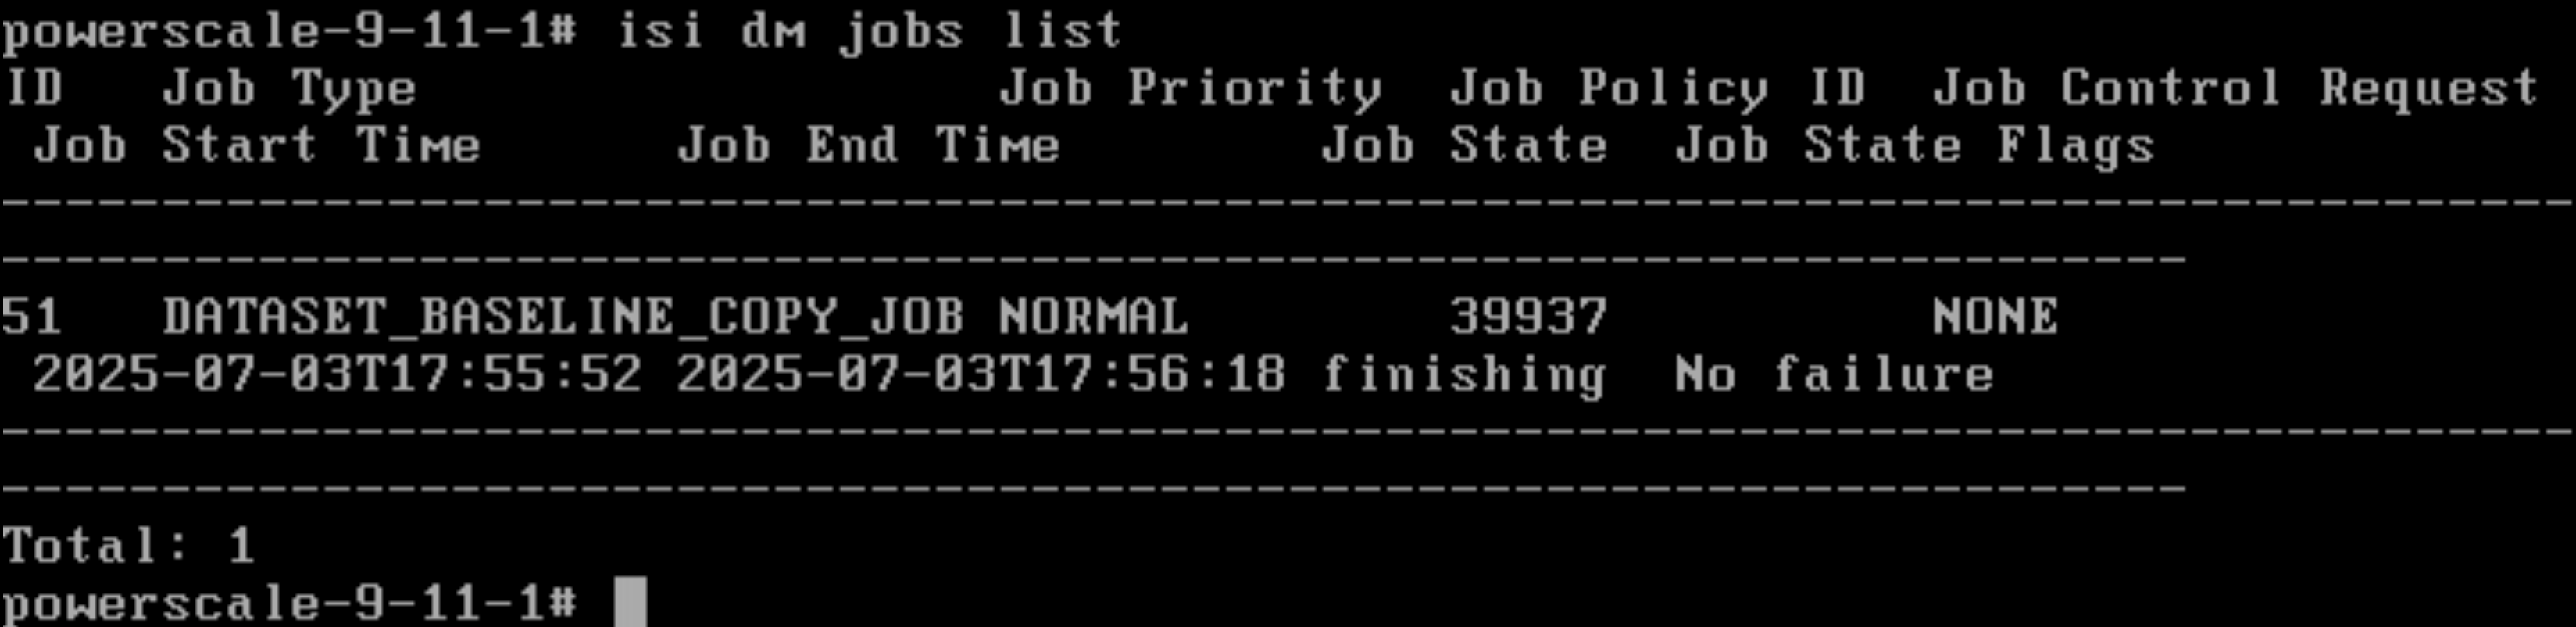
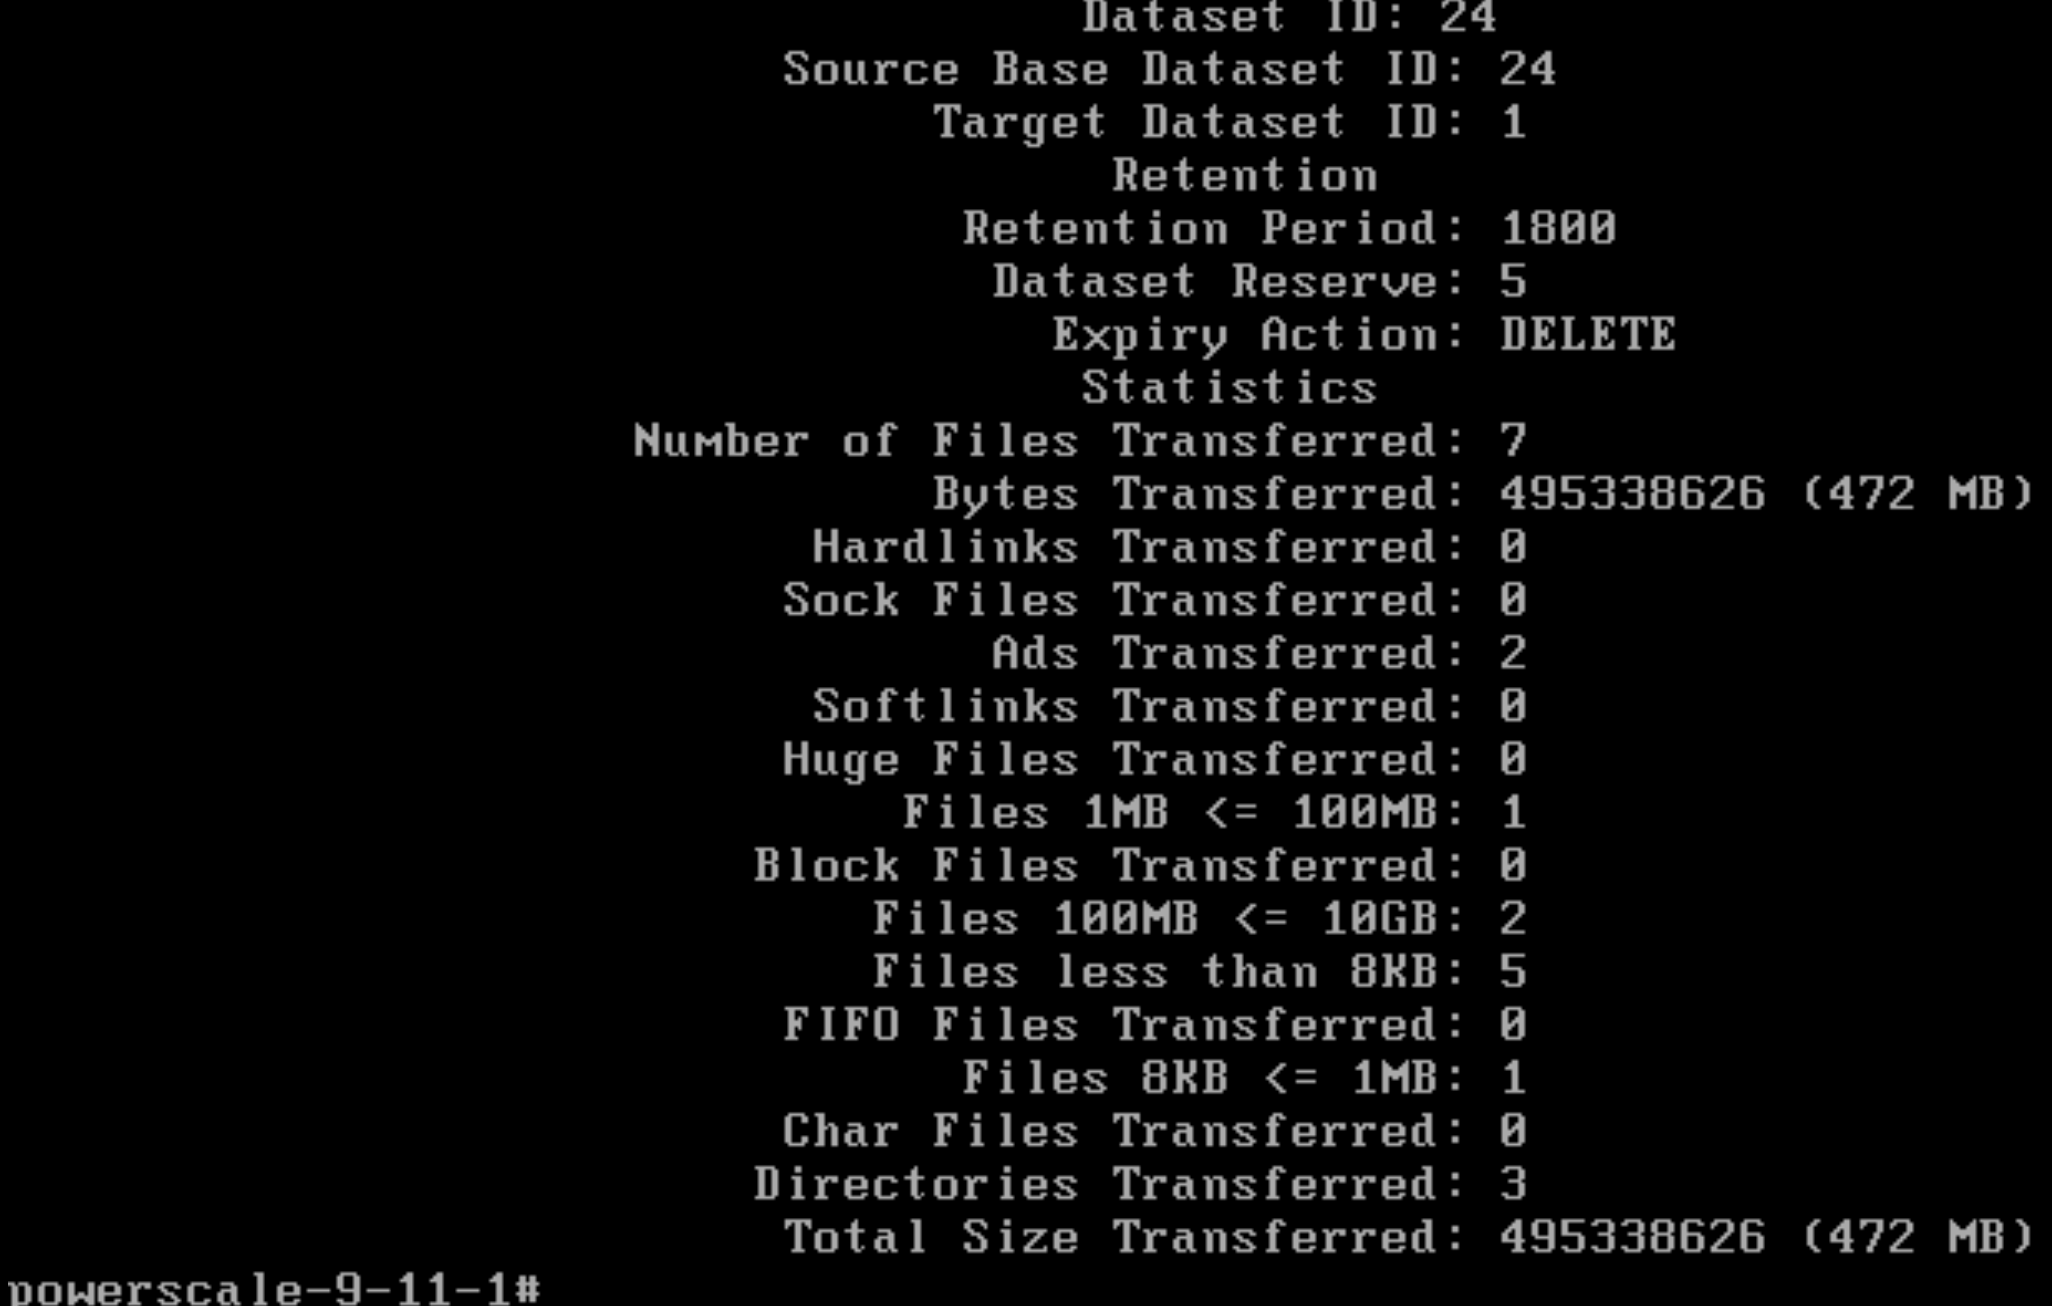
You can view the job by running
isi dm jobs view xxand verifying that the data was transferred.isi dm jobs view (JOB NUMBER)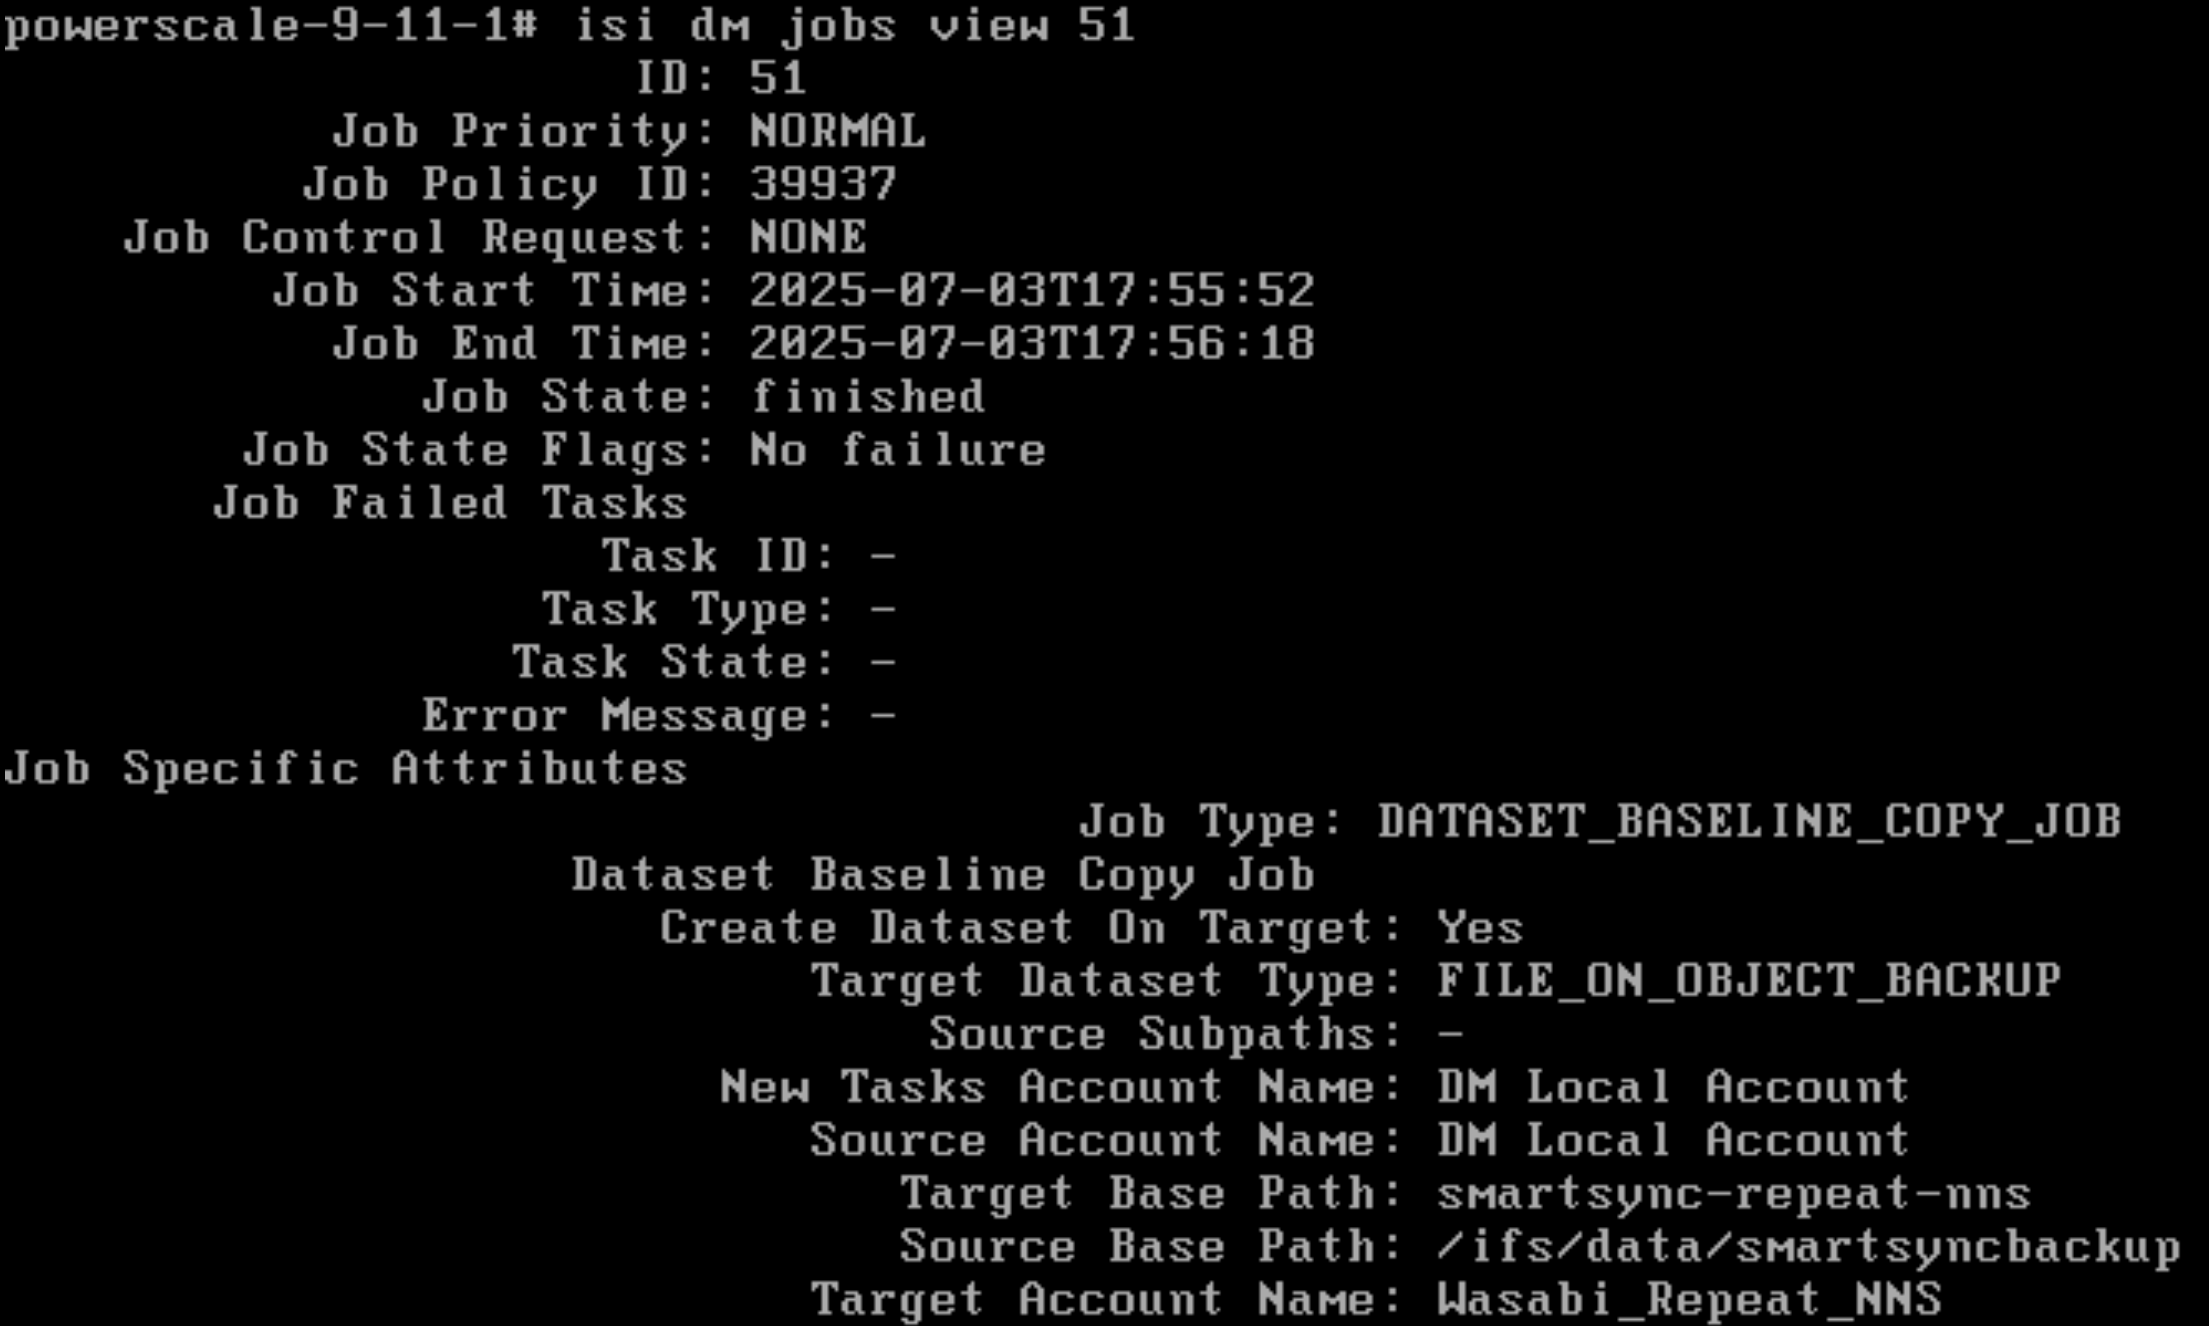
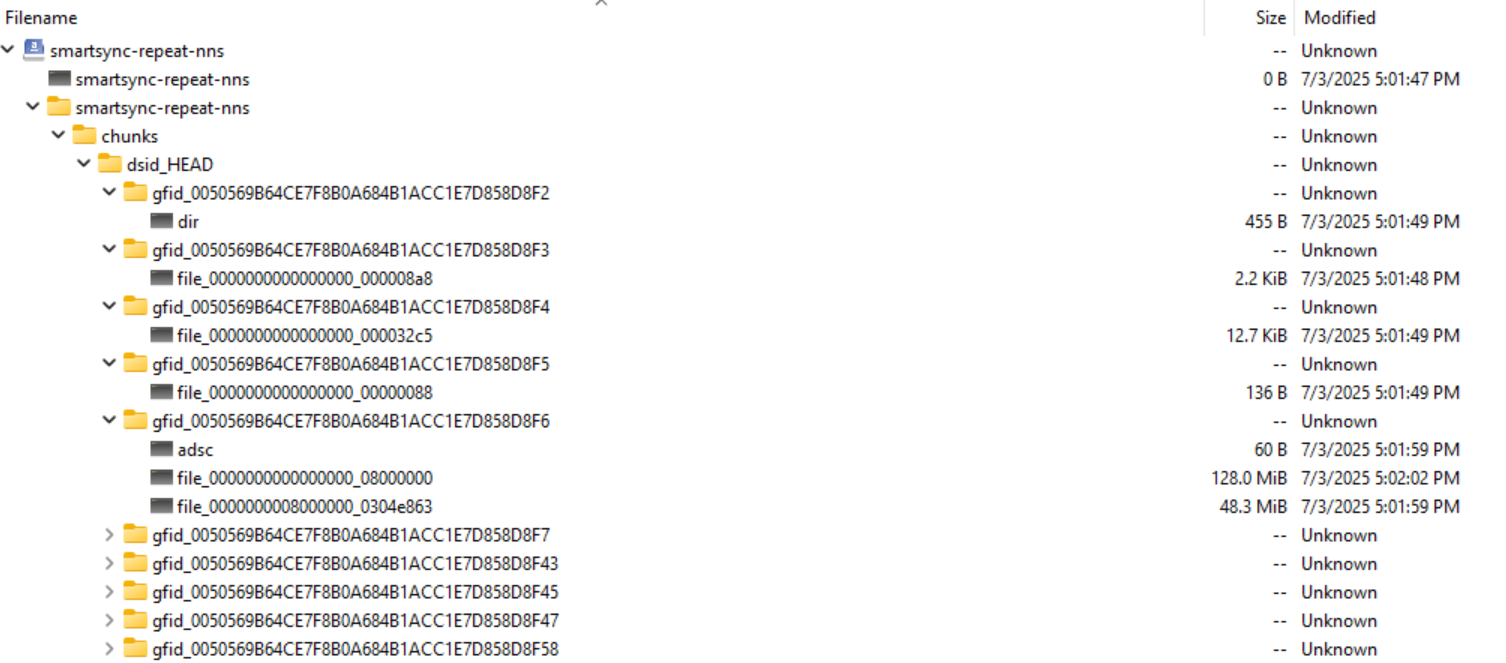
When using the Repeat Copy job, the data is transferred to Wasabi ObjectScale storage in proprietary format. Using Cyberduck, S3 Browser, or any other application, you can view your Wasabi With Dell ObjectScale bucket and see that the data is successfully in your bucket. The data, however, will not be in a readable format, and you will need to use SmartSync to view or restore the data.
Running Copy Job Incrementally
After running the initial baseline copy/backup job with the initial dataset, any new jobs will be incremental, comparing the data against the original snapshot in the series and uploading only changed files.
isi dm policies modify (POLICY NUMBER) --run-now=true
        isi dm policies modify (POLICY NUMBER) --run-now=true
        isi dm jobs list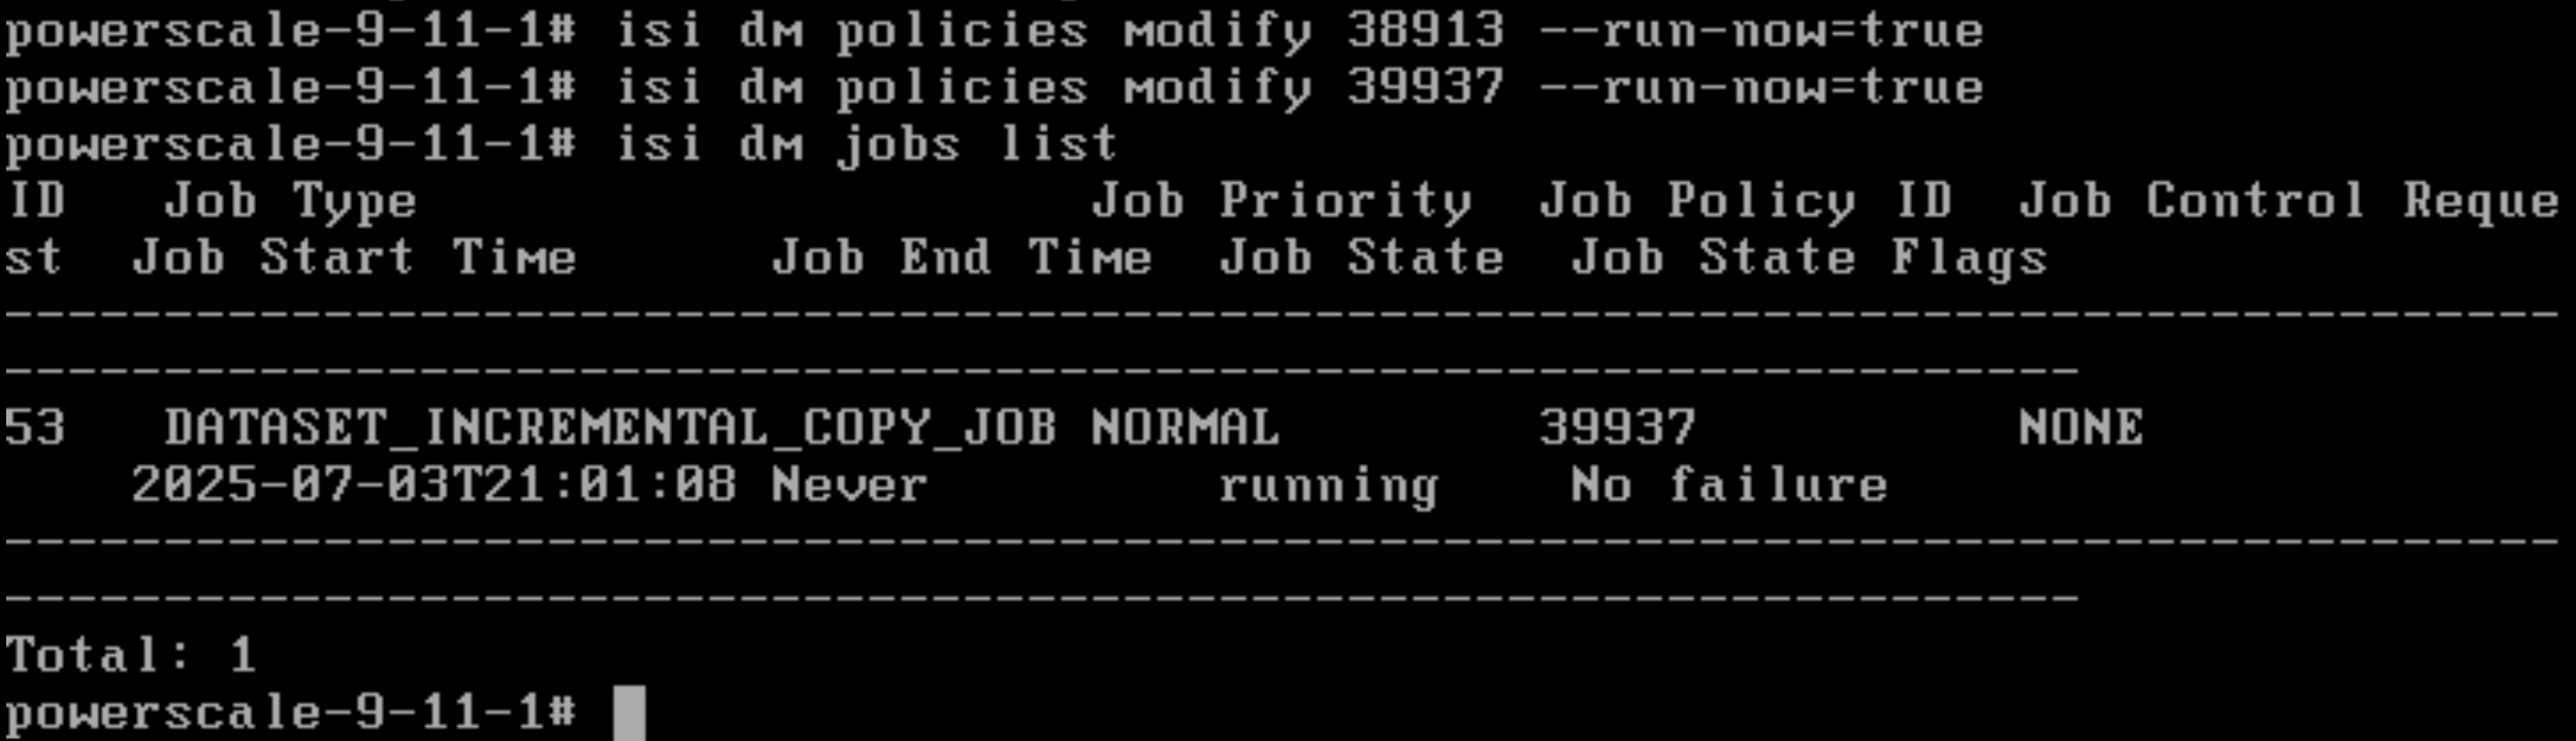
Run isi dm reports list to show all the jobs run and their job type.
isi dm reports list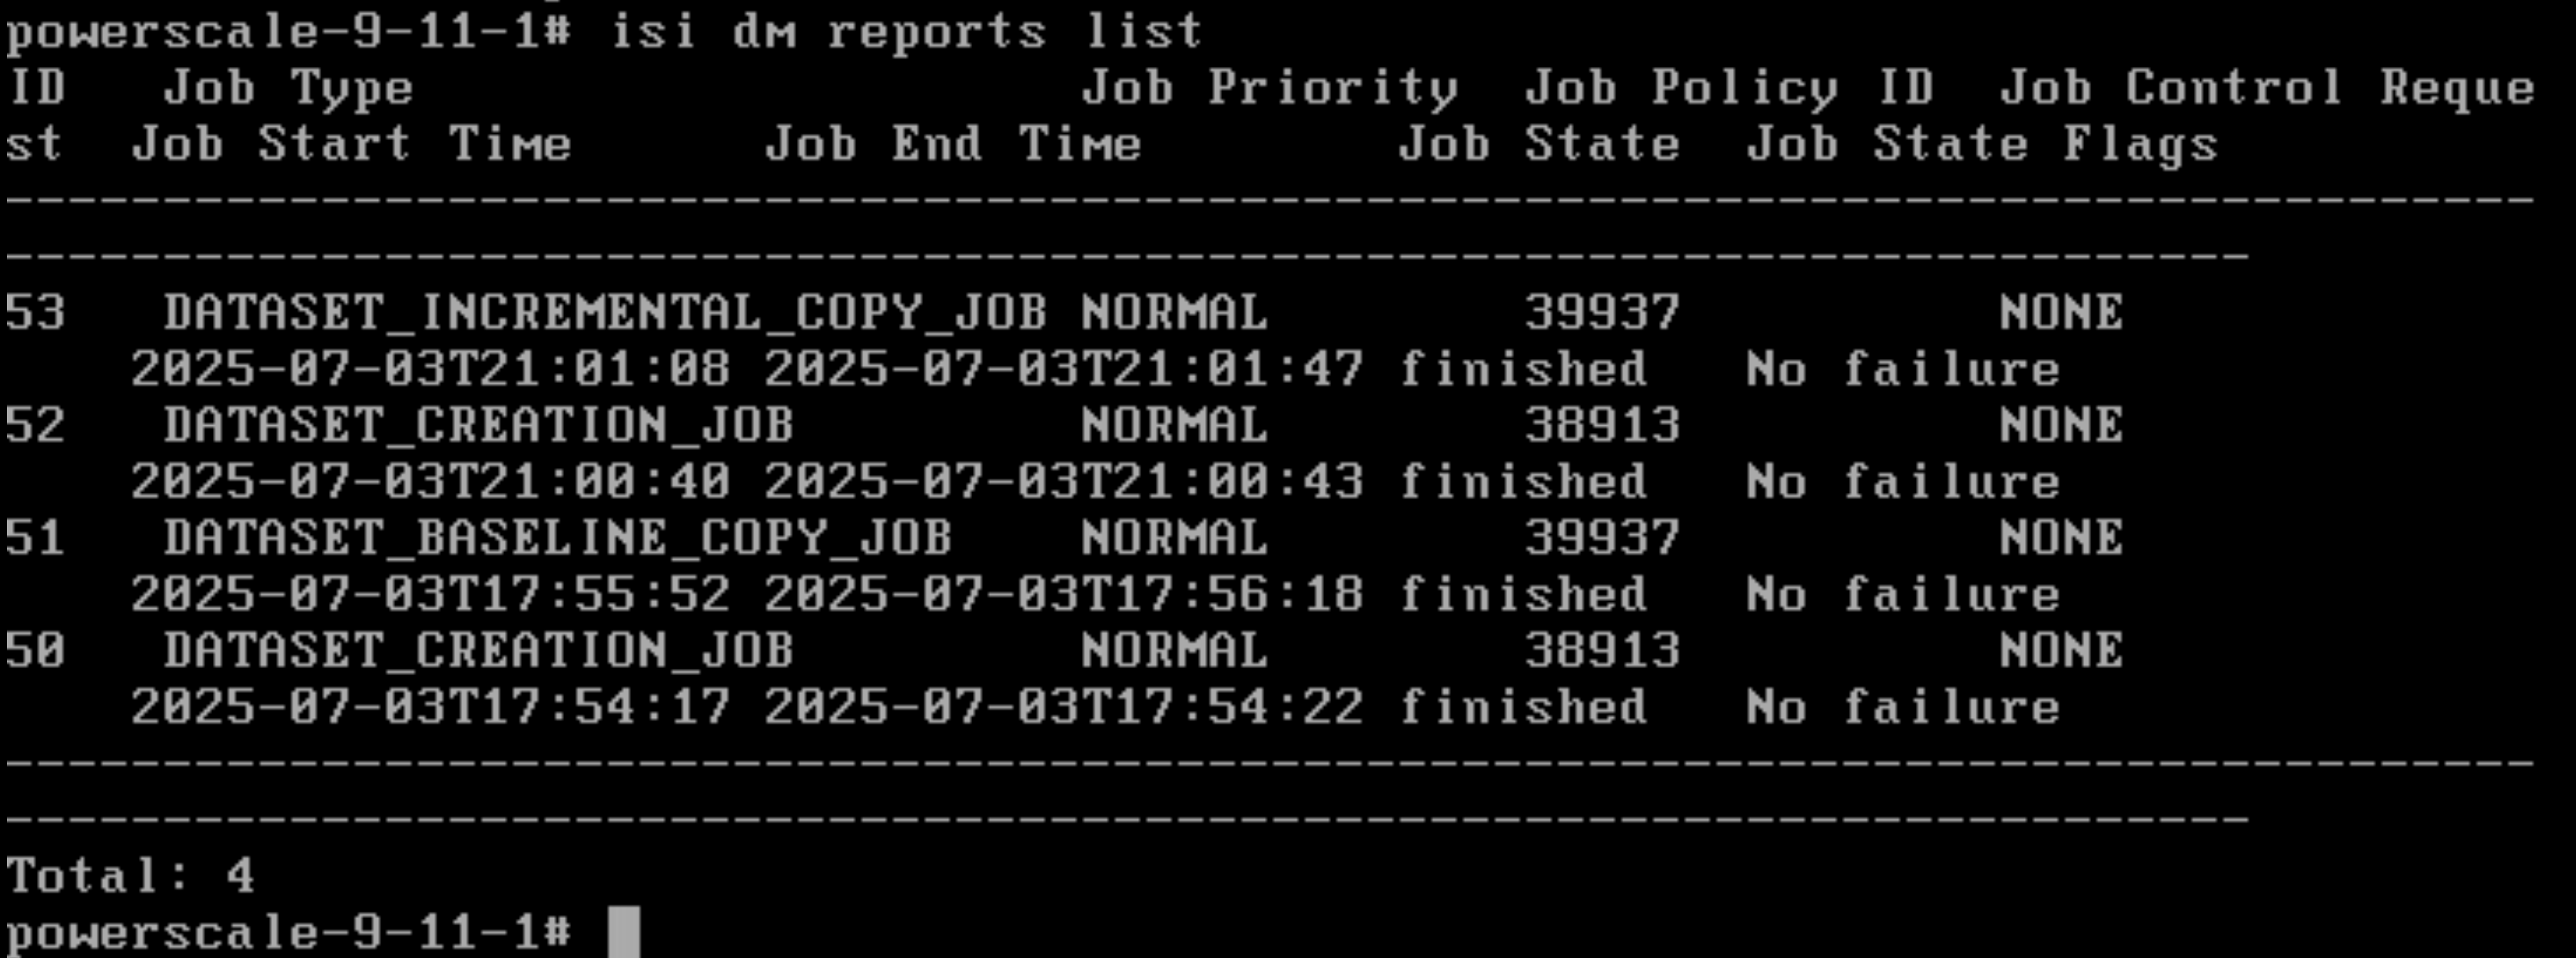
Restoring SmartSync
Restore data from Cloud to the Powerscale Cluster with either partial or full restoration. Partial restoration restores a subset of the directory structure specified under the source path. Full restoration is the process of restoring the entire dataset.
Check and view the dataset id for restoration.
isi_dm browse
        list-accounts
        connect-account (Cloud Account ID)
        list-datasets
        connect-dataset (Dataset ID)
Creating a Partial Restoration Policy
--copy-source-subpaths supports multiple listings (“hr”, “finance”), and --copy-base-target-base-path, which is a Target directory, must be empty.
isi dm policies create (UNIQUE POLICY NAME) --policy-type='COPY' --enabled='true' --priority='NORMAL' --copy-base-target-account-id=(LOCAL ACCOUNT ID) --copy-base-source-account-id=(SOURCE ACCOUNT ID) --copy-source-base-path=(SOURCE PATH) --copy-create-dataset-on-target='false' --copy-base-target-dataset-type='FILE' --copy-base-target-base-path=(TARGET PATH ON CLUSTER) --copy-dataset-id=(DATASET ID FOR RESTORATION) --copy-source-subpaths=(SUB PATH FOR RESTORATION)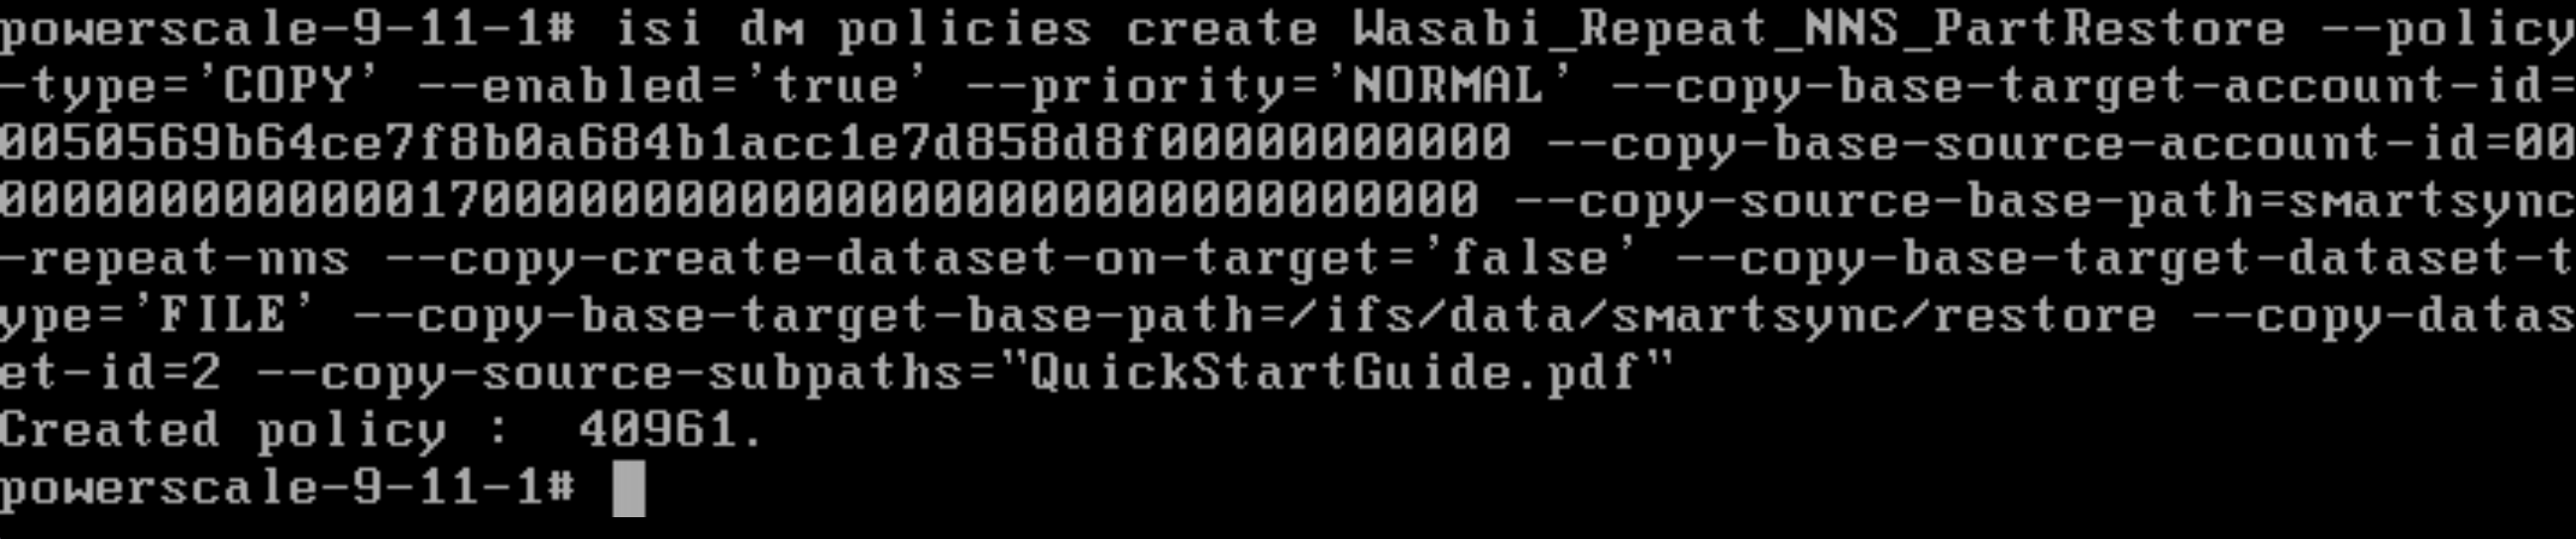
Run the Partial Restoration policy.
isi dm policies list
                isi dm policies modify (RESTORATION POLICY ID) --run-now=true
View the Data Restoration Job Status.
isi dm jobs list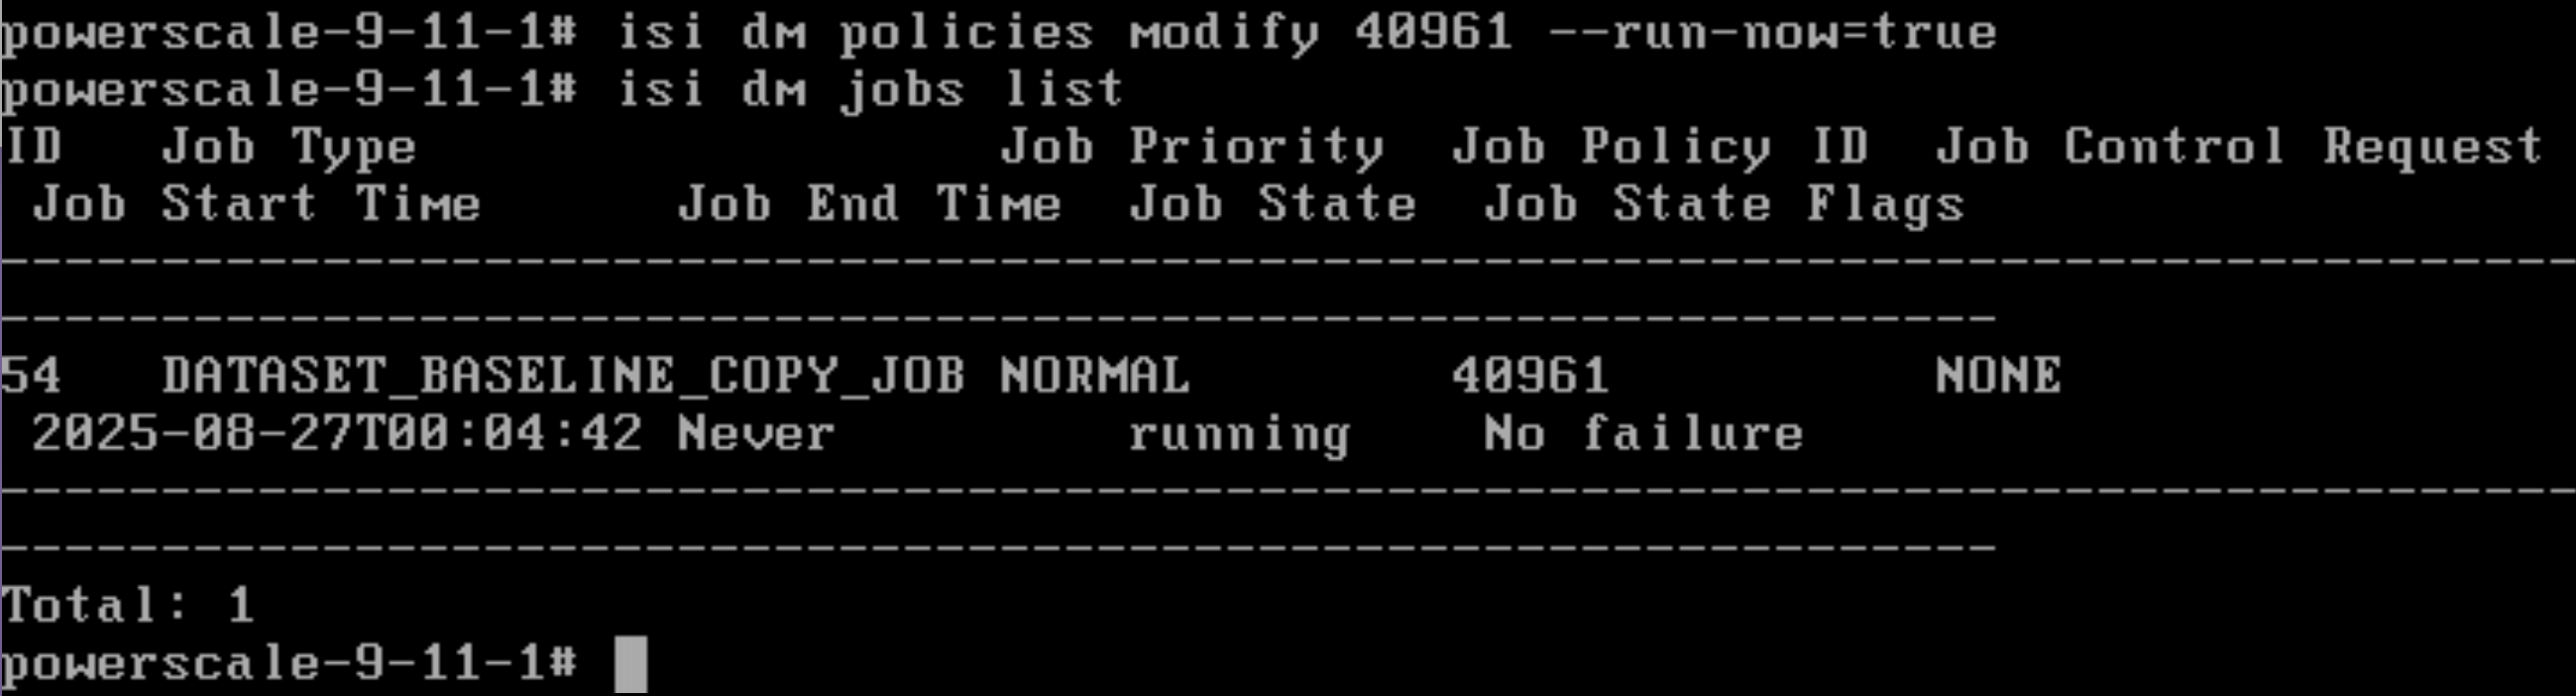
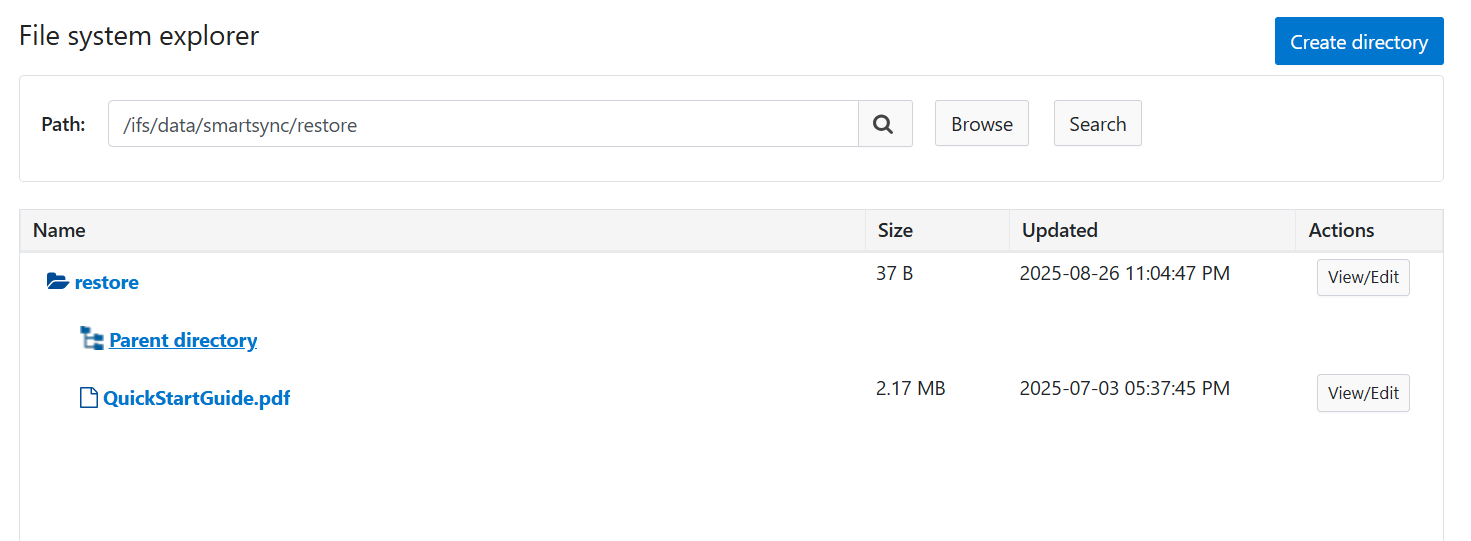
Once complete, you can validate a successful restore by browsing to that local source path to see that the file(s) are now restored.
Creating a Full Restoration Policy
To restore a full dataset, follow the same steps as above for a partial restoration, just removing the Subpath command.
--copy-base-target-base-path, which is a Target directory, must be empty.
isi dm policies create (UNIQUE POLICY NAME) --policy-type'COPY' --enabled='true' --priority='NORMAL' --copy-base-target-account-id=(LOCAL ACCOUNT ID) --copy-base-source-account-id=(SOURCE ACCOUNT ID) --copy-source-base-path=(SOURCE PATH) --copy-create-dataset-on-target=(TRUE OR FALSE) --copy-base-target-dataset-type='FILE' --copy-base-target-base-path=(TARGET PATH ON CLUSTER) --copy-dataset-id=(DATASET ID FOR RESTORATION) Run the Partial Restoration policy.
isi dm policies list
                isi dm policies modify (RESTORATION POLICY ID) --run-now=true
View the Data Restoration Job Status.
isi dm jobs list
Restoring Remote Browse Datasets
Remote browsing of datasets allows you to view them and manually restore the data object-by-object.
Run
isi_dm browseto enter the dataset commands.Run
connect-accounts xxxx,where you input your ECS_S3 account number.Run
list-datasetsto view all datasets created.Run
connect-dataset xand specify the number associated with the dataset you want to view.Run
lsto list all the files in that dataset.isi_dm browse $ connect-account (CLOUD ACCOUNT NUMBER) $ list-datasets $ connect-dataset (DATASET ID) $ ls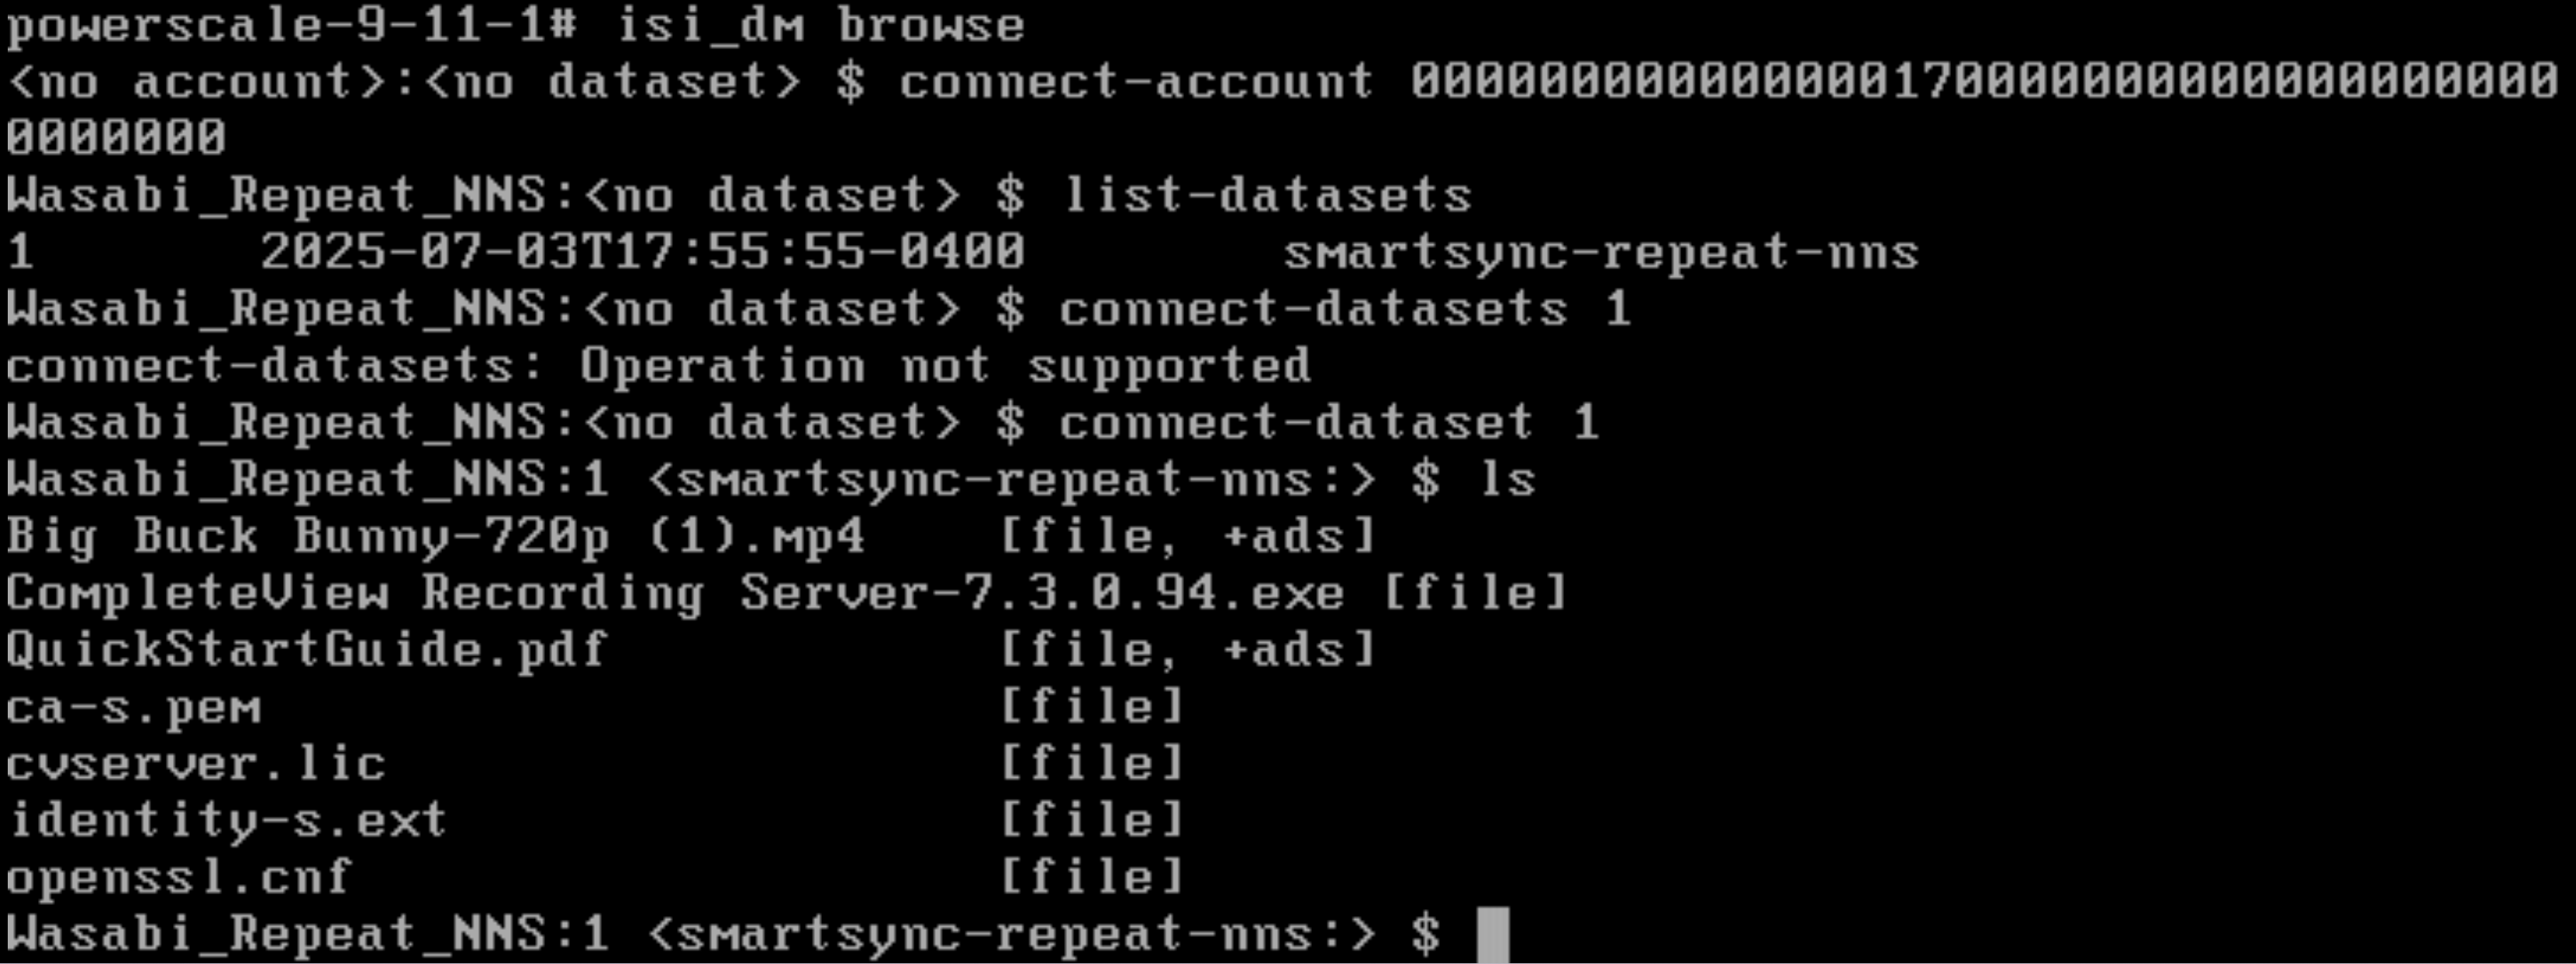
This is for testing purposes, if you delete a file from one of your shares.
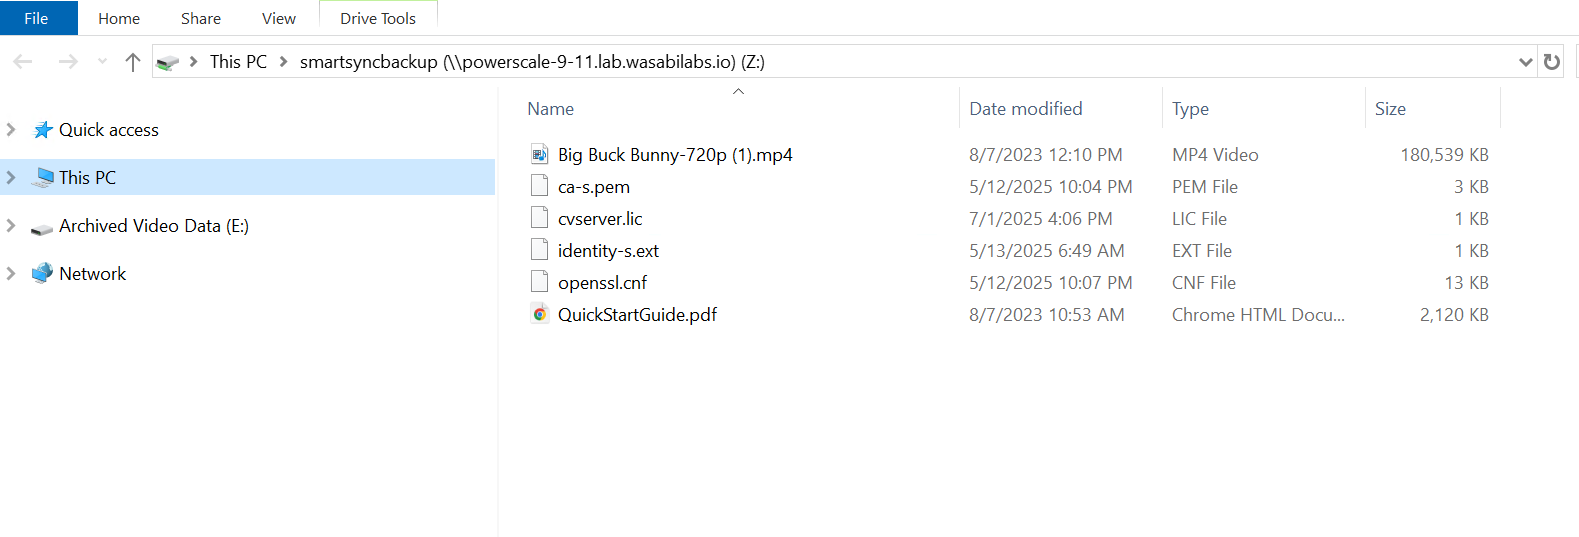
Run the
downloadcommand while connected to the dataset and restore it to the share.Specify the file you want to download and the path where you want to restore it.

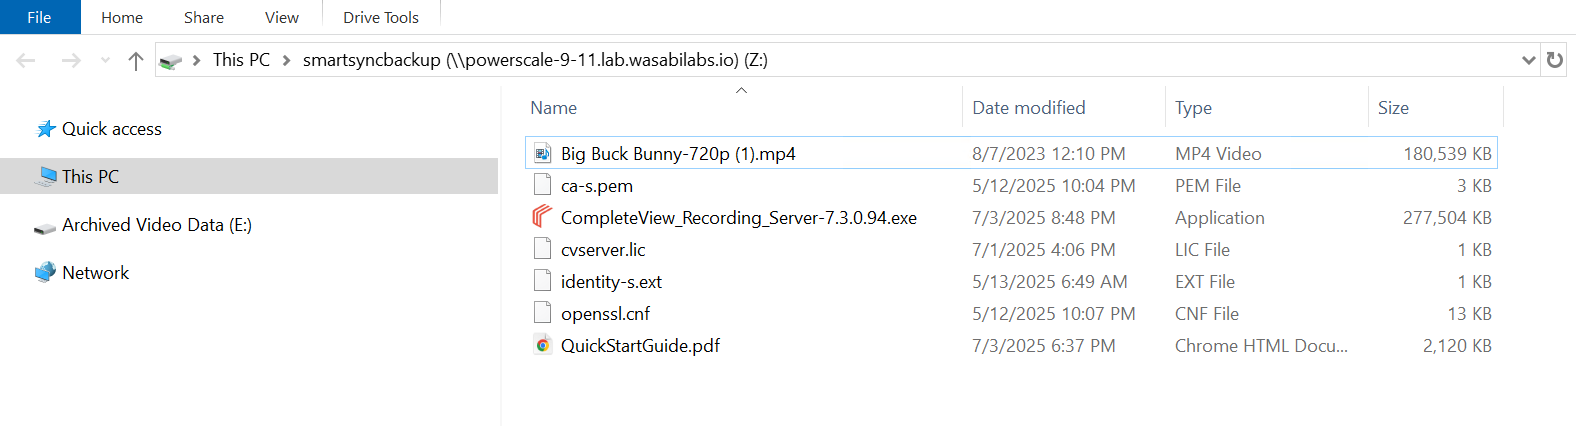
When you go back to your share, you will see the file back in place.
SmartSync Expiration Policy
Expiration policies are needed to clean up expired datasets locally on the cluster (Source DM Account) and on the target platform (Target DM Account).
isi dm policies create [Expiration Policy Name] --policy-type='EXPIRATION' --enabled='true' --priority='NORMAL' --copy-base-target-account-id=[Local account id] –-expiration-account-id [Source DM Account or Target DM Account] ––recurrence="cron expression" --start-time="YYYY-MM-DD HH:MM:SS"The dataset-reserve field specifies the number of datasets to keep in reserve and protected from expiration, irrespective of the dataset-retention-period specified.