Amazon EMR (Elastic MapReduce) is a fully managed cloud big-data platform provided by Amazon Web Services. It enables organizations to process and analyze vast amounts of data quickly using open-source frameworks such as Apache Hadoop, Apache Spark, Apache Hive, Apache HBase, and Presto, among others.
AWS EMR is used across a wide range of data-intensive workloads, including:
Large-scale ETL (Extract, Transform, Load) pipelines to prepare data for analytics warehouses.
Machine learning model training using distributed compute across many nodes.
Log processing and analysis at petabyte scale.
Real-time streaming analytics in combination with Apache Kafka or Amazon Kinesis.
Interactive SQL queries against large datasets using Apache Hive or Presto.
EMR clusters are composed of EC2 instances organized into primary, core, and task node groups. They can be configured to read from and write to object storage, making Wasabi Hot Cloud Storage an ideal storage location for EMR workloads — providing S3-compatible, high-performance, and cost-effective storage.
Data processed and produced by AWS EMR clusters can be stored in Wasabi Hot Cloud Storage. The S3A connector built into Hadoop and Spark can read from and write to Wasabi buckets without any additional software. Configure the S3A properties to point to the appropriate Wasabi endpoint and supply your Wasabi access and secret keys.
This document walks through the steps required to create an EMR cluster that is configured to use Wasabi as its object storage layer.
Requirements
An active Wasabi Cloud Storage account.
Access to the Wasabi Console to create and manage buckets and access keys.
A Wasabi bucket created in the desired storage region. See Creating a Bucket for details on this procedure.
Wasabi access key and secret key with appropriate permissions to access the bucket. See 3—Creating a User Account and Access Key for further information.
AWS account with permissions to create EMR clusters and associated IAM roles.
AWS CLI installed and configured on your local machine.
This solution was tested with EMR version 7.13.0.
Creating an SSH Key Pair
An EC2 key pair is required to SSH into the EMR cluster nodes. Run the following commands to create a key pair named “my-emr-key” and save it to your local machine.
aws ec2 create-key-pair \
  --key-name my-emr-key \
  --query "KeyMaterial" \
  --output text > ~/.ssh/my-emr-key.pem

chmod 400 ~/.ssh/my-emr-key.pem
The create-key-pair command generates the key pair in AWS and writes the private key directly to a local .pem file. The chmod 400 command restricts the file permissions so that only the owner can read it.
Creating the Default EMR Roles
Before creating an EMR cluster, the default EMR IAM roles must exist in your AWS account. If they do not already exist, run the following command once using the AWS CLI.
aws emr create-default-rolesThis creates two IAM roles that EMR requires: EMR_DefaultRole (used by the EMR service itself) and EMR_EC2_DefaultRole (used by the EC2 instances in the cluster). These roles only need to be created once per AWS account.
Configuring the AWS CLI
Before creating a cluster, ensure the AWS CLI is configured with your credentials and default region. Run the following command and follow the prompts.
aws configureYou will be prompted for four values.
AWS Access Key ID – Your AWS IAM access key.
AWS Secret Access Key – Your AWS IAM secret key.
Default region name – The AWS region where your EMR cluster will be created (for example, us-east-1).
Default output format – The format for CLI output. json is recommended.
These settings are saved to ~/.aws/credentials and ~/.aws/config on your local machine. The create-cluster command used below does not include an explicit --region flag, so it uses the default region set here. To target a different region for a specific command, you can override it with the --region flag (e.g. --region us-west-2).
The AWS region configured here controls where the EMR cluster and its EC2 instances are launched. It is separate from the Wasabi storage region, which is determined by the
fs.s3a.endpointproperty in the--configurationsparameter as indicated below.
Creating an EMR Cluster
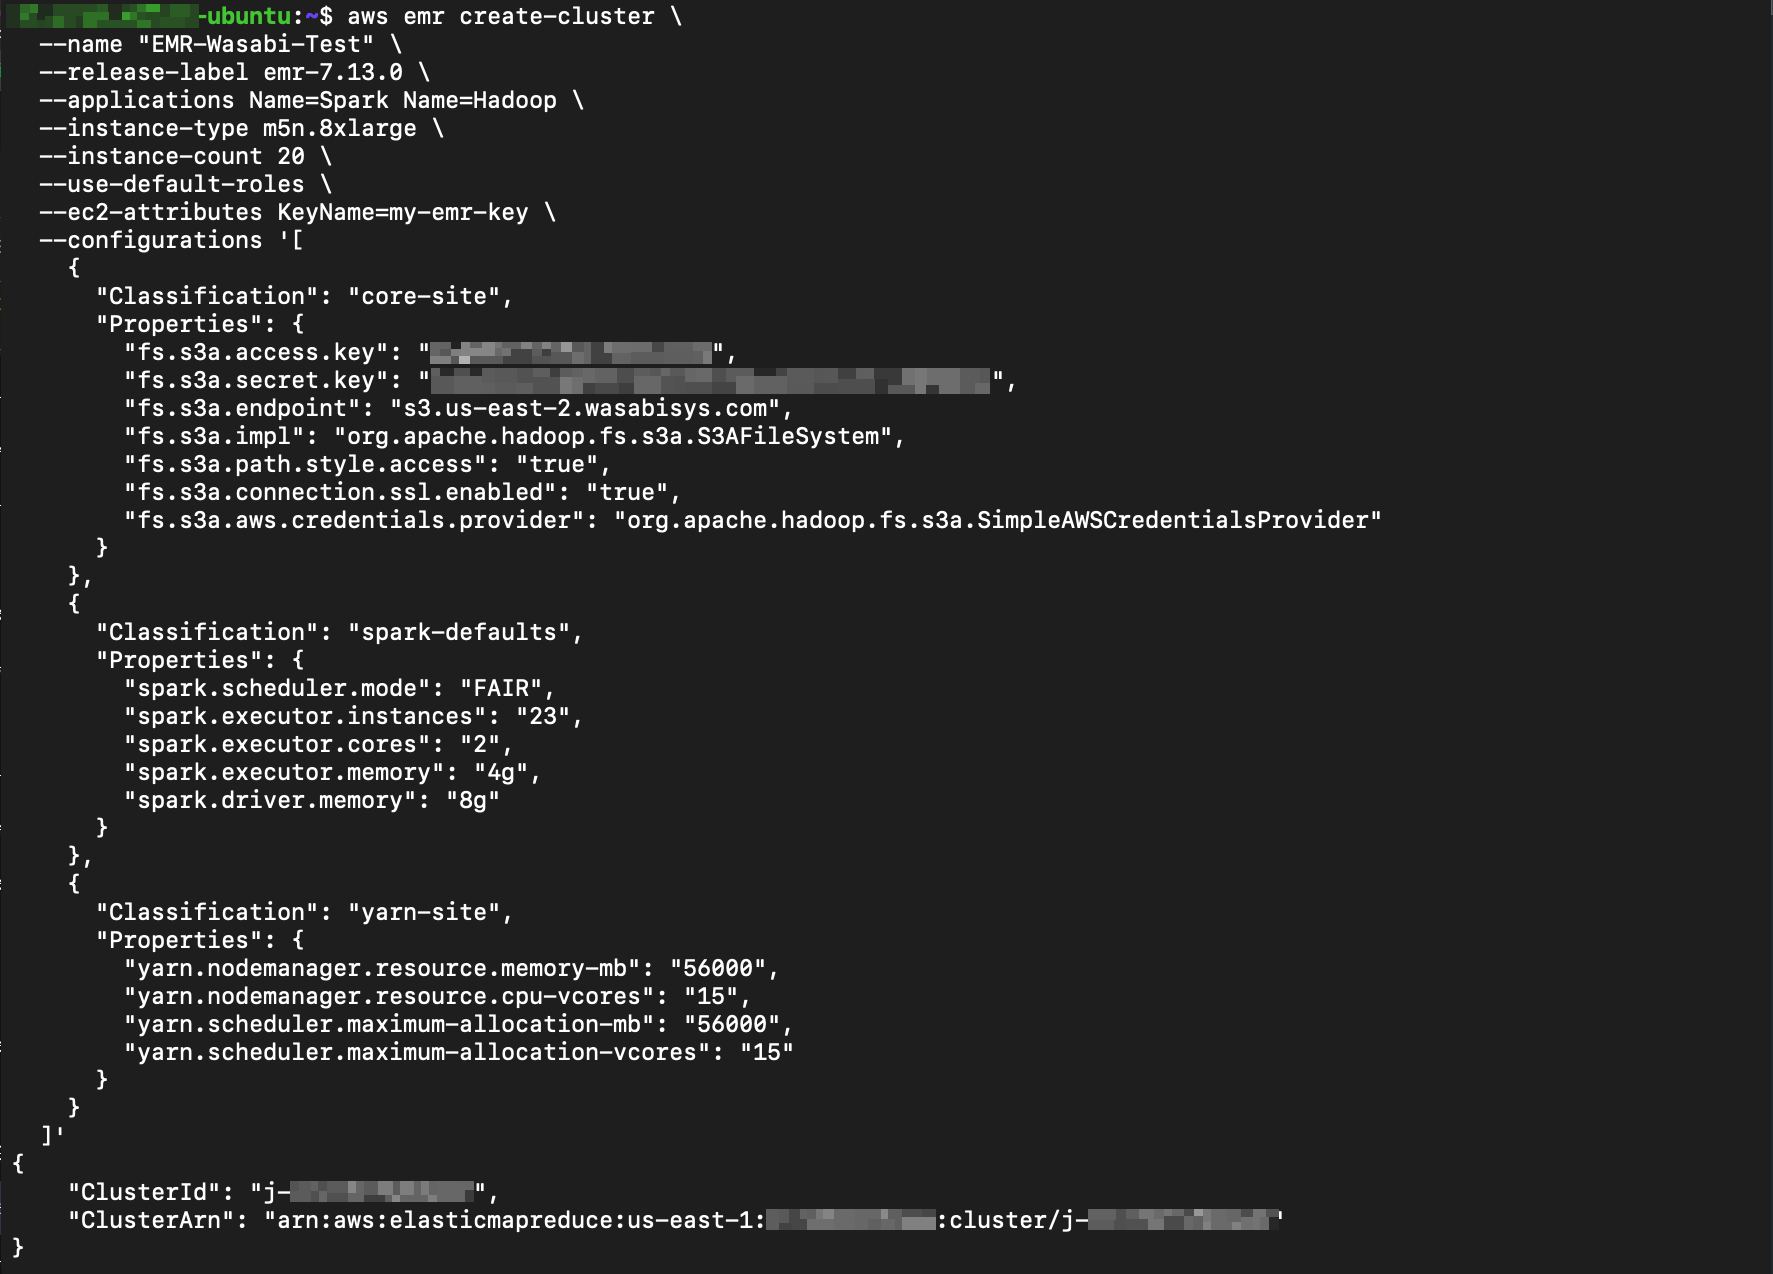
Use the following AWS CLI command to create an EMR cluster configured to use Wasabi Hot Cloud Storage via the S3A connector. This example uses an “m5n.8xlarge” instance type. Note that the Apache Hadoop application is required for S3A connectivity, even when running Spark-only workloads. Include other apps as needed.
aws emr create-cluster \
  --name "EMR-Wasabi-Test" \
  --release-label emr-7.13.0 \
  --applications Name=Spark Name=Hadoop \
  --instance-type m5n.8xlarge \
  --instance-count 20 \
  --use-default-roles \
  --ec2-attributes KeyName=my-emr-key \
  --configurations '[
    {
      "Classification": "core-site",
      "Properties": {
        "fs.s3a.access.key": "YOUR_WASABI_ACCESS_KEY",
        "fs.s3a.secret.key": "YOUR_WASABI_SECRET_KEY",
        "fs.s3a.endpoint": "s3.us-east-2.wasabisys.com",
        "fs.s3a.impl": "org.apache.hadoop.fs.s3a.S3AFileSystem",
        "fs.s3a.path.style.access": "true",
        "fs.s3a.connection.ssl.enabled": "true",
        "fs.s3a.aws.credentials.provider": "org.apache.hadoop.fs.s3a.SimpleAWSCredentialsProvider"
      }
    },
    {
      "Classification": "spark-defaults",
      "Properties": {
        "spark.scheduler.mode": "FAIR",
        "spark.executor.instances": "23",
        "spark.executor.cores": "2",
        "spark.executor.memory": "4g",
        "spark.driver.memory": "8g"
      }
    },
    {
      "Classification": "yarn-site",
      "Properties": {
        "yarn.nodemanager.resource.memory-mb": "56000",
        "yarn.nodemanager.resource.cpu-vcores": "15",
        "yarn.scheduler.maximum-allocation-mb": "56000",
        "yarn.scheduler.maximum-allocation-vcores": "15"
      }
    }
  ]'
The following example shows the command and its output from our testing. Note the cluster-id in the output at the bottom.
Parameter Descriptions
The top-level parameters of the create-cluster command are described below.
--name—The name of the EMR cluster.--release-label—Specifies the EMR release version to use.emr-7.13.0was the latest release as of the date of our testing.--applications—Specifies the applications to install on the cluster. Setting this toName=Spark Name=Hadoopinstalls both Spark and Hadoop on all nodes.--instance-type—The EC2 instance type to use for all nodes in the cluster. Setting this tom5n.8xlargeprovides 32 vCPUs, 128 GiB of memory, and 25 Gbps of network bandwidth as of the publication of this document.--instance-count—The total number of EC2 instances in the cluster, including the master node. Setting this to20provides 19 core nodes plus 1 master node.--use-default-roles—Instructs EMR to use the default IAM rolesEMR_DefaultRoleandEMR_EC2_DefaultRolefor the cluster service role and EC2 instance profile respectively.--ec2-attributes—Specifies EC2-specific attributes for the cluster. SettingKeyName=my-emr-keyassigns an EC2 key pair to the cluster nodes, used for SSH access to the master node.
Wasabi S3A Configuration Properties
The --configurations parameter passes a JSON array to EMR. The classification “core-site” targets the Hadoop core-site.xml configuration file, and the Properties object within it sets individual configuration keys. Each key is described below.
fs.s3a.access.key—Wasabi access key. Replace YOUR_WASABI_ACCESS_KEY with your access key.fs.s3a.secret.key—Wasabi secret key. Replace YOUR_WASABI_SECRET_KEY with your secret key.fs.s3a.endpoint—The Wasabi region endpoint URL. The endpoint must match the region where your Wasabi bucket is located.fs.s3a.impl—Specifies the S3A filesystem implementation class. Setting this toorg.apache.hadoop.fs.s3a.S3AFileSystemtells Hadoop to use the S3A connector for all storage operations.fs.s3a.path.style.access—Enables path-style URL access.fs.s3a.connection.ssl.enabled—Enables SSL/TLS encryption for all connections to Wasabi.fs.s3a.aws.credentials.provider—Specifies the credentials provider class. Setting this toorg.apache.hadoop.fs.s3a.SimpleAWSCredentialsProviderensures the S3A connector uses the explicitly provided access key and secret key rather than attempting to discover credentials from the EC2 instance role or environment.
This example uses Wasabi’s us-east-2 storage region. Use the endpoint URL for the region where your bucket is located. For a list of regions and their endpoint URLs, see Service URLs for Wasabi’s Storage Regions.
Spark Defaults Parameters
spark.scheduler.mode—Sets the Spark job scheduler mode. Setting this toFAIRallows multiple Spark jobs to run concurrently and share cluster resources equally rather than queuing sequentially.spark.executor.instances—Sets the number of Spark executor JVMs to launch across the cluster. Setting this to23ensures enough executor JVMs are allocated to drive sufficient parallel connections to Wasabi. Each executor is a separate JVM with its own S3A connection pool, directly influencing the total number of connections to Wasabi.spark.executor.cores—The number of CPU cores allocated to each executor. Setting this to2allows more executors to fit per node within the available vCPU budget.spark.executor.memory—The amount of memory allocated to each executor JVM. Setting this to4gallows more executors to fit per node within the available memory budget.spark.driver.memory—The amount of memory allocated to the Spark driver JVM. Setting this to8gprovides sufficient memory for the driver to coordinate job execution across all executors.
YARN Site Parameters
yarn.nodemanager.resource.memory-mb—The total amount of memory in MB that YARN makes available for containers on each node. Setting this to56000allocates approximately 55 GiB of the 128 GiB available on them5n.8xlargeinstance to YARN, leaving the remaining 73 GiB for operating system and EMR processes.yarn.nodemanager.resource.cpu-vcores—The number of virtual CPU cores YARN makes available for containers on each node. Setting this to15allocates 15 of the 32 available vCPUs on them5n.8xlargeinstance to YARN, leaving the remaining 17 vCPUs for operating system and EMR processes.yarn.scheduler.maximum-allocation-mb—The maximum memory in MB that YARN will allocate to a single container. Setting this to56000matchesyarn.nodemanager.resource.memory-mb, allowing containers to use all available node memory if needed.yarn.scheduler.maximum-allocation-vcores—The maximum number of virtual CPU cores YARN will allocate to a single container. Setting this to15matchesyarn.nodemanager.resource.cpu-vcores, allowing containers to use all available node cores if needed.
This configuration is recommended for an “m5n.8xlarge” EMR instance type. Load testing should be used to determine the final values. Use the following email to contact Wasabi Support for assistance with setting these parameters: support@wasabi.com.
Attaching the Role Policy
To allow Systems Manager (SSM) connectivity and ensure the cluster nodes can be managed properly, attach the AmazonSSMManagedInstanceCore policy to the EMR_EC2_DefaultRole if not already attached.
aws iam attach-role-policy \
  --role-name EMR_EC2_DefaultRole \
  --policy-arn arn:aws:iam::aws:policy/AmazonSSMManagedInstanceCore
This policy grants the EC2 instances in the cluster the permissions required by the AWS Systems Manager agent. It only needs to be attached once per AWS account.
Authorizing SSH Access
By default, the EMR-managed security group does not allow inbound SSH connections. The following steps retrieve the cluster’s master node DNS name and security group, then open port 22 to your current public IP address.
Retrieve the ID of the EMR-managed master security group. The cluster-id can be obtained from the output of the
create-clustercommand above.
aws emr describe-cluster \
  --cluster-id j-XXXXXXXXXXXX \
  --query "Cluster.Ec2InstanceAttributes.EmrManagedMasterSecurityGroup"
Below is an example output from our testing.

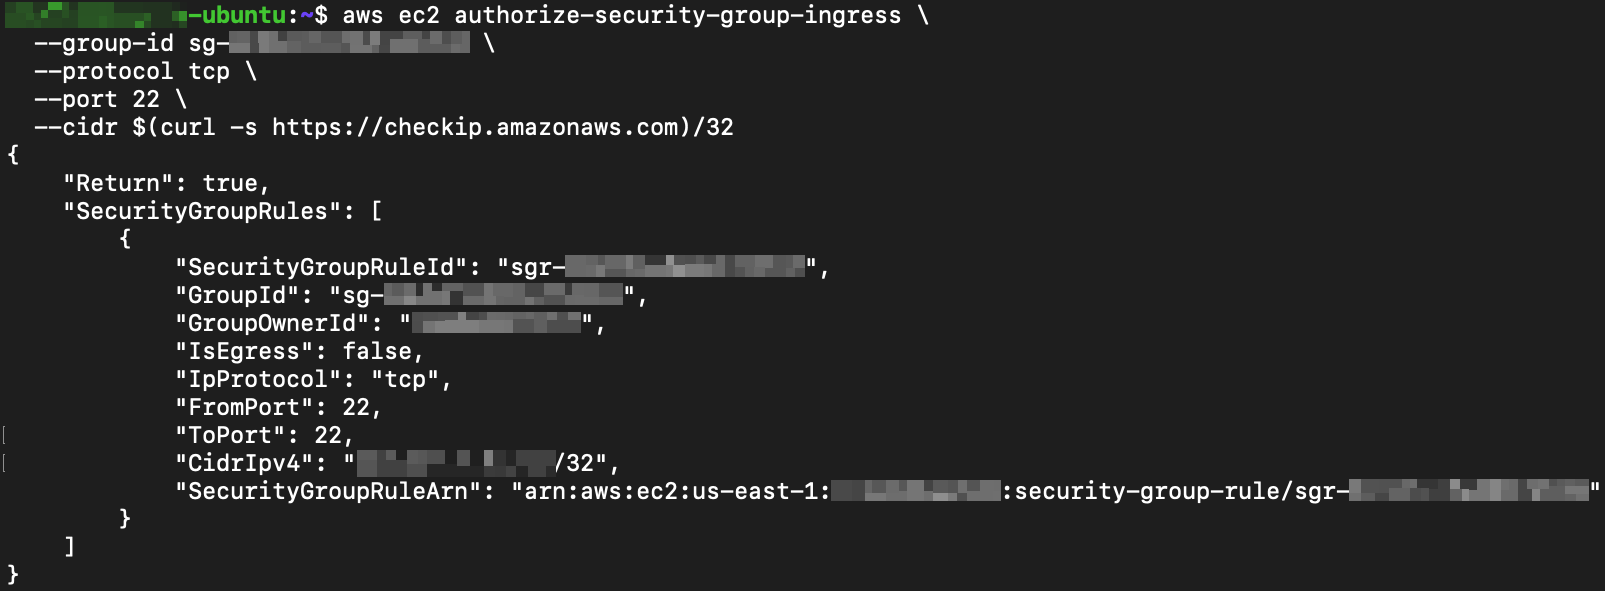
Authorize inbound SSH (port 22) from your current public IP address. The curl command automatically detects your public IP.
aws ec2 authorize-security-group-ingress \
  --group-id sg-xxxxxxxxxxxxxxxxx \
  --protocol tcp \
  --port 22 \
  --cidr $(curl -s https://checkip.amazonaws.com)/32
The following shows the output returned during our testing.
Replace j-XXXXXXXXXXXX with your actual cluster ID and sg-xxxxxxxxxxxxxxxxx with the security group ID returned by the
describe-clustercommand above. The--cidrflag restricts access to your current public IP only, which is recommended for security. If your IP changes, re-run the authorize command with the new IP.
Connecting to the Cluster
Once SSH is authorized, use the following commands to resolve the master node DNS name and open an SSH session.
MASTER_DNS=$(aws emr describe-cluster \
  --cluster-id j-XXXXXXXXXXXX \
  --query "Cluster.MasterPublicDnsName" \
  --output text)

ssh -i ~/.ssh/my-emr-key.pem hadoop@$MASTER_DNS
Our test session output is shown below.
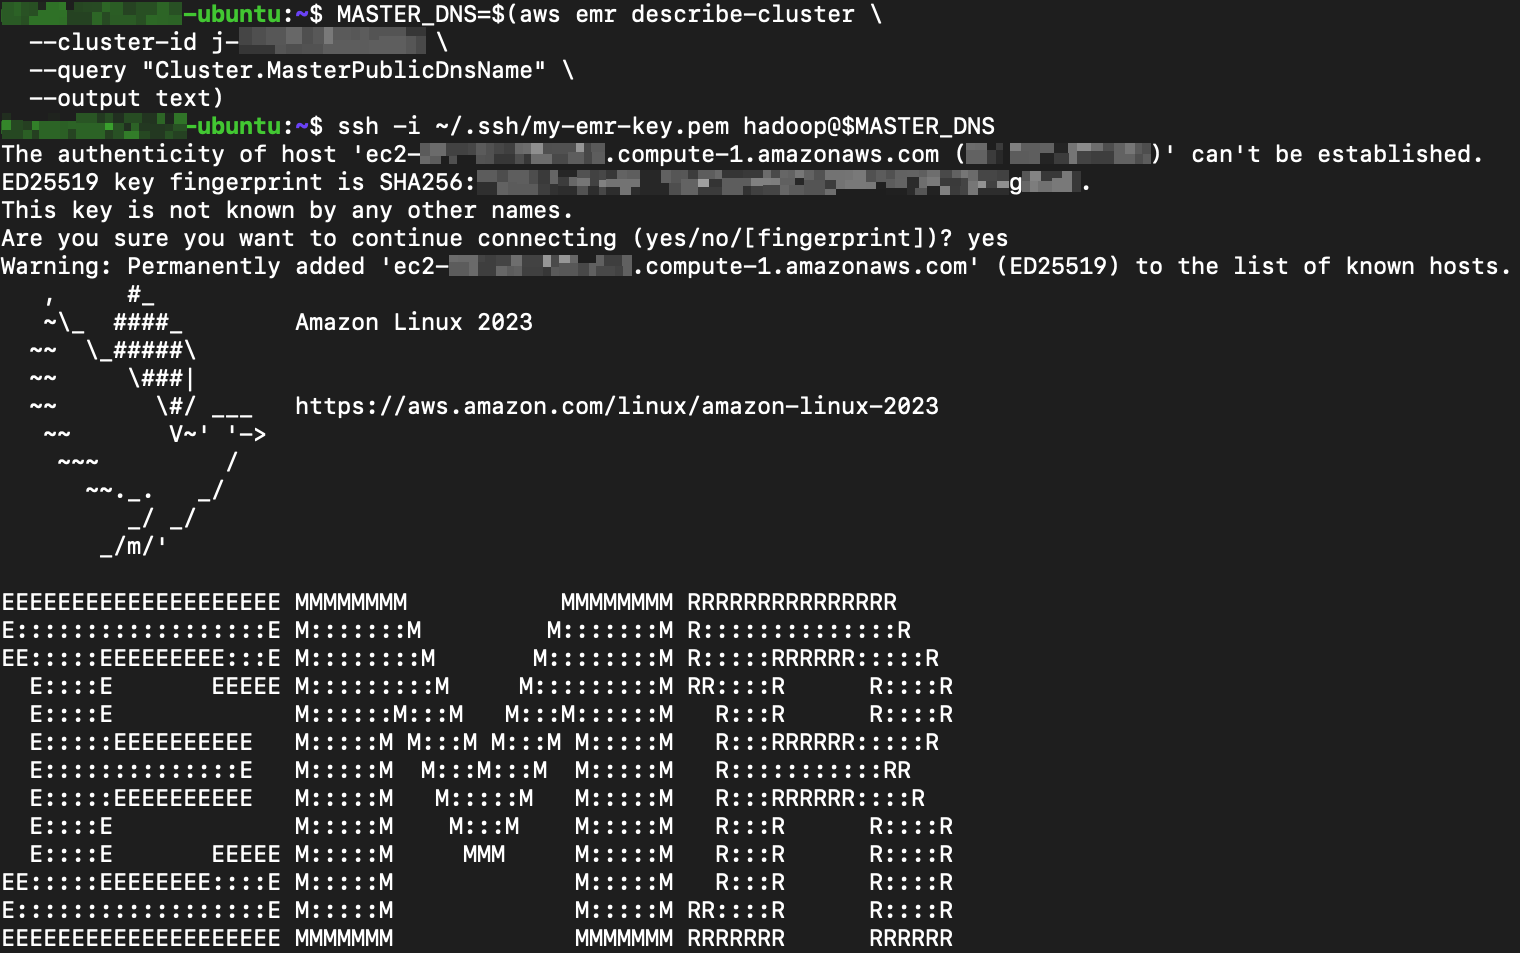
The first command stores the master node’s public DNS name in the MASTER_DNS shell variable. The second command connects as the hadoop user, which is the default SSH user for EMR clusters. Once connected, you can run Hadoop and Spark commands directly on the cluster.
Testing Wasabi Connectivity
Once the cluster is running, SSH into the primary node and run the following commands to verify that the cluster can successfully communicate with your Wasabi bucket.
"mt-emr-test" is the bucket name used in our testing. Replace it with the name of your own Wasabi bucket.
List the contents of the bucket.
hadoop fs -ls s3a://mt-emr-test/The screenshot below shows the output from our test run.

Write a test file to the bucket.
echo "hello wasabi" | hadoop fs -put - s3a://mt-emr-test/test.txtOur test output for this command is shown below.

Read the test file back from the bucket.
hadoop fs -cat s3a://mt-emr-test/test.txtThe following shows the output observed during our testing, confirming successful read-back from Wasabi.

The final line, “hello wasabi”, confirms that the file was successfully written to and read back from your Wasabi bucket.
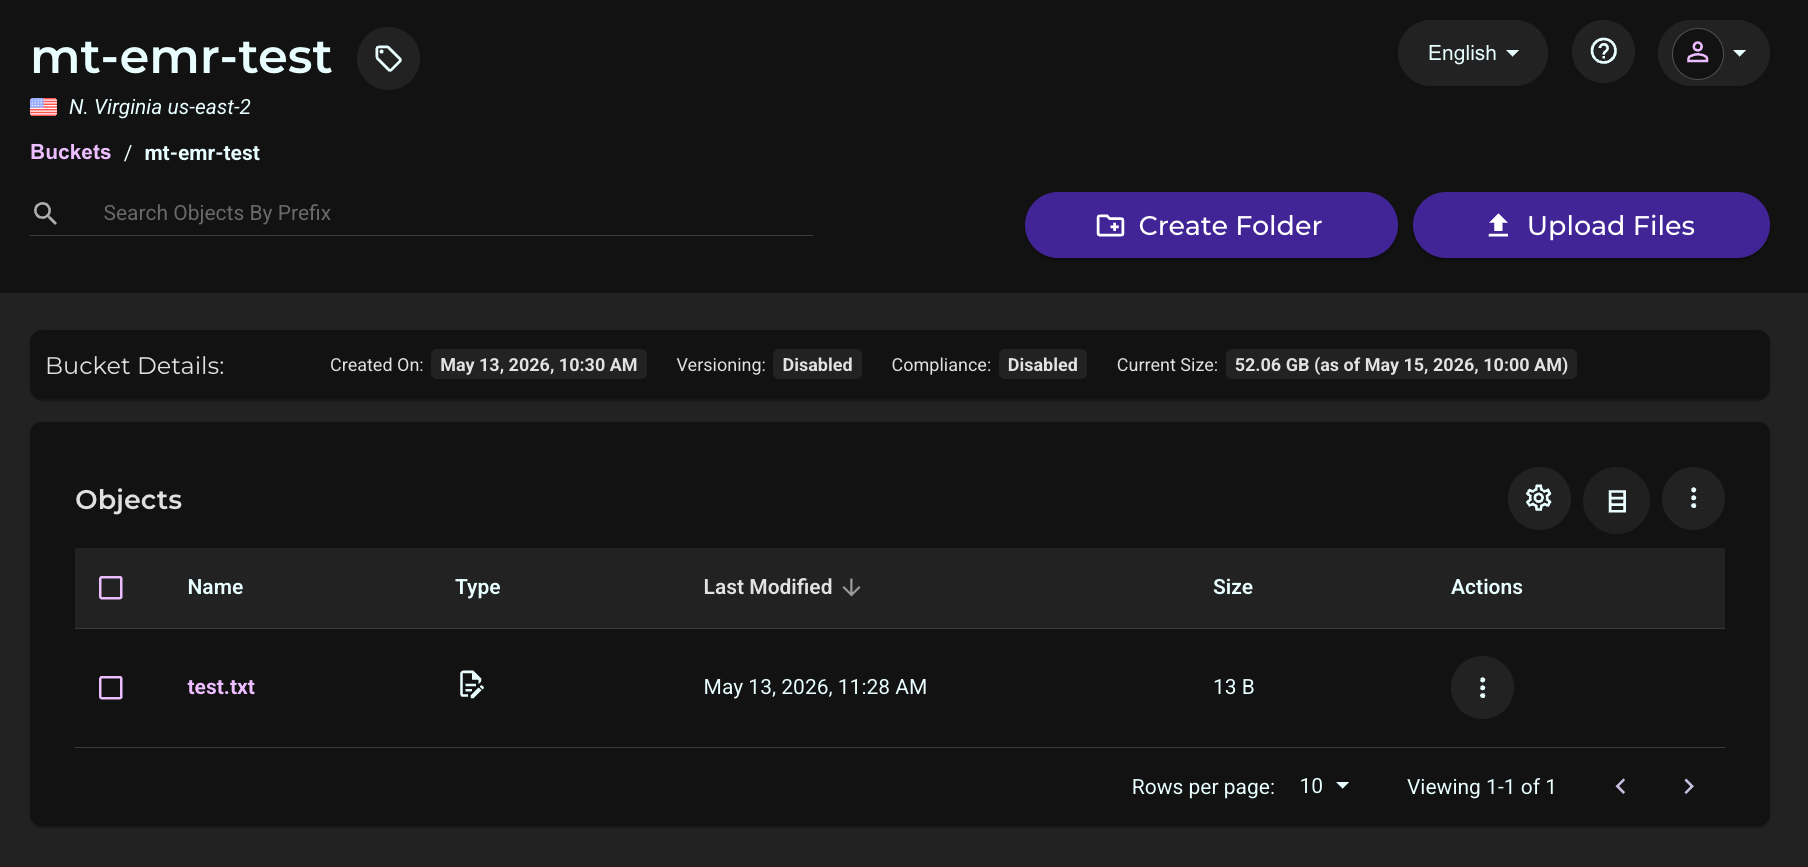
Verifying Your Wasabi Bucket Data
Log in to the Wasabi Console. Click Buckets then click the name of your bucket used above.
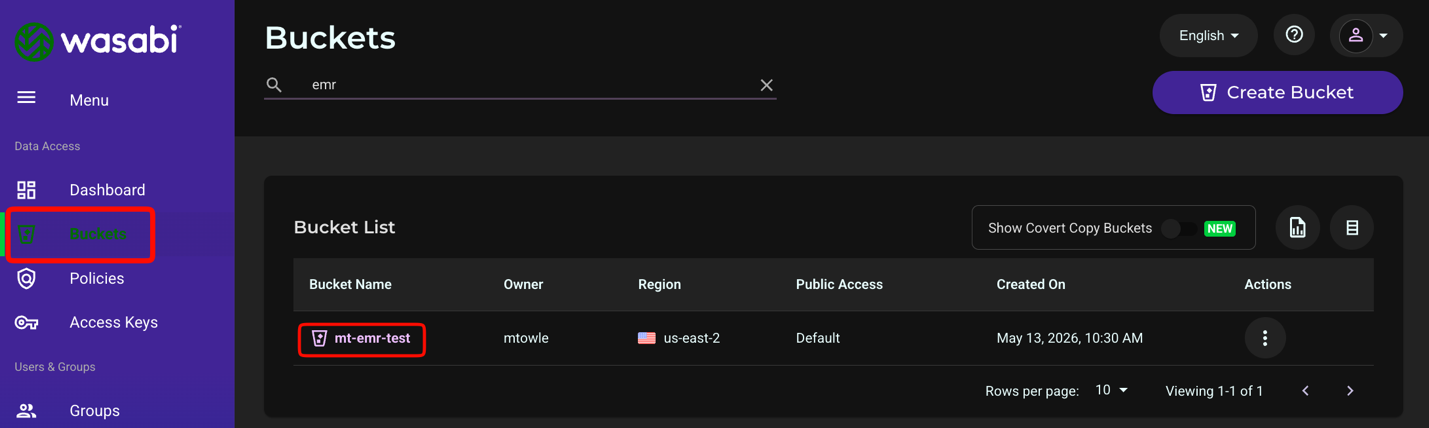
You will see the test.txt object in your bucket.
Terminating the Cluster
When you are finished with the cluster, terminate it to stop incurring EC2 charges.
aws emr terminate-clusters --cluster-ids j-XXXXXXXXXXXXReplace j-XXXXXXXXXXXX with your actual cluster ID.
Termination is permanent and all data stored on the cluster will be lost. Any data written to Wasabi during the session will be retained.