- 25 Mar 2025
- 1 Minute to read
- Print
- PDF
Adding/Removing a Sub-Account From a Channel Account in Wasabi Account Control Manager
- Updated on 25 Mar 2025
- 1 Minute to read
- Print
- PDF
Control Account and Account Governance users can add a Sub-Account to a Channel Account.
When a Channel Account user creates a Sub-Account, there is no need to add the Sub-Account to the Channel Account; it is automatically added when the account is created.
Adding a Sub-Account
To add a Sub-Account to a Control Account or Account Governance account, follow these steps:
Log in to WACM as a Control Account or Account Governance user. For example, if you log in to a Control Account, you will see a page similar to the one below.
Select the Sub-Account to add to the Channel Account.
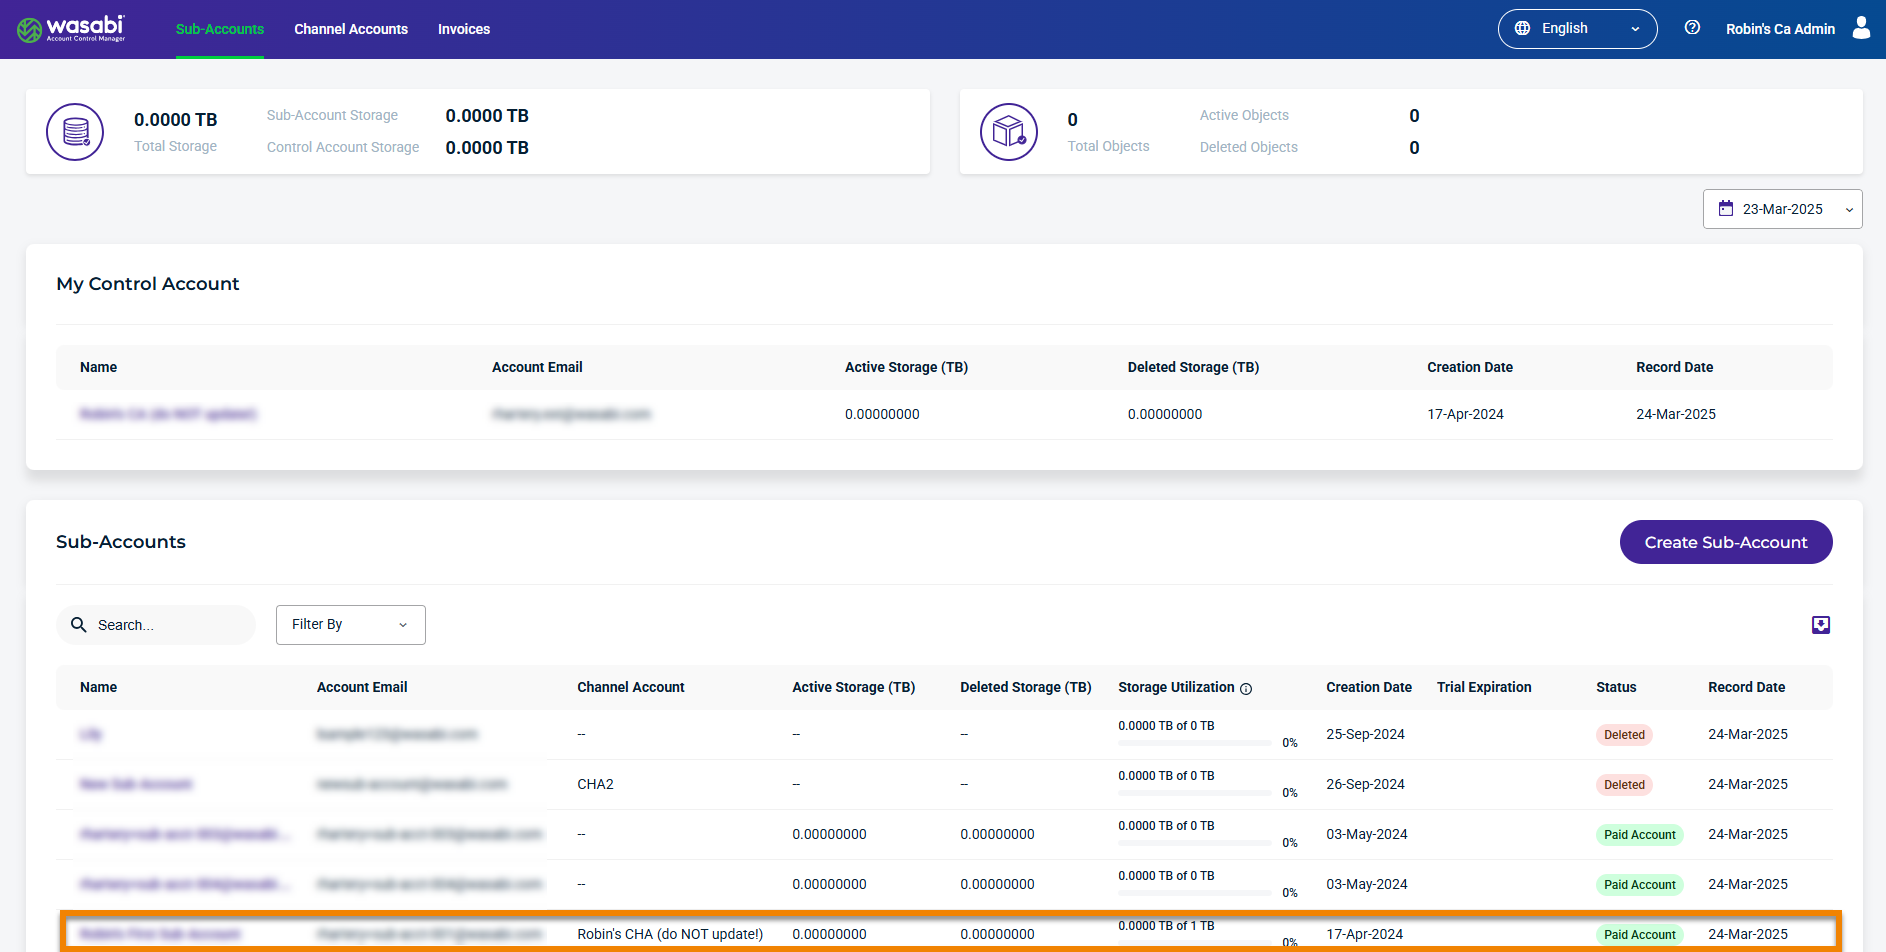
The selected Sub-Account Usage page is displayed by default.
Click the Account tab. The Account Information page is displayed.
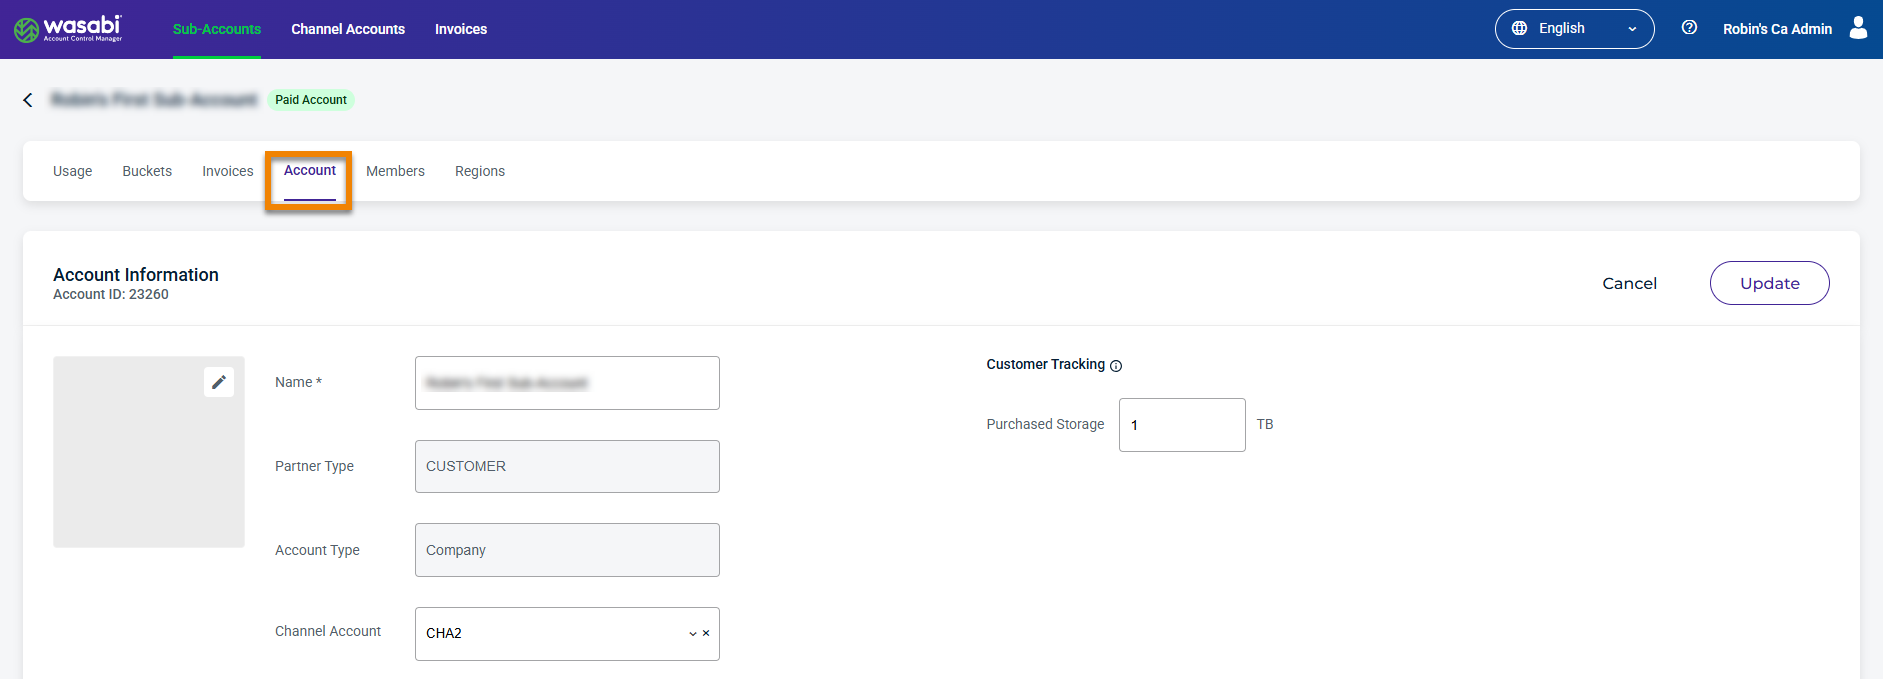
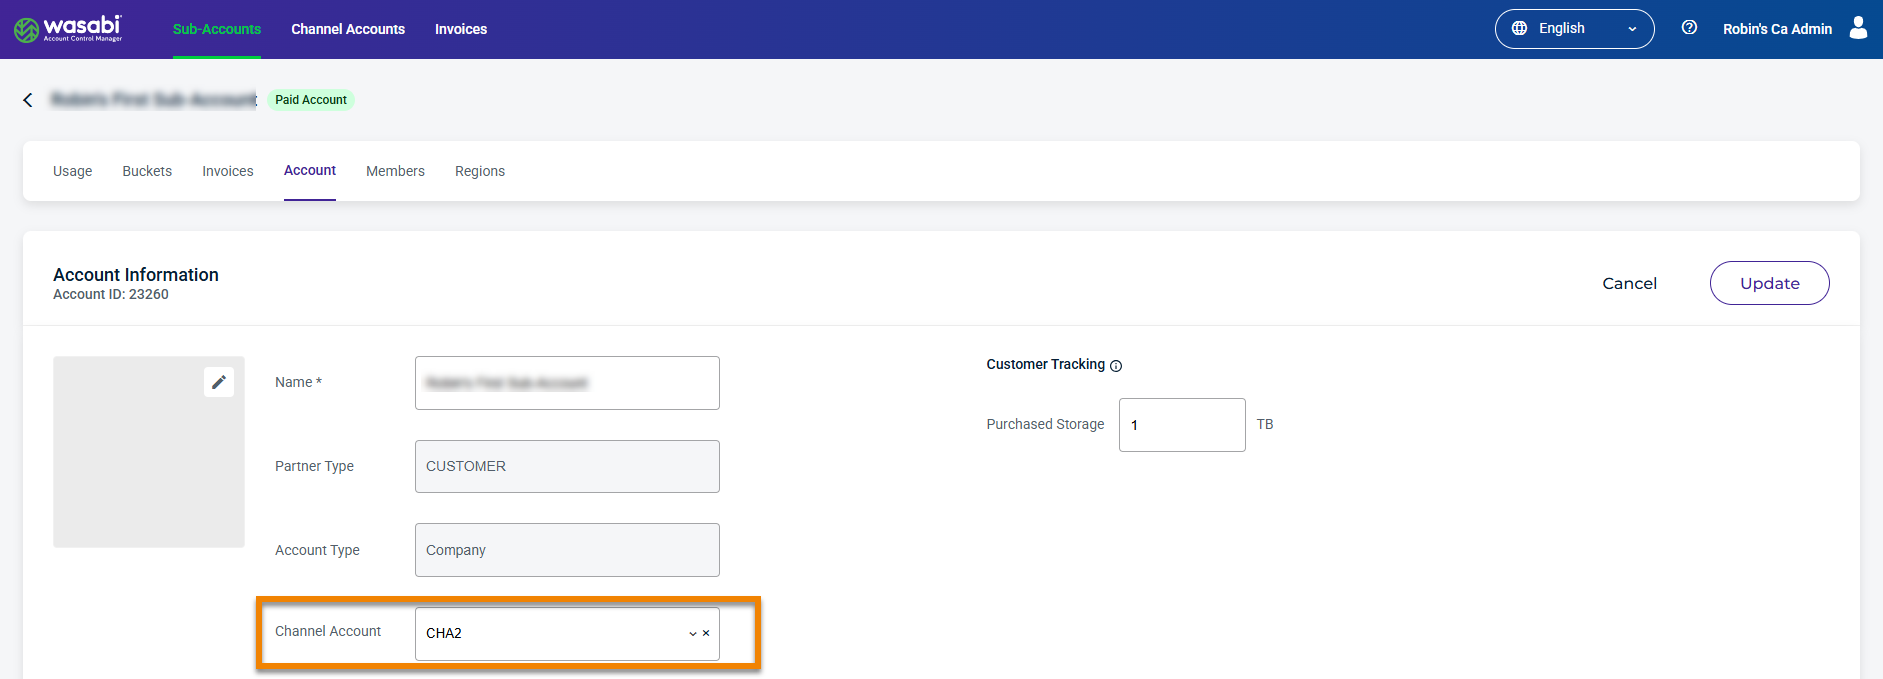
Select the Channel Account drop-down and choose the Channel Account for which to add the Sub-Account.
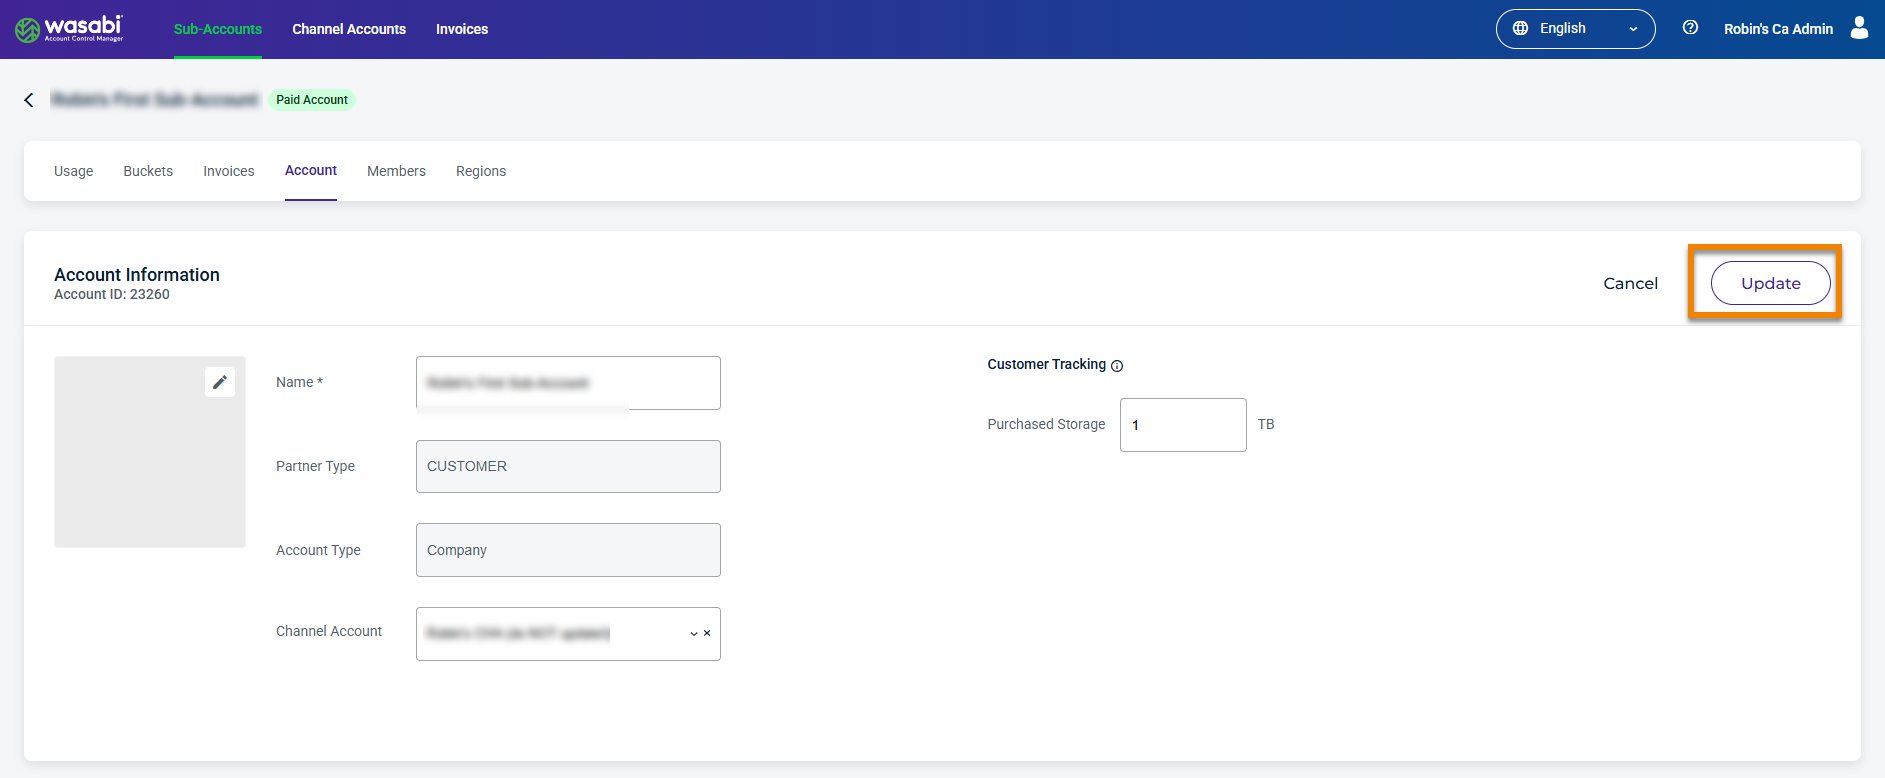
Click Update.
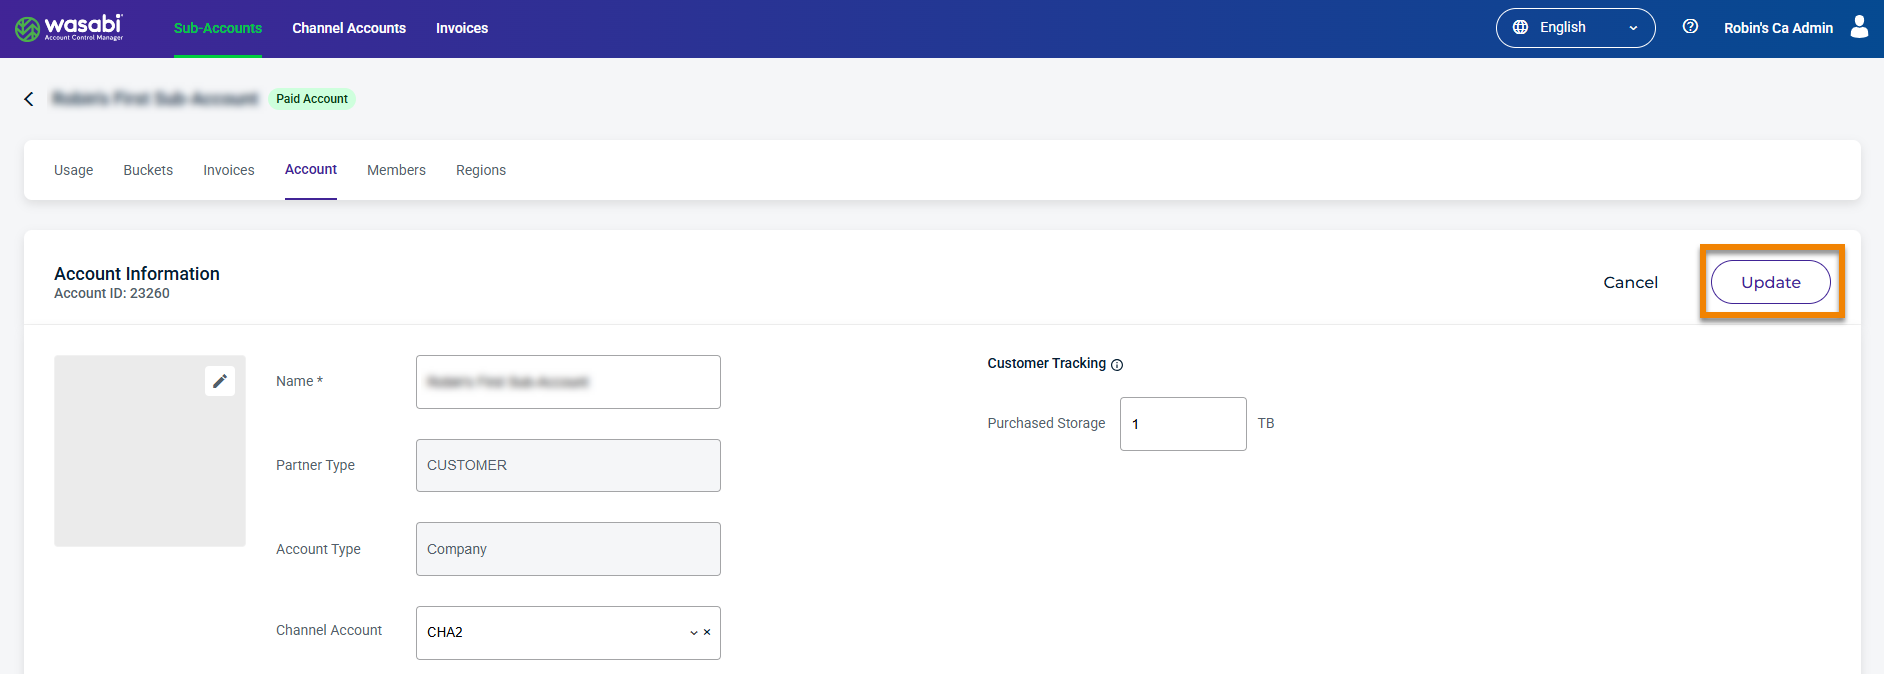
Removing a Sub-Account
To remove a Sub-Account from the Control Account or Account Governance account, follow these steps:
Select the Channel Account drop-down, choose the account to remove and click the X symbol.
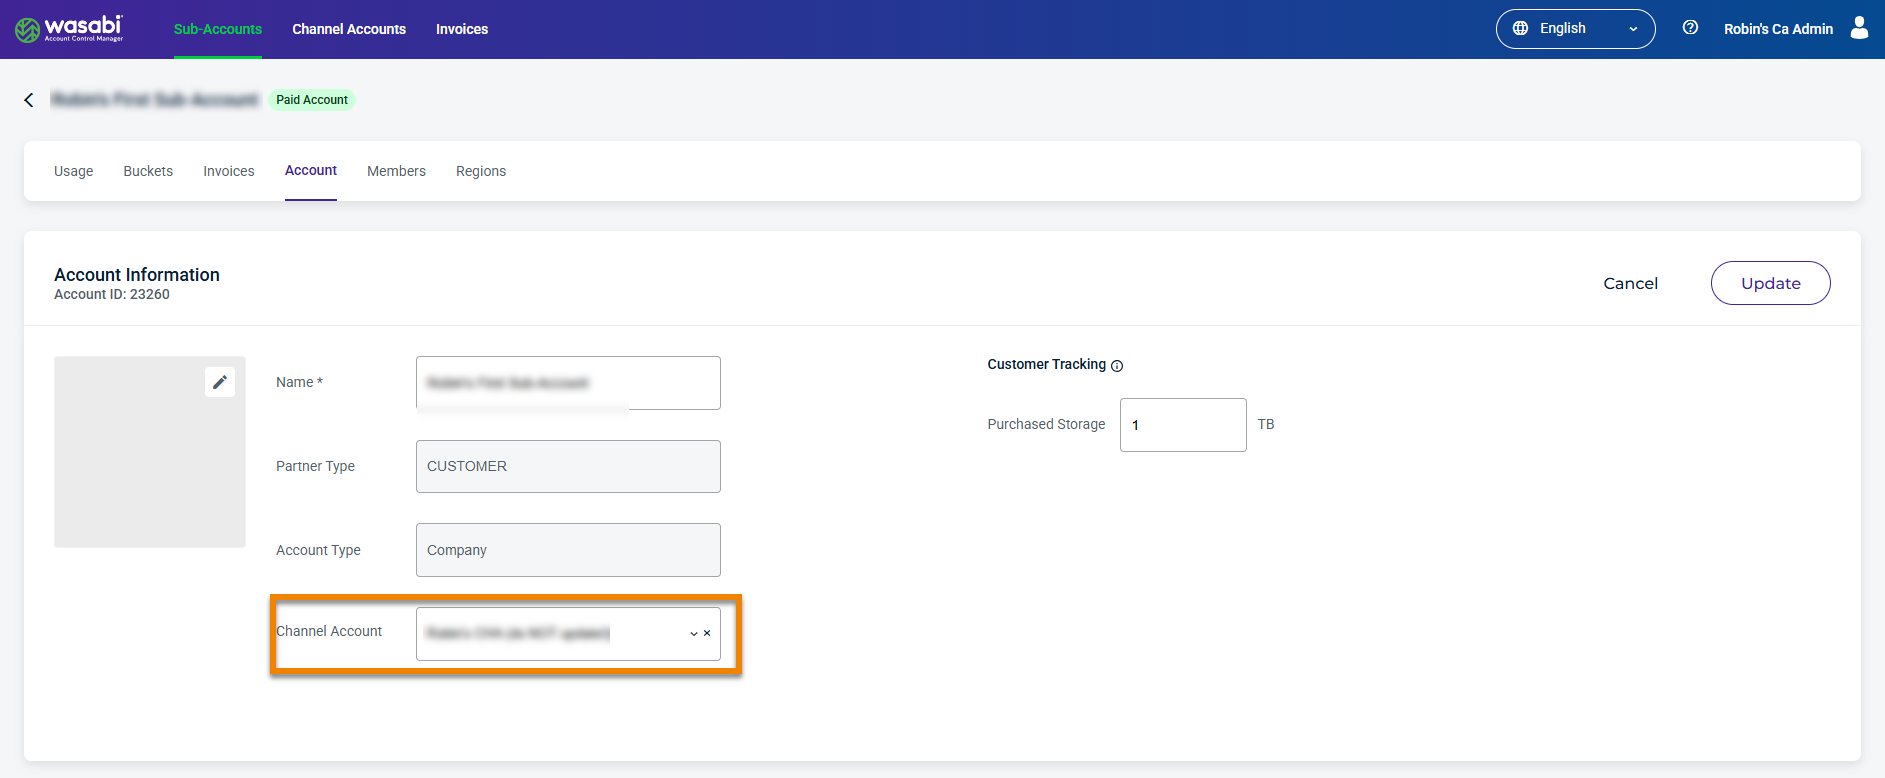
Click Update to save the changes.
