The Event Notifications feature works with your existing AWS account and utilizes the AWS SNS service to send notifications to a configured SNS target regarding selected events that occur within your Wasabi bucket.
To configure Event Notifications on your Wasabi bucket, you need to set up and configure your AWS account with:
An IAM user with the proper permissions to perform actions against the AWS SNS service
An SNS topic
A subscription to the above SNS topic
Once the above prerequisites are completed on the AWS account, you can configure your Wasabi account for:
Your AWS credentials with your Wasabi account (so Wasabi can access the AWS SNS service on your behalf)
Event Notifications (that you want to be notified about) on the bucket(s)
Configuring Your AWS Account
To configure your AWS account, you will:
Configure an SNS topic
Create a permission policy for your IAM user
Create the user and attach the policy to the user
Copy the user ARN and modify the SNS topic access policy
Retrieve the access and secret keys for your IAM user
The examples in this procedure use the us-east-1 region for all configurations.
Configure an SNS Topic
Go to SNS > Topics > Create Topic.
Select a Standard topic.
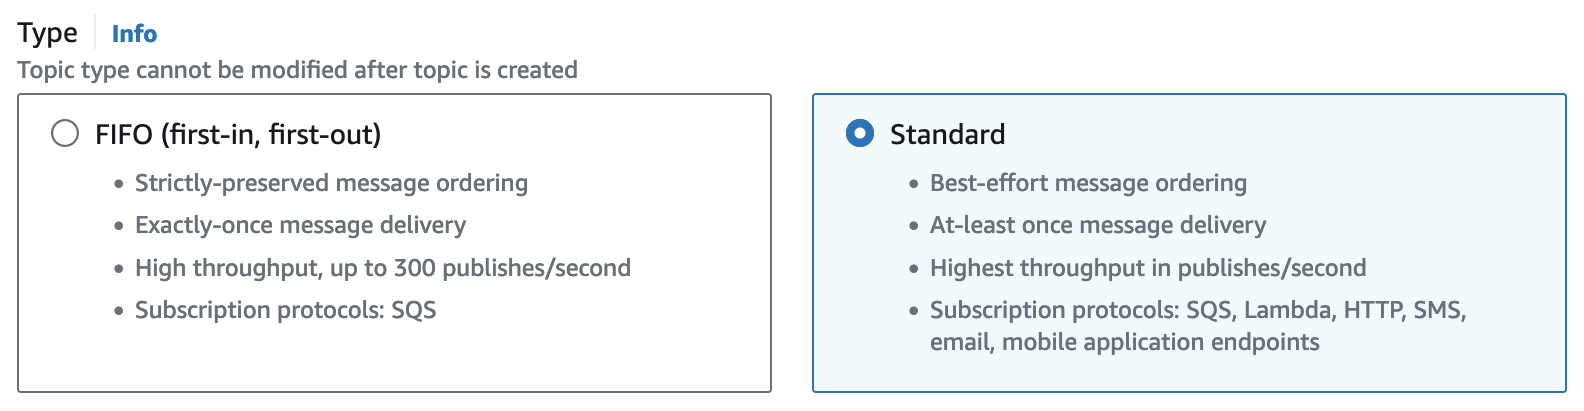
Enter a name (wasabi-sns-topic is used in this example).

Click Create topic. (You will modify the access policy in a later step.)
Once the topic is created, copy the topic ARN because you will need it in a later step when creating the IAM user permission policy.
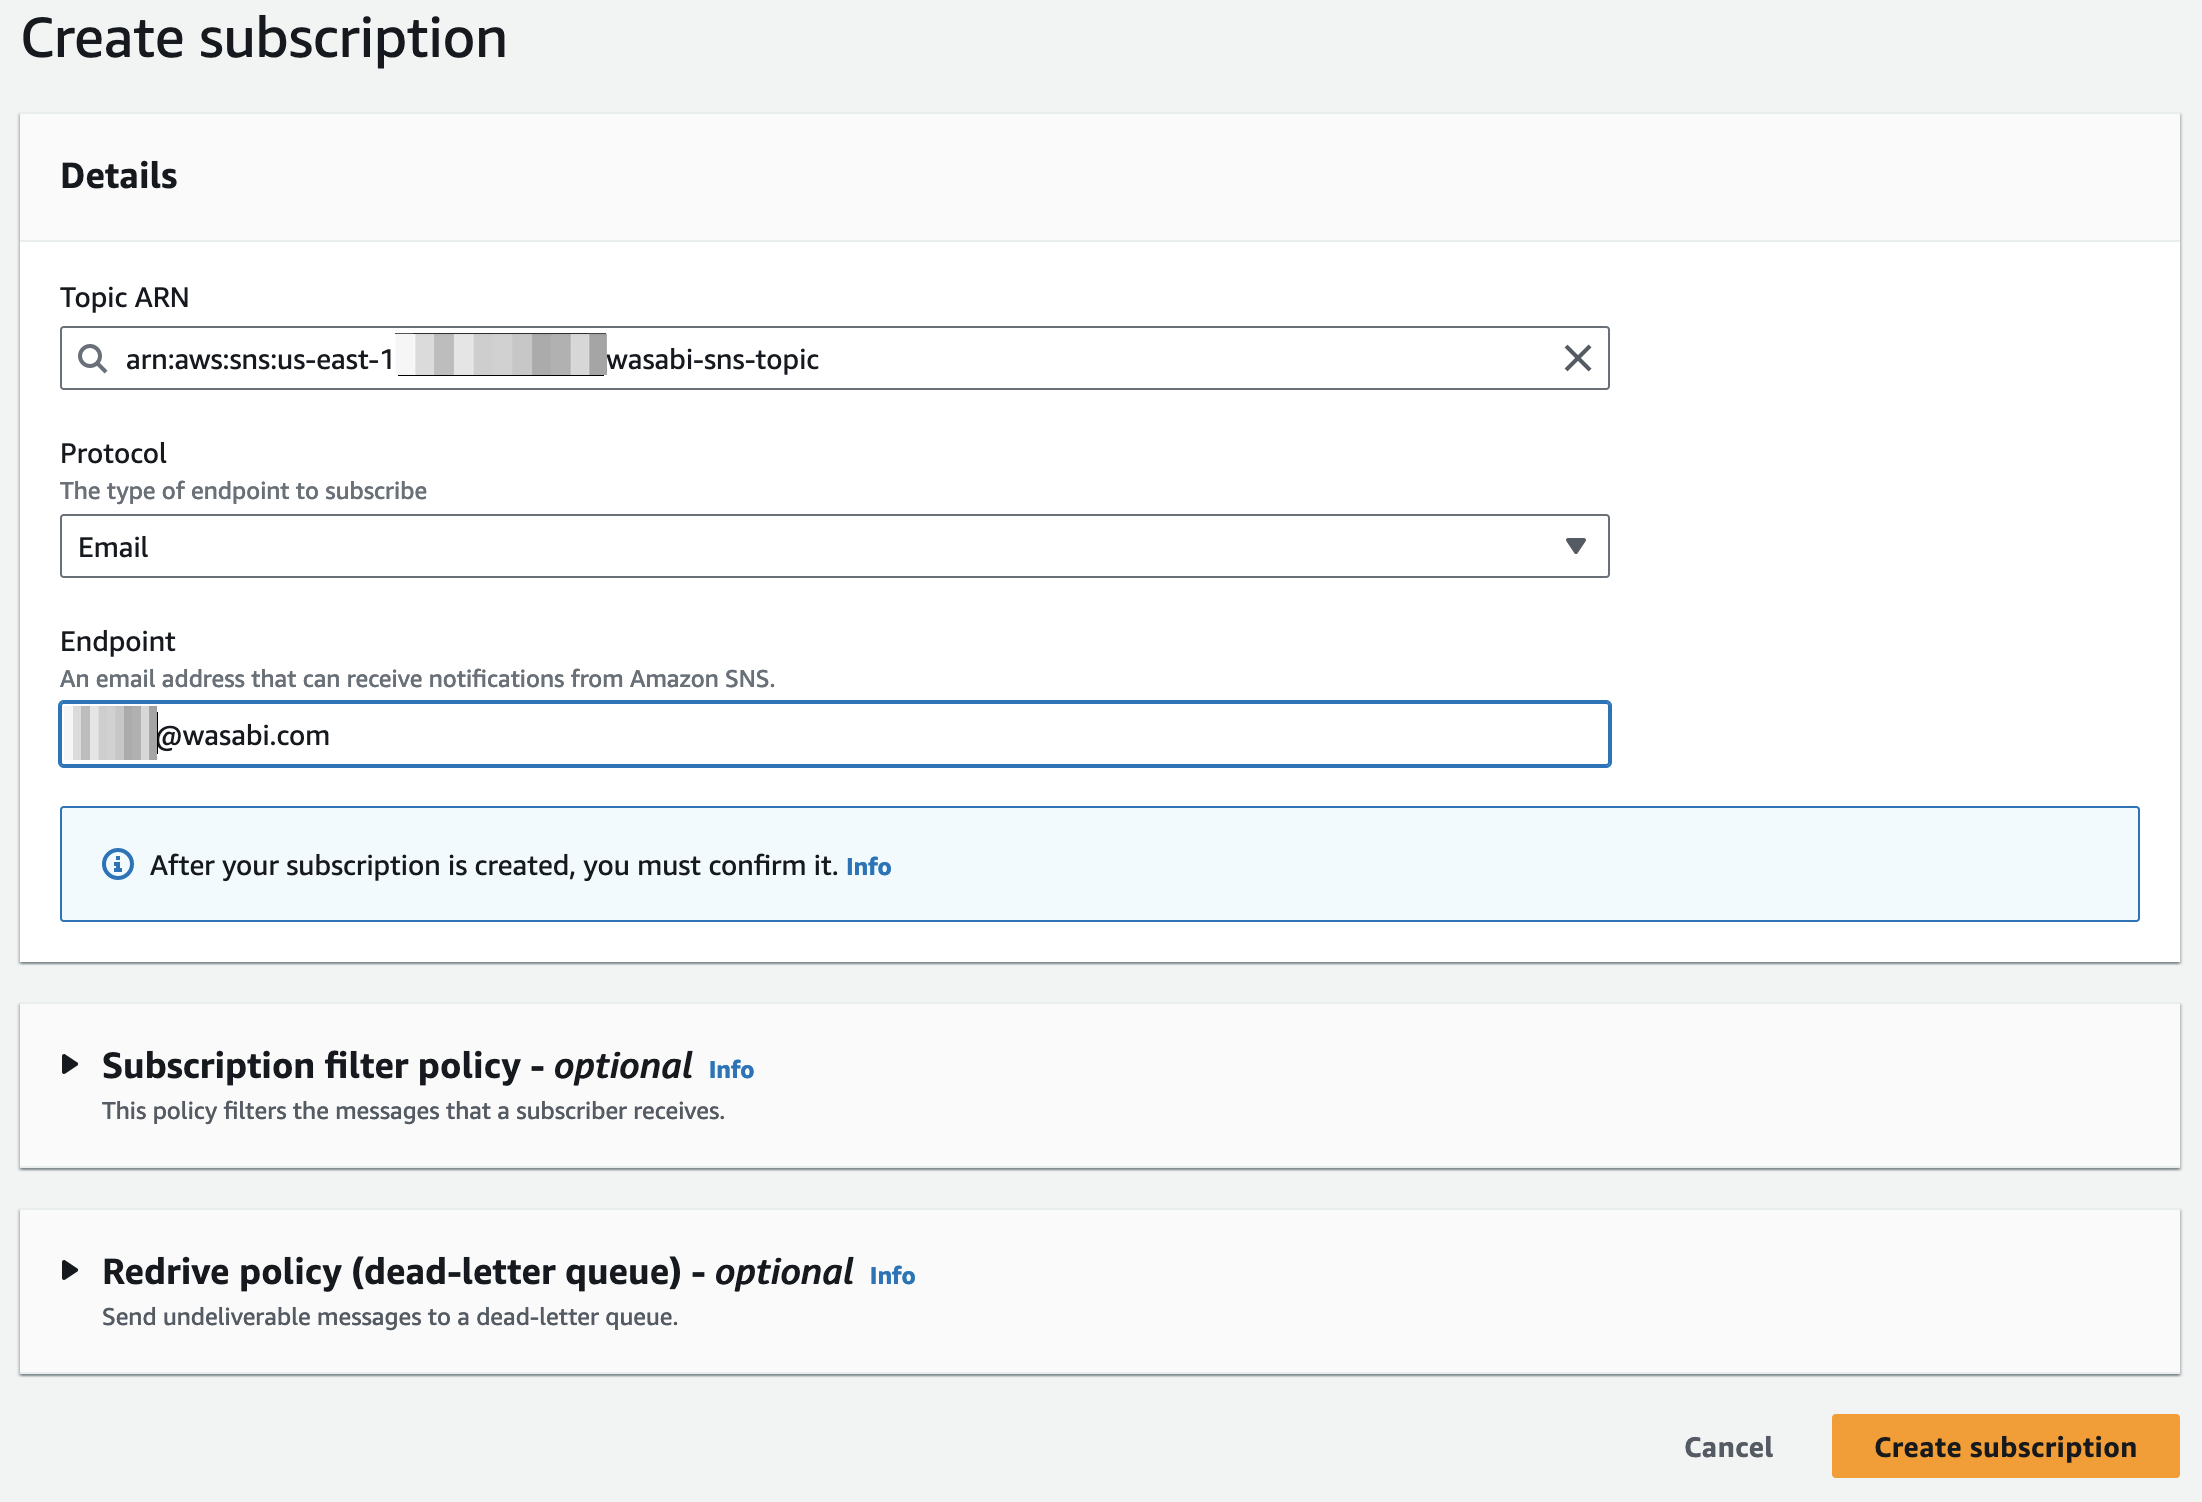
Create a subscription to the topic you created. For this example, you will use e-mail notifications.
Go to SNS > Subscriptions > Create Subscription.
For the Topic ARN, enter the ARN of the topic created in the above step.
For the Protocol, enter E-mail (because we want e-mail notifications in this example).
For the Endpoint, enter your e-mail address. This must be confirmed after the subscription is created.
Click Create subscription.
Once the subscription has been created, we should see the configuration below the topic:

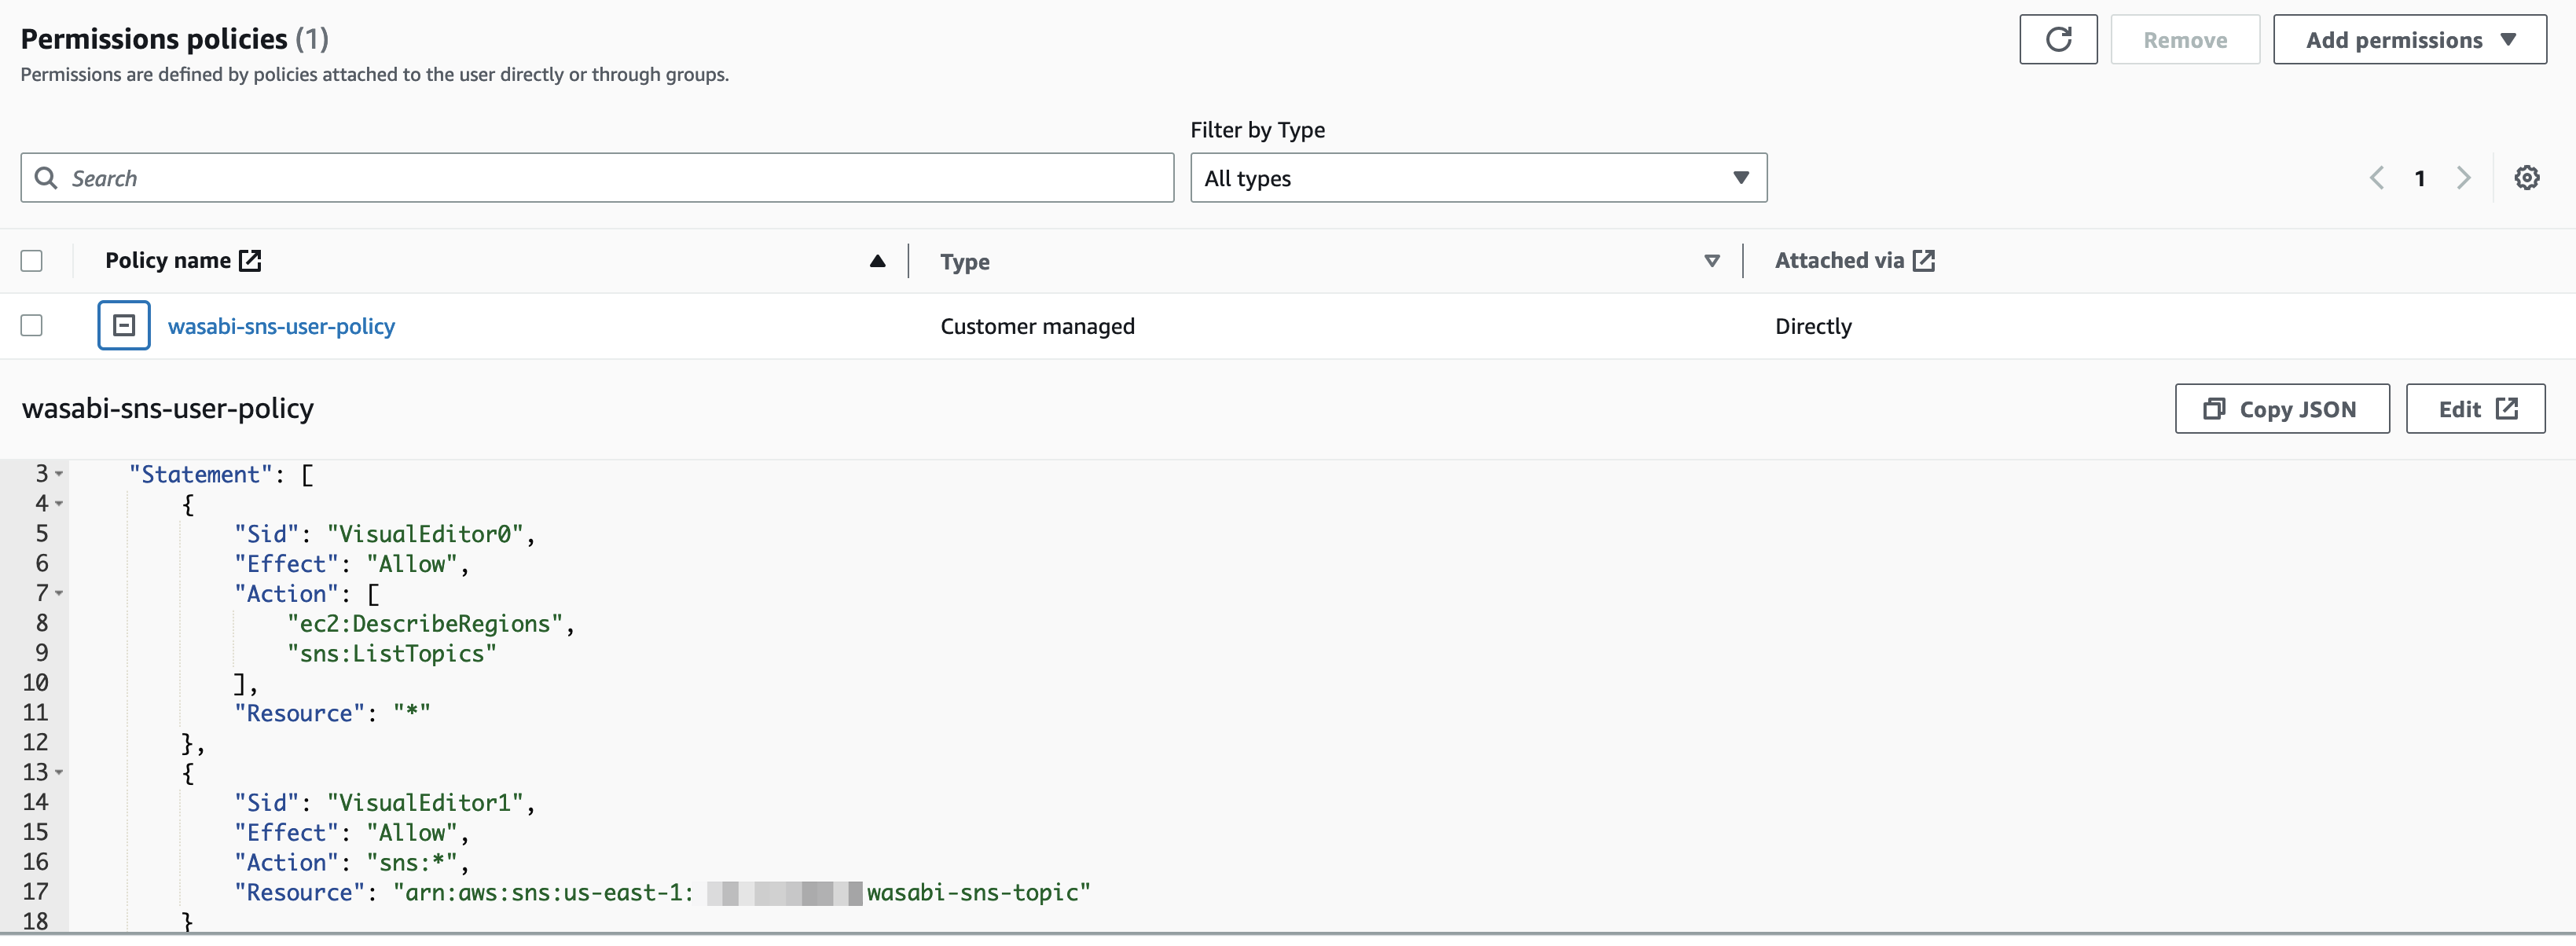
Create a Permission Policy for Your IAM User
Go to IAM > Policies > Create Policy.
In the upper-right of your screen, switch to JSON view.
Enter (paste) the following policy:
{
                "Version": "2012-10-17",
                "Statement": [
                {
                "Effect": "Allow",
                "Action": [
                "ec2:DescribeRegions",
                "sns:ListTopics"
                ],
                "Resource": "*"
                },
                {
                "Effect": "Allow",
                "Action": "sns:*",
                "Resource": "arn:aws:sns:us-east-1:XXXXXXXXXXXX:wasabi-sns-topic"
                }
                ]
                }
Note that you will need to edit the Resource section of the SNS policy to be the topic ARN you copied in the above steps when creating the topic.
Click Next.
Enter the name of your policy (wasabi-sns-user-policy is used in this example).
Click Create policy.
Create the User and Attach the Policy to the User
Go to IAM > Users > Add Users.
Enter the user name (wasabi-sns-user is used in this example). Click Next.
Click Permissions options and Attach policies directly. Select the policy (wasabi-sns-user-policy is used in this example) by check the box to the left of the policy. Click Next.
Click Create user.
You should see the user with the policy attached:
Copy the User ARN and modify the SNS Topic Access Policy
Go to IAM > Users > wasabi-sns-user (or the name you gave your user) > ARN > Copy ARN.
Go to SNS > Topics > Your Topic > Edit > Access Policy.
On line 9, you will see "AWS": "*"
Change the AWS resource to be the ARN of your IAM user.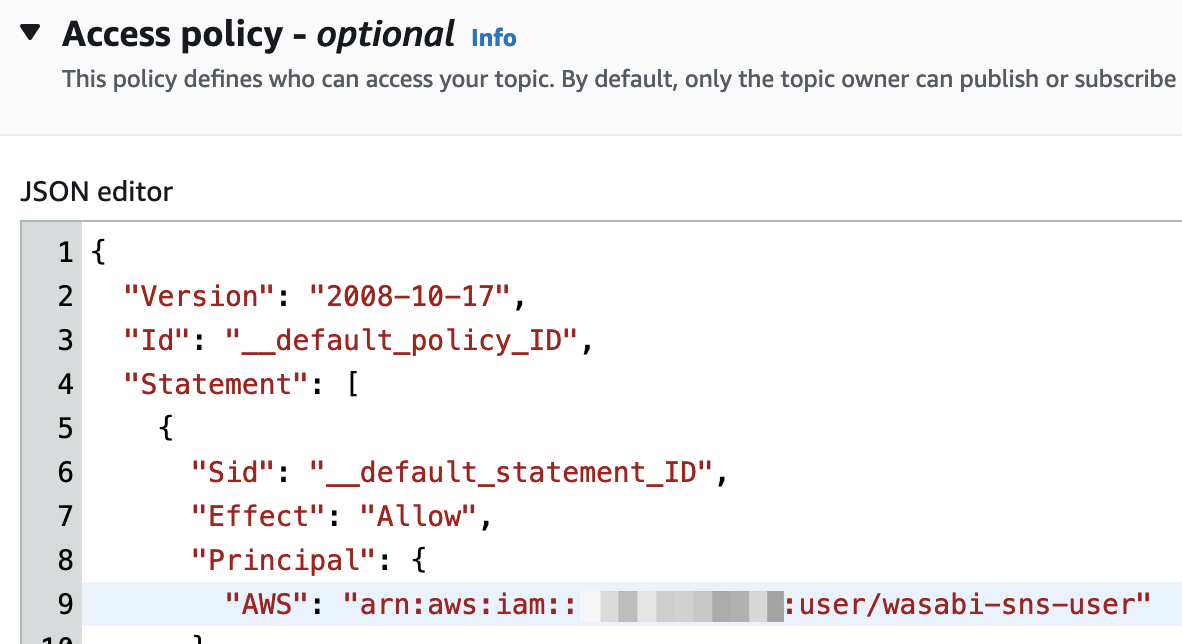
Click Save Changes.
Retrieve the Access and Secret Keys for Your IAM User
Retrieve the access/secret key combination pair for your IAM user so that you may use the user with Wasabi to send Event Notifications.
Go to IAM > Users > wasabi-sns-user (or the name you gave your user) > Security credentials > Create access key > Other > Next.
Create the access key. Download the .csv file or copy/paste the access and secret keys into a secure location.
Configuring Wasabi Bucket Event Notifications
Once you have configured an IAM user to work with AWS SNS, and have also configured an AWS SNS topic and subscription, you can configure your Wasabi account to utilize these AWS resources and send notifications for bucket activity. You will:
Incorporate your AWS credentials with the Wasabi Event Notification service
Enable the Event Notifications feature on your bucket(s)
Incorporate Your AWS Credentials With the Wasabi Event Notification Service
Log in to your Wasabi account as the Root user.
Go to your account settings by clicking Settings on the Wasabi menu, or opening the account sign-in
 drop-down and clicking Settings.
Follow the instructions for Configuring Credentials.
Enable the Event Notifications Feature on Your Bucket(s)
Follow the instructions for Creating an Event Notification.
Your Wasabi bucket is now configured to send event notifications for all selected events using the AWS SNS service. Once your configuration is saved, you should receive an s3:TestEvent notification confirming that the notifications have been configured and are working properly.
If an SNS Publish Event Notification Fails
The SNS Publish will be retried up to an additional seven times for a total of eight attempts.
After the initial SNS Publish fails, it will be retried 1 minute later. If that also fails, each subsequent retry will be performed at double the time of the previous (for example, 2 minutes, 4 minutes, 8 minutes, 16 minutes, 32 minutes, and finally 64 minutes).
Upon final retry failure (that is, after the eighth attempt), the Object Event Notification will be placed into a Dead-Letter-Queue where it will exist for 24 hours before being deleted automatically.
There is no mechanism to notify customers of event failures.
If you experience any issue while configuring your Wasabi Event Notifications, or if you have any questions about this service, contact a Wasabi Customer Support representative: support@wasabi.com