Open the Signiant console, and login with your Signiant account.
.png)
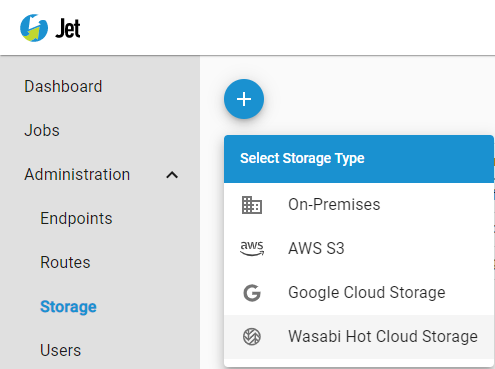
In the Signiant console, select the Storage link in the navigation menu.
.png)
On the Storage page, click on the plus symbol, and select the Wasabi Hot Cloud Storage option.
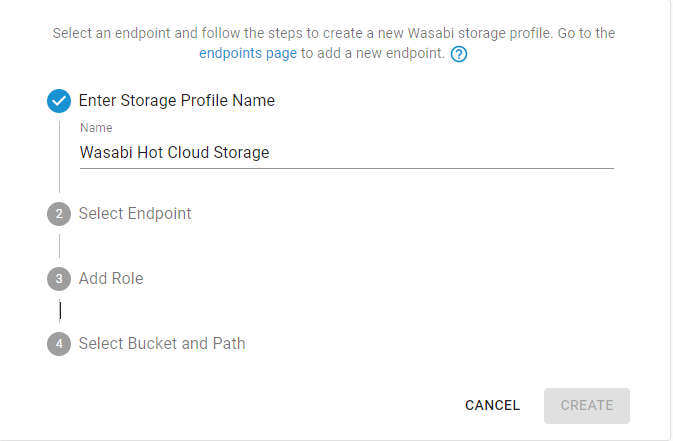
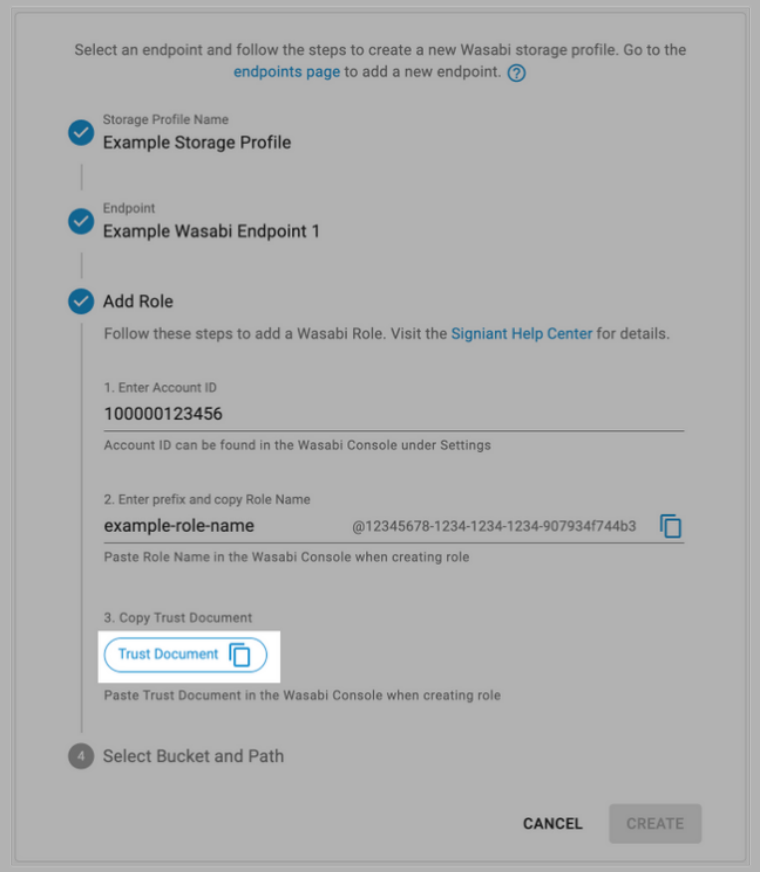
A configuration window will appear to setup a storage profile for the Wasabi Hot Cloud Storage endpoint. Give the storage profile a unique name.
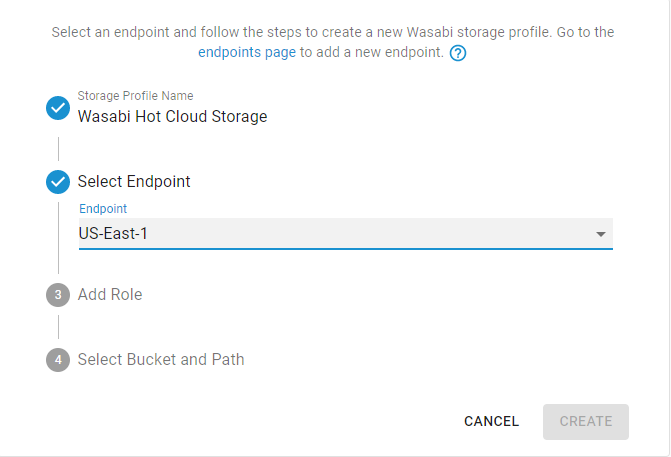
Select the Wasabi Hot Cloud Storage endpoint you have created previously.
In a separate browser tab, log into the Wasabi Console.
Click Settings to open the Account Settings page.
Copy the Account ID to your clipboard.

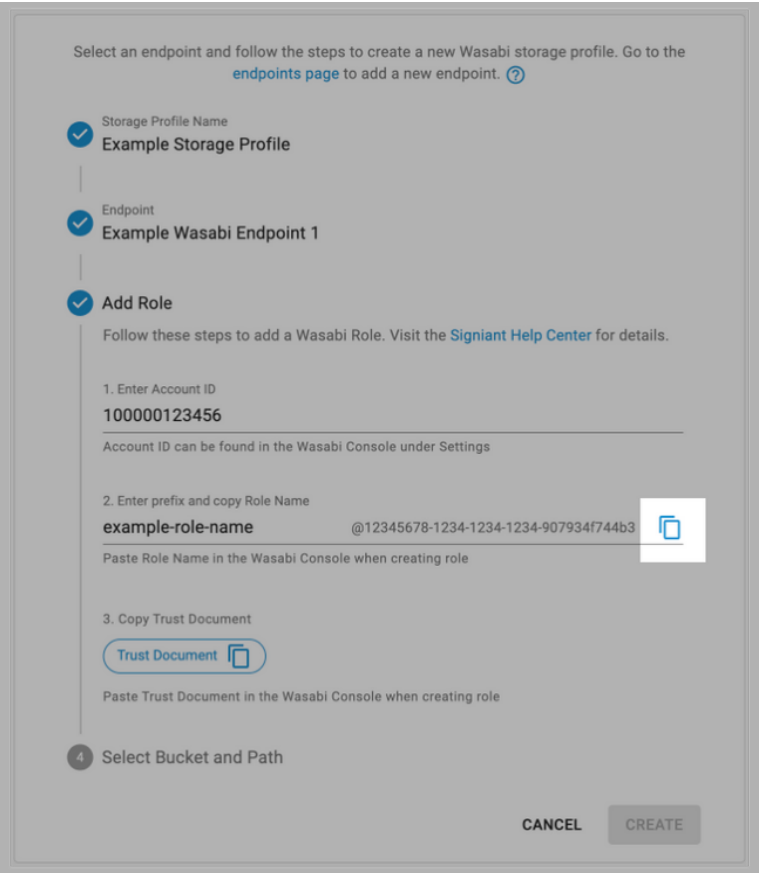
In the Signiant Console, paste the Account ID into the Account ID field.
Enter a role name prefix. Note: The prefix, combined with the suffix, must be used as the Role Name to be recognized by Jet. Treat this role name as a secure credential.
Click to copy the full account role name.
In the Wasabi Console, click Roles to open the Roles page.
Click Create Role.
Paste the role name from the Signiant Console into the Name field.
.png)
In the Signiant Console, click to copy the Trust Document.
In the Wasabi Console, remove the existing trust document content from the Trust Document field.
Paste the trust document from the Signiant Console into the Trust Document field.
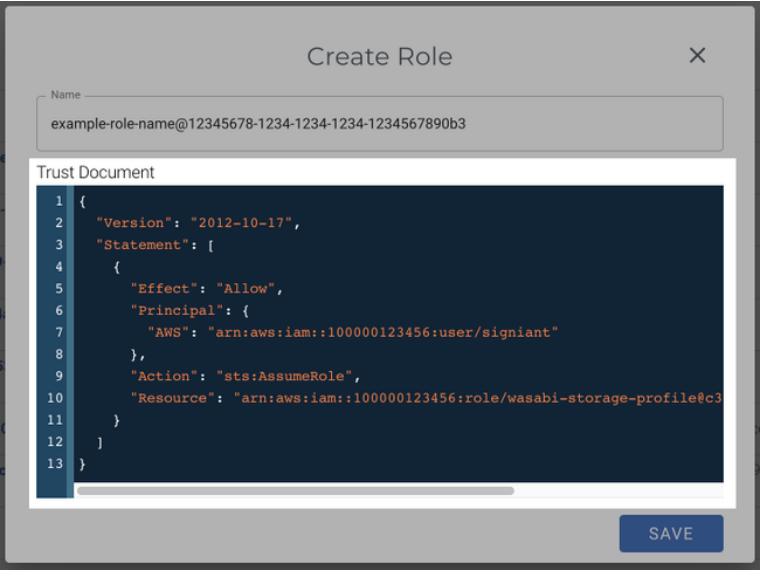
Click Save to create the role.
Make sure you have created a Signiant Jet policy.
On the Roles page, click the role name to edit the new role.
Assign the created policy to the role.
Add the bucket and optional path, and then submit the configuration.
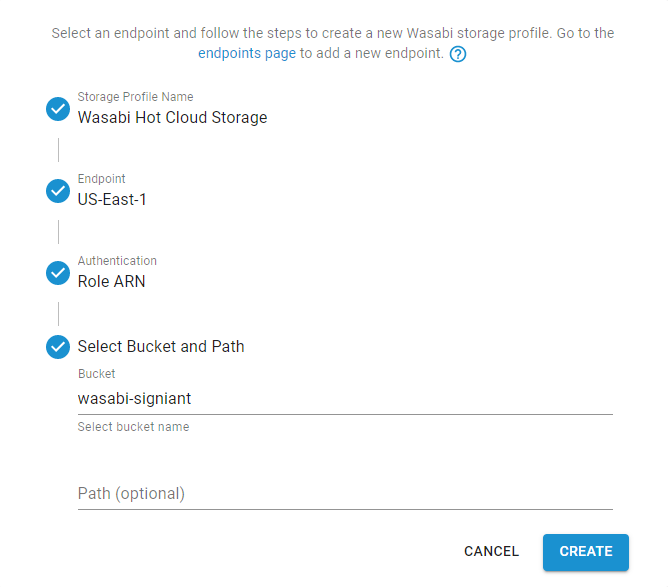
Once created, the storage profile will be accessible in the list of storage profiles.