All buckets and objects are private by default and accessible only with your permission as the object owner.
There may be times when you need to share an object. You can do so by creating a presigned URL using your security credentials. This would enable others to access and download the object for a specific duration of time, from 12 hours to 7 days (168 hours). For instance, imagine you want to share a presentation with a collaborator, or you want to allow a friend to download a video file stored in your bucket. In both situations, you could generate a presigned URL and then email or message the recipient the URL, which would allow the recipient short-term access.
Presigned URLs are also useful if you want someone to be able to upload an object to your bucket, but you do not want to issue them security credentials or permissions.
Creating a Presigned URL
To create a valid presigned URL, you must provide your security credentials, a bucket name, an object key, specify the HTTP method (for instance, PUT to upload an object or GET to download an object), and an expiration date and time.
A presigned URL is valid only for the specified duration. That is, you must start the action before the expiration date and time. If the action consists of multiple steps, such as a multipart upload, all steps must be started before the expiration; otherwise, you will receive an error when Wasabi attempts to start a step with an expired URL.
Several approaches to generating a valid presigned URL involve using:
Presigned S3 URLs for temporary, automated access in your application code using:
Python and Boto3
AWS SDK for Nodejs
AWS SDK for PHP (V2)
Examples in this article discuss the use of Wasabi's us-east-1 storage region. For other Wasabi storage regions, use the appropriate URL as described in Service URLs for Wasabi's Storage Regions.
Using Wasabi Explorer
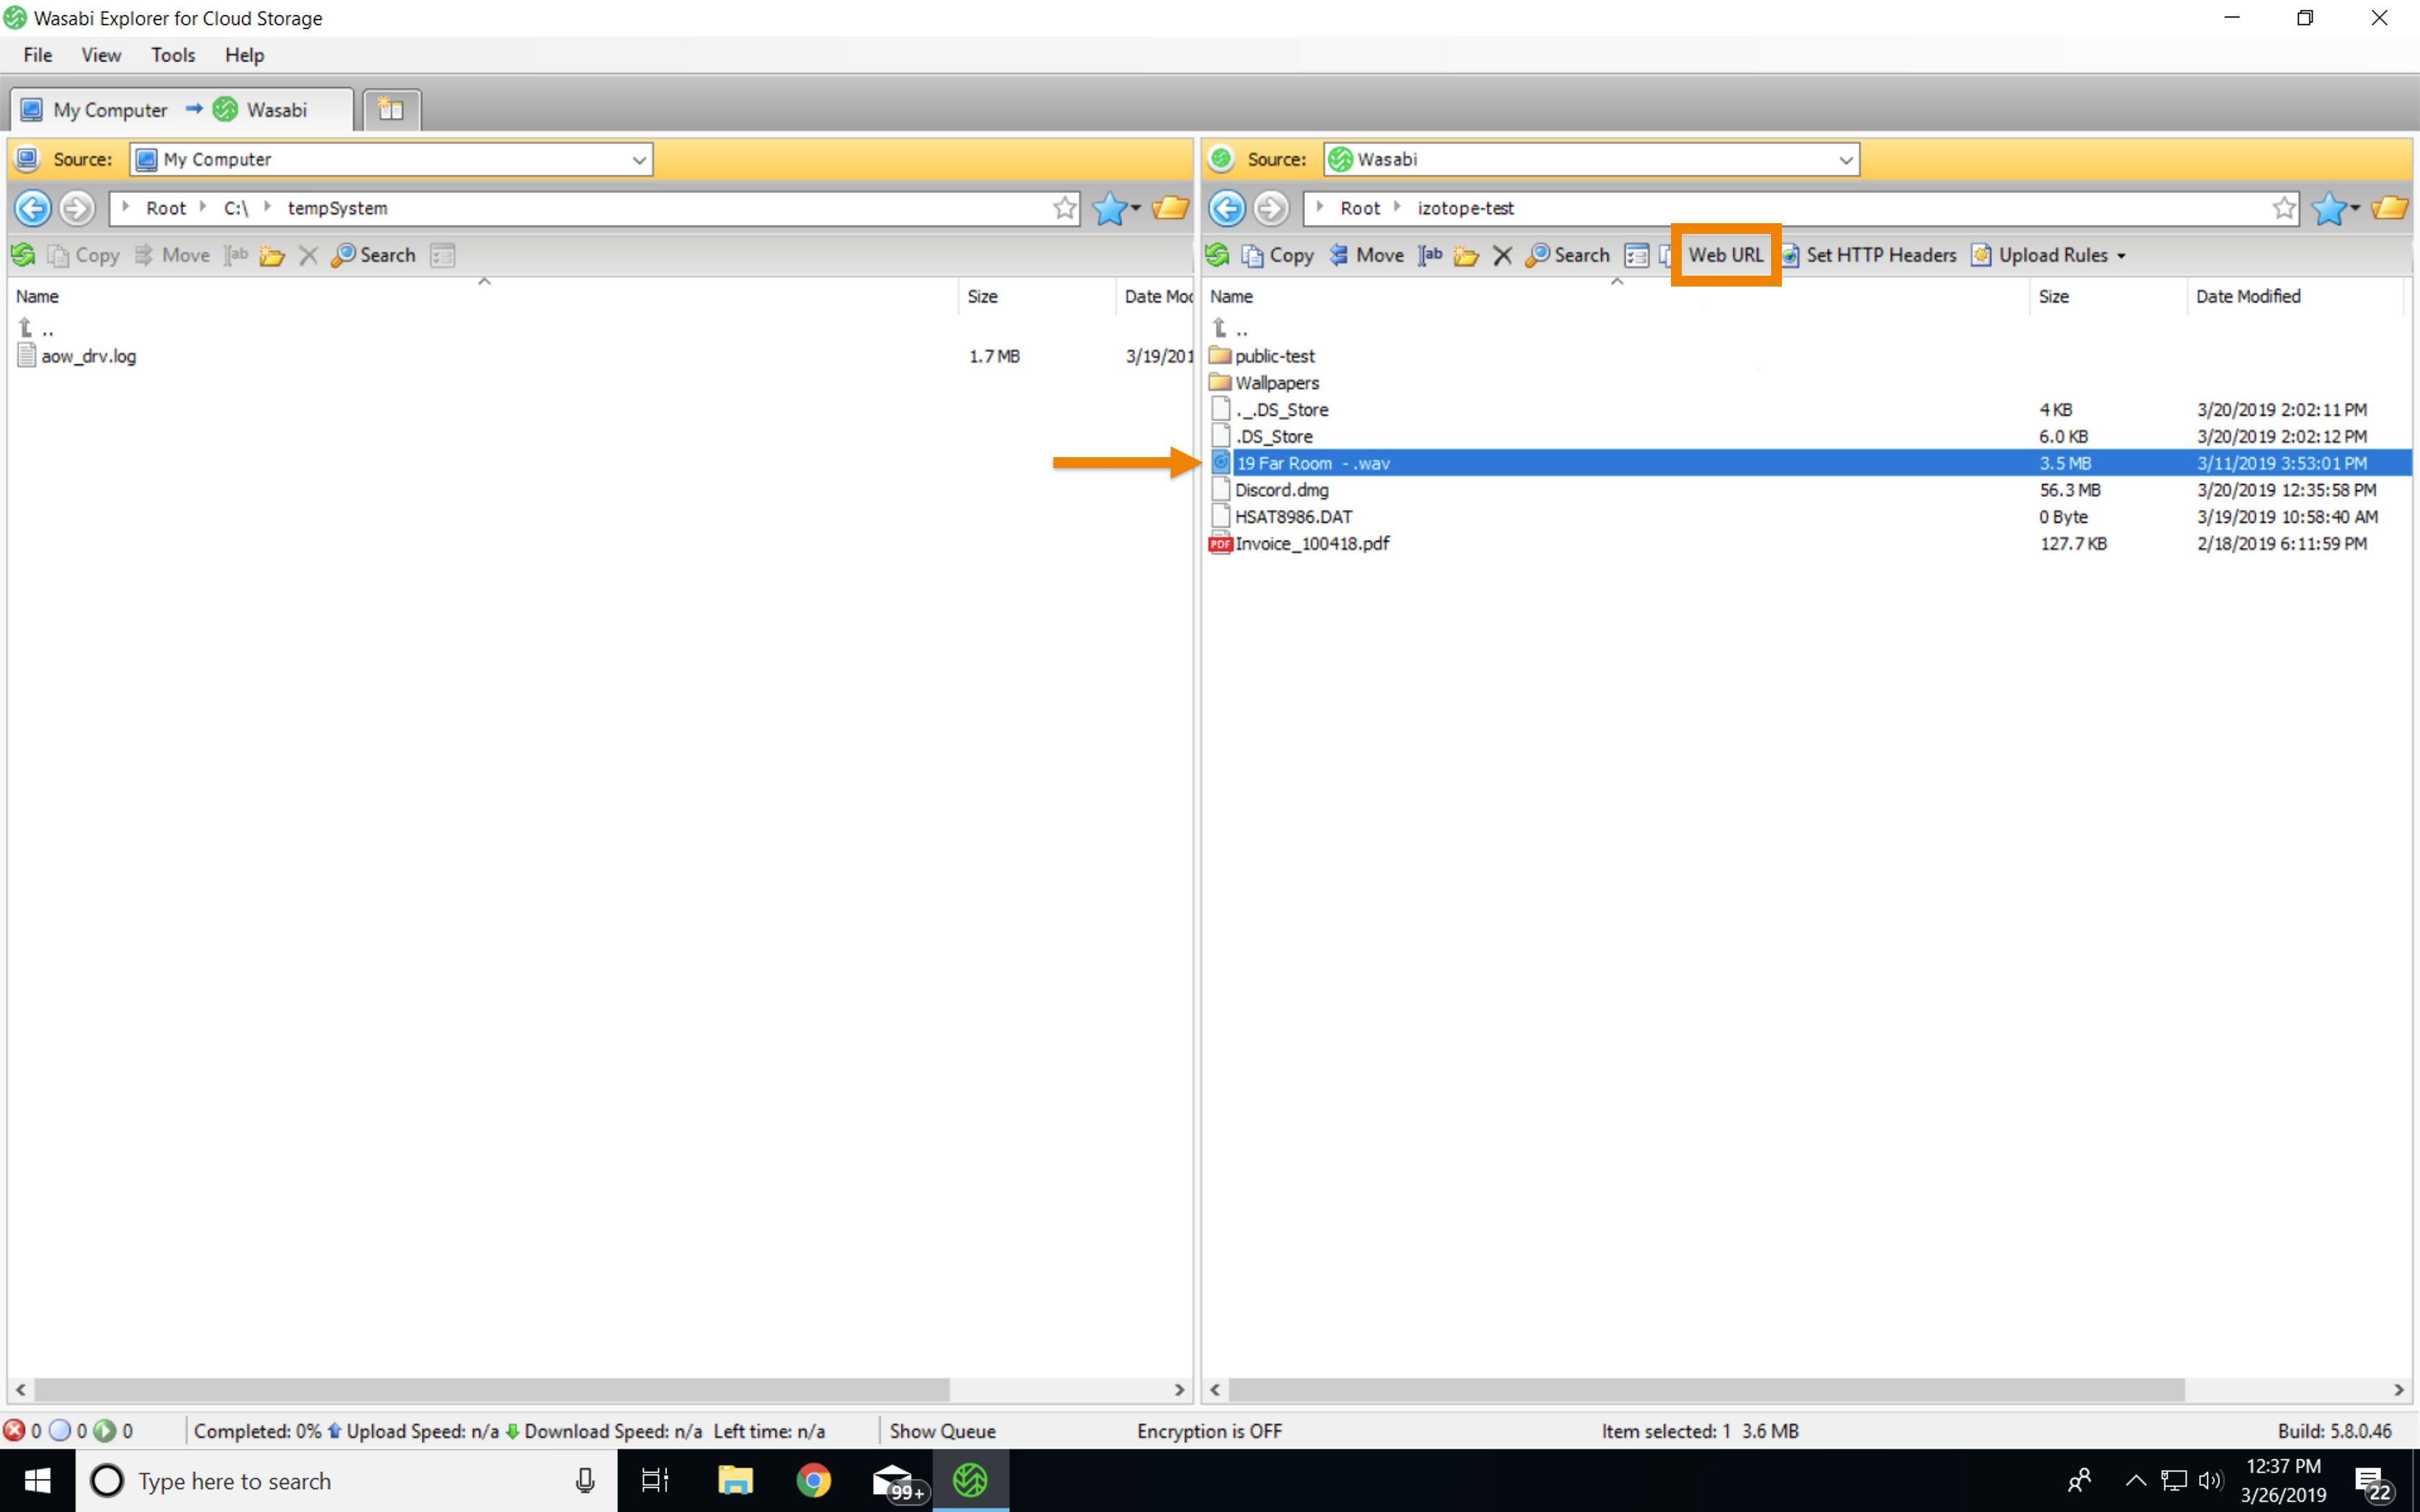
Wasabi Explorer is the easiest way to generate a presigned S3 URL.
Select the object for which you want to generate a presigned S3 URL.
Click Web URL.
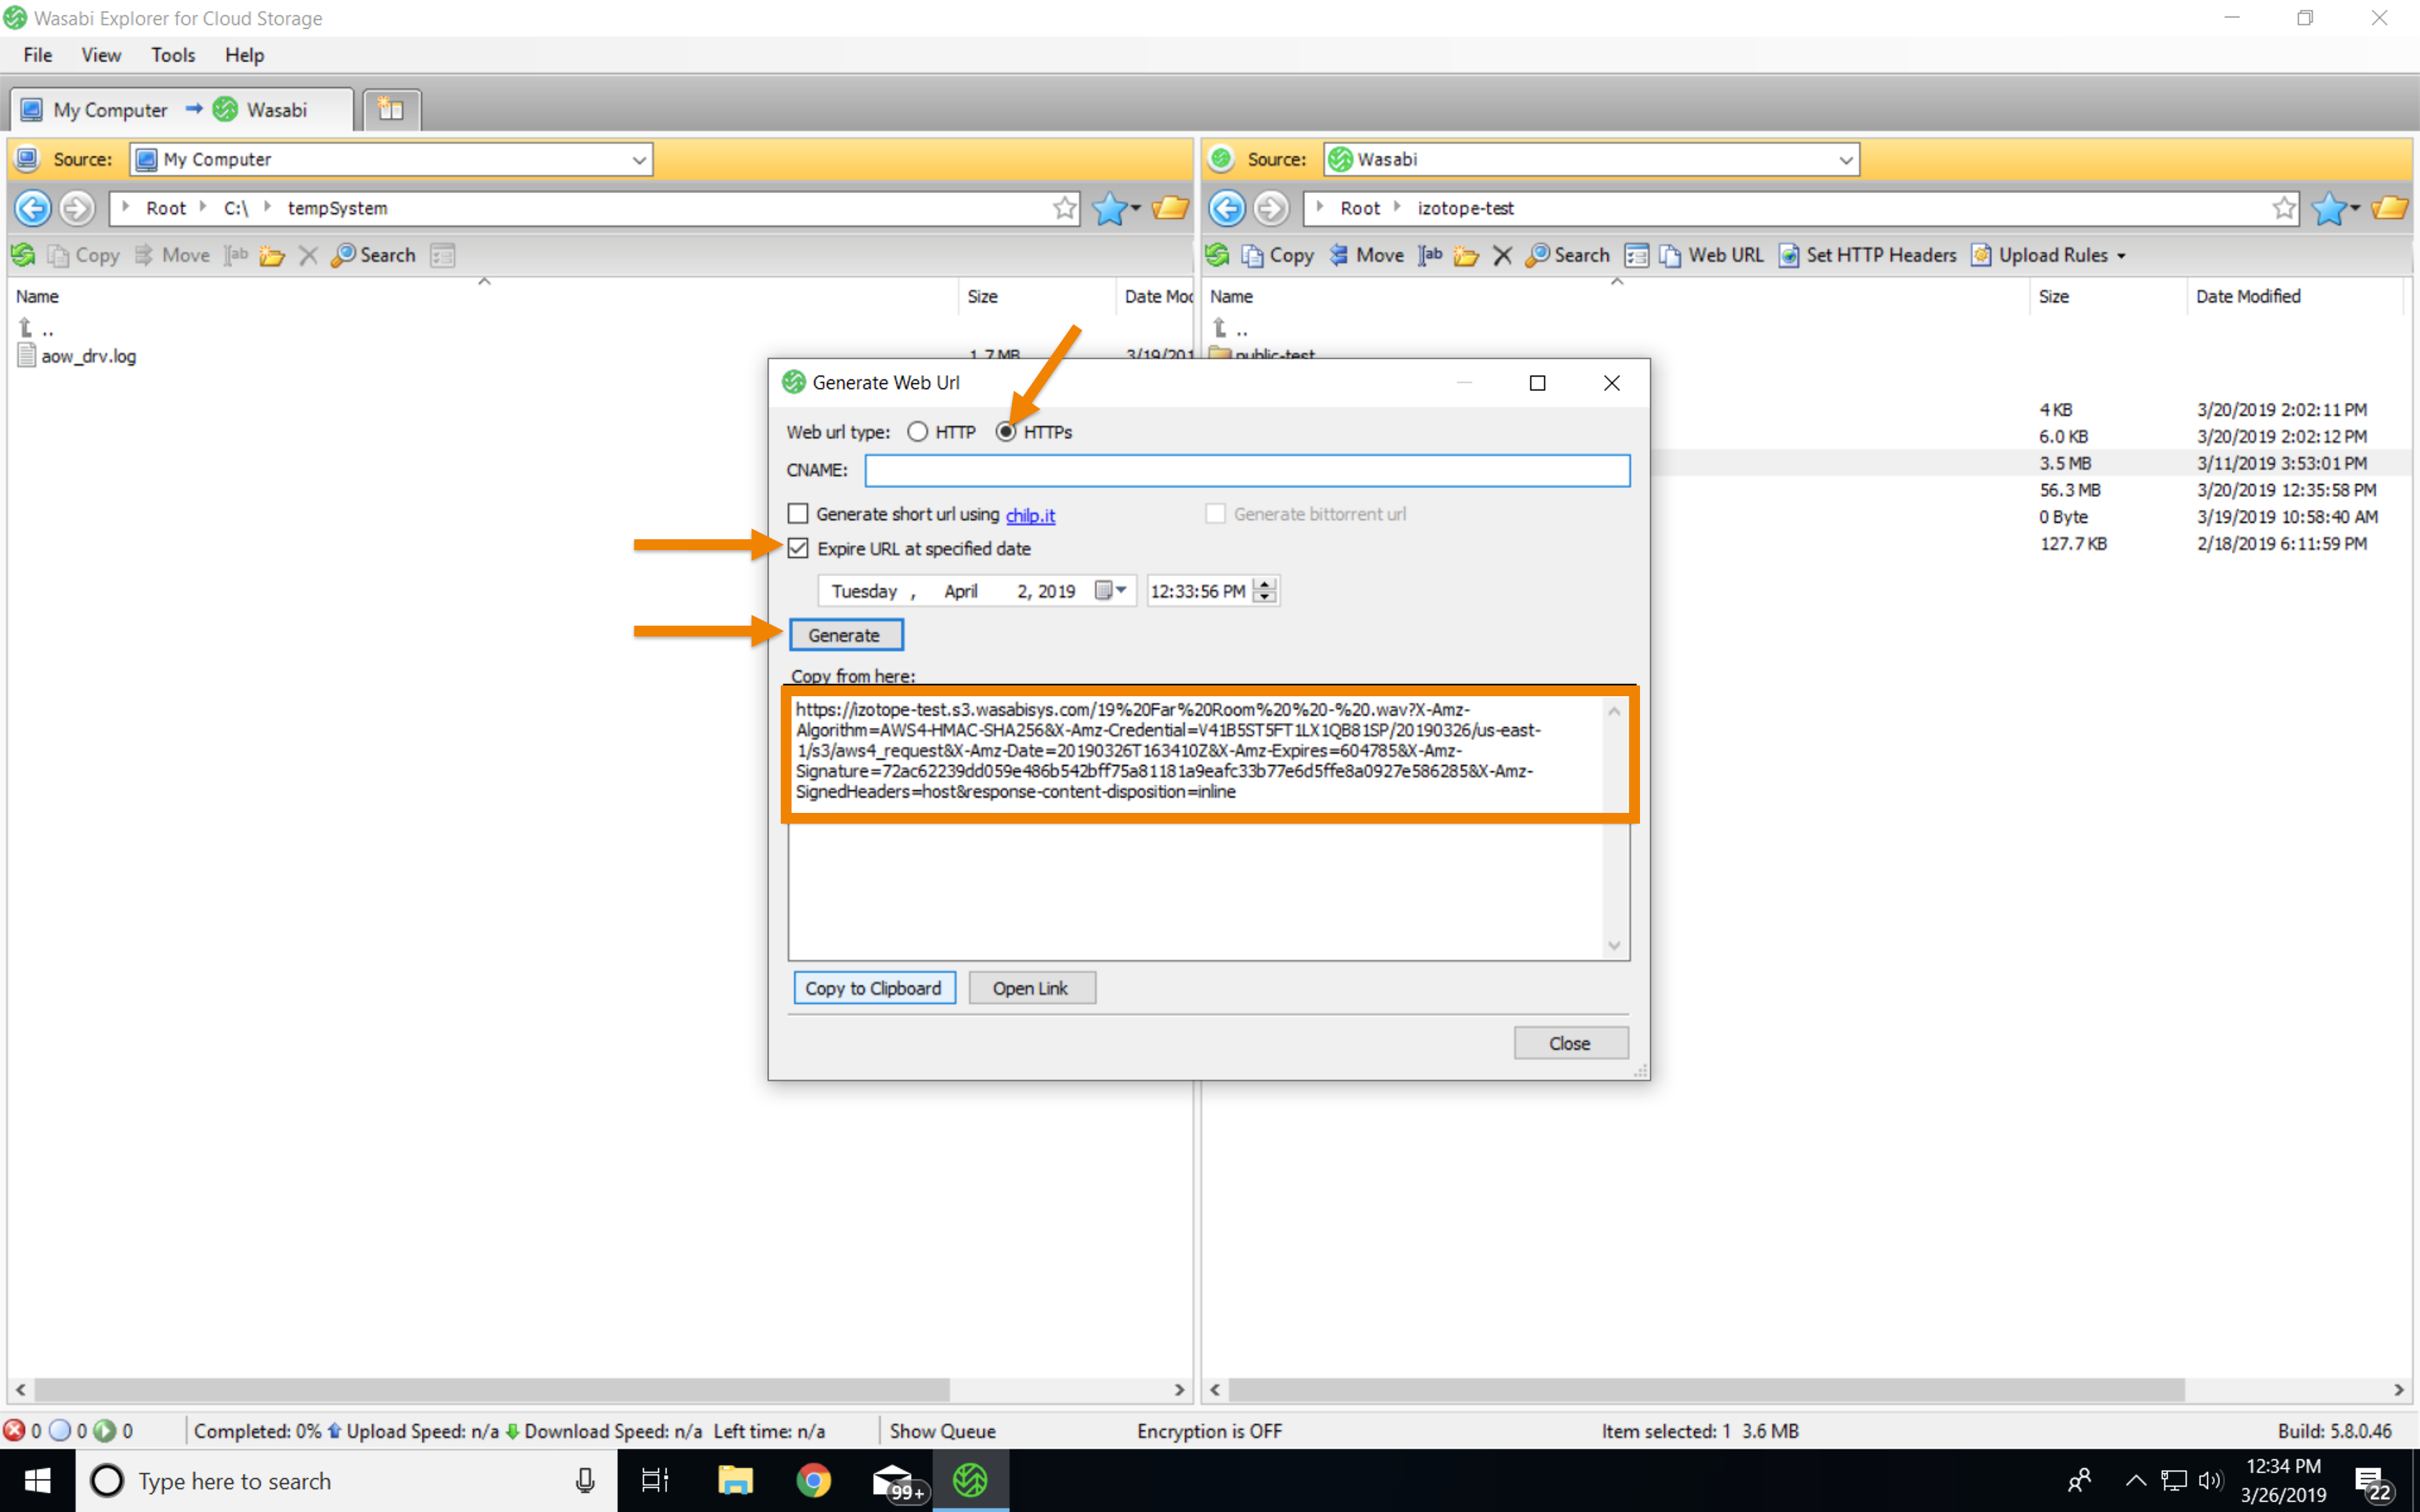
Indicate whether you want an HTTP or HTTPS URL. HTTPS is preferred so that the query string parameters, including the access key and signature, will be sent over a secure connection.
Select Expire URL at specified date, and indicate when you want the presigned URL to expire.
Click Generate.
Copy the URL in the Copy from here box, as highlighted below.
Using the AWS CLI
To generate a presigned S3 URL with the AWS CLI, use the AWS S3 presign command.
On a Windows system, the command is:
"C:\Program Files\Amazon\AWSCLI\aws.exe" s3 presign s3://yourbucket/presentation.ppt --endpoint-url https://s3.wasabisys.comThis will return the URL that you will then provide. For example:
https://yourbucket/presentation.ppt?AWSAccessKeyId=T43W6LLO9TVP12345ABC&Expires=1553550766&Signature=AC7uJ8L9E30PwWtJIHXVWV%2FEuSg%3DOn a Mac or Linux system, the command is:
$ aws s3 presign s3://yourbucket/presentation.ppt --endpoint-url https://s3.wasabisys.comThe above command runs for the default profile when you run aws configure. Use the -- profile option if the Wasabi credentials are under a different profile.
Using the AWS Tools for PowerShell
If you use the AWS Tools for PowerShell, you can use the Get-S3PreSignedURL cmdlet to generate a presigned S3 URL in your PowerShell. The syntax is:
Get-S3PreSignedURL -Bucket yourbucket -Key presentation.ppt -Expire 2019-03-26 -EndpointUrl "https://s3.wasabisys.com"Using the S3 Browser
You can use the S3 Browser PRO version to generate a presigned S3 URL.
Select the object for which you want to generate a presigned S3 URL.
Right-click on the object and select Generate Web URL(s).

Select options, as appropriate.
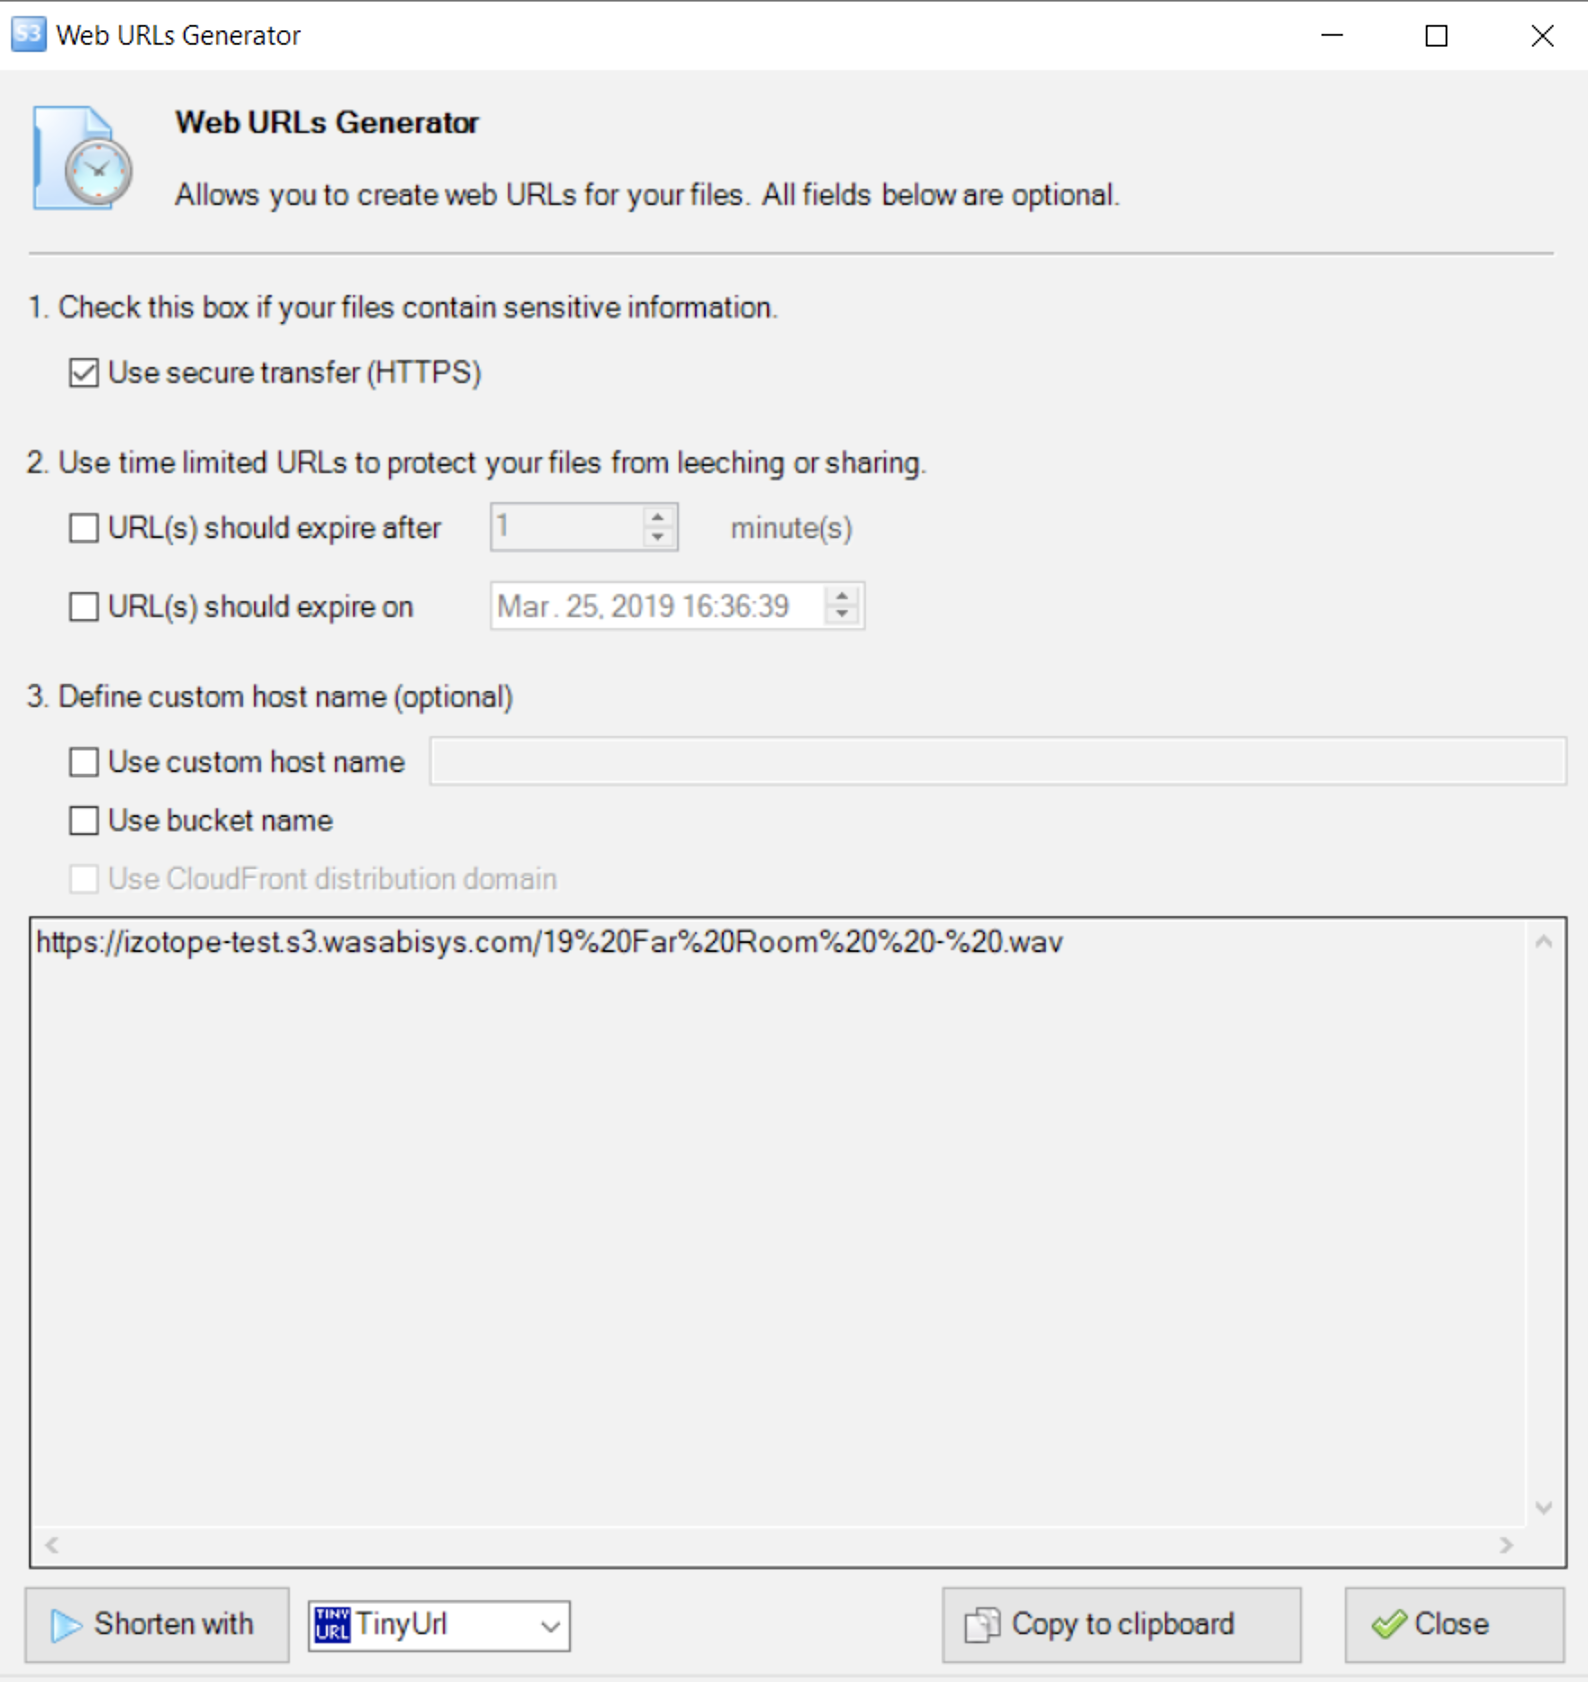
Click Close.
Using Presigned S3 URLs for Temporary, Automated Access in Your Application Code
The examples above are useful for generating a single presigned S3 URL that you need for a one-time case. More commonly, you may have an application that needs to programmatically generate short-term access to a Wasabi bucket.
Some examples of this programmatic usage include:
Your application generates invoice PDFs at the end of a billing cycle and stores the PDFs on Wasabi. You need to provide a link for your users to download the PDF of their invoice.
Your application allows users to upload videos to your Wasabi bucket. You would like users to upload directly from their browser, rather than sending the video to your servers, without leaking credentials to the browser.
You can perform both of these operations with the AWS SDKs for any language. Below are examples of how to generate presigned S3 URLs in your application code.
Presigned URLs that are authenticated with an IAM user are valid for a maximum of 7 days.
Generating a Presigned S3 URL for Reading an Object in Your Application Code With Python and Boto3
As mentioned above, you may want to provide temporary read access to a Wasabi object to a user of your application, such as downloading a PDF of an invoice. The code snippet below shows how to do this in your application code.
Import the boto3 library and construct a client to interact with Wasabi.
Generate a presigned S3 URL that will allow the GetObject API call on the object you specify.
import boto3

        s3 = boto3.client('s3',
        endpoint_url = 'https://s3.wasabisys.com',
        aws_access_key_id = '',
        aws_secret_access_key = '')

        url = s3.generate_presigned_url(
            ClientMethod='get_object',
            Params={
                'Bucket': 'your-bucket-name',
                'Key': 'invoice.pdf'
            }
        )
        print(url)

        # https://your-bucket-name.s3.wasabisys.com/invoice.pdf?AWSAccessKeyId=AKIALGKOKBY37F5FZF4I&Signature=bPSs8Kcak%2FgjEqqjOO5cFS022x0%3D&Expires=1531446995
The resulting URL could be sent to a user to view in their browser and receive temporary access to the invoice.
Generating a Presigned S3 URL for Uploading an Object in Your Application Code With Python and Boto3
You can generate a presigned S3 URL that can be used for POST requests. This can be useful to allow clients to upload large files. Rather than sending the large file through your application’s servers, the client can upload the file directly from the browser via tightly-scoped permissions.
Imagine you want to allow a user to upload a file to your Cloudberry-examples bucket with the key name of uploads/image.jpg. In the example below, the generate_presigned_post method is used to construct the URL and return it to the client. You can even add conditions onto the request, such as ensuring the file size is no larger than 1 MB.
import boto3

        s3 = boto3.client('s3',
        endpoint_url = 'https://s3.wasabisys.com',
        aws_access_key_id = '',
        aws_secret_access_key = '')

        response = s3.generate_presigned_post(
            Bucket='your-bucket-name',
            Key='uploads/image.jpg',
            Conditions=[
                ['content-length-range', 1, 1048579]
            ]
        )

        print(response)
        {'url': 'https://your-bucket-name.s3.wasabisys.com/', 'fields': {'key': 'uploads/image.jpg', 'AWSAccessKeyId': 'AKIALGKOKBY37F5FZF4I', 'policy': 'eyJleHBpcmF0aW9uIjogIjIwMTgtMDctMTNUMDI6Mzg6MTBaIiwgImNvbmRpdGlvbnMiOiBbWyJjb250ZW50LWxlbmd0aC1yYW5nZSIsIDEsIDEwNDg1NzldLCB7ImJ1Y2tldCI6ICJjbG91ZGJlcnJ5LWV4YW1wbGVzIn0sIHsia2V5IjogInVwbG9hZHMvaW1hZ2UuanBnIn1dfQ==', 'signature': 'ZY7Orehfdzg+ToJJXhYuV/XyK5o='}}
The response will include a URL property as well as a fields property with a set of key-value pairs. The fields key-value pairs must be sent with the file as part of a multipart/form-data request.
Generating a Presigned S3 URL for Uploading an Object in Your Application Code With aws-sdk for Nodejs
const ep = new AWS.Endpoint('s3.wasabisys.com');
        const s3 = new AWS.S3({endpoint: ep});
        var uuid = require('uuid');

        const presignedUpload = () =>{
        let url = s3.getSignedUrl('putObject', {
        Bucket: 'izotope-test',
        Key: 'invoice.pdf',
        ContentType:'application/pdf',
        ACL: 'bucket-owner-full-control',//filename
        Expires: '100' //time to expire in seconds
        });
        console.log(url);
        };
Generating a Presigned S3 URL for Uploading an Object in Your Application Code With AWS SDK for PHP (V2)
$s3 = new S3Client([
        'endpoint' => ' http://s3.wasabisys.com',
        'region' => 'us-east-1',
        'version' => 'latest',
        'credentials' => array(
        'key' => XXXX,
        'secret' =>XXXX,
        )
        ]);

        $cmd = $s3->getCommand('GetObject', [
        'Bucket' => 'yourbucket',
        'Key' => 'hYTYRT56.mp3',
        'ACL' => 'public-read',
        ]);

        $request = $s3->createPresignedRequest($cmd, '+20 minutes');
        $presignedUrl = (string)$request->getUri();
Using a Presigned URL to Upload Objects to Wasabi
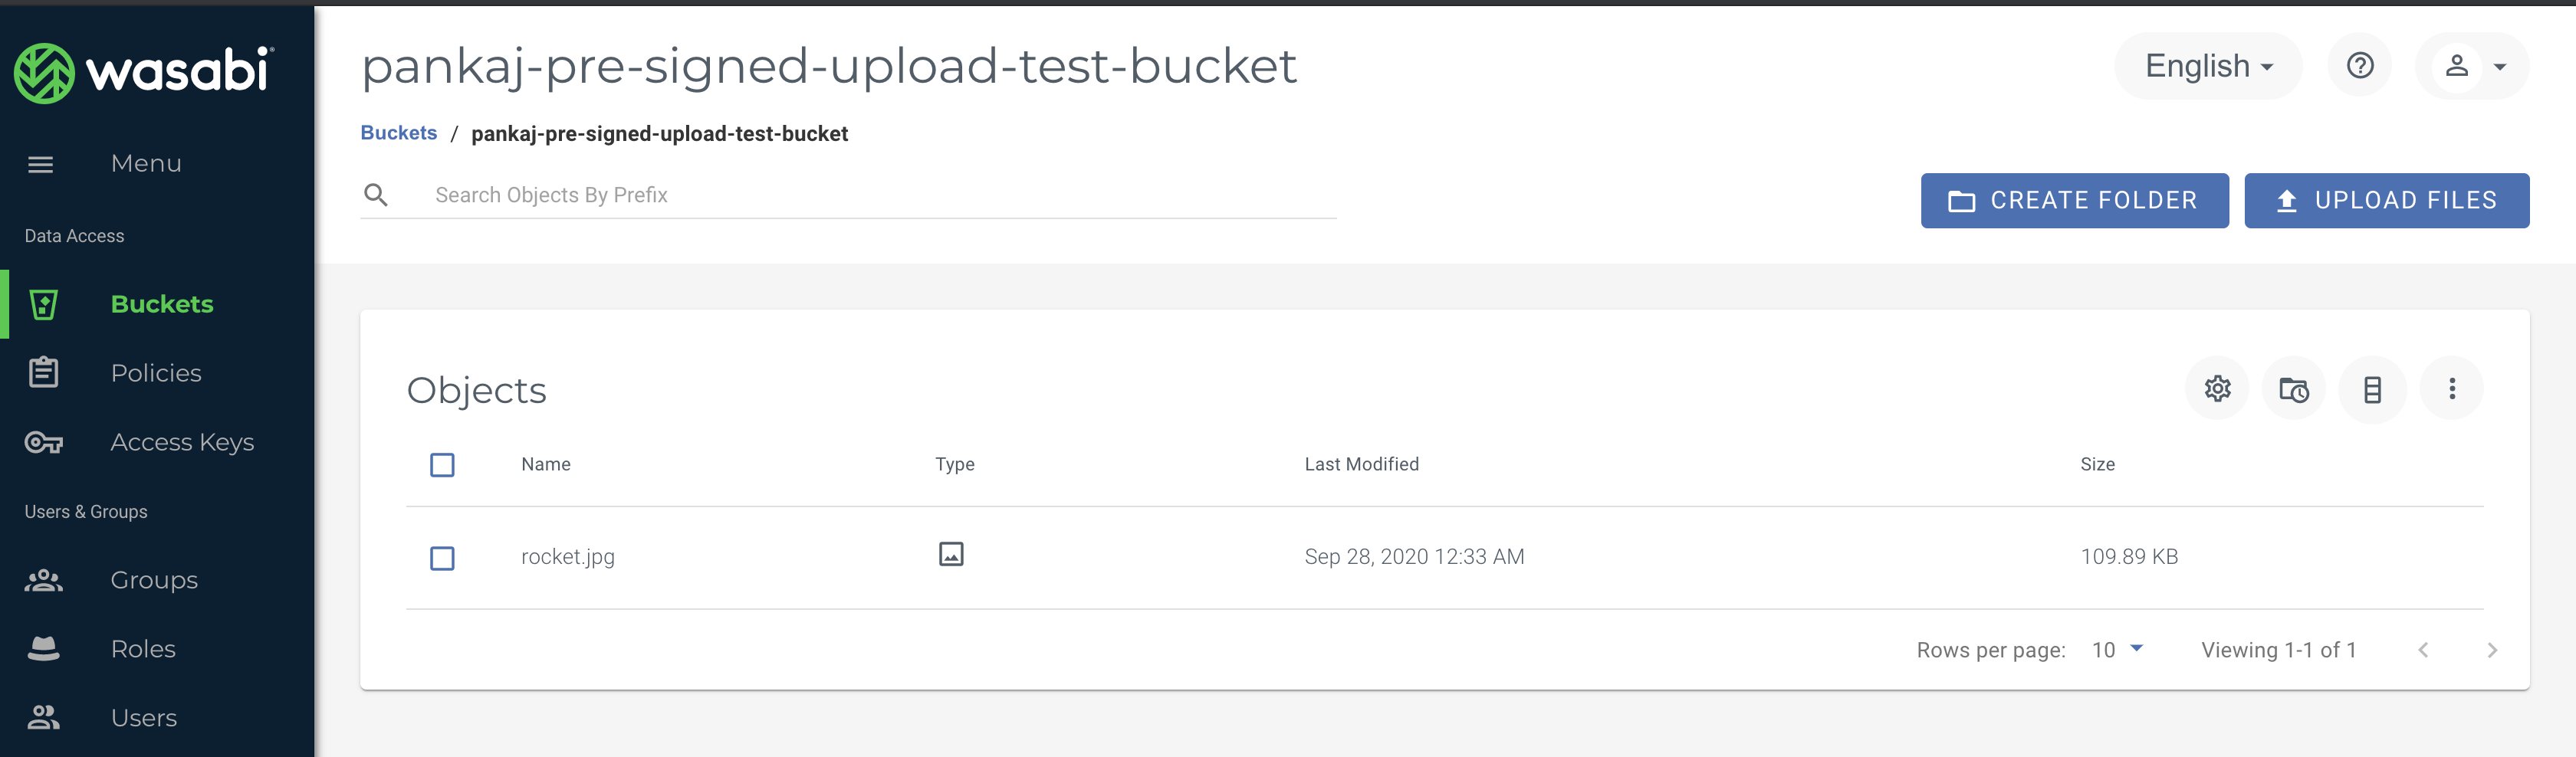
You can use the presigned URL multiple times, up to the expiration date and time. The example below generates a presigned URL programmatically using Python to upload a file. Note that the code example discusses the use of Wasabi's us-east-2 storage region. For other Wasabi storage regions, use the appropriate URL as described in Service URLs for Wasabi's Storage Regions.
Make sure you have installed AWS SDK Boto3 for Python on your CLI before running the script.
Use the following Python code and save it as a PY file. Enter your correct Wasabi-Access-Key and Wasabi-Secret-Key in the script. Set the expiration value of this URL as per your requirement. This example specifies 3600 seconds (ExpiresIn=3600).
import boto3
                import requests
                import json

                s3 = boto3.client('s3')

                s3 = boto3.client(
                's3',
                endpoint_url = 'https://s3.us-east-2.wasabisys.com',
                aws_access_key_id='Wasabi-Access-Key',
                aws_secret_access_key='Wasabi-Secret-Key')

                bucket = input("Enter your Bucket Name: ")

                key= input("Enter your desired filename/key for this upload: ")

                print (" Generating pre-signed url...")

                response = s3.generate_presigned_url('put_object', Params={'Bucket':bucket,'Key':key}, ExpiresIn=3600, HttpMethod='PUT')
                print (response)

                if response is None:
                exit(1)

                response = requests.put(response)
                print('PUT status_code: ', response.status_code)
                print('PUT content: ', response.content)
On your command line/terminal, navigate to the directory/folder where you saved the PY file.
Execute the script and enter your own bucket name and desired filename/key.
You will receive a presigned URL. For example:

Copy the URL to the clipboard.
On your command line, use curl to upload any file to Wasabi using the presigned URL.
curl --request PUT --upload-file "http://your-pre-signed-url"
Check your Wasabi S3 bucket for a successful upload.