Wasabi is a member of Veeam's cloud partner ecosystem. We have worked with Veeam closely to offer both a seamless implementation, and a smooth transition to cloud storage. For more information on using Veeam with Wasabi, review Veeam with Wasabi Solution Overview.
The data restoration process is handled by your specific backup software application. As there are many, potential variables that will affect your unique environment, Wasabi strongly recommends that you seek the guidance of your backup software's technical support team in the event that you encounter difficulty, or have application-specific inquiries.

Native S3 interface: The Veeam v10 release has continued its native support of the S3 interface for Veeam's Backup & Replication product. This native S3 interface allows Veeam customers to use S3-compatible storage, such as Wasabi, as a Cloud Tier. Veeam customers should contact their Veeam account team for specific details.
The steps outlined below require the Veeam v10 release. For other release versions, please check our Veeam With Wasabi.
The Veeam application requires base licensing of Enterprise or Enterprise Plus in order to leverage the Scale-Out Backup Repository feature. The SOBR is required for Wasabi Integration. Contact your Veeam sales representative to learn more about Veeam licensing. You can read more about Veeam Licensing on the Veeam Product Features Comparison page.
Using Wasabi Object Storage with Veeam necessitates the creation of a Scale-Out Backup Repository (SOBR). The SOBR, in turn, requires a Local Performance Tier Backup Repository in order to be created.
If you already have an existing Local Performance Tier Backup Repository, and it meets the criteria given in the Veeam Limitations for Scale-Out Backup Repositories Guide, you can use your existing backup repositories.
If this is not the case, you should setup your SOBR with a Local Performance Tier repository based on your chosen type of Performance Tier (Local Storage, DeDeuplication Device, NAS, etc…). There are many ways to achieve this. The Veeam Support team is the best point of contact in order to configure your SOBR appropriately.
Following along in this guide, we will create a Local Performance Tier using your Veeam local drives. This is an optional step.
CAUTION: Some configuration choices below are used as examples of a typical local data storage environment. Your specific environment may differ from the example. If you are unsure of any configuration changes, it is recommended that you reach out to Veeam support directly.
Adding Disk Storage as Backup Repository
This section lists the steps that will allow you to create a local Backup Repository, in order to store your initial backups. Veeam will always take backups to the local repository before it copies/moves them to Wasabi Hot Cloud Storage, also known as Cloud Tier/Object Storage.
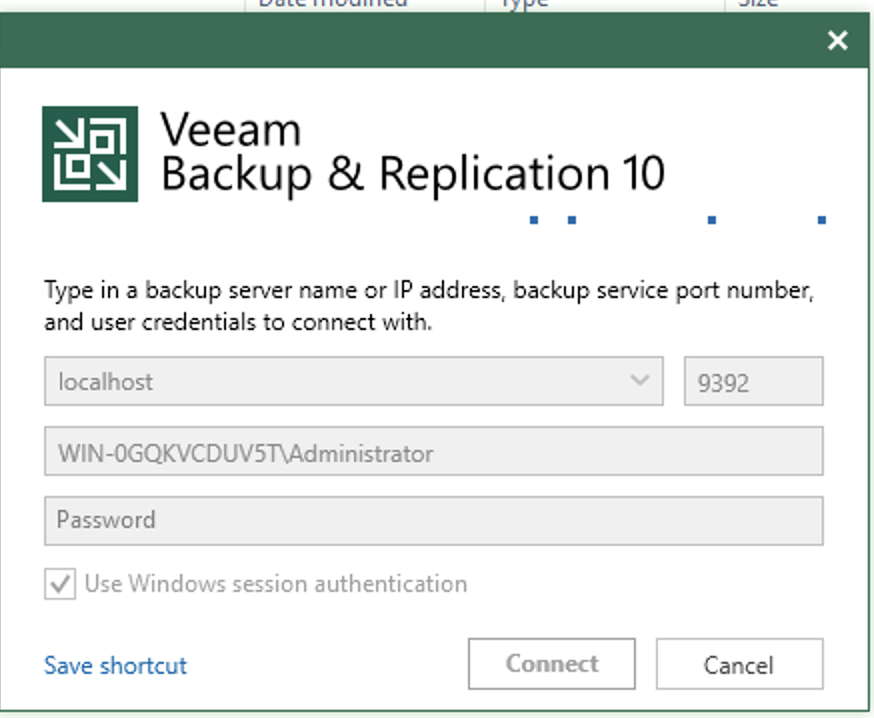
Log into your Veeam version 10 instance.
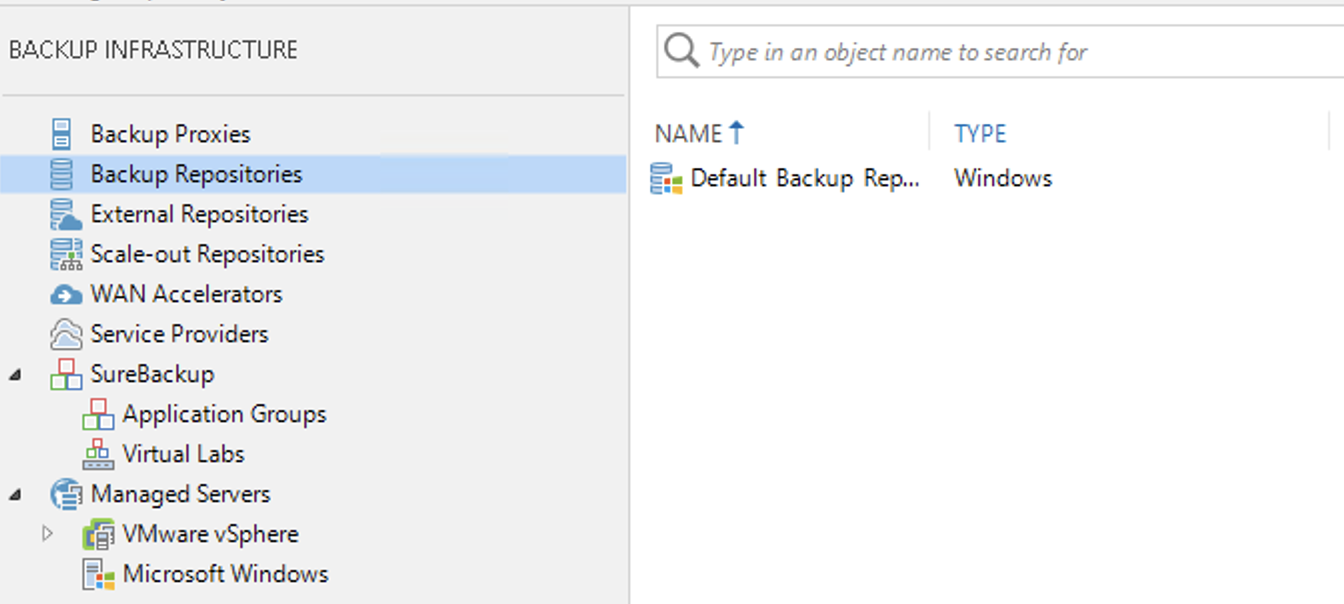
Click Backup Infrastructure.
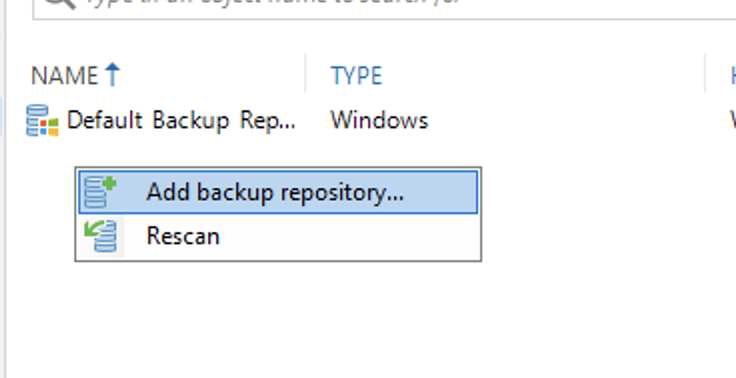
Click Backup Repositories.
Right-click to select Add backup repository.
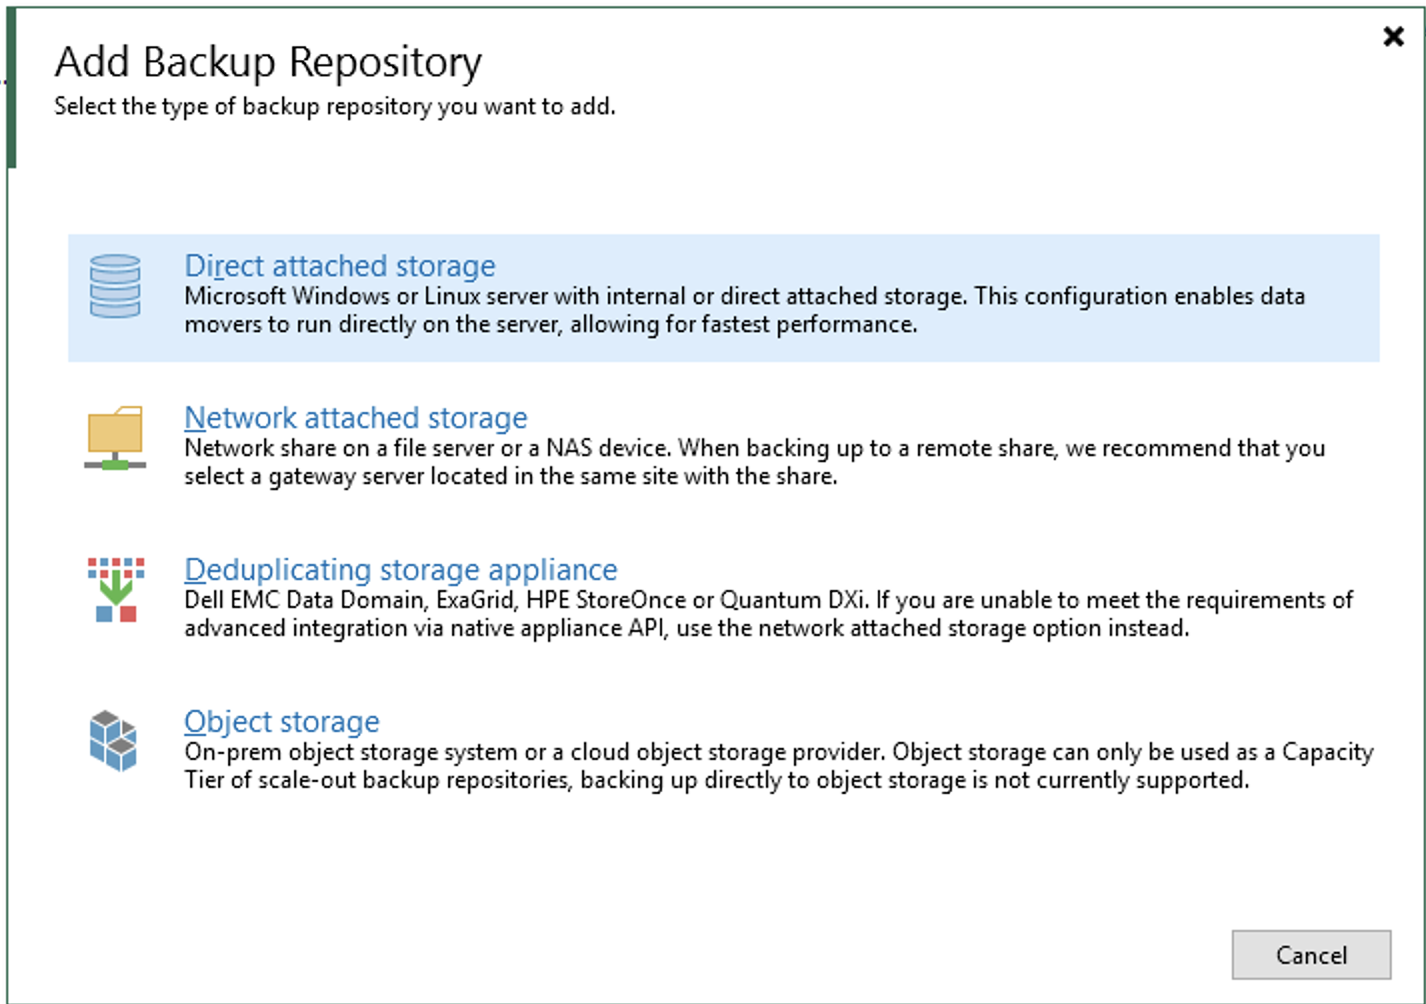
Click Direct Attached Storage.
This could also be Network attached storage or a Deduplicating storage appliance, depending upon your specific environment. Contact Veeam Support for more information about integrating NAS or other de-duplication appliances.
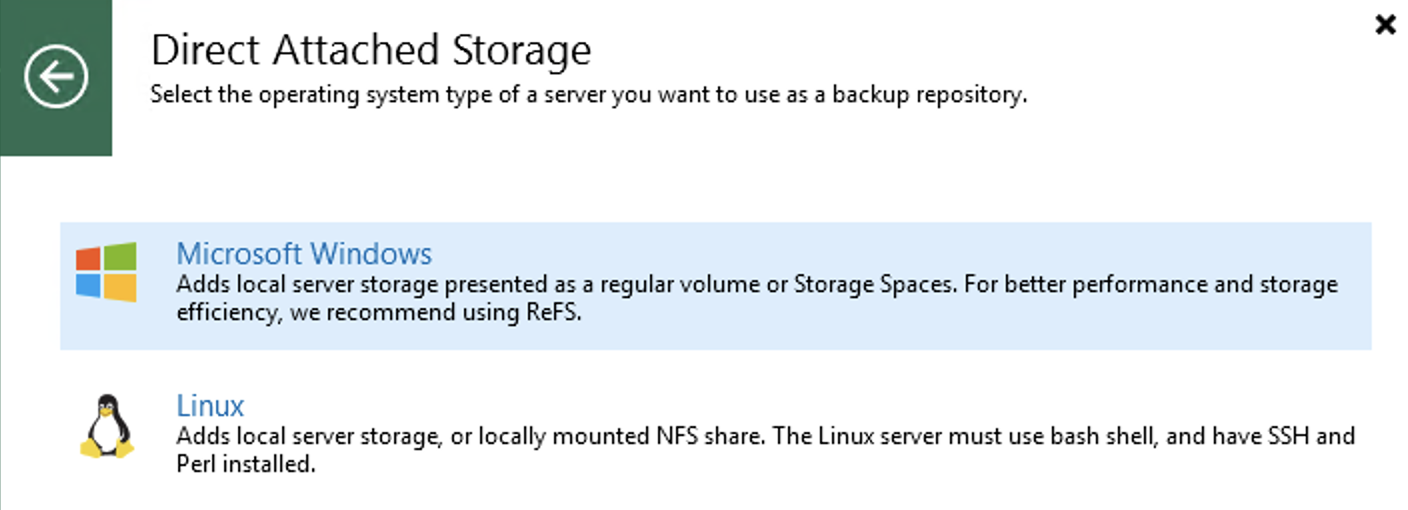
Click Microsoft Windows.
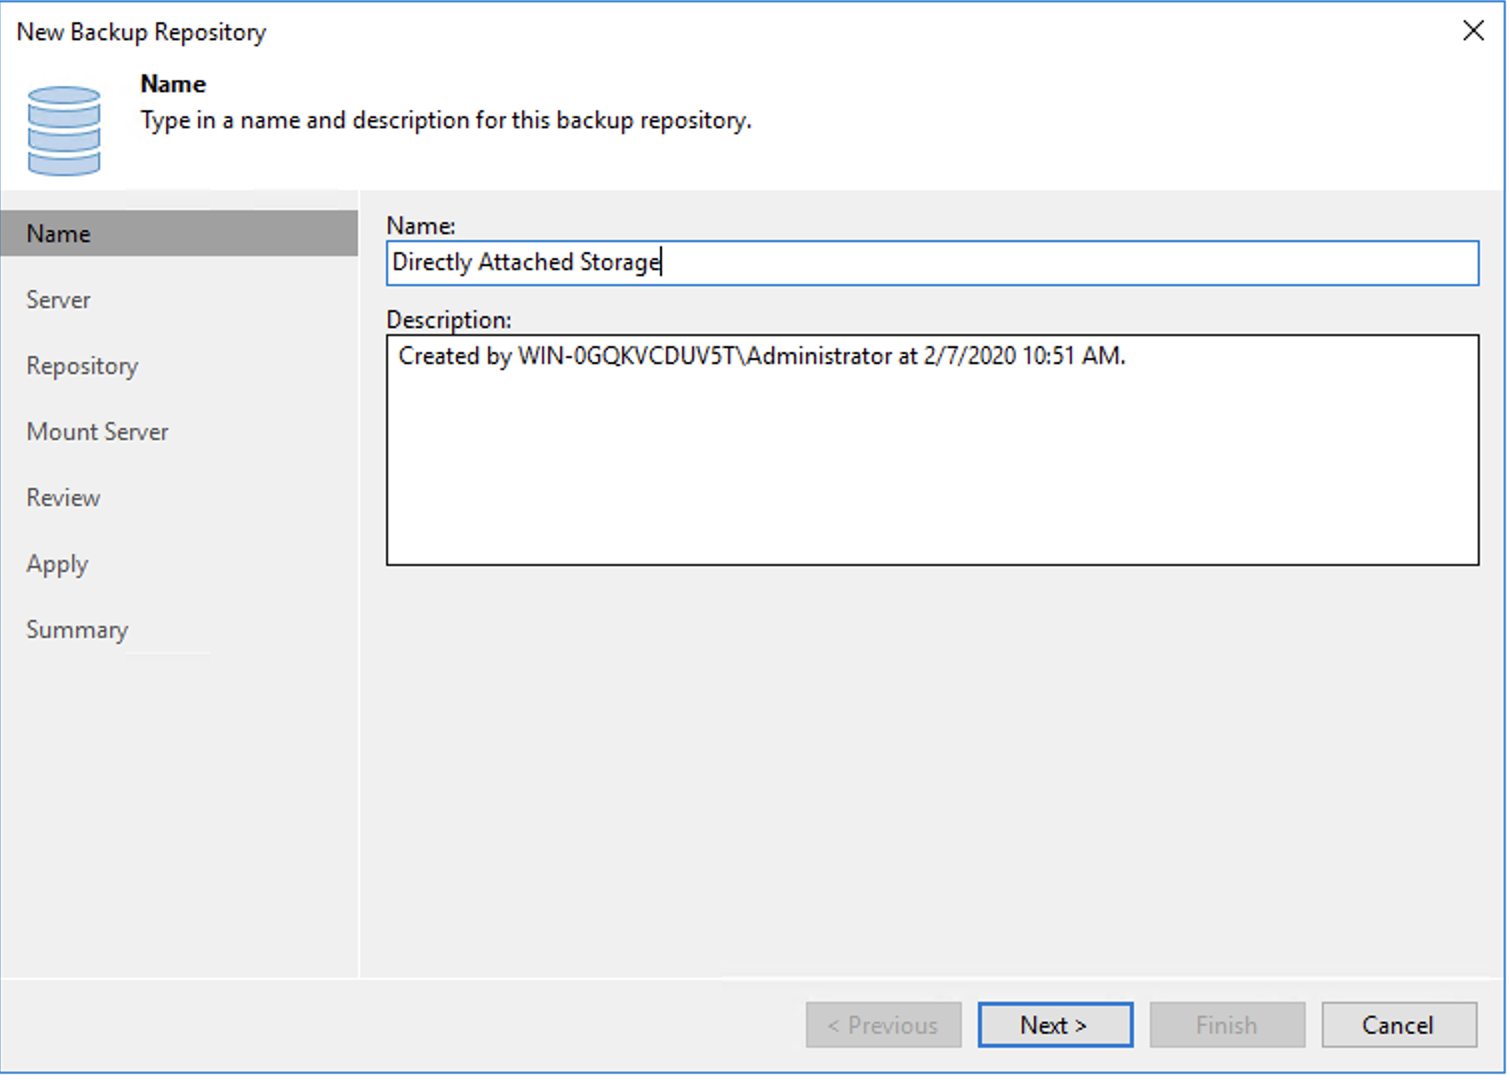
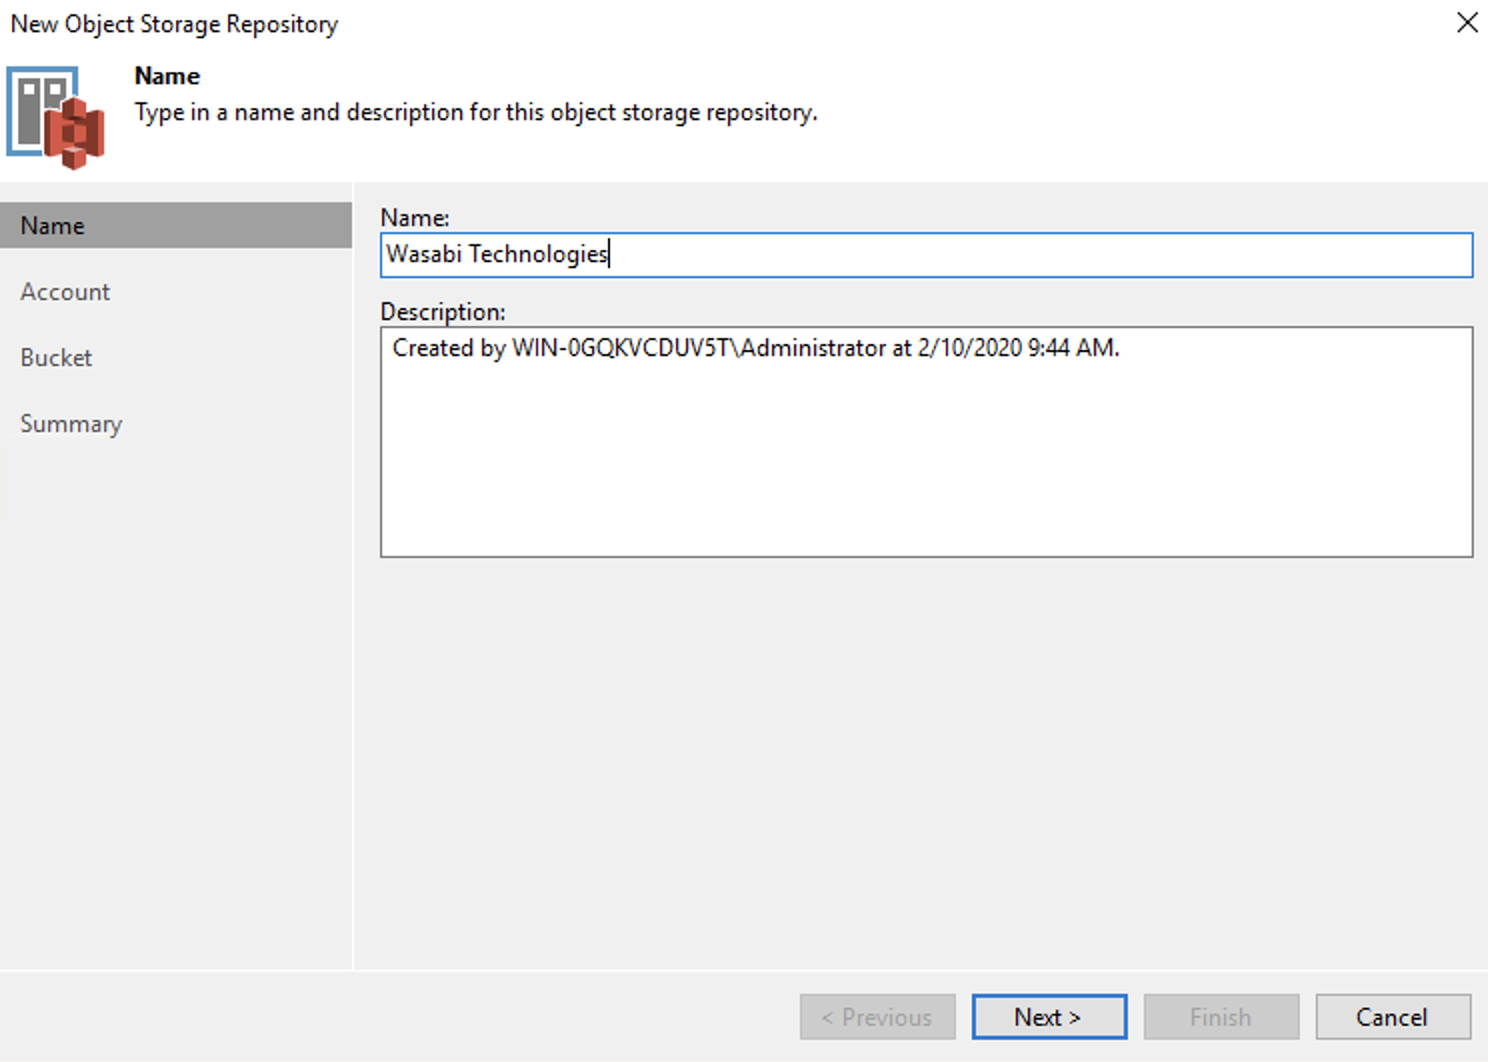
Input a Name and Description. Click Next.
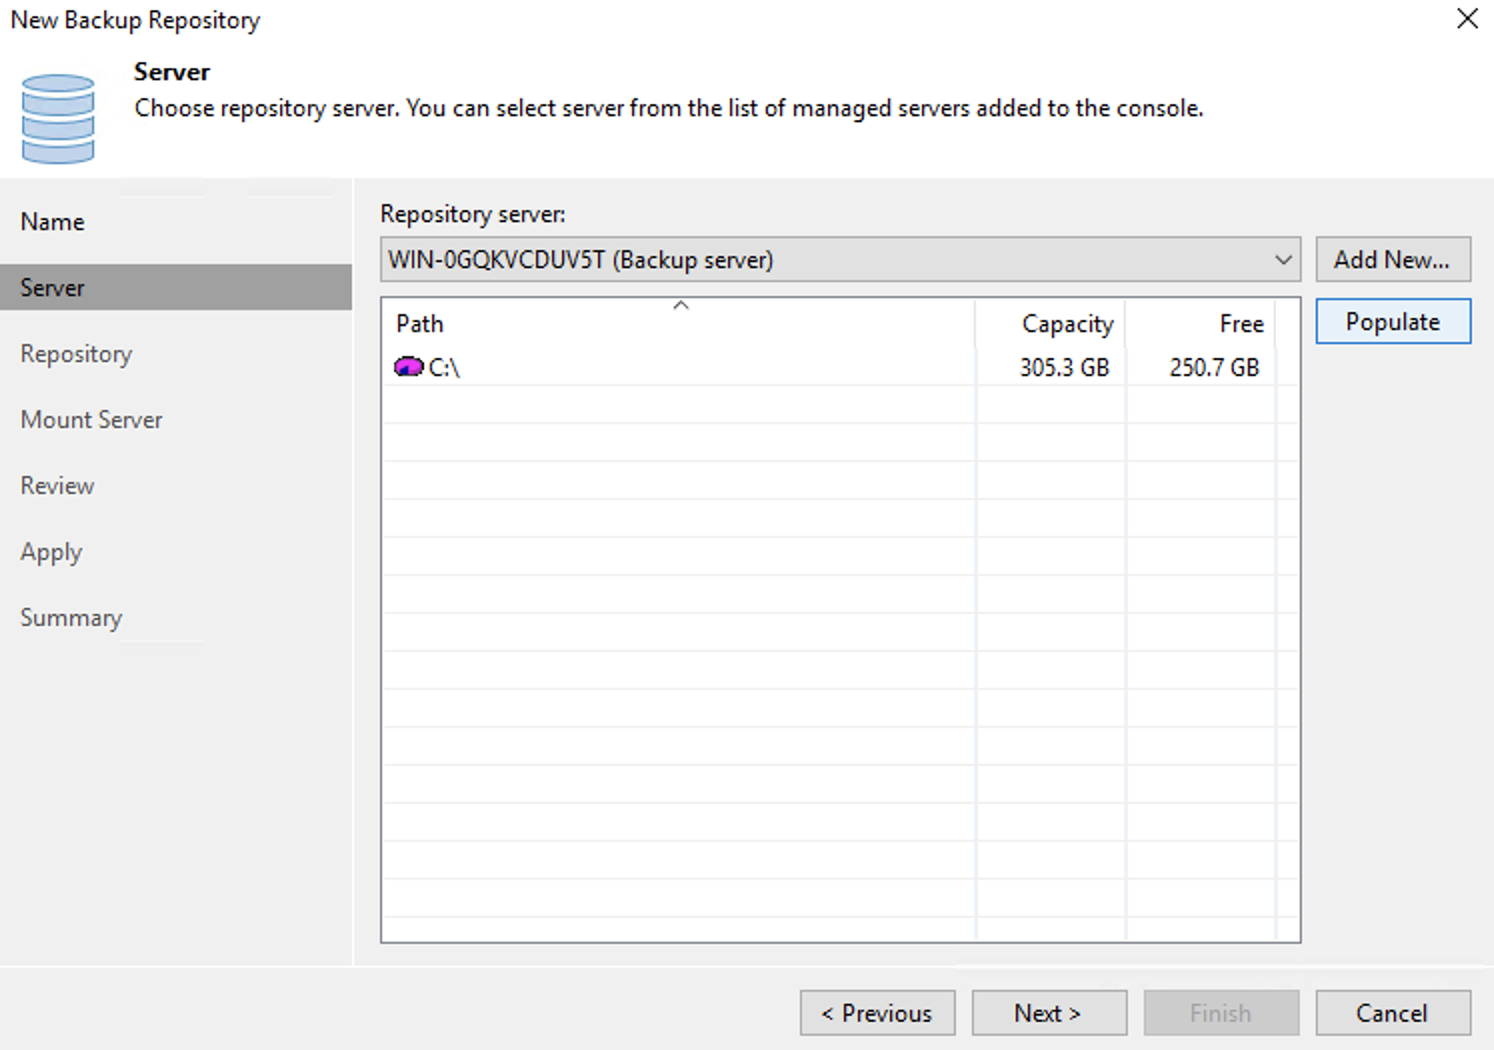
Click Populate and choose your desired local storage drive.
In this case, we have a local OS drive C:\. We will be using C:\ for the Local Storage Repository.
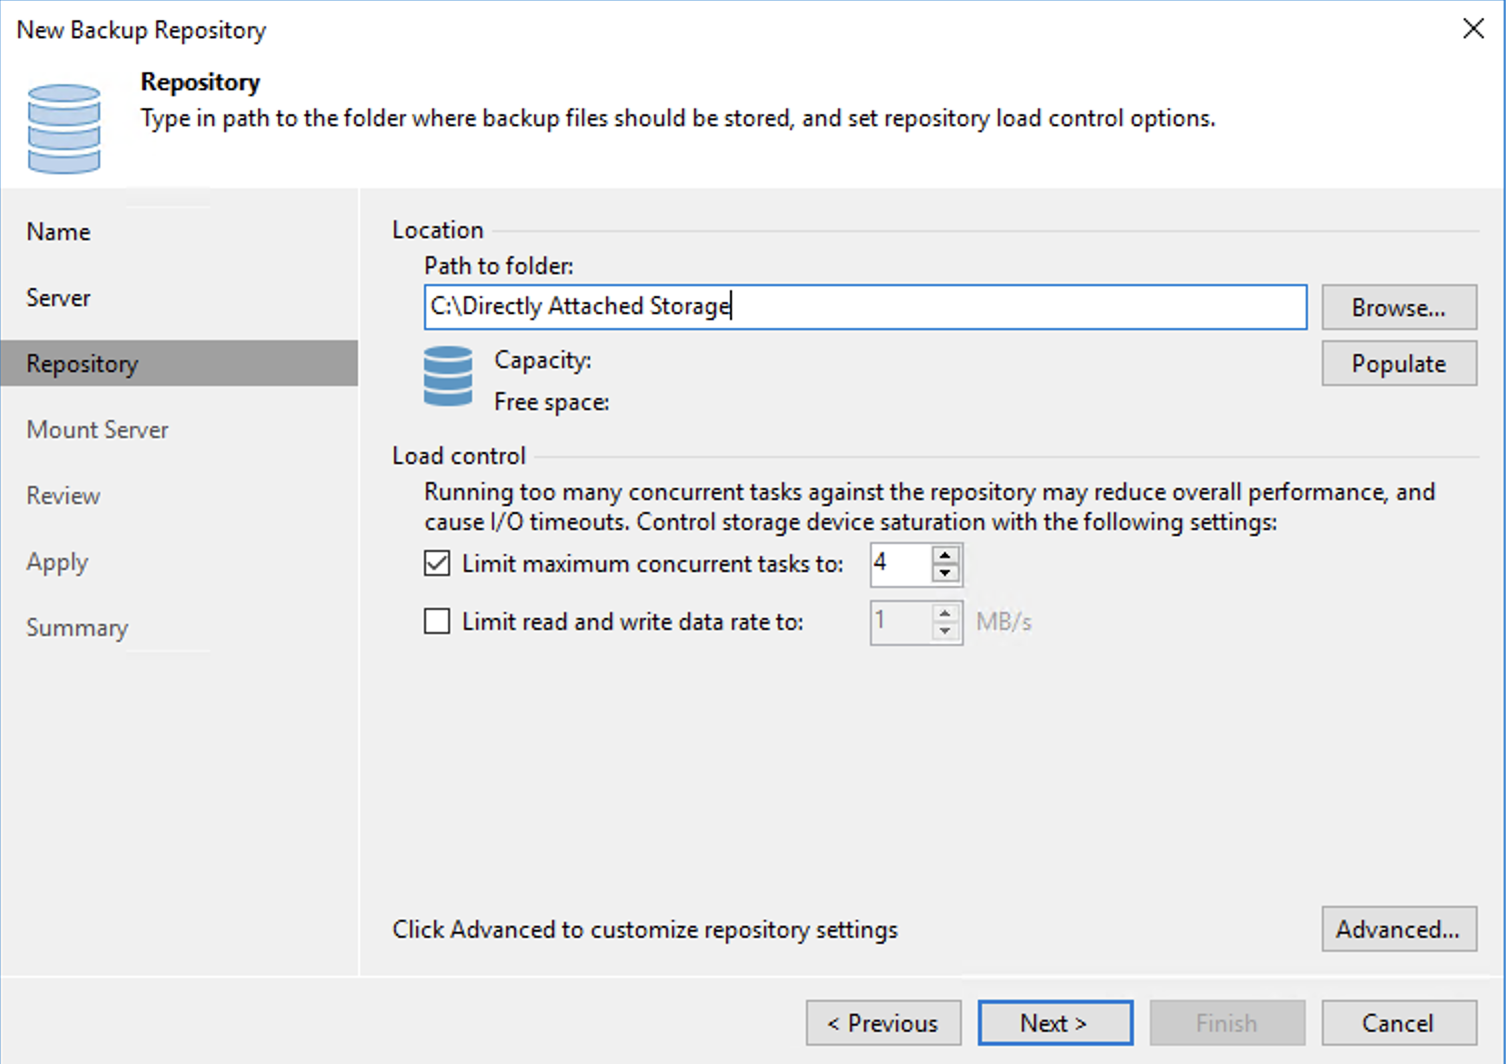
Input the path to the folder in which to use.
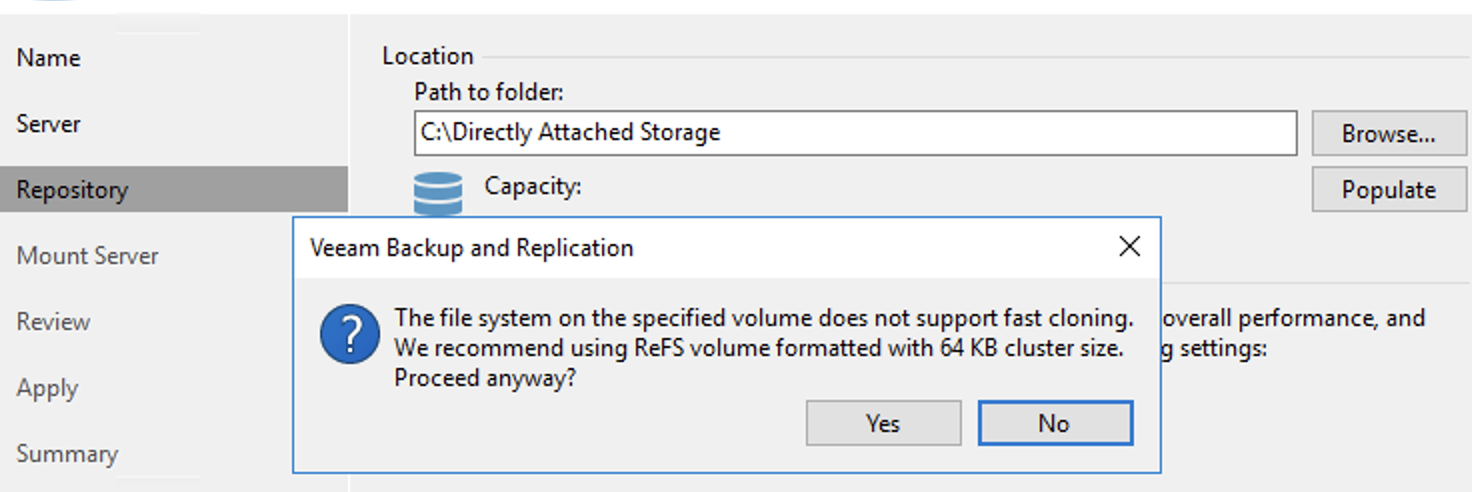
If you receive a question about recommending using ReFS formatted with 64K cluster size, click Yes to proceed. This may or may not appear, depending on the formatting of the drive you had chosen.
Choose the default settings for Mount server, Review, and Apply. Click Next.
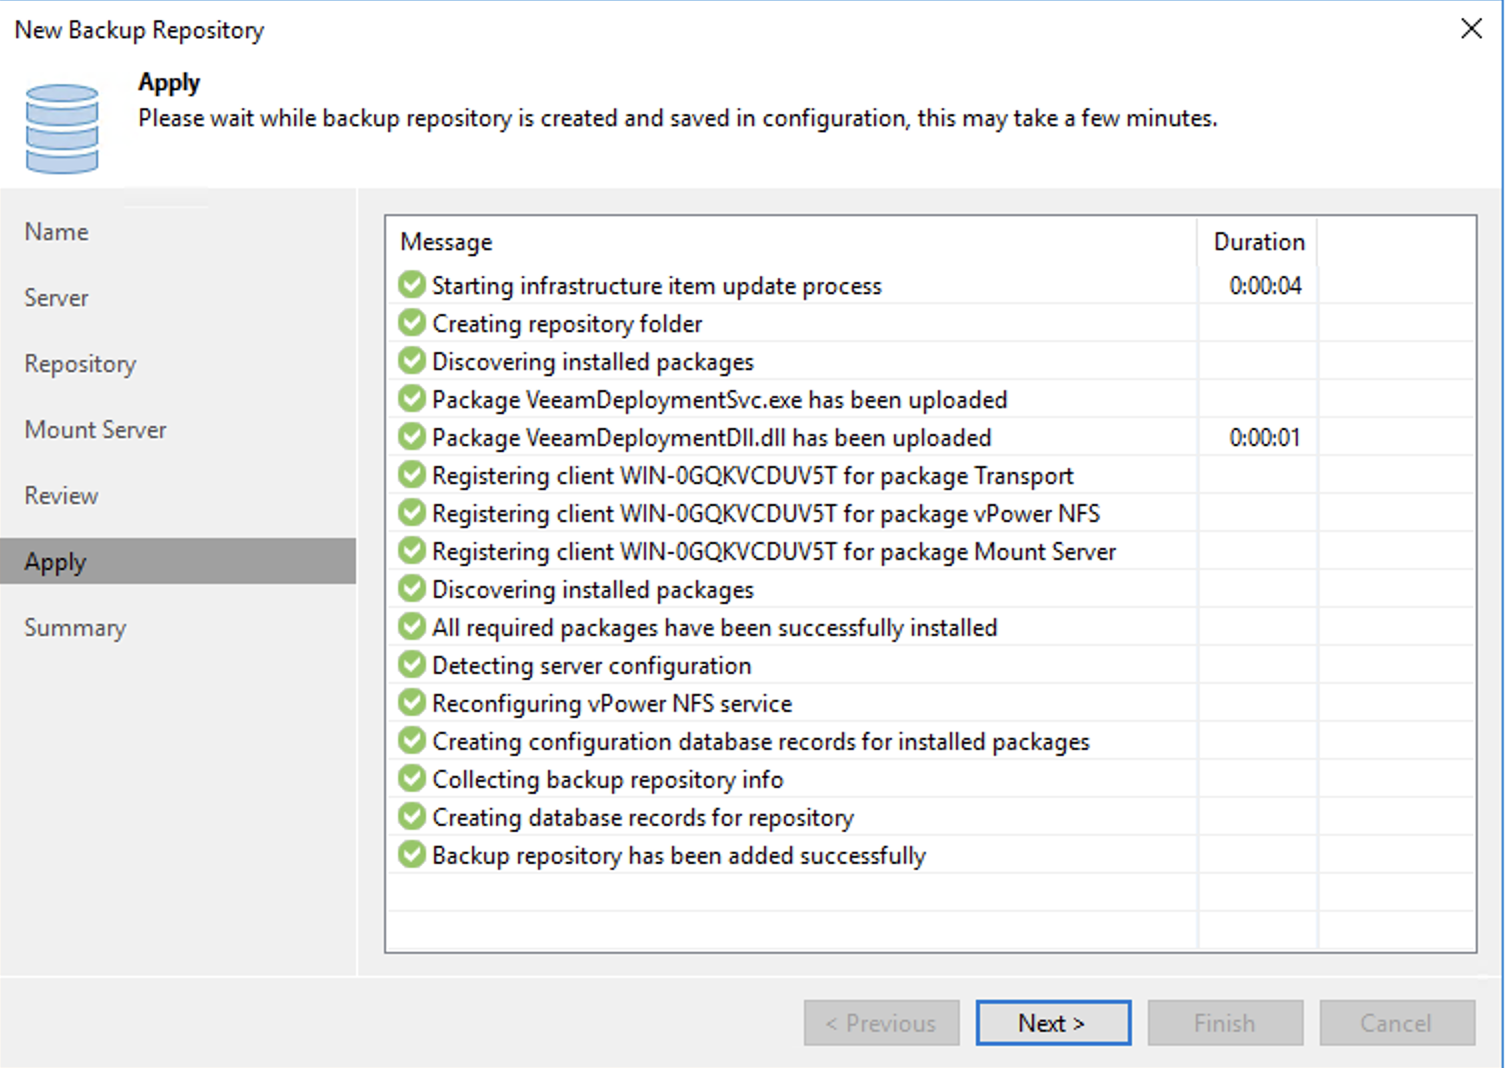
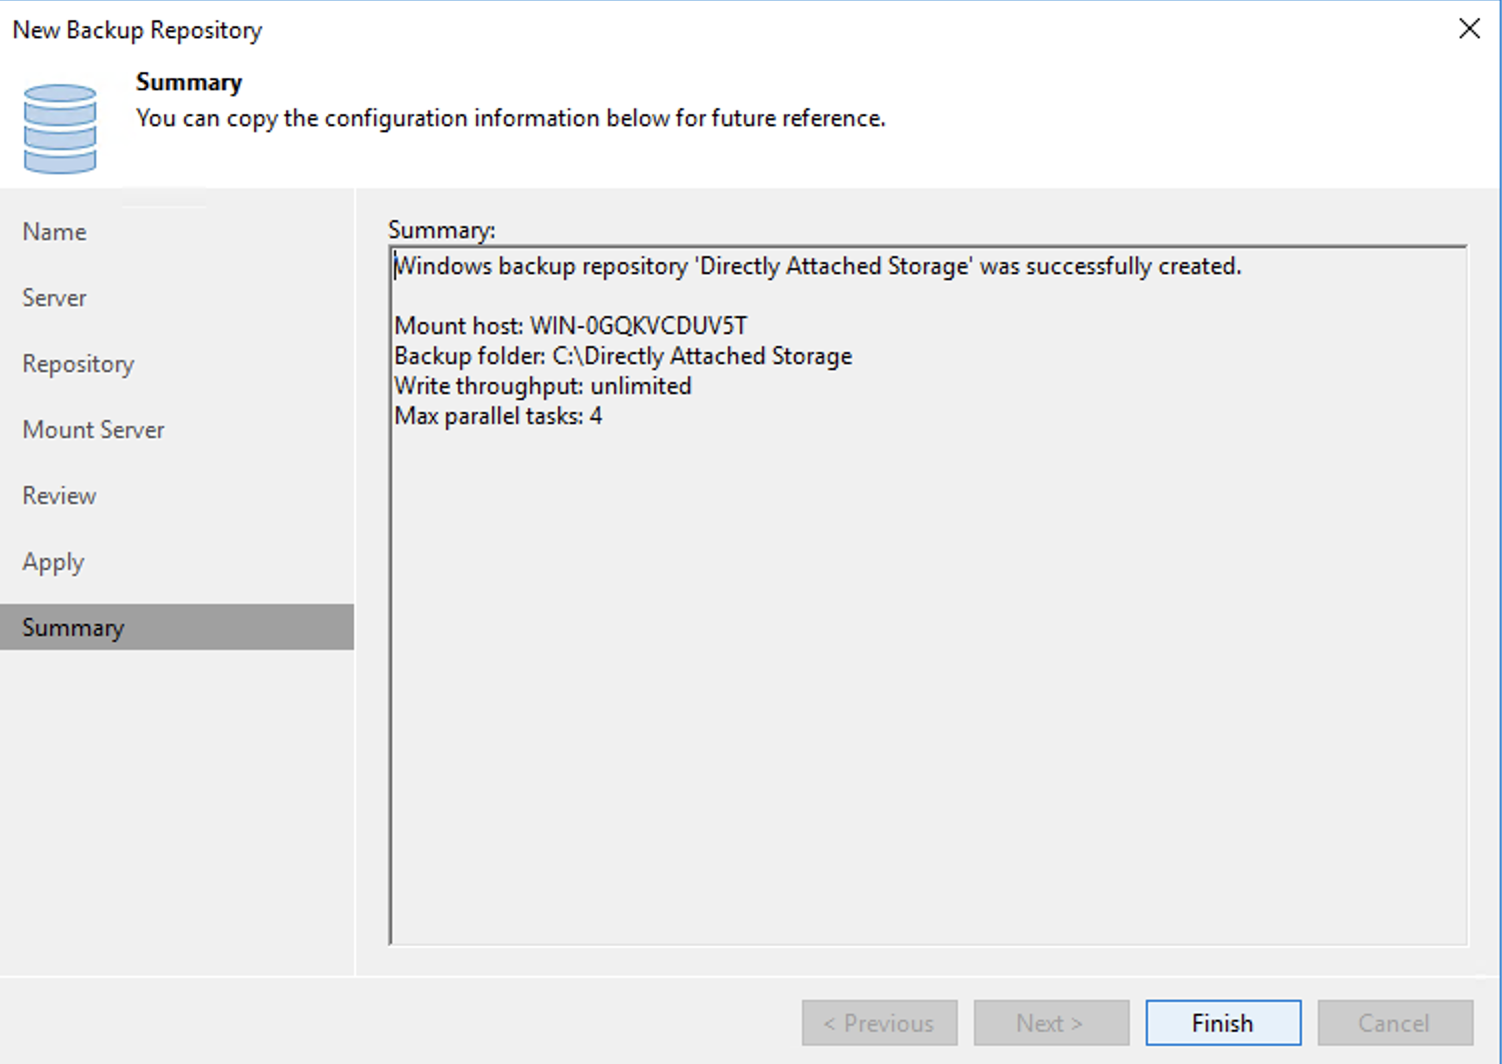
On the Summary page, click Finish.
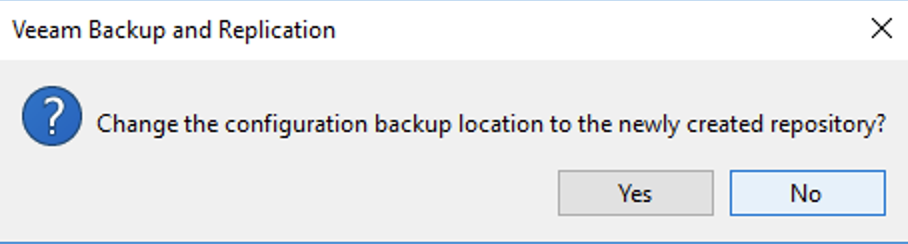
In the Veeam Backup and Replication pop-up window, click No to decline changing the configuration backup location to the new repository.
A backup repository containing a "Configuration Backup Job" (the backup of Veeam's configuration and settings), cannot be a part of an SOBR. Therefore, you do not want to use the newly created local repository as the target for the "Configuration Backup Job".
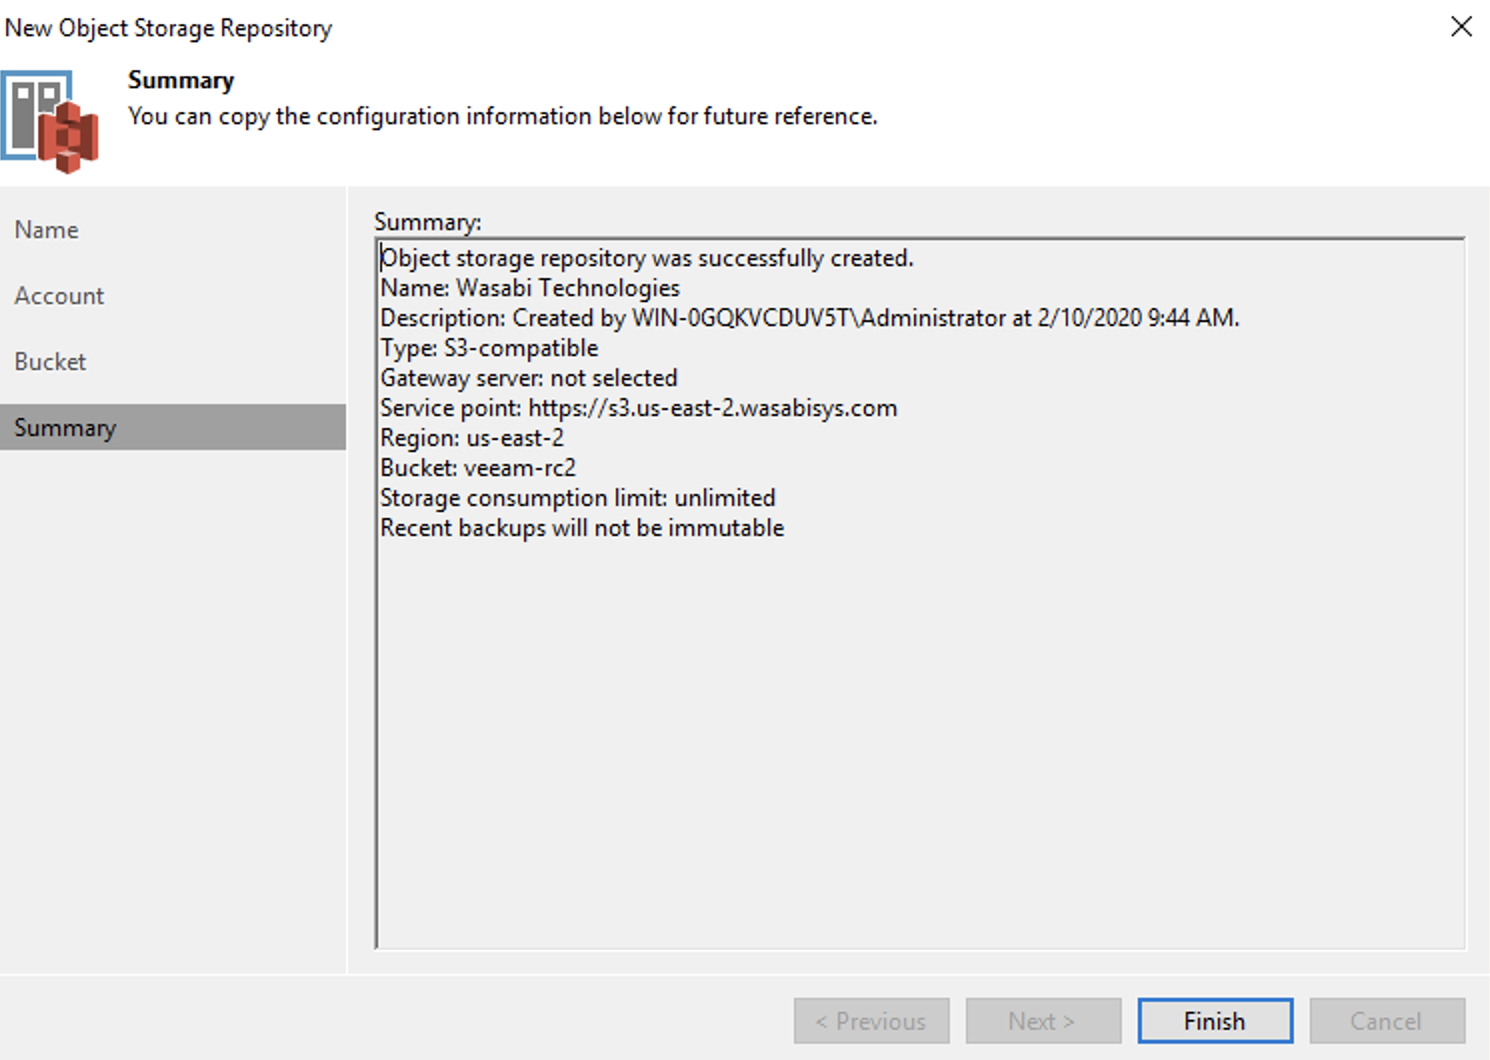
Adding Wasabi as a Backup Repository
This section lists the steps to create the configuration for the actual Wasabi Hot Cloud Storage Repository. It is the only place you will be interacting with Wasabi in the configuration process. You will need to have already created a Wasabi Bucket, and you will need both your Access Key and Secret Key for your Wasabi account.
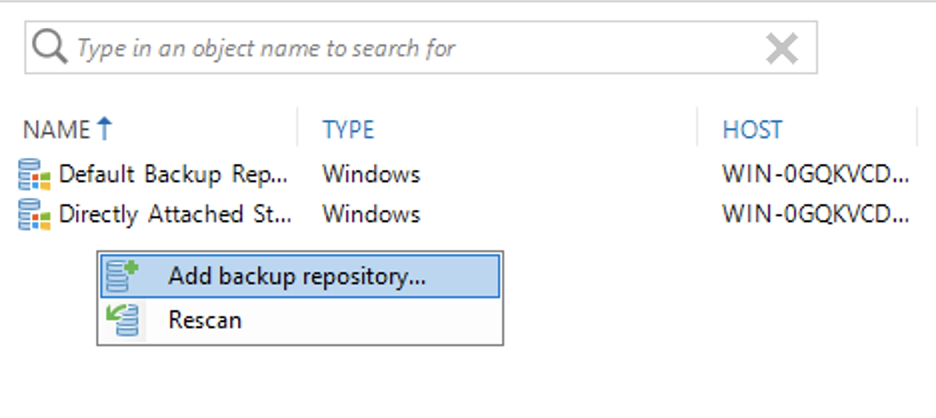
Right-click on the Backup Infrastructure page. Click Add Backup repository....
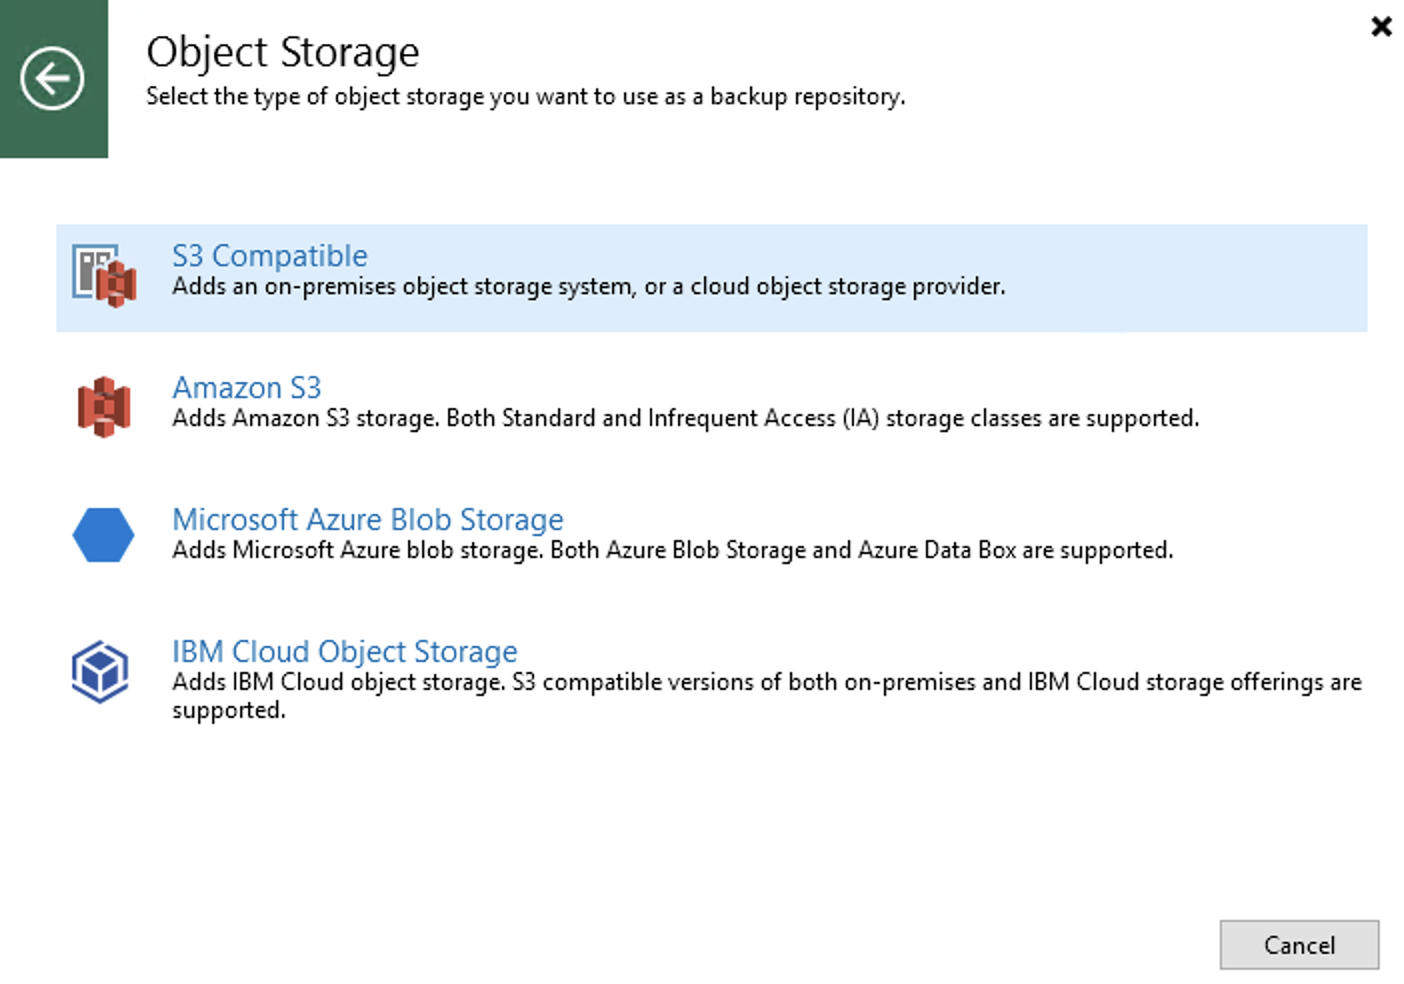
Click Object Storage.

Click S3 compatible.
Input a Name and Description.
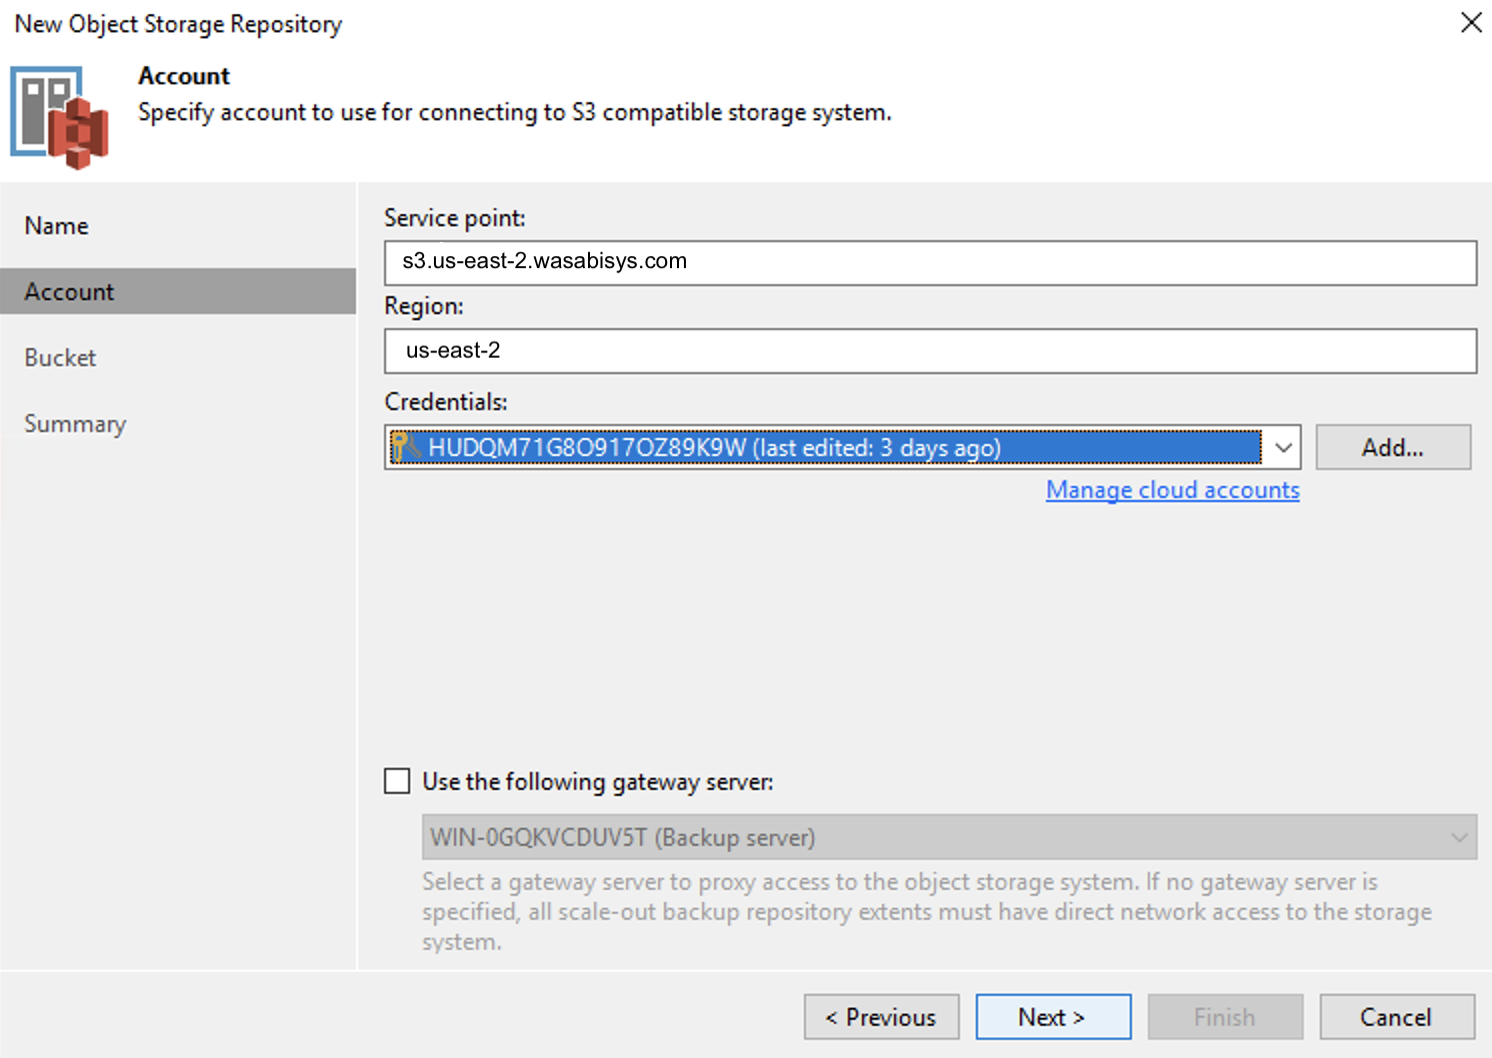
Input the following information:
Service Point: s3.us-east-2.wasabisys.com
Region: us-east-2
Credentials (Your Access key and Secret Key)
This configuration example discusses the use of Wasabi's us-east-2 storage region. To use other Wasabi storage regions, use the appropriate Wasabi service URL as described in Wasabi Service URLs.
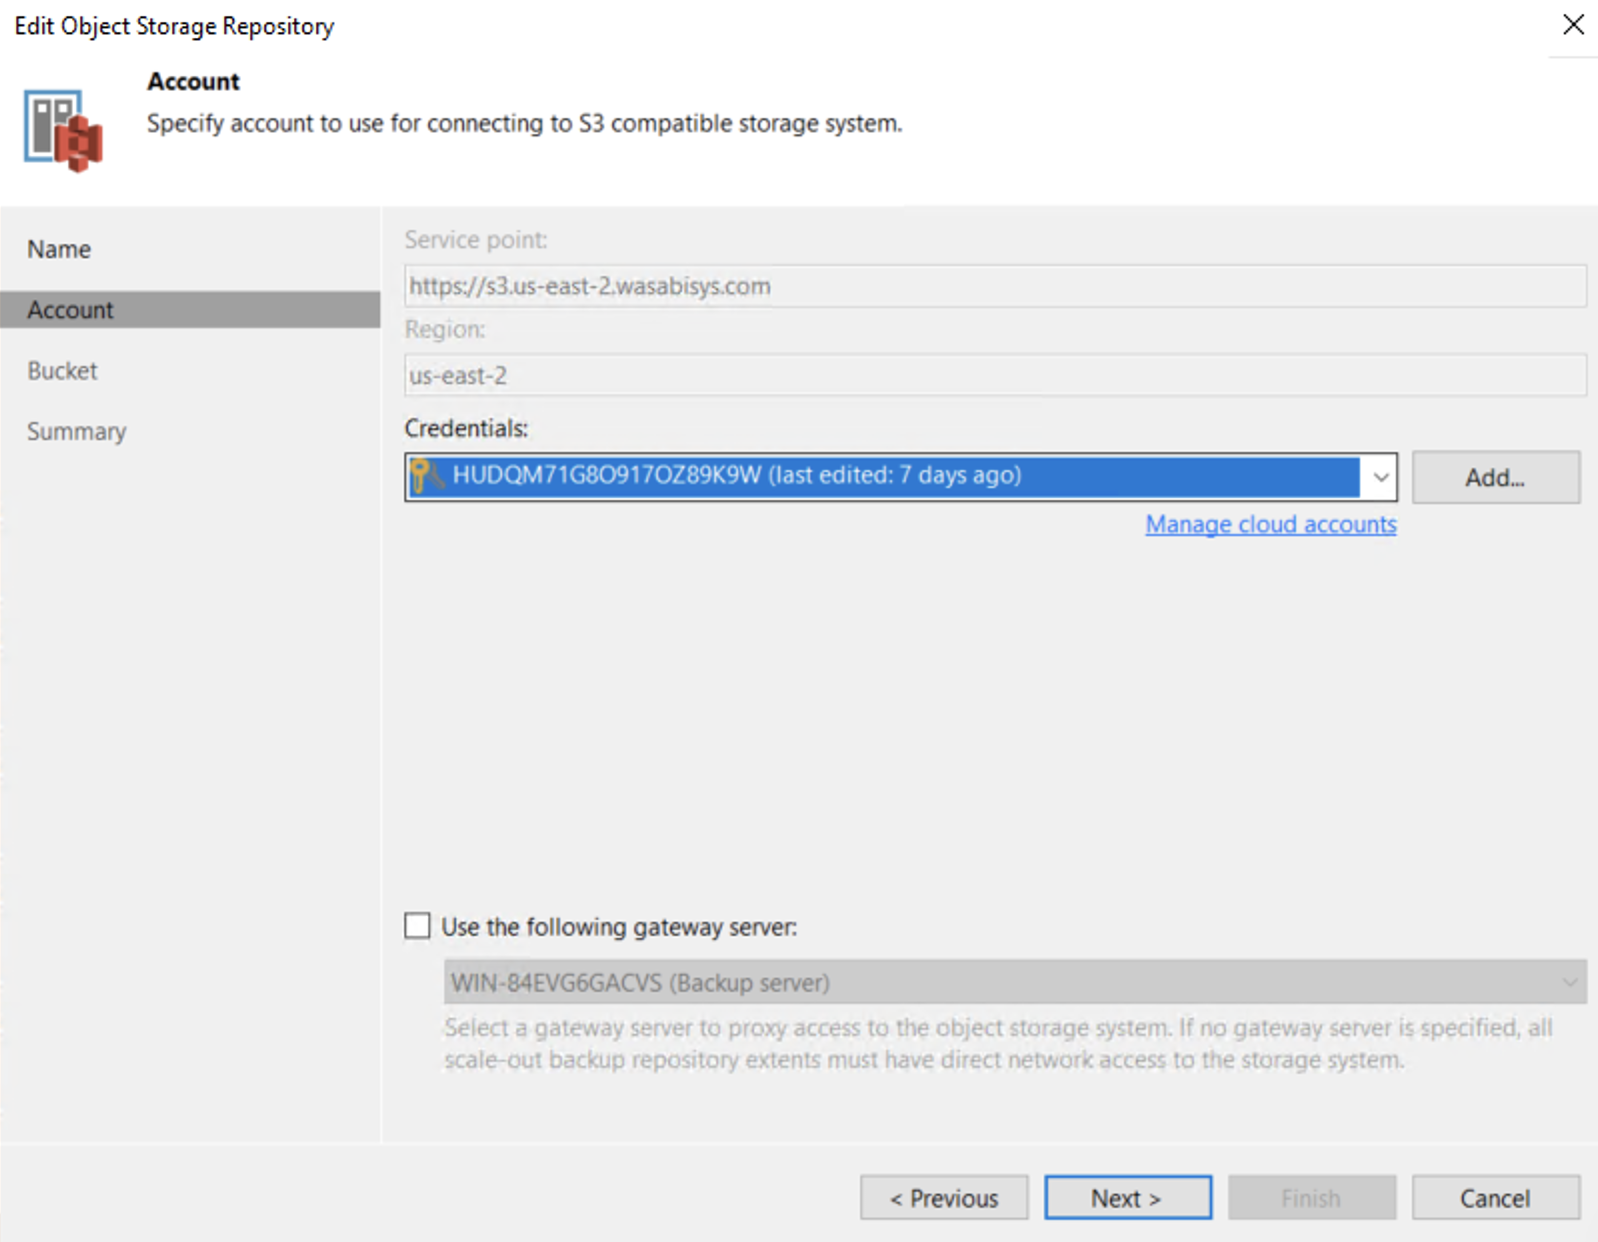
Once you have input your Access & Secret Keys, click Next.
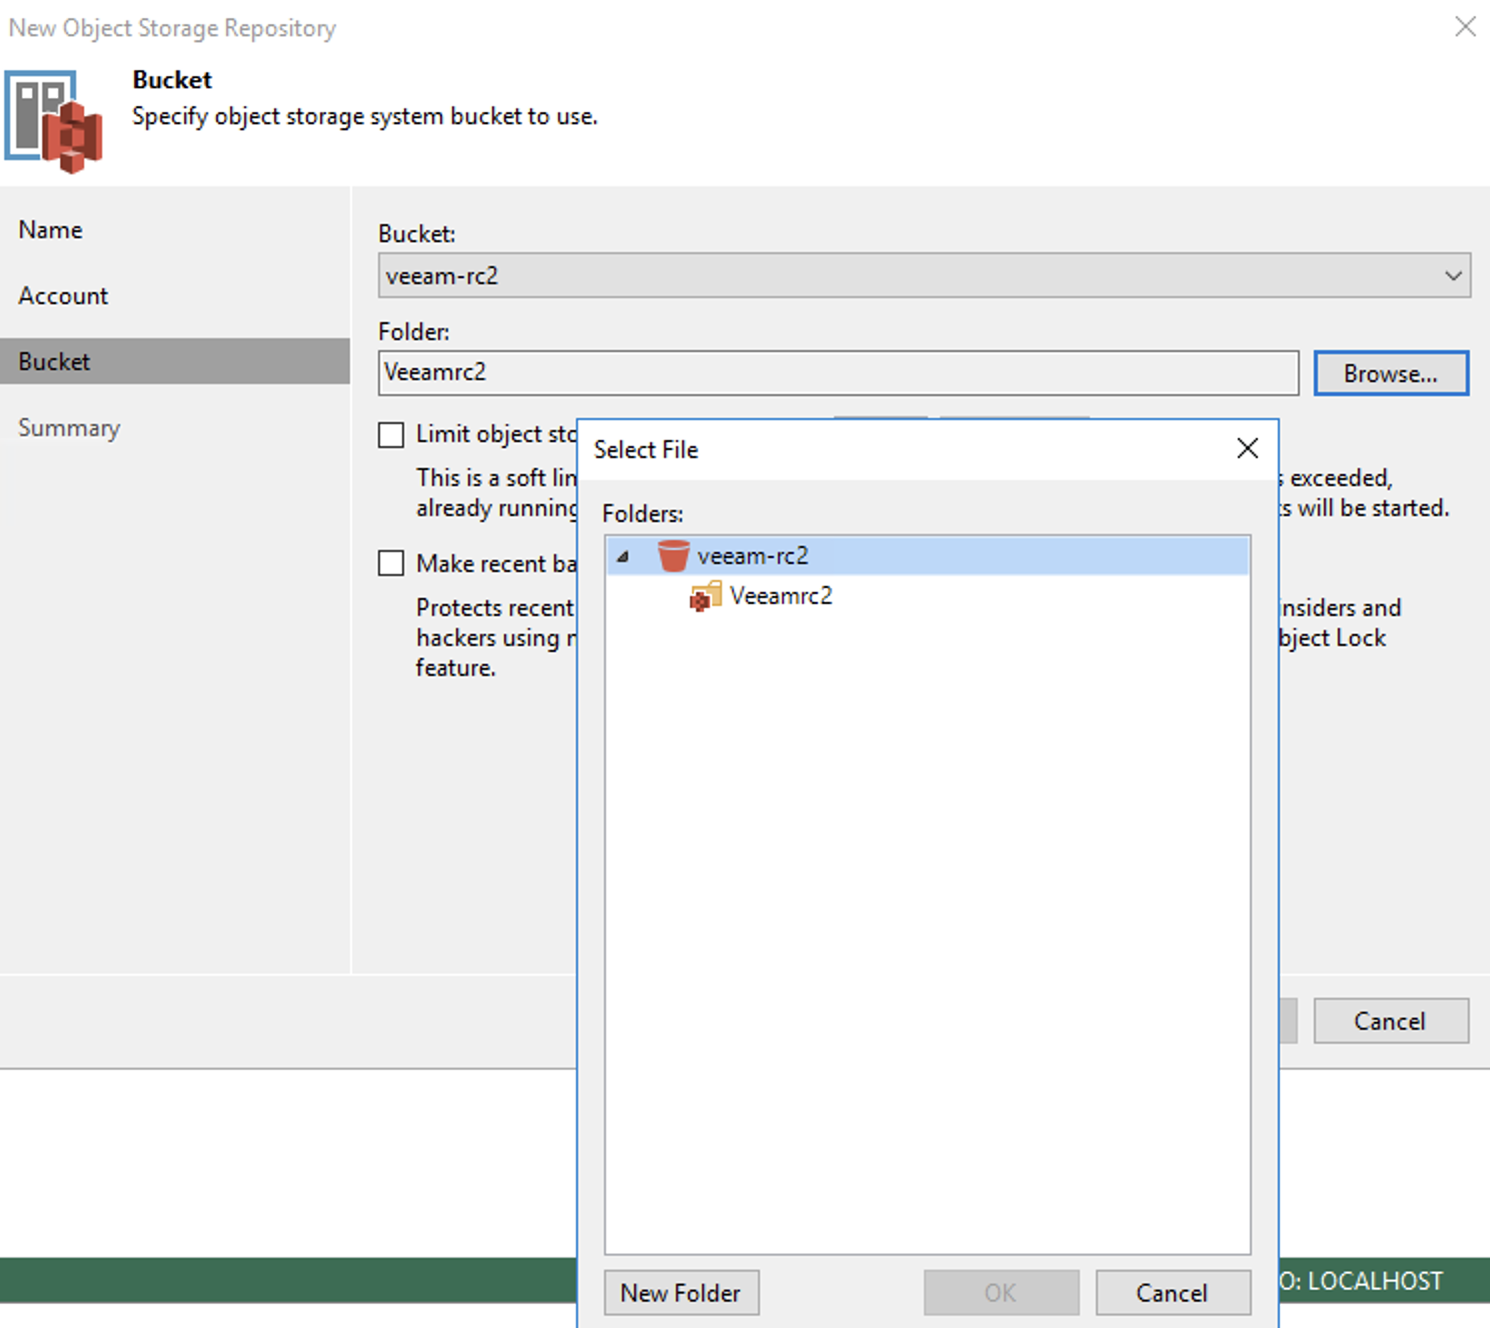
Choose an existing bucket and create a new folder by clicking on Browse. Click New Folder.
Review the Summary page and click Finish.
If you want to leverage Veeam with Immutable Object Storage, refer to the Veeam Object Lock Integration guide, as you will have created a bucket with Object Lock support.
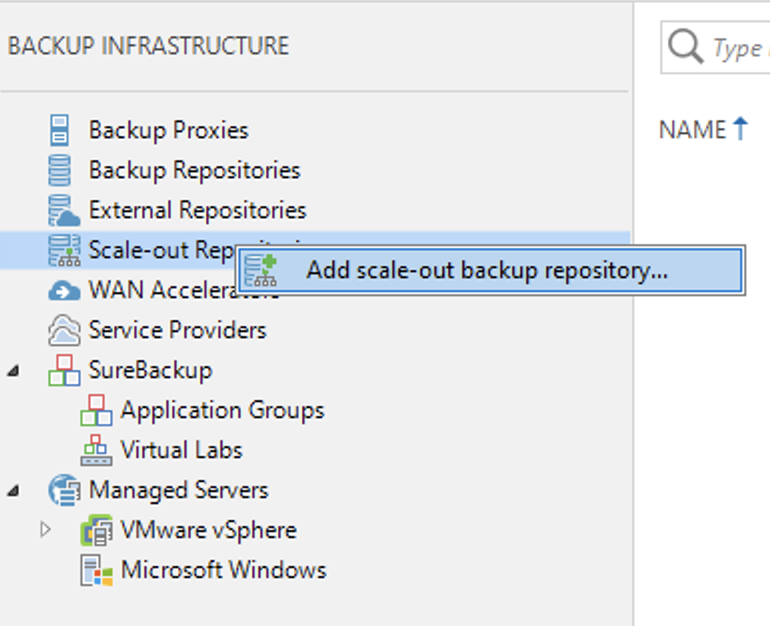
Creating a Scale Out Repository
This section lists the steps to create a Scale-Out Backup Repository (SOBR). In Veeam terms, this is a combination of a Performance Tier Repository and a
Capacity Tier Repository. They work in conjunction as follows: First, the backups are created directly to the Performance Tier Repository. Once the backups are created, they are copied or moved over to your Capacity Tier Repository, depending on your settings. You must always have sufficient storage space in your Performance Tier Repository to meet your backup requirements.
Right-click on Scale-out Repositories. Click Add scale-out backup repository....
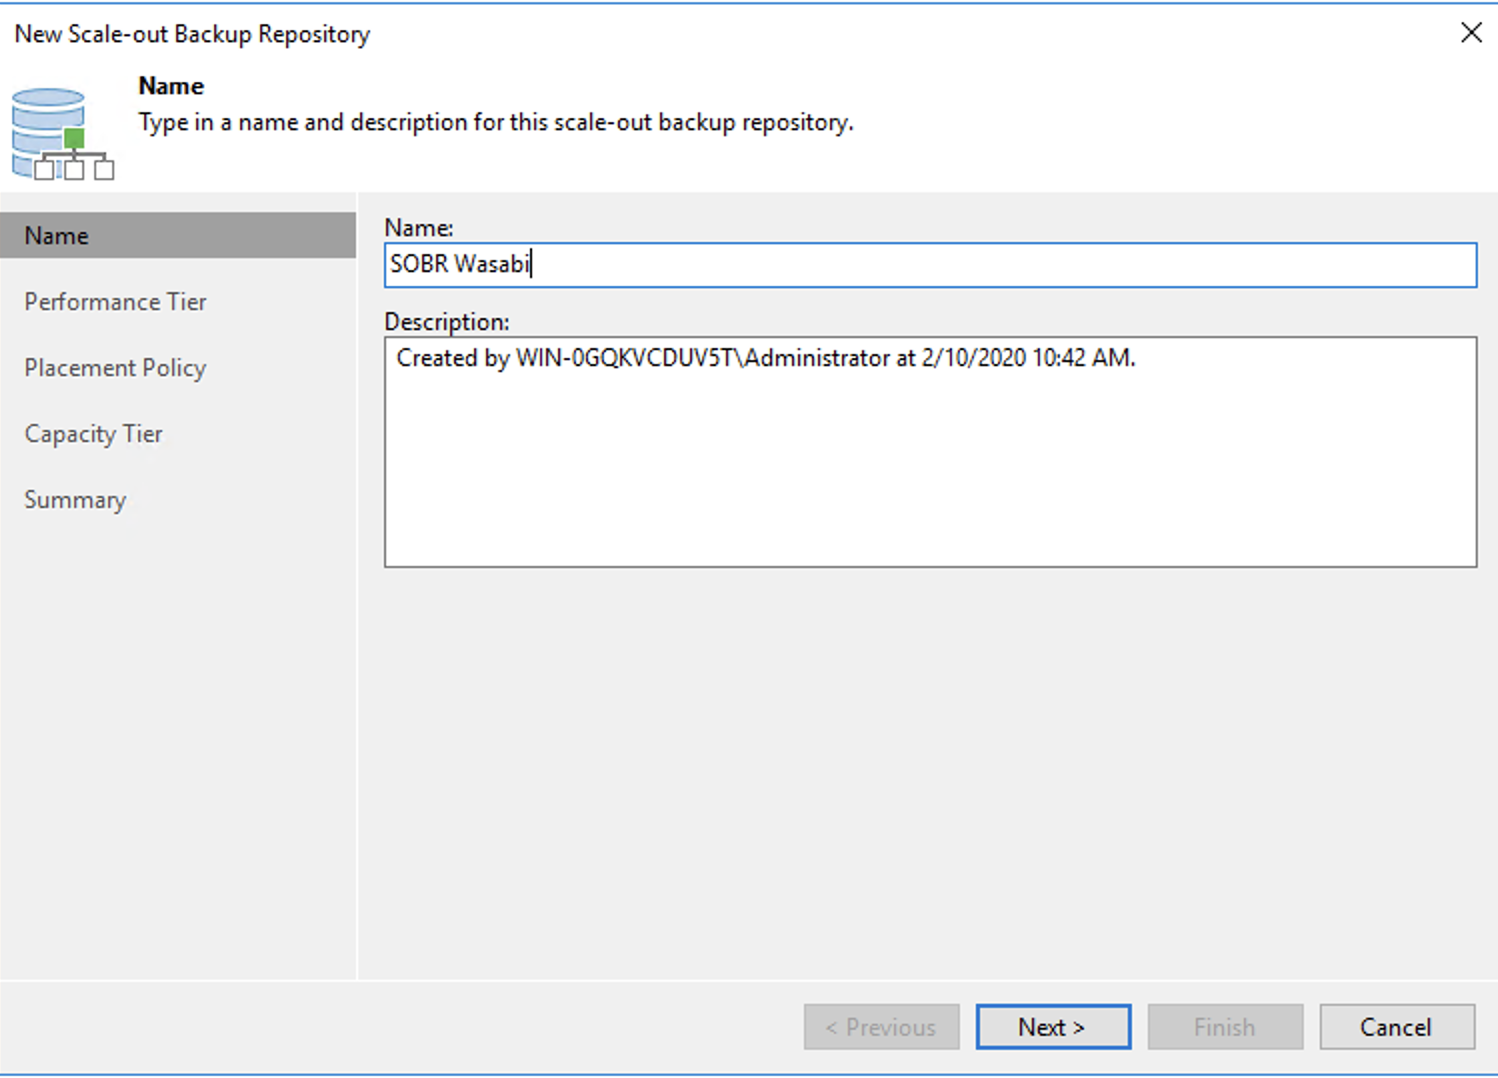
Input a Name. Click Next.
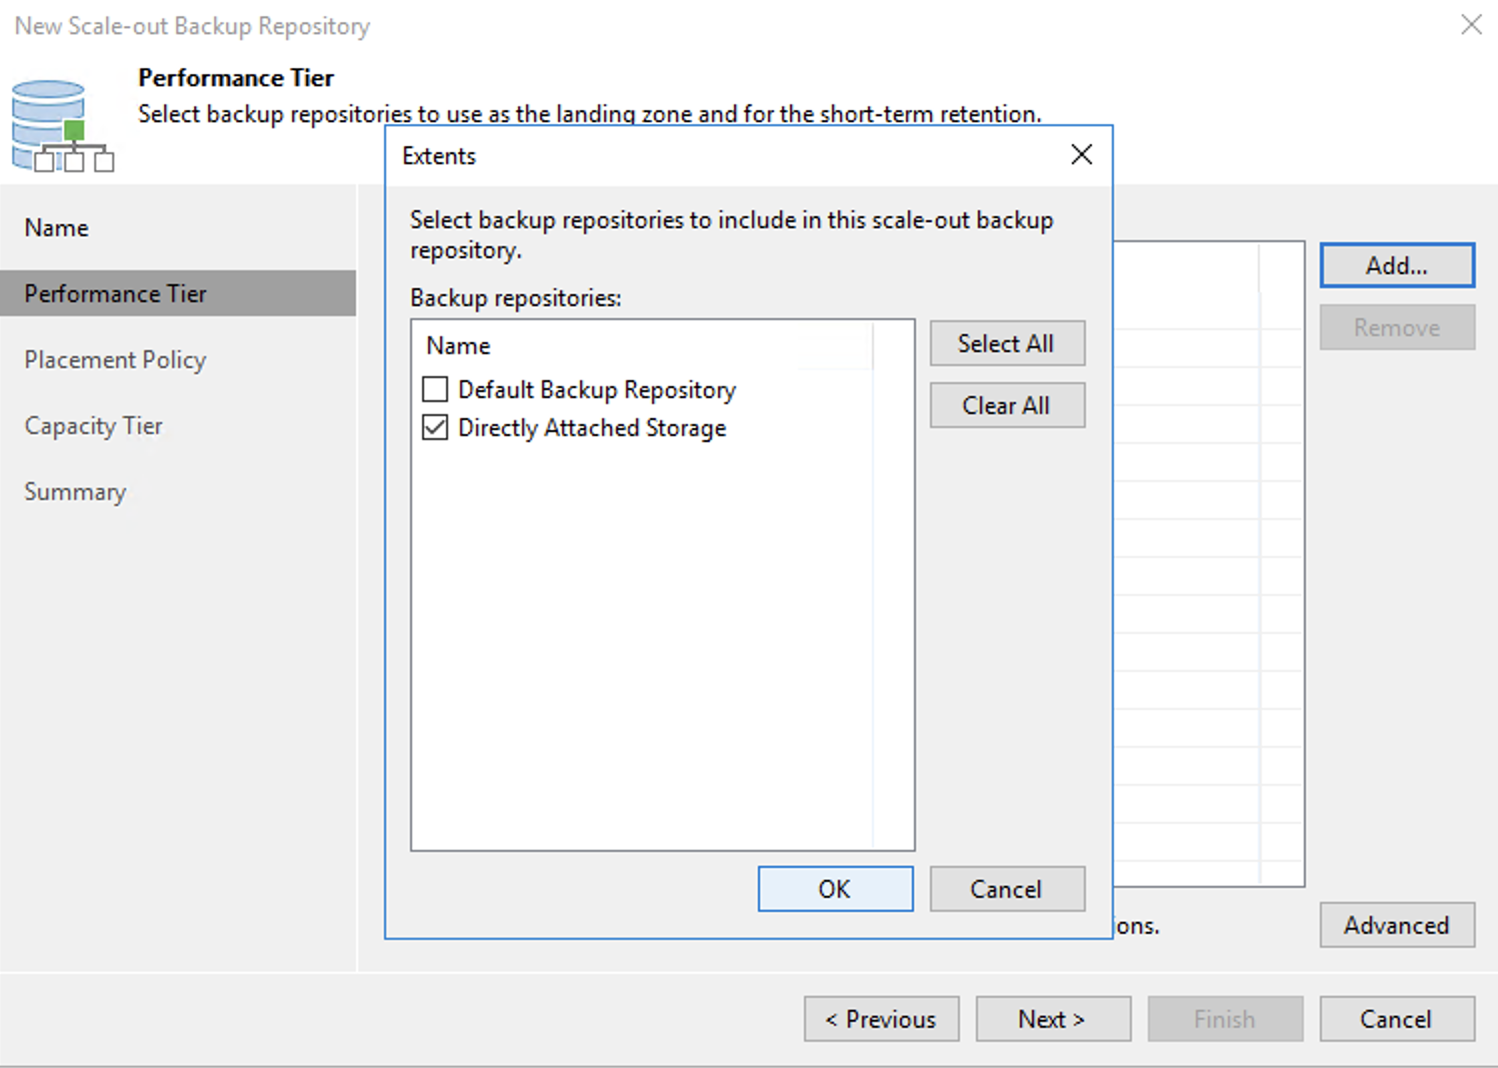
In the Performance Tier section, click Add. Click the checkbox next to the previously created Performance Tier Local Storage Repository. Click Next.
In this instance, we previously created "Directly Attached Storage", so we checked the box next to that.
CAUTION: You will not be able to continue if you select Default Backup Repository. This is the default repository where Veeam keeps its local configuration backups. This is why we needed to create a new Local Repository to use for Wasabi.
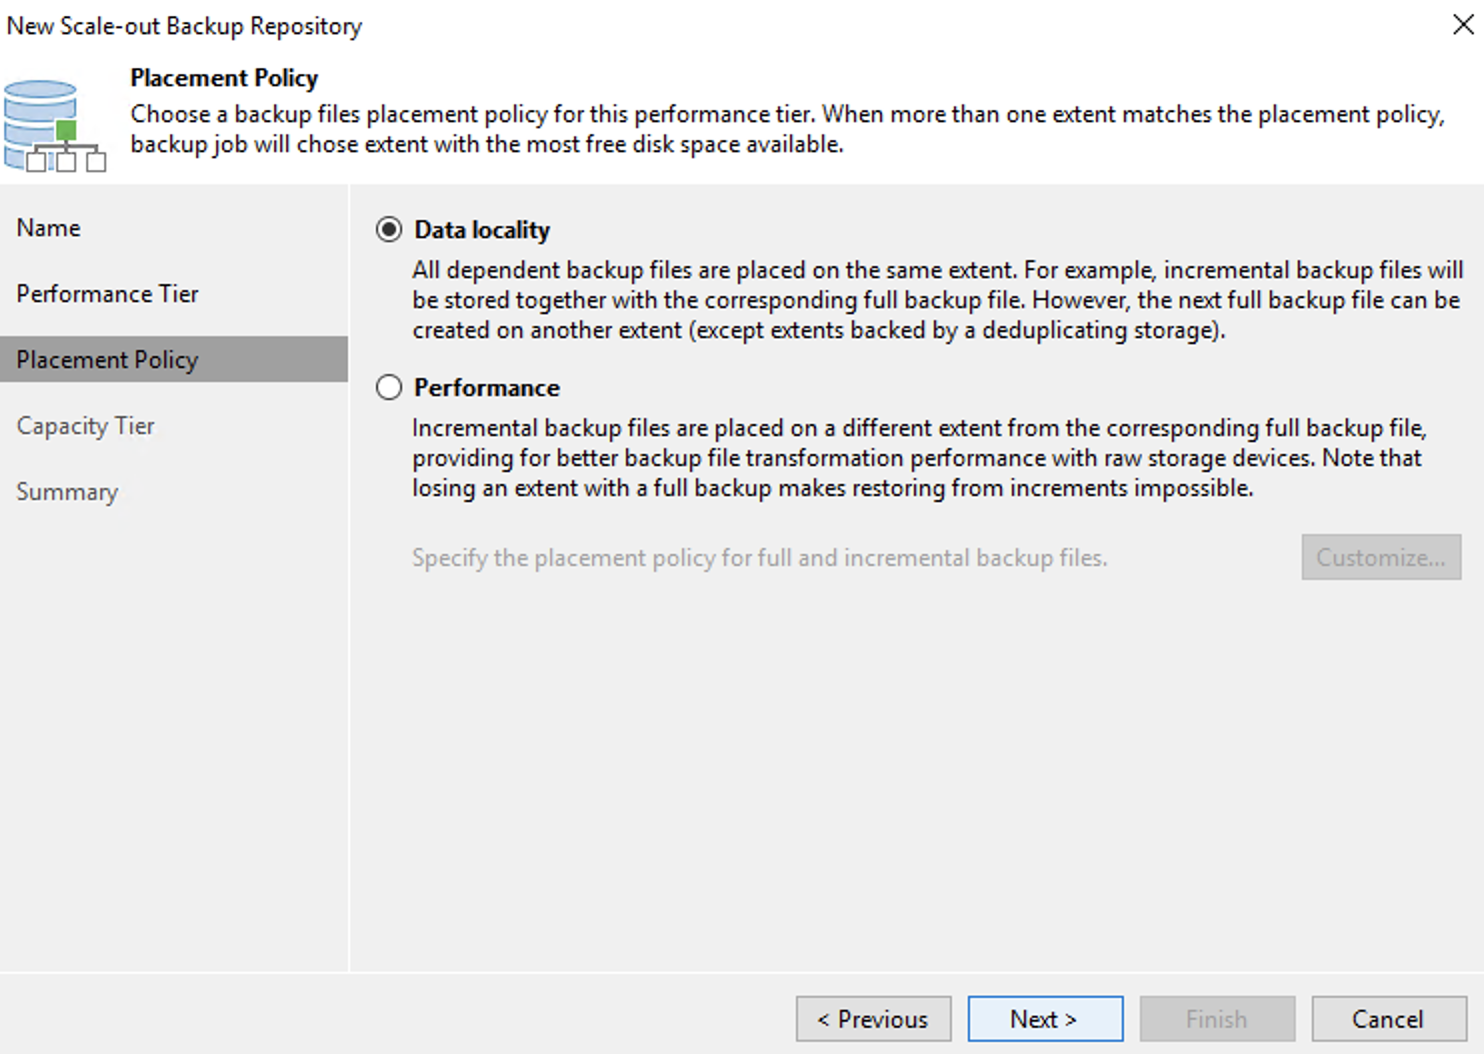
Select the default values for Placement Policy. Click Next.
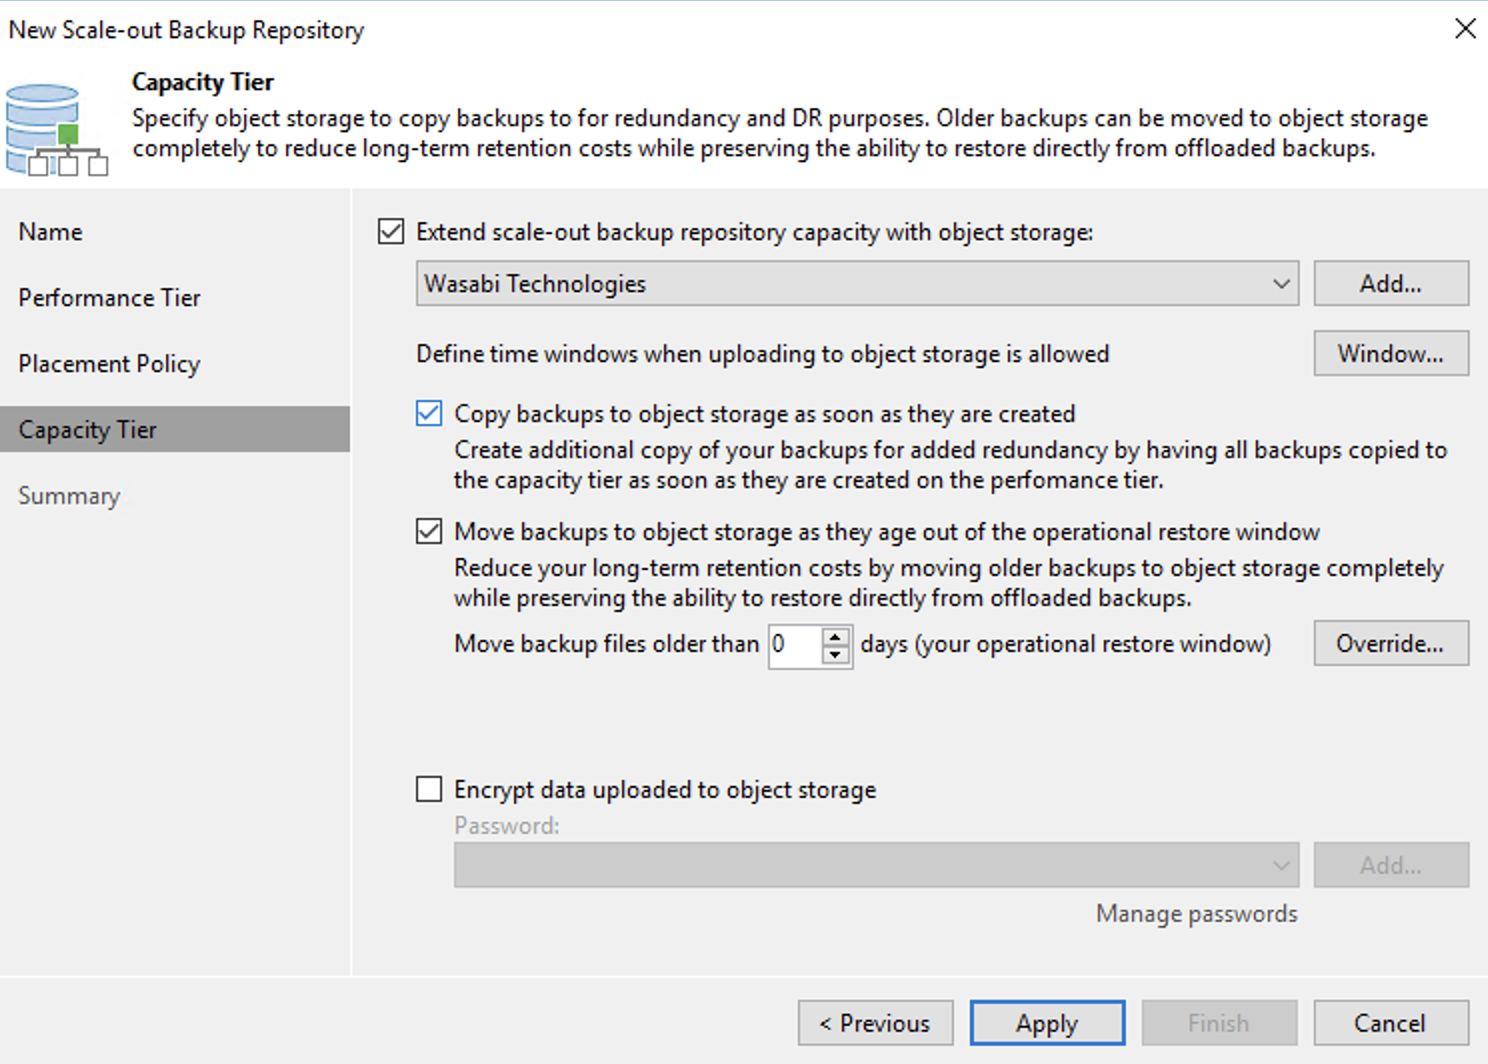
On the Capacity Tier configuration page, click the checkbox to Extend scale-out backup repository capacity with object storage. From the drop-down menu, choose the Wasabi Hot Cloud Storage Repo that was previously created as a Capacity Tier Repo.
Optionally, select one or both of the following options, depending on business needs.
Copy backups to object storage as they are created. Checking this box this will immediately copy any backups made into Wasabi Hot Cloud Storage.
Move backups to object storage as they age out of the operational restore window. Change the days to fit your needs. Checking this box will move backups off local storage after the active backup chain has been sealed, and the backup files are older than X days.
Selecting this option by itself will not immediately move files into Wasabi. The backup chain must be sealed first, by creating an "Active Full Backup", or a "Synthetic Full Backup", then waiting for the operational window to pass, and finally, having the "SOBR Offload Job" run.
Encrypt data uploaded to object storage. By Checking this, Veeam will apply its own 3rd party encryption before sending objects to Wasabi.
Click Apply when you are done making configuration choices.
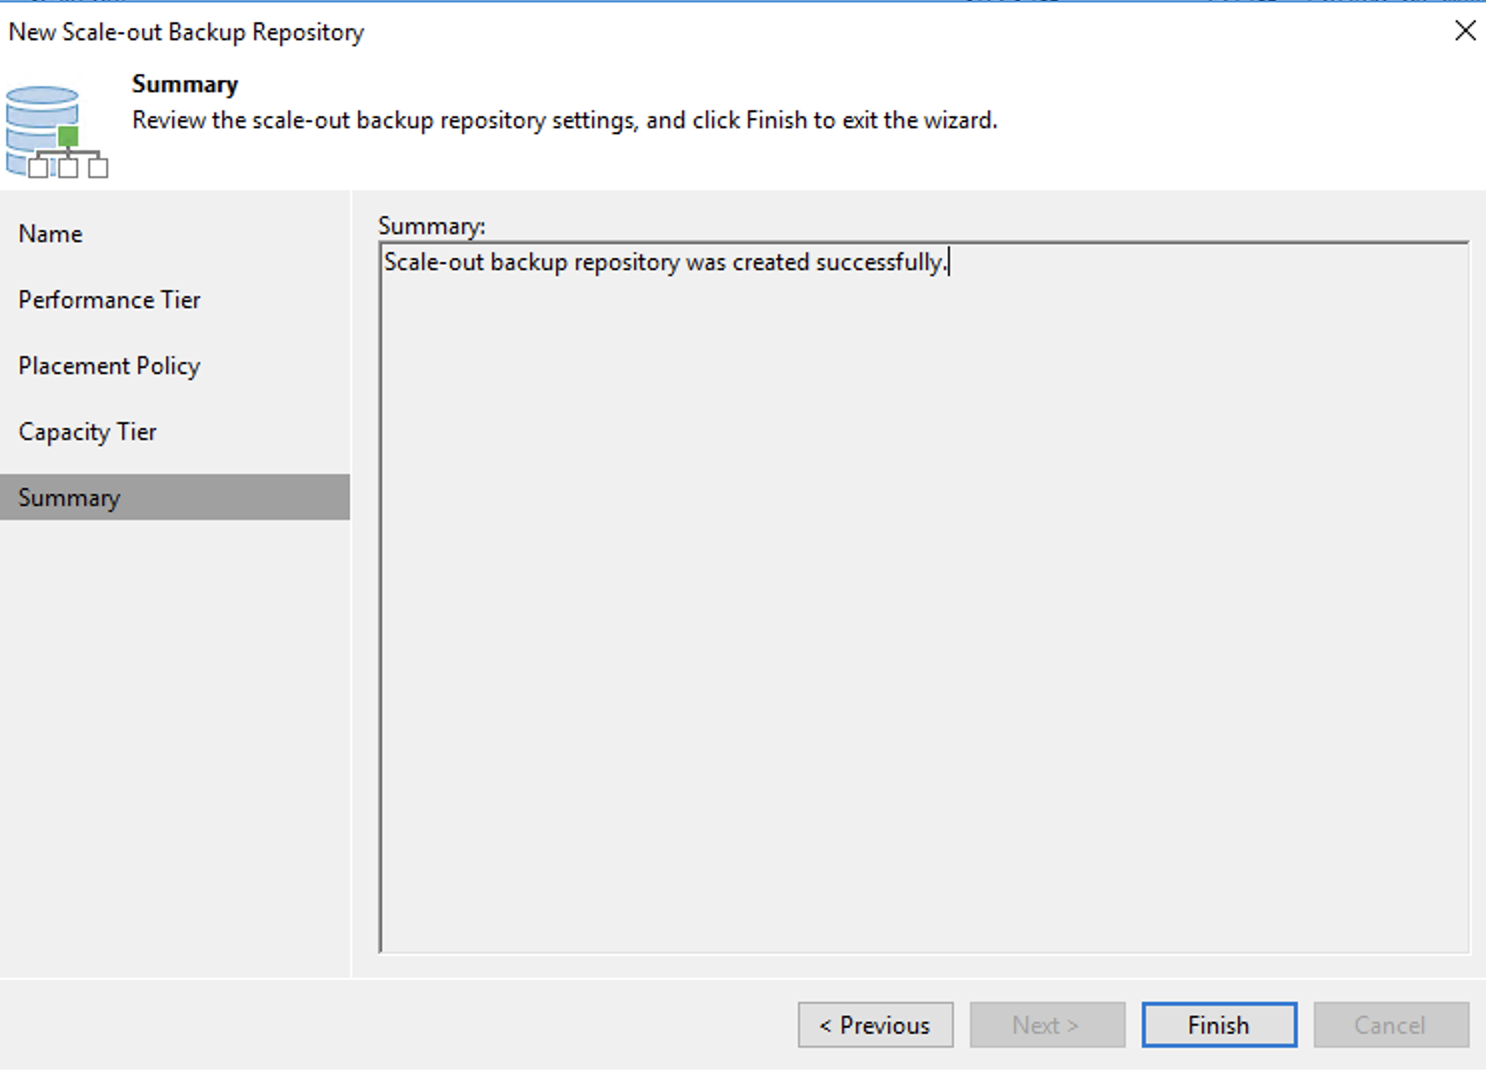
Review the Summary page. Click Finish.
Creating a Backup Job
This section lists the steps that allow you to create a new "Backup Job" which leverages the newly created SOBR to first run backups locally, then copy these backups to Wasabi based upon the selected settings in the SOBR configuration.
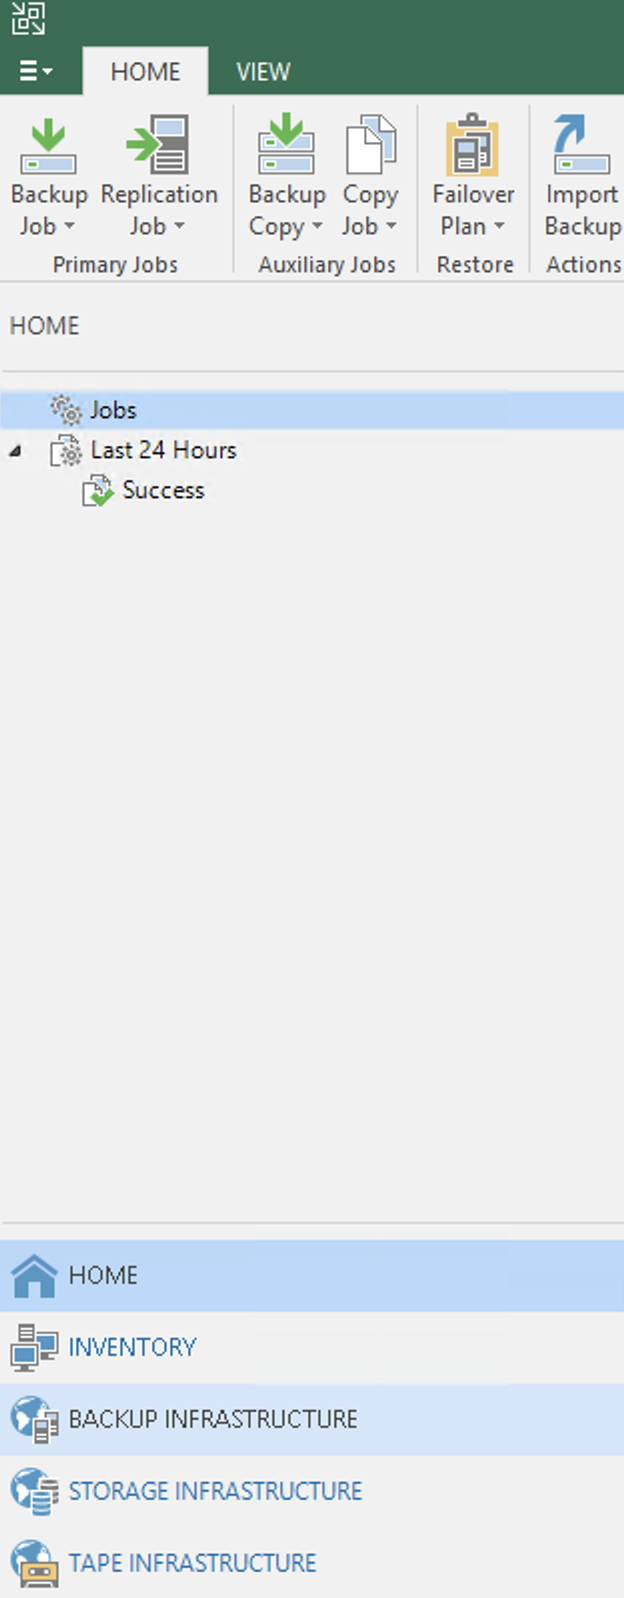
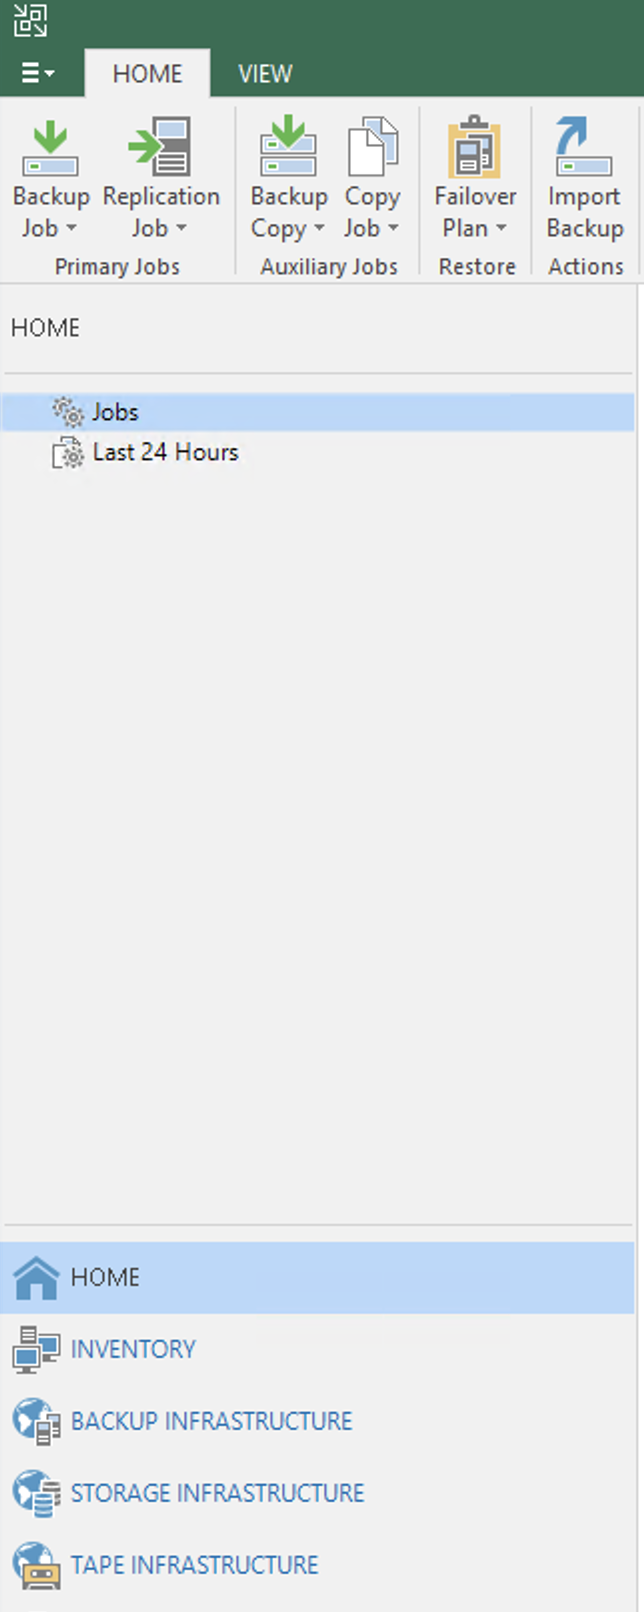
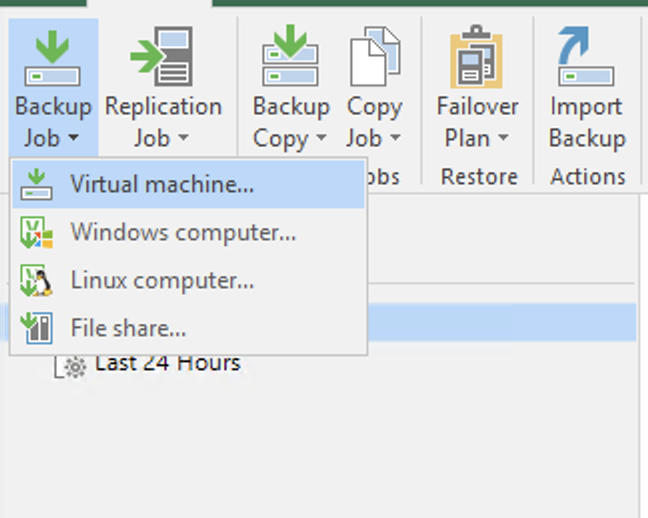
Click Home, then click Jobs.
Click Backup Job, then click Virtual machine.
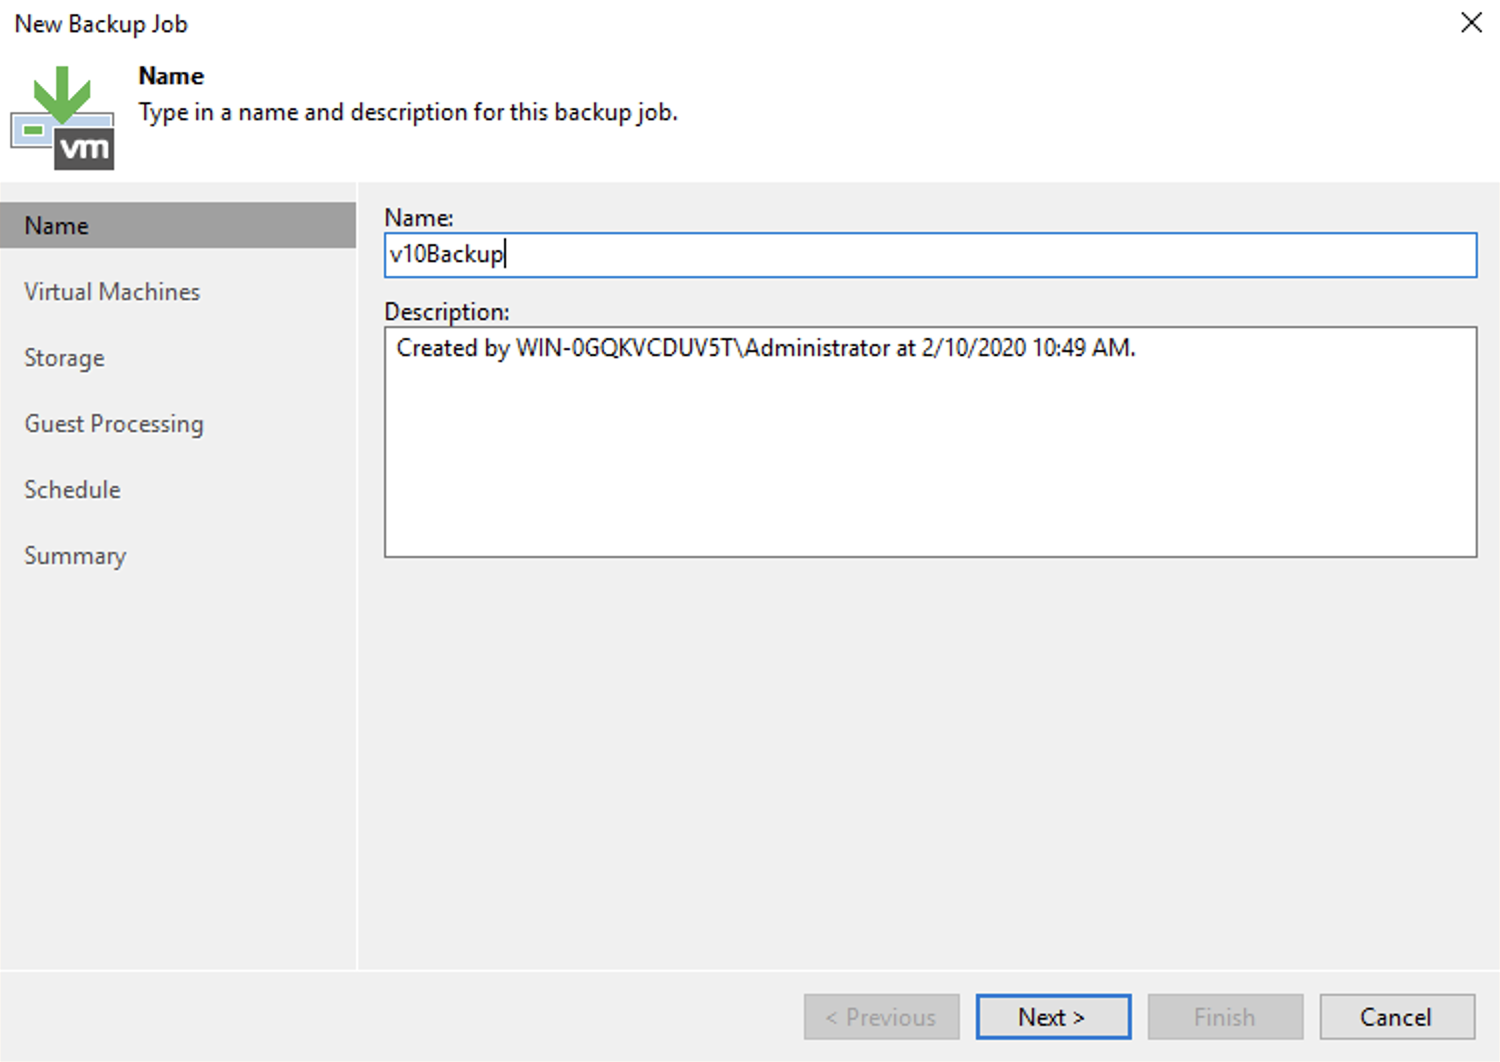
Input a Name and Description. Click Next.
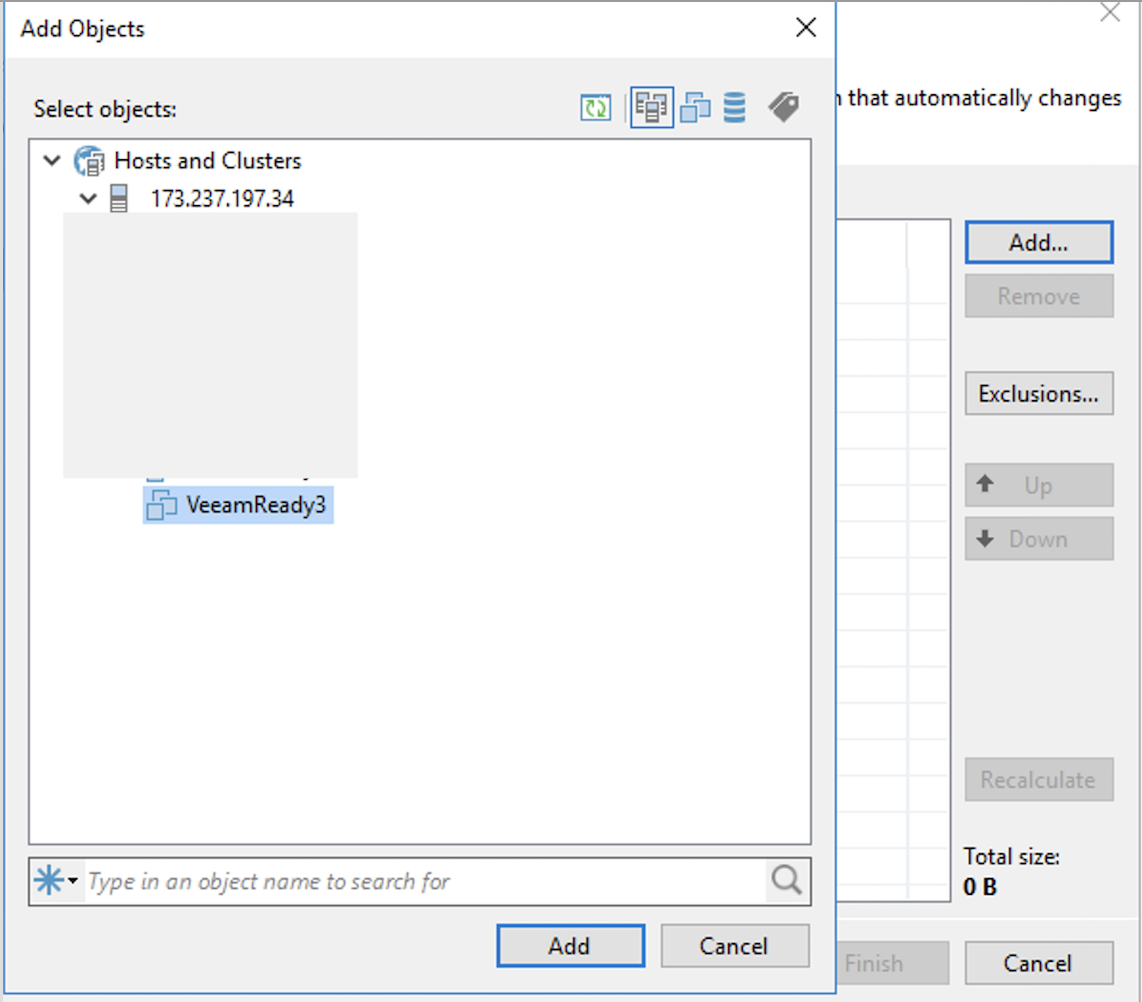
Select the Virtual Machine by clicking Add. Select the Virtual Machine to back up, then click Next.
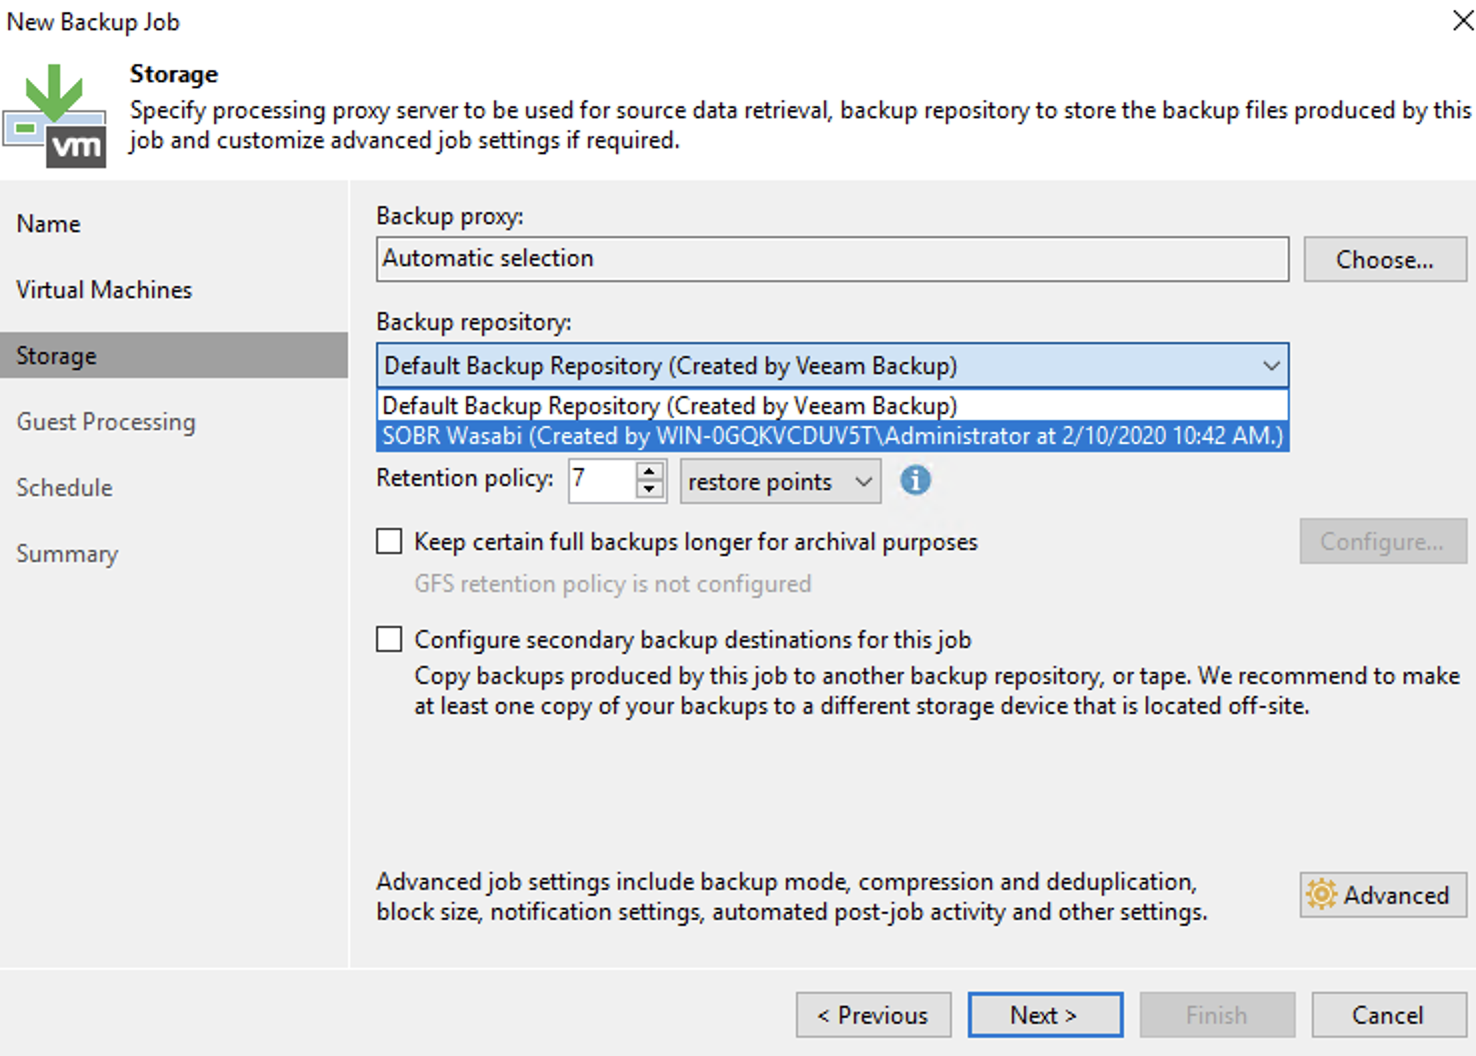
Choose the scale out backup repository that was created previously (SOBR Wasabi). Click Next.
Optionally, configure backup storage settings.
Keep certain full backups longer for archival purposes. Checking this will enable you to configure GFS (Grandfather/Father/Son) backups, which are kept in addition to your backups kept by the retention policy. For more information, refer to Veeam GFS Docs.
Configure secondary destinations for this job. Checking this will enable you to assign this backup to be backed up by a Backup Copy Job. A Backup Copy Job, is a separate job that makes copies of an existing Backup Job when it runs. In order to check this box, you will need to have already created an existing Backup Copy Job. For more information, refer to Veeam Backup Copy Docs.
The Retention Policy here determines the number of days, or restore points, for which your backup jobs will be retained after its successful job.
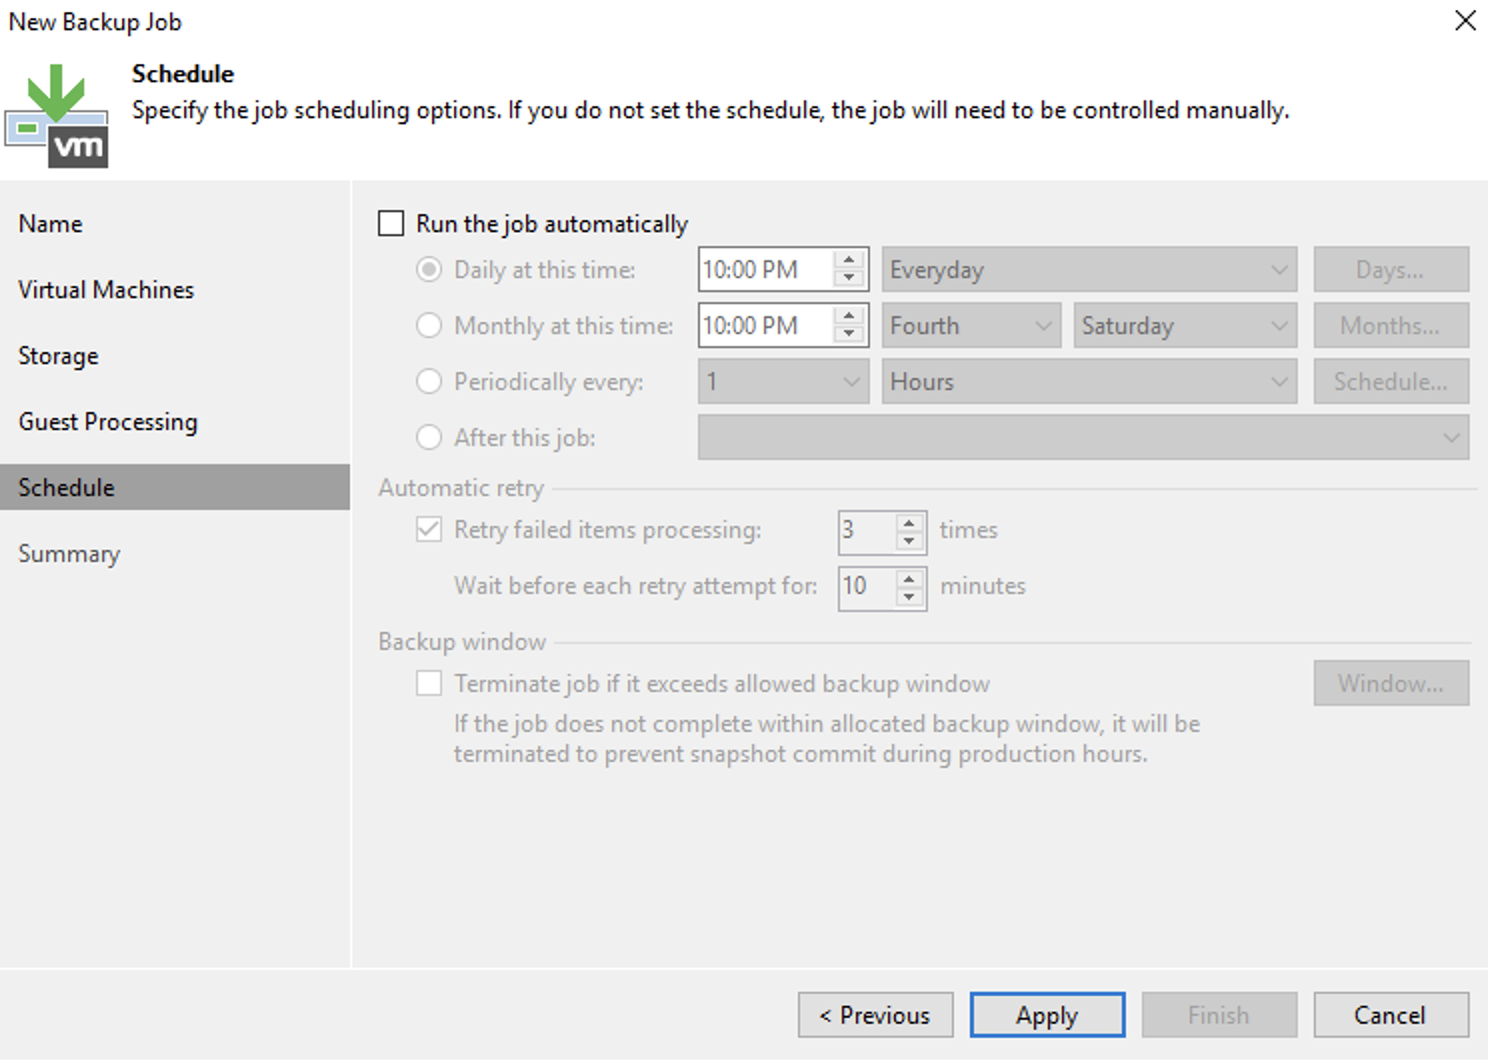
Leave the default values for Guest Processing and Schedule. Optionally, configure Scheduling settings. Click Apply.
For information about the Veeam Specific Scheduling Options, refer to the Veeam Job Scheduling Docs.
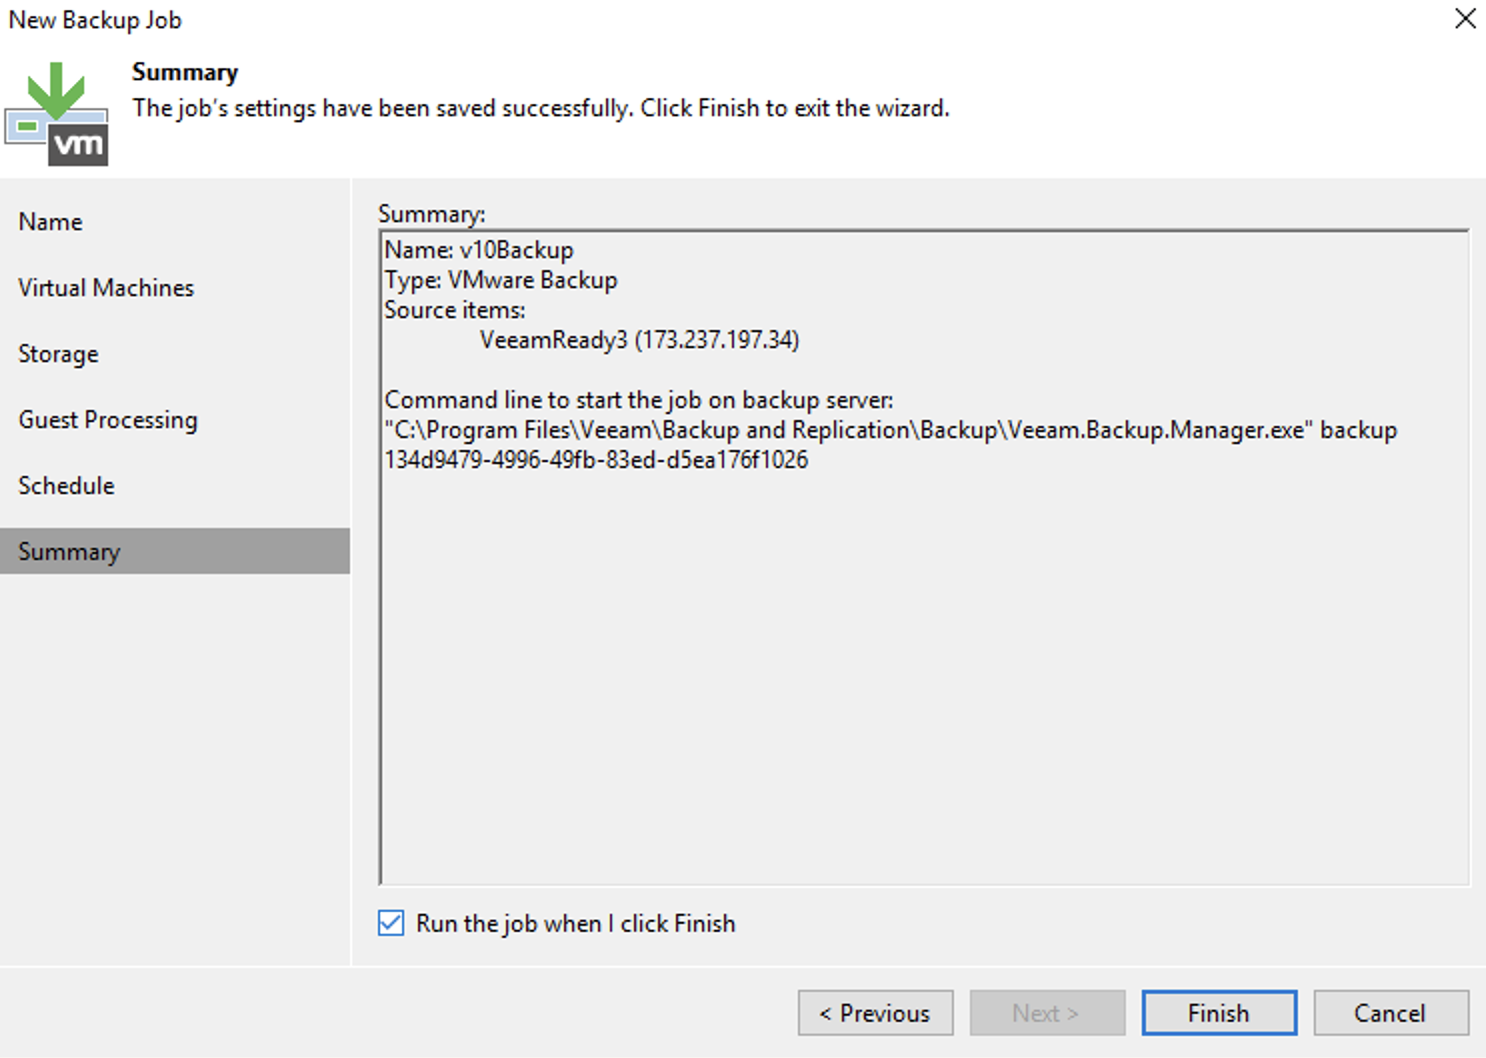
On the Summary page, click the checkbox to Run the job when I Finish. Click Finish.
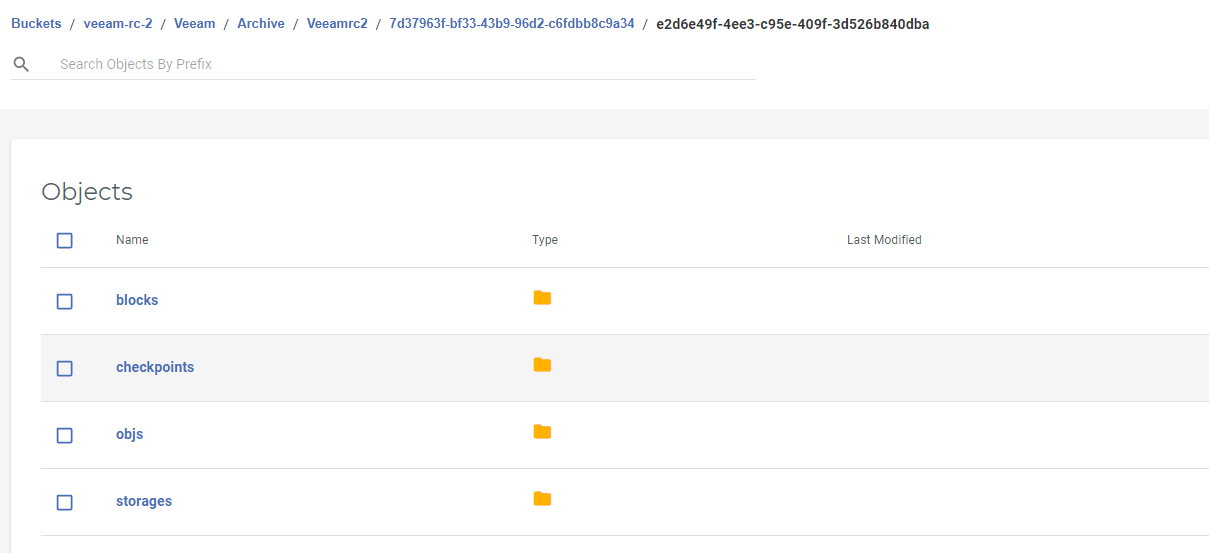
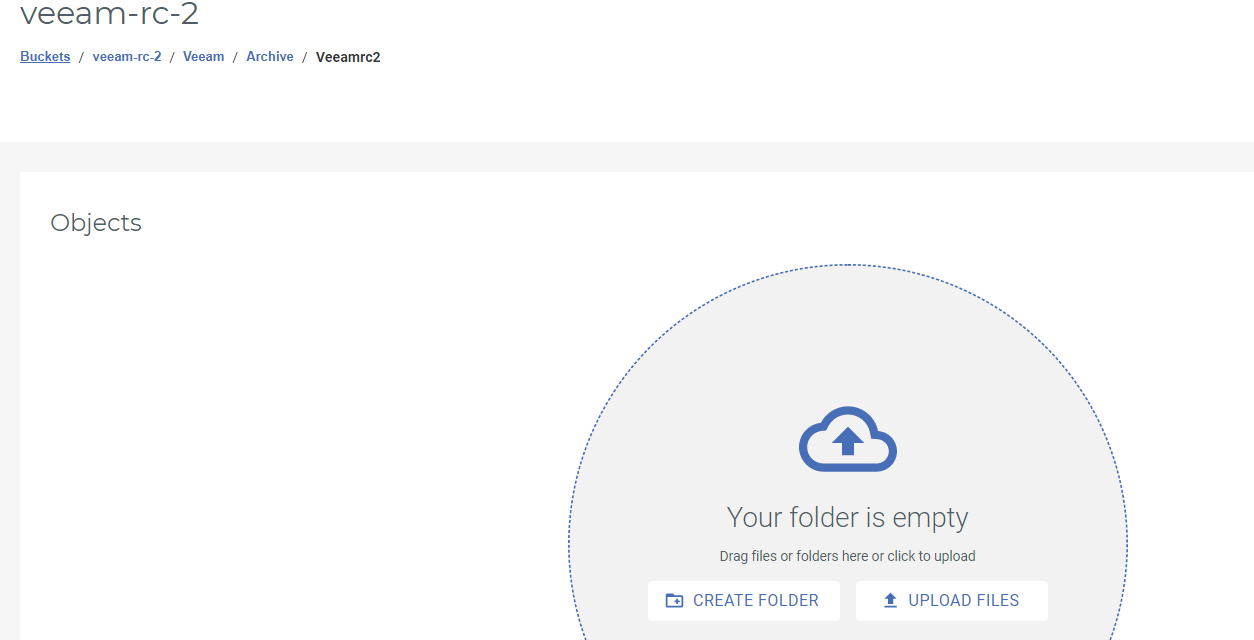
Check your Wasabi storage account for the new folder structure created by Veeam. You will notice that no backups are stored yet.
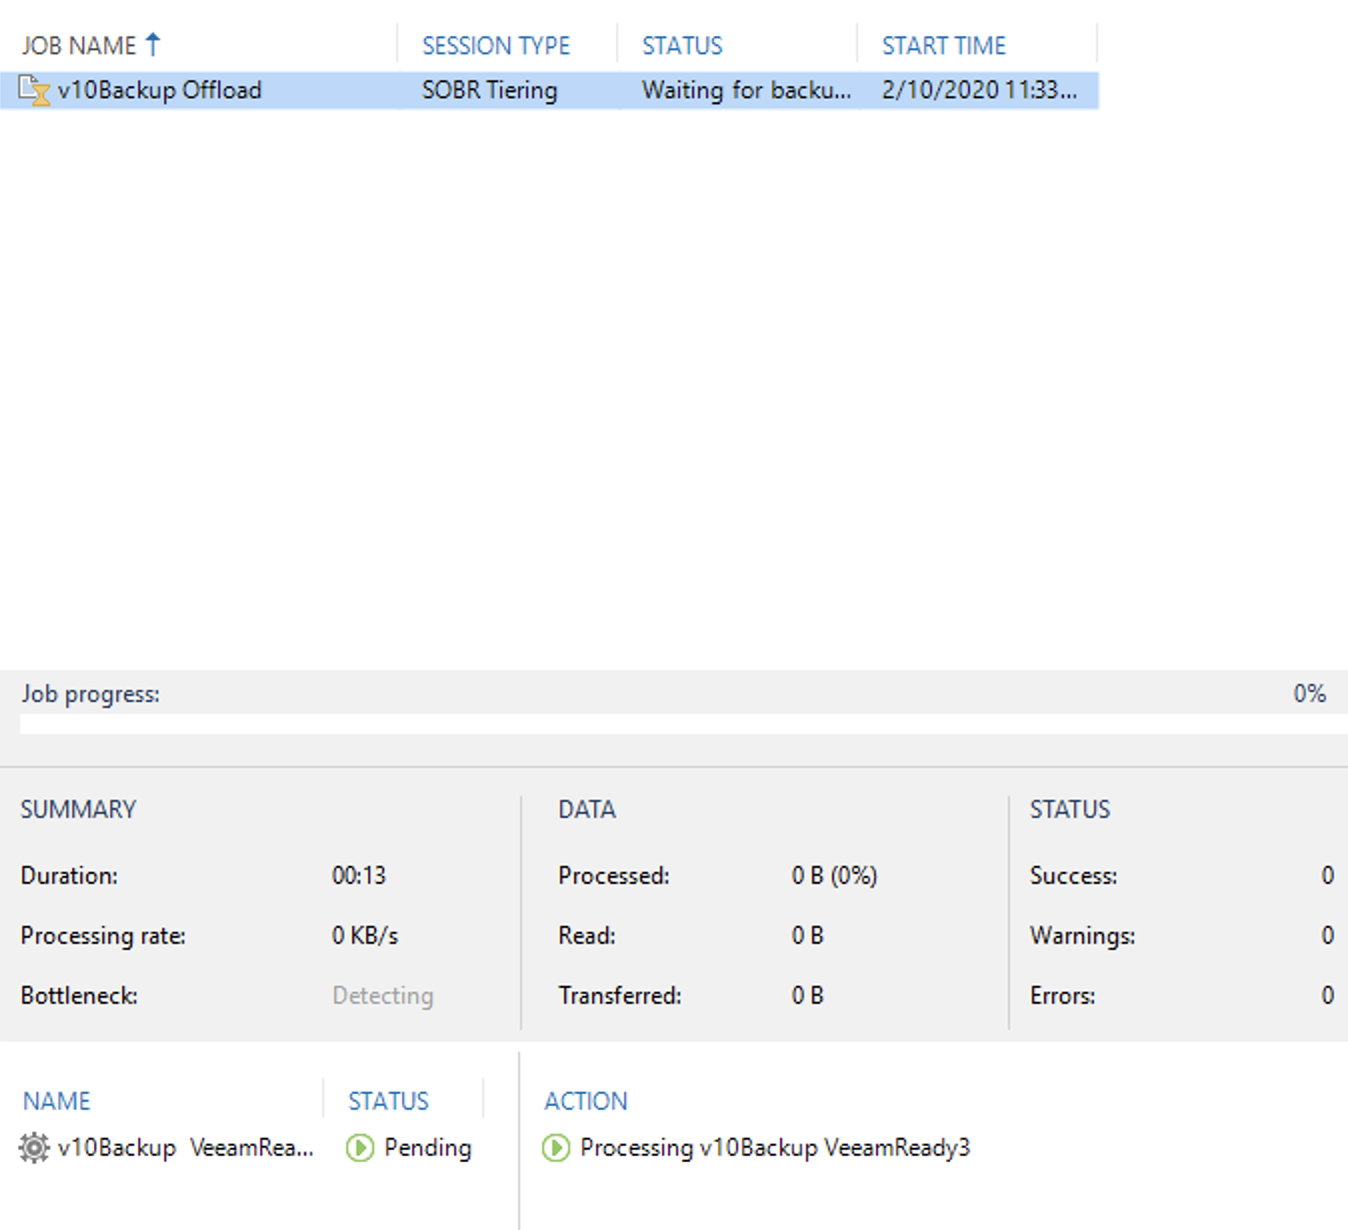
Go back to the Veeam application and verify that the backup executed.
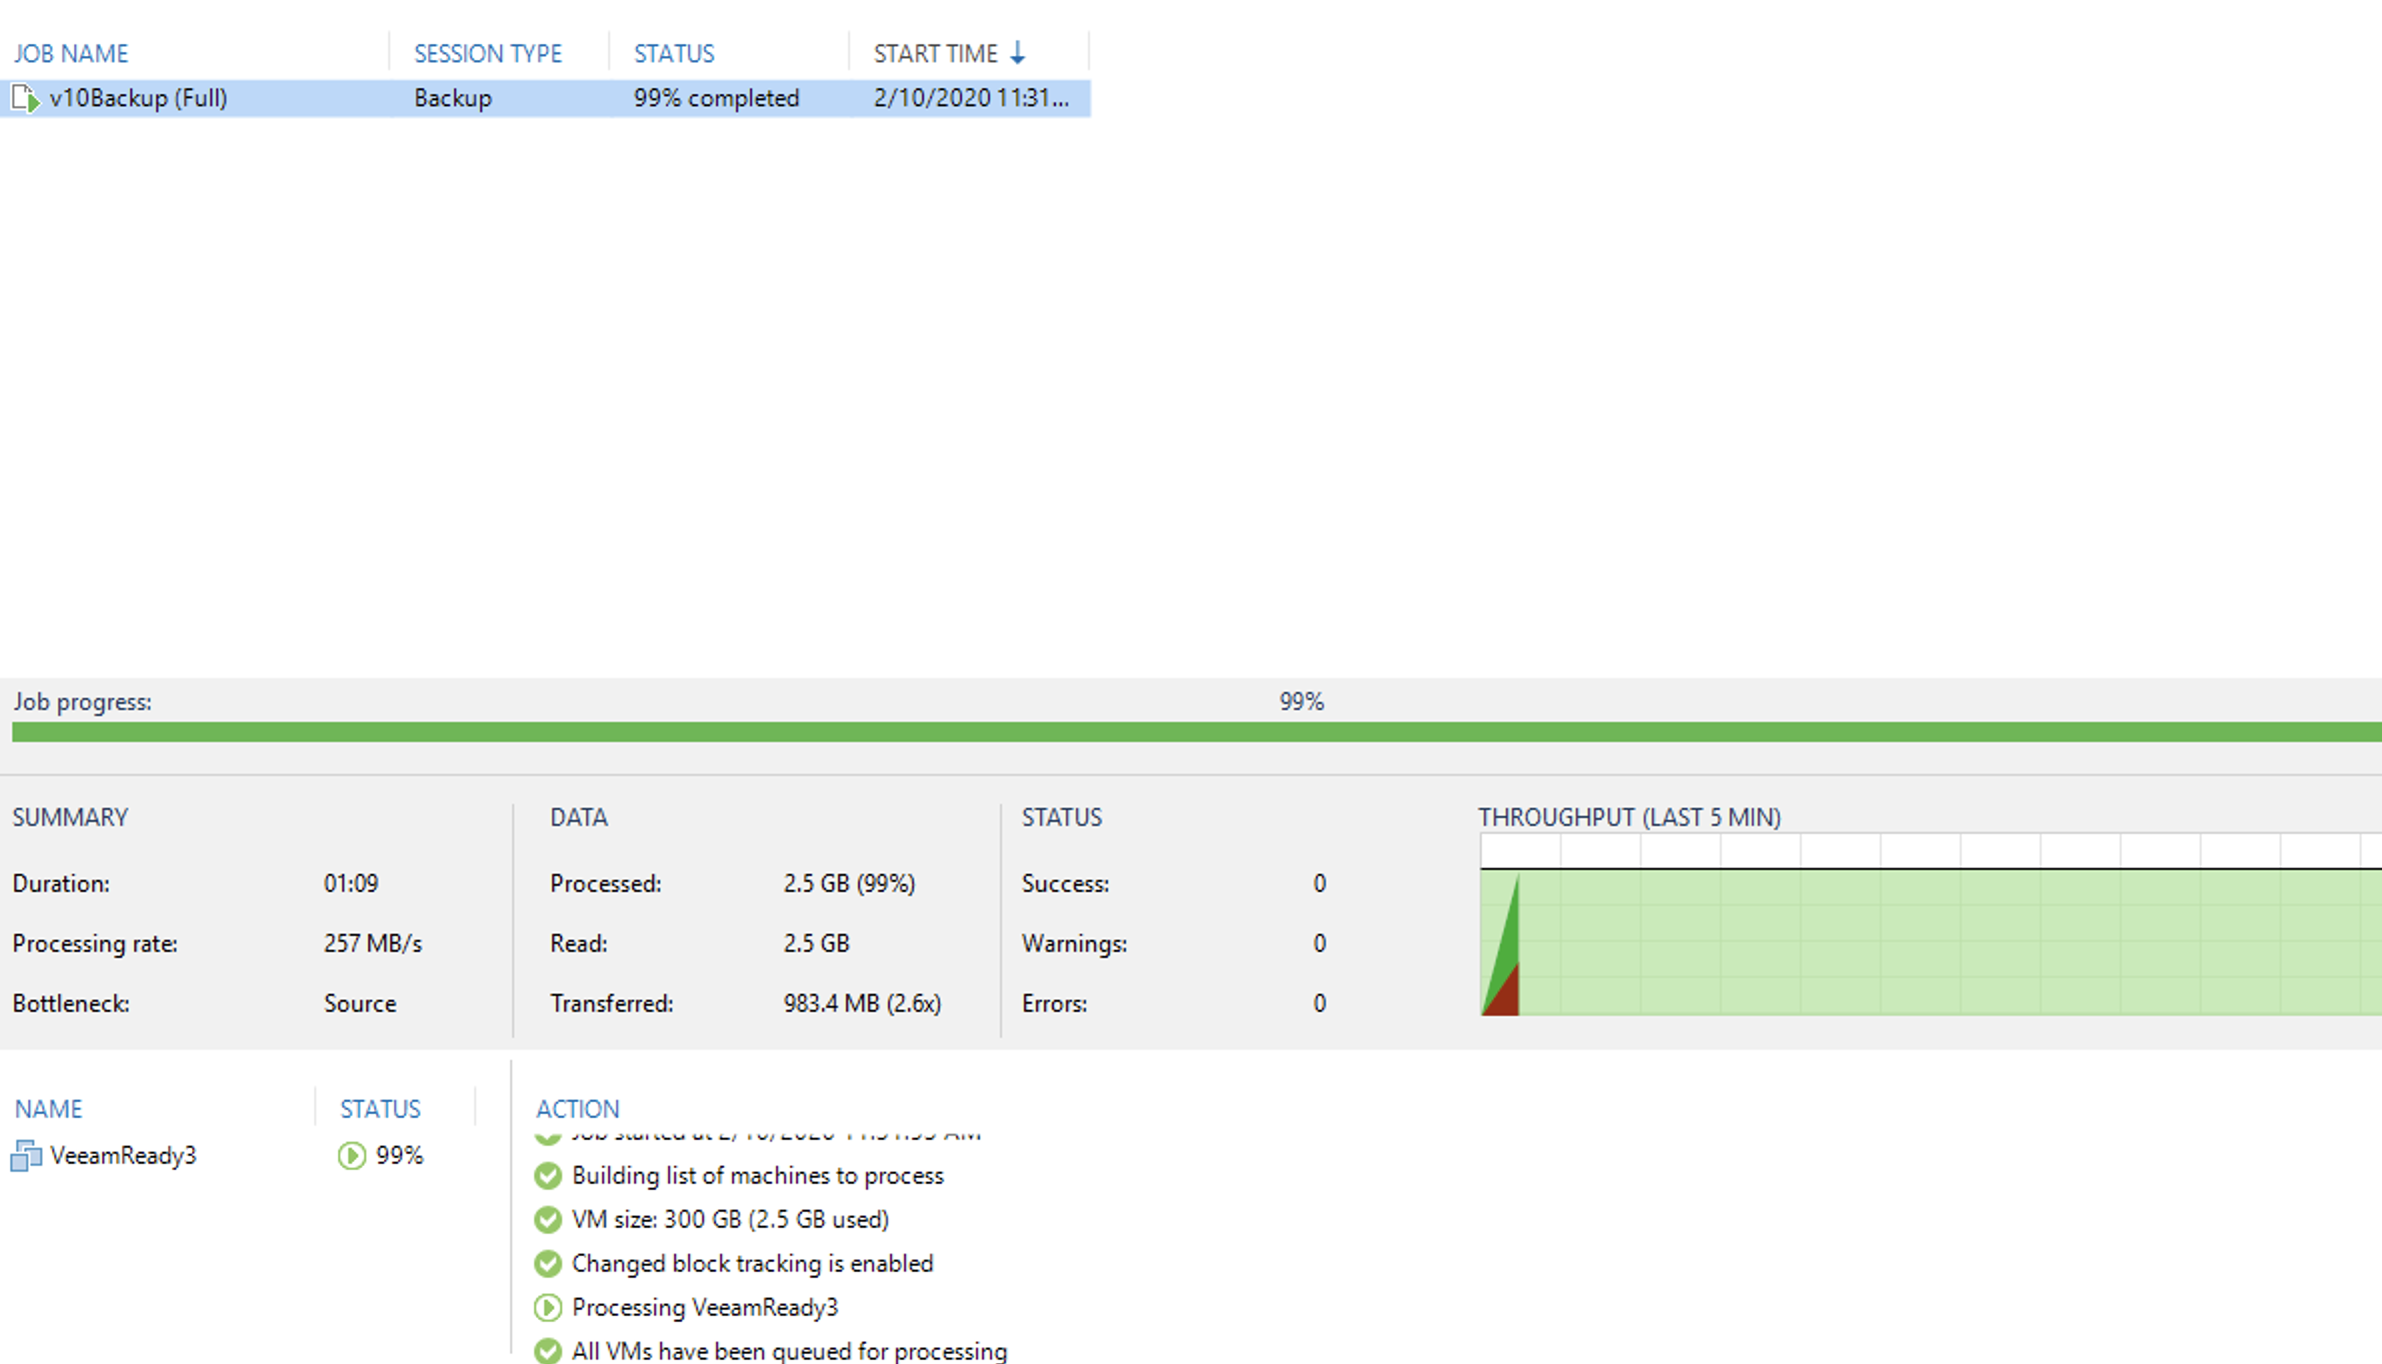
Once the Backup Job completes, an offload activity begins. This activity moves the backup instantly to Wasabi storage.
Once the offload completes, review the Summary page.
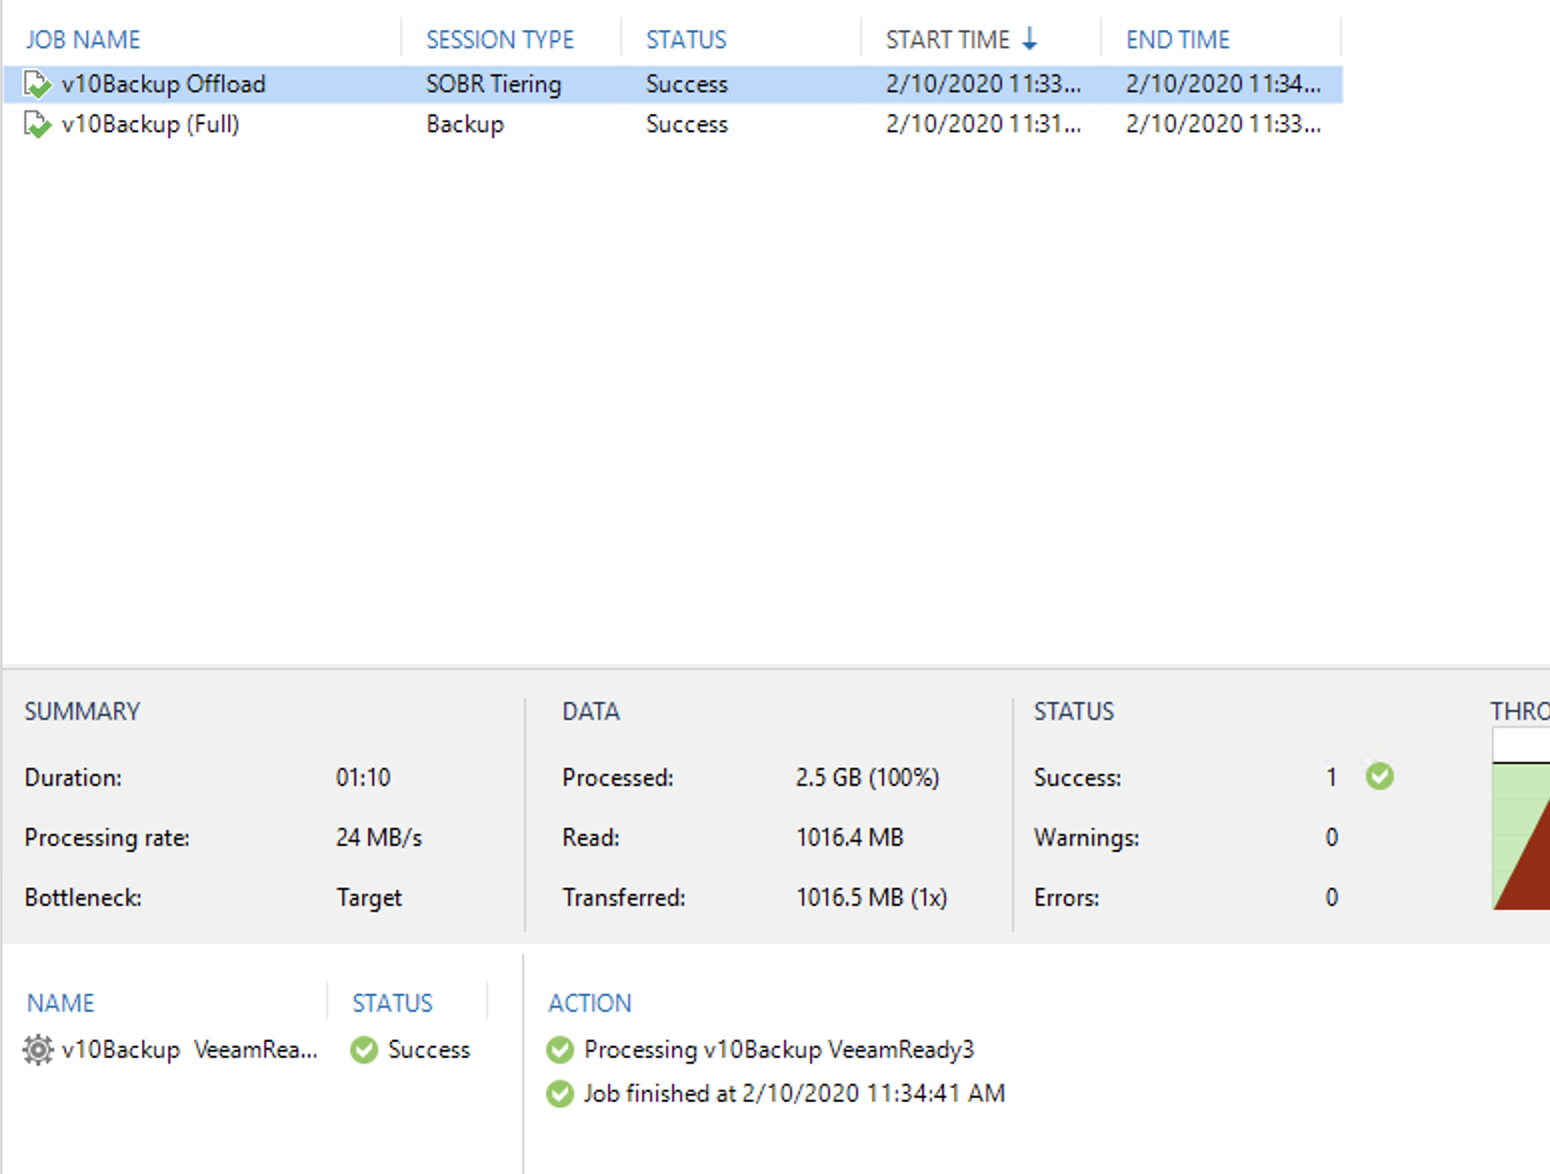
Check your Wasabi storage bucket to confirm the backup has been stored.