This article describes the procedure to use Asigra's SaaSAssure to back up SaaS (Software as a Service) workloads to Wasabi. SaaSAssure enables organizations to back up, recover, and secure business-critical SaaS data generated and stored across multiple cloud applications through a single, easy-to-use platform.
Your specific backup software application handles the data restoration process. As there are many potential variables that can affect your unique environment, Wasabi strongly recommends seeking the guidance of your backup software's technical support team in the event that you encounter difficulty or have application-specific questions.
Requirements
Active Wasabi Cloud Storage account and console access.
Wasabi access and secret keys.
SaaSAssure account and portal access.
Existing SaaSAssure connector(s). See What Connectors does SaaSAssure Support? for details.
Creating a Wasabi Bucket
The first step is to create a bucket in your Wasabi account that will contain the backup data. Log in to the Wasabi Console as the root user or a sub-user with permission to create buckets and then follow the instructions in the "Working With Buckets and Objects" article to create a bucket. Make a note of the bucket name and the region where your bucket resides.
Do NOT enable Object Lock or Versioning as SaaSAssure does not currently support them.
Creating a Wasabi Storage Location
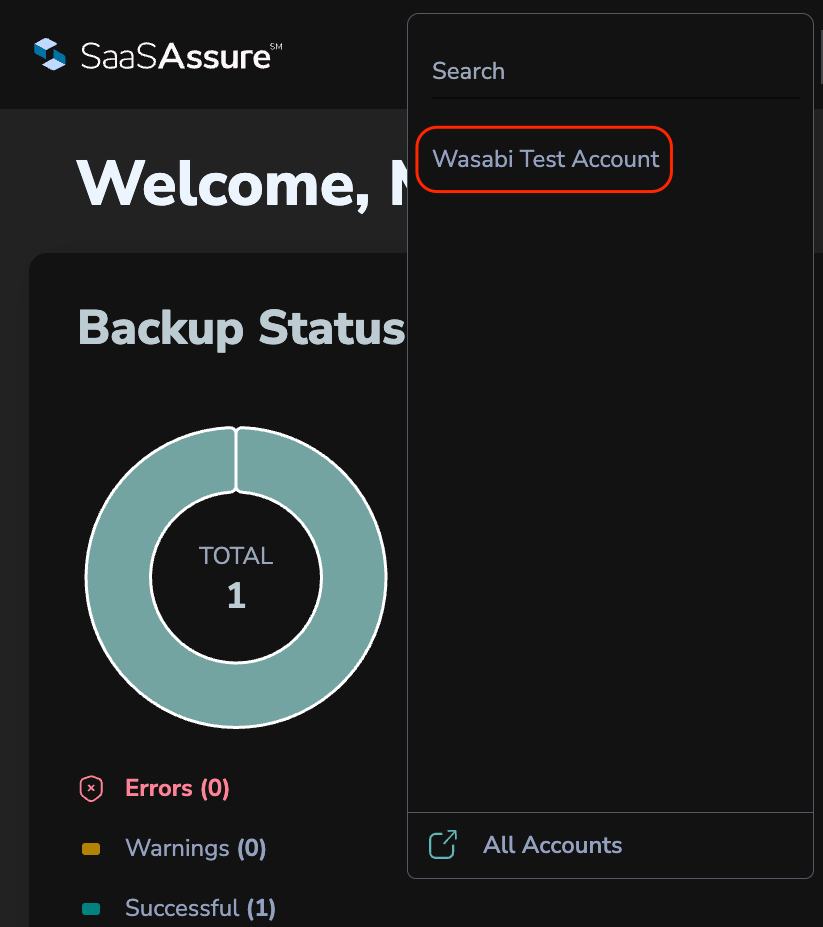
Log in to the SaaSAssure UI and then click the Accounts drop-down.
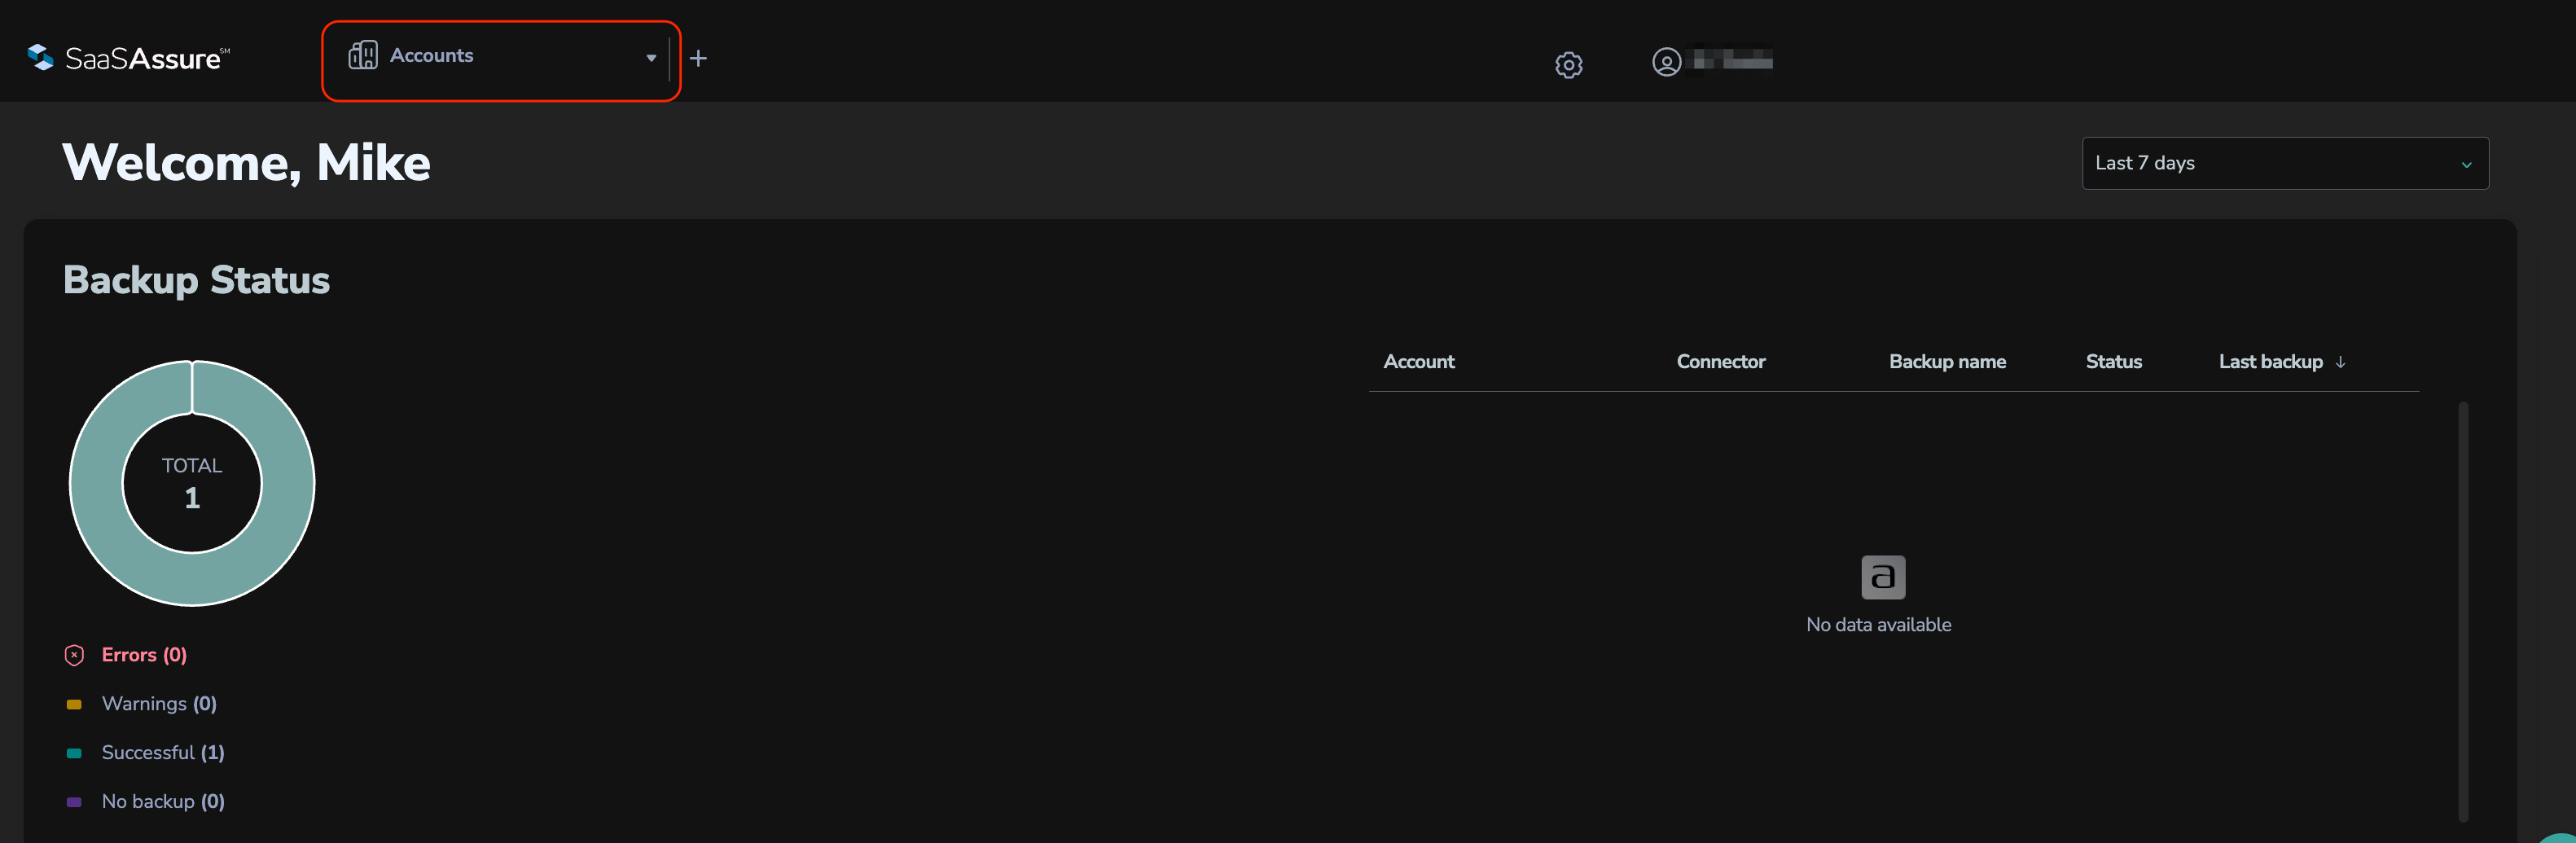
Select the appropriate account.
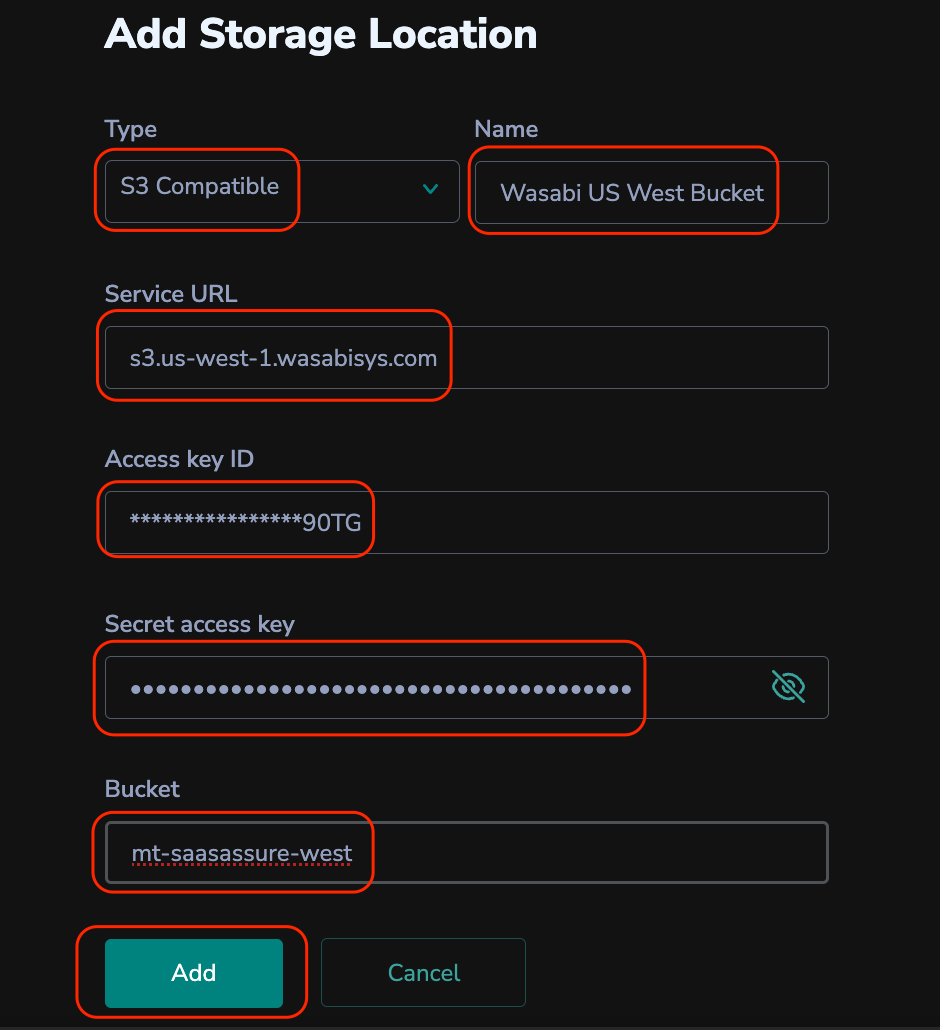
Navigate to Storage Locations and click the green icon to add a new storage location.

Select the Type S3 Compatible and name the storage location. Enter the Wasabi Service URL (without a preceding transport definition, such as "https://") that corresponds to the location of the previously created bucket. Enter your Wasabi access and secret keys, along with the bucket name. Click Add.
This configuration example discusses the use of Wasabi's us-west-1 storage region. To use another Wasabi storage region, use the appropriate Wasabi service URL.
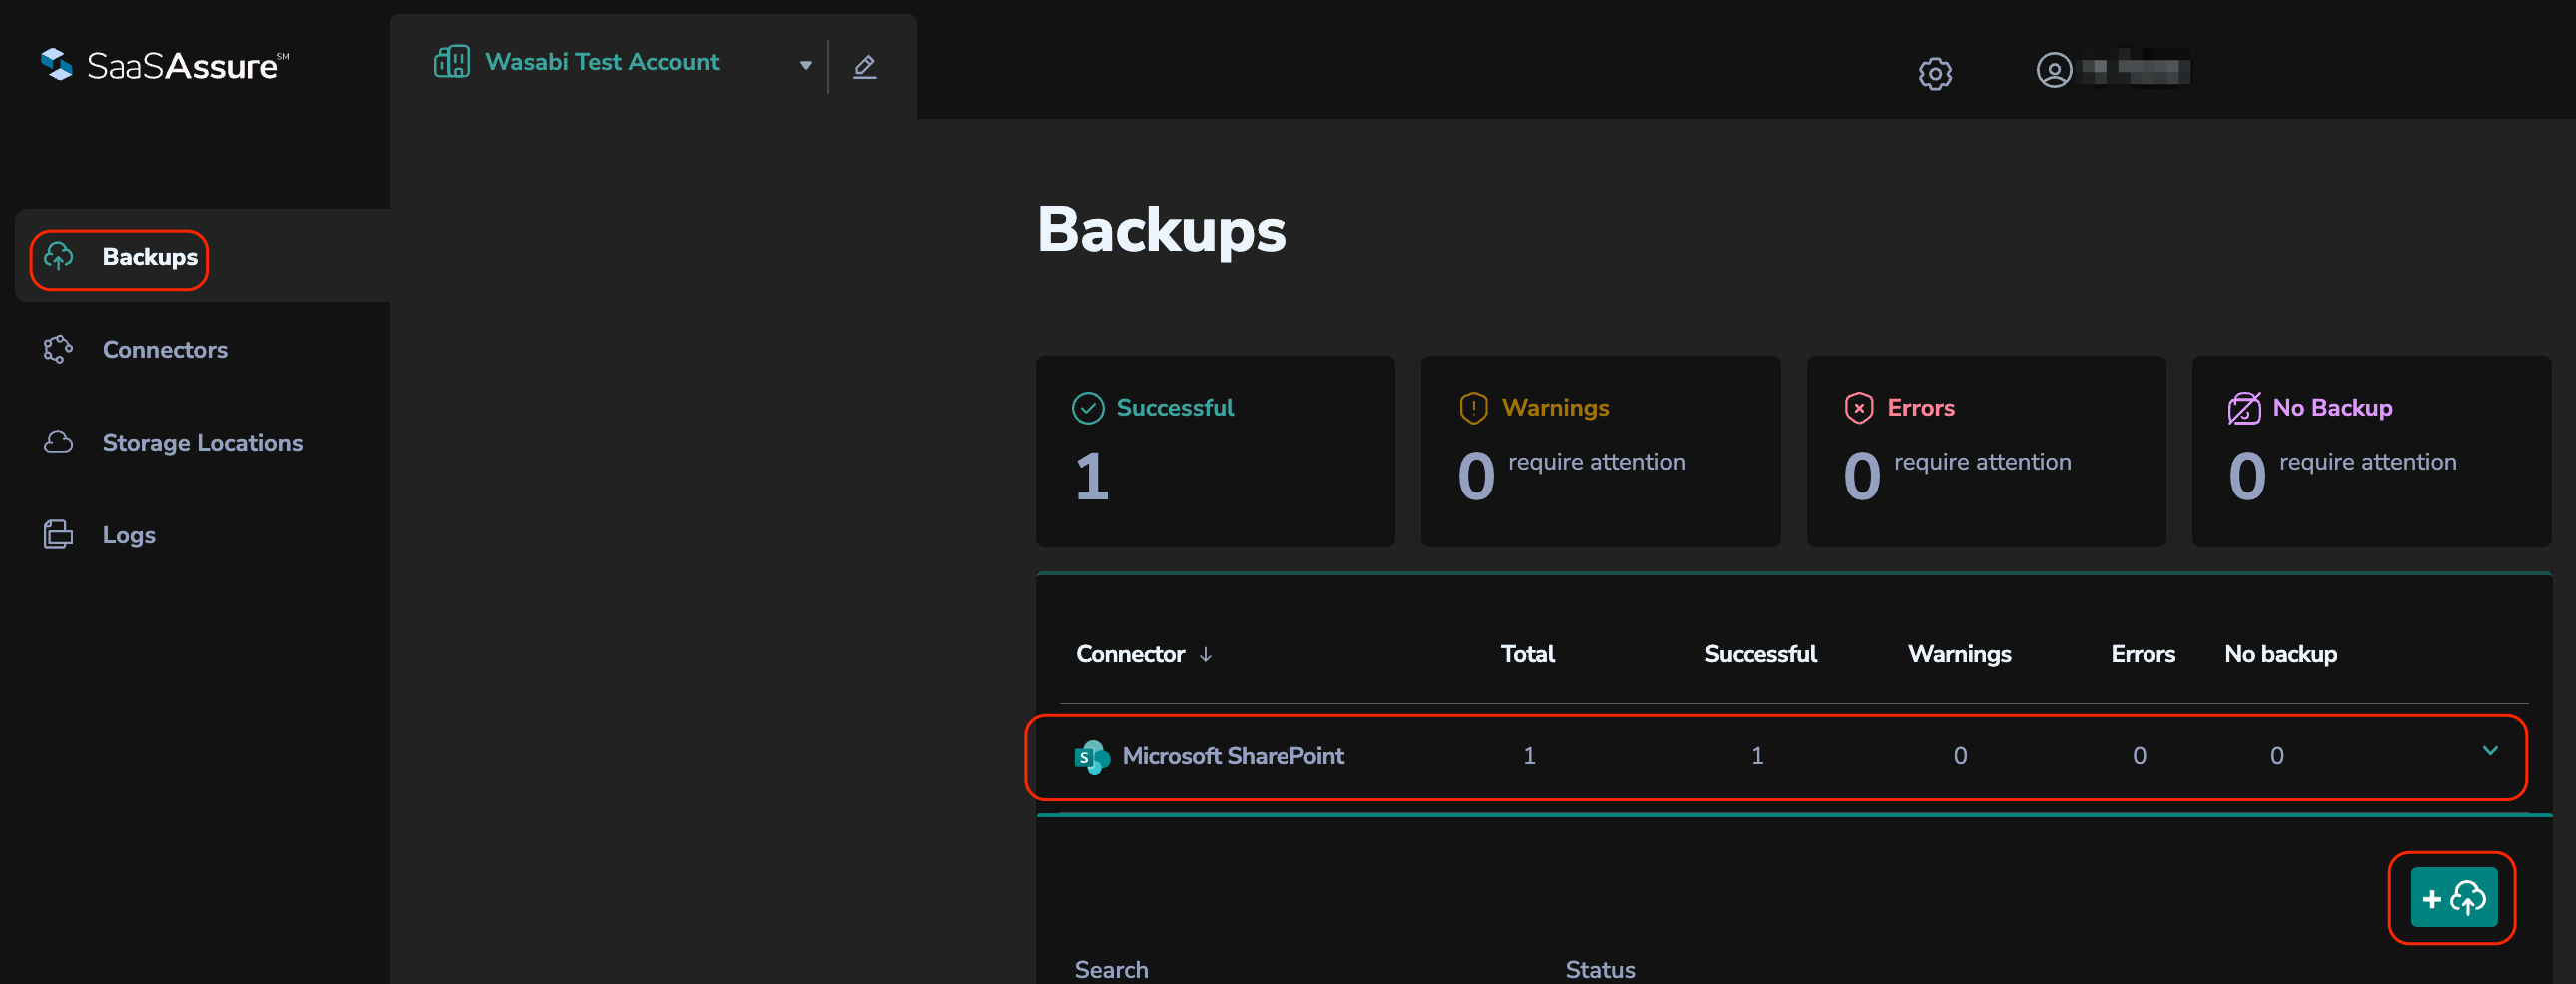
Creating a Backup
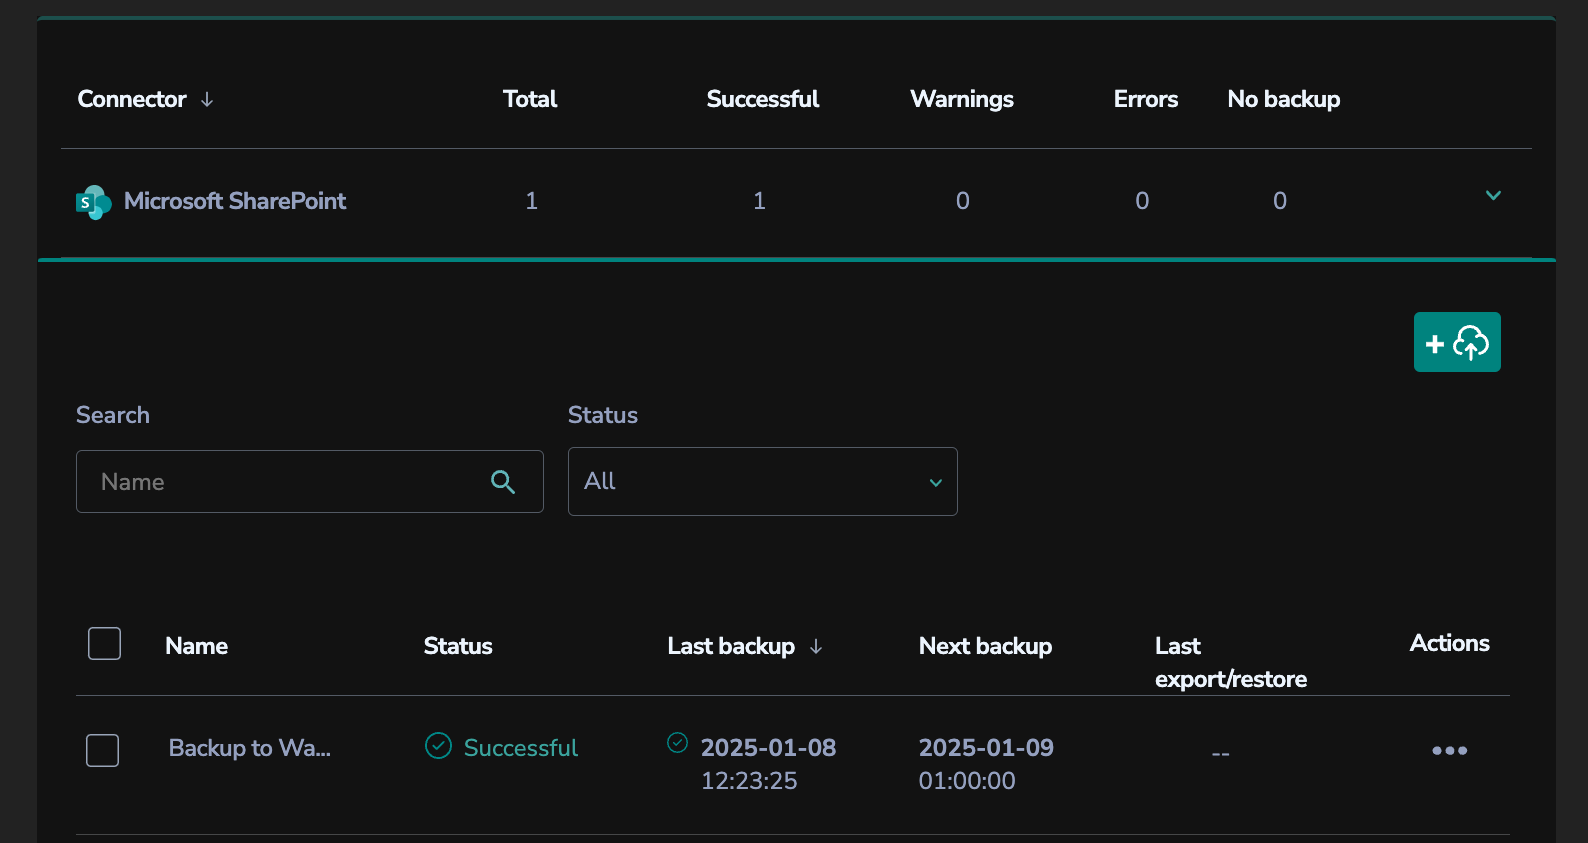
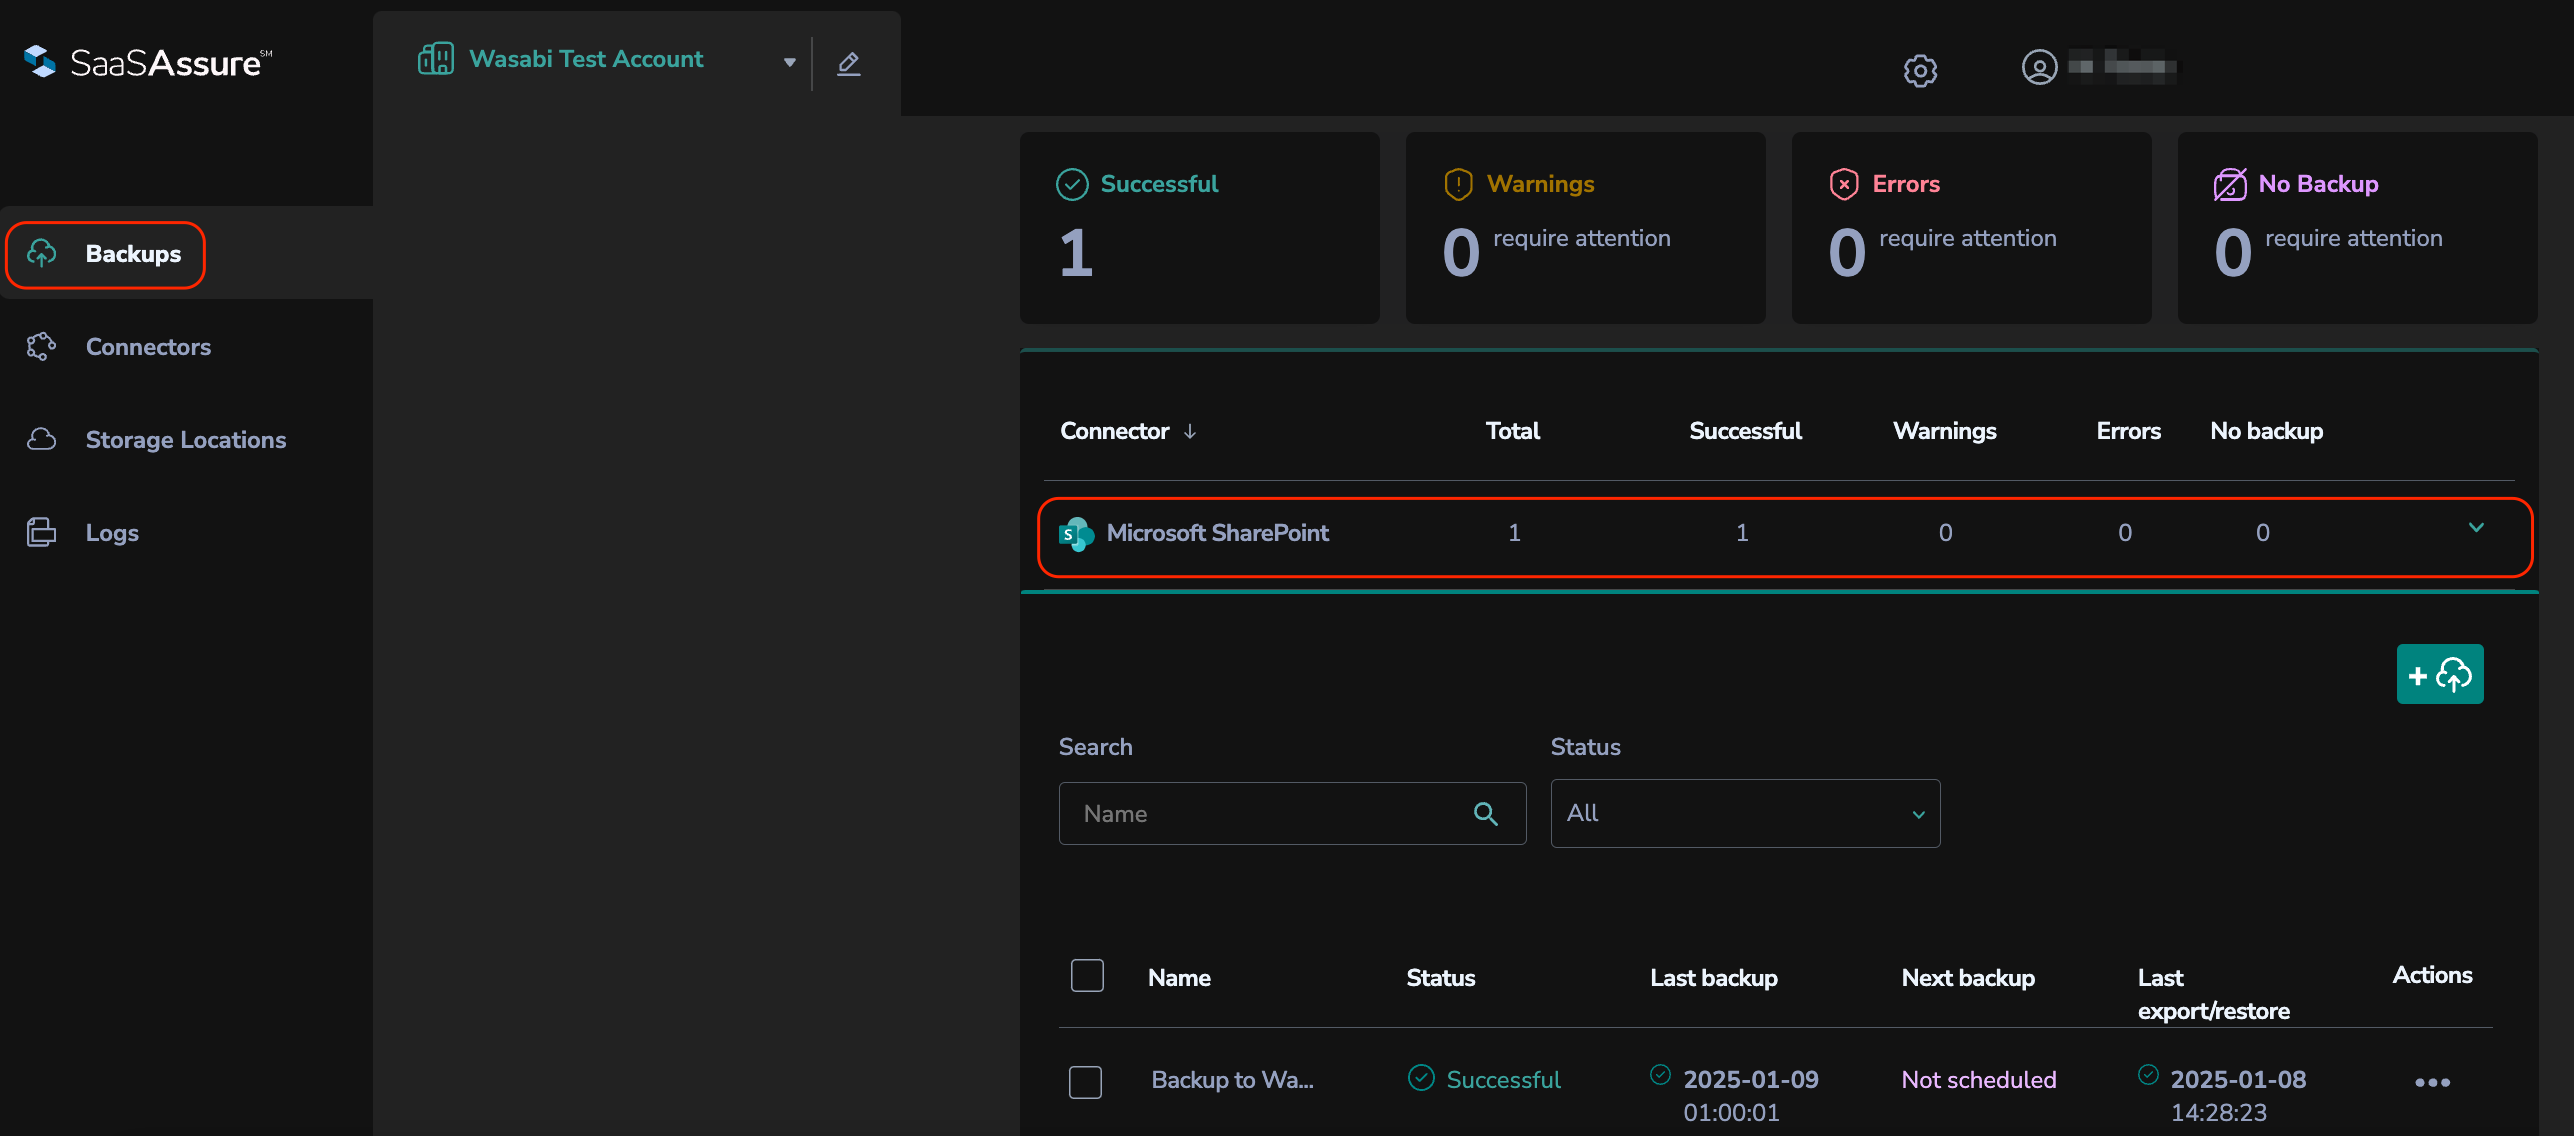
Navigate to Backups, click an existing Connector (we used Microsoft SharePoint in this example), and click the green icon to create a new Backup.
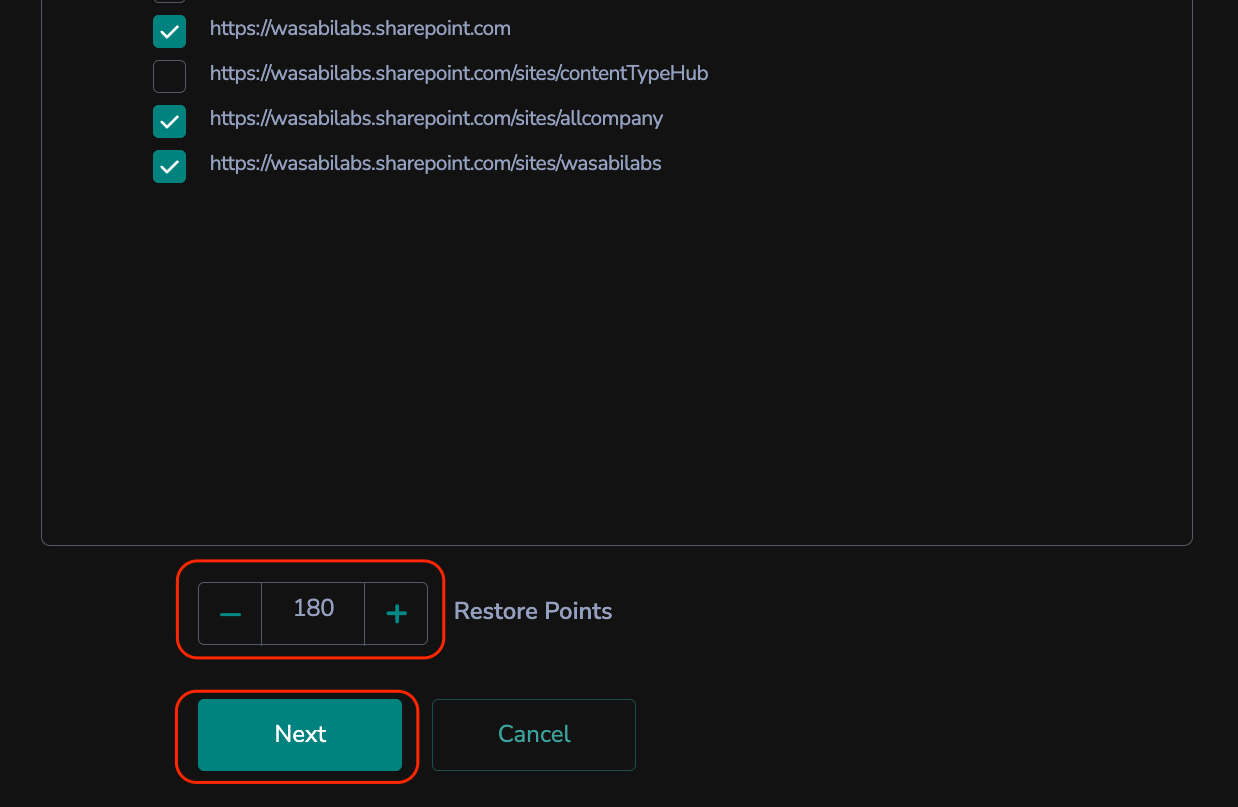
Enter a Backup Name and select the appropriate Backup Items. In this case, select individual items; we need to back up the items.

Check the appropriate restore points and click Next.
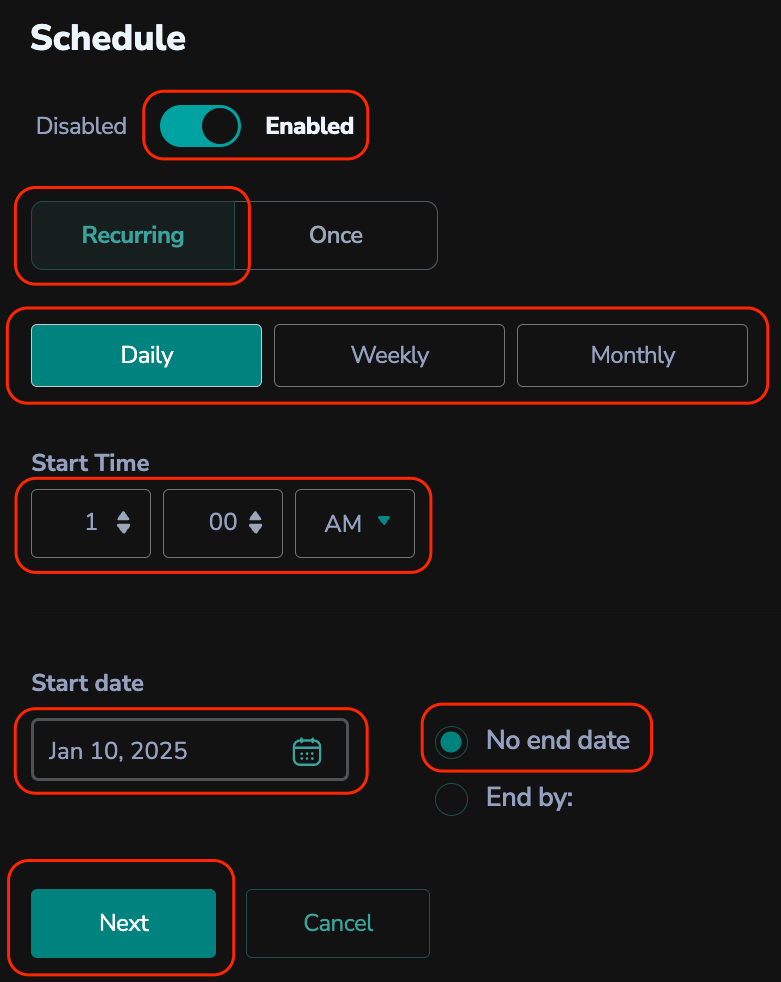
Set the schedule to Enabled and click Recurring. Select the appropriate backup frequency: daily, weekly, or monthly. Daily is selected in this example. Then, select a Start Time and Start Date to initiate the backup (these must be in the future). Next, select No end date and click Next.
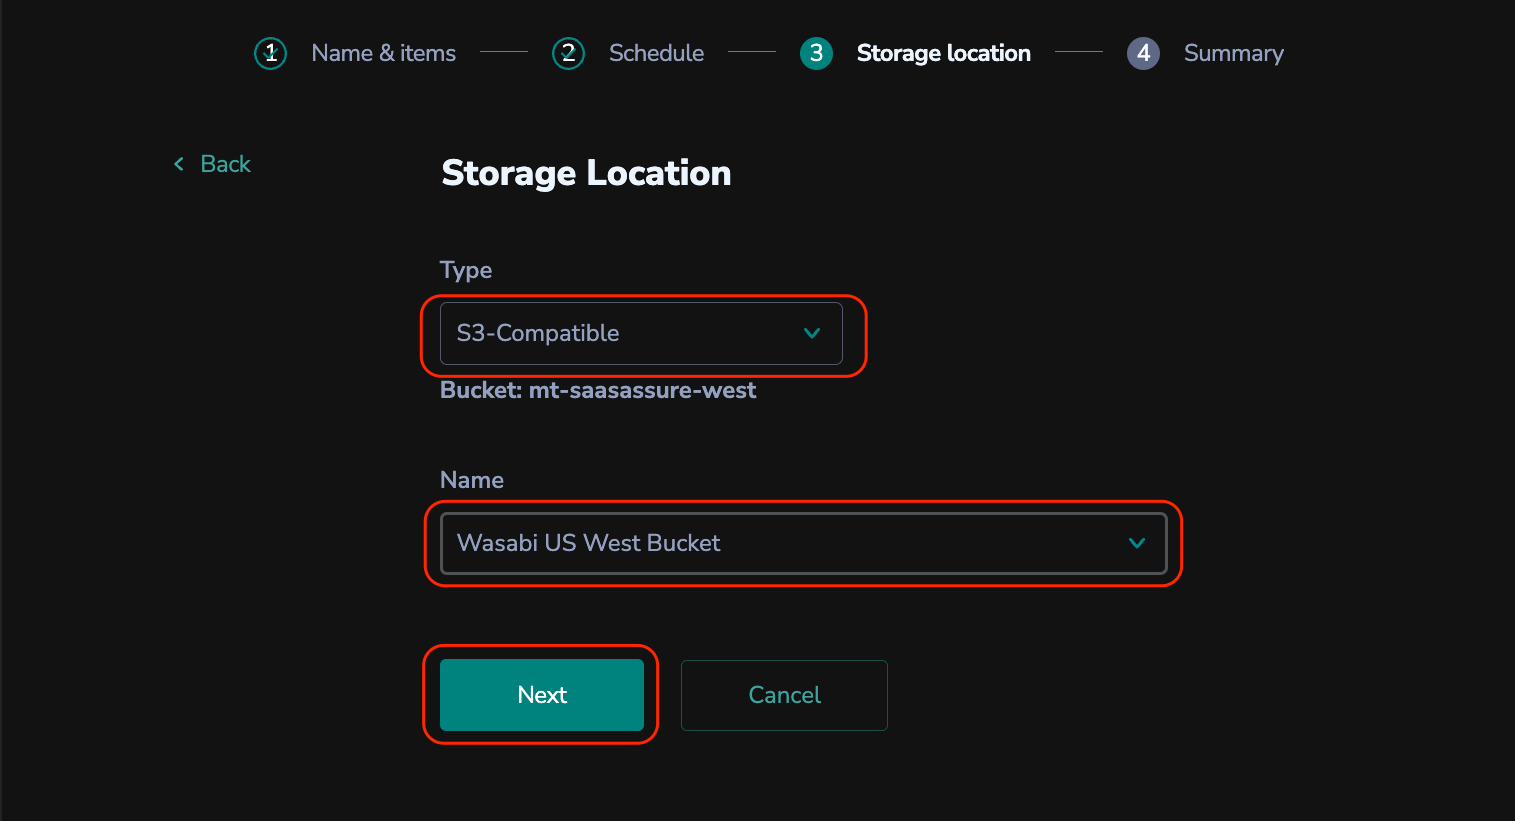
Select S3-Compatible from the Type drop-down, then select the name of the Wasabi storage location previously created. Click Next.
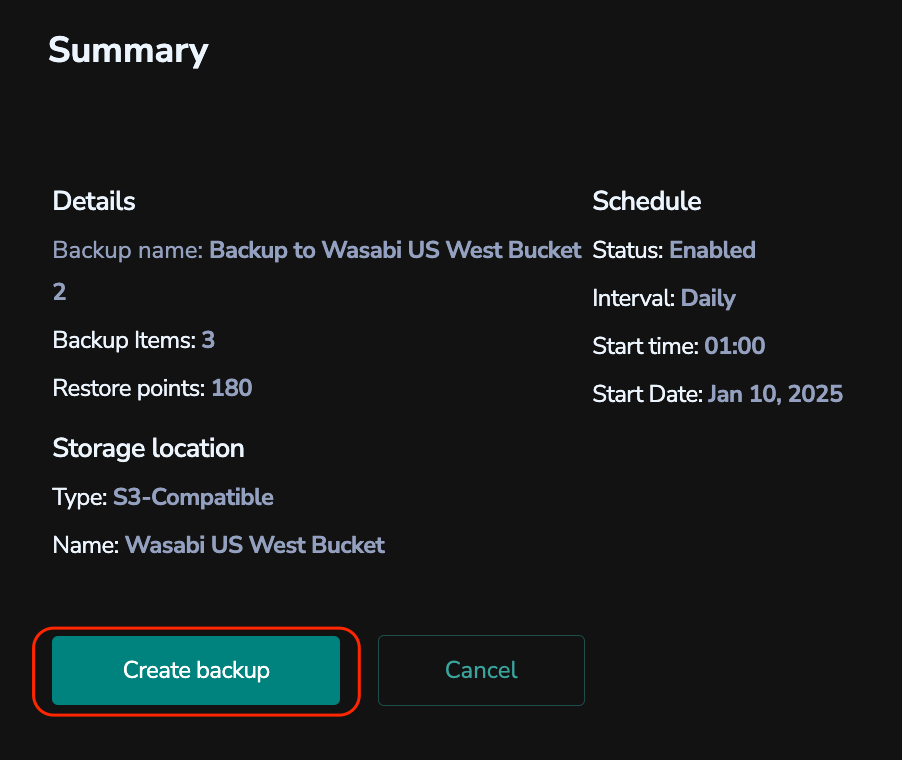
Review the summary and click Create backup.
Performing a Test Backup
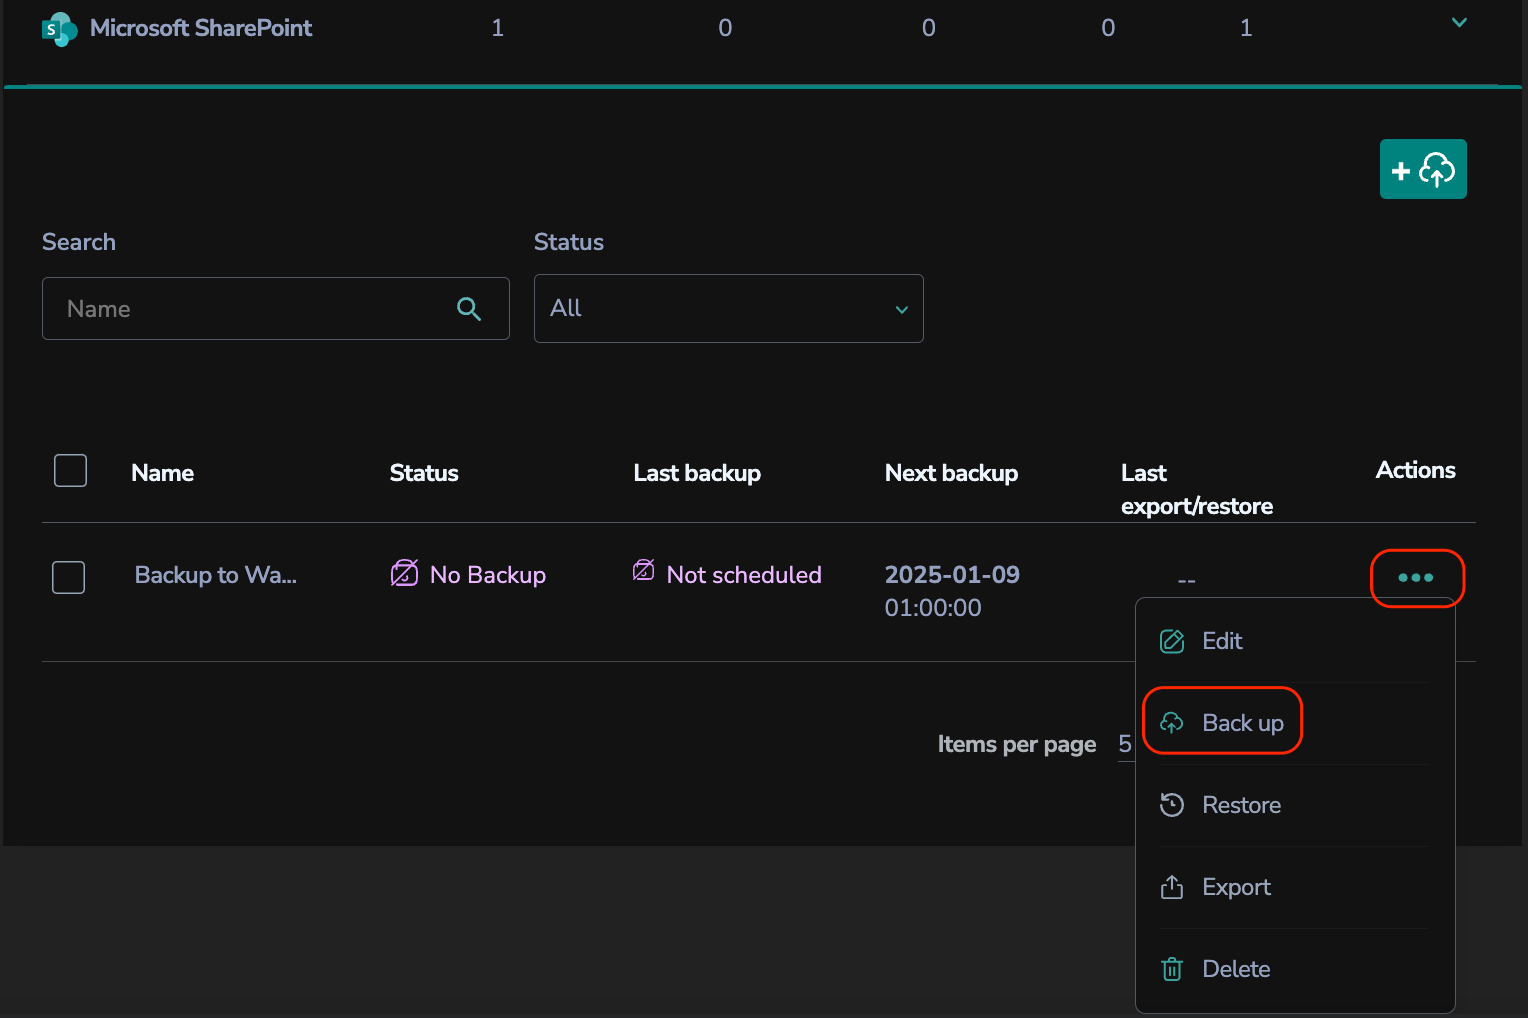
Navigate to Backups and select an existing connector (we used Microsoft SharePoint in this example).
Click the 3 horizontal dots on the right, then click Back up.
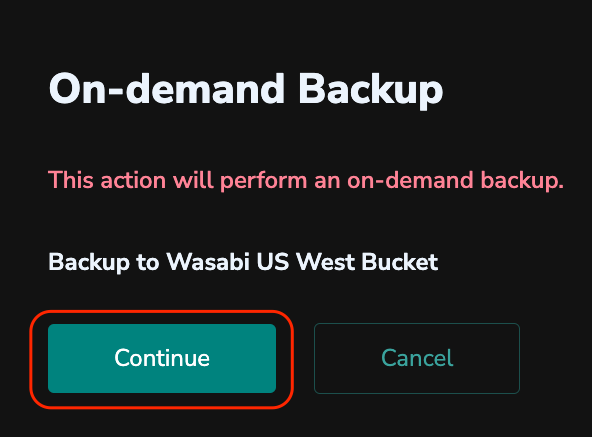
Click Continue.
Note this view may have additional information depending on the MPA and MFA settings.
Navigate away from the Backups tab, then return to the Backups tab to see the status. It may take some time to complete. You will now see the backup Status as successful.