AWS CloudFront is a content delivery network (CDN) that caches and serves content from edge locations worldwide. You can use CloudFront to distribute objects stored in Wasabi, reducing latency for end users while keeping your data in Wasabi's low-cost storage. This article describes the recommended setup, restricting direct access to your Wasabi bucket so content is only served through CloudFront, and some optional methods including basic setup (without referer headers), and an alternate setup using signed URLs/Cookes useful for when you want per-user access control.
Requirements
Wasabi Hot Cloud Storage Account
Wasabi bucket with Public Access Enabled. For information on creating a bucket, review Creating a Bucket. For information on enabling Public Access, review Public Access Override: Enabling/Disabling.
Amazon Web Services Account
Cloudfront Enabled—Refer to the AWS CloudFront documentation, What is Amazon CloudFront?.
These configuration examples discuss the use of Wasabi's us-east-1 storage region. Use the region your bucket is located in. For a list of regions, see Service URLs for Wasabi's Storage Regions.
Integrating Wasabi as an Origin for AWS CloudFront (Recommended)
This option is best suited for public content where you wish to prevent direct S3 URL access and hot-linking, but do not need per-user access control. This approach adds a shared secret “Referer” header that CloudFront includes with every request to Wasabi. Your bucket policy then rejects any request that does not include the header. This prevents direct access to your Wasabi bucket.
Log in to your AWS Console and navigate to CloudFront.
Click Create Distribution.

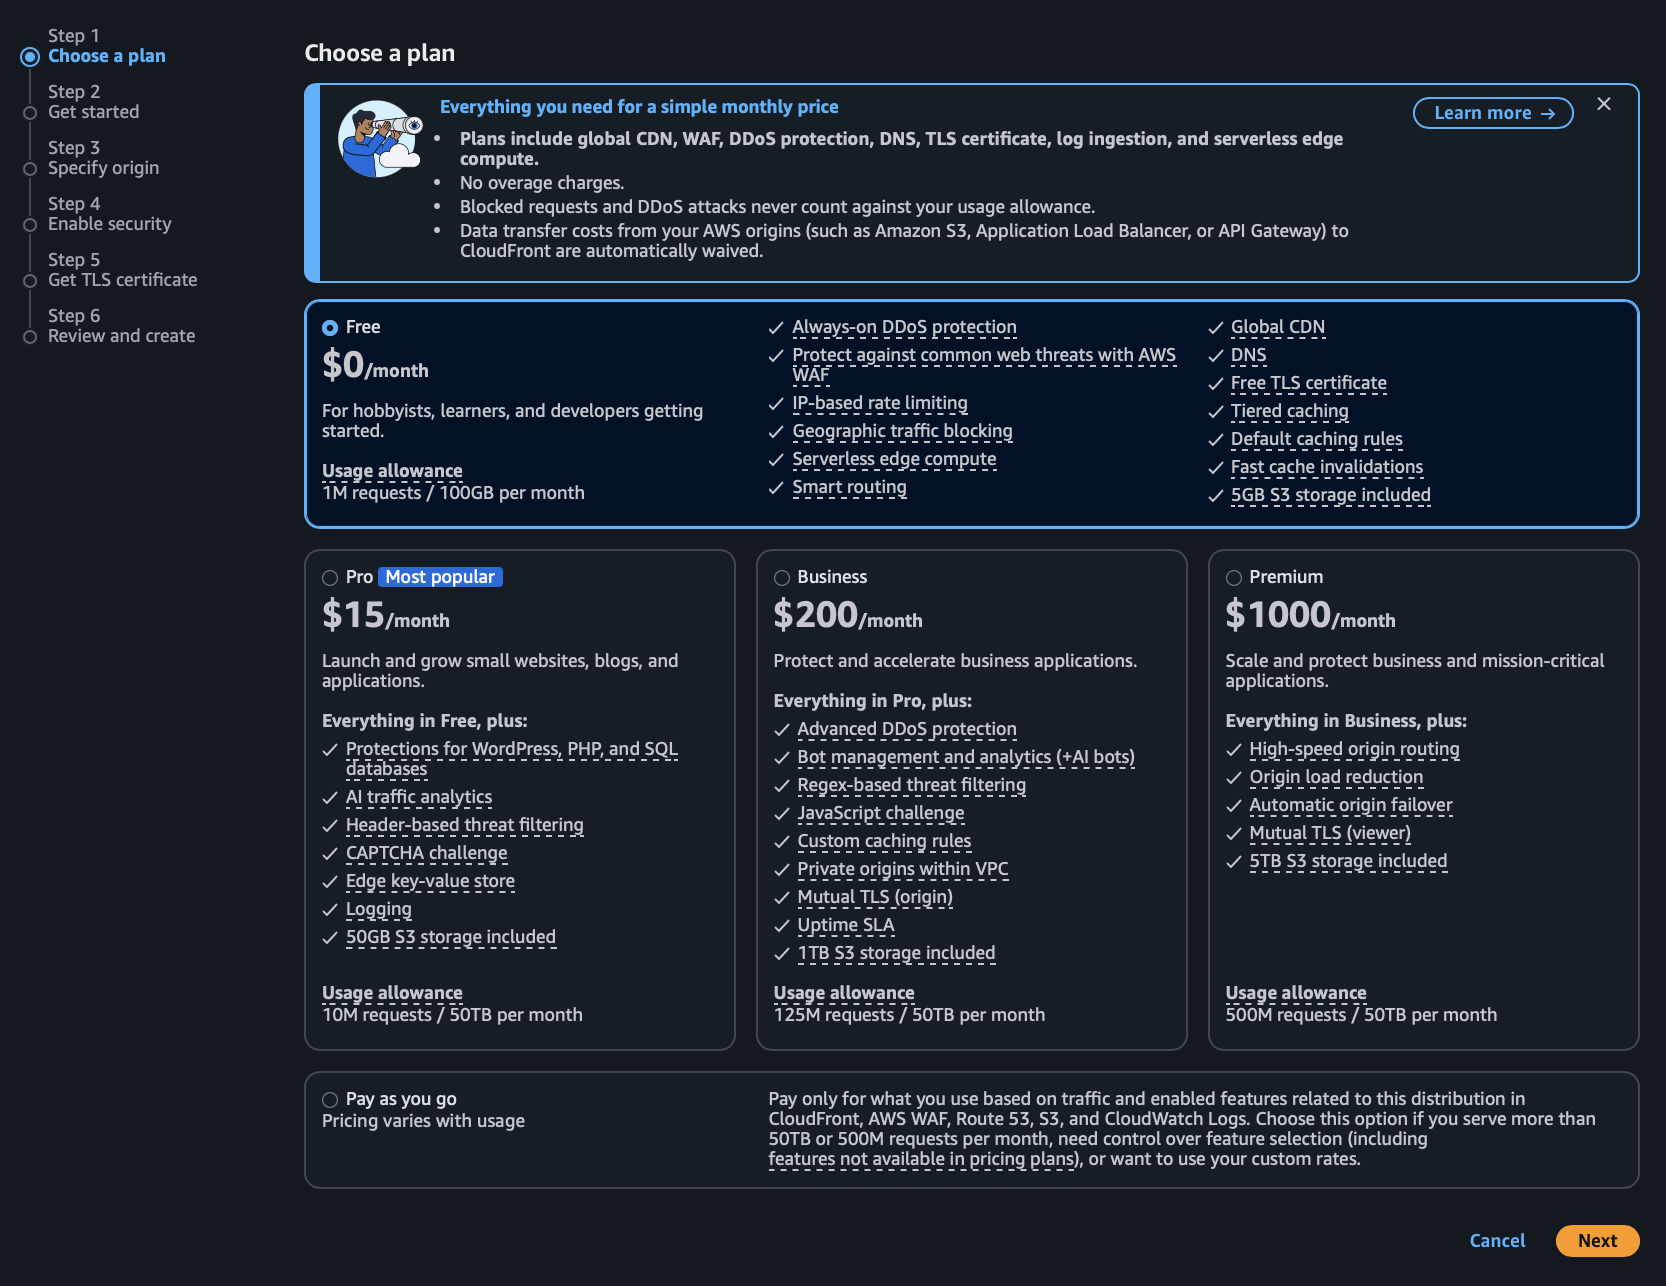
Choose a plan type based on your needs (in this example, we are using the free plan), then click Next.

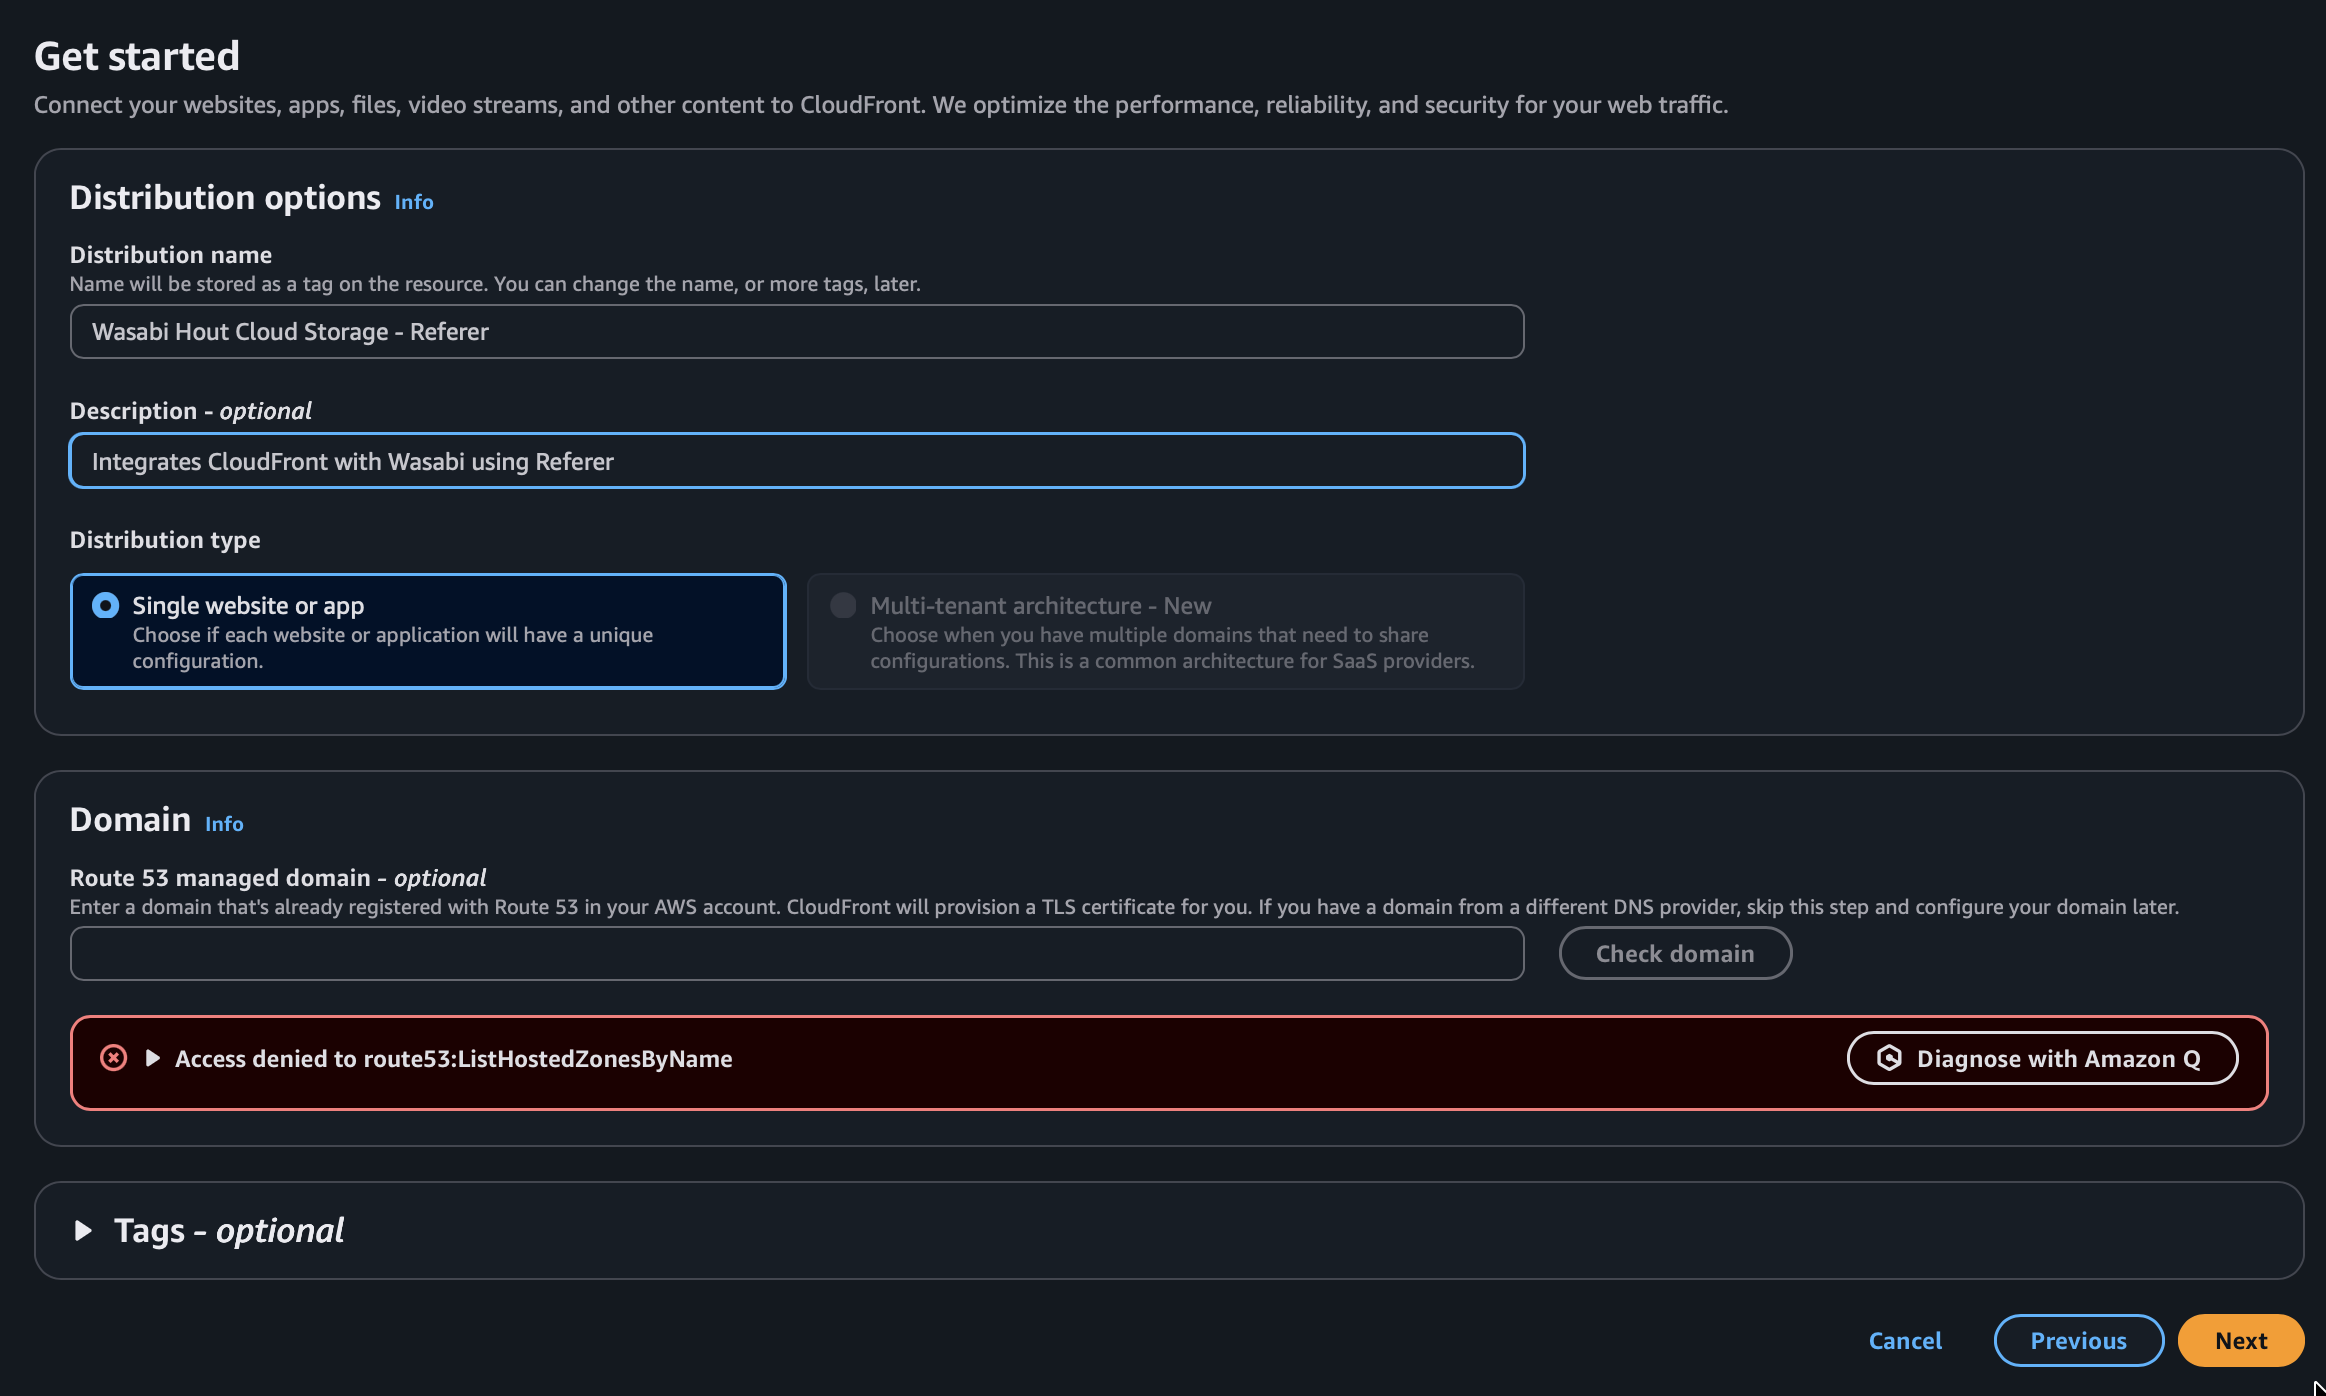
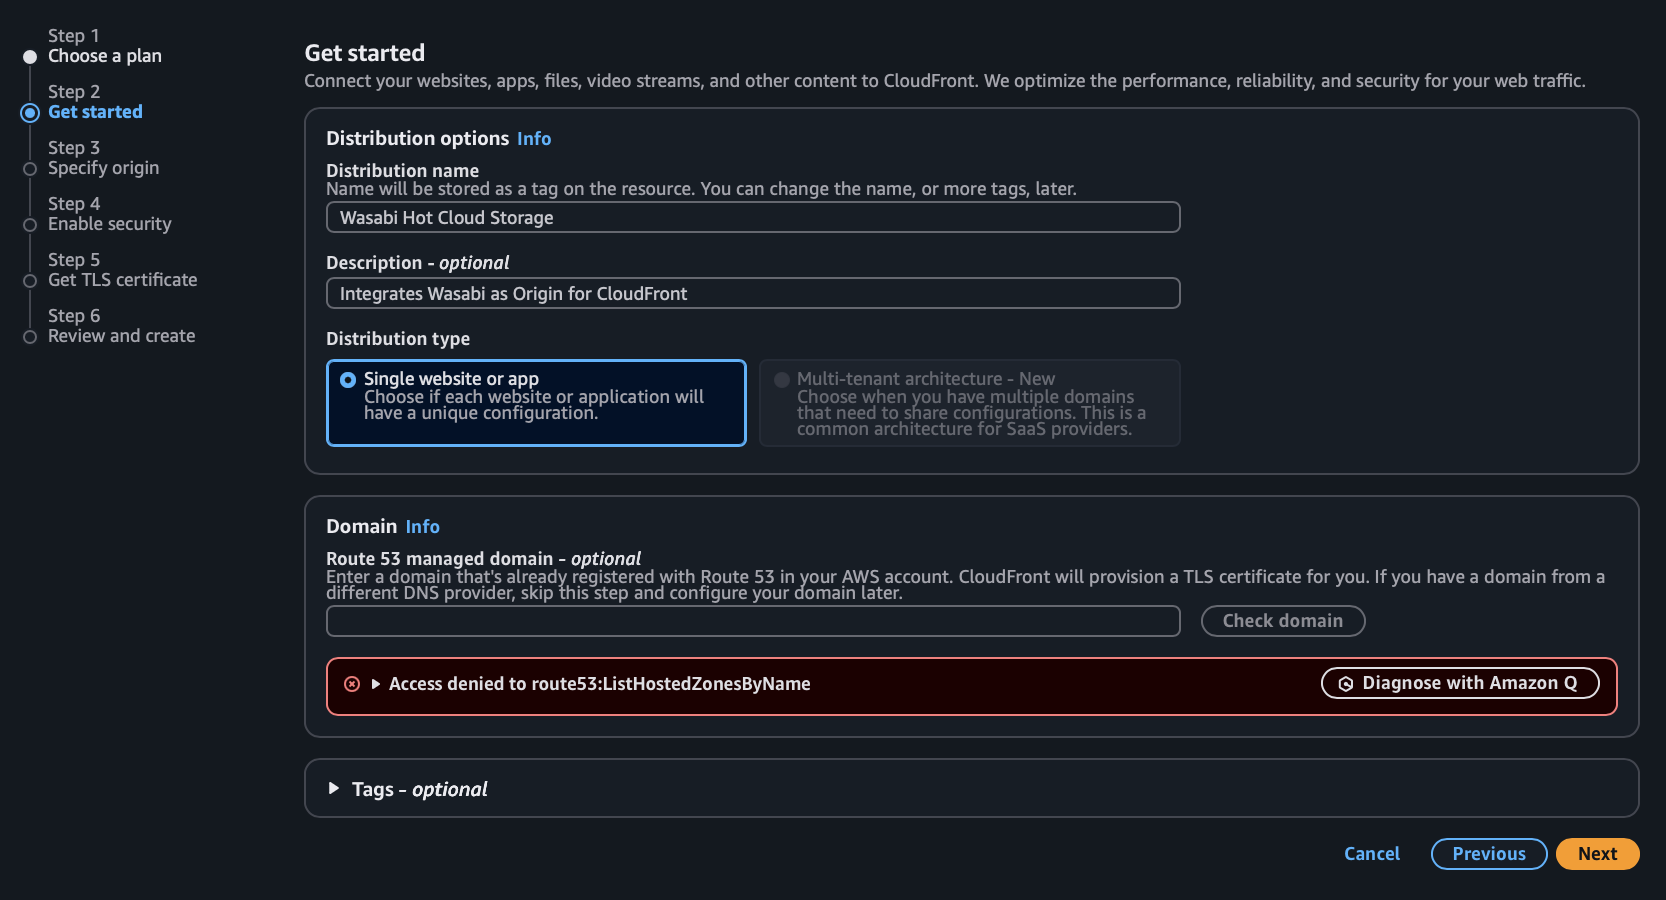
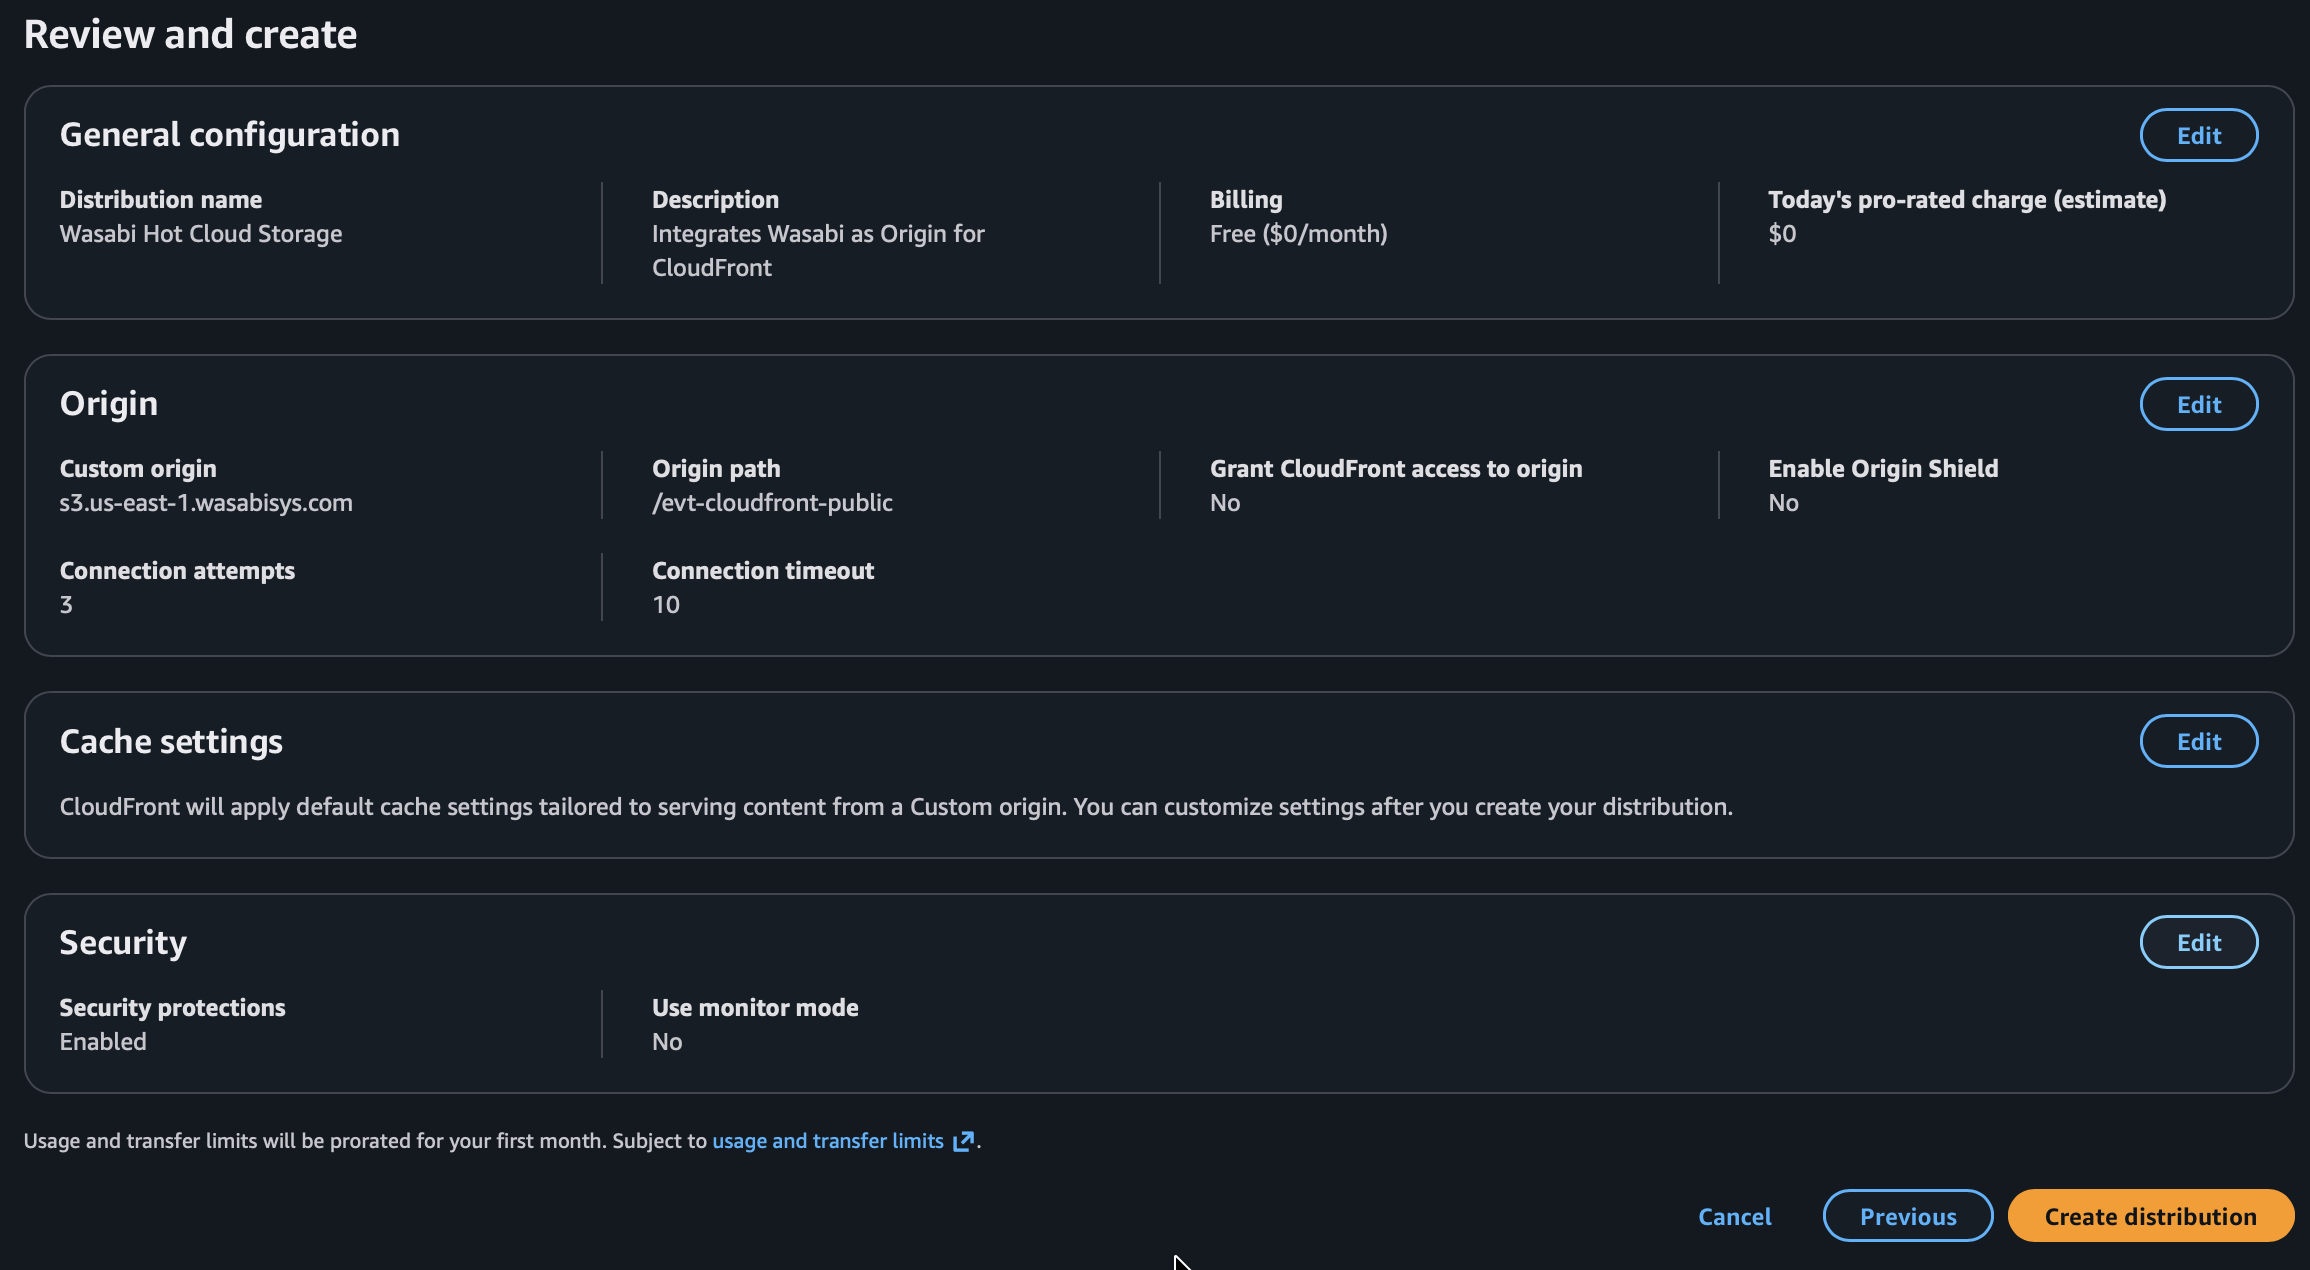
Input a name for your distribution, and optionally a description, then click Next.
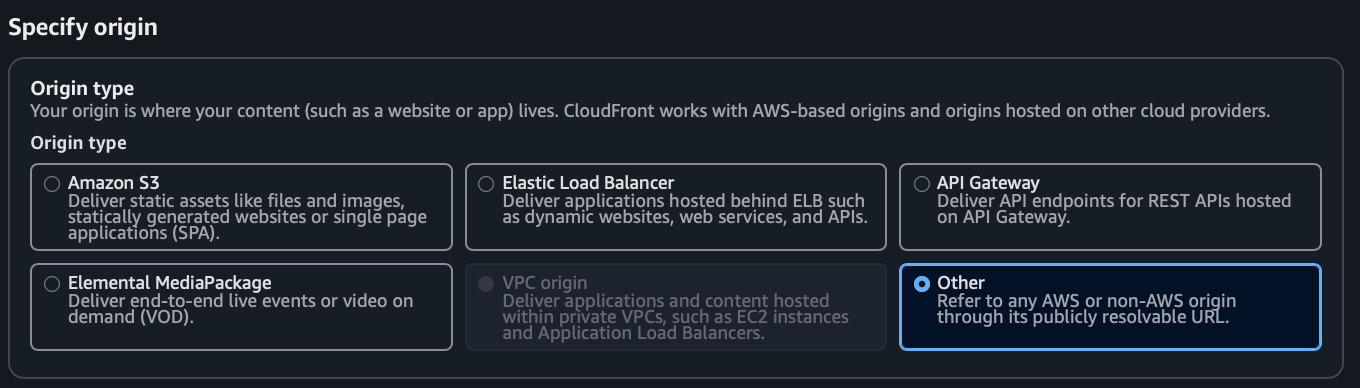
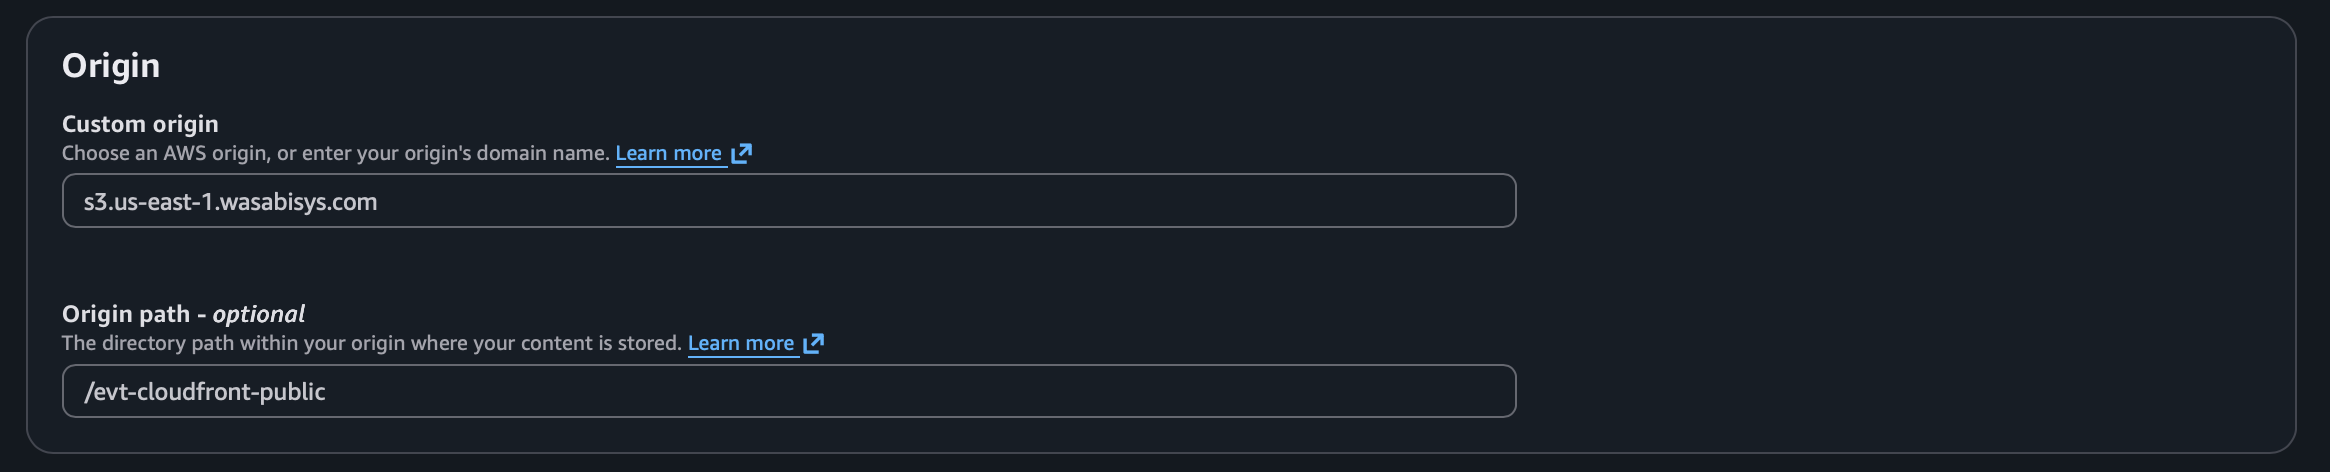
Choose Other for Origin Type.
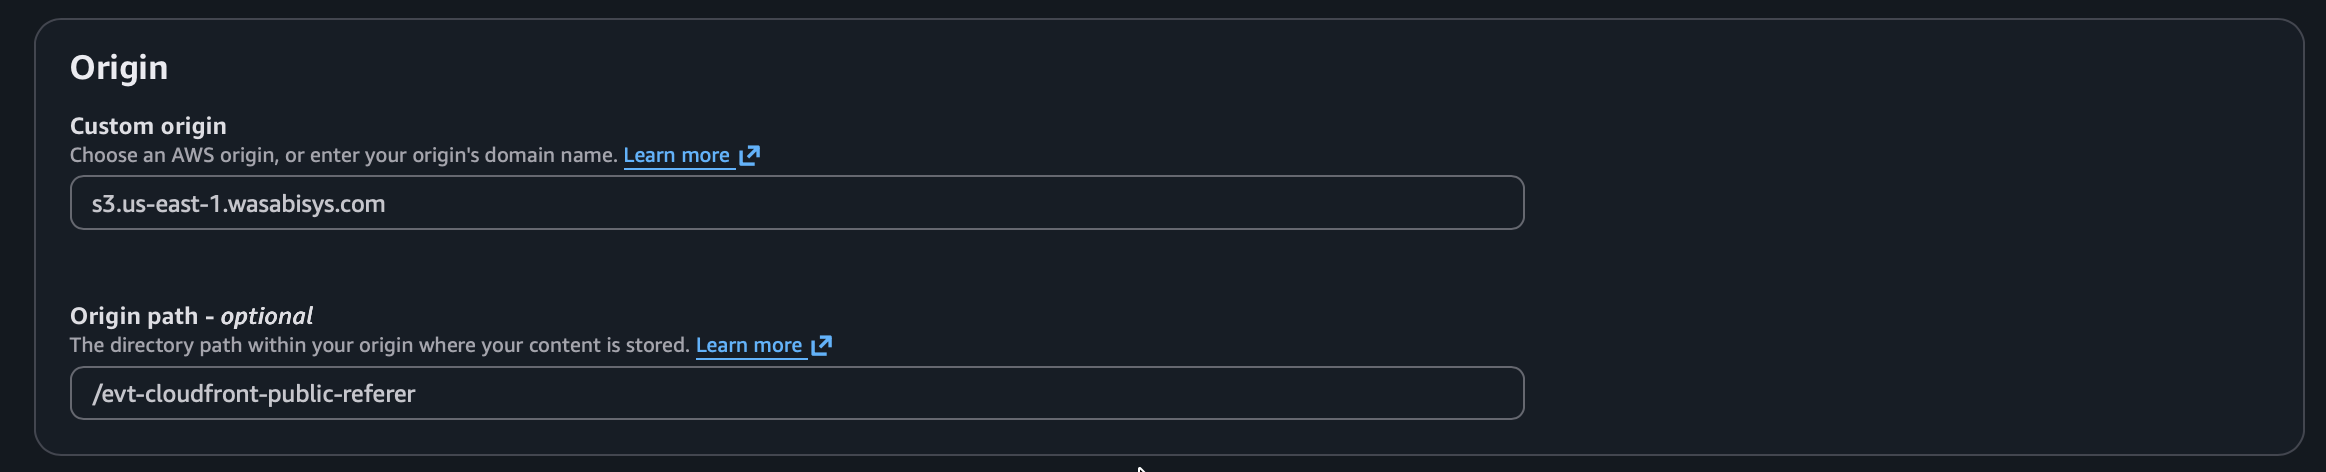
In the Custom origin field, input the Wasabi Service URL for the location in which your bucket was created. In the Origin path field, input “/your-bucket-name” using the actual name of your bucket.
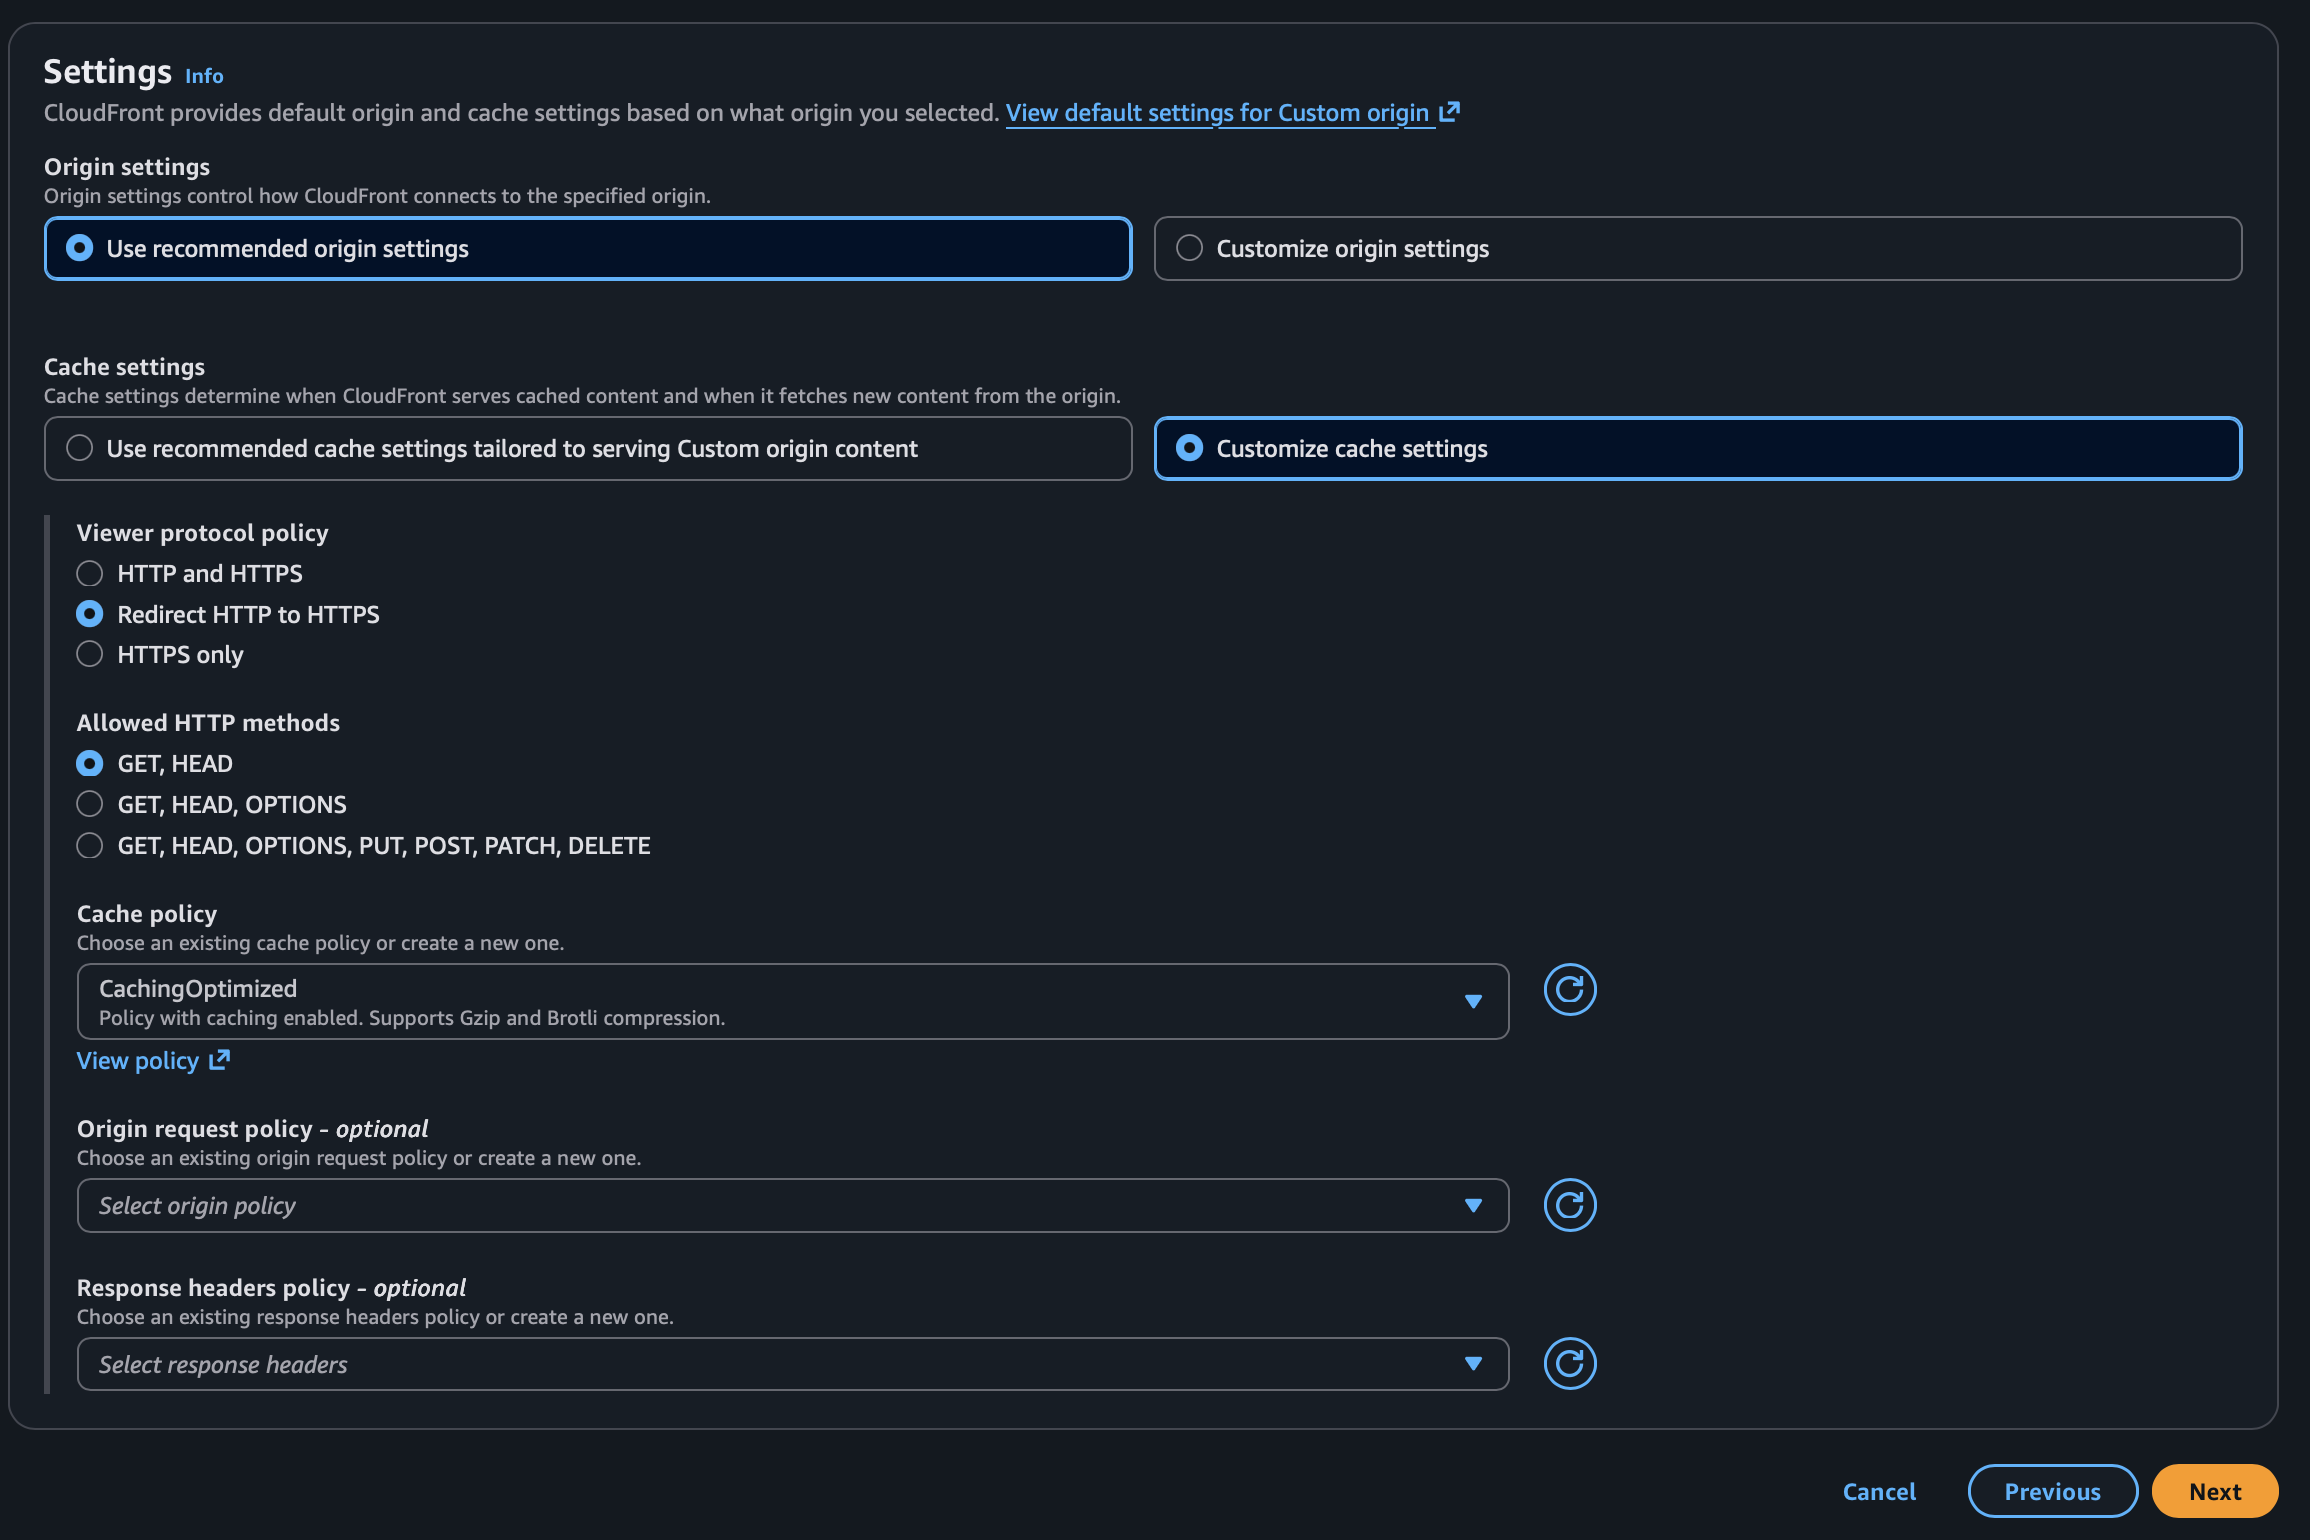
Click Customize origin settings, then click Add header to add a header.
Set the Header Name to Referer.
Set the Value to a randomly generated secret string (for example, a GUID/UUID like a26f037e-8d6b-4e75-a3b2-8886a9a3dd0e). Use a strong random value and treat this like a password. Do not use a guessable value.
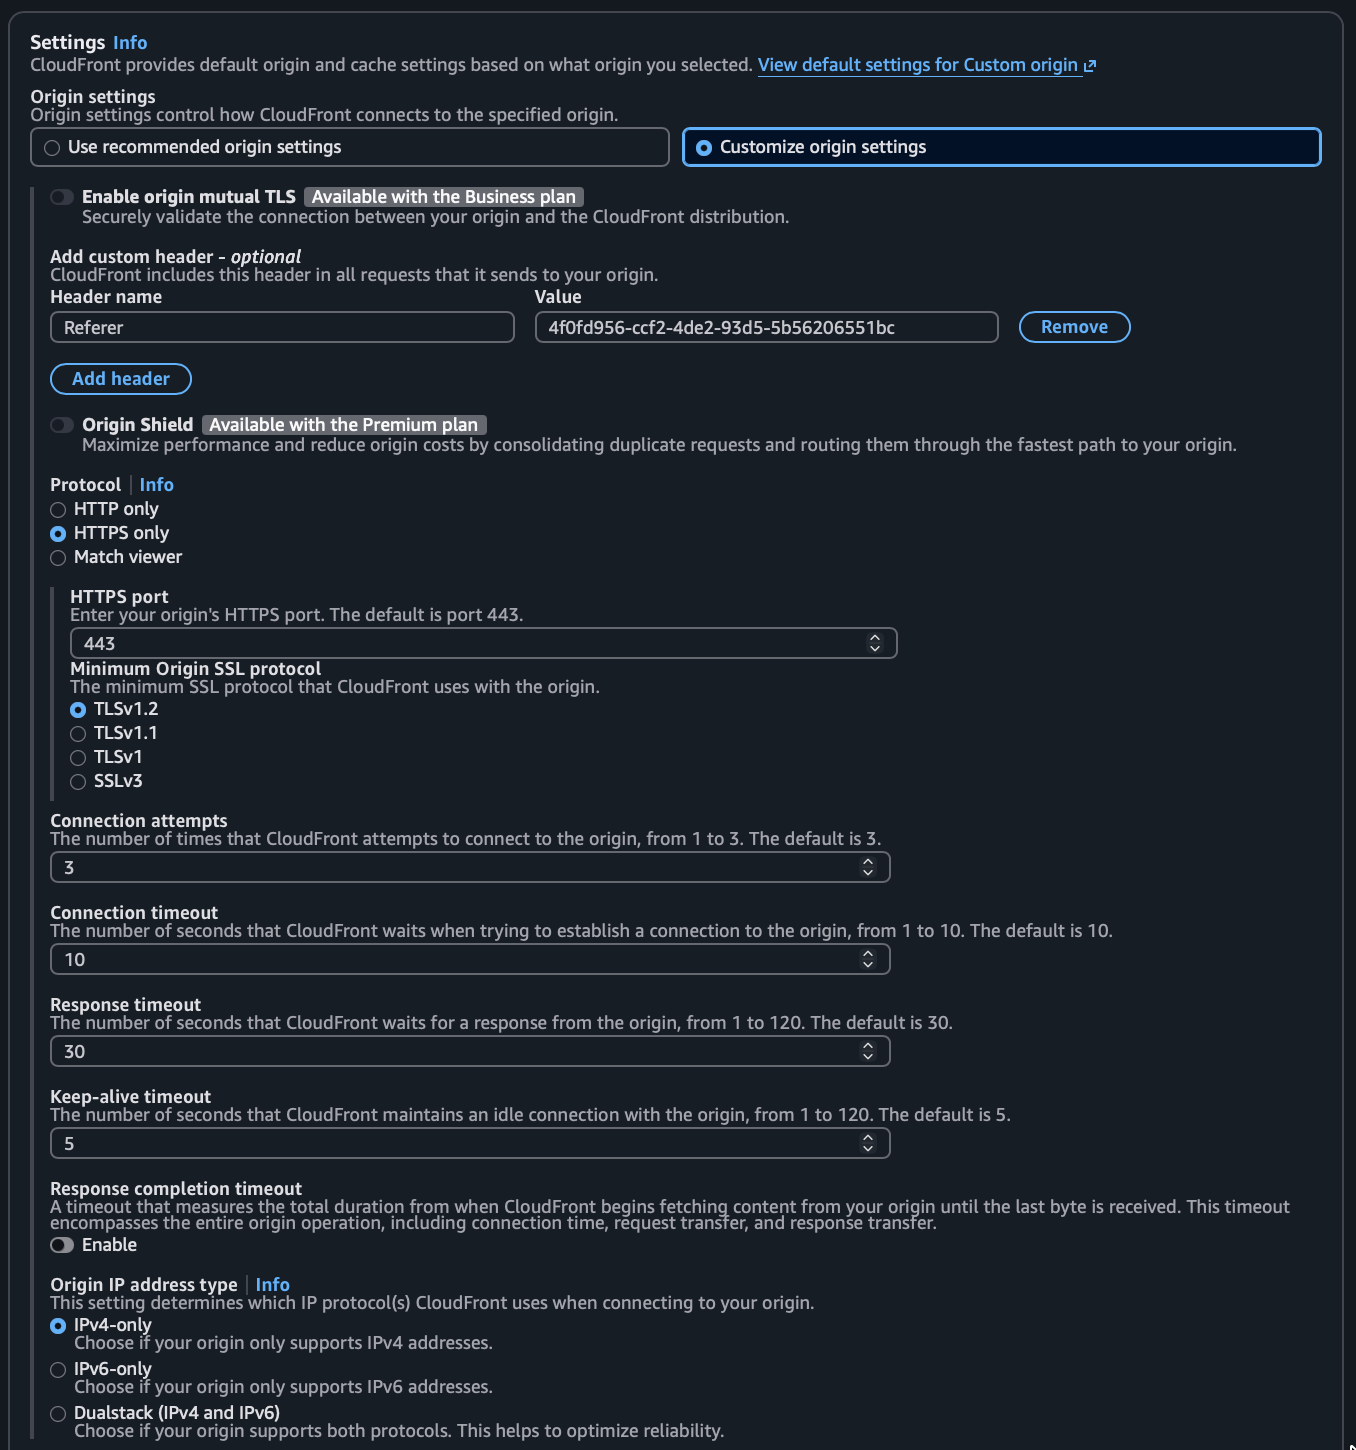
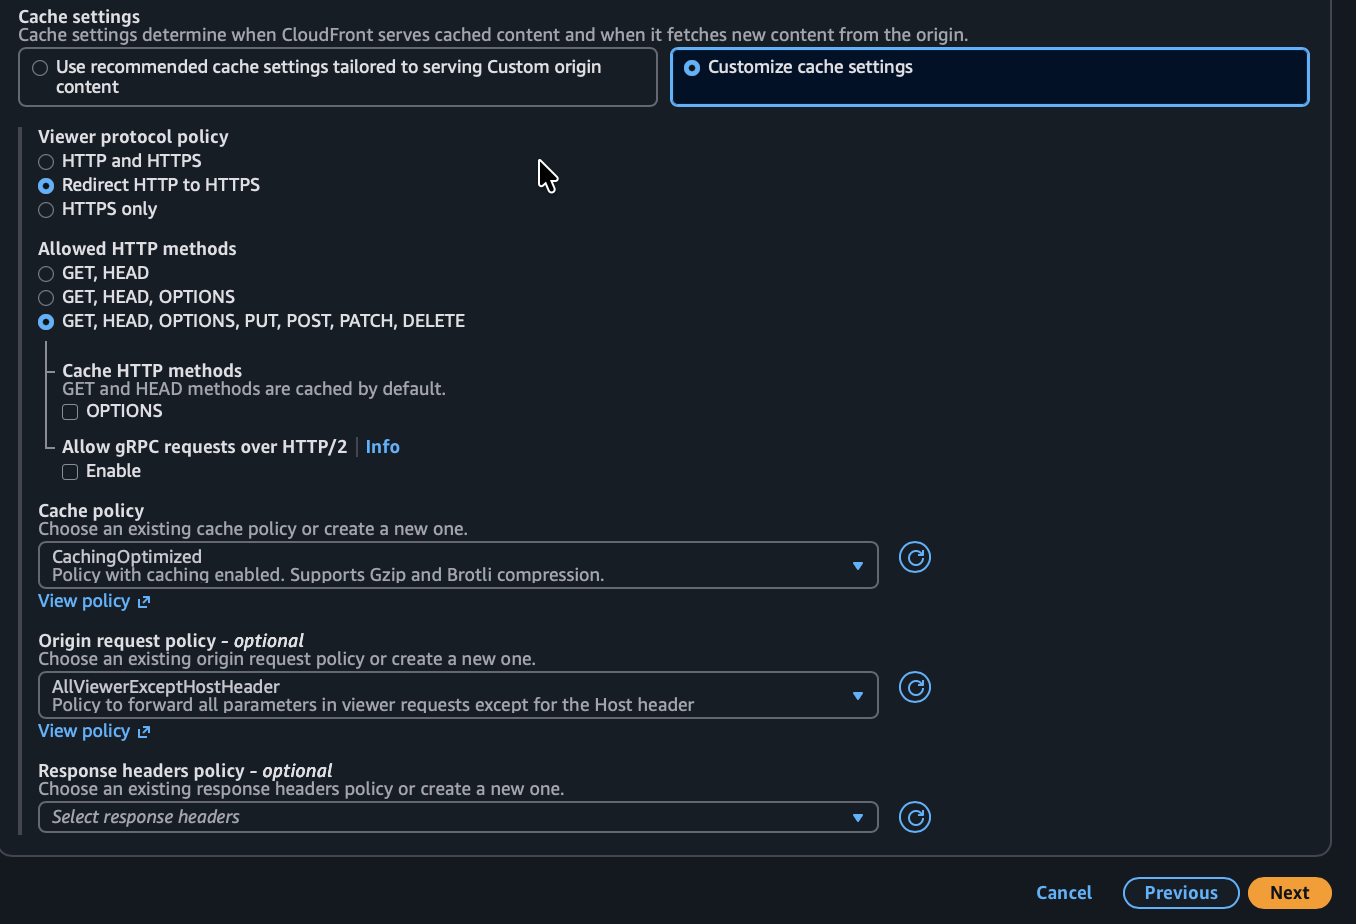
For Cache settings, choose Customize cache settings.
Under Cache policy select CachingOptimized. For static assets (images, CSS, JS), the default caching policy works well. For frequently updated content, consider a shorter TTL.
Under Origin request policy, choose AllViewerExceptHostHeader.This policy does not forward the host header. This is critically important, as you are using a custom Referer header, and a policy implemented in later steps to prevent access to requests that do not include your secret Referer header value.
Click Next.
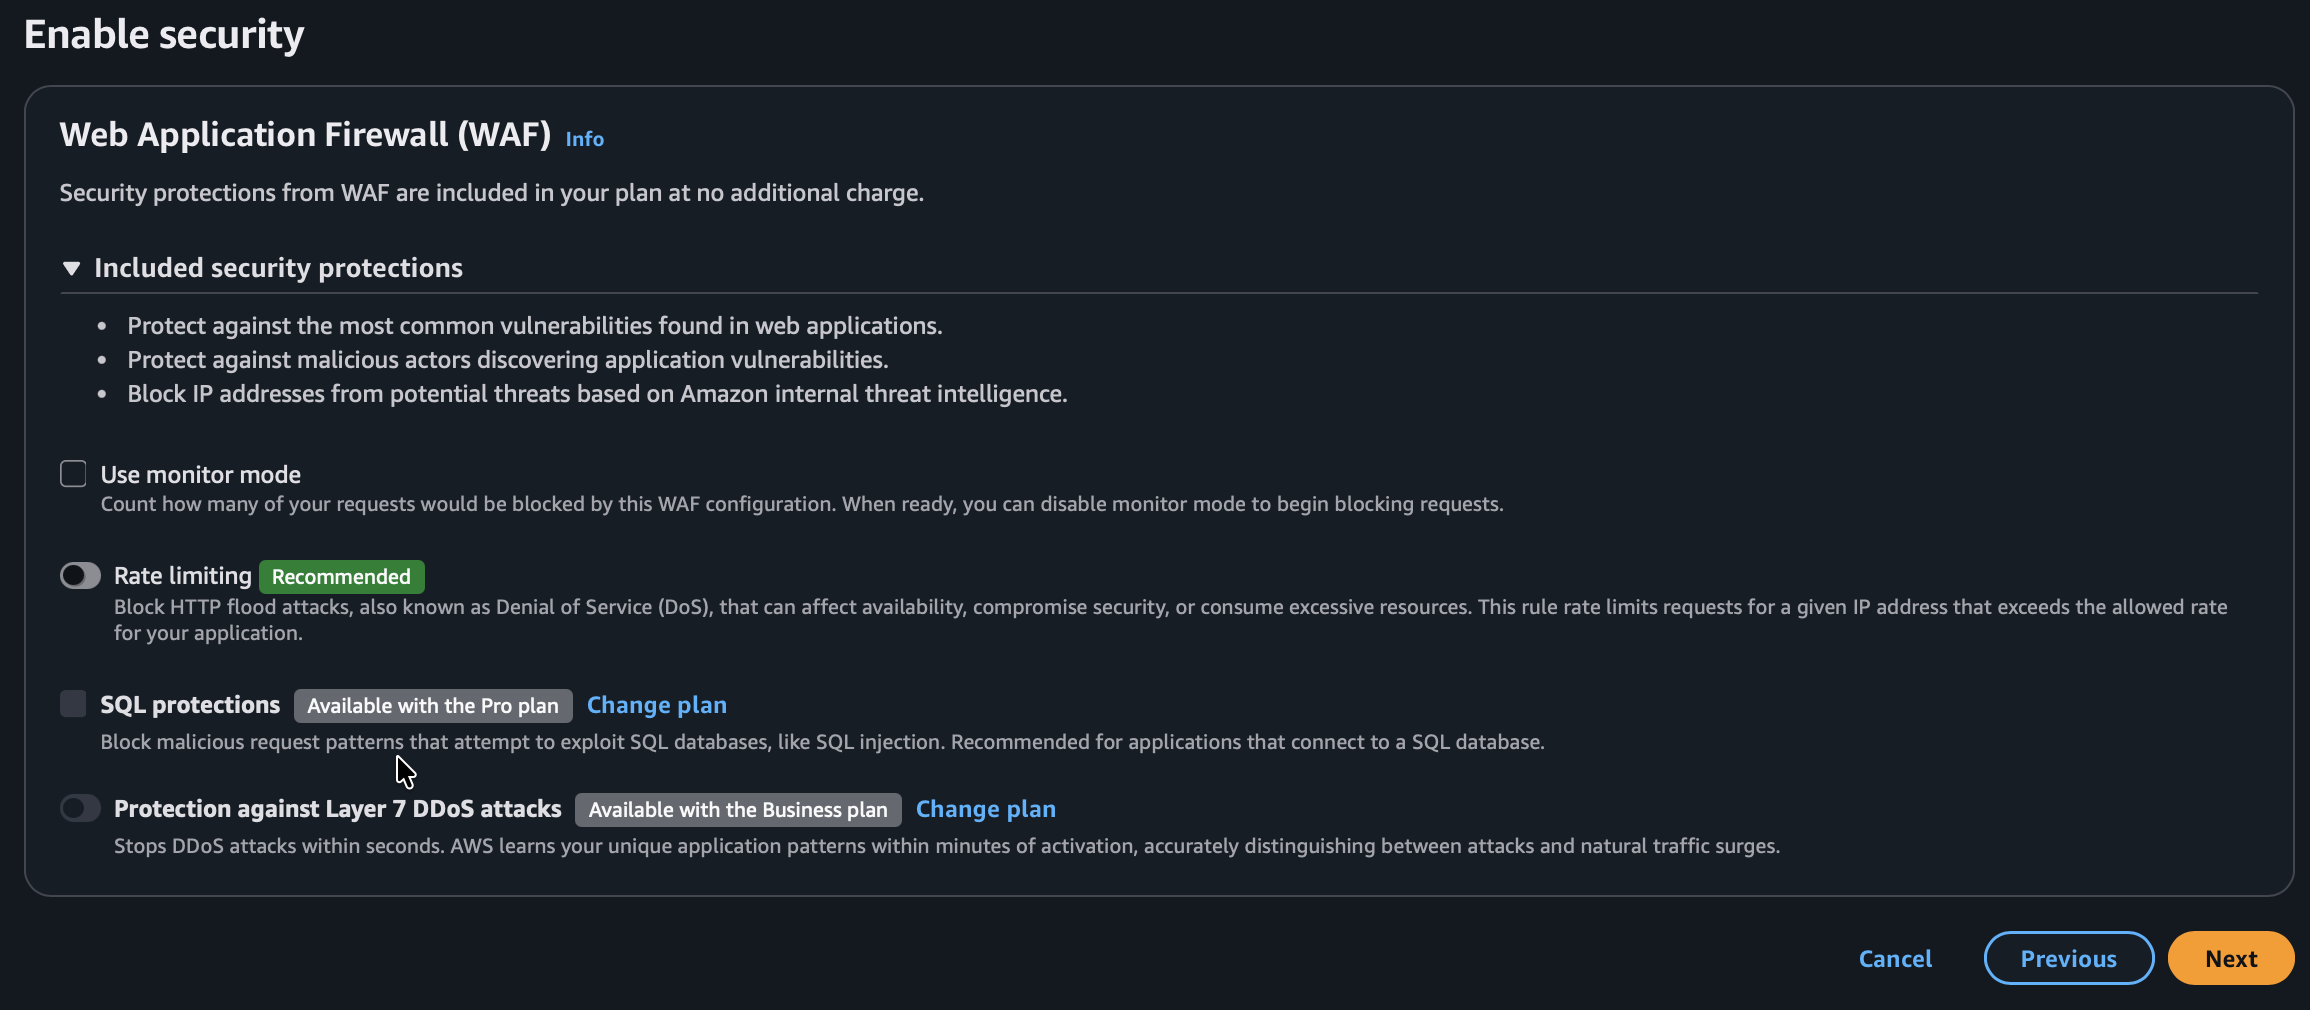
Optionally, enable additional Web Application Firewall settings. Click Next.
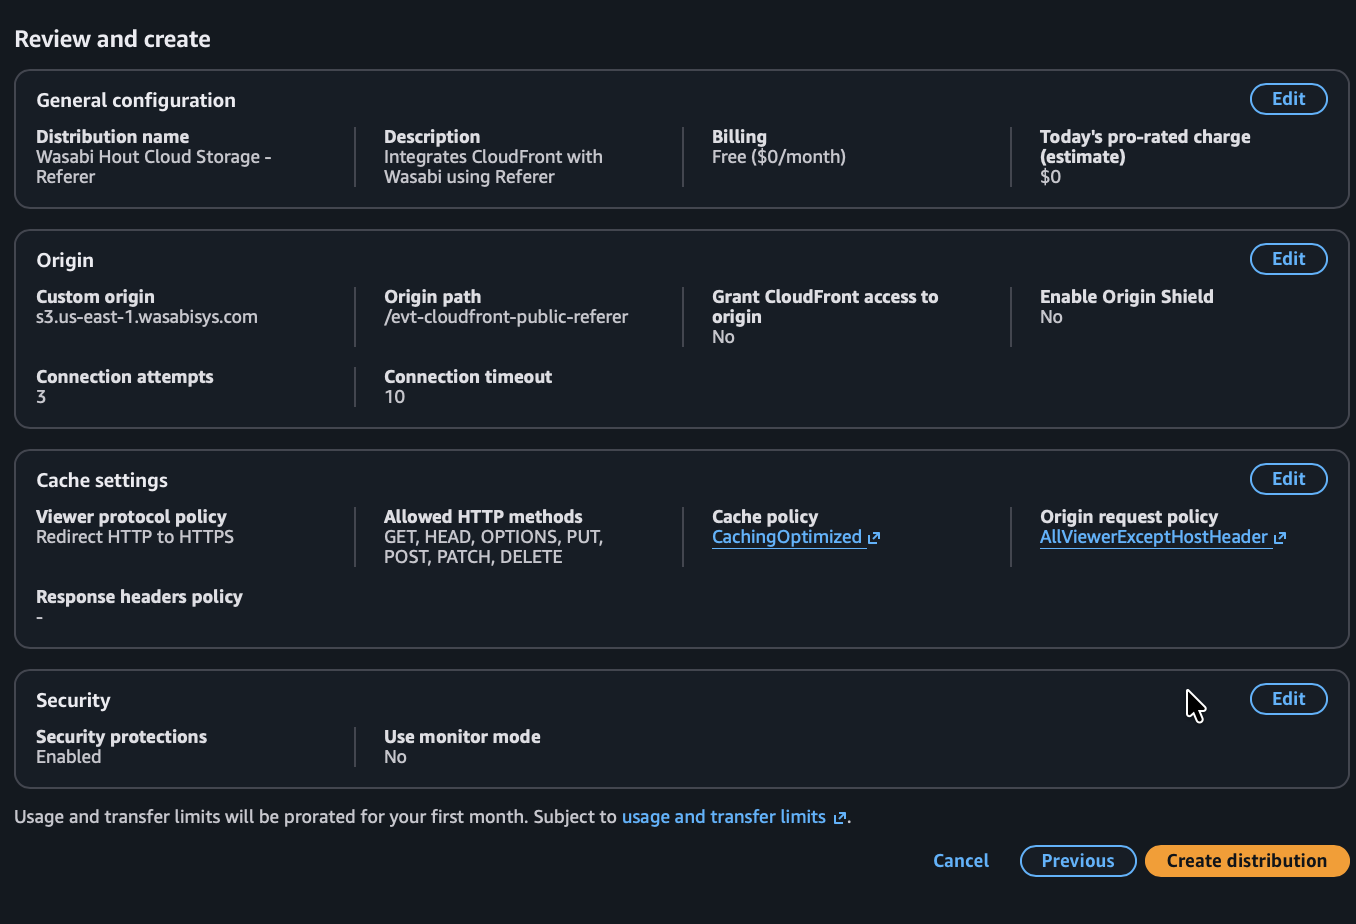
Review settings. Click Create Distribution.
Add a bucket policy via the Wasabi Storage Console. Your Wasabi bucket needs a policy that allows public read access so CloudFront can fetch objects from it, as well as prevent access to requests that do not include your secret Referer header value. Apply this policy to your bucket, replacing your-bucket-name with your actual bucket name, and replacing “your-secret-value” with your actual secret value. For more details, review Permissions: Defining a Policy and Enabling.
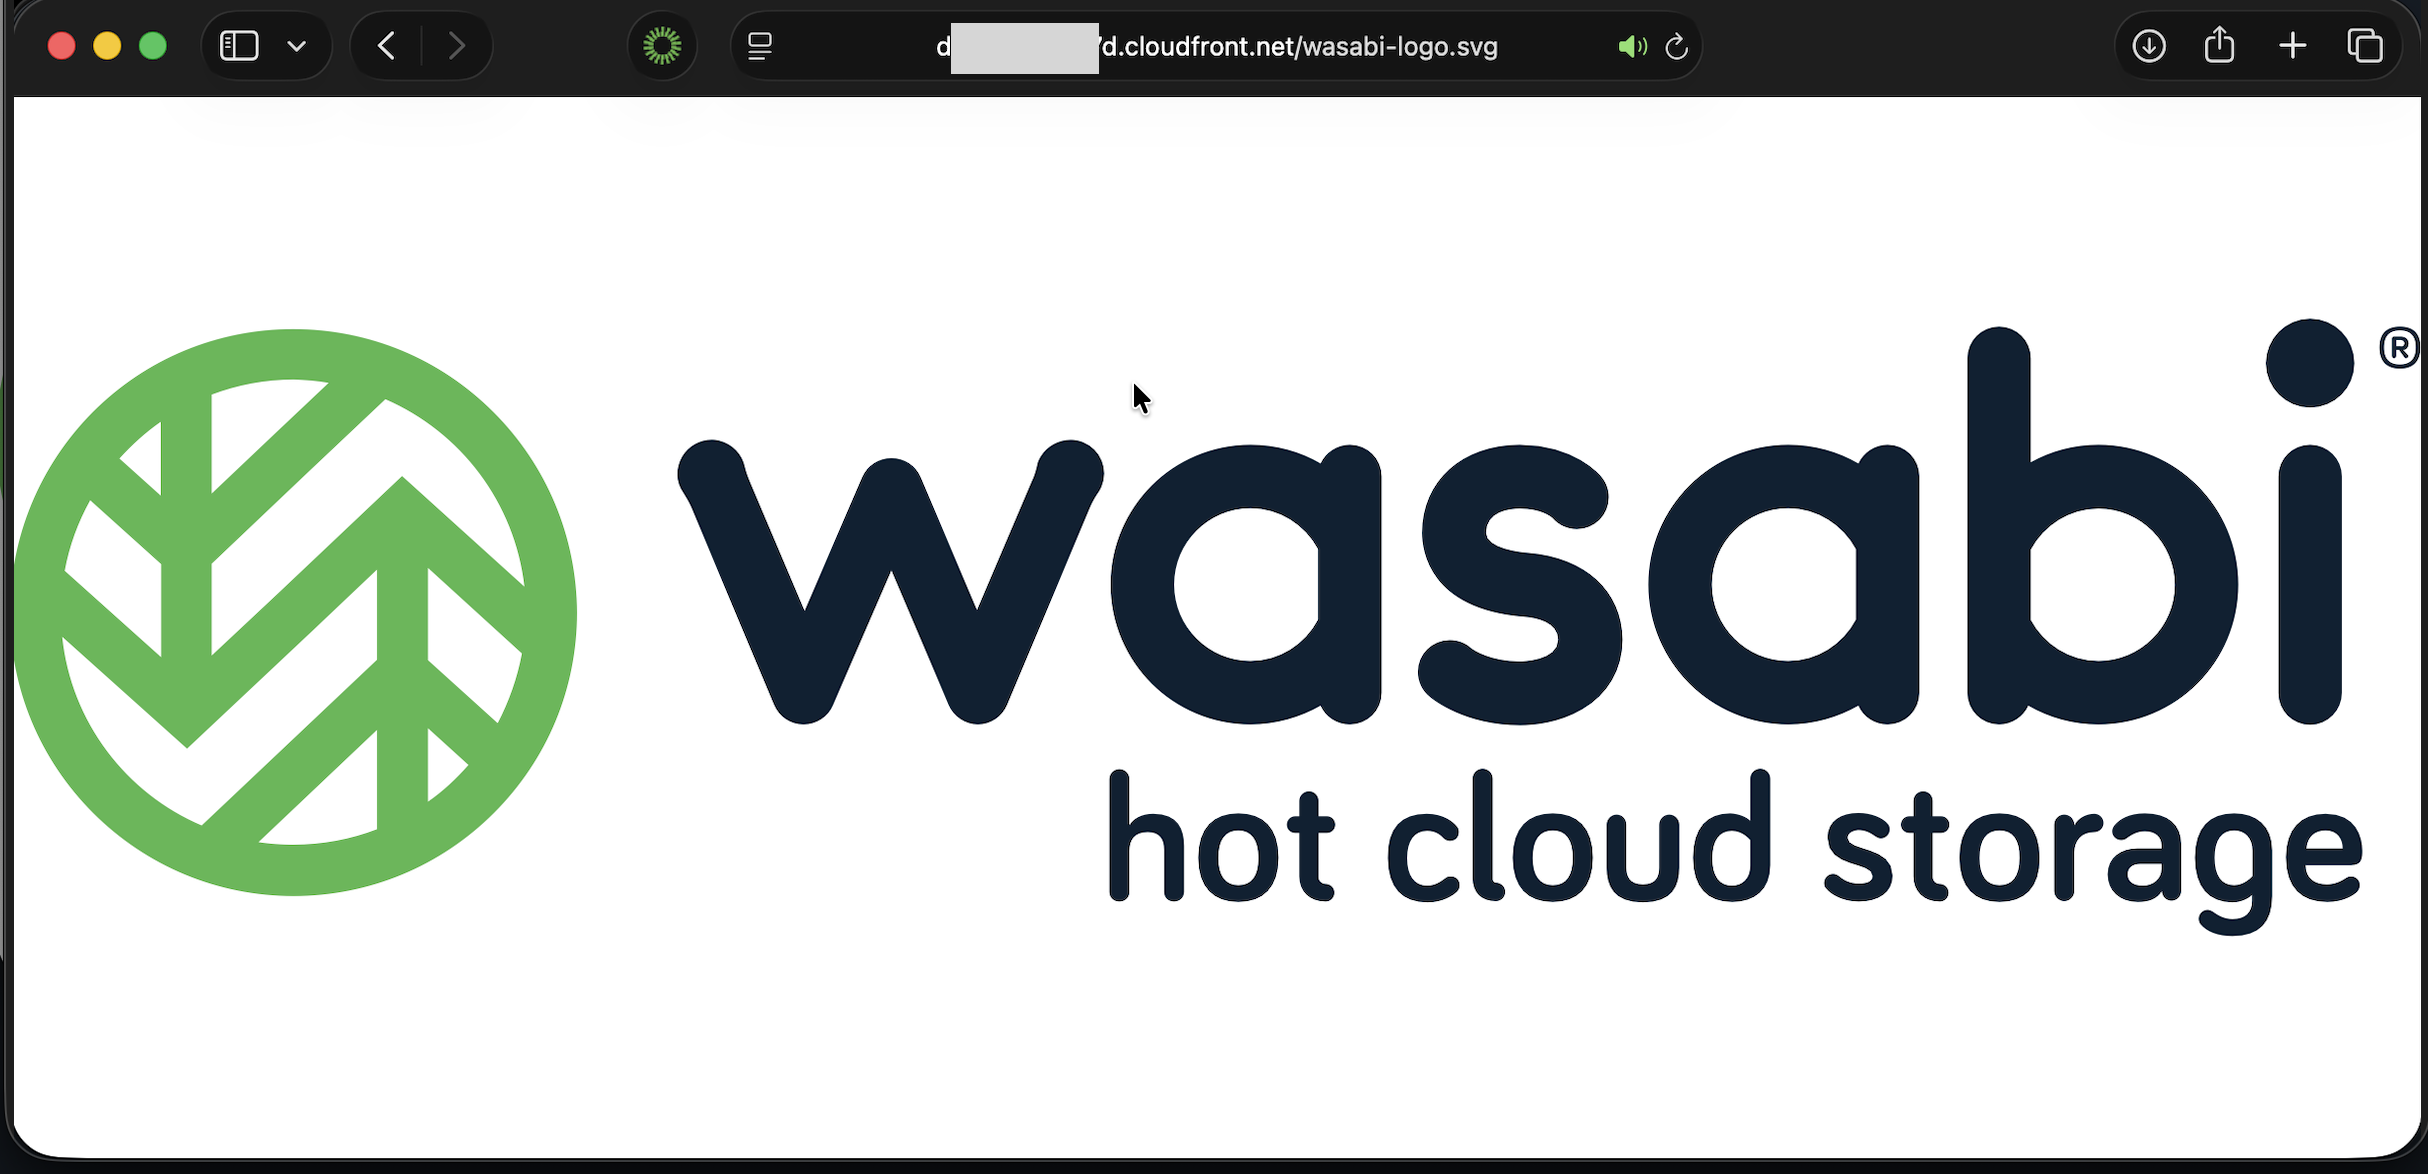
{
  "Version": "2012-10-17",
  "Statement": [
    {
      "Effect": "Allow",
      "Principal": {
        "AWS": "*"
      },
      "Action": "s3:GetObject",
      "Resource": "arn:aws:s3:::your-bucket-name/*",
      "Condition": {
        "StringEquals": {
          "aws:Referer": "your-secret-value"
        }
      }
    }
  ]
}
To confirm functionality, you can visit the URL: “Distribution-domain-name/folder-name/object-name” in your browser.
Integrating Wasabi as an Origin for AWS CloudFront (Basic)
This configuration is for basic setup of Wasabi with CloudFront. In this example, your bucket is publicly accessible, and anyone with the Wasabi S3 URL can access objects directly, bypassing CloudFront. To allow hot-linking of content (and understand the risks of making the data publicly accessible), you can use this method.
Any data egress directly from your Wasabi bucket will count against your egress quota, as described in Fair Use Policies.
Log in to your AWS Console and navigate to CloudFront.
Click Create Distribution.

Choose a plan type based on your needs (in this example, we are using the free plan), then click Next.
Input a name for your distribution. Optionally, enter a description. Then click Next.
Choose Other for Origin Type.

In the Custom origin field, input the Wasabi Service URL for the location in which your bucket was created. In the Origin path field, input “/your-bucket-name” using the actual name of your bucket.
Leave the Origin settings section as the default (Use Recommended Settings). Set Cache settings to Customize cache settings, and choose CachingOptimized from the Cache Policy drop-down. Then click Next.
Optionally enable additional Web Application Firewall settings. Then click Next.

Review settings and finally click Create Distribution.
Add a bucket policy via the Wasabi Storage Console. Your Wasabi bucket needs a policy that allows public read access so CloudFront can fetch objects from it. Apply this policy to your bucket, replacing “your-bucket-name” with your actual bucket name. For more details, review Permissions: Defining a Policy and Enabling.
{
  "Version": "2012-10-17",
  "Statement": [
    {
      "Effect": "Allow",
      "Principal": {
        "AWS": "*"
      },
      "Action": "s3:GetObject",
      "Resource": "arn:aws:s3:::your-bucket-name/*"
    }
  ]
}
To confirm functionality, you can visit the URL: “Distribution-domain-name/folder-name/object-name” in your browser.
Alternative Methods
CloudFront Signed URLs or Signed Cookies
CloudFront signed URLs or signed cookies are best suited for private or paid content that requires per-user or time-limited access control. With signed URLs or signed cookies, your application generates a cryptographic signature that CloudFront validates before serving content. Wasabi is not involved in the signing. It serves objects to CloudFront normally, and all access control happens at the CloudFront layer.
Signed URLs—Each URL contains a signature, an expiration date, and an optional IP restriction. Best when you need to control access to individual files, or when cookies are not supported (such as API clients and direct downloads).
Signed cookies—The browser stores the signature in a cookie that gets sent with every request. Best when users browse multiple files after authenticating (such as media libraries, gated documentation, and streaming).
The general flow is as follows.
Create a trusted key group in CloudFront with a public key.
Configure your CloudFront distribution to restrict viewer access and use the trusted key group.
In your application, use the corresponding private key to generate signed URLs or signed cookies for authenticated users.
CloudFront validates the signature and serves the content. Invalid or expired signatures are rejected with a 403.
For implementation details, refer to the following AWS documentation: