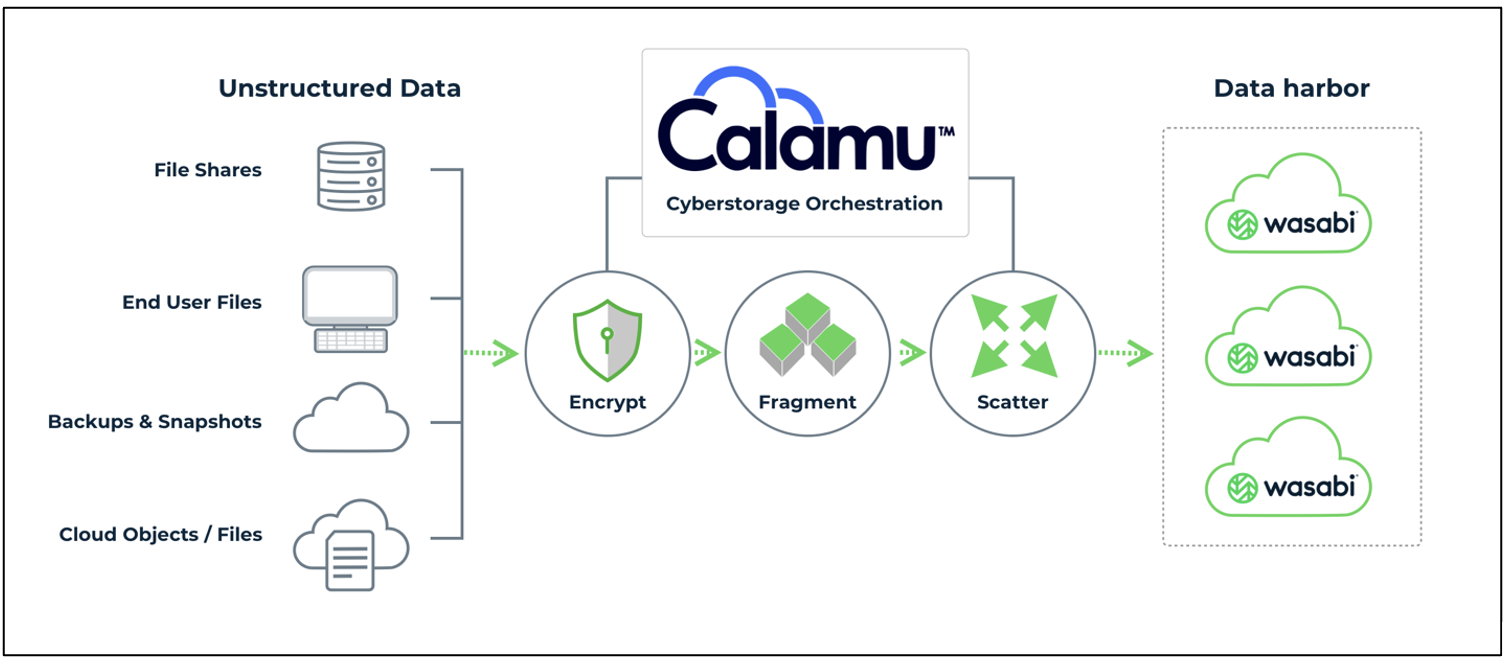
Wasabi has been validated for use with Calamu. Calamu provides protection where it is most needed and most effective— onto the data itself. The patented Cyberstorage solution automatically encrypts and fragments your data into pieces, then scatters them across geographically dispersed locations, making nefarious access nearly impossible. To learn more about the Calamu + Wasabi solution, refer to our Partner Solution Brief. To use this product with Wasabi, follow the instructions below.
Reference Architecture
Requirements
Calamu v 1.3.
An active Wasabi account.
A minimum of 4 buckets created in Wasabi console (three for distribution locations and one for recovery locations).
It is best practice is to use geographically dispersed locations to maintain resilience. For the lowest latency, use locations closest to the computing resources utilizing Calamu.
Configuration
Log in to Calamu Console.
.png)
Navigate to Storage Locations.
.png)
In the Distribution tab, click + New to create a Wasabi Distribution Locations. Distribution Locations are Storage Locations that will hold the file fragments.
.png)
Click Wasabi. Provide the details below and click Submit.
Region
Bucket
Access Key
Secret Key
.png)
Repeat the Steps 2-4 until you have a minimum of Distribution locations.
Each of these locations needs to be a separate storage bucket to maintain fragment segregation. Best practice is to use geographically dispersed locations to maintain resilience. For the lowest latency, use locations closest to the computing resources utilizing Calamu.
In the Recovery tab, click + New to add a Wasabi Recovery location. Recovery Location(s) are preconfigured locations that serve as hot standby. If a location goes down or is compromised, Calamu will automatically self-heal and distribute the files to the new location.
.png)
Click Wasabi. Provide the details below and click Submit.
Region
Bucket
Access Key
Secret Key
.png)
The next step is to create a Data Harbor. A Data Harbor is a collection of geographically and physically separated Storage Locations used to store data fragmented into less valuable pieces, such that no single location contains all the fragments needed to reconstruct the data in its original form.
Navigate to Data Harbors and click + New to add a Wasabi Data Harbor.
.png)
In the New Data Harbor dialog box, add Description and assign the Wasabi Storage Locations created earlier to the Data Harbor by selecting the desired Wasabi Distribution and Recovery locations created in Steps 3-8.
.png)
To view the Wasabi Storage locations, return to the Dashboard.
.png)
To start using the Wasabi Data Harbor, Calamu customers can reference articles on Vault Templates, Vaults, Calamu Connectors, and File Explorer.
For additional help, email support@calamu.com or visit Calamu Support.