How do I use Comet Enterprise Backup with Wasabi?
Comet Backup has been validated for use with Wasabi. The tips and screen shots below provide details on configuration.
Note: The data restoration process is handled by your specific backup software application. As there are many potential variables that will affect your unique environment, it is strongly recommended that you seek the guidance of your backup software's technical support team in the event that you encounter difficulty, or have application-specific inquiries.
1. Prerequisites
Active Wasabi Cloud Storage Account
Active & Licensed Comet Account
Comet Server and Client Backup Software
Create your bucket for your Comet Backups in the Wasabi Console
Note: You will want to create your buckets beforehand so that you can select the appropriate Wasabi Storage Region for you data as you cannot select this through the Comet Storage Vault Creation process.
2. Configure Wasabi as a Storage Template
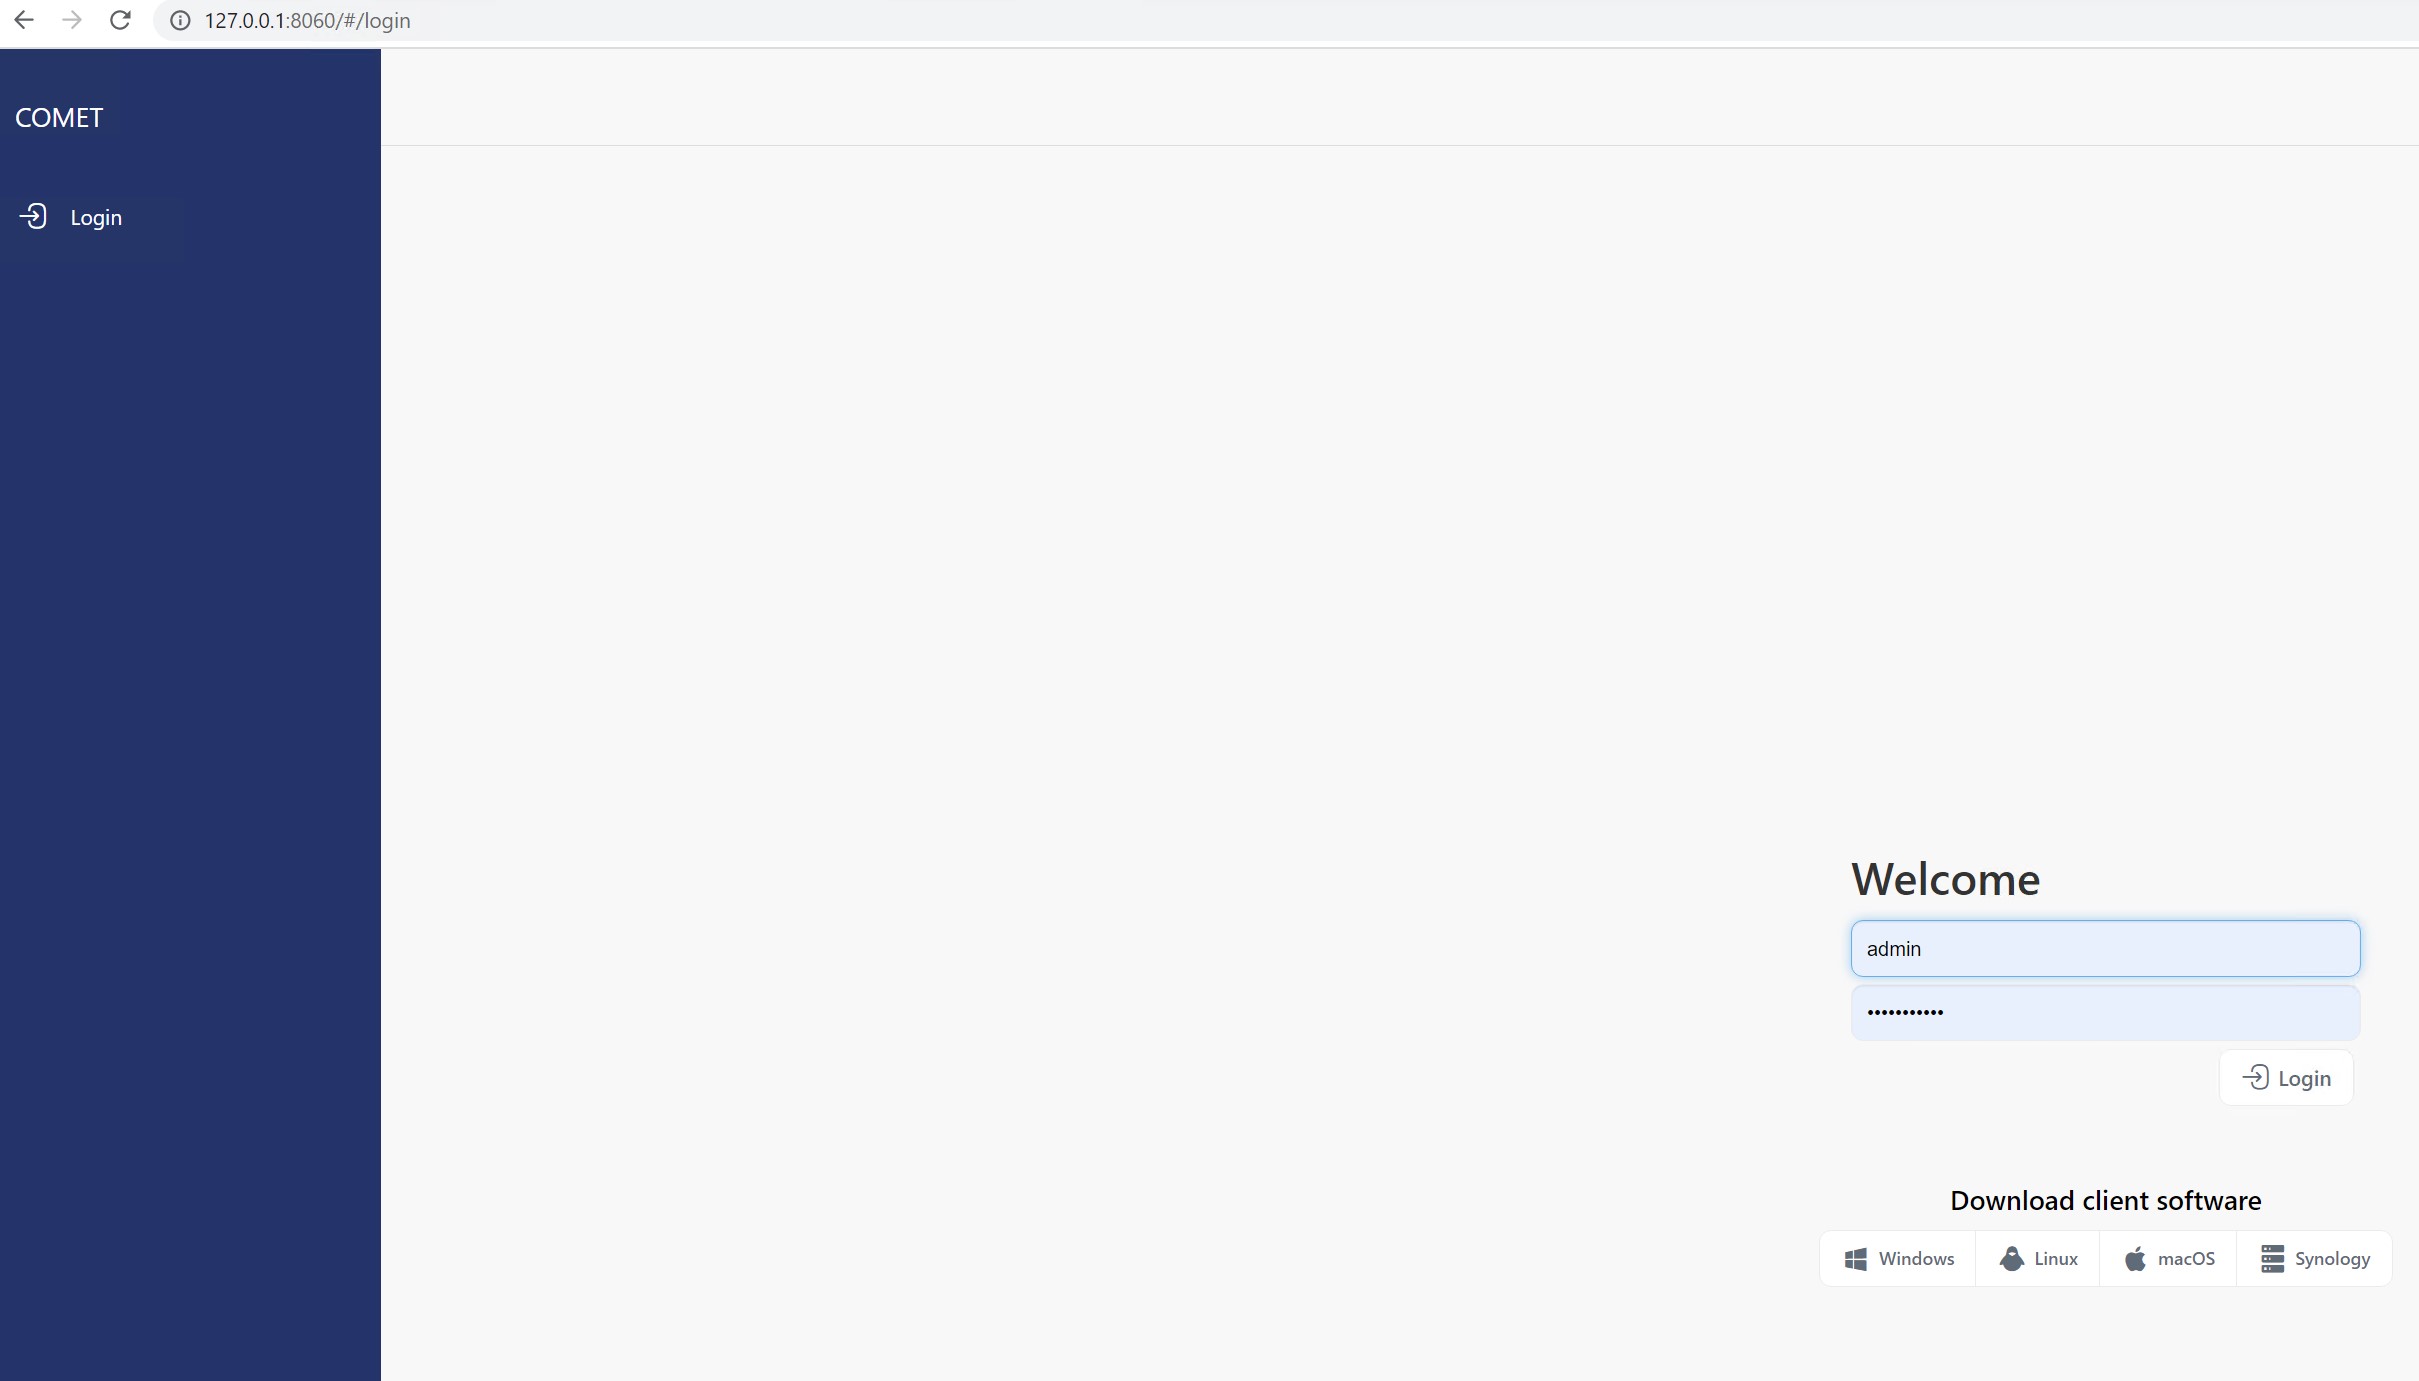
2.1 Log into the Server Admin using the set IP address chosen during installation.
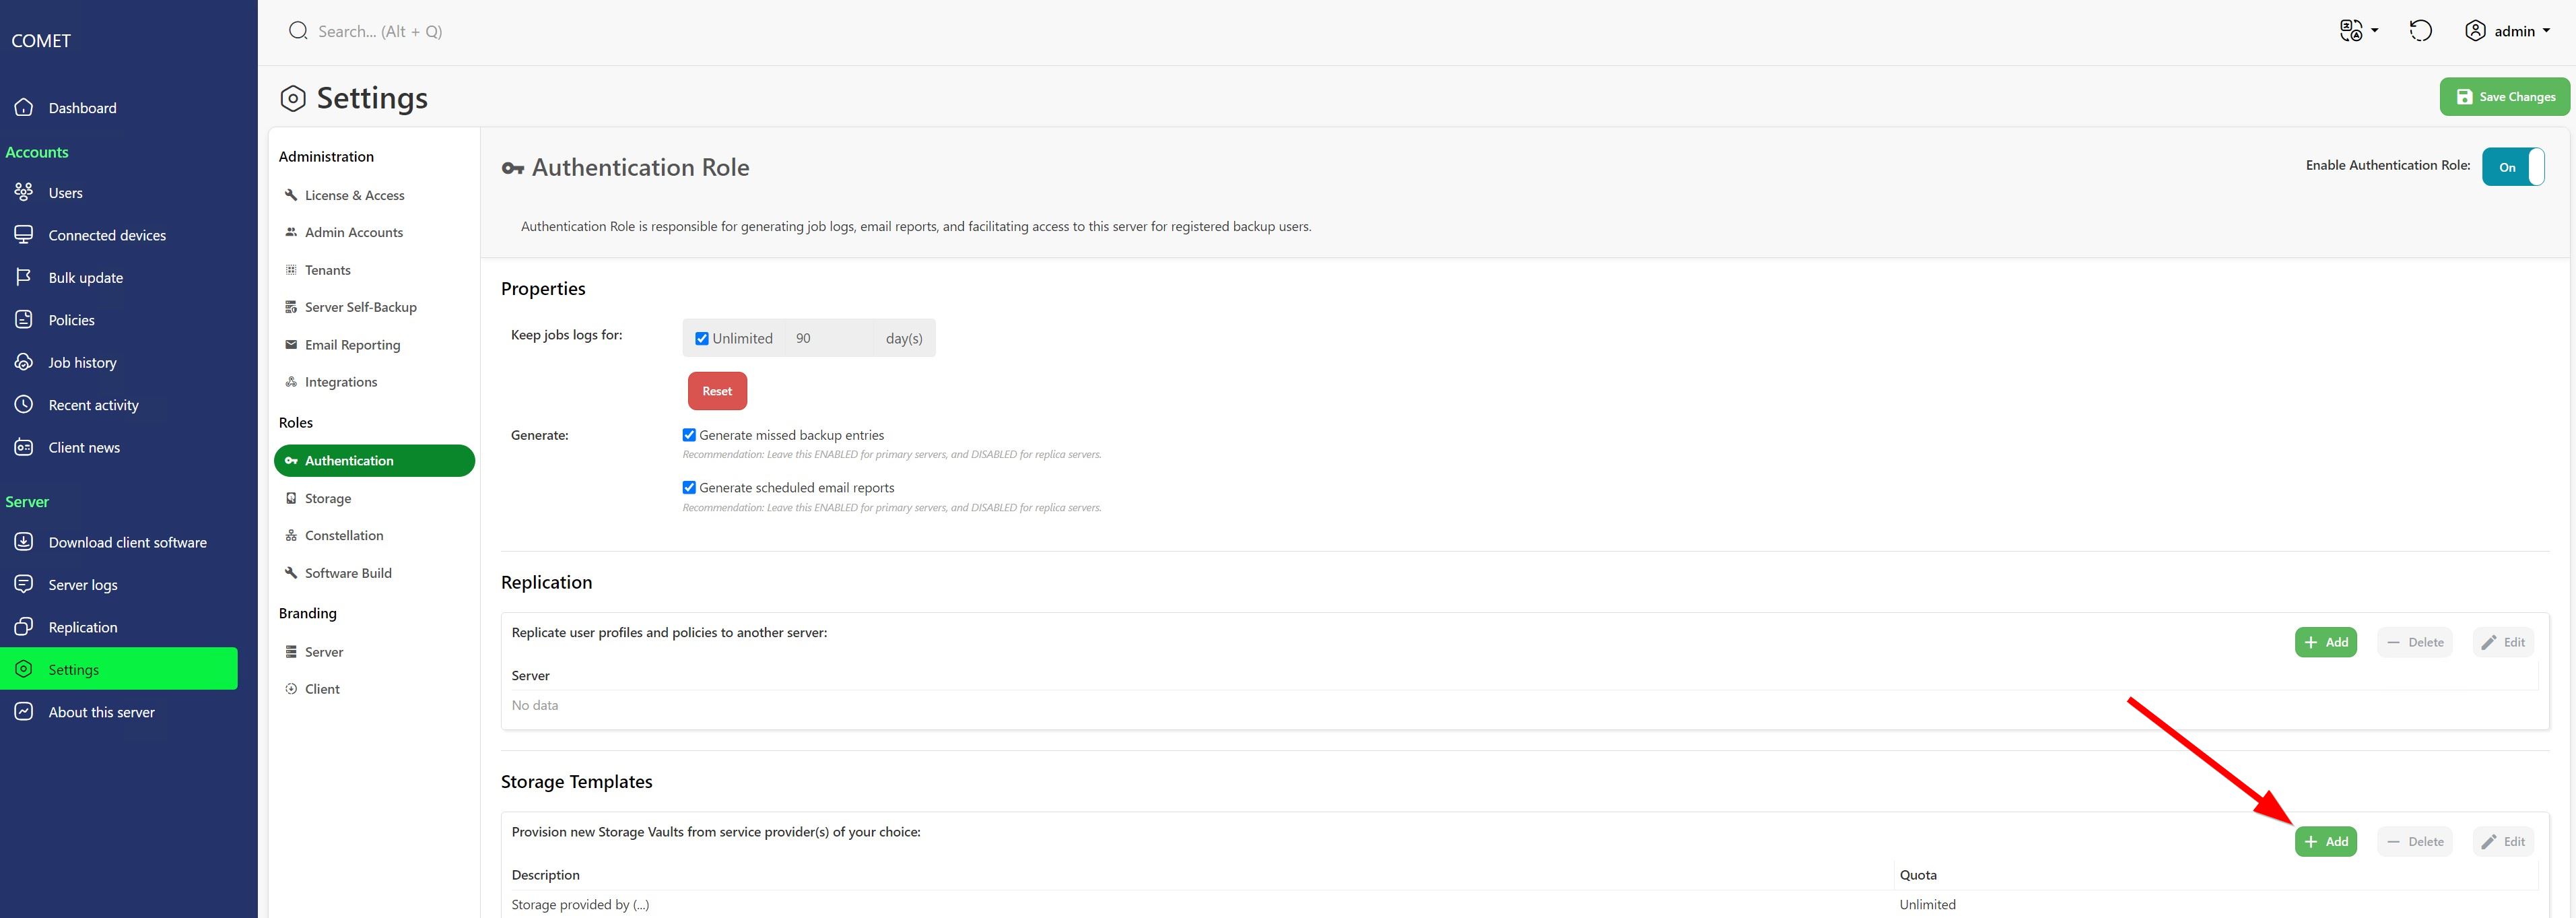
2.3 Navigate to Settings and then Authentication Role. Locate Storage Templates and Click on "+Add".
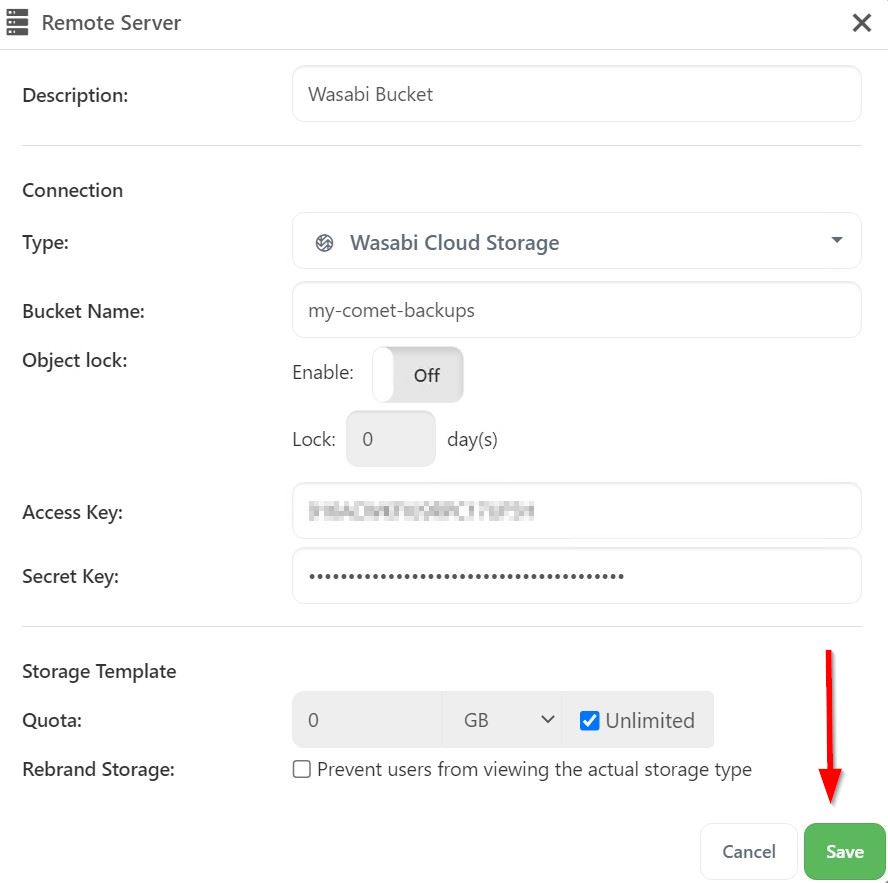
2.4 To create your Storage Template complete the following steps:
Type - Select Wasabi Cloud Storage.
Bucket Name - Name of the Bucket you pre-created in the Wasabi Console
Access Key - Wasabi Access Key
Secret Key - Wasabi Secret Key
Click "Save"
Note: Creating your bucket through the Storage Template creation process will default to the Wasabi East Service Location. If you desire a different Service URL you will need to create your bucket in the Wasabi Console ahead of time.
2.5 Make sure to click on "Save Changes" to save your settings in the Upper Right Hand Corner.

2.6 Now you will be able to select your premade Storage Template in the Client when setting up your Backups.
3. Backup Process
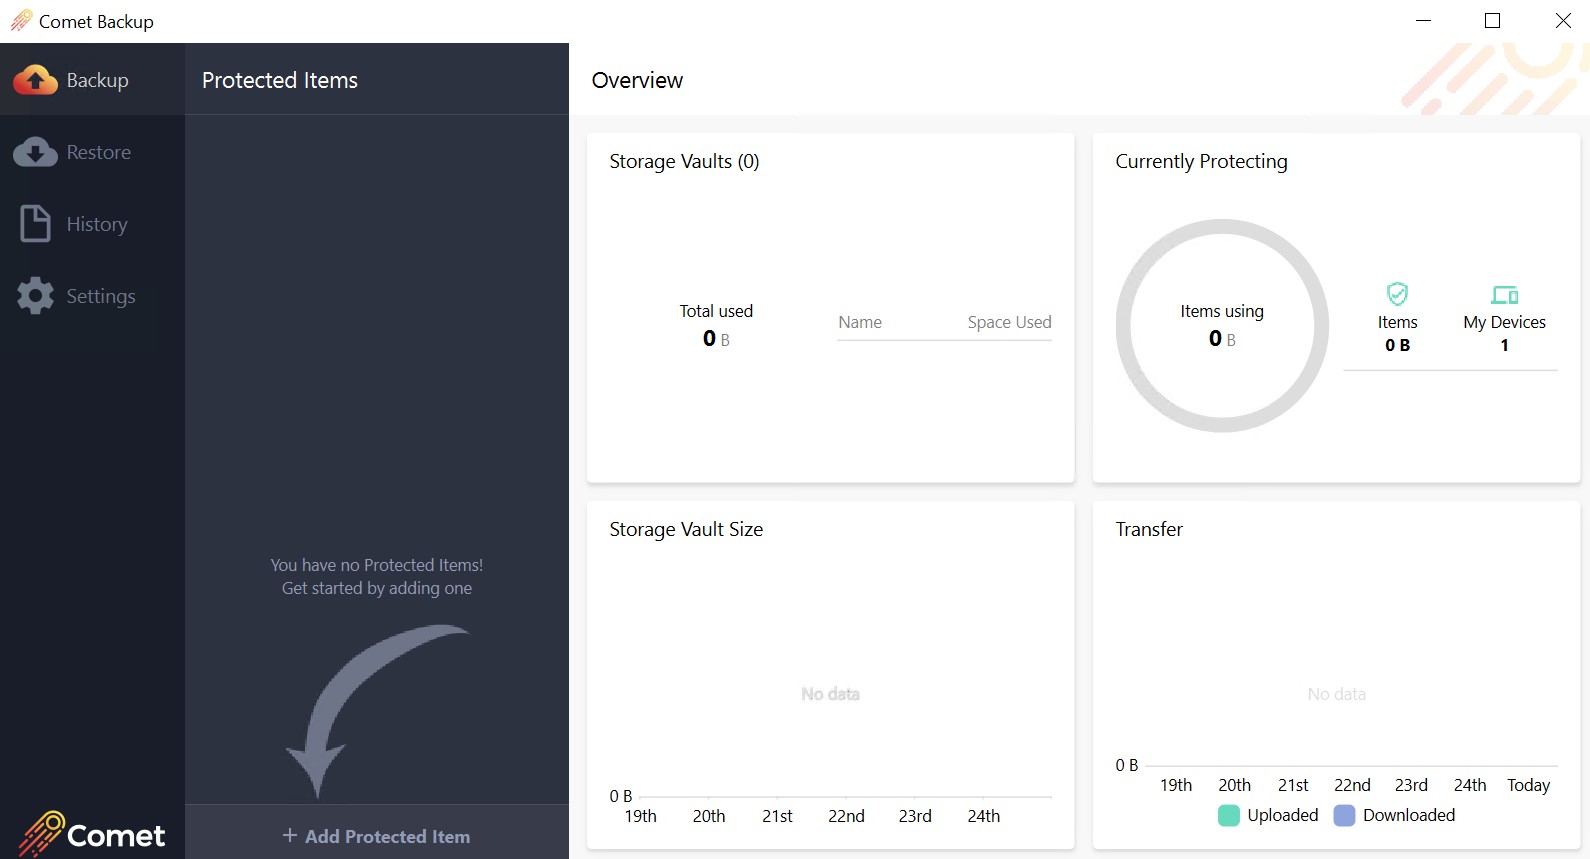
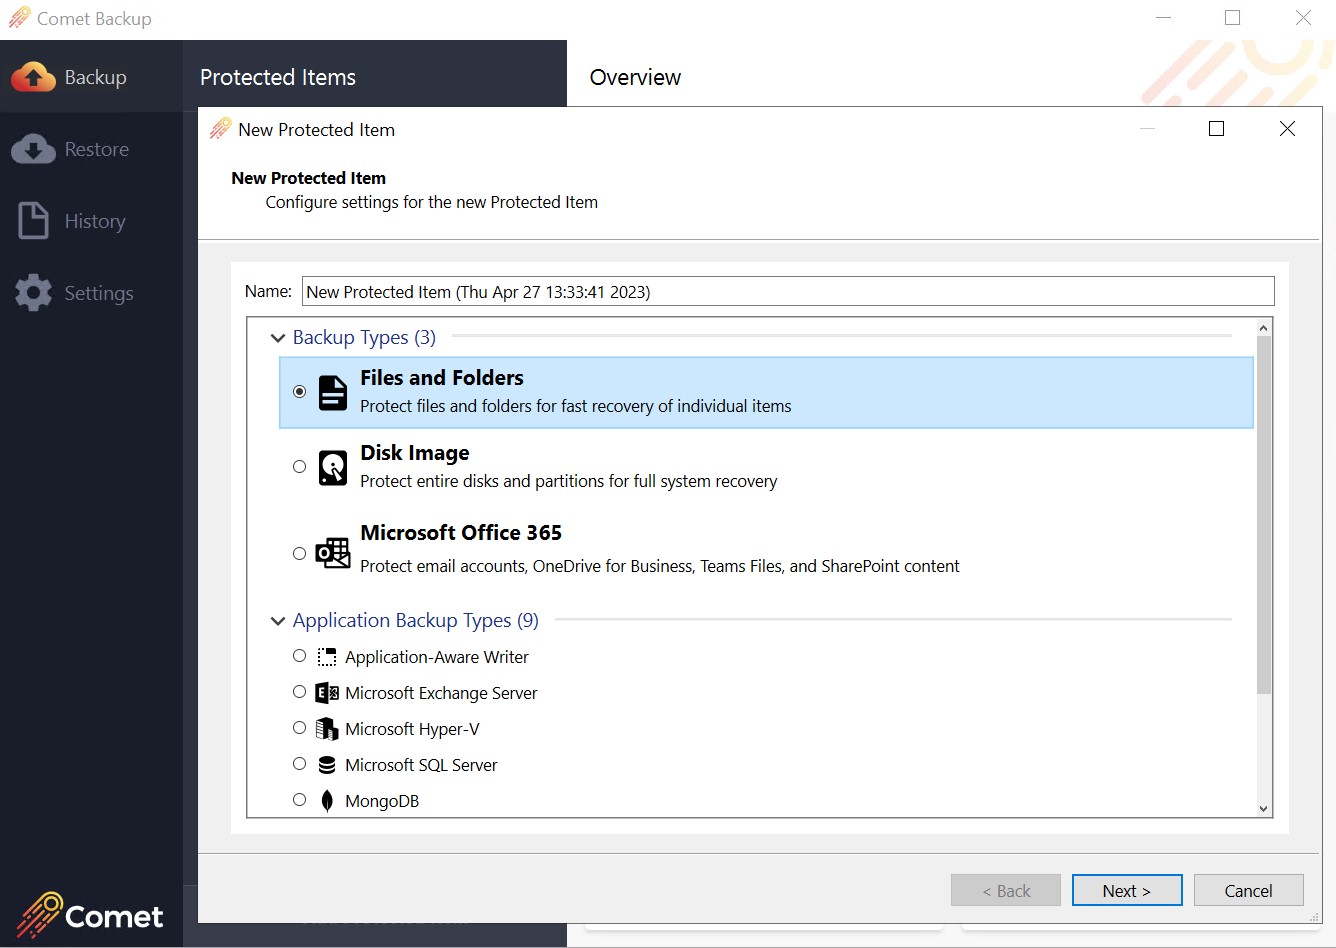
3.1 With the Comet Backup Client open Click on the Backup Tab and Click on "+ Add Protected Item".
3.2 Name your Protected Item Accordingly and then Select the type of Item you want to backup.
Click on "Next".
3.3 For Files and Folders you can specify a main folder or create a custom path to a specific sub-folder or file.
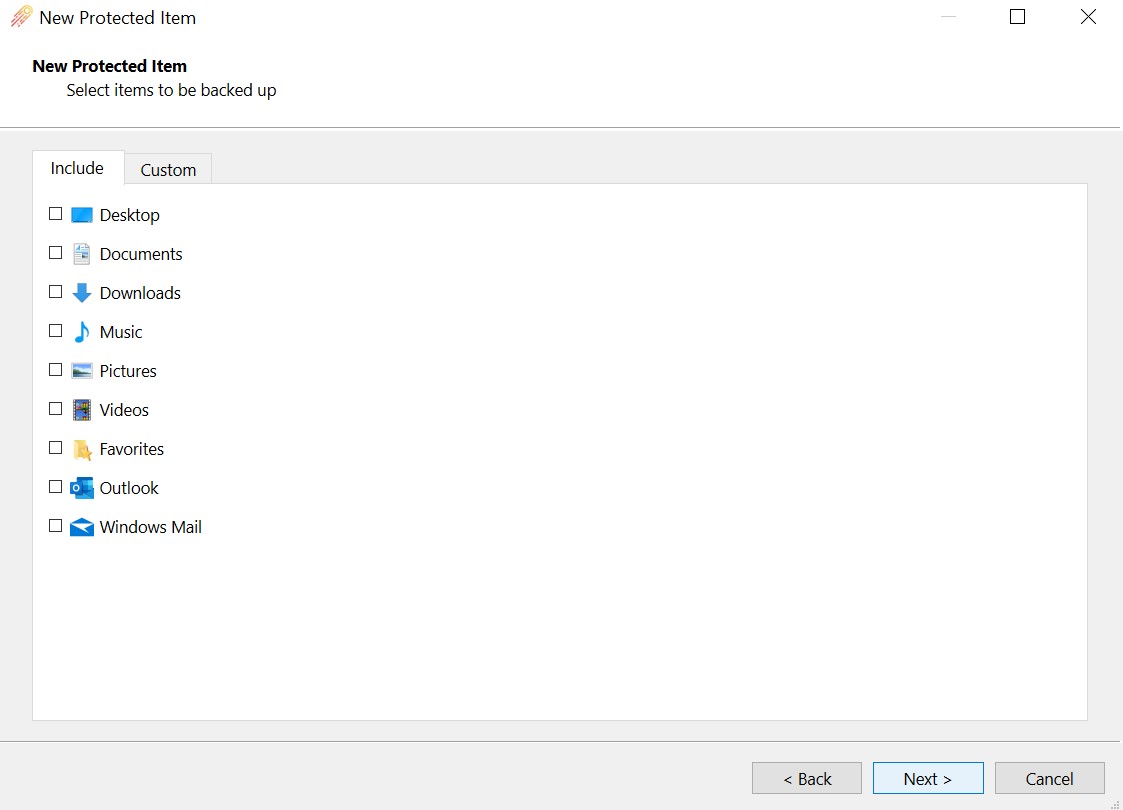
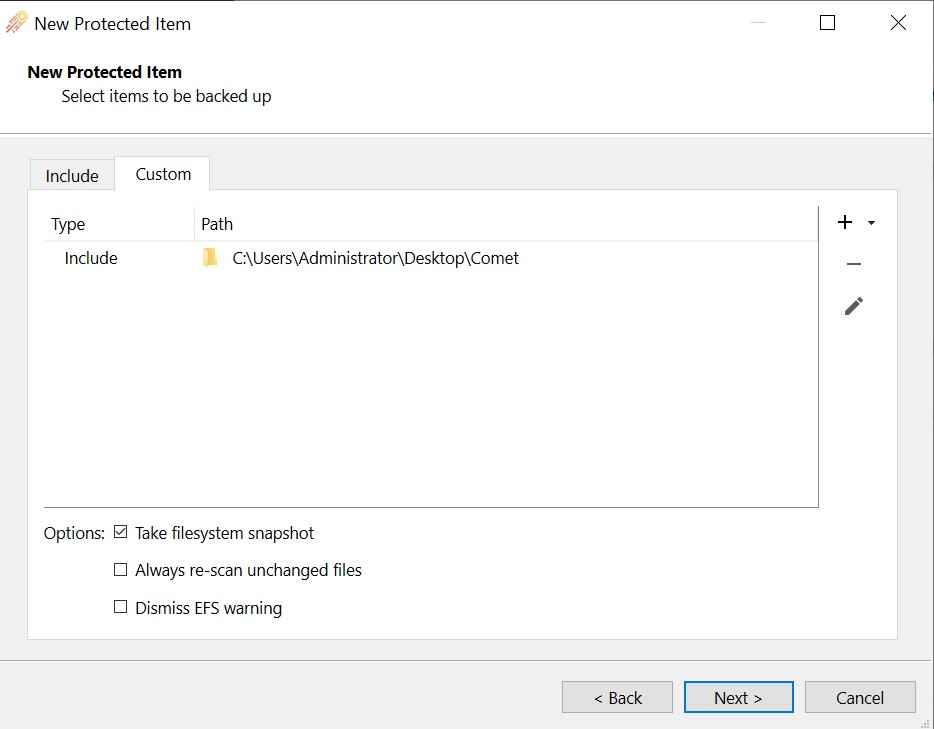
Click on "Next" and "Next" again on the Default Commands Page.
3.4 Now you will Add your Storage Vault and Create your Backup Time Schedule. Click on the "+" Symbol.
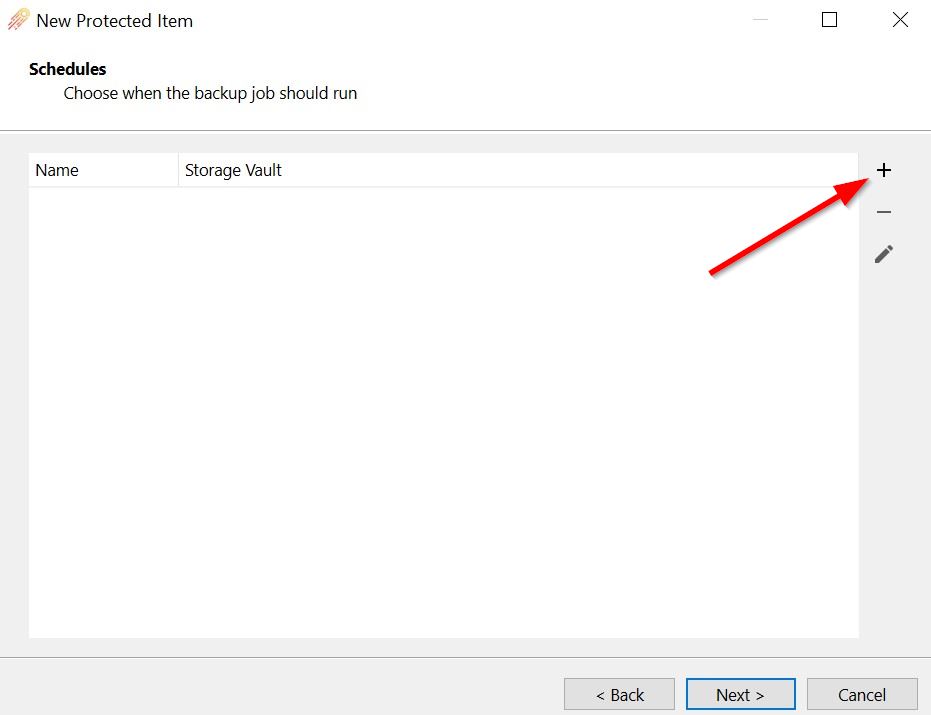
3.5 Here you will Name the Schedule and Select the Storage Vault you created. You can customize and select any of the below options depending your requirements. Click on the "Time" Tab to select when you want the backup jobs to run.
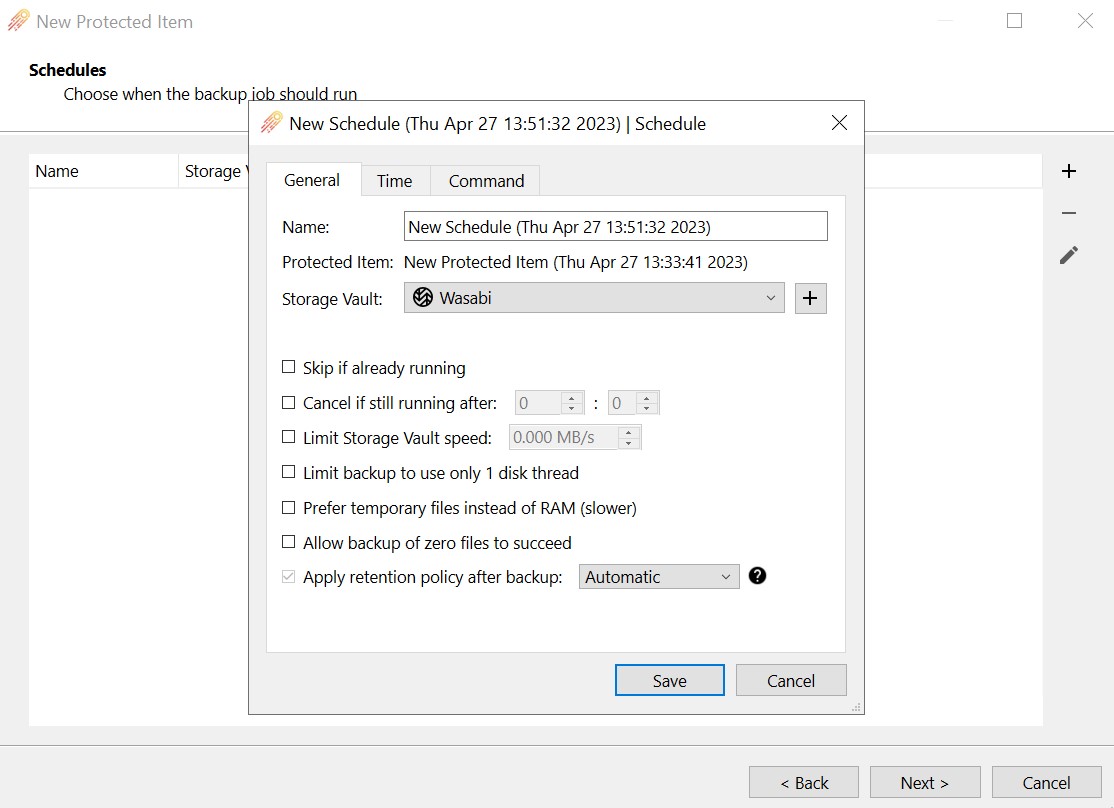
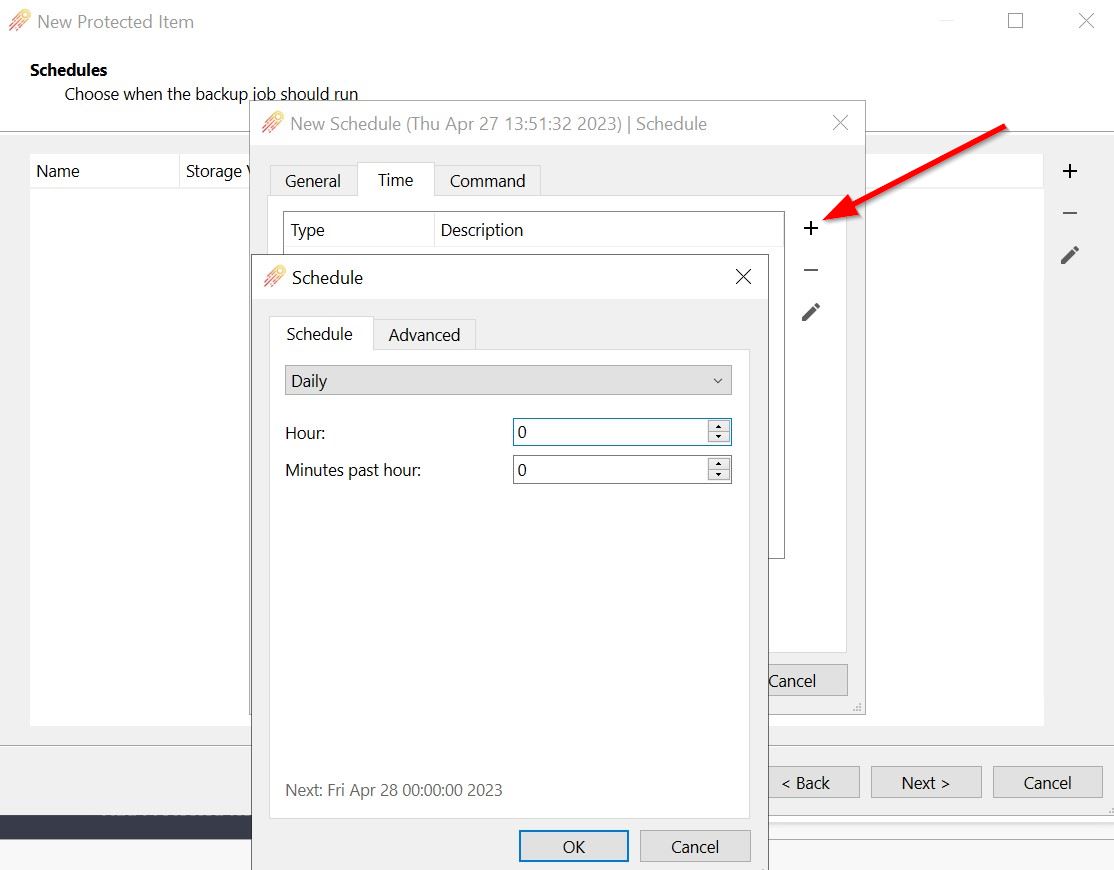
3.6 Click on the "+" symbol and then specify when you want your backups to run being either Hourly, Daily, Weekly or Monthly. Click "Ok" and then on "Save".
3.7 Click on "Next" at the Retention Page and then on the Finish Page you Can Check or Un-Check to Run the Backup Now and Click on "Finish".
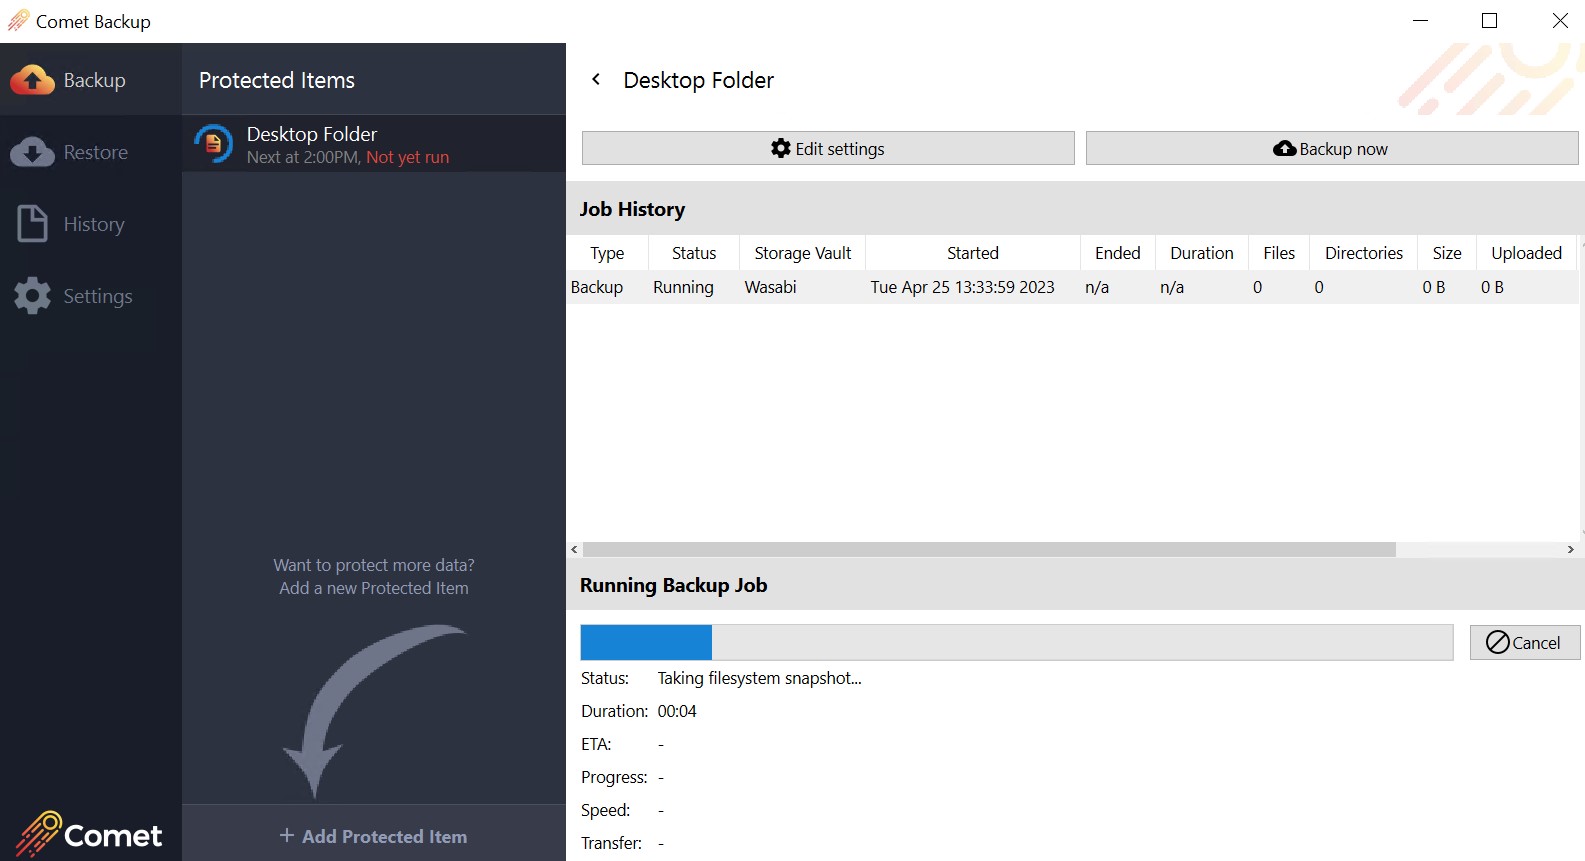
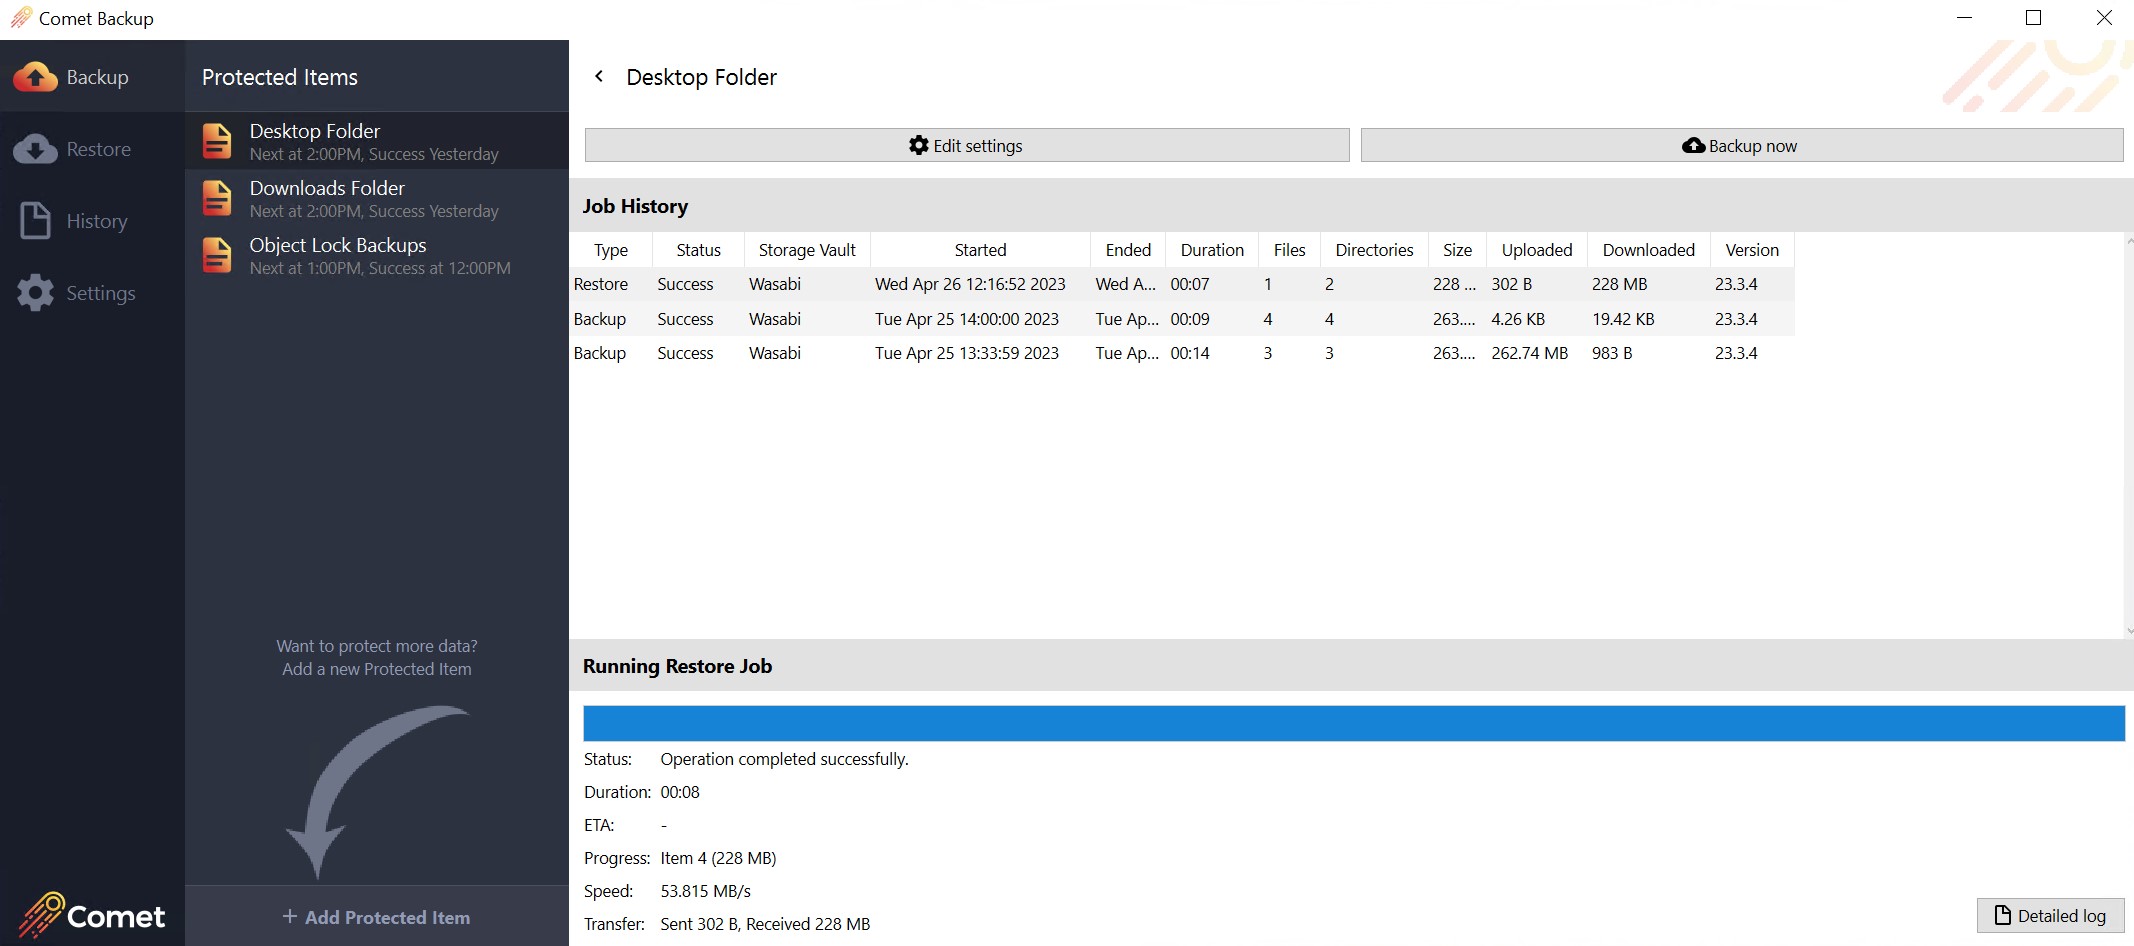
3.8 Once the backup job is running you will see a progress bar initialize and then change to completed successfully.
4. Restore Process
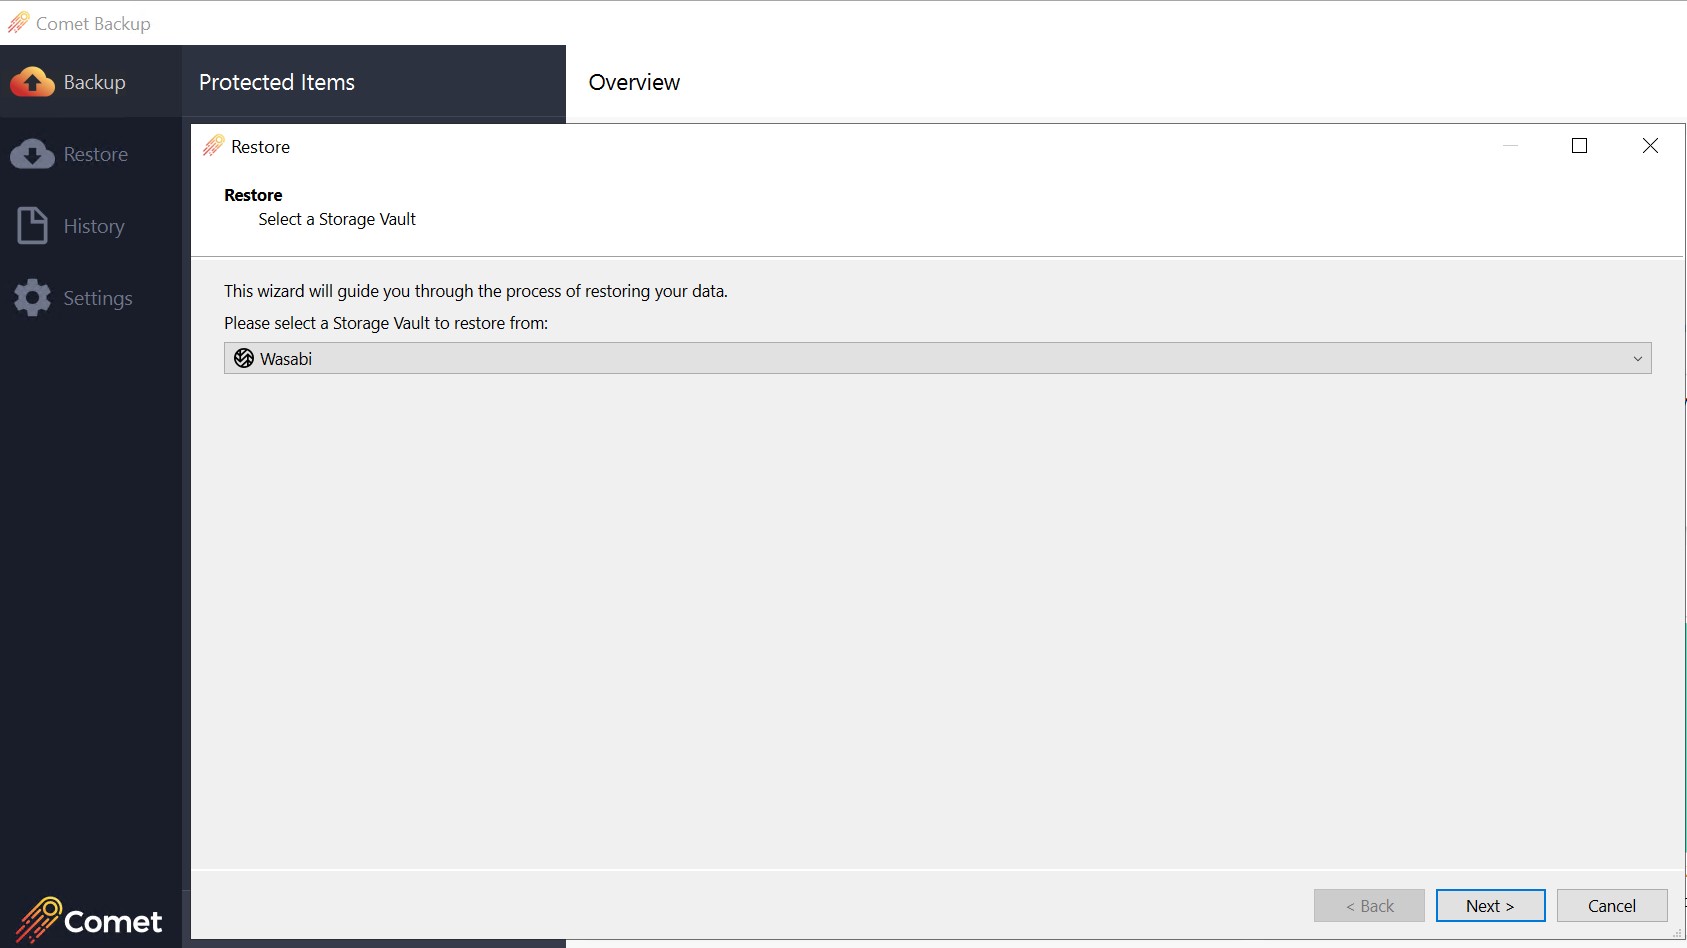
4.1 In Order to Restore any Folders or Files open the Comet Backup Client and Click on the Restore tab. Select the Vault you wish to Restore from and then Click on "Next".
4.2 Select the Protect Item and Backup Date from when you want to restore and then Click on "Next".
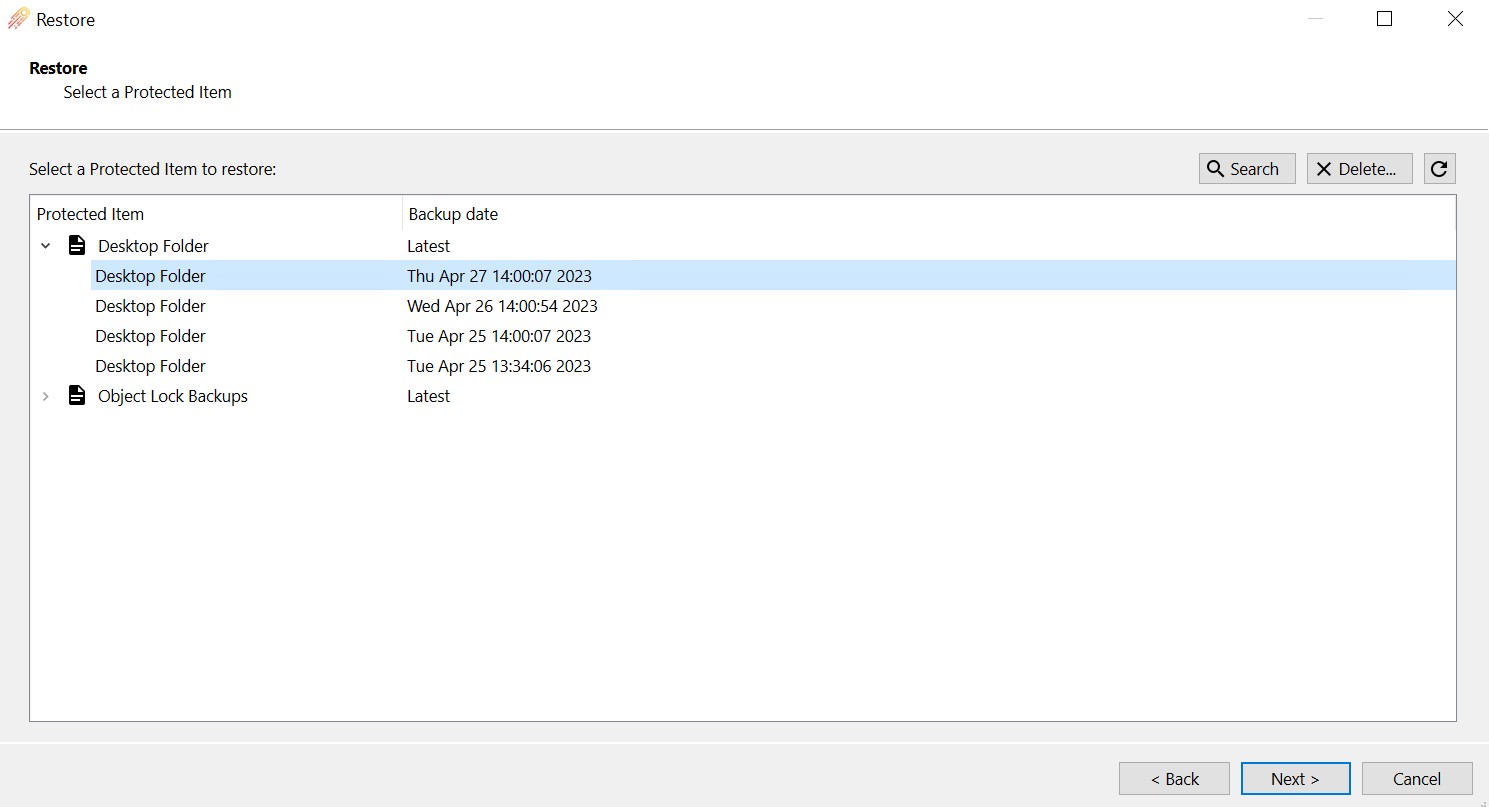
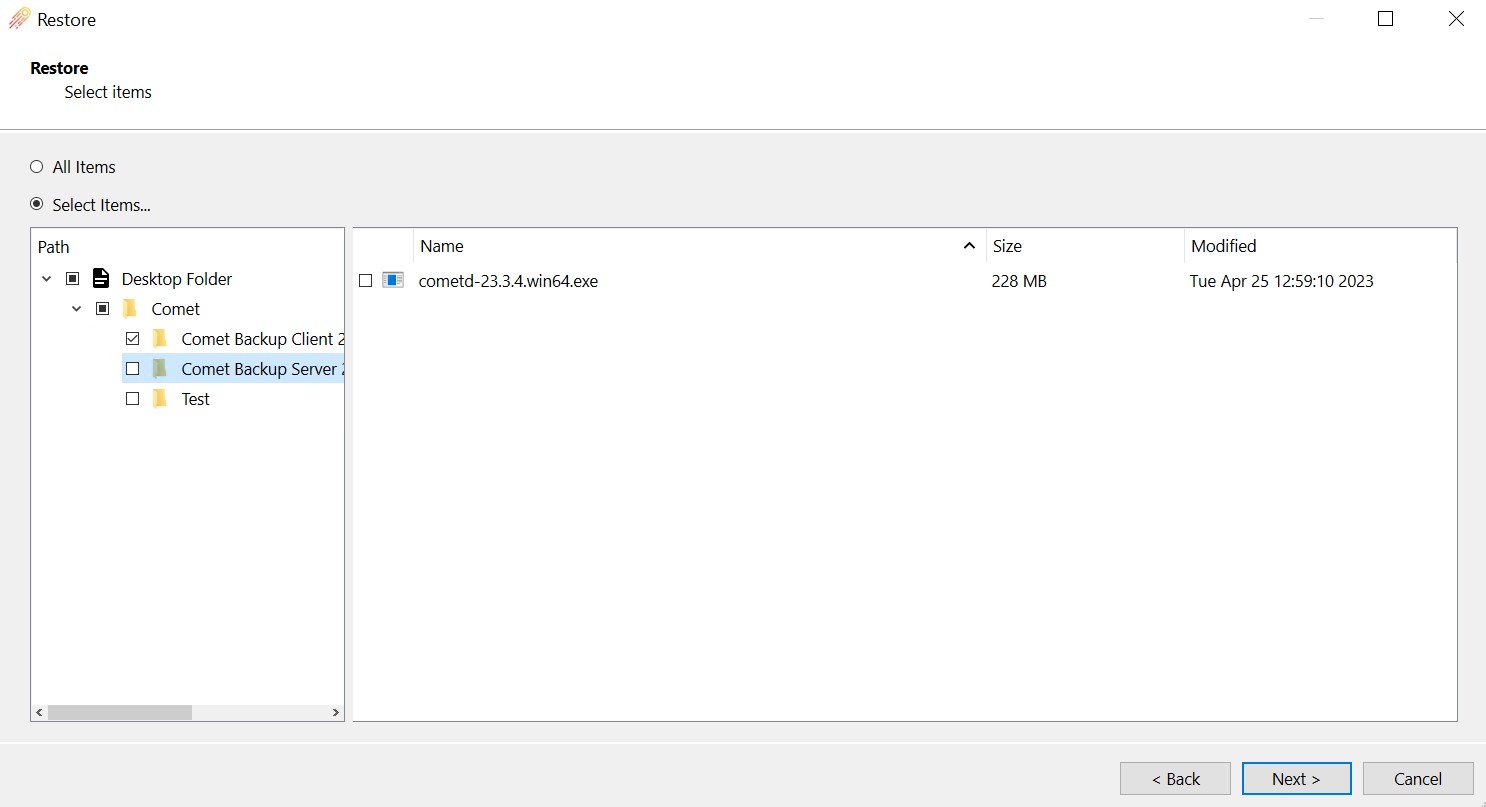
4.3 Choose which folder or file that you wish to restore and click on "Next".
4.4 Choose where you want the data to be restored to and whether or not you wish to overwrite the existing files in that current path and then click on "Restore". 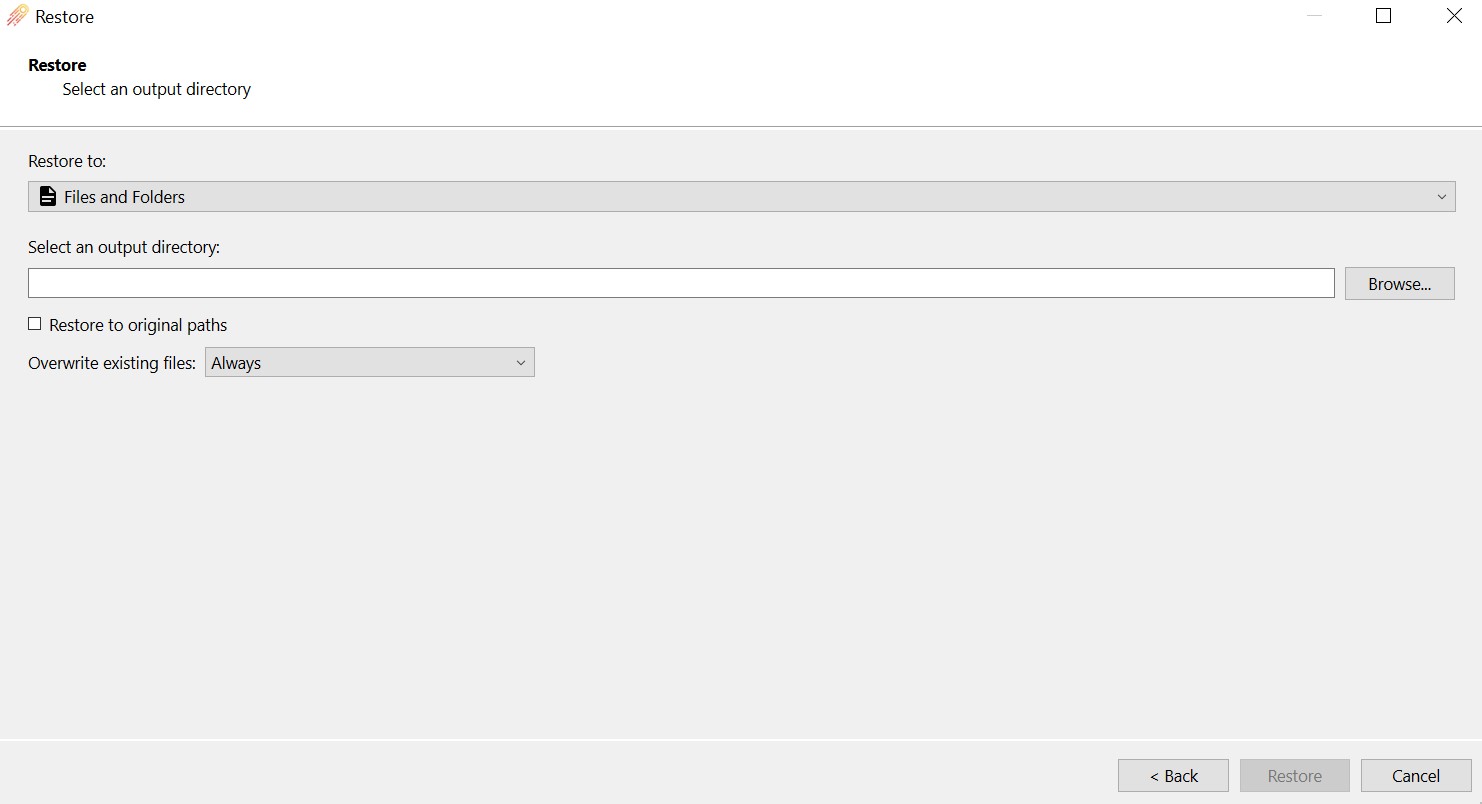
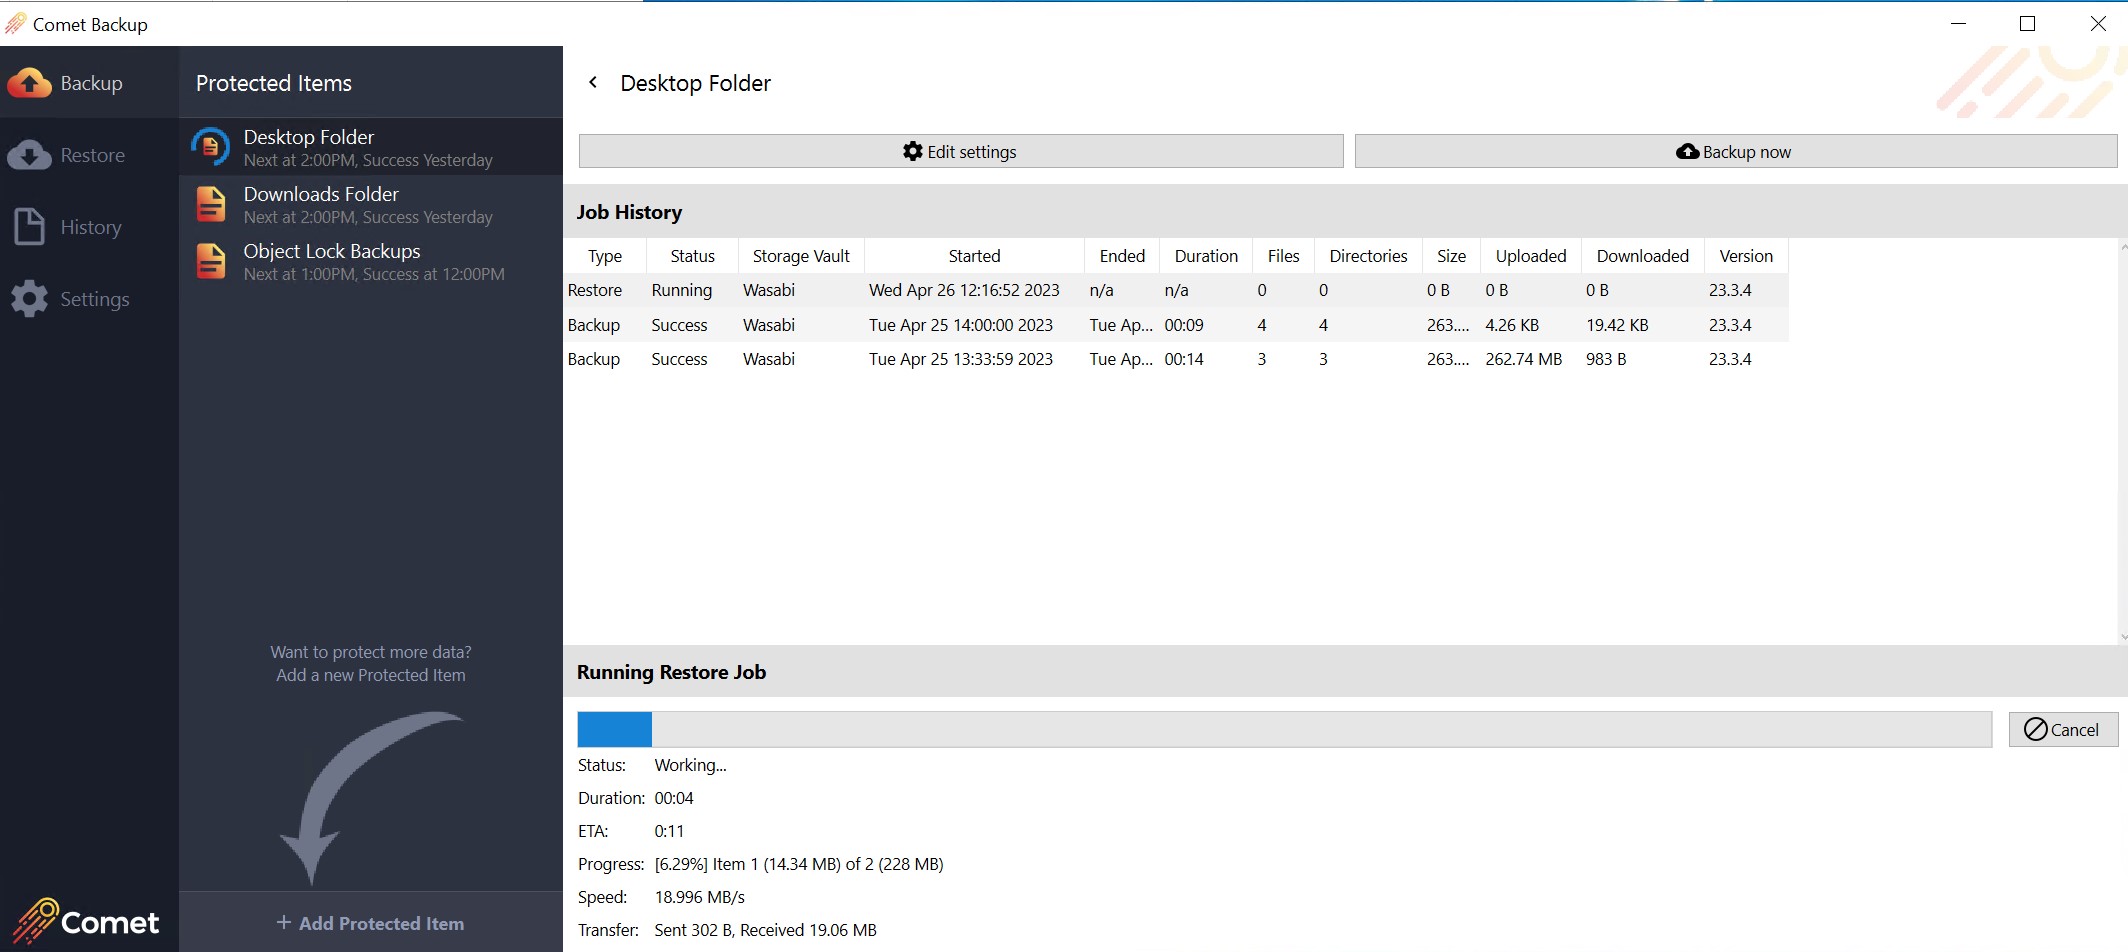
4.5 The Restore process will begin and the progress bar will initialize and then complete upon successful restore.
5. Configure Immutability
You can now use Wasabi's Object Lock with Comet Voyager 23.3.1 or higher software.
5.1 Log into your Wasabi Cloud Console and create your Object Lock Enabled Bucket following the steps in Object Lock Enabled Bucket article.
Note: You will want to create your Object Lock Enabled buckets beforehand so that you can select the appropriate Wasabi Storage Region for you data as you cannot select this through the Comet Storage Vault Creation process.
5.2 Log into the Server Admin using the set IP address chosen during installation.

5.3 Navigate to Settings and then Authentication Role. Locate Storage Templates and Click on "+Add".

5.4 To create your Storage Template follow the following steps:
Type - Select Wasabi Cloud Storage.
Bucket Name - Name of the Object Lock Bucket you pre-created in the Wasabi Console
Object Lock - Turn Enable On
Lock - Specify how many days you want to keep your data immutable
Access Key - Wasabi Access Key
Secret Key - Wasabi Secret Key
Hit Save
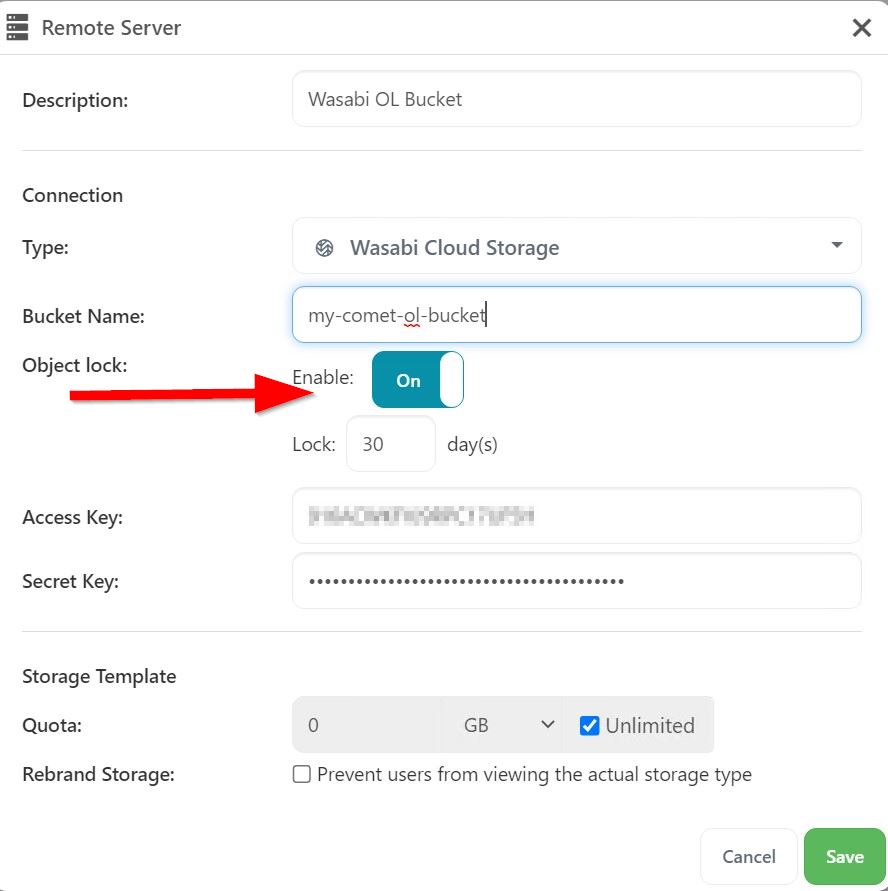
Note: Creating your bucket through the Storage Template creation process will default to the Wasabi East Service Location. If you desire a different Service URL you will need to create your bucket in the Wasabi Console ahead of time following the Object Lock Creation article.
5.5 Make sure to save your settings in the Upper Right Hand Corner.

5.6 Open the Comet Client Application and Create a new Protected Item.
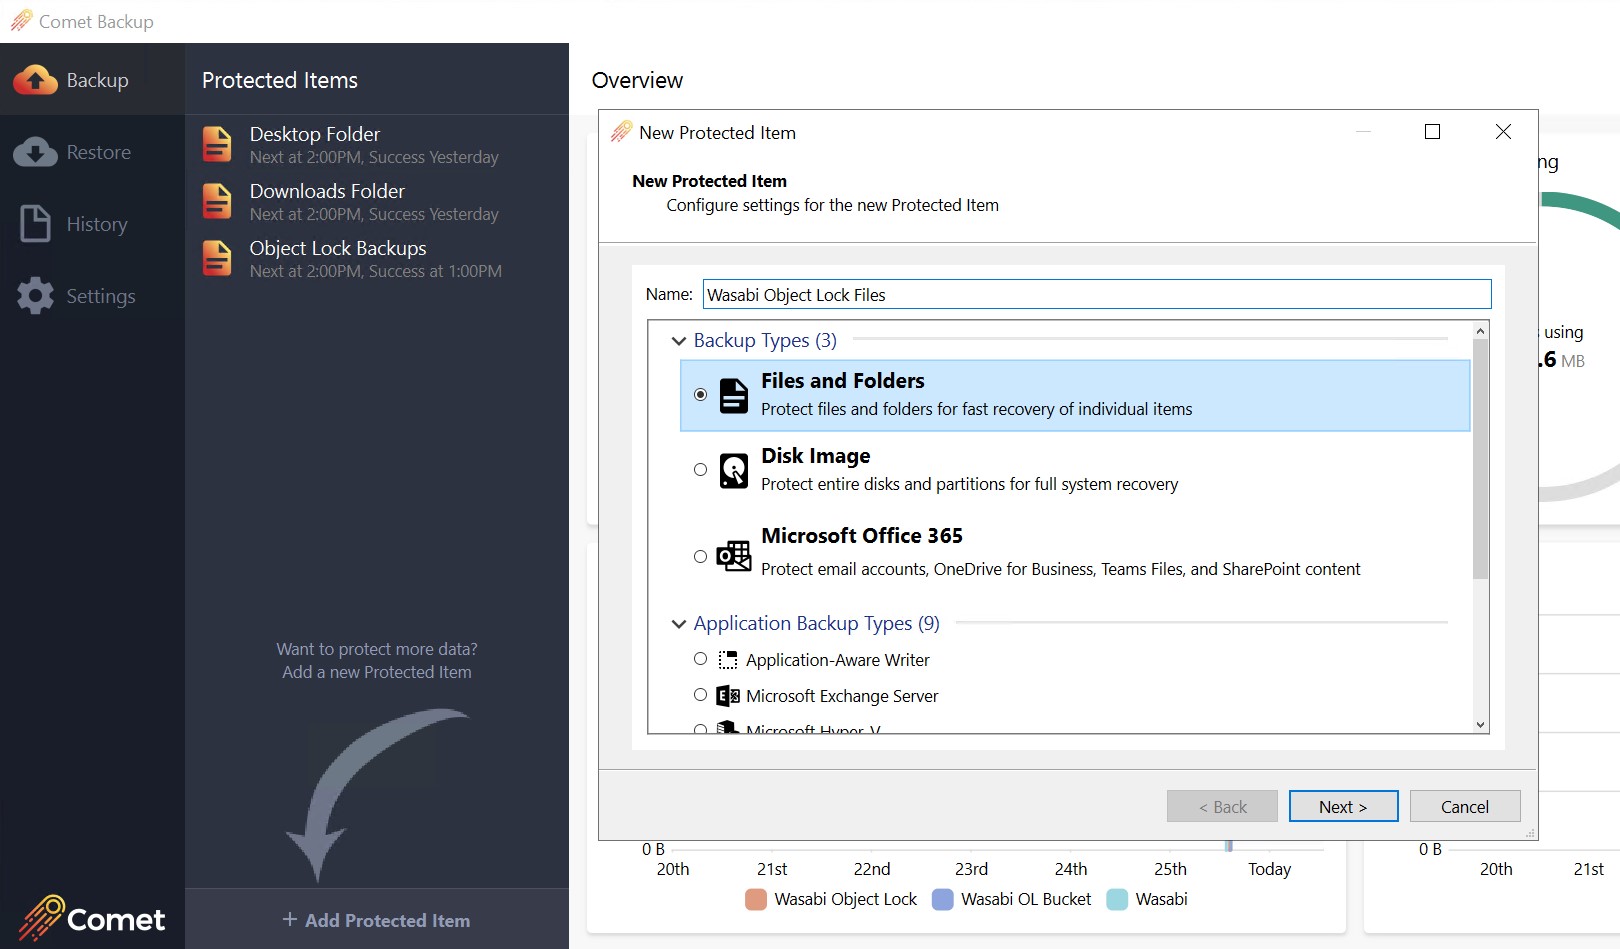
5.7 Set the path to the item you want to protect.
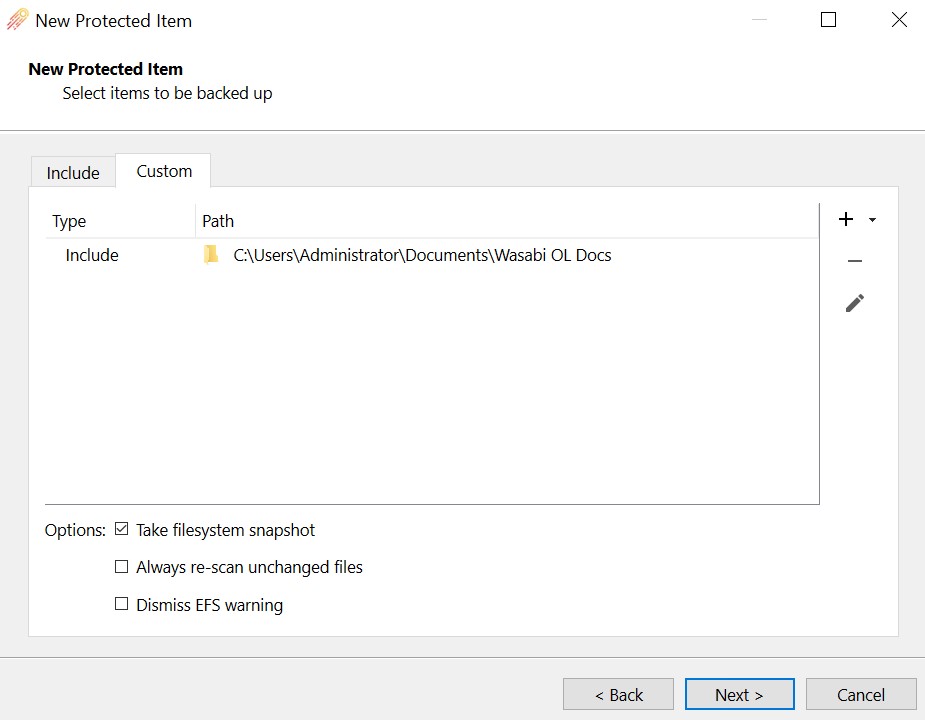
5.8 Select the Storage Vault you wish to use for your Object Lock backup. When you Click "Ok" it will create the bucket in your Wasabi Console.
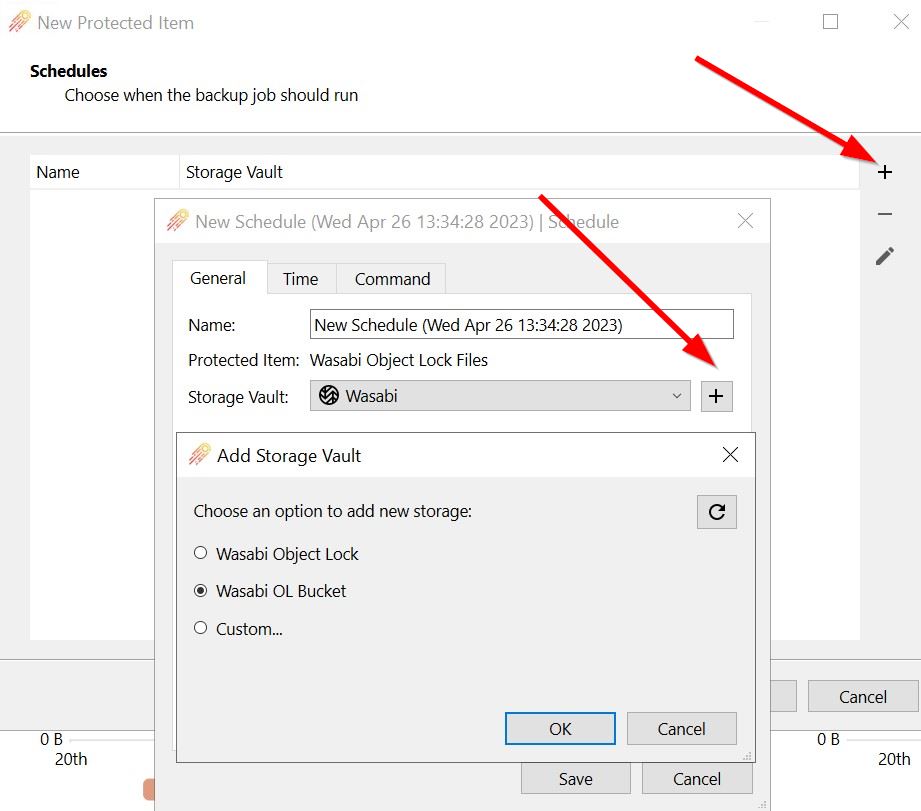
5.9 Create your time profile to backup the files that you have selected. Click "Ok" and then "Save". You will then click "Next" and then be prompted to either Run a Backup now or you can wait until the specified time schedule that you created.
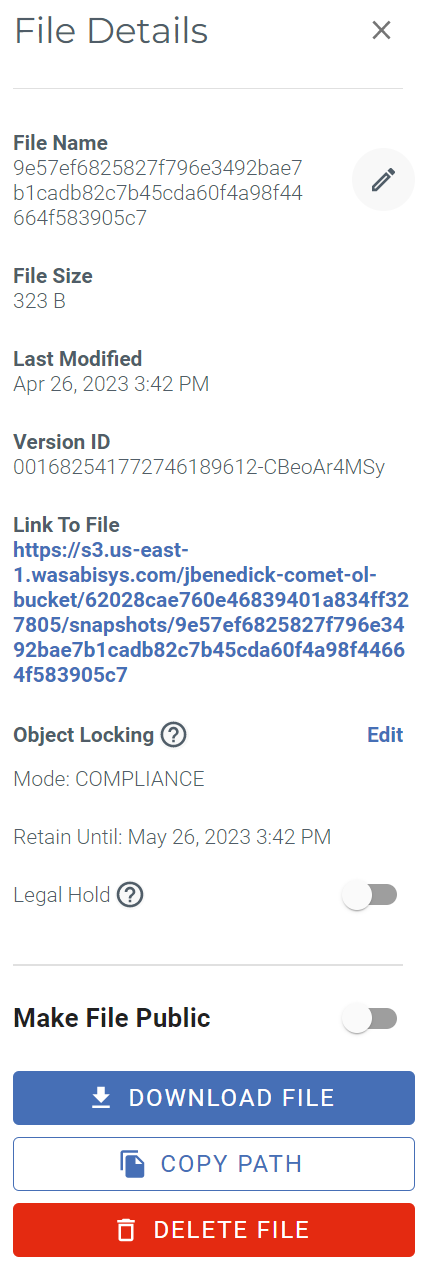
5.10 After you backup has run you can validate that the files are protected with Wasabi Object Lock by logging into your Wasabi Cloud Console. Navigate to your bucket and go into the files and select one. This will bring up the right hand Details pane of that file and showcase the Object Locking details that you specified when creating your Storage Template in Comet. 
6. Appendix
With Comet Backup Client you can configure Storage Vaults through the Client software. Below are the steps to manually configure a Storage Vault for Wasabi using the Client.
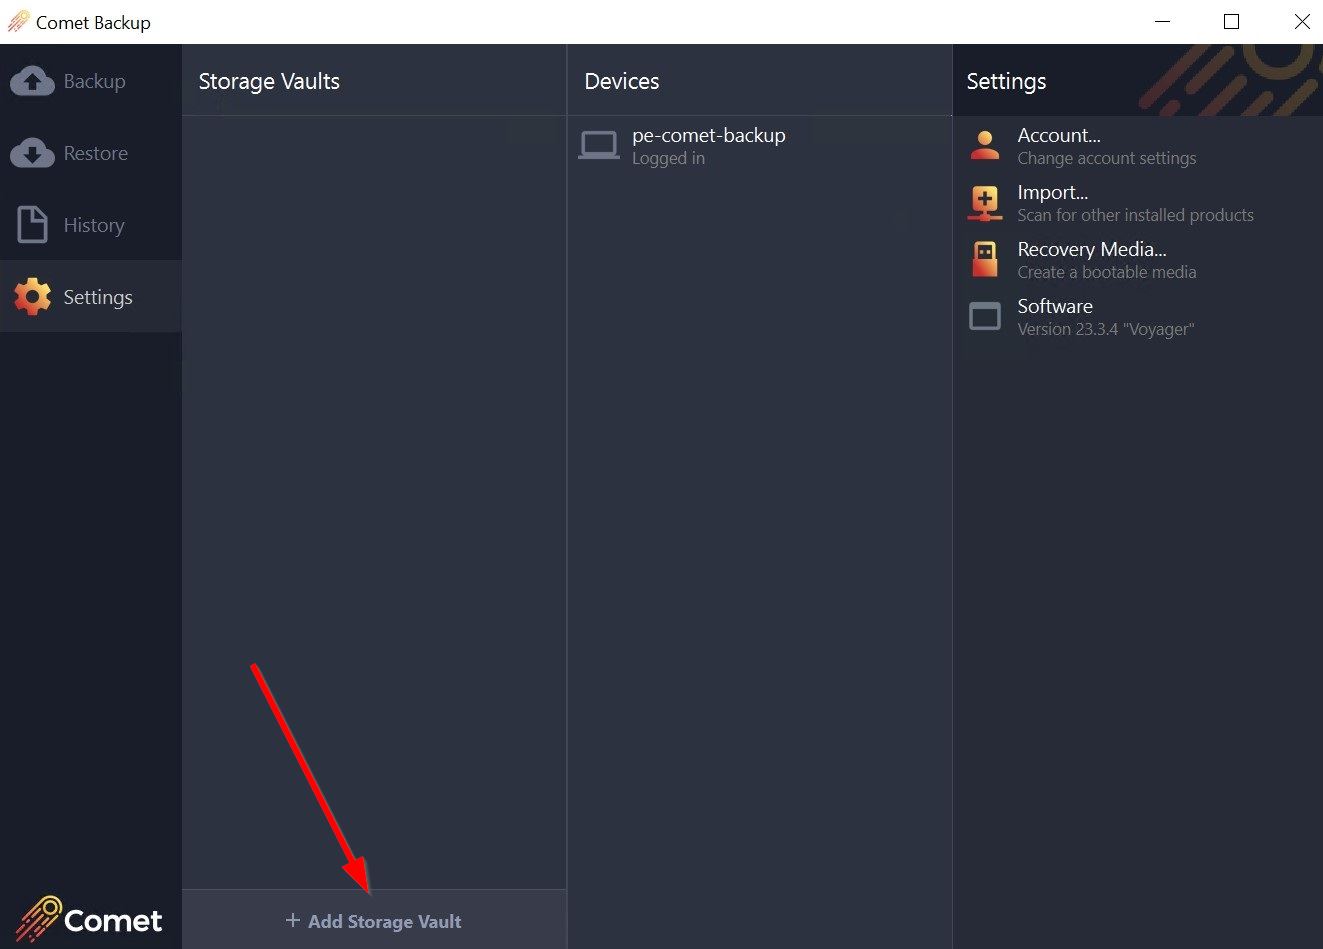
6.1 Open the Comet Backup Client Software and Login. Click on Settings and then Click on "+ Add Storage Vault".
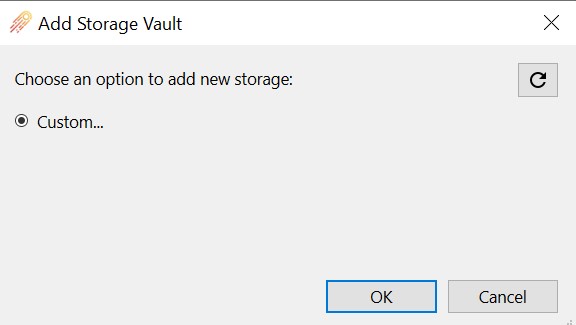
6.2 Click on "Ok"
6.3 Name the Storage Vault
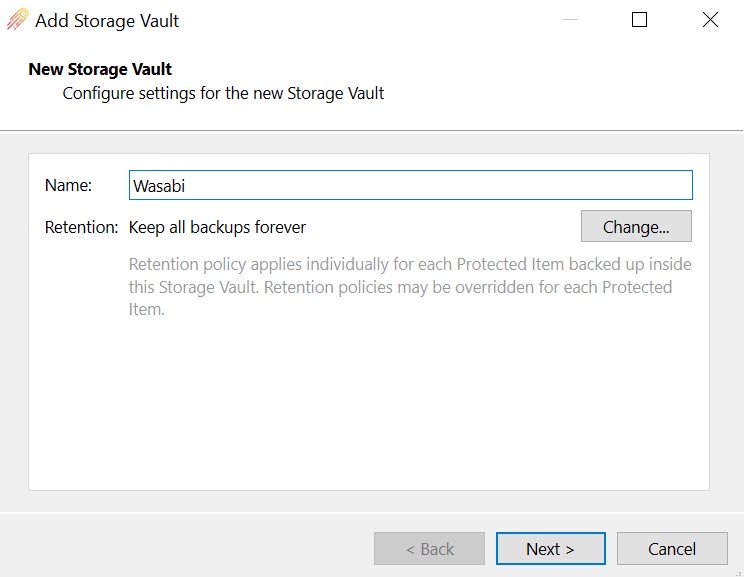
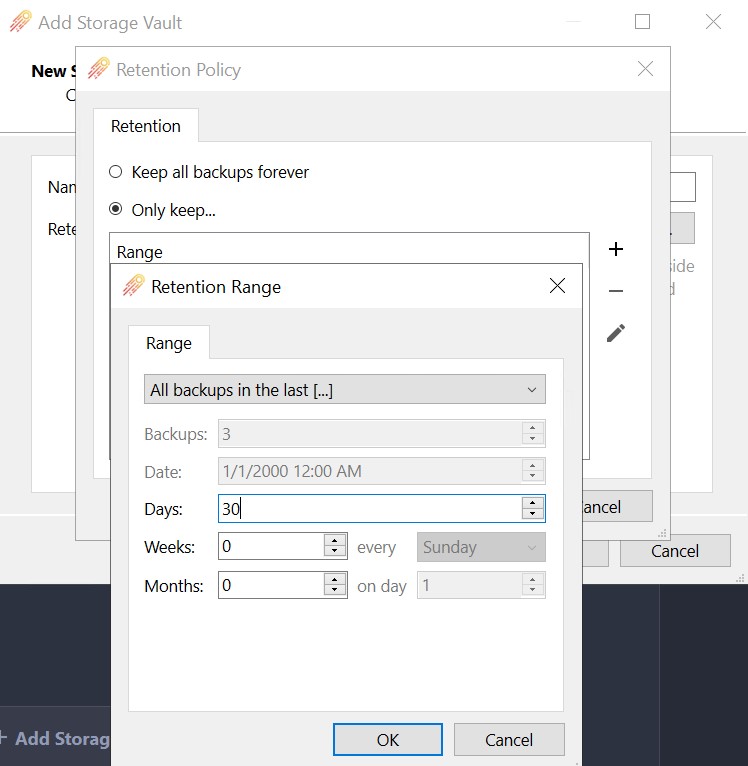
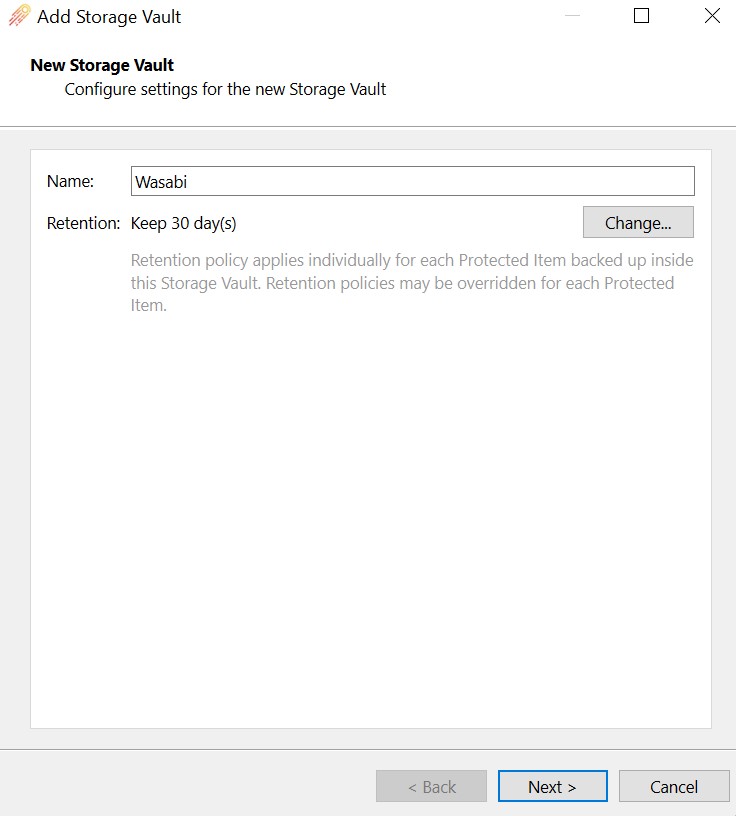
6.4 To set how long your backups are stored for click on Change and set your retention.
6.5 Click On "Next".
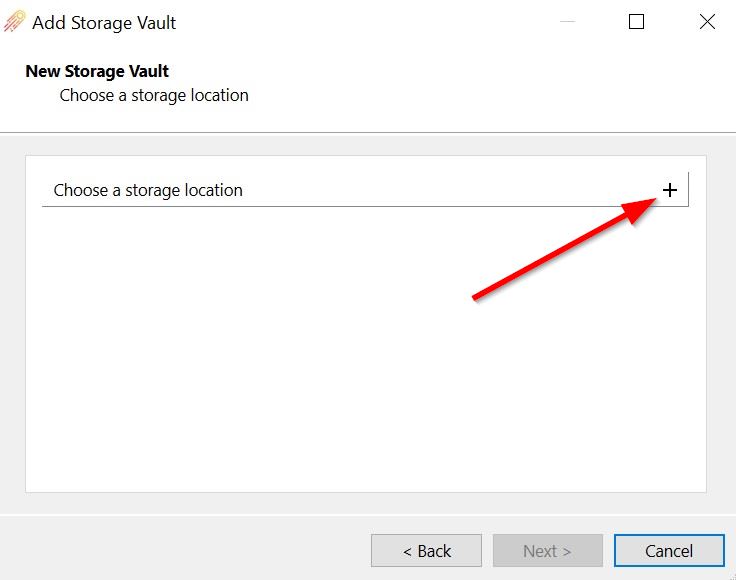
6.6 Click on the "+" Symbol to choose the Storage provider.
6.7 Click On "Wasabi" and then click "Ok".
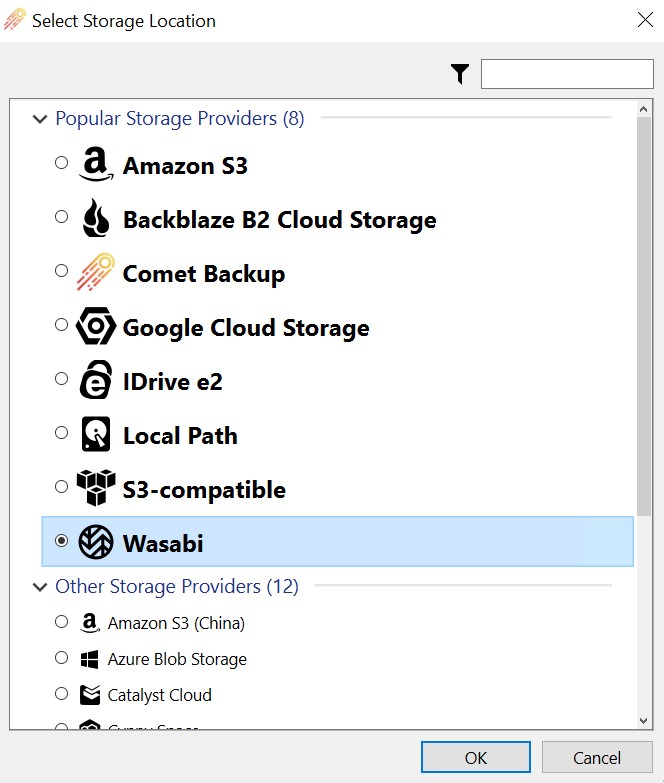
6.8 In the dialog box, provide the following details:
Access Key - Wasabi Access Key
Secret Key - Wasabi Secret Key
Bucket - Wasabi Bucket Name Pre-Created in your Wasabi Console
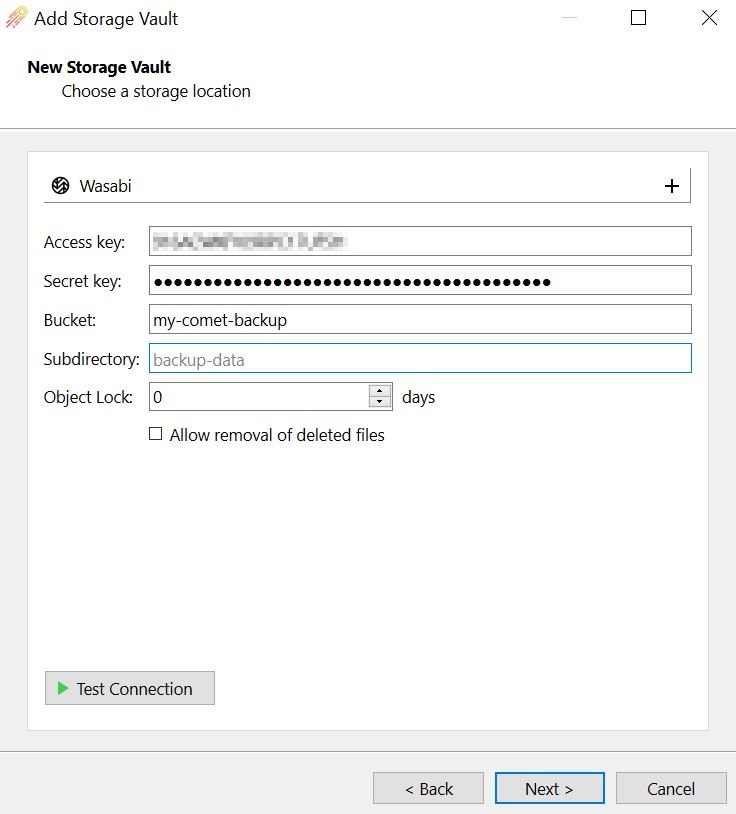
Click "Test Connection" and you will get either "Authentication Validation Passed" or "Authentication Validation Failed"
6.9 Click "Next" and then "Save" and your Storage Vault is created.