Commvault is certified for use with Wasabi. The formal Commvault certification test results are attached to this article. Wasabi is listed by Commvault as a supported cloud storage vendor at the URL at http://documentation.commvault.com/commvault/v11/article?p=9237.htm
Wasabi is also listed by Commvault as a Tech Alliance Partner at the URL at http://www.commvault.com/partners/find
Please Note: The data restoration process is handled by your specific backup software application. As there are many potential variables that will affect your unique environment, it is strongly recommended that you seek the guidance of your backup software's technical support team in the event that you encounter difficulty, or have application-specific inquiries.
Requirements
Commvault v11 sp19 or earlier installed and configured
Access to Commcell console
An active Wasabi Cloud storage account
Set up a Commvault Storage Library
In Commvault Storage Resources, right-click on Libraries and select Add. Then, provide the following information -
Name - provide a name for the cloud storage library
Type - Select Wasabi Hot Cloud Storage from the dropdown menu
MediaAgent - Select the desired Media Agent
Service Host - provide the endpoint URL of the Wasabi region
Credentials - expand the dropdown menu and select Create New to add the access credentials.
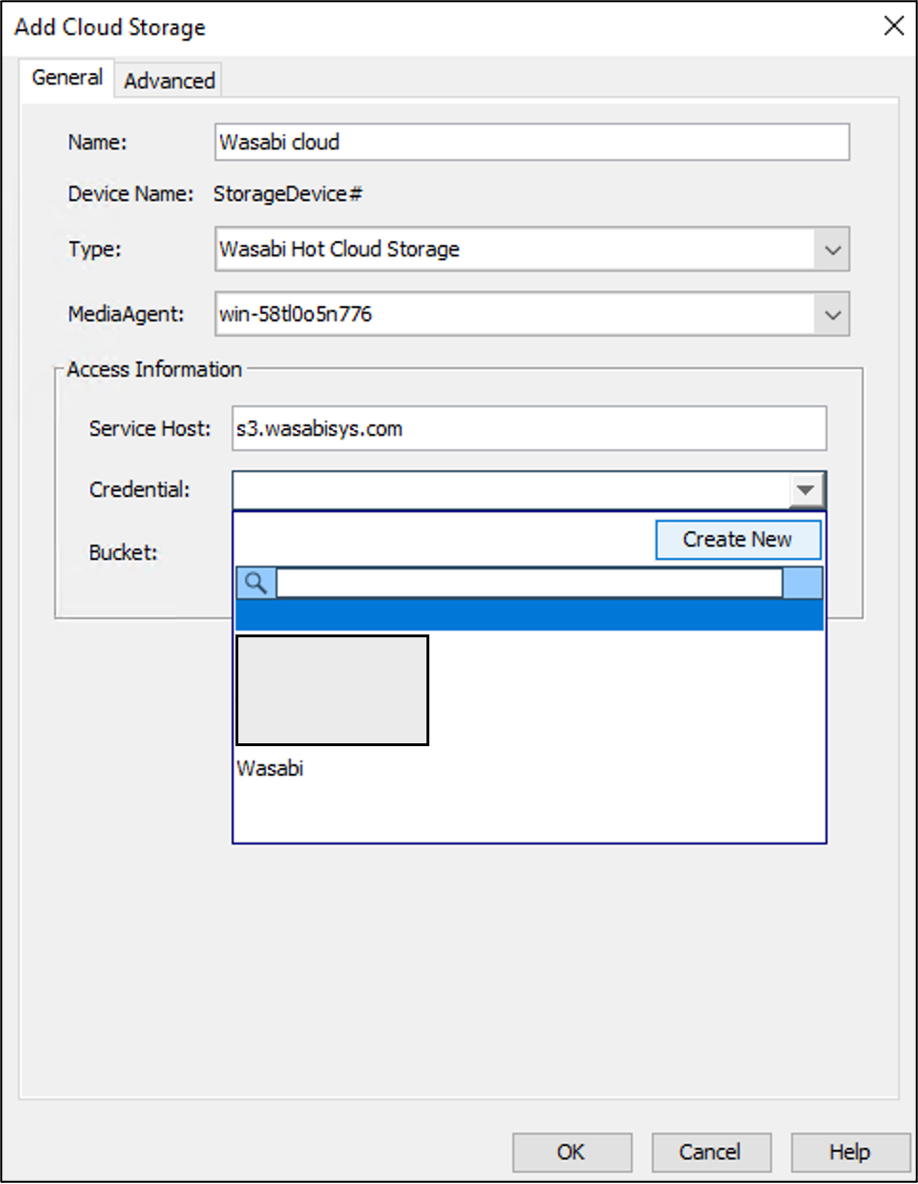
Note: This config example uses Wasabi's us-east-1 storage region. To use other Wasabi storage regions, please use the appropriate Wasabi service URL as described in this article.
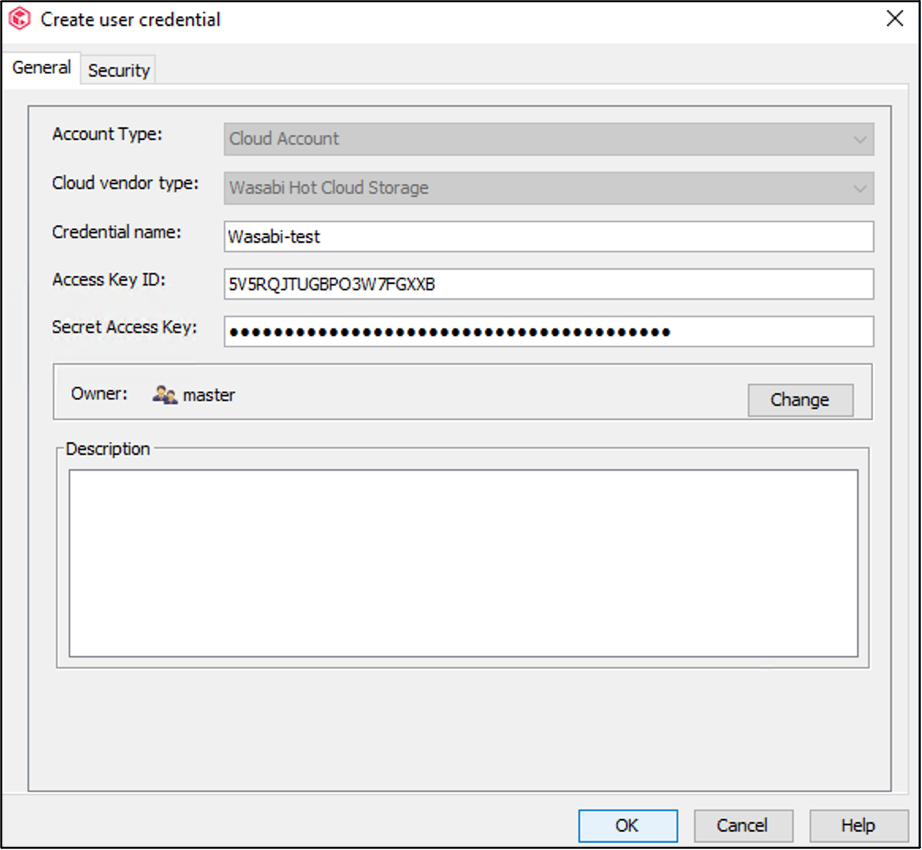
2. In the Create User Credential window, provide the following details and click OK.
Credential name - the name under which the credentials will be saved
Access Key ID - Wasabi access key
Secret Access Key - Wasabi secret key
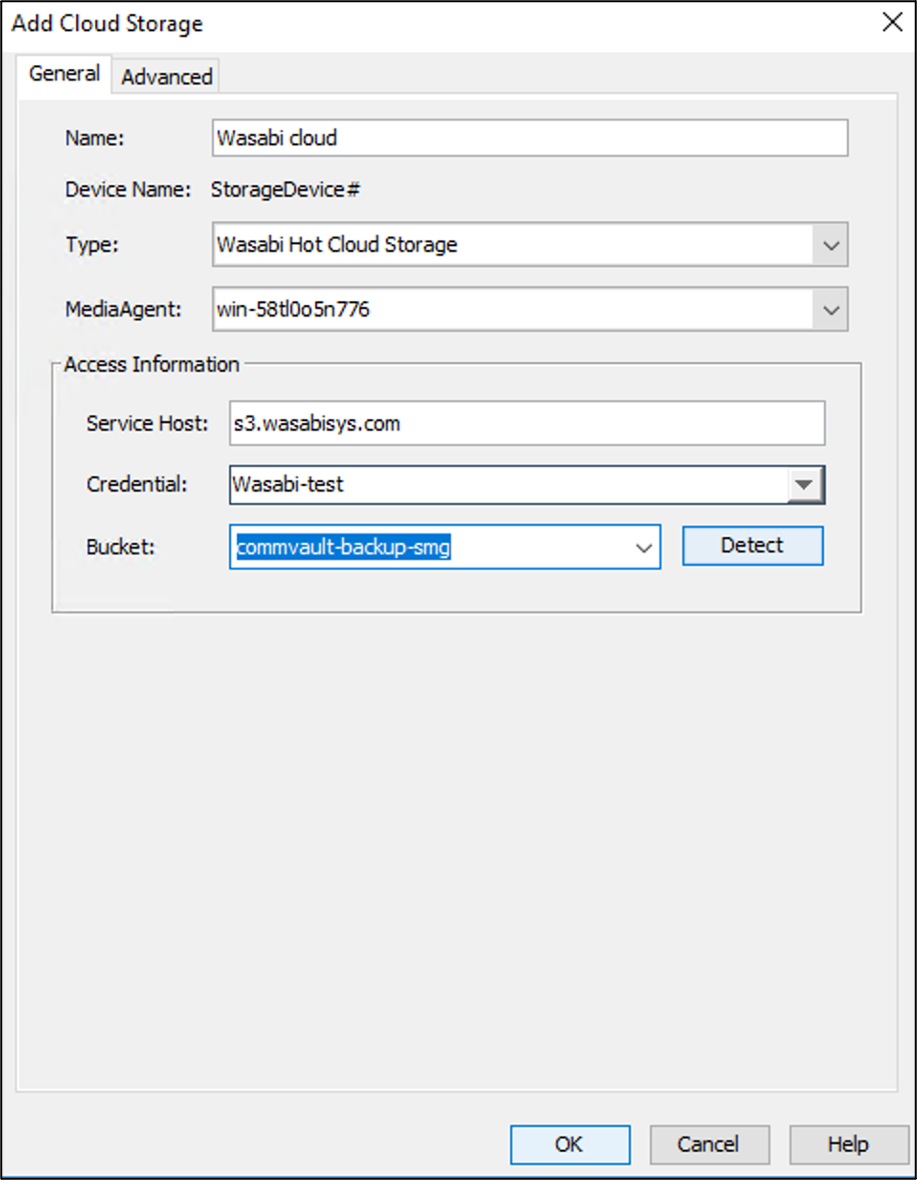
3. The newly added credentials are populated in the Credentials field. Select Detect to list your buckets in the configured region and select the desired bucket.

4. Confirm the desired bucket is populated. Click OK.
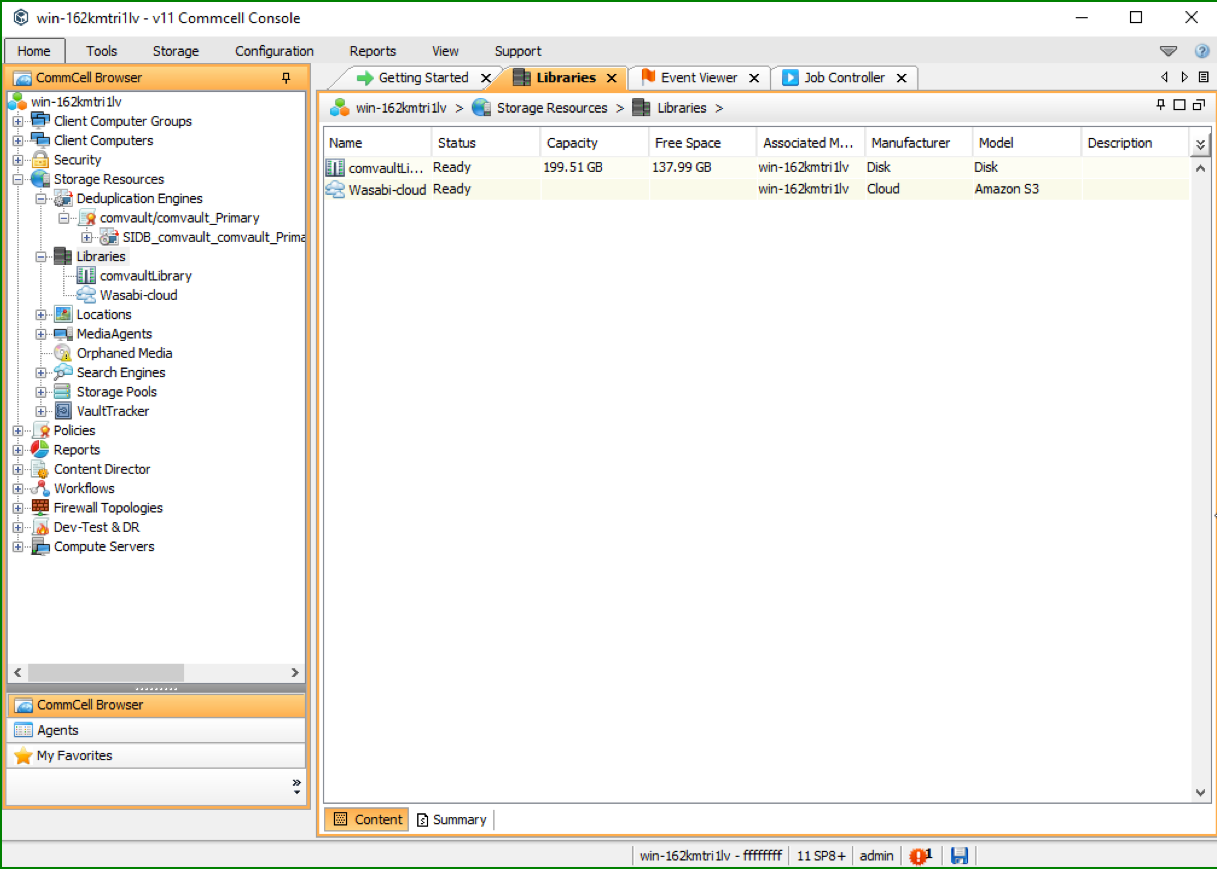
5. The newly created storage library is now listed in the Libraries tab.
Set Up a Commvault Storage Policy
In Policies, right-click on Storage Policies.
Select New Storage Policy.
Using the Create Storage Policy Wizard, define the policy (such as Wasabi Cloud).
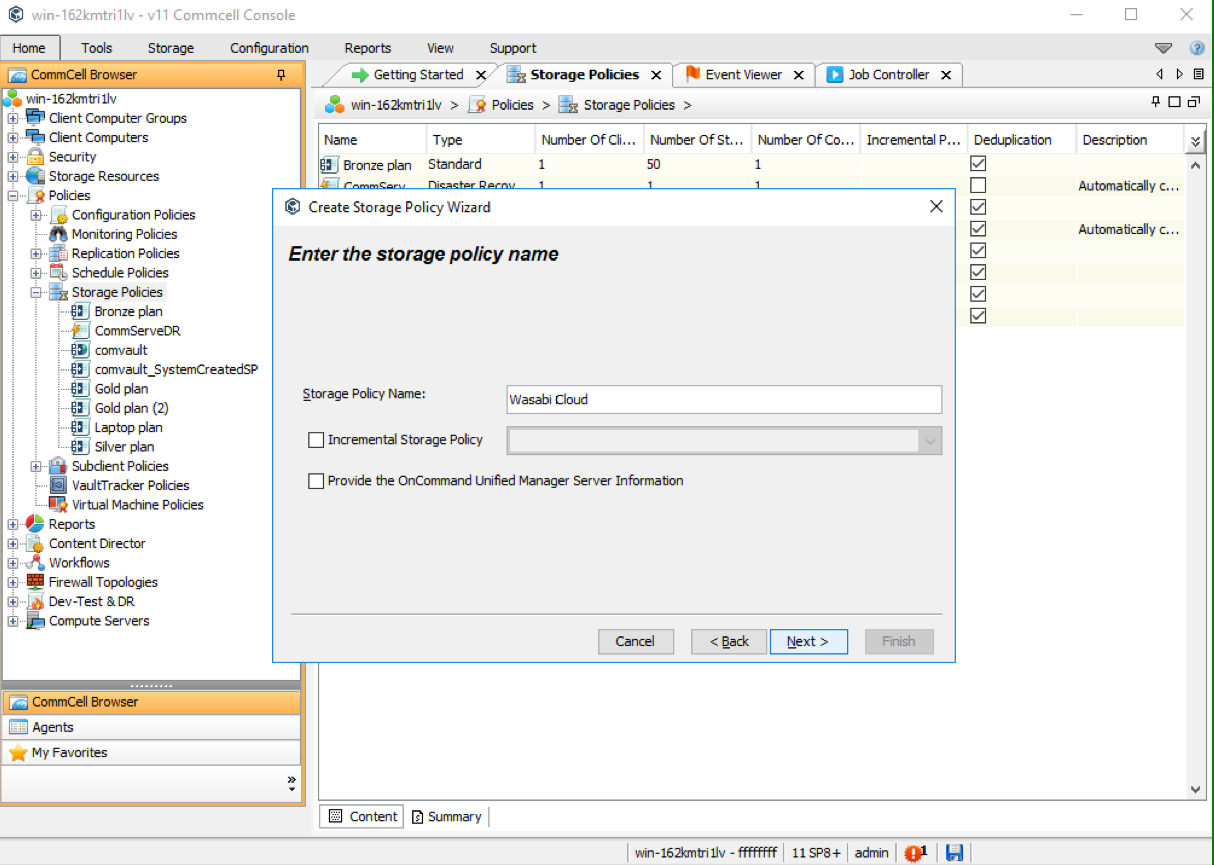
Click Next.
Enter information, and be sure to include Wasabi-cloud:
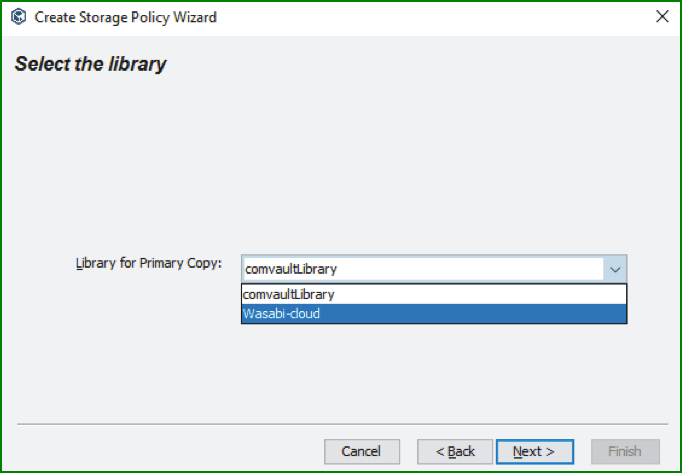
Click Next.
Enter the remaining information as appropriate for your application.
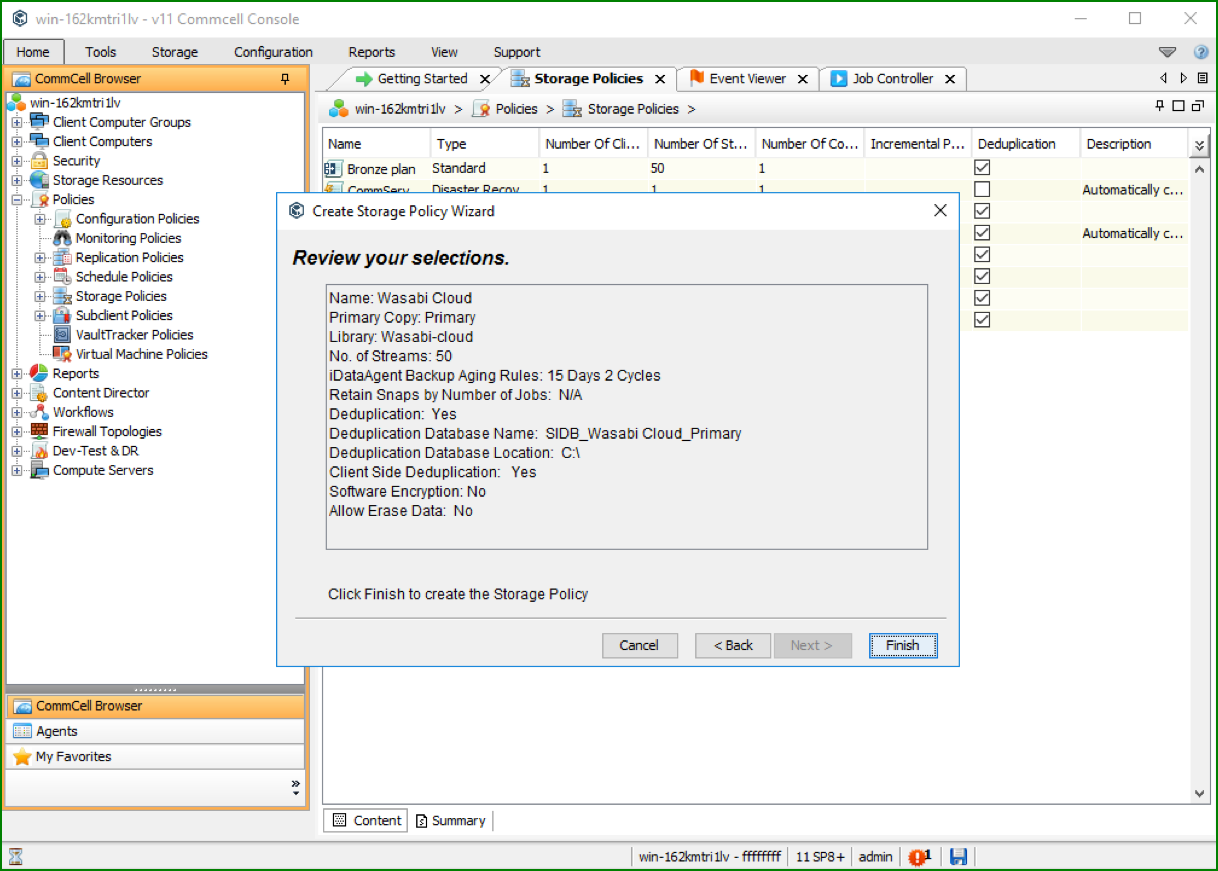
Click Finish.
Back Up the Commvault Storage Library Folder to Wasabi
Right-click on the File System folder to be backed up. Select Properties. Specify the General subclient properties.
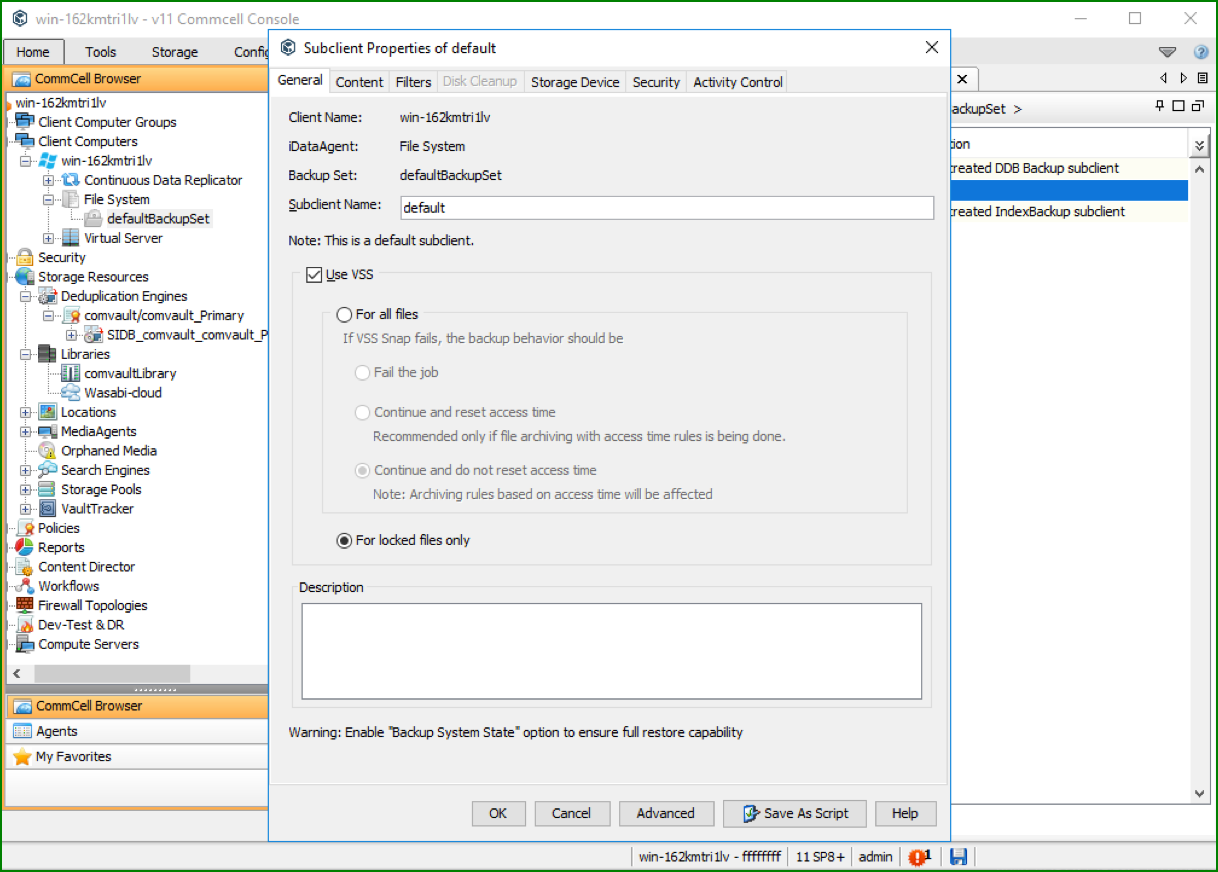
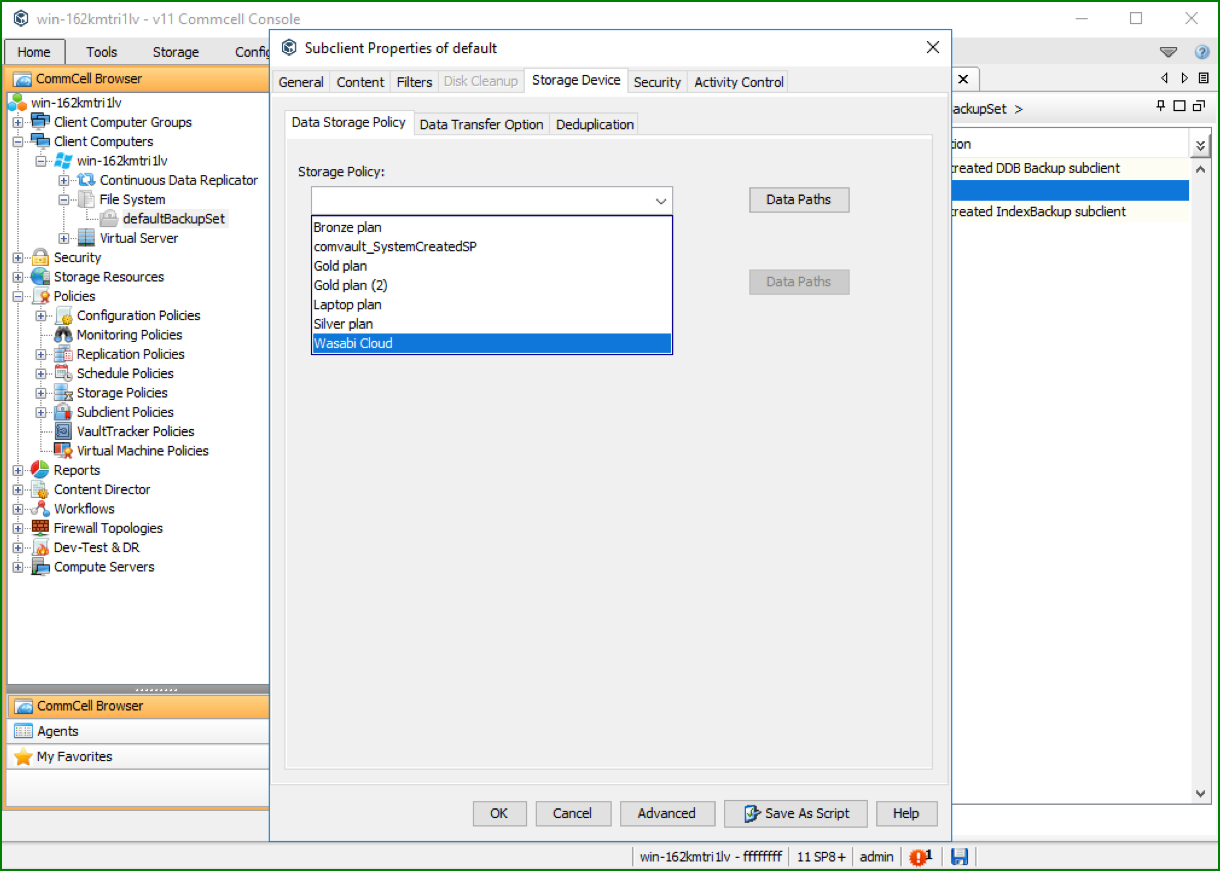
On the Storage Device tab, be sure to select the Data Storage Policy as the one you set up above (such as Wasabi Cloud):
Once the properties are set up, right-click on the file system folder to be backed up and select Backup.
Configuring immutable backups using object lock
You can configure immutable backups by enabling WORM functionality on the cloud storage server. Commvault supports object lock in Compliance mode.
Follow the steps below to make your backups immutable.
Create an object lock-enabled Wasabi bucket. For more information, refer to Object Lock: Enabling.
Add a new storage target using the bucket created above.
Log in to the Commvault Commcell Console. In the CommCell Browser, navigate to Storage Resources. Select Libraries. Right-click on the required library and click Properties.

In the General tab, select the checkbox for WORM Copy. Click OK.

Assign this storage server as the destination in the appropriate backup plan.
All backups will be written to Wasabi in WORM mode after the retention period specified in the backup plan.