Dell Technologies PowerProtect DD Cloud Tier backup and de-duplication storage software is validated for use with Wasabi. Wasabi is now on the Dell validated list of cloud providers. PowerProtect DD Cloud Tier enables object storage from Wasabi to be added for long term retention of your data in the Wasabi cloud.
This article describes the procedure to integrate Wasabi cloud storage with PowerProtect DD Cloud Tier. The procedure outlined in this article applies to all PowerProtect DD appliances, such as DD3300, DD6400, DD6900, DD9400, DD9900 and PowerProtect DD Virtual Edition. The PowerProtect DD Virtual edition can be installed on a Dell PowerEdge R750 server.
Requirements
Active Wasabi cloud storage account.
PowerProtect DD product suite with Cloud Tier feature.
Cloud Tier license on PowerProtect DD.
The data restoration process is handled by your specific backup software application. As there are many potential variables that will affect your unique environment, Wasabi recommends that you seek the guidance of your backup software’s technical support team in the event that you encounter difficulty or have application-specific inquiries.
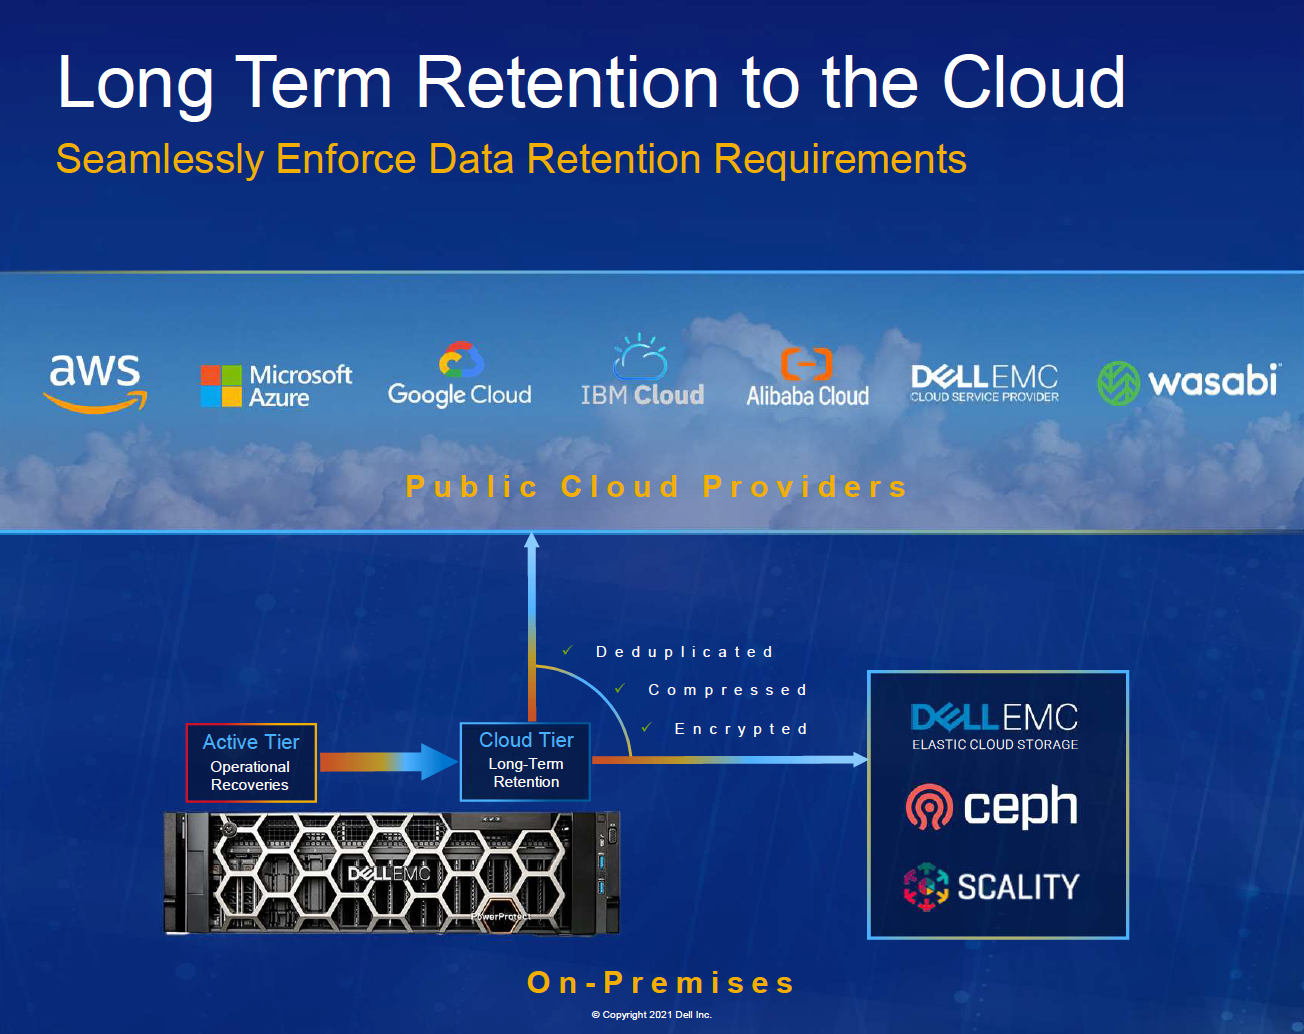
Architecture Diagram
Wasabi fits into the PowerProtect DD reference architecture, as shown in the diagram below.
Enabling Cloud Tier
Cloud Tier storage is required for the DD system to support cloud-units. The Cloud Tier holds the metadata for the migrated files, while the actual data resides in the cloud. Before enabling Cloud Tier, the File System must be disabled. Below are the steps to disable the File System.
Log in to the DD System Manager.
Open the Data Management drop-down.
Select File System.
Click the SUMMARY tab.
Click Disable.

Open the Hardware drop-down.
Click Storage.

Expand the Cloud Tier drop-down. Click Configure.

Select the checkbox for the shelf to be added from the Addable Storage selection.
Click Add to Tier.
Click Next to add the storage.

Open the Data Management drop-down.
Select File System.
Click Enable Cloud Tier.
Configure the cloud tier of the file system. To enable the cloud tier, you must meet the storage requirement for the licensed capacity.

Click Enable File System from Bottom. When enabling the file system is complete, you should see the message below.

Click Close.
Importing a CA Certificate
For more information on downloading the certificate, review Wasabi CA Certificate for https Support on Third-Party Applications.
Download the "DigiCert Global Root G2" root certificate, which was used to sign the Wasabi vaults.
To import the certificate:
Open the Data Management drop-down.
Select File System.
Click Cloud Units.
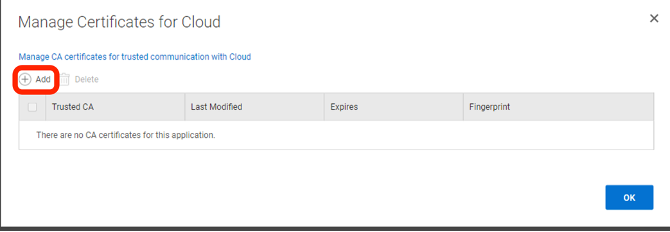
Click Manage Certificates. The Manage Certificates for Cloud dialog is displayed.
Click Add to add the certificate.
Select one of the following options:
Uploading the Certificate as a .pem File
Copying and Pasting the Certificate Text
Uploading the Certificate as a .pem File
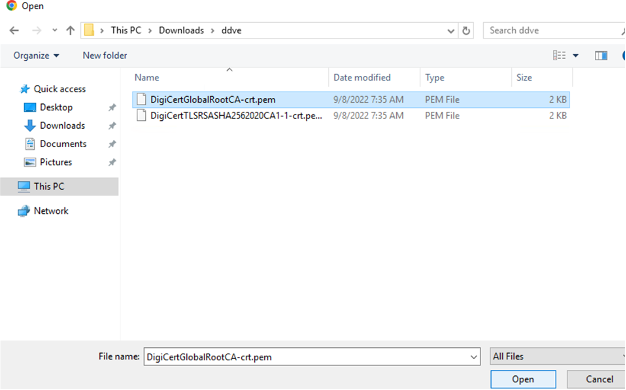
Click Choose File.
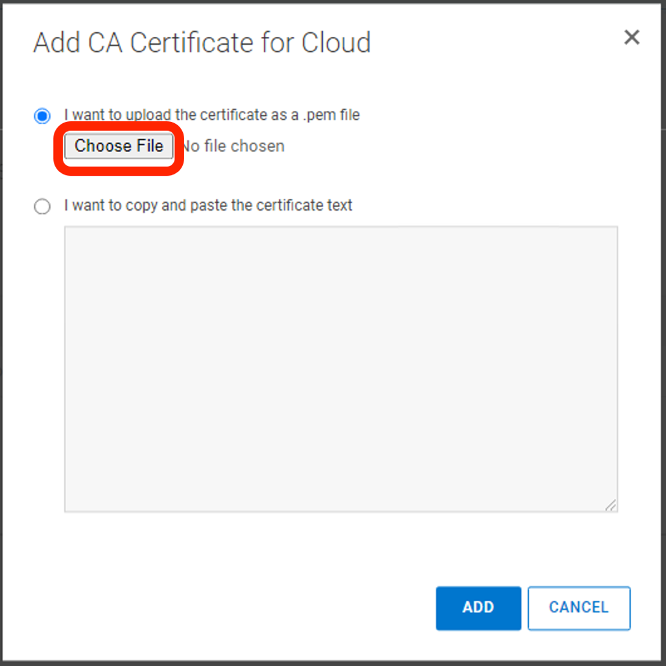
Select the Root CA file.
Copying and Pasting the Certificate Text
Copy the contents of the .pem file to your copy buffer. Paste the buffer into the dialog.
Click Add to add the certificate.
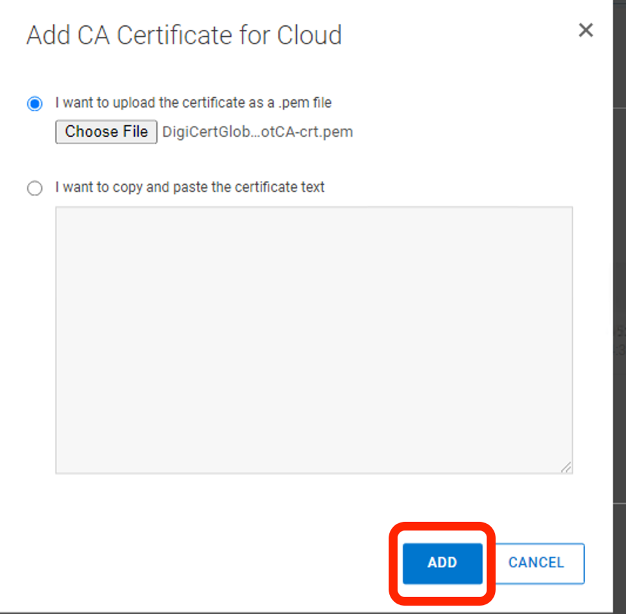
You will see the certificate listed in the certificate table.

Adding the Cloud Unit
Follow the steps below to add the Wasabi bucket.
Port 443 (HTTPS) and/or Port 80 (HTTP) must be open for bi-directional traffic toward the configured Wasabi endpoint URLs.
Open the Data Management drop-down.
Click File System.
Click the CLOUD UNITS tab.
Click Add.

Enter your Wasabi account credentials.

— Provide a name for the cloud unit.
— Select Flexible Cloud Tier Provider Framework for S3 as the Cloud Provider.
— Click Manage certificates and be sure that the imported certificate is checked.
DDOS version prior to 7.9 did not have the option to add a bucket name.
— Enter the name of the Wasabi bucket that you want to use.
DDOS version prior to 7.9 did not have the option to add a bucket name.
— Enter "Wasabi" as the S3 Provider name.
If you are running DDOS version 7.9 on the PowerProtect DD, use the fqdn of the endpoint as the S3 Provider name. For example, if using Wasabi's us-west-1 region the S3 Provider Name will be s3.us-west-1.wasabisys.com.
— Enter your access key and secret key for your Wasabi account. For more detail, review How do I create a sub-user with Console access and Access and Secret Keys?
— Enter the appropriate storage region and endpoint URL. For more detail, review Service URLs for Wasabi's Storage Regions.
— Select standard for the Storage class.
Click Verify to run the cloud provider verify tool before adding the cloud unit. This tool performs pre-check tests to ensure that all requirements are met before adding the actual cloud unit.
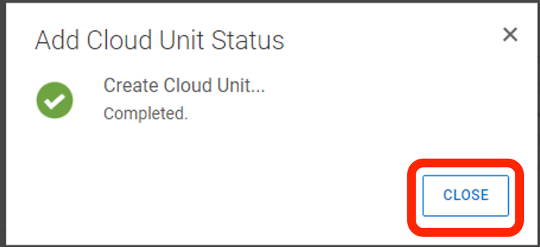
Click Add to add the cloud unit.

Click Close to close the status window.
The file system main window now displays summary information for the new cloud unit and a control for enabling and disabling the cloud unit.

Adding Data Movement
Data is moved from the active tier to the cloud tier as specified by the data movement policy. The policy is set on a per-MTree basis. Data movement can be initiated manually or automatically using a schedule.
Open the Data Management drop-down.
Select MTree. In the top panel, select the MTree to which you want to add a data movement policy.

Click the SUMMARY tab.
Under Data Movement Policy, click Add.

Select the Cloud Unit added above as the Destination.
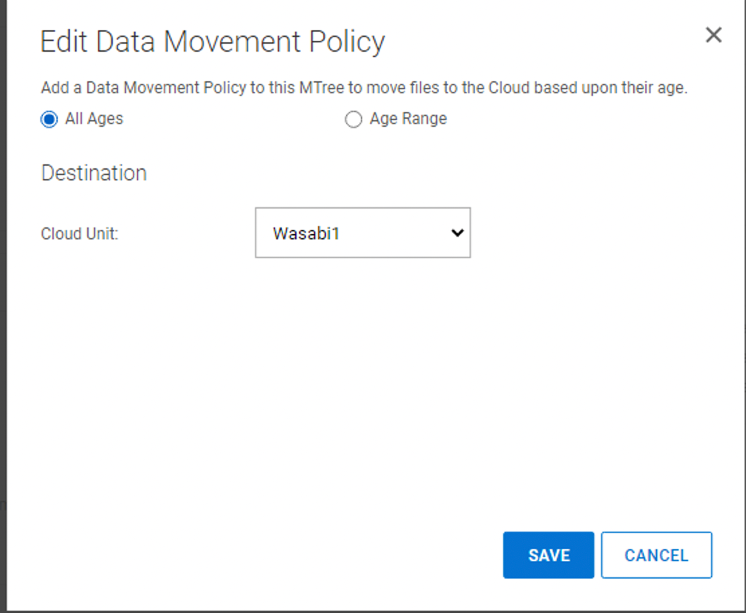
If you select Age Range, you can select a range of ages. For File Age in Days, set the file age threshold (Older than) and, optionally, the age range (Younger than).
The minimum number of days for Older than is 14.
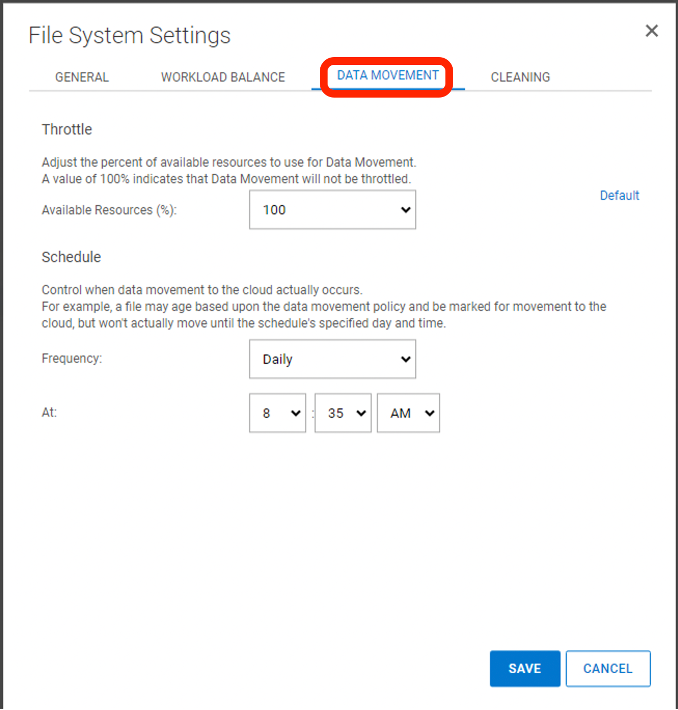
Data movement can be triggered automatically to move data from Active Tier to Cloud Tier based on a schedule. To set a schedule:
Open the Data Management drop-down.
Select File System.
Click Settings.
Click the DATA MOVEMENT tab and set the Throttle and Schedule.
Click Save.
Data movement can be started and stopped manually for any MTree that has a data movement policy.
Open the Data Management drop-down.
Select File System.
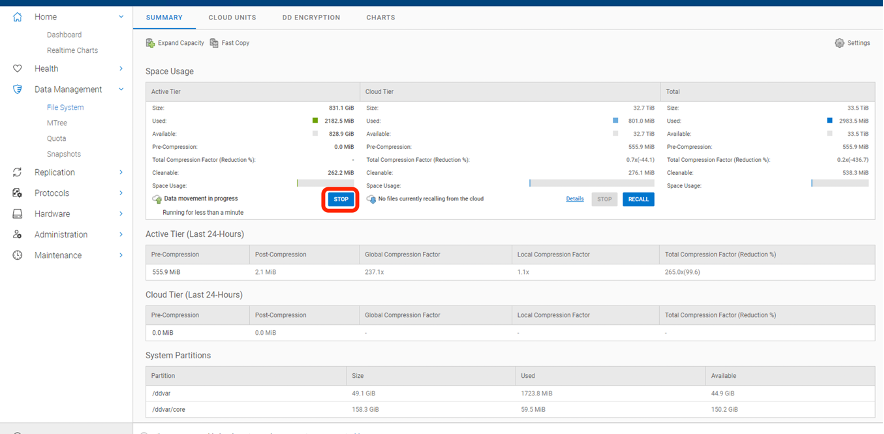
Click the SUMMARY tab.
Under Active Tier, click Start to start the data movement to the Cloud Tier.
To stop data movement, click Stop when data movement is running.
To view the statistics for Cloud Tier:
Open the Data Management drop-down.
Select File System.
Click the SUMMARY tab.
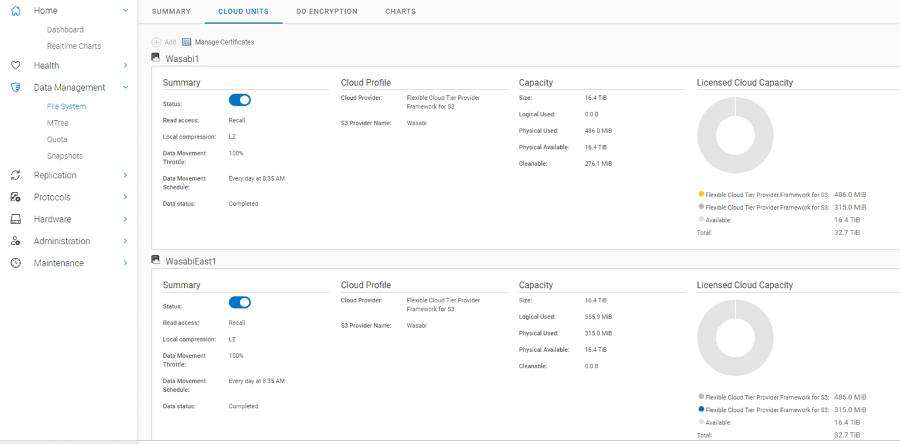
To view the statistics for data stored in each of the Cloud Units.
Open the Data Management drop-down.
Select File System.
Click the CLOUD UNITS tab.
Cloud Tier File Structure in Wasabi Storage
PowerProtect DD creates a ‘/’ directory in the Wasabi bucket as a top level directory. It further creates three directories under the top level directory- 'd x', 'c x' and 'm x'. The d x directory is used for data segments. The directory named 'c x' is used for configuration data. The directory named’m x' is used for storing metadata.
For any questions, submit a request.