Hitachi Vantara's Hitachi Content Platform (HCP) has been validated to work with Wasabi's cloud storage.
HCP is a scalable, multitiered, multitenant, multicloud storage solution for small, midsized and enterprise organizations as well as service providers. Wasabi can be used as a S-3 compatible extended storage to tier object data to Wasabi.
1. Prerequisites
HCP cluster version 8 and above installed and working. The screenshots in this KB are from HCP version 9.4.0.267.
Admin login to the HCP system management console.
Tenant created with administrator login for the tenant.
An active Wasabi account
2. Architecture Diagram
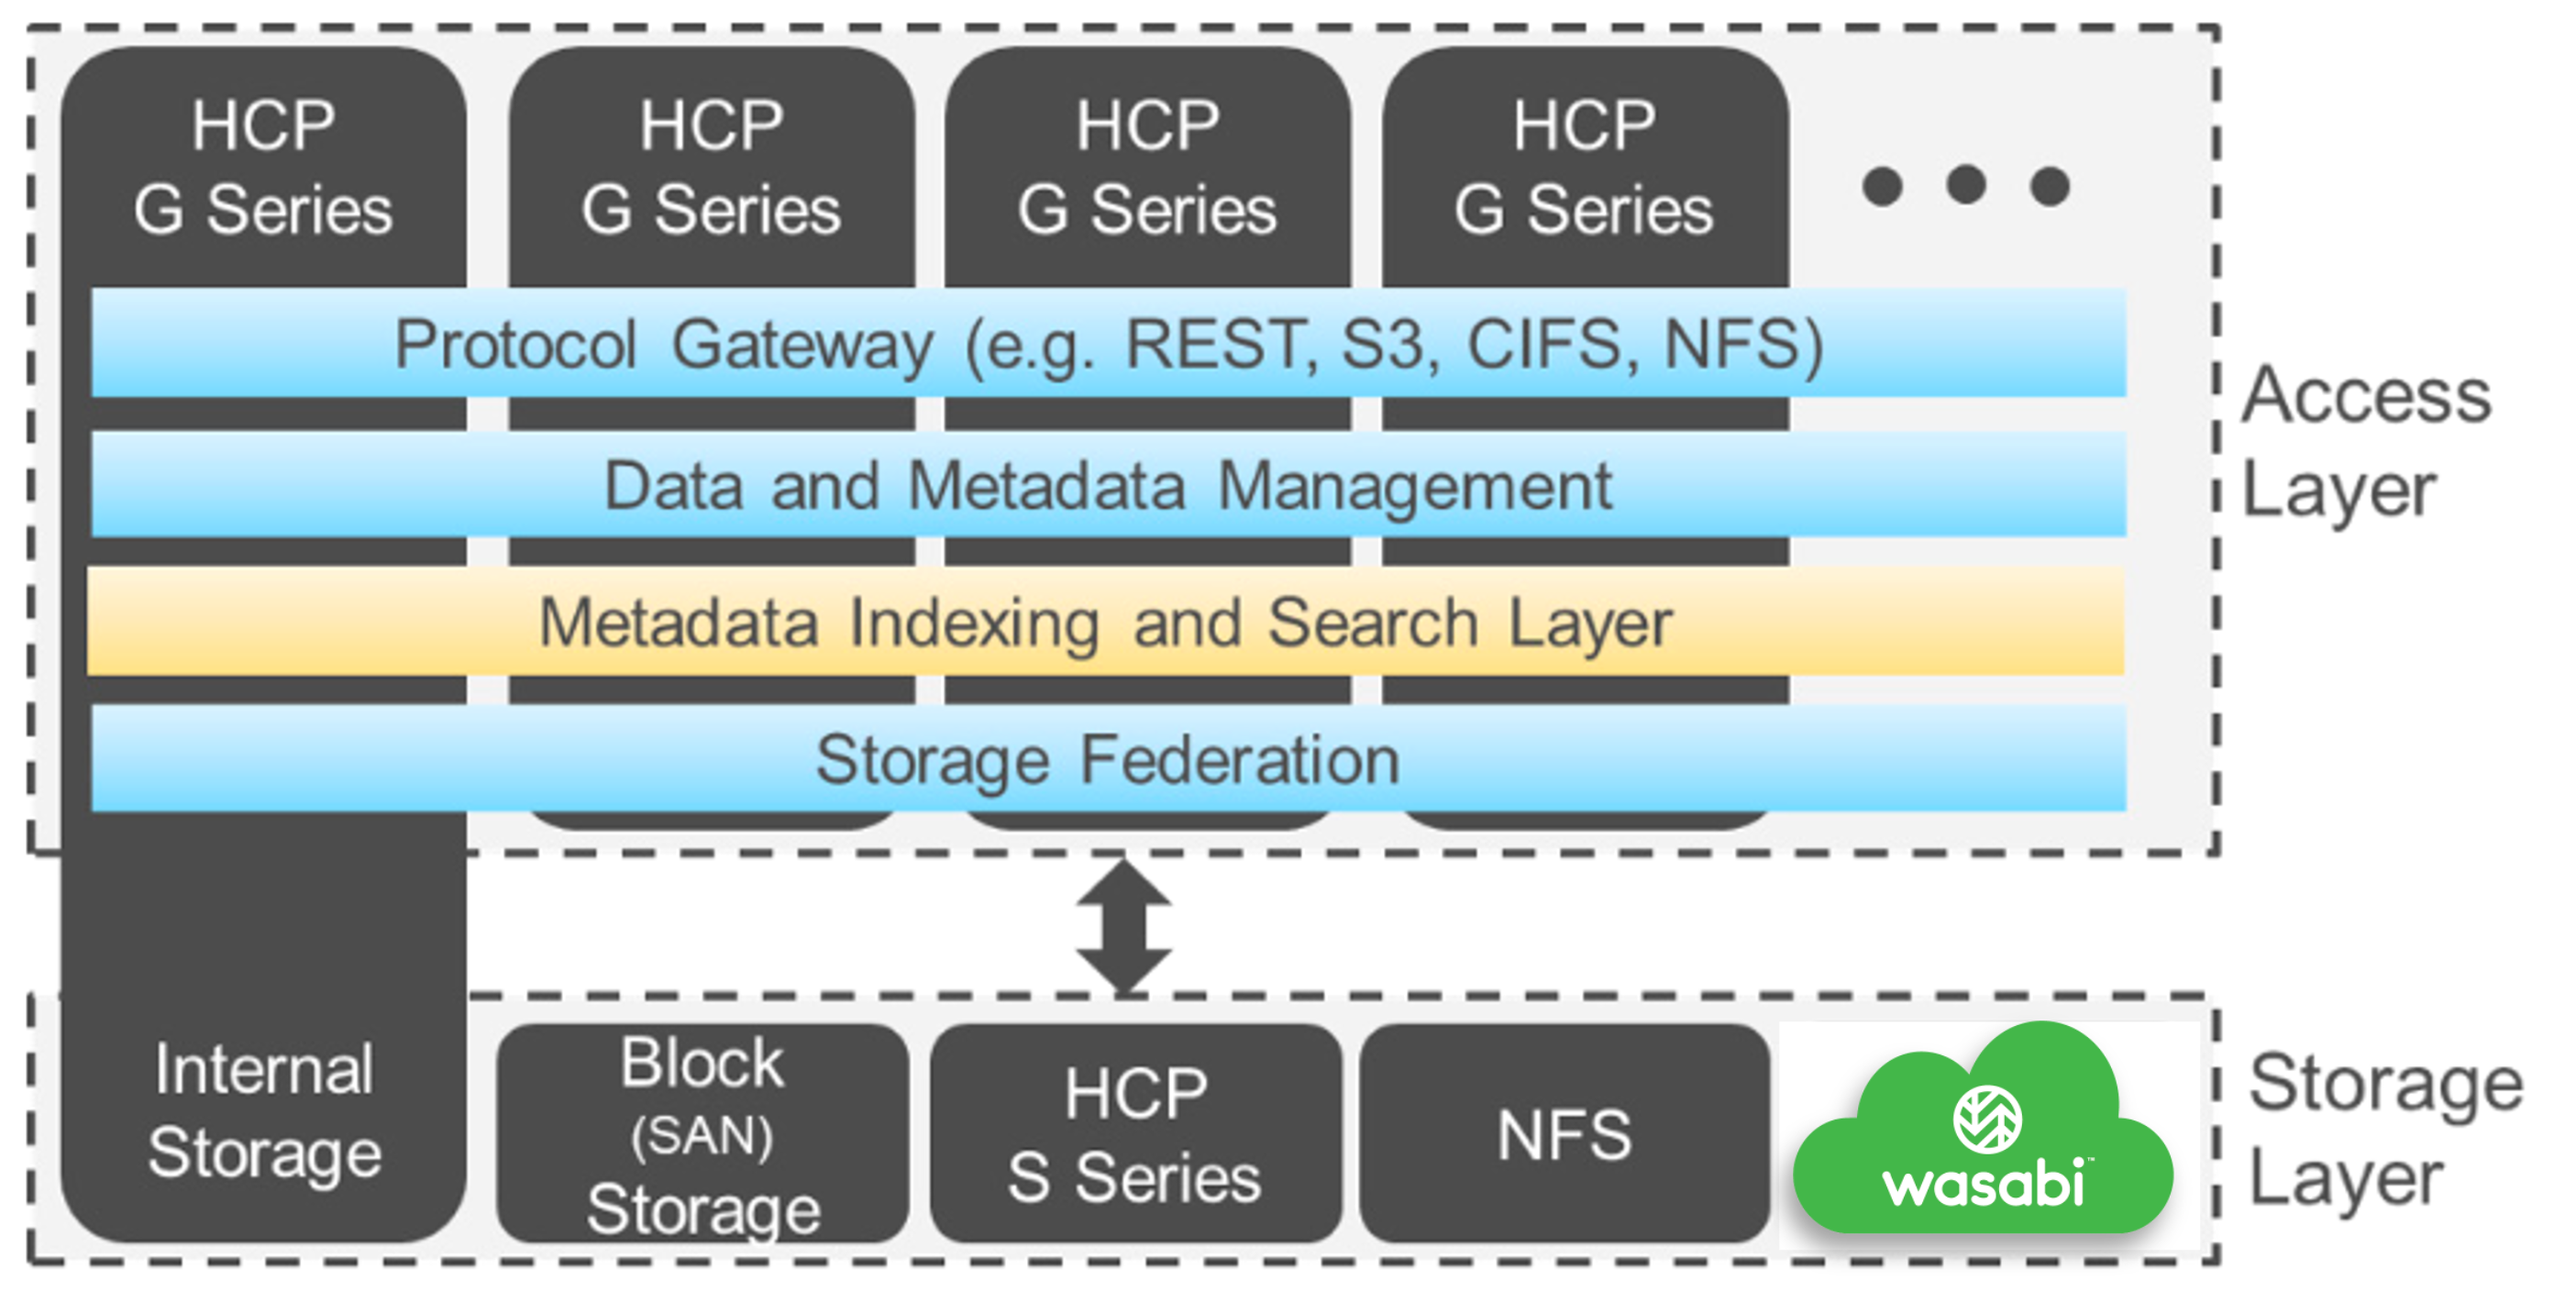
3. Create an Extended Storage Component
HCP system can be configured to use Wasabi as an extended storage for tiering data to public cloud.
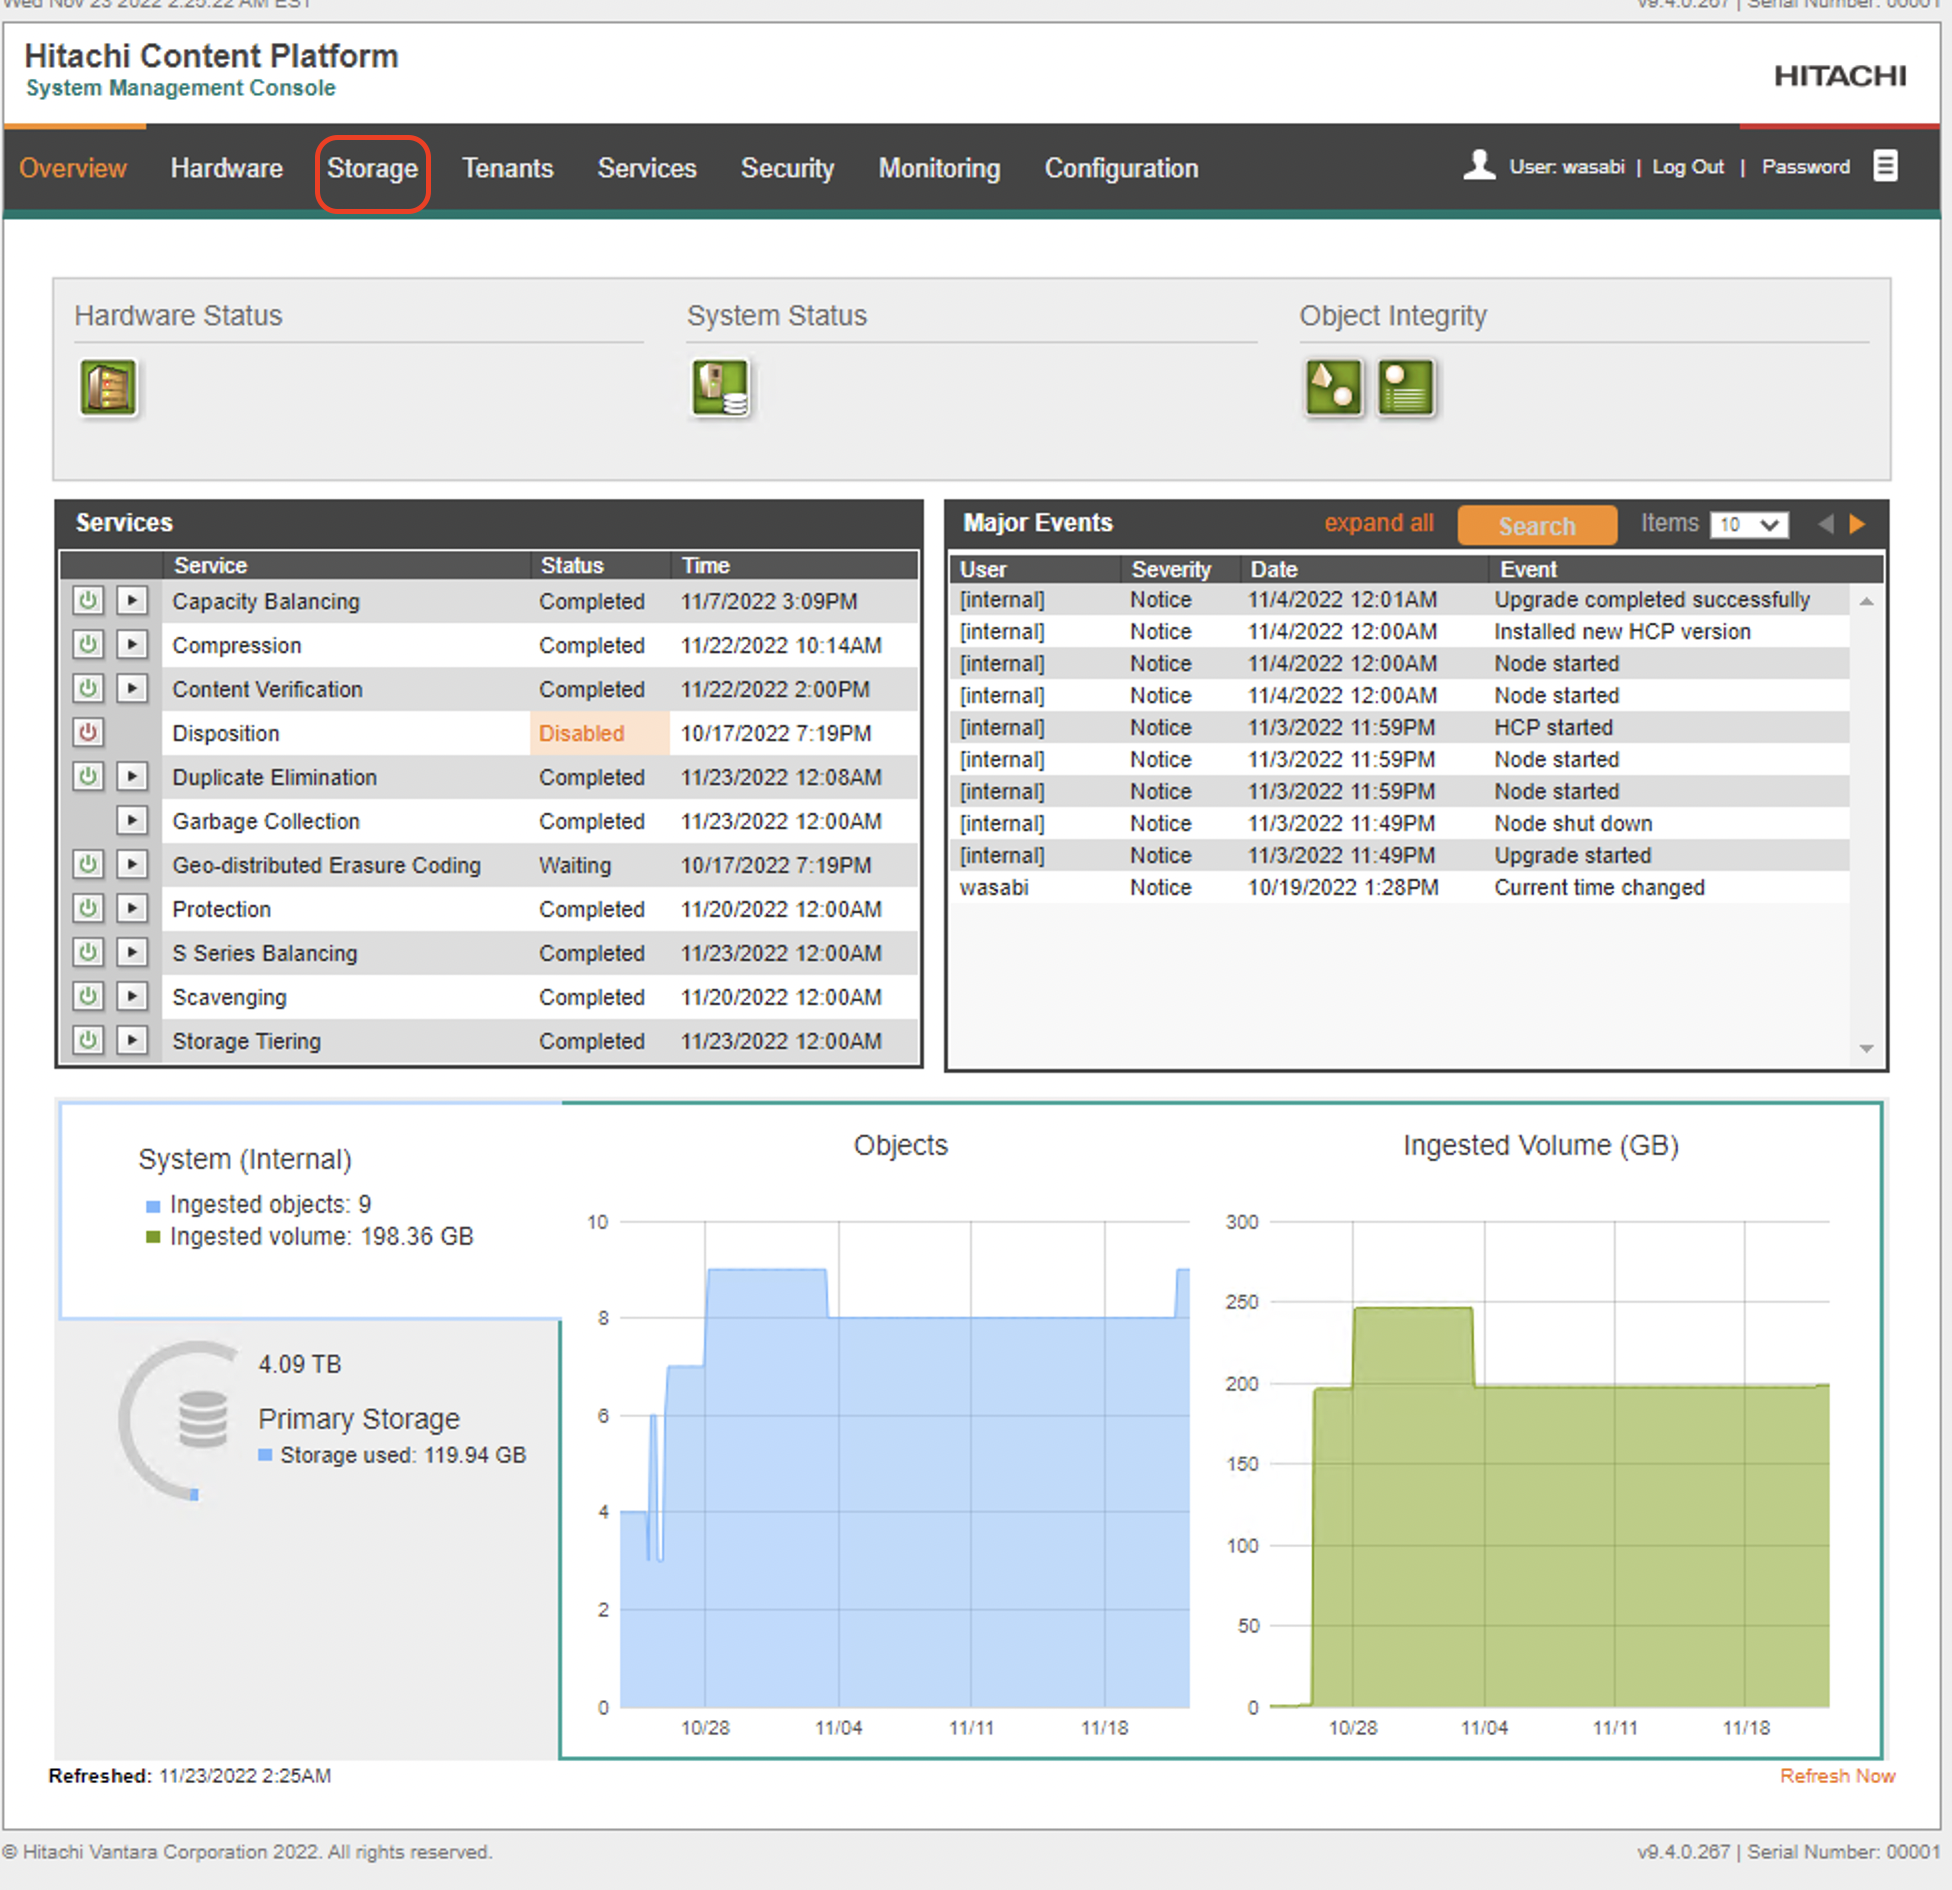
3.1 Login to the HCP Management Console and click Storage.
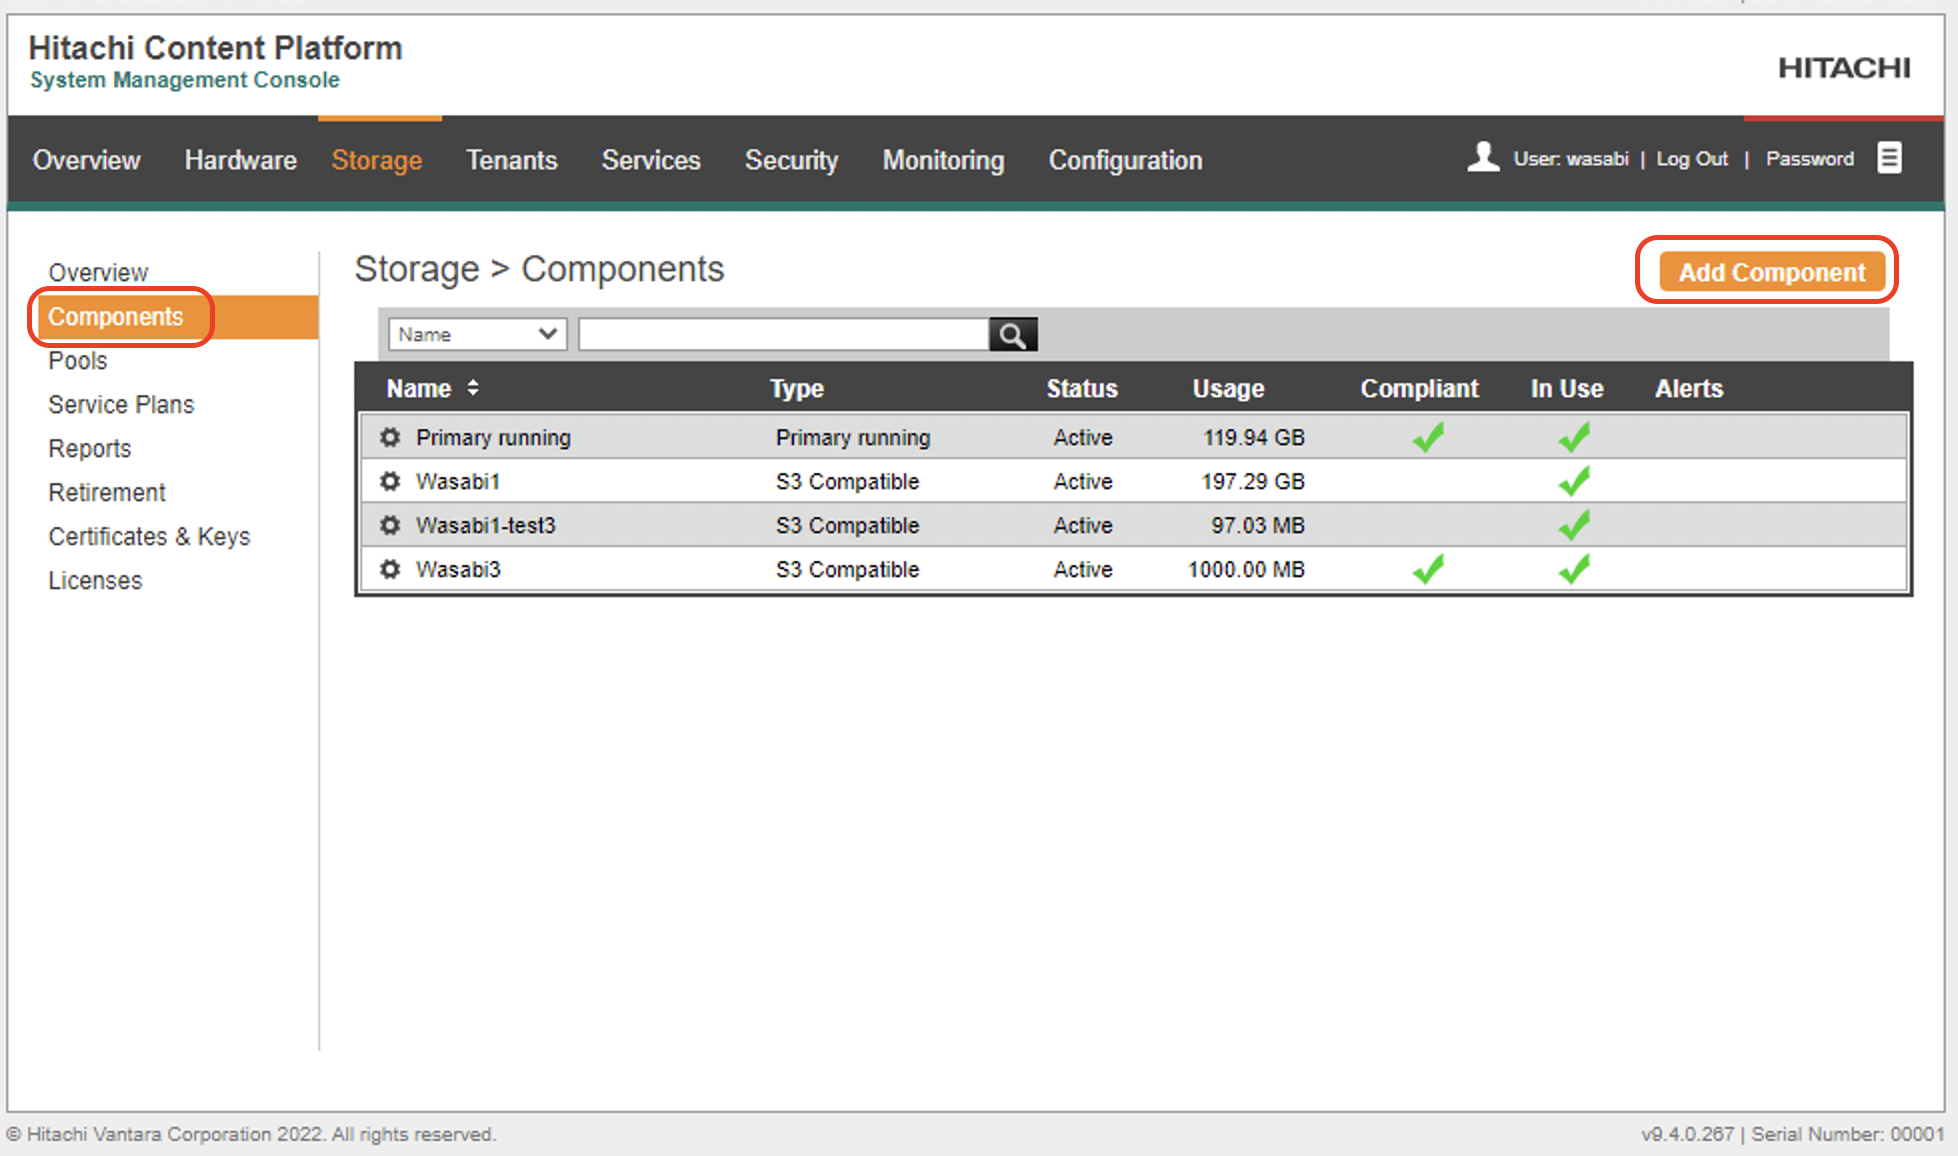
3.2 Click Components in the left pane on the On the Storage page. Click Add Component to add a new component.
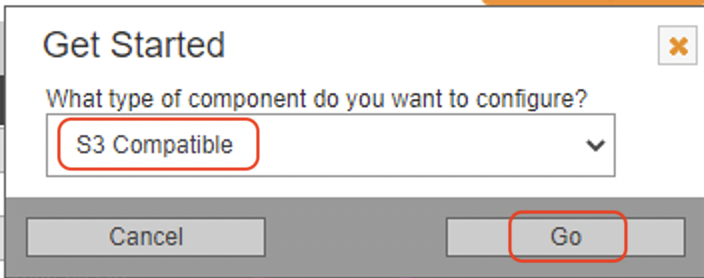
3.3 Select S3 Compatible in the Get Started dialogue box. Click Go.
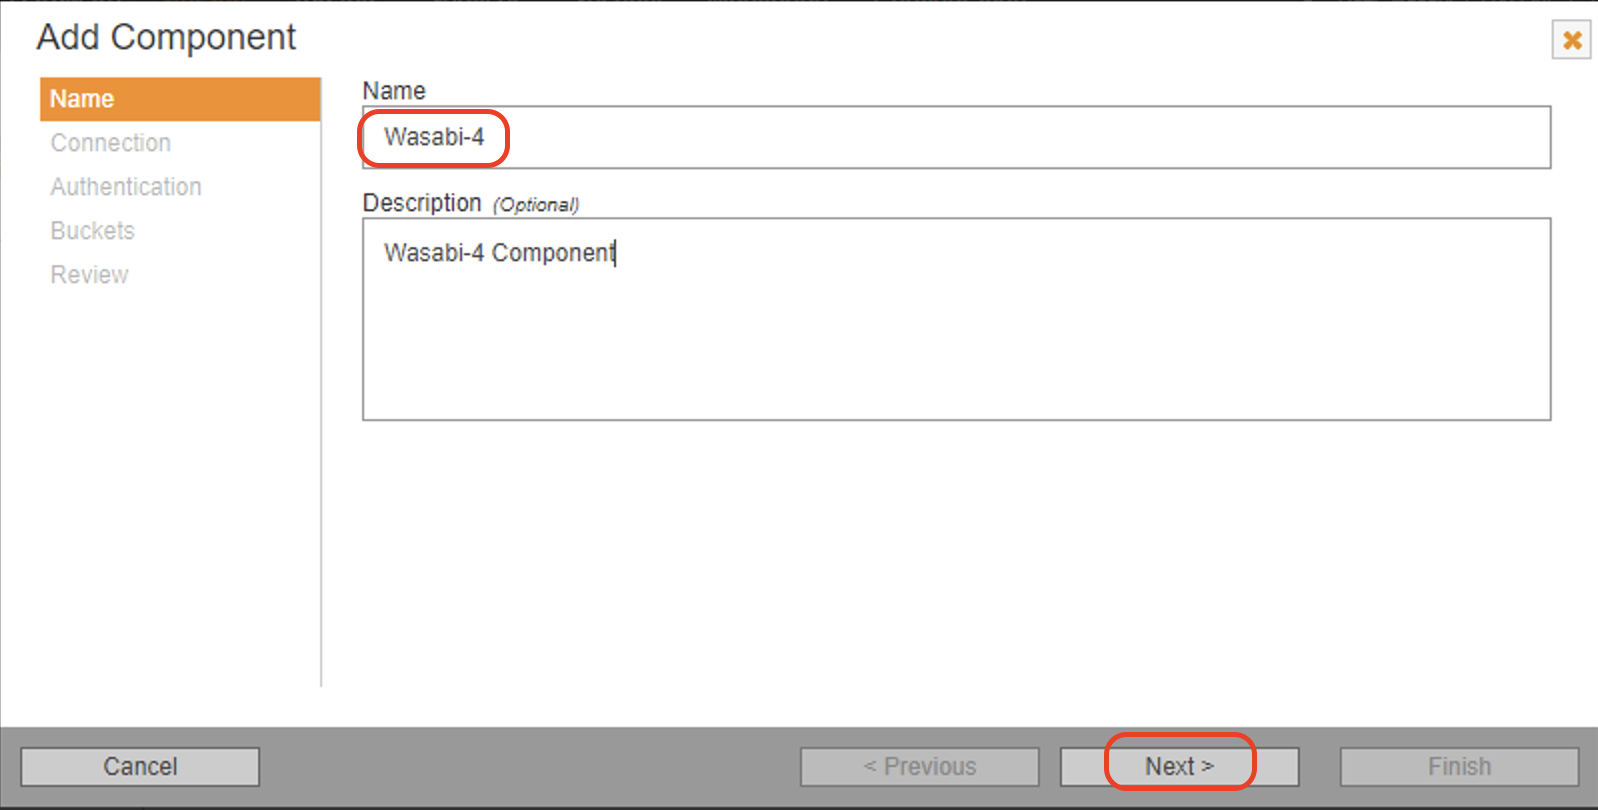
3.4 Enter a Name for the storage component in the Add component window.
3.5 Enter the Endpoint url in the connection tab and click Next.
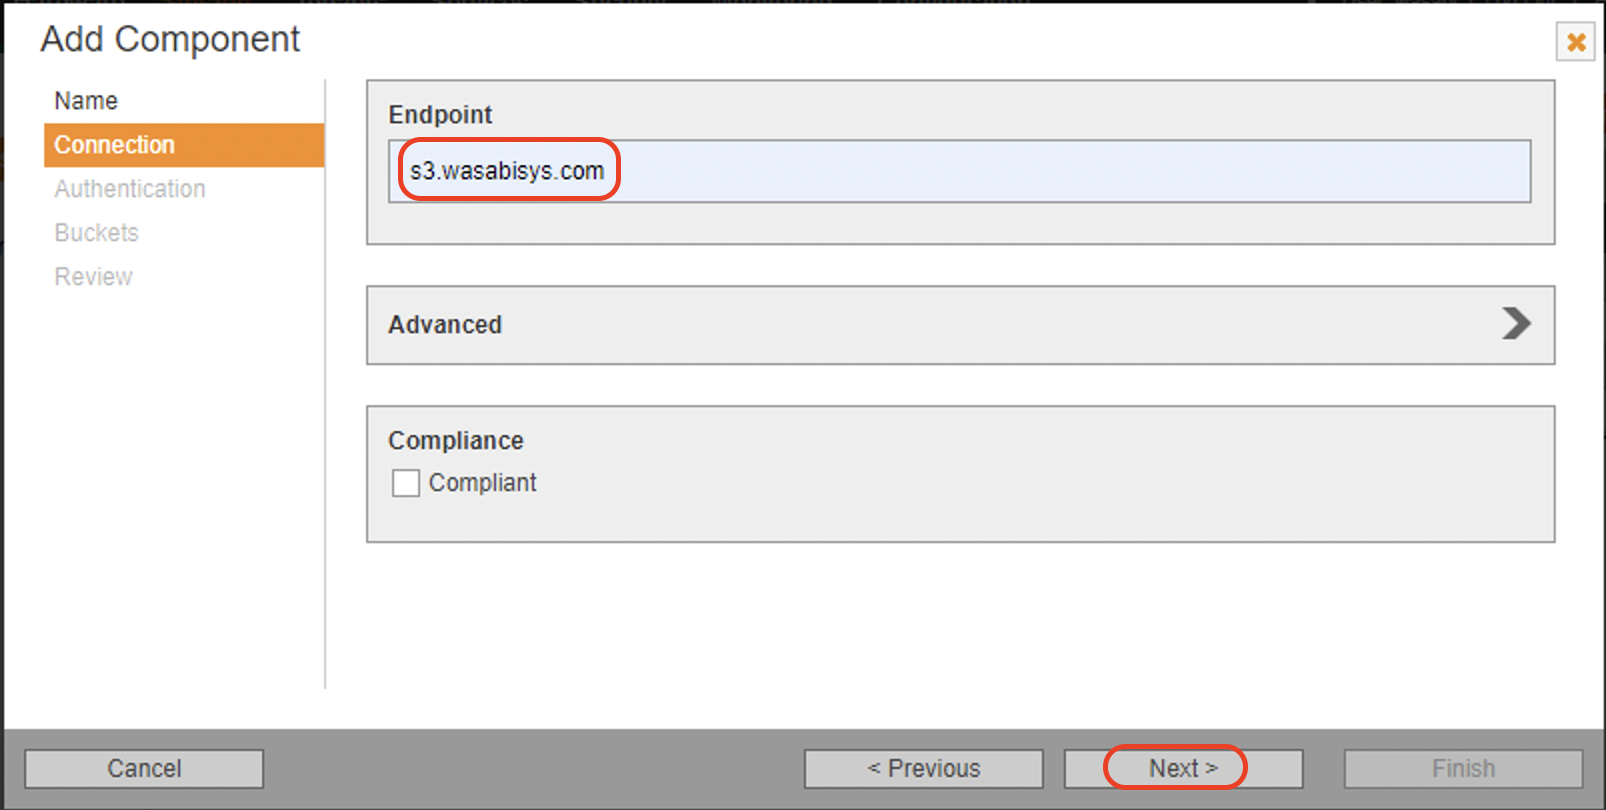
Note: Refer to Wasabi service URLs article for more information on the correct URL.
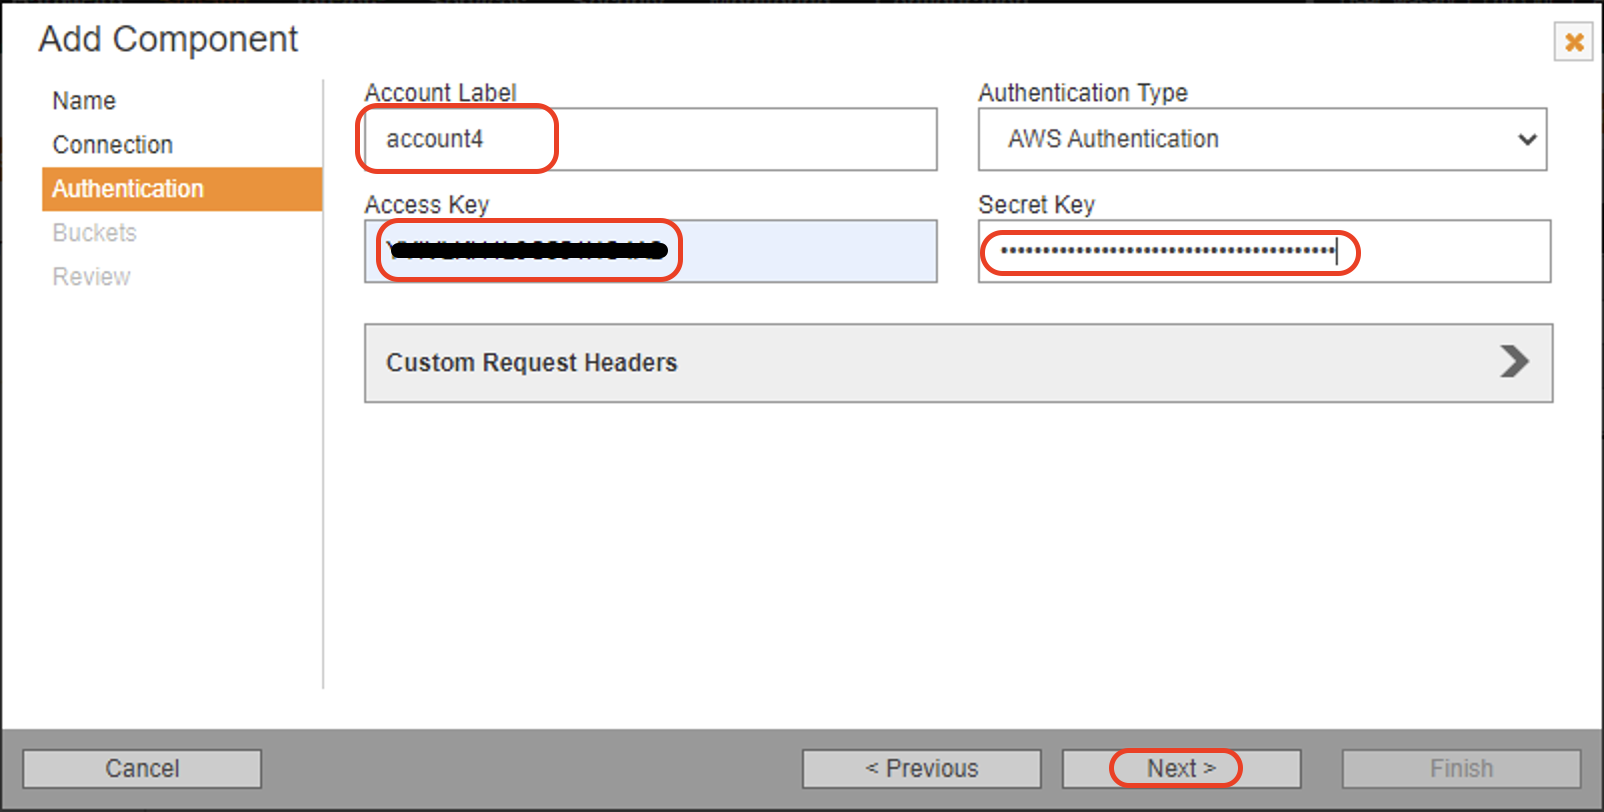
3.6 Enter the details in the Authentication tab and click Next.
Account label- HCP uses the account label to represent the user account with the specified credentials.
Authentication Type- Select "Authentication Type".
Access Key- Enter your access key for your Wasabi account. Refer to creating a sub-user and access and secret keys.
Secret Key- Enter your secret key for your Wasabi account. Refer to creating a sub-user and access and secret keys.
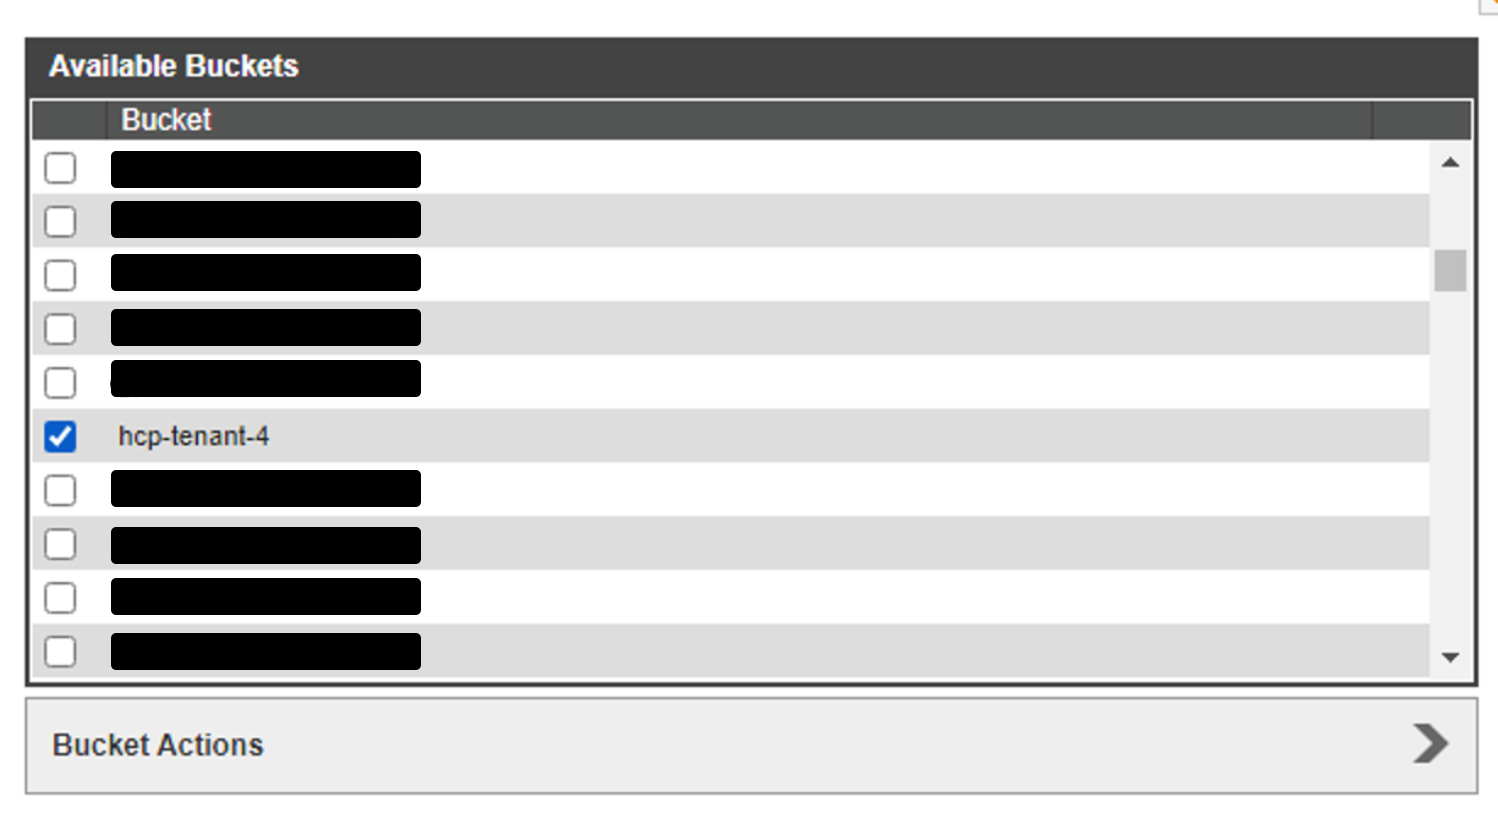
3.7 Select the Wasabi bucket you want to use for the storage component and click Next.
3.8 Review the configuration and click Finish to create the storage component.
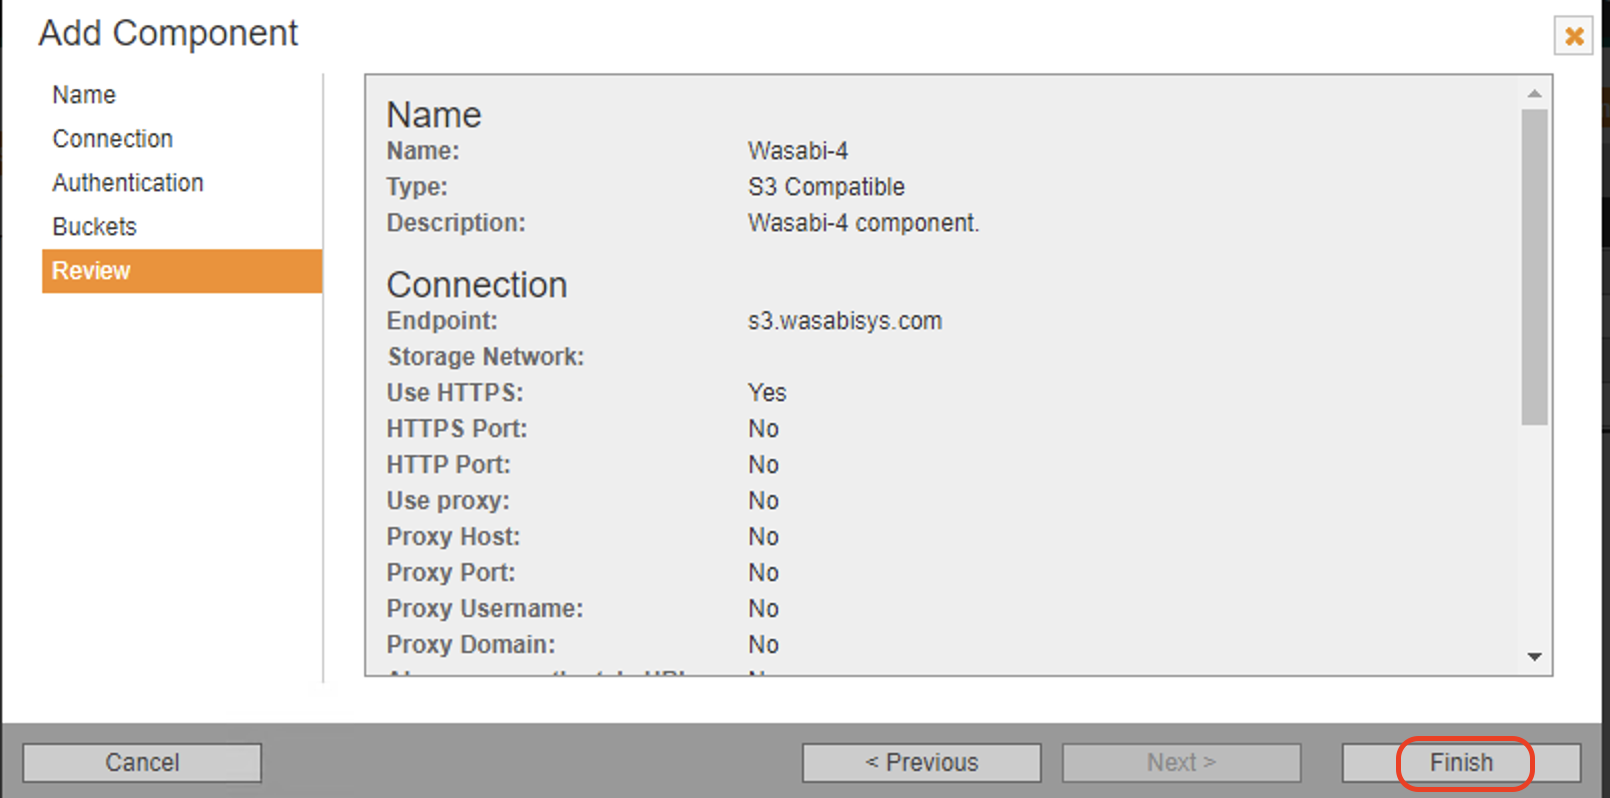
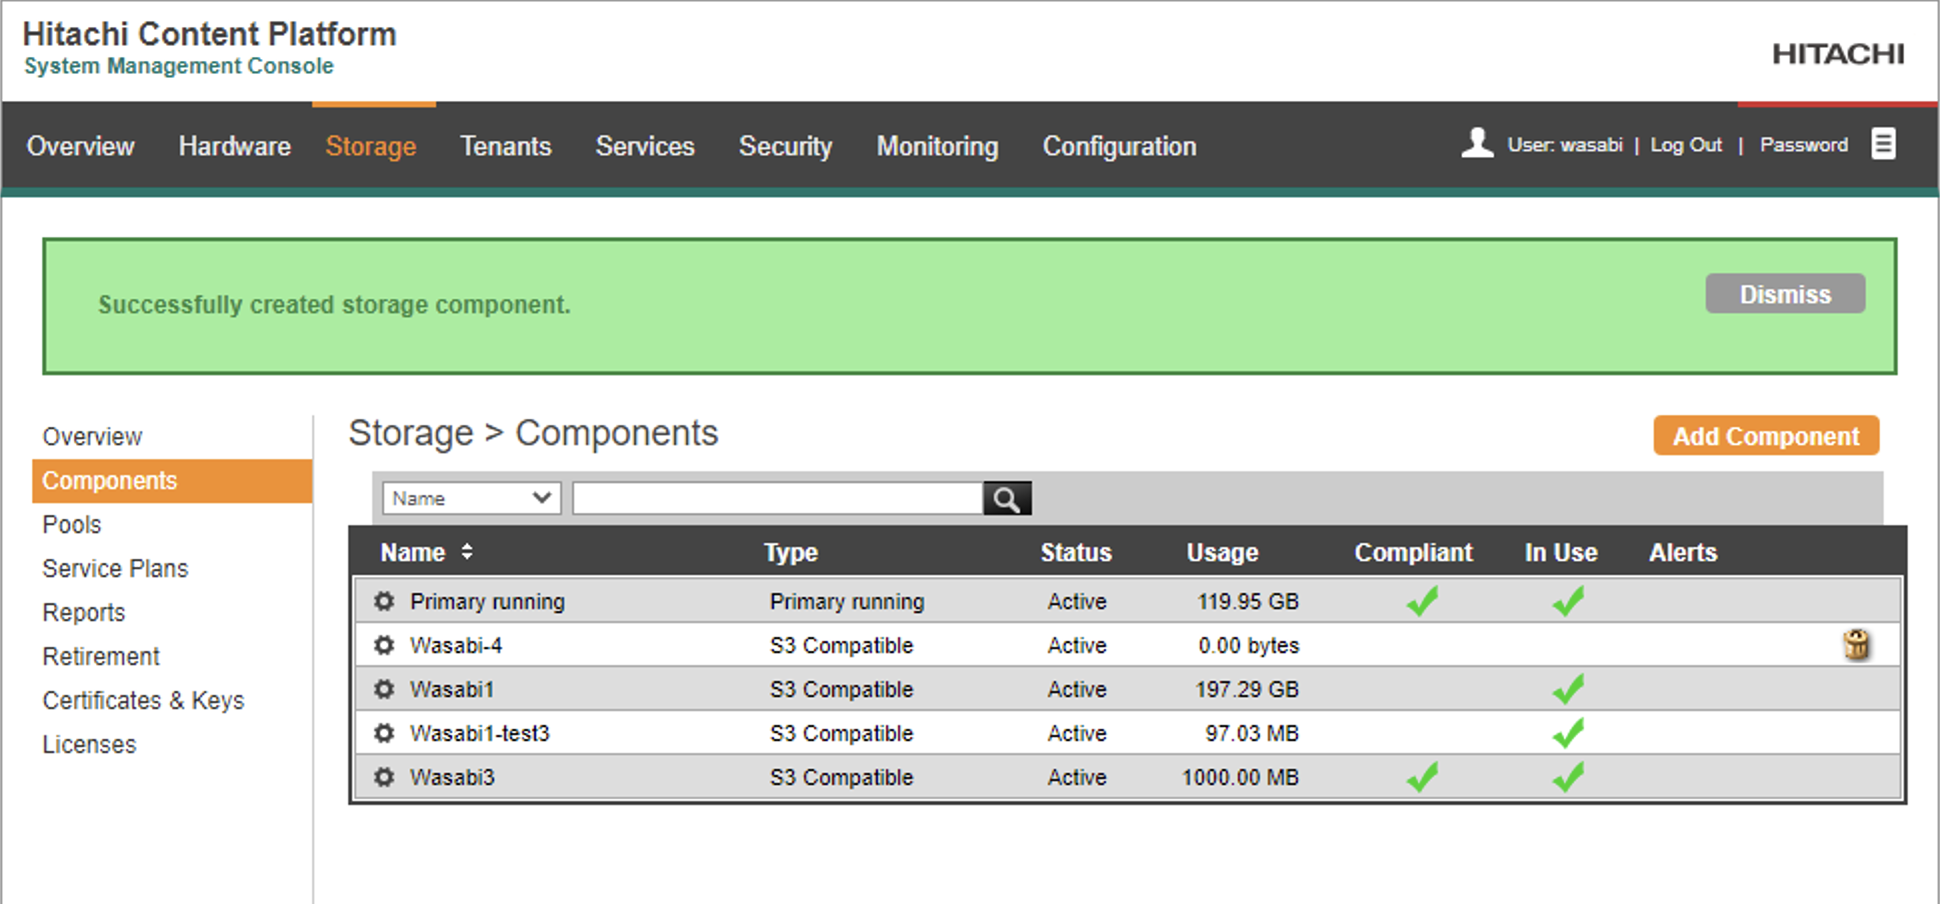
3.9 The new storage component is listed in Storage components page.
4. Create an Extended Storage Pool
HCP uses extended storage pools to represent logical groups of storage components that can be used as storage tiers. The following steps create an extended storage pool containing the storage component created in section-3 above.
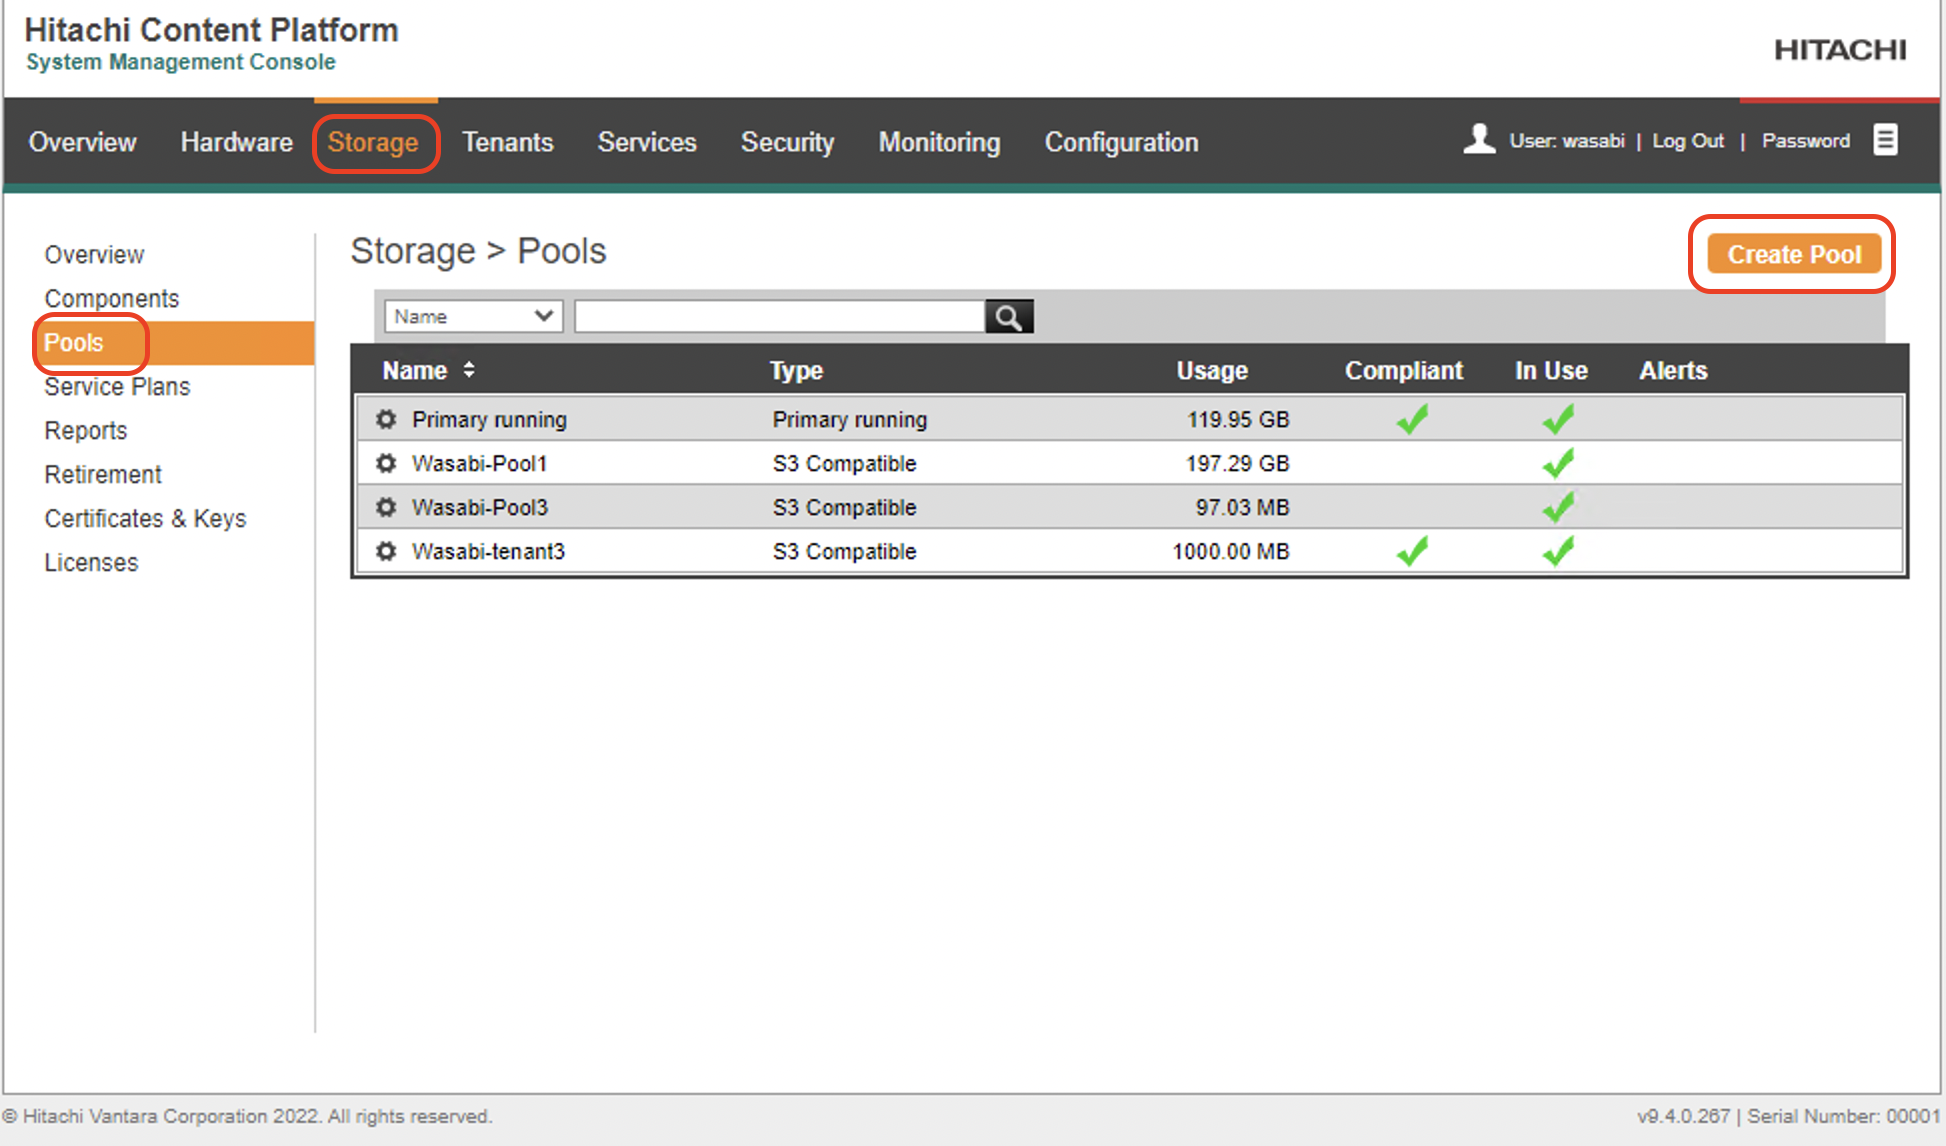
4.1 Login to the HCP System Management console and click on Storage. Click Pools. In the Pools page click Create Pools to create a new extended storage pool.
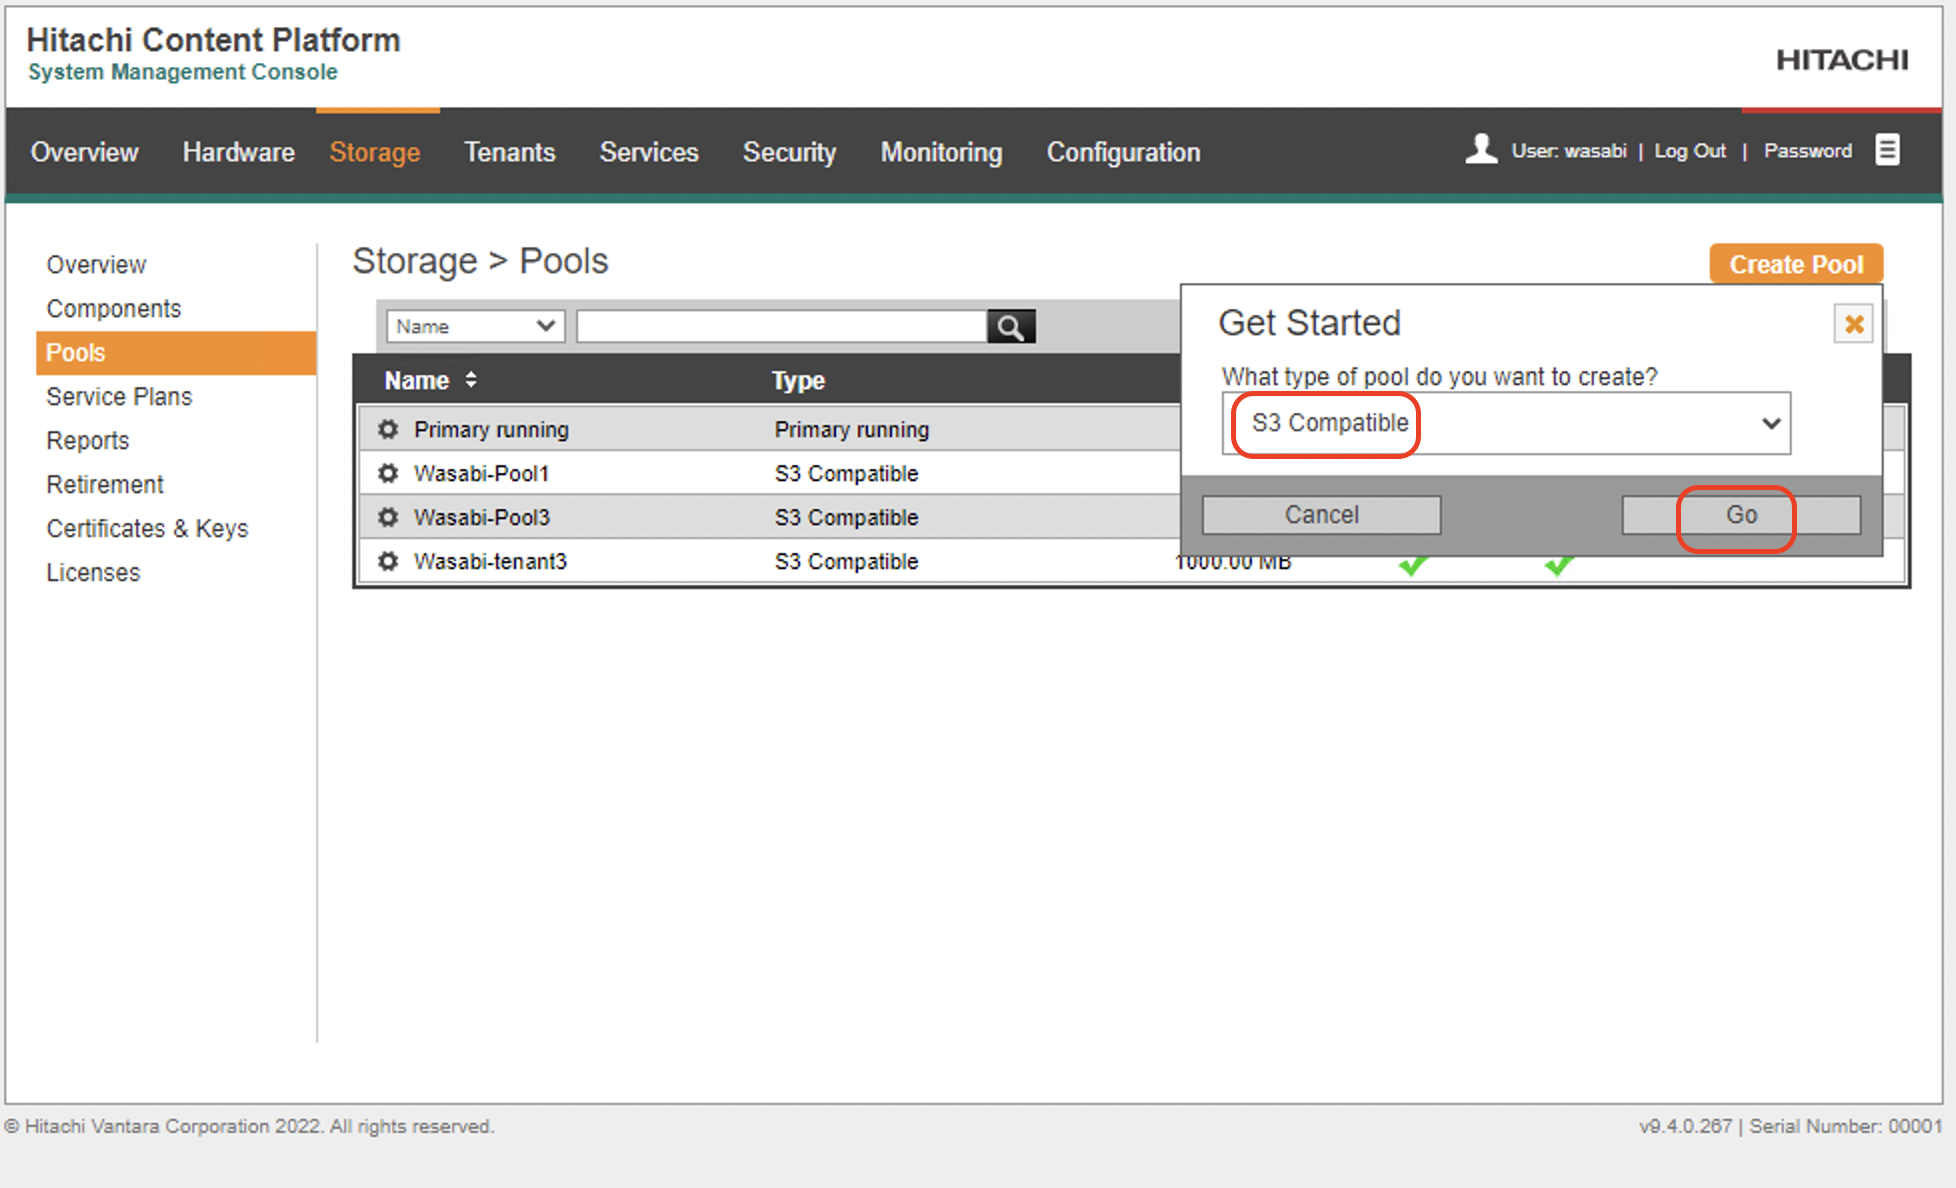
4.2 Select S3 Compatible in the Get started dialog box and click Go.
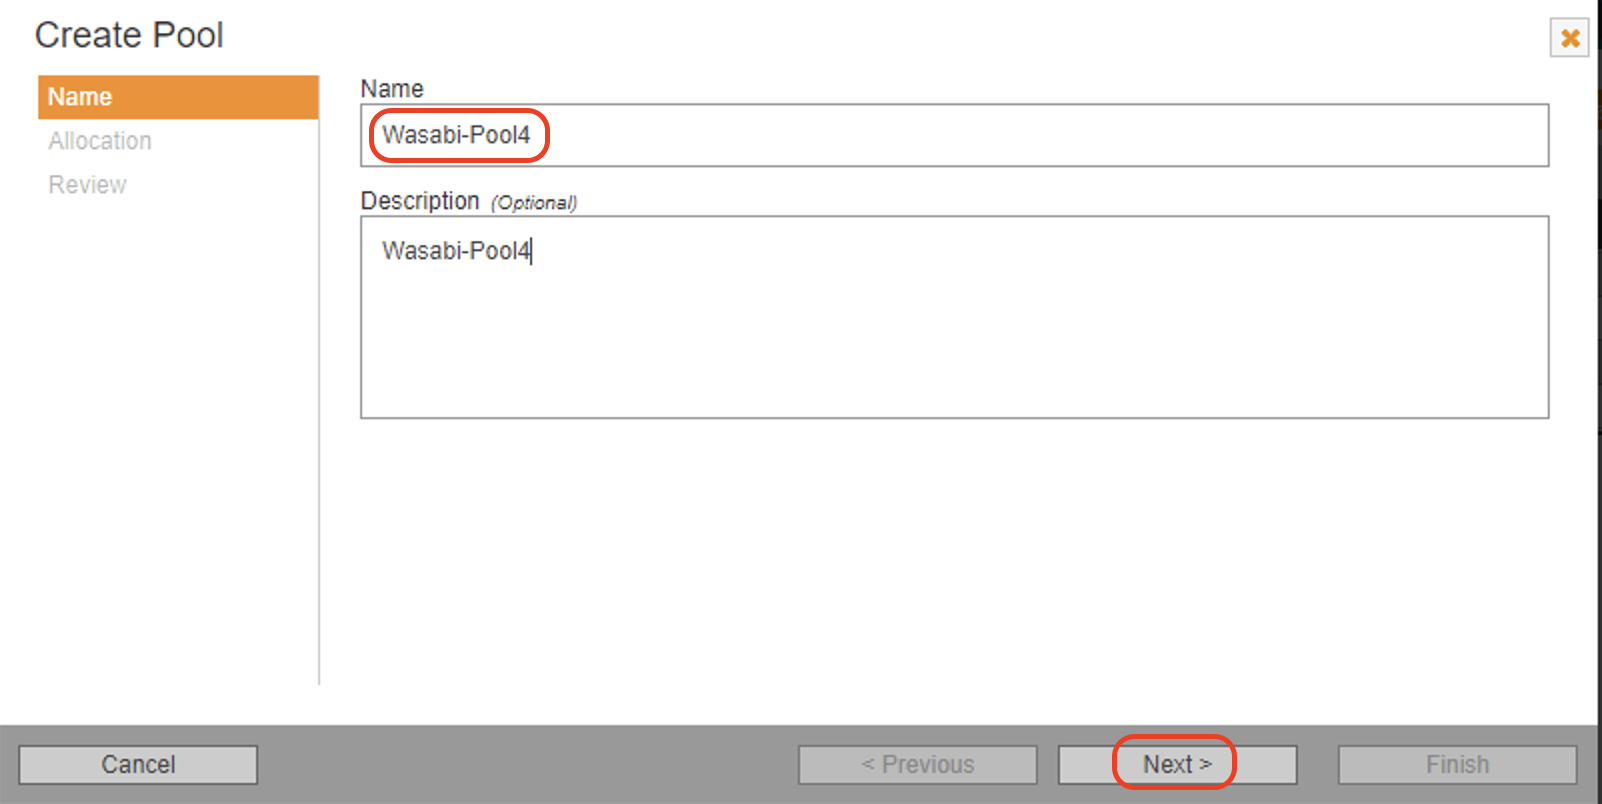
4.3 Enter the name for the storage pool in the Create Pool window and click Next.
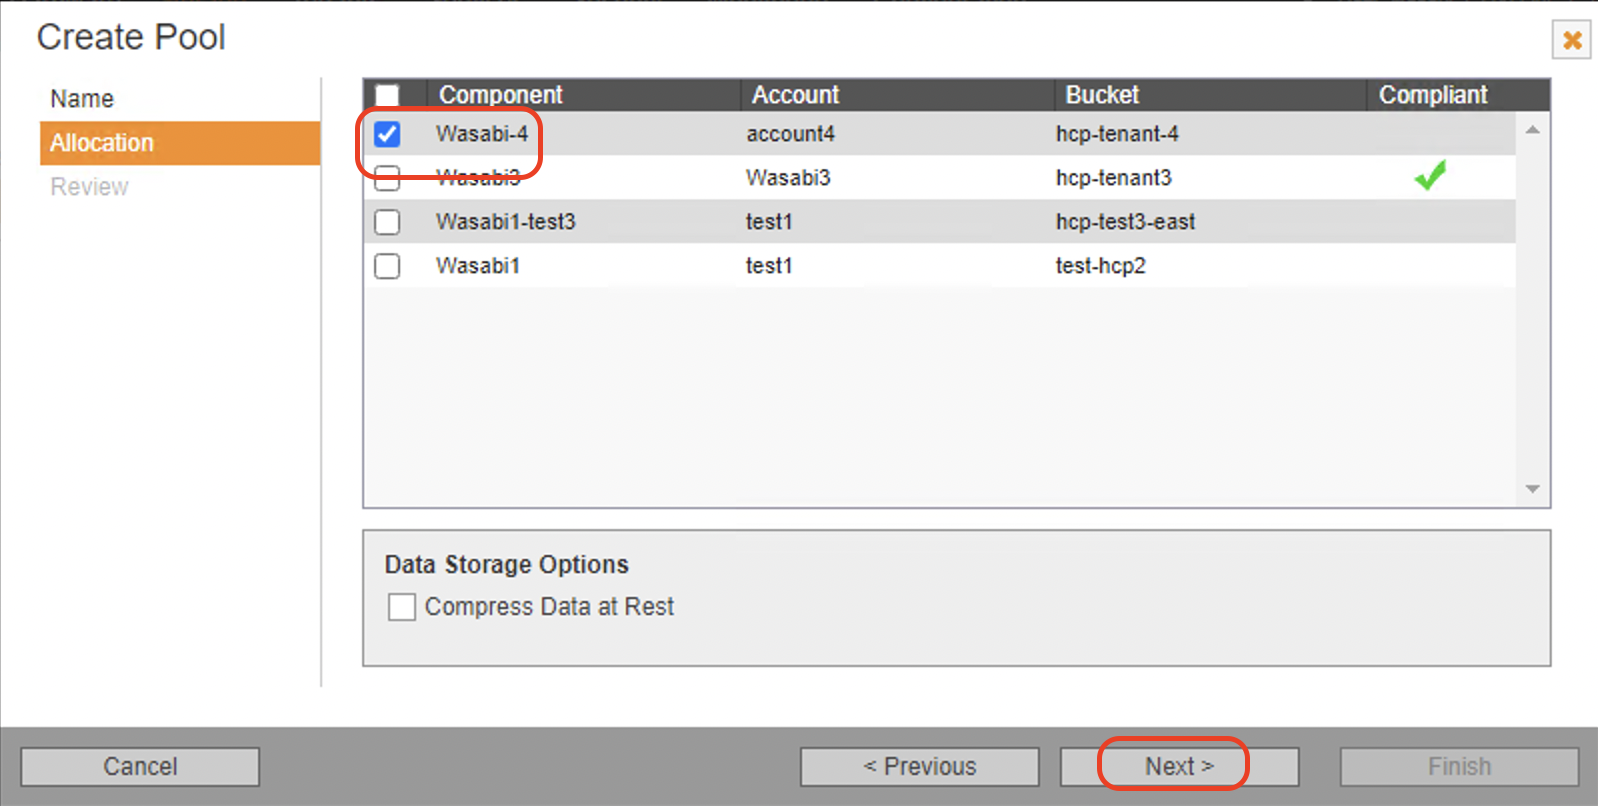
4.4 Select the storage component created above and click Next.
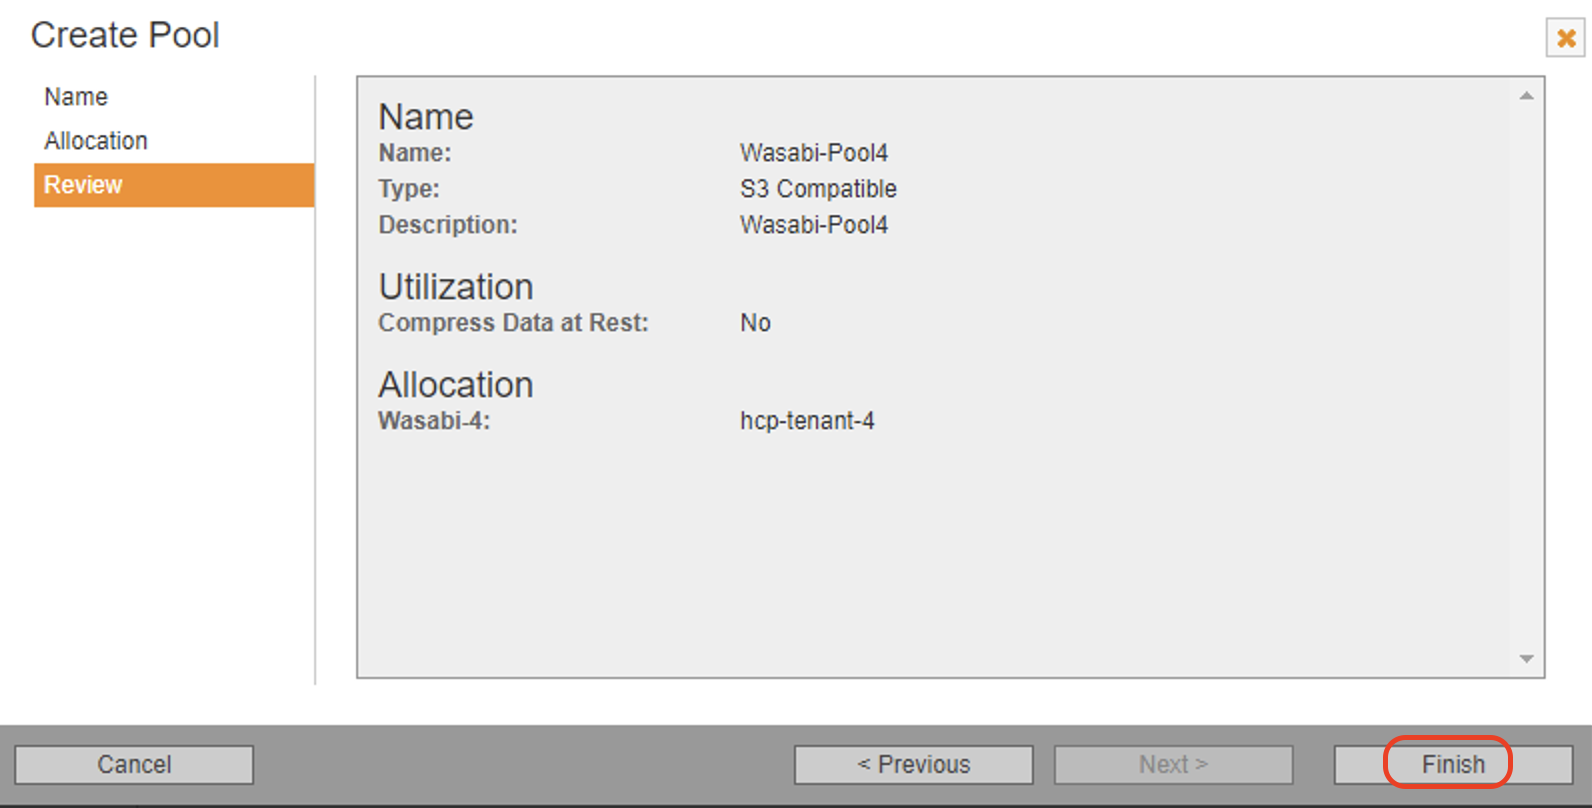
4.5 Review the configuration and click Finish to create the storage pool.
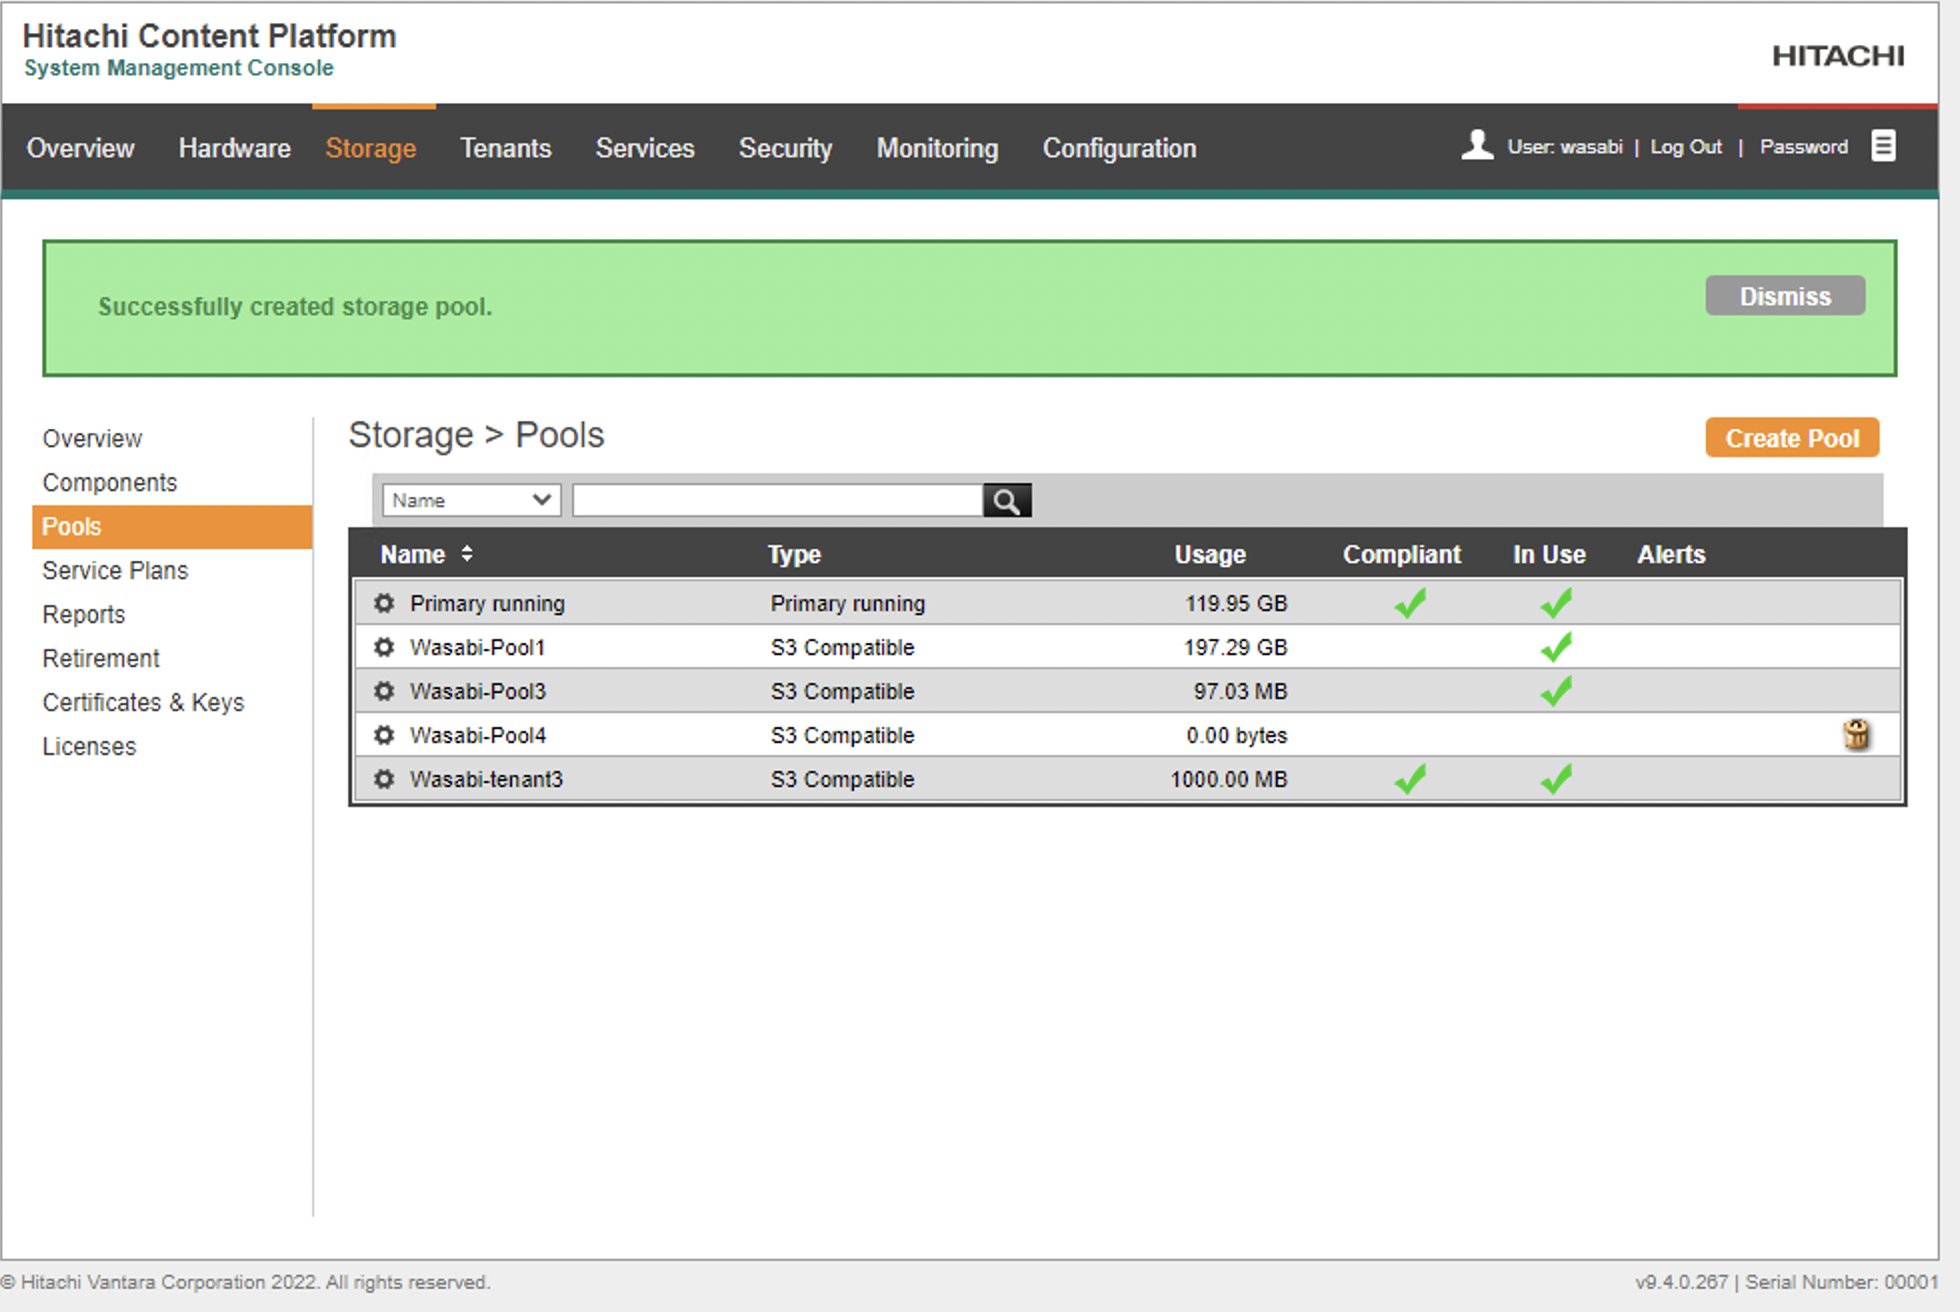
4.6 The storage pool should be listed in the Pools tab.
5. Create a Service Plan
HCP moves object content from primary running storage onto one or more other types of storage according to rules specified in service plans.
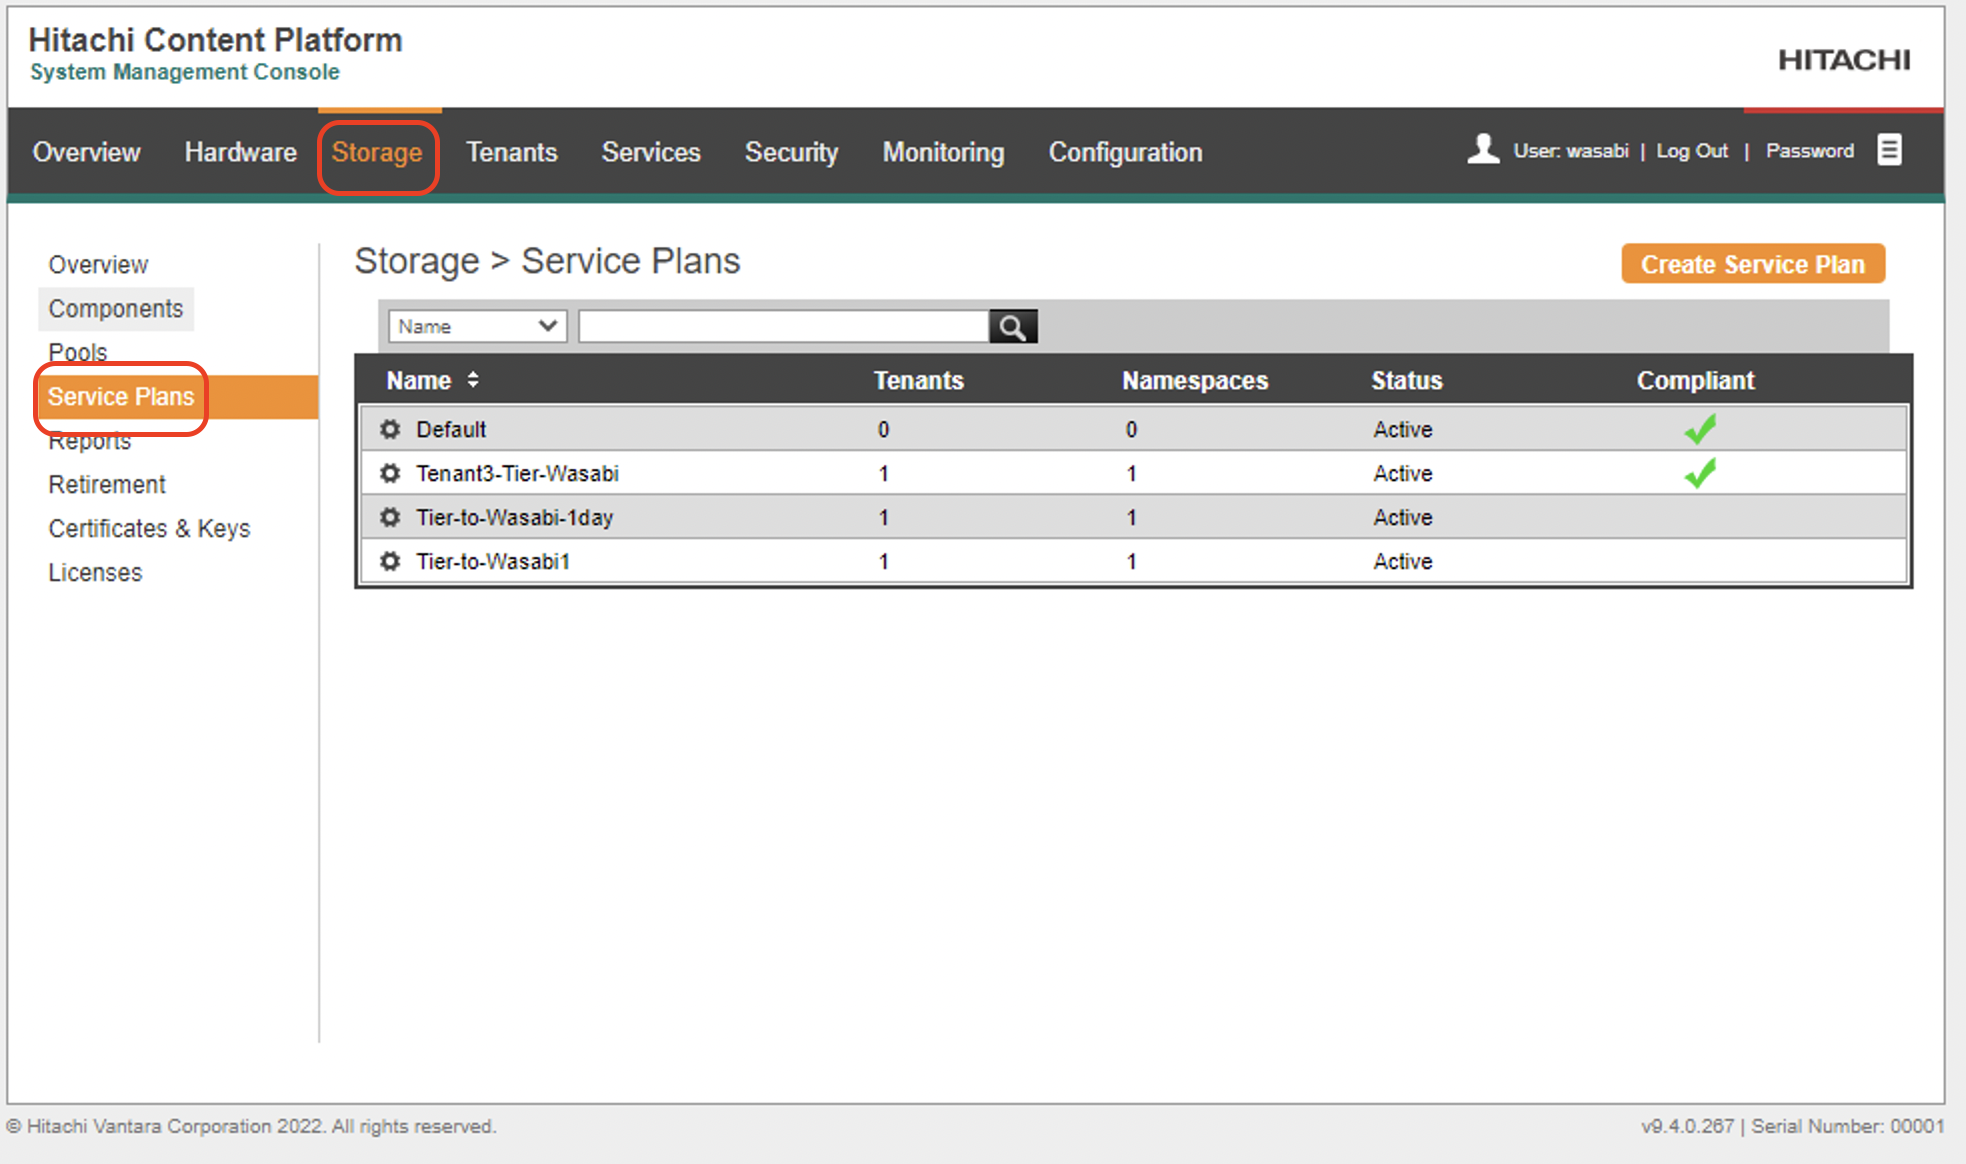
5.1 Log on to the HCP System Management Console and click Storage, click Service Plan from the left pane to get to the Service plan webpage.
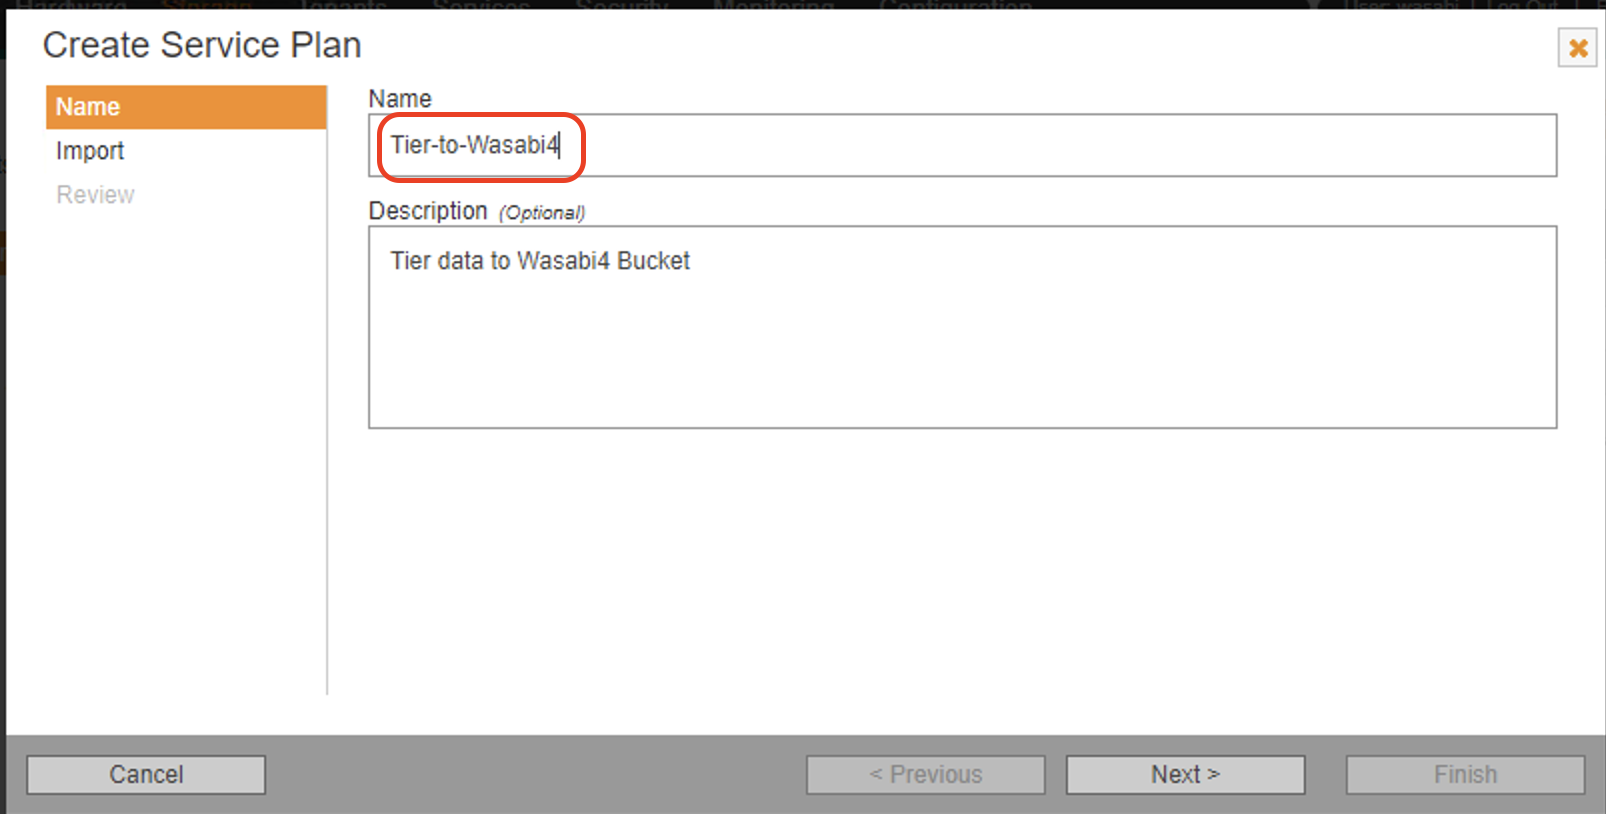
5.2 Enter the name of the Service Plan and click on Next.
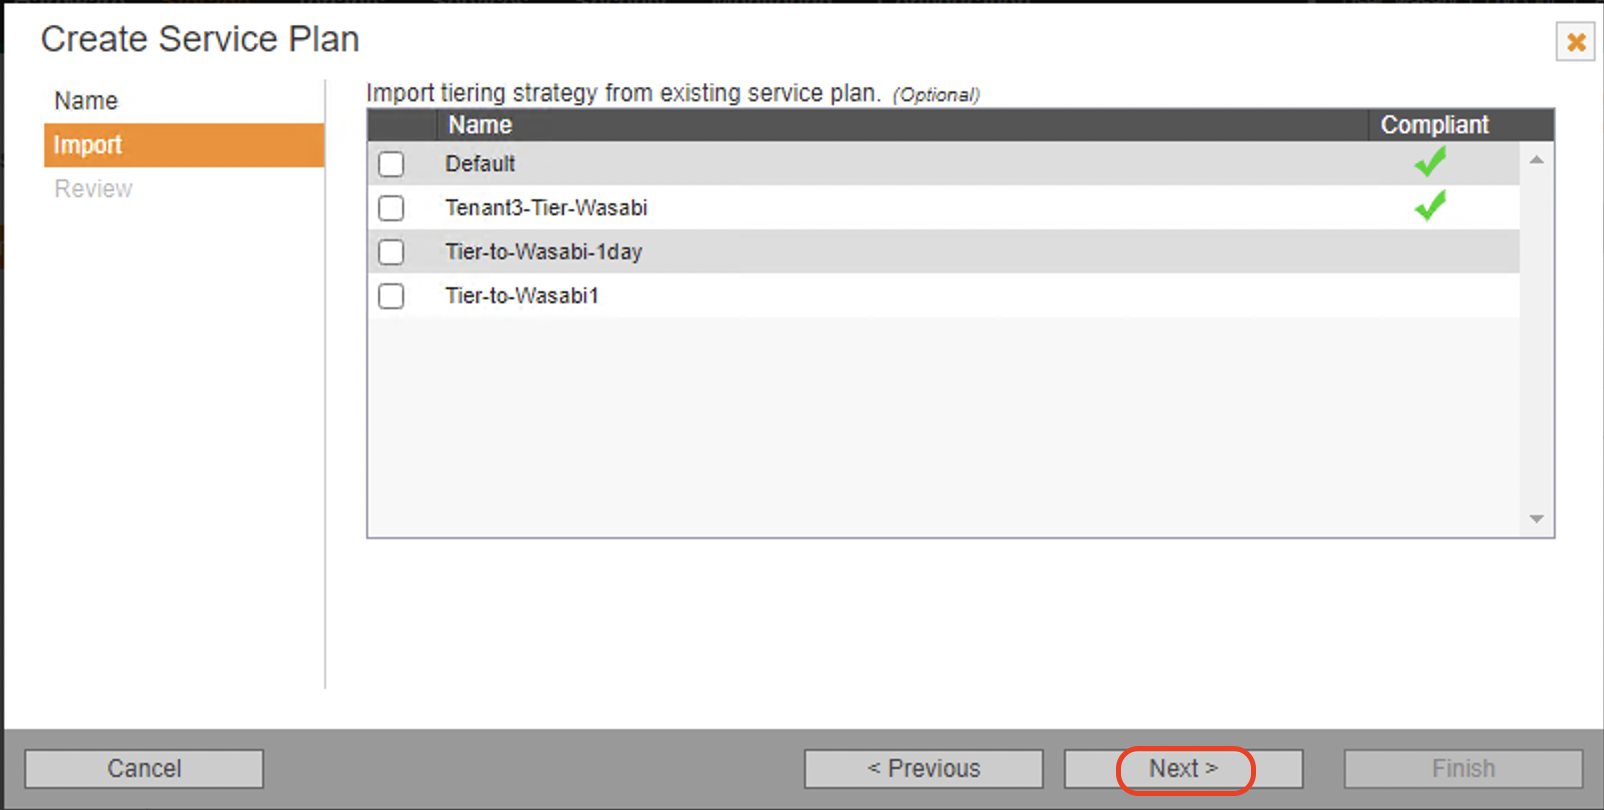
5.3 Optionally import from an existing service plan and click Next.
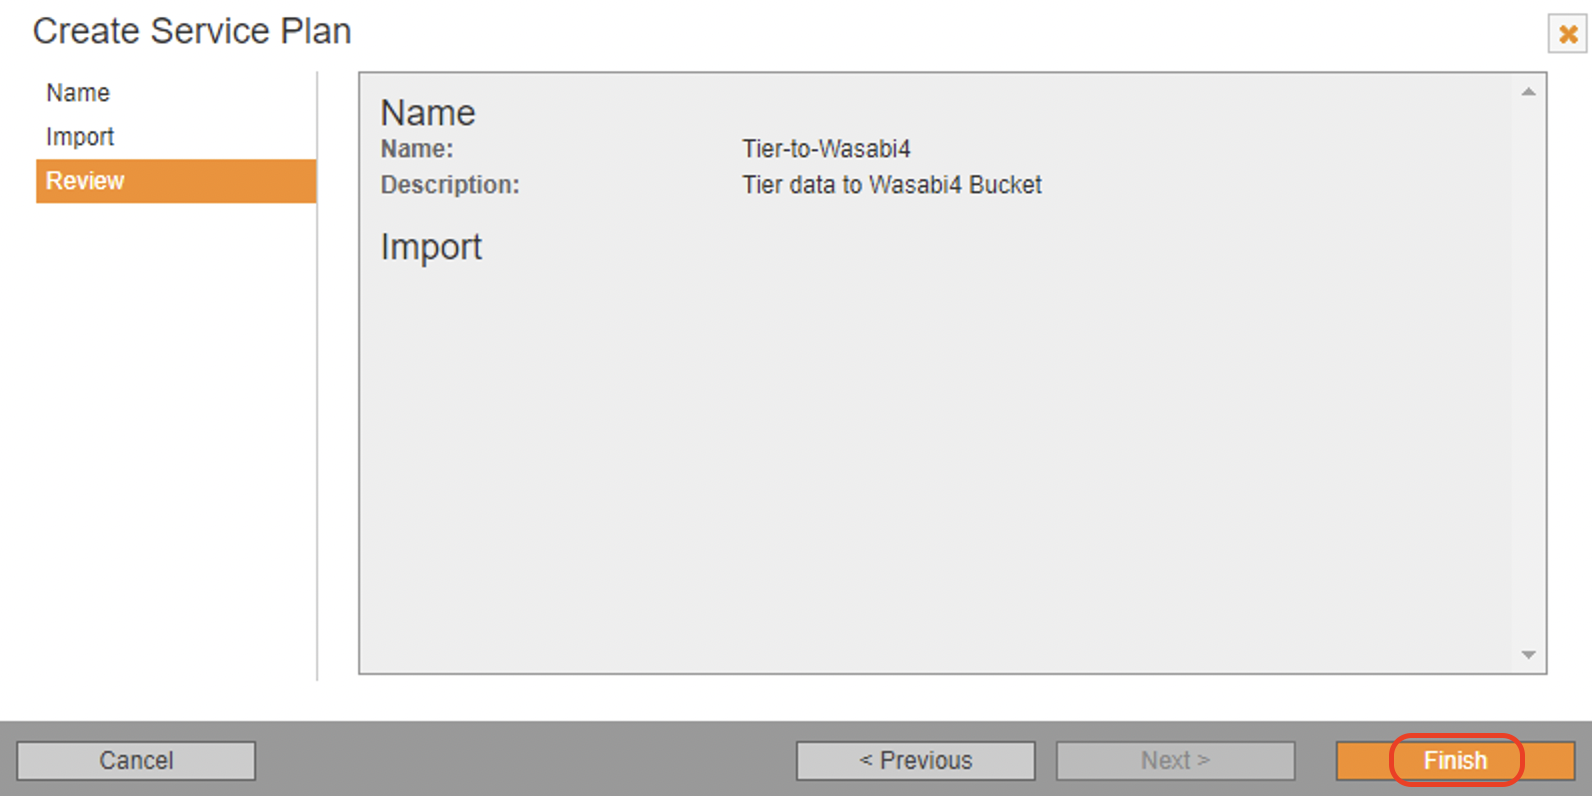
5.4 Review the information and click Finish to create the service plan.
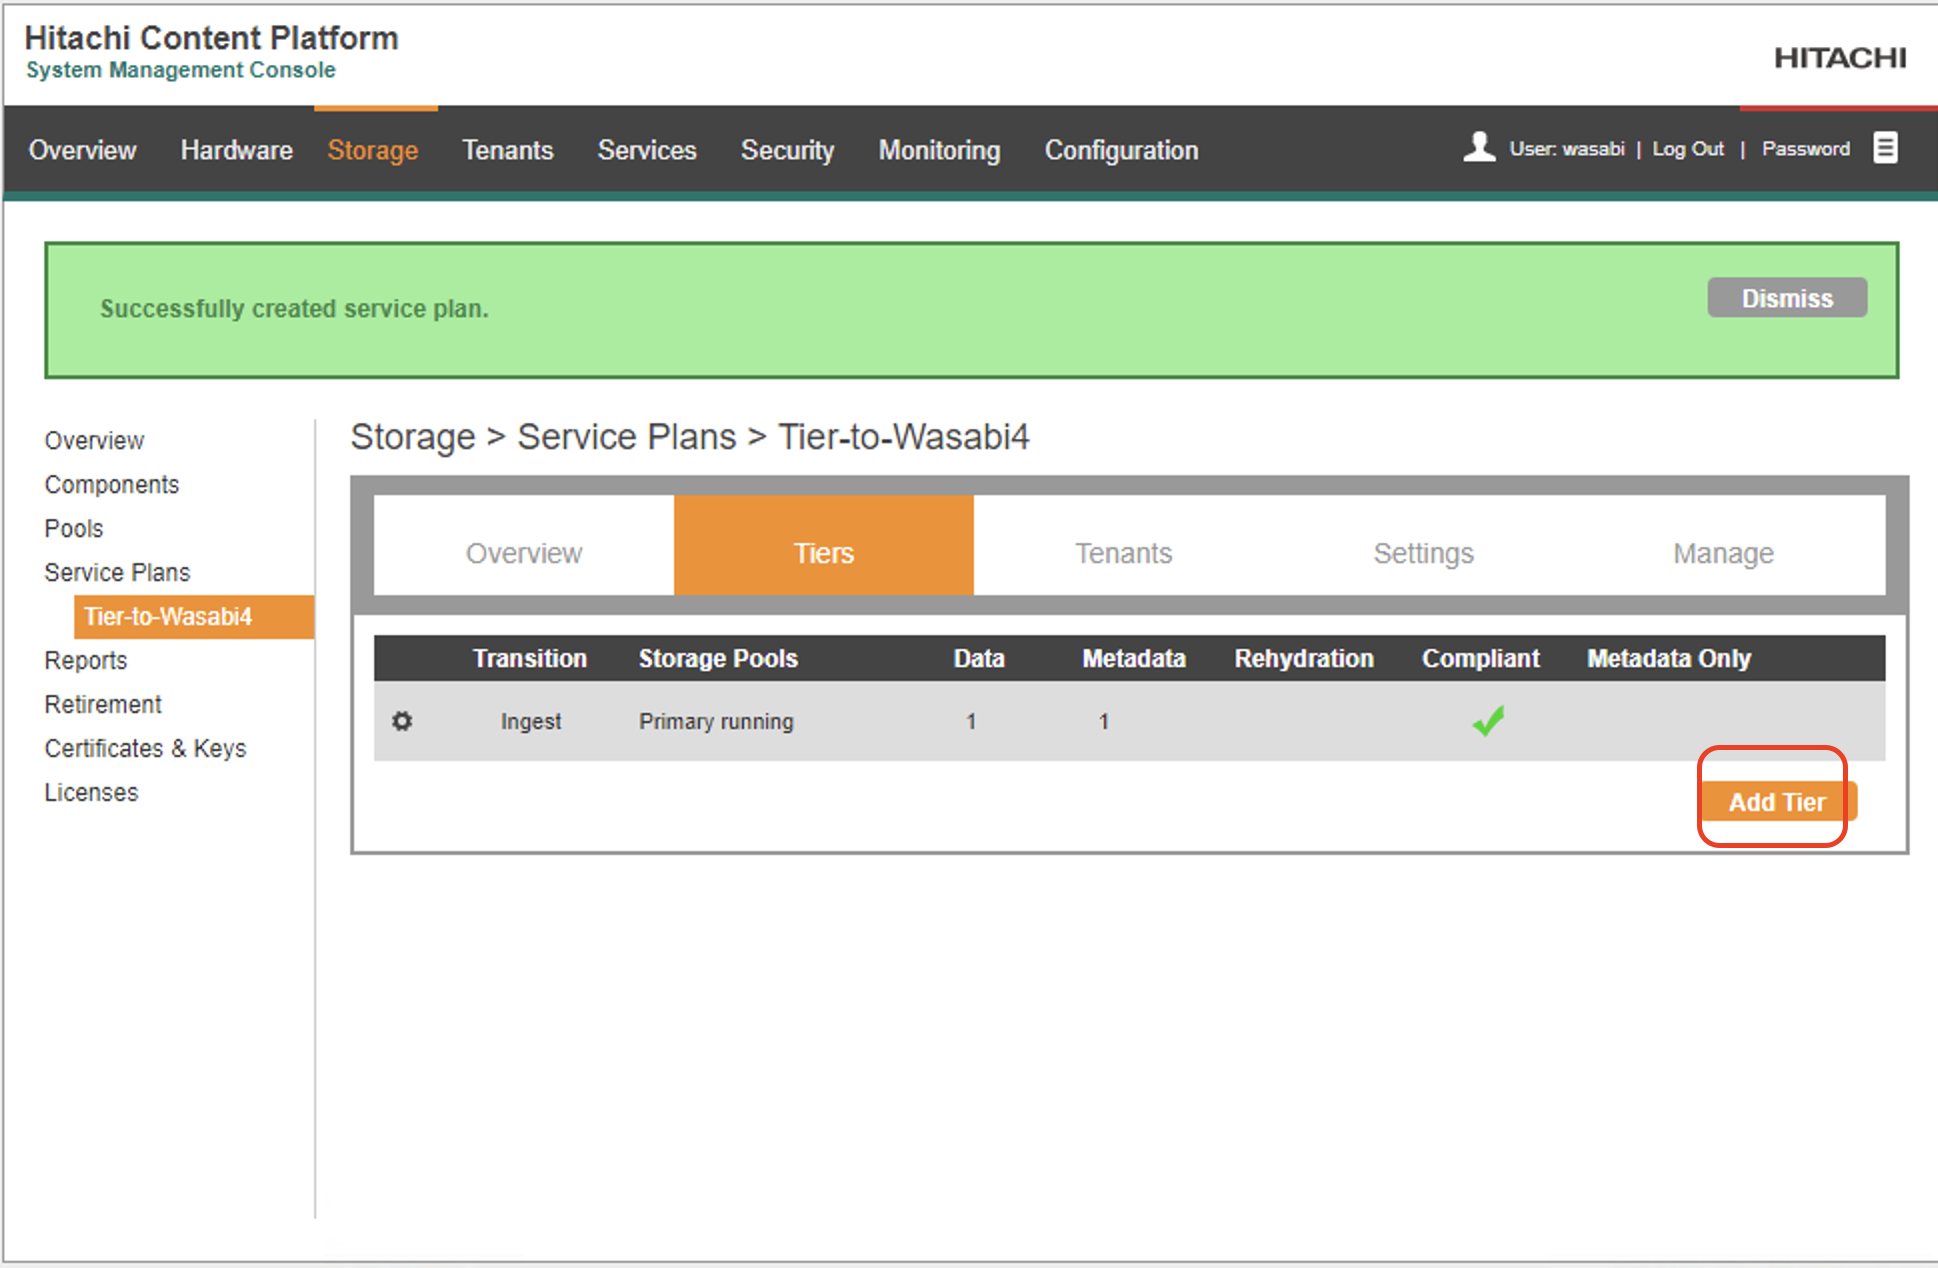
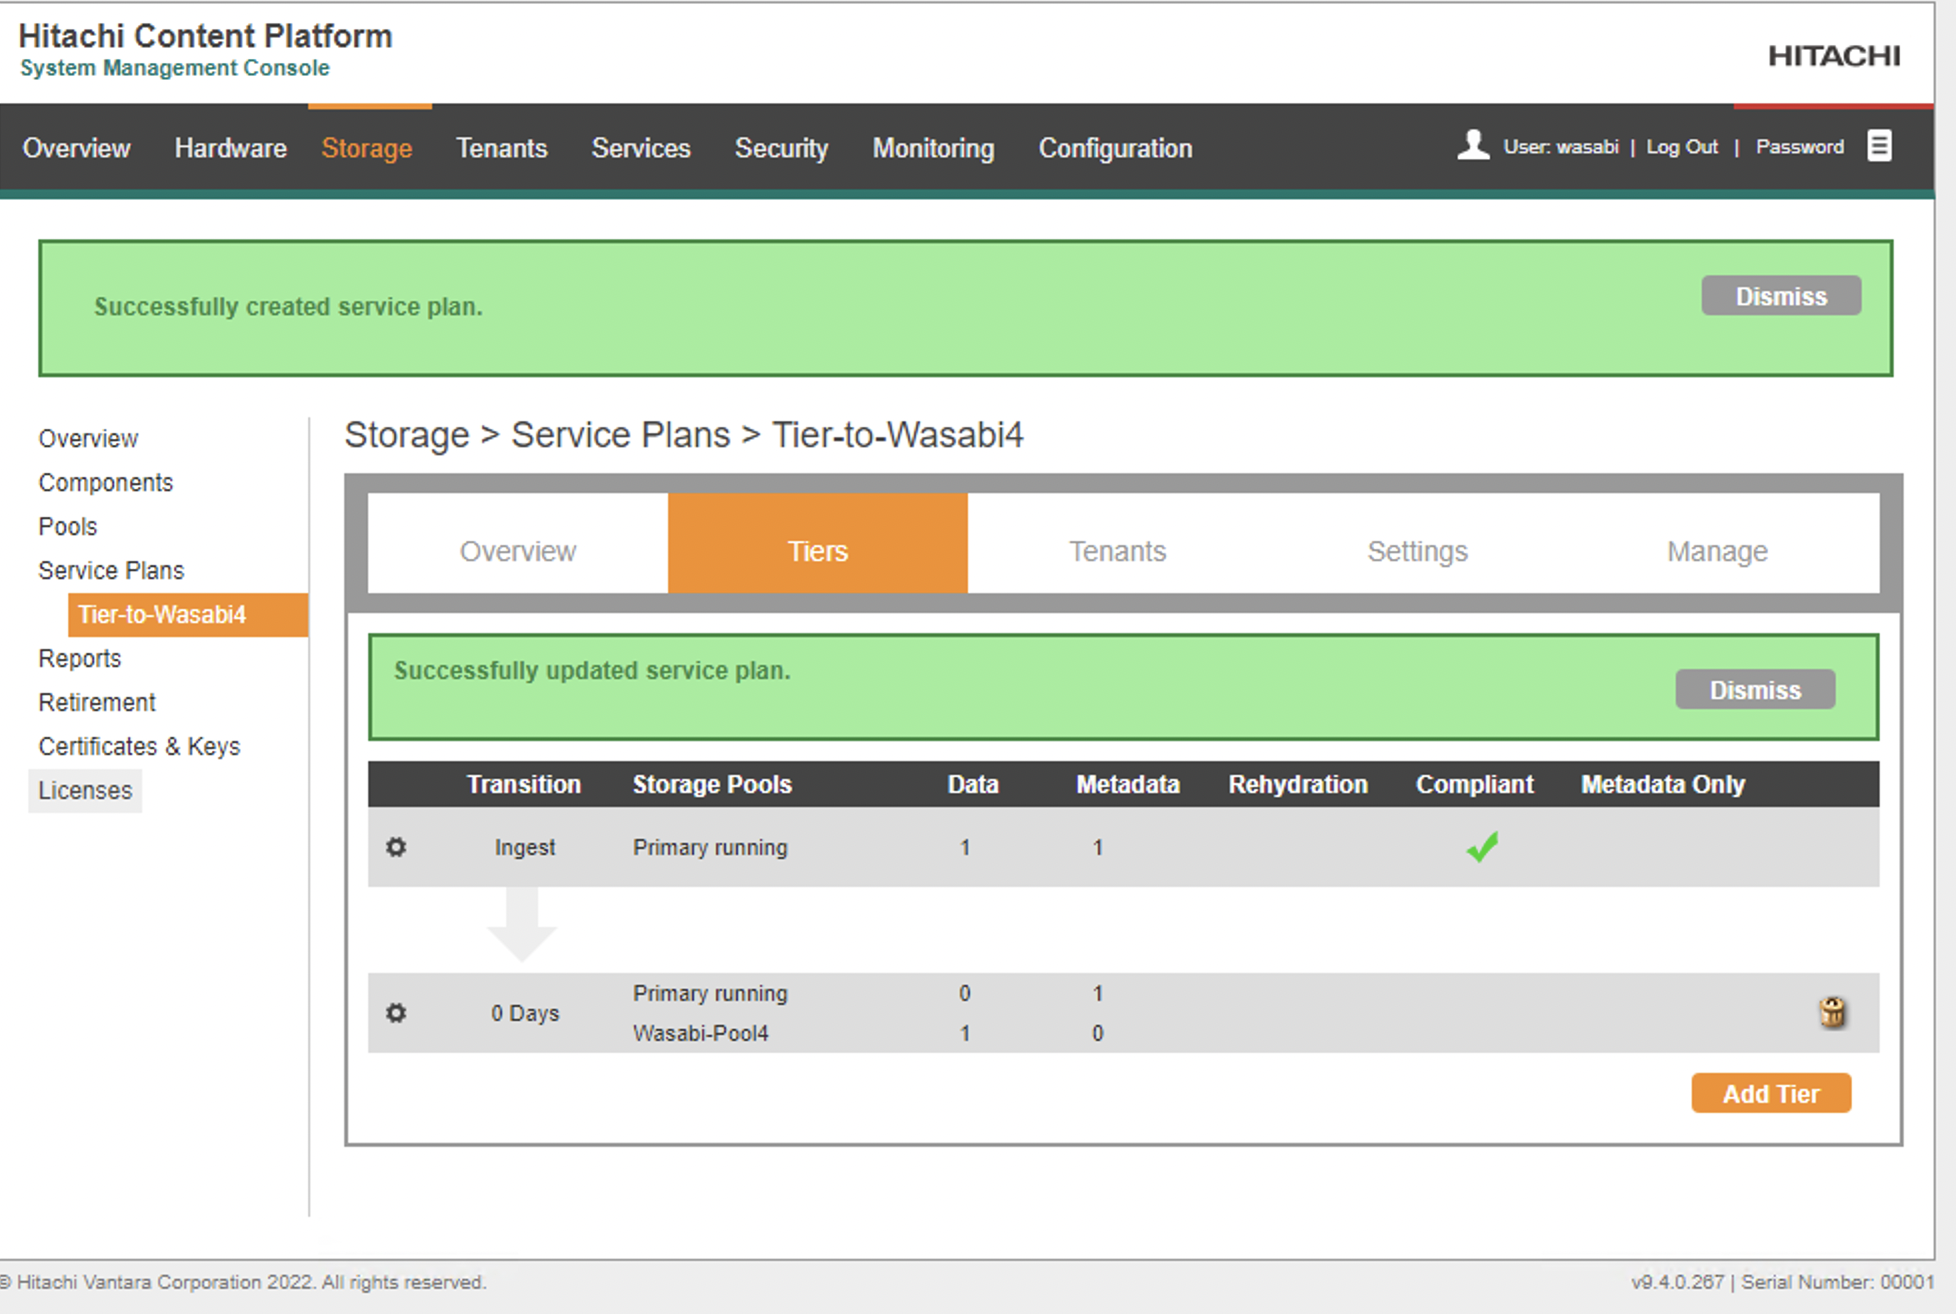
5.5 In the Service plan page, click Add Tier to add a tier to the service plan.
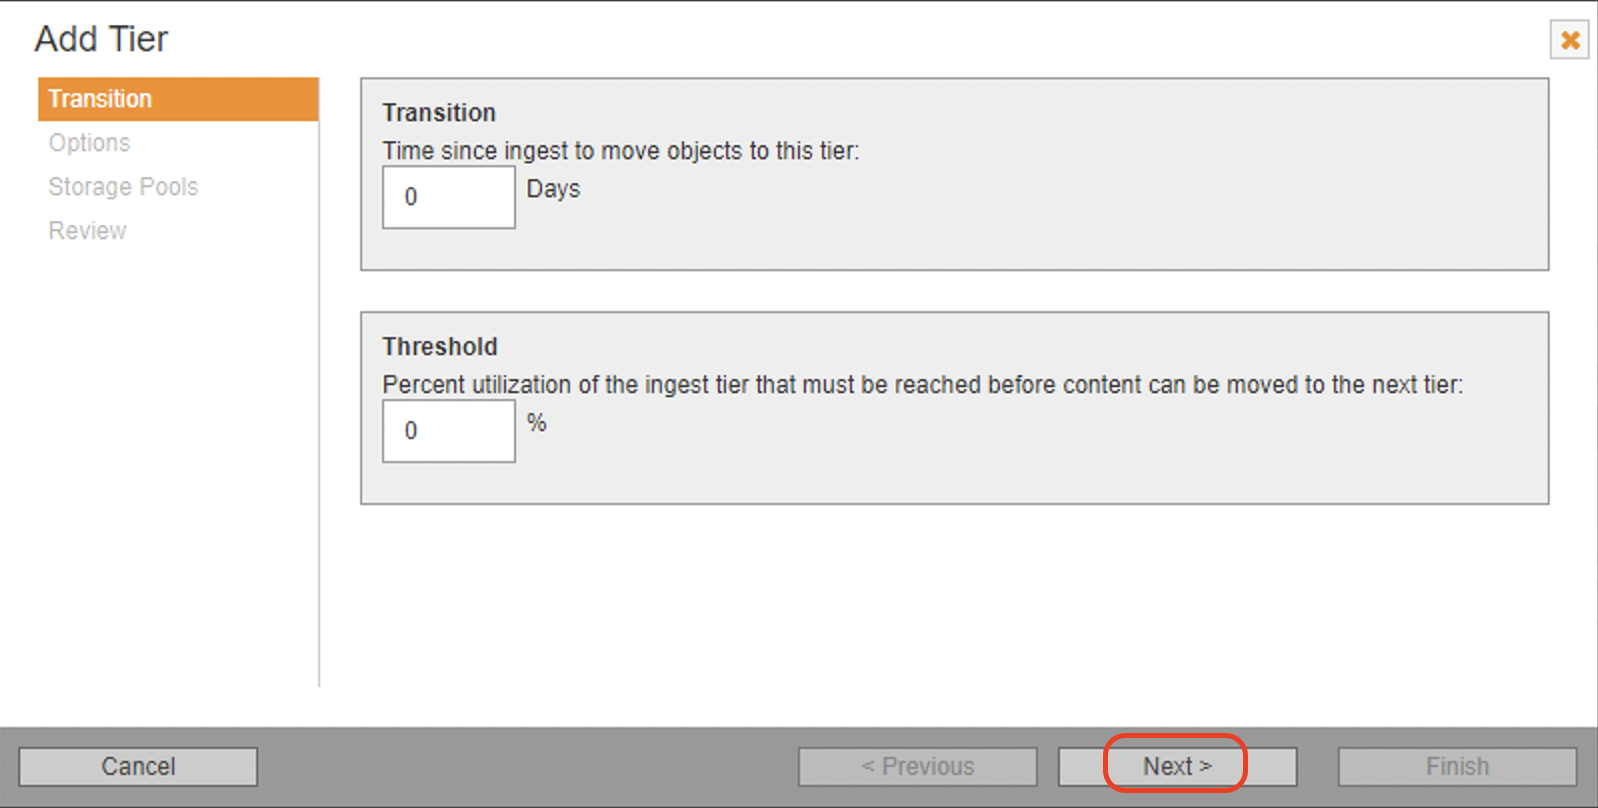
5.6 Enter the number of days or percent utilization threshold and click Next.
Transition- Enter the object age (number of days since ingest) when data needs to be moved to the tier.
Threshold- Select whether a threshold based on the ingest tier's percent utilization will be applied to the second tier.
5.7 Optionally enable Rehydration and click Next. If you anticipate frequent reads of the same objects in a namespace while the objects are stored on a Wasabi tier, consider enabling rehydration on the service plan.

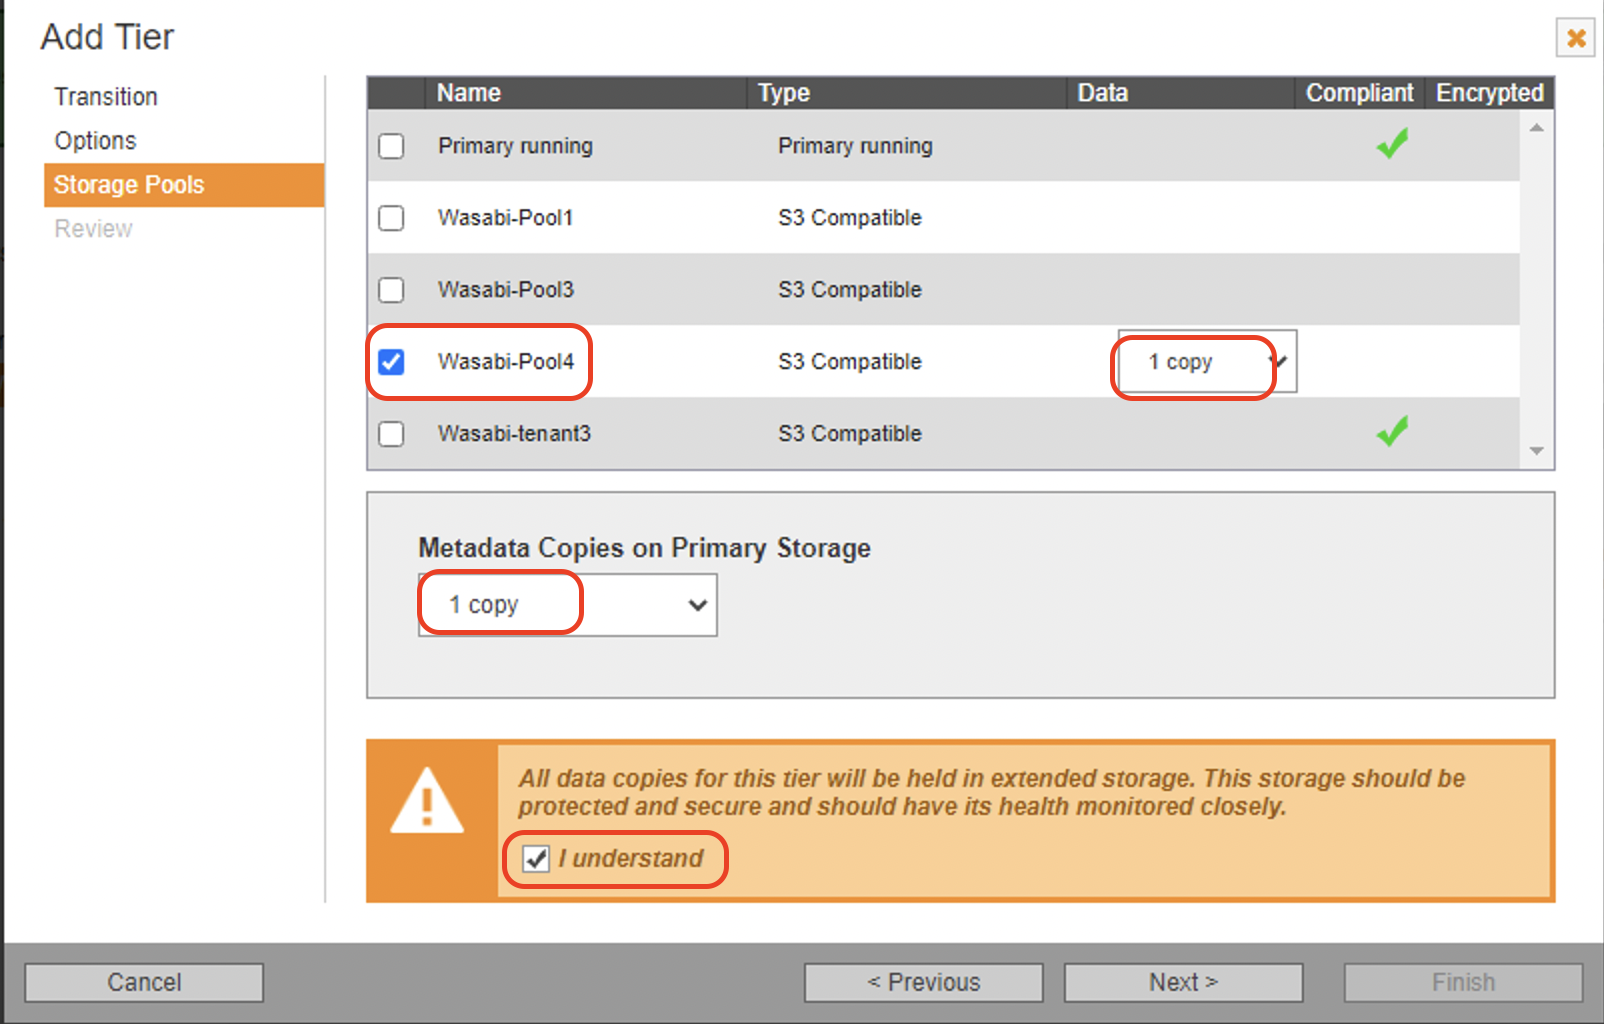
5.8 In the Storage Pools tab, check the name of the storage pool to be used for tiering data. From the data column, select 1 copy to be tiered to Wasabi. Select the number of metadata copies to keep on primary storage and check the I understand" check box. Click on Next.
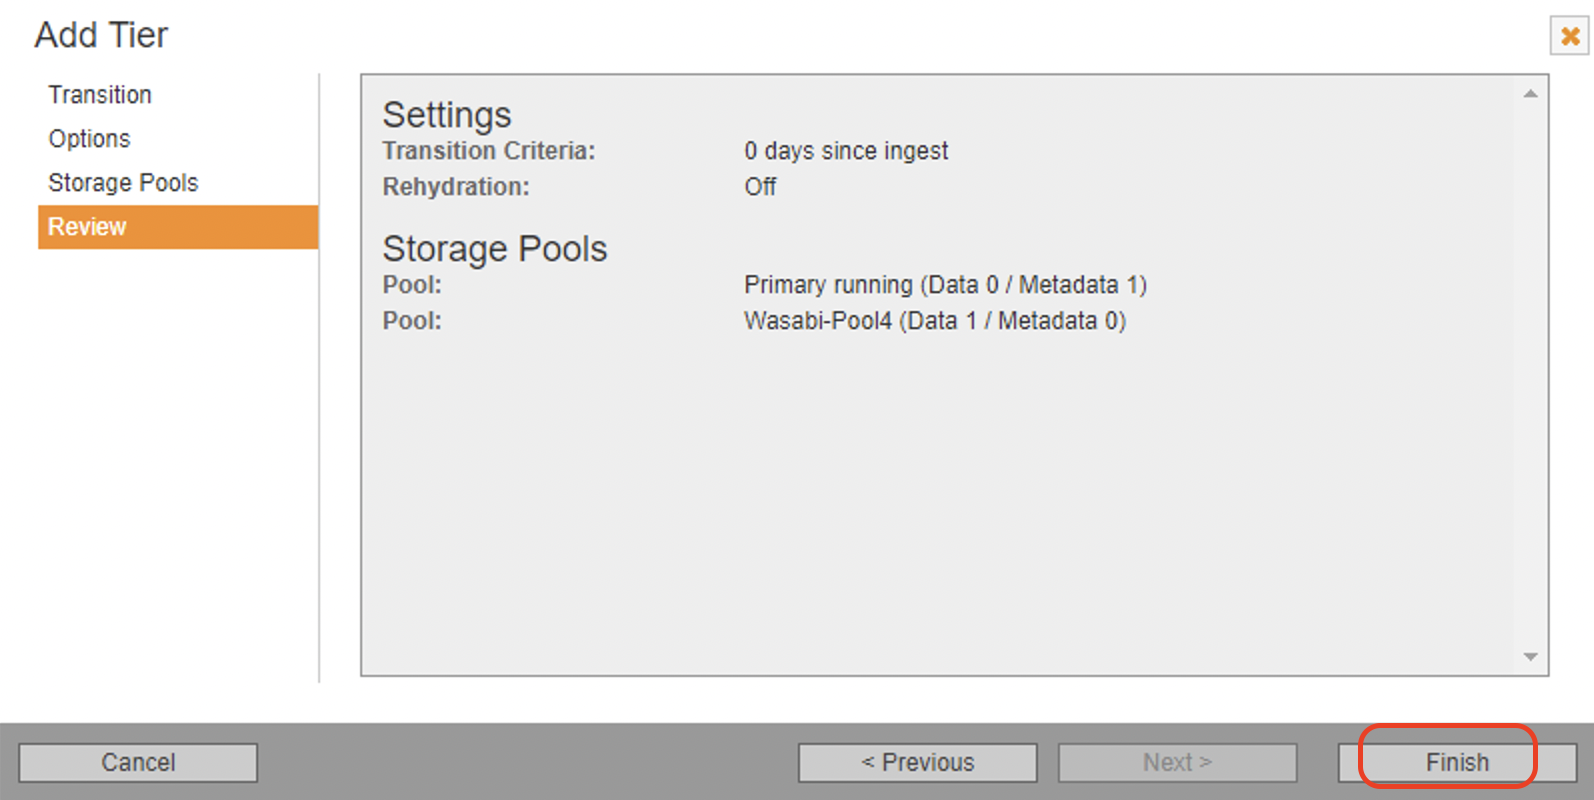
5.9 Review the tiering configuration and click Finish to complete the tiering wizard.
5.10 The new service plan with tiers will display in the service plans page.
6. Namespace and Tenant Configuration for tiering
The service plan for tiering is configured in the namespace which will be used to tiered data to Wasabi. The following steps provide the recommended configuration for Namespace configuration and tiering to Wasabi. Please refer to HCP documentation for more details.
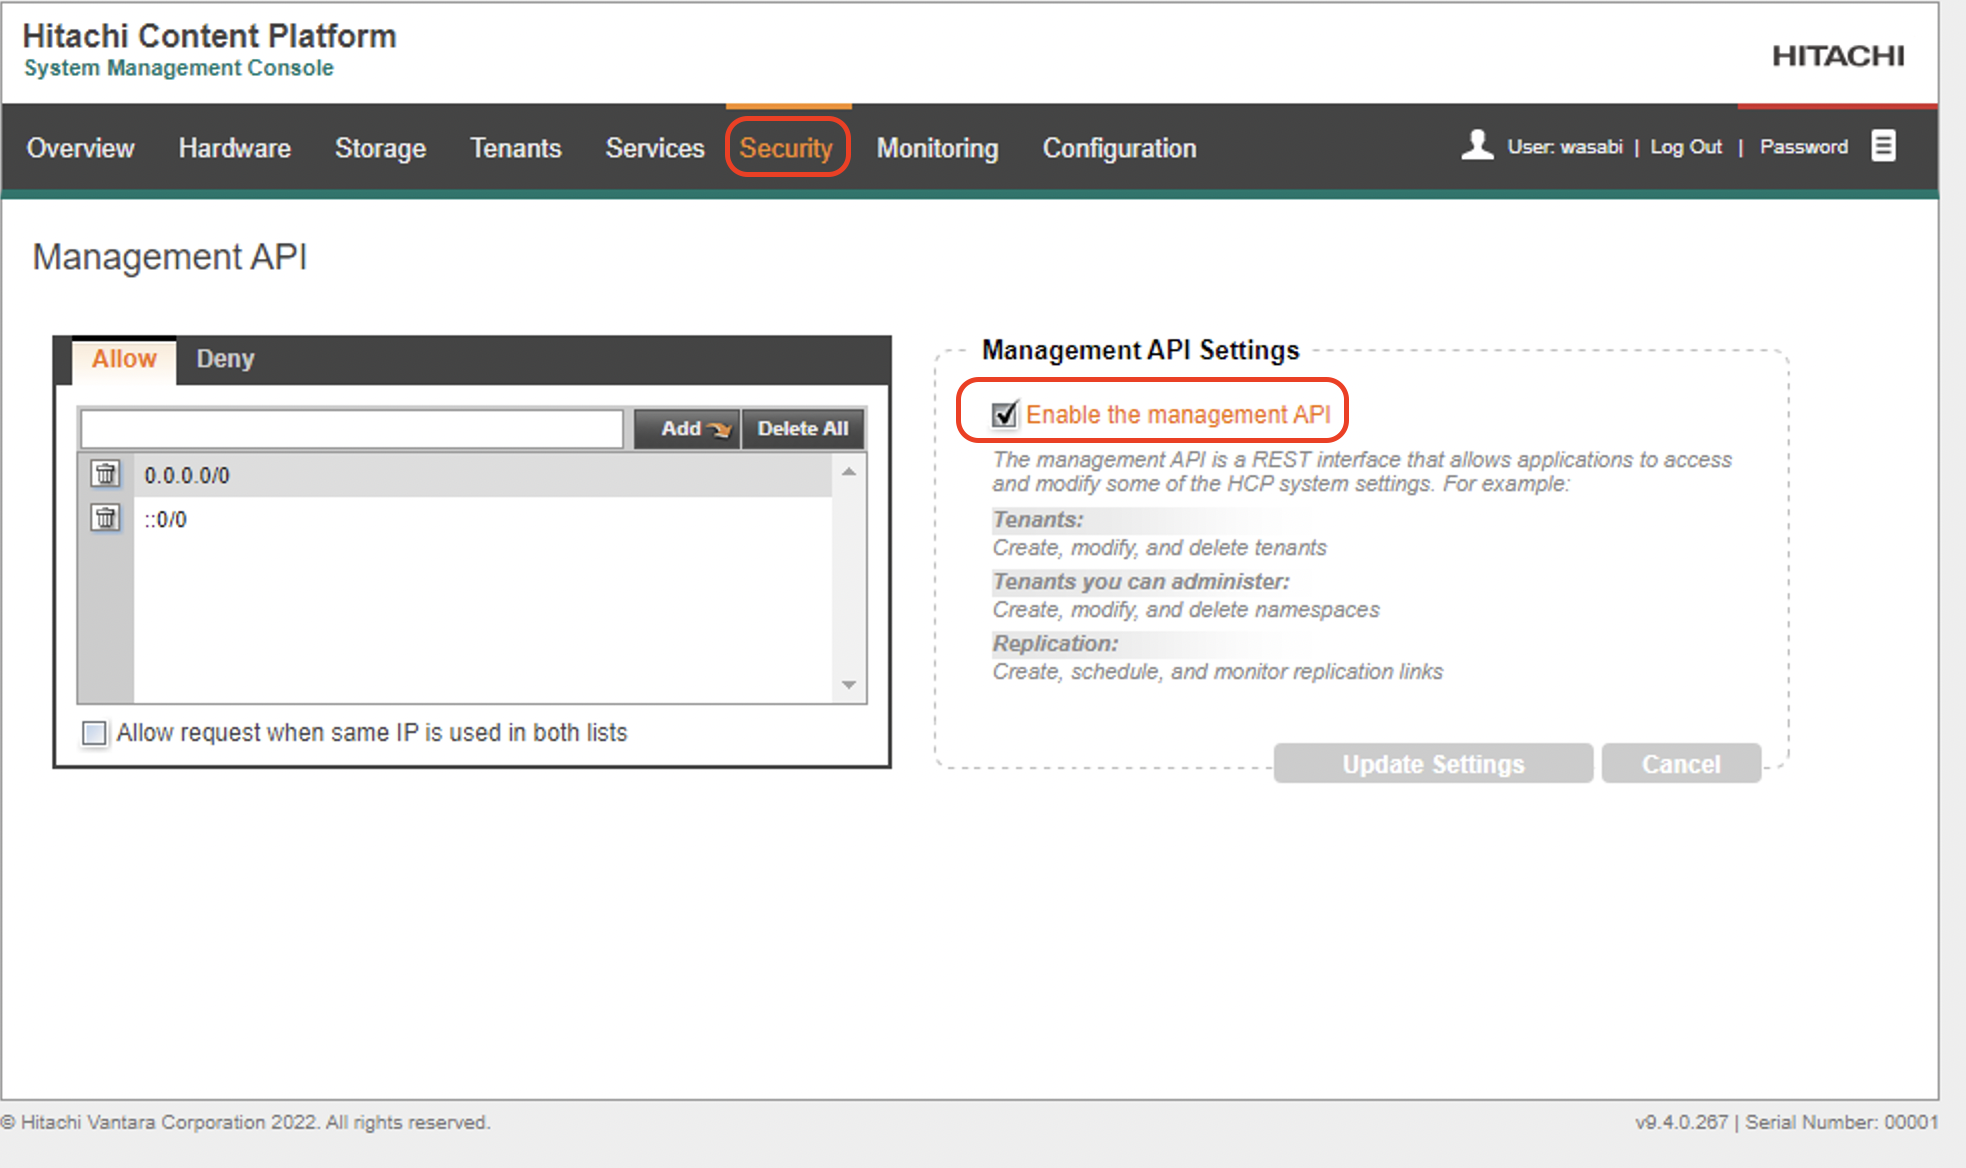
6.1 Login to the HCP System Management Console to enable management API for the system.
Click on the Security tab and check "Enable the management API" parameter to allow S3 api access on HCP namespaces. Click "Update Settings" to apply the change.
6.2 Login to the HCP Tenant Management Console and click on Namespaces. Click on Create Namespace to create a new namespace.
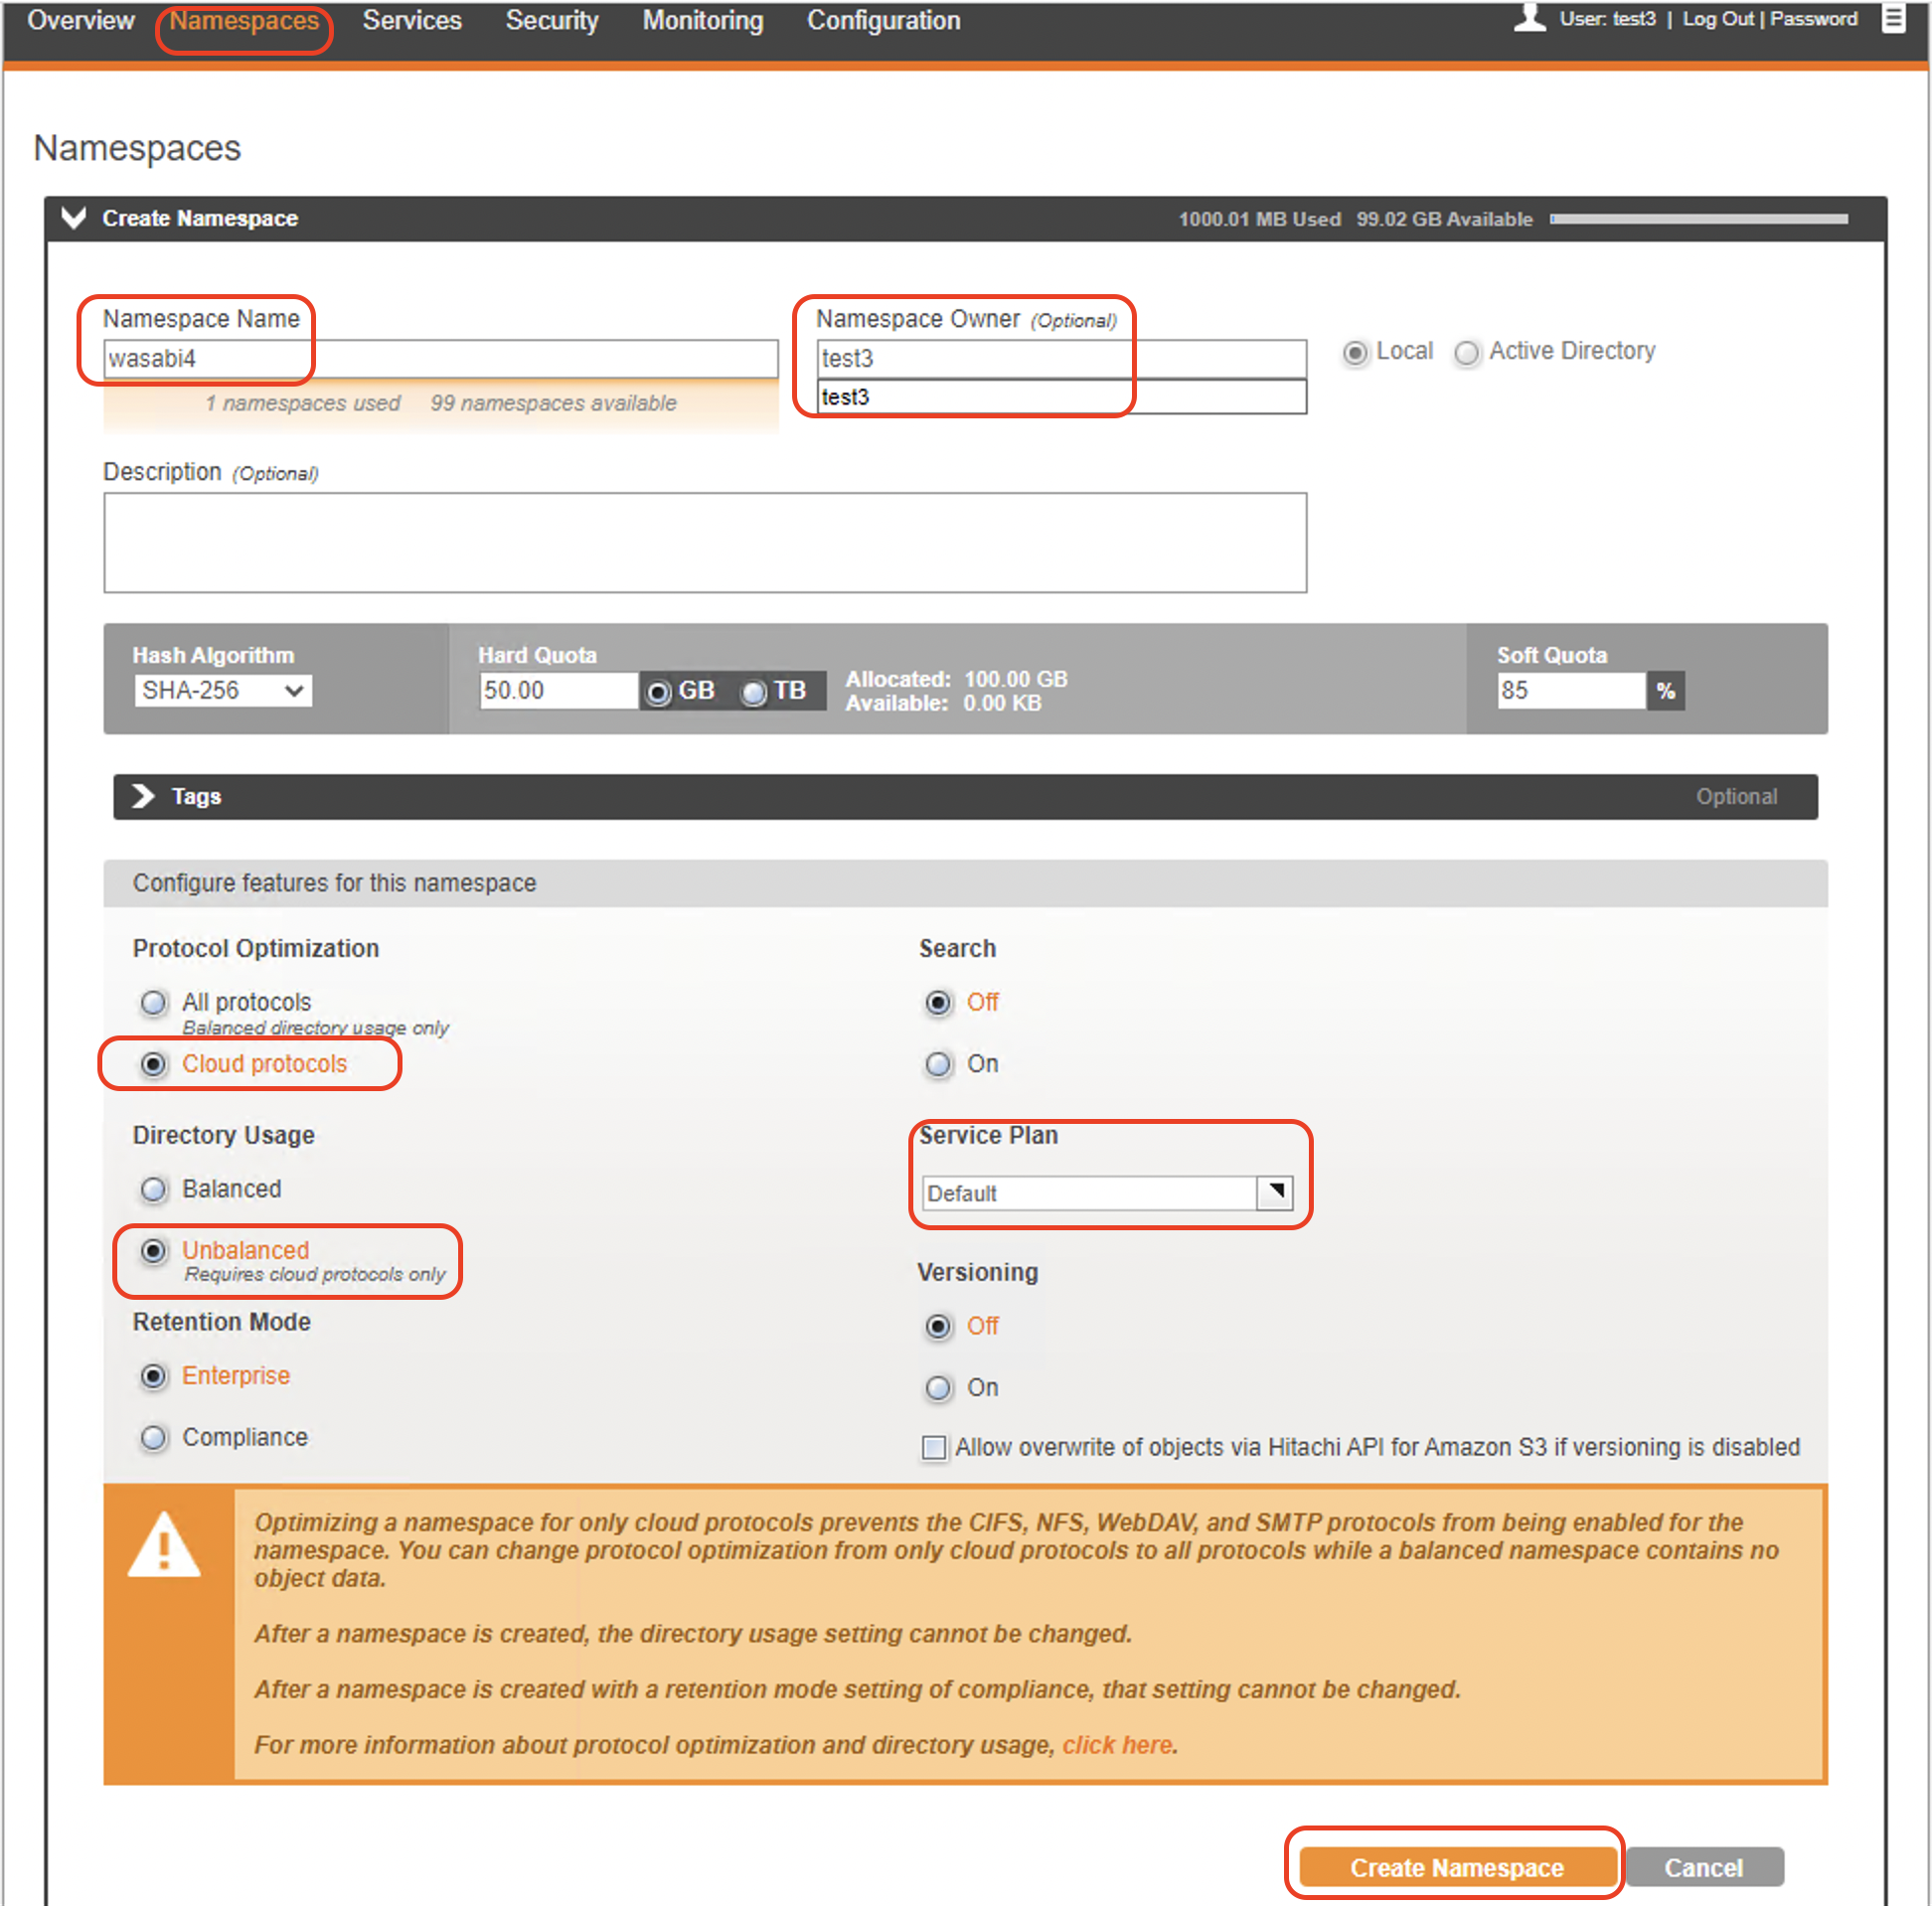
Namespace Name- Enter the name for the namespace
Protocol Optimization- Select "Cloud protocols". For tiering with Wasabi, it is recommended to use Cloud protocols. Cloud-only optimization improves the ingest rate of namespaces using cloud protocols
Directory Usage- HCP namespaces can use either balanced or unbalanced directory structure. It is recommended to use "Unbalanced" cloud protocols for tiering with Wasabi. Please refer to HCP documentation for more details on directory structures.
Service Plan- Select the service plan that was created in section 5 above.
Click "Create Namespace" to create the namespace.
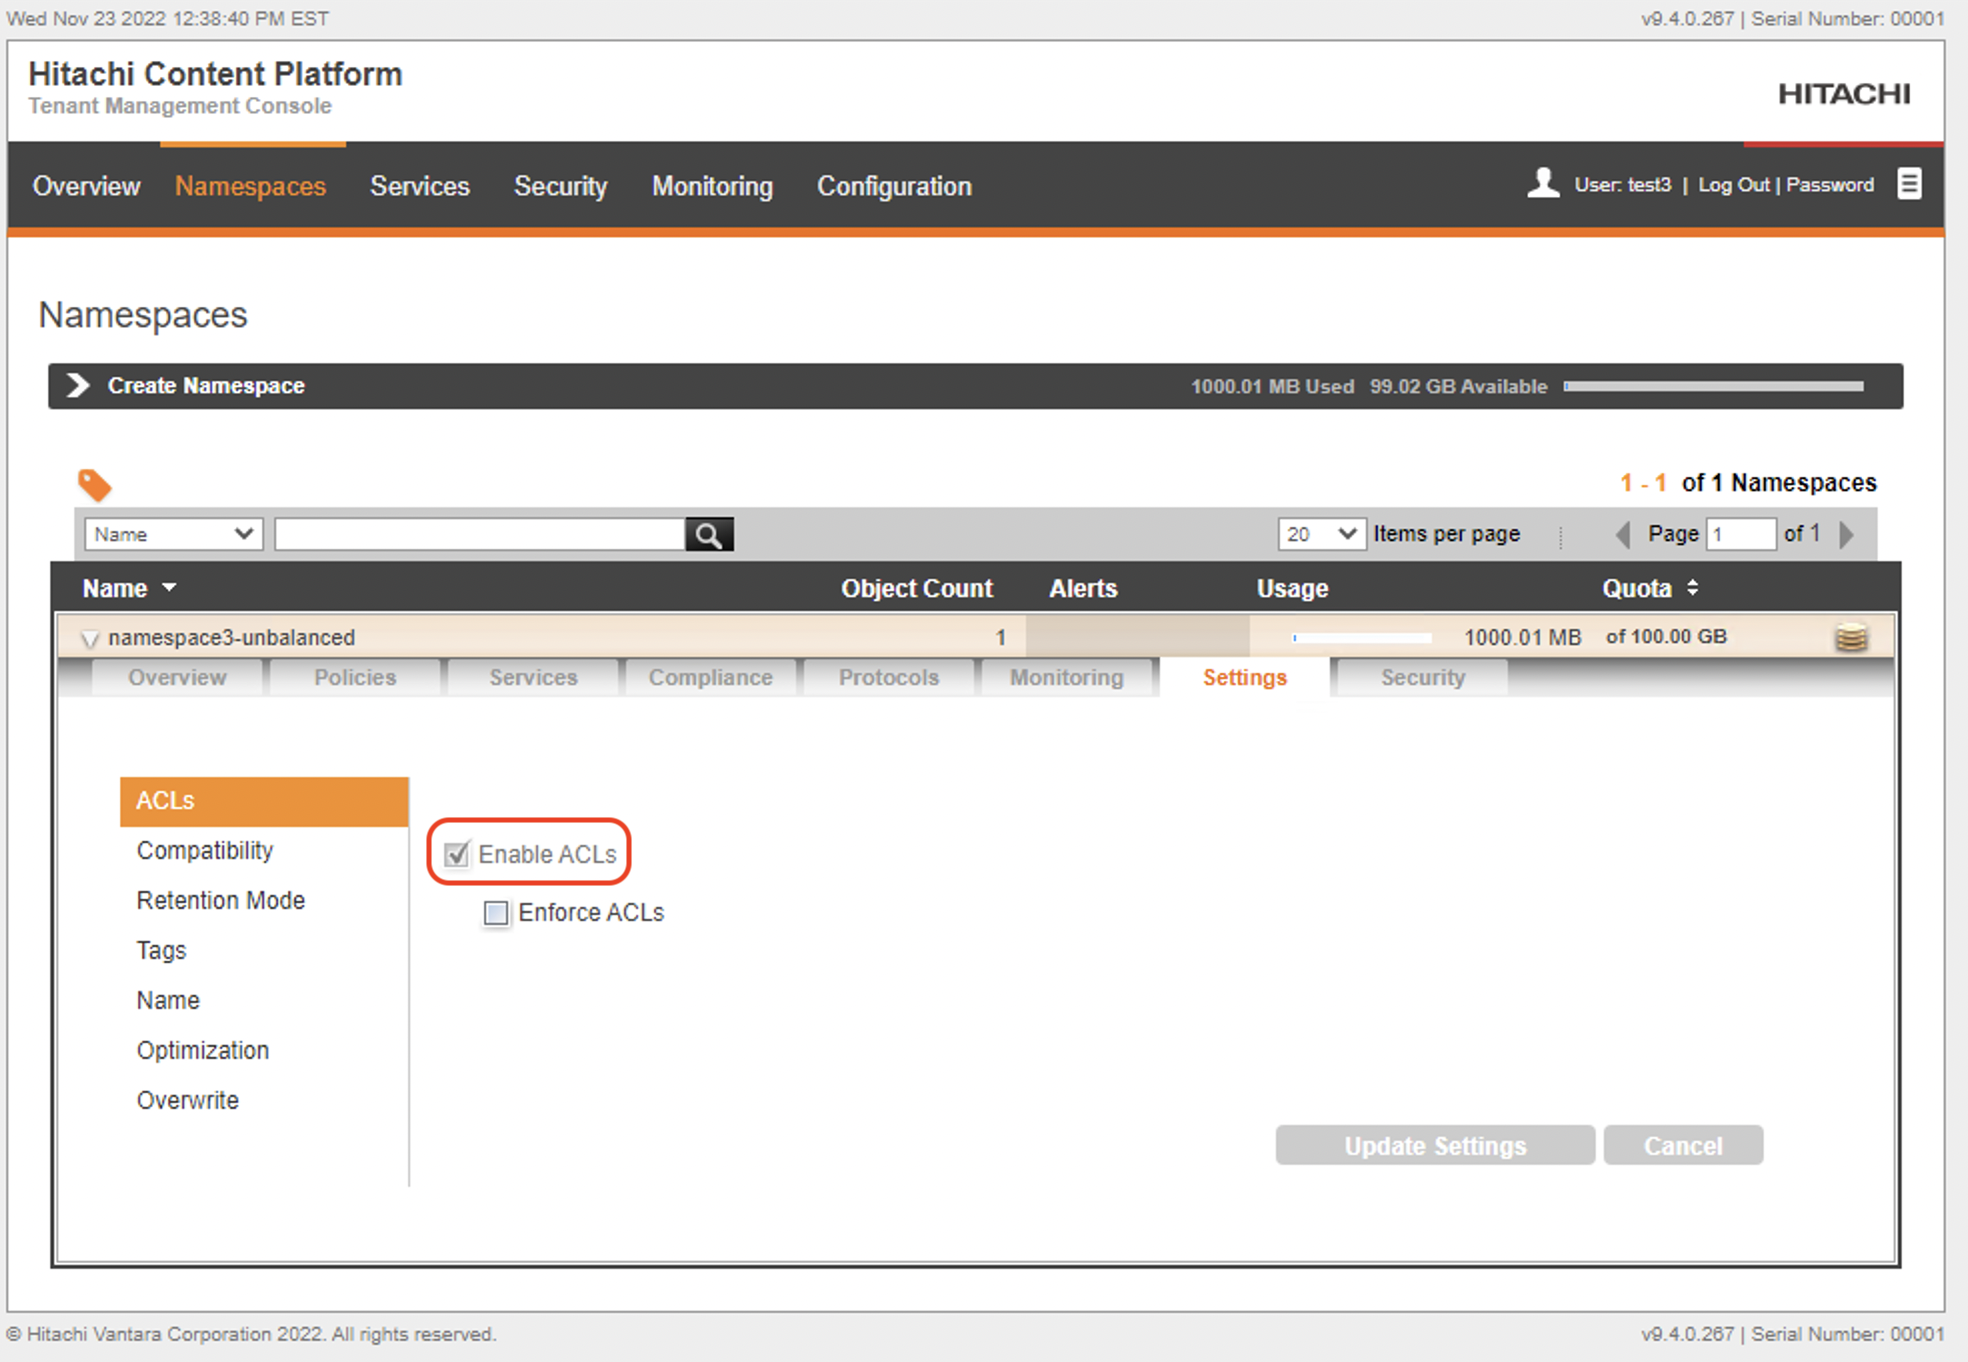
6.3 Configure ACLs to enable S3-API access to the namespace. On the Tenant Management console, click on Namespaces and select the namespace to edit. Click on Settings and check Enable ACLs.
Optionally, you can select Enforce ACLs to configure HCP to enforce ACLs in the namespace.
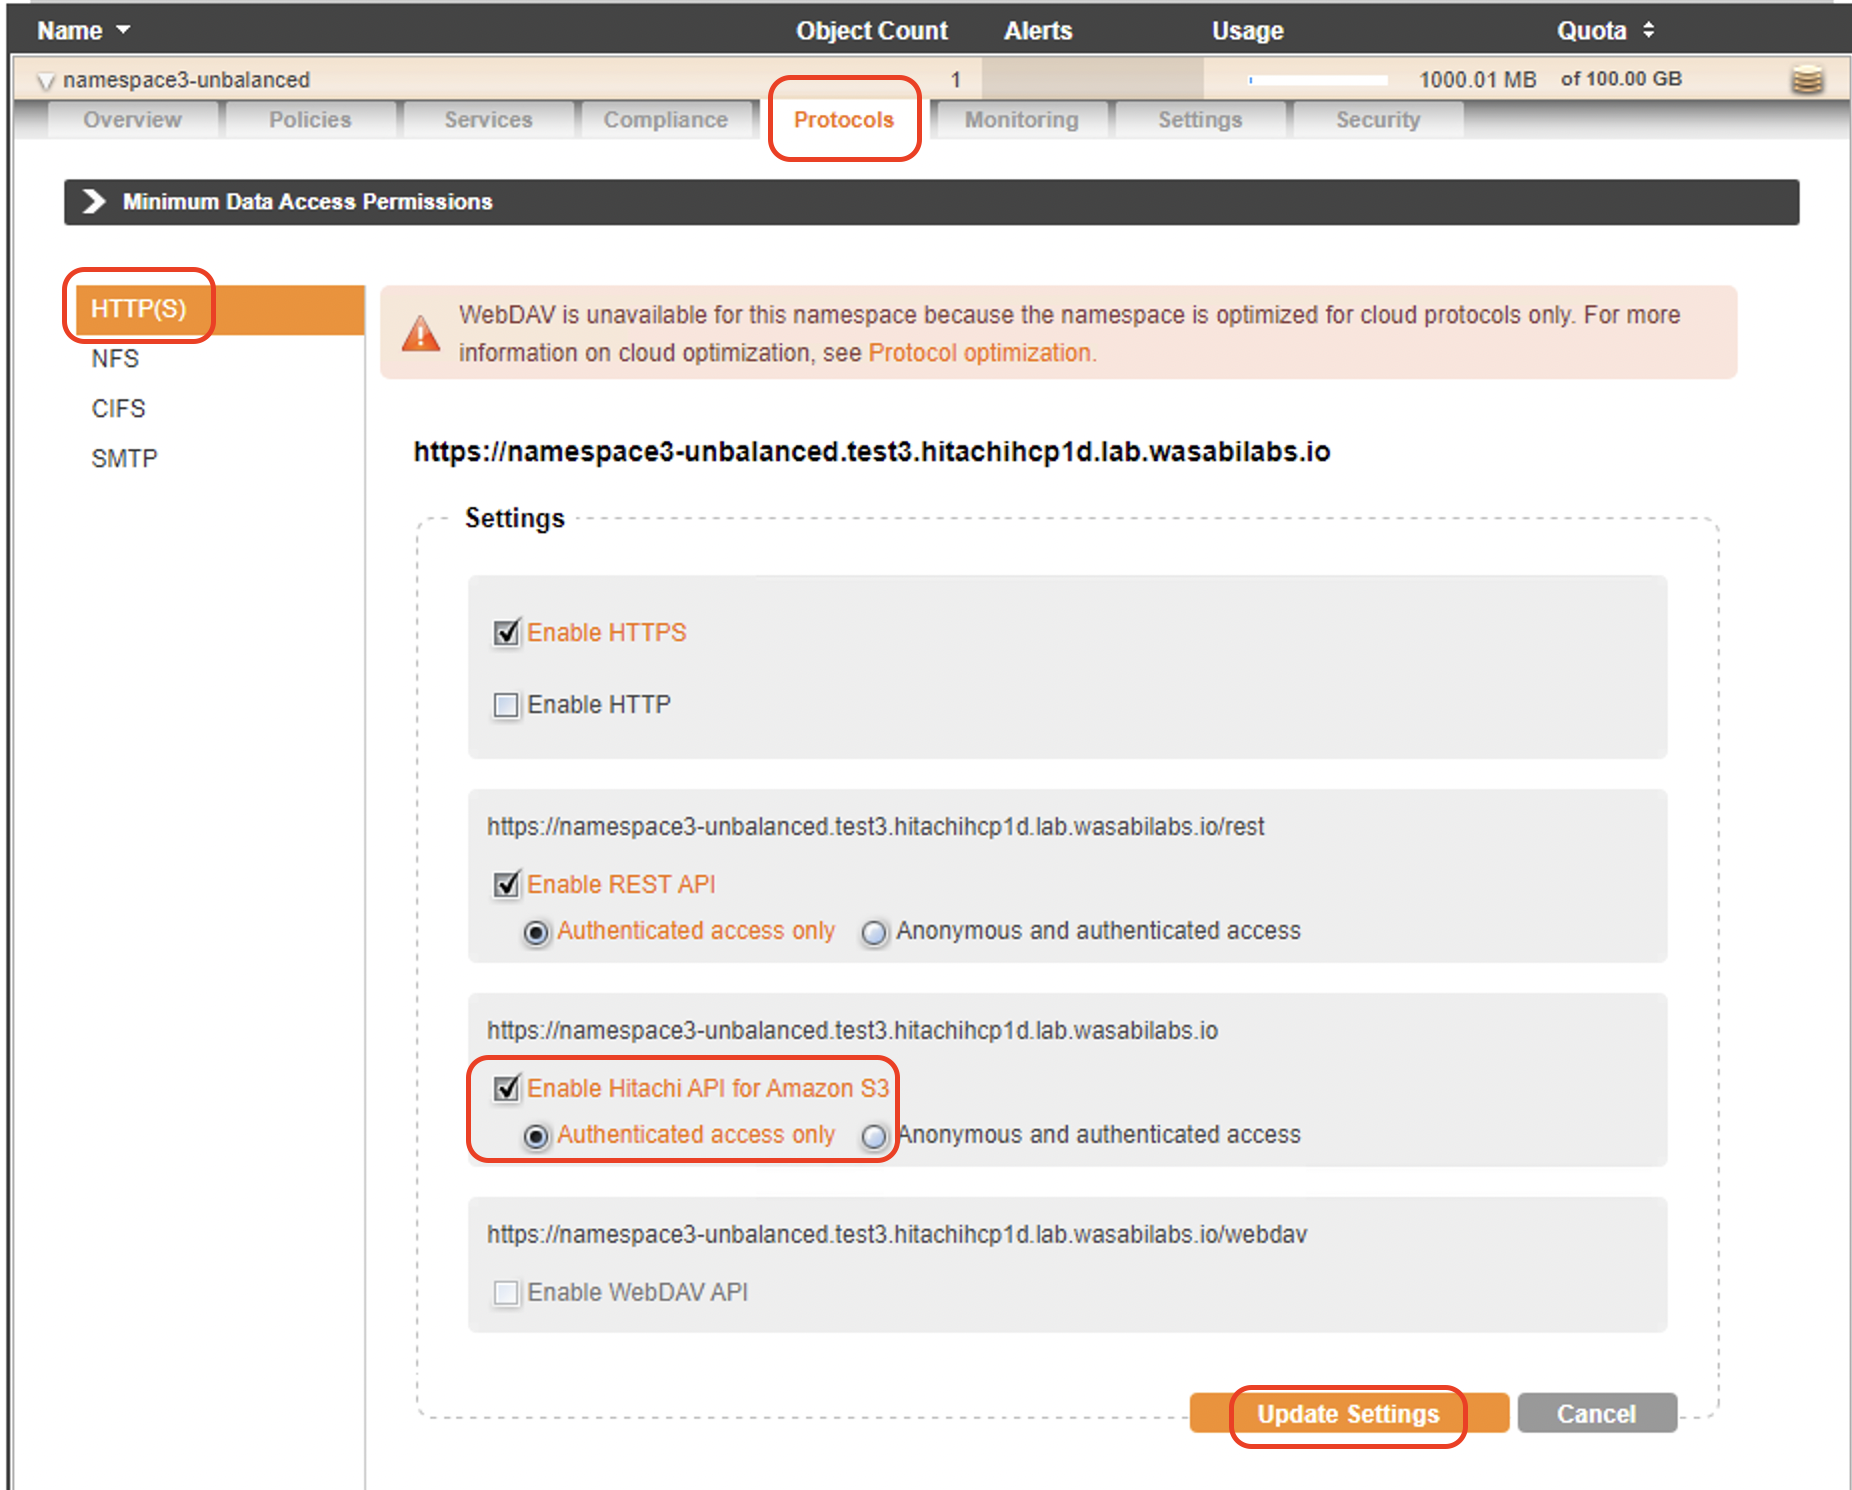
6.4 Enable Hitachi API for Amazon S3 for the Namespace.
7. User Access to HCP namespaces
Users can access the HCP namespaces via the Web UI for namespaces or through S3-compatible applications for example S3 browser or Cyberduck.
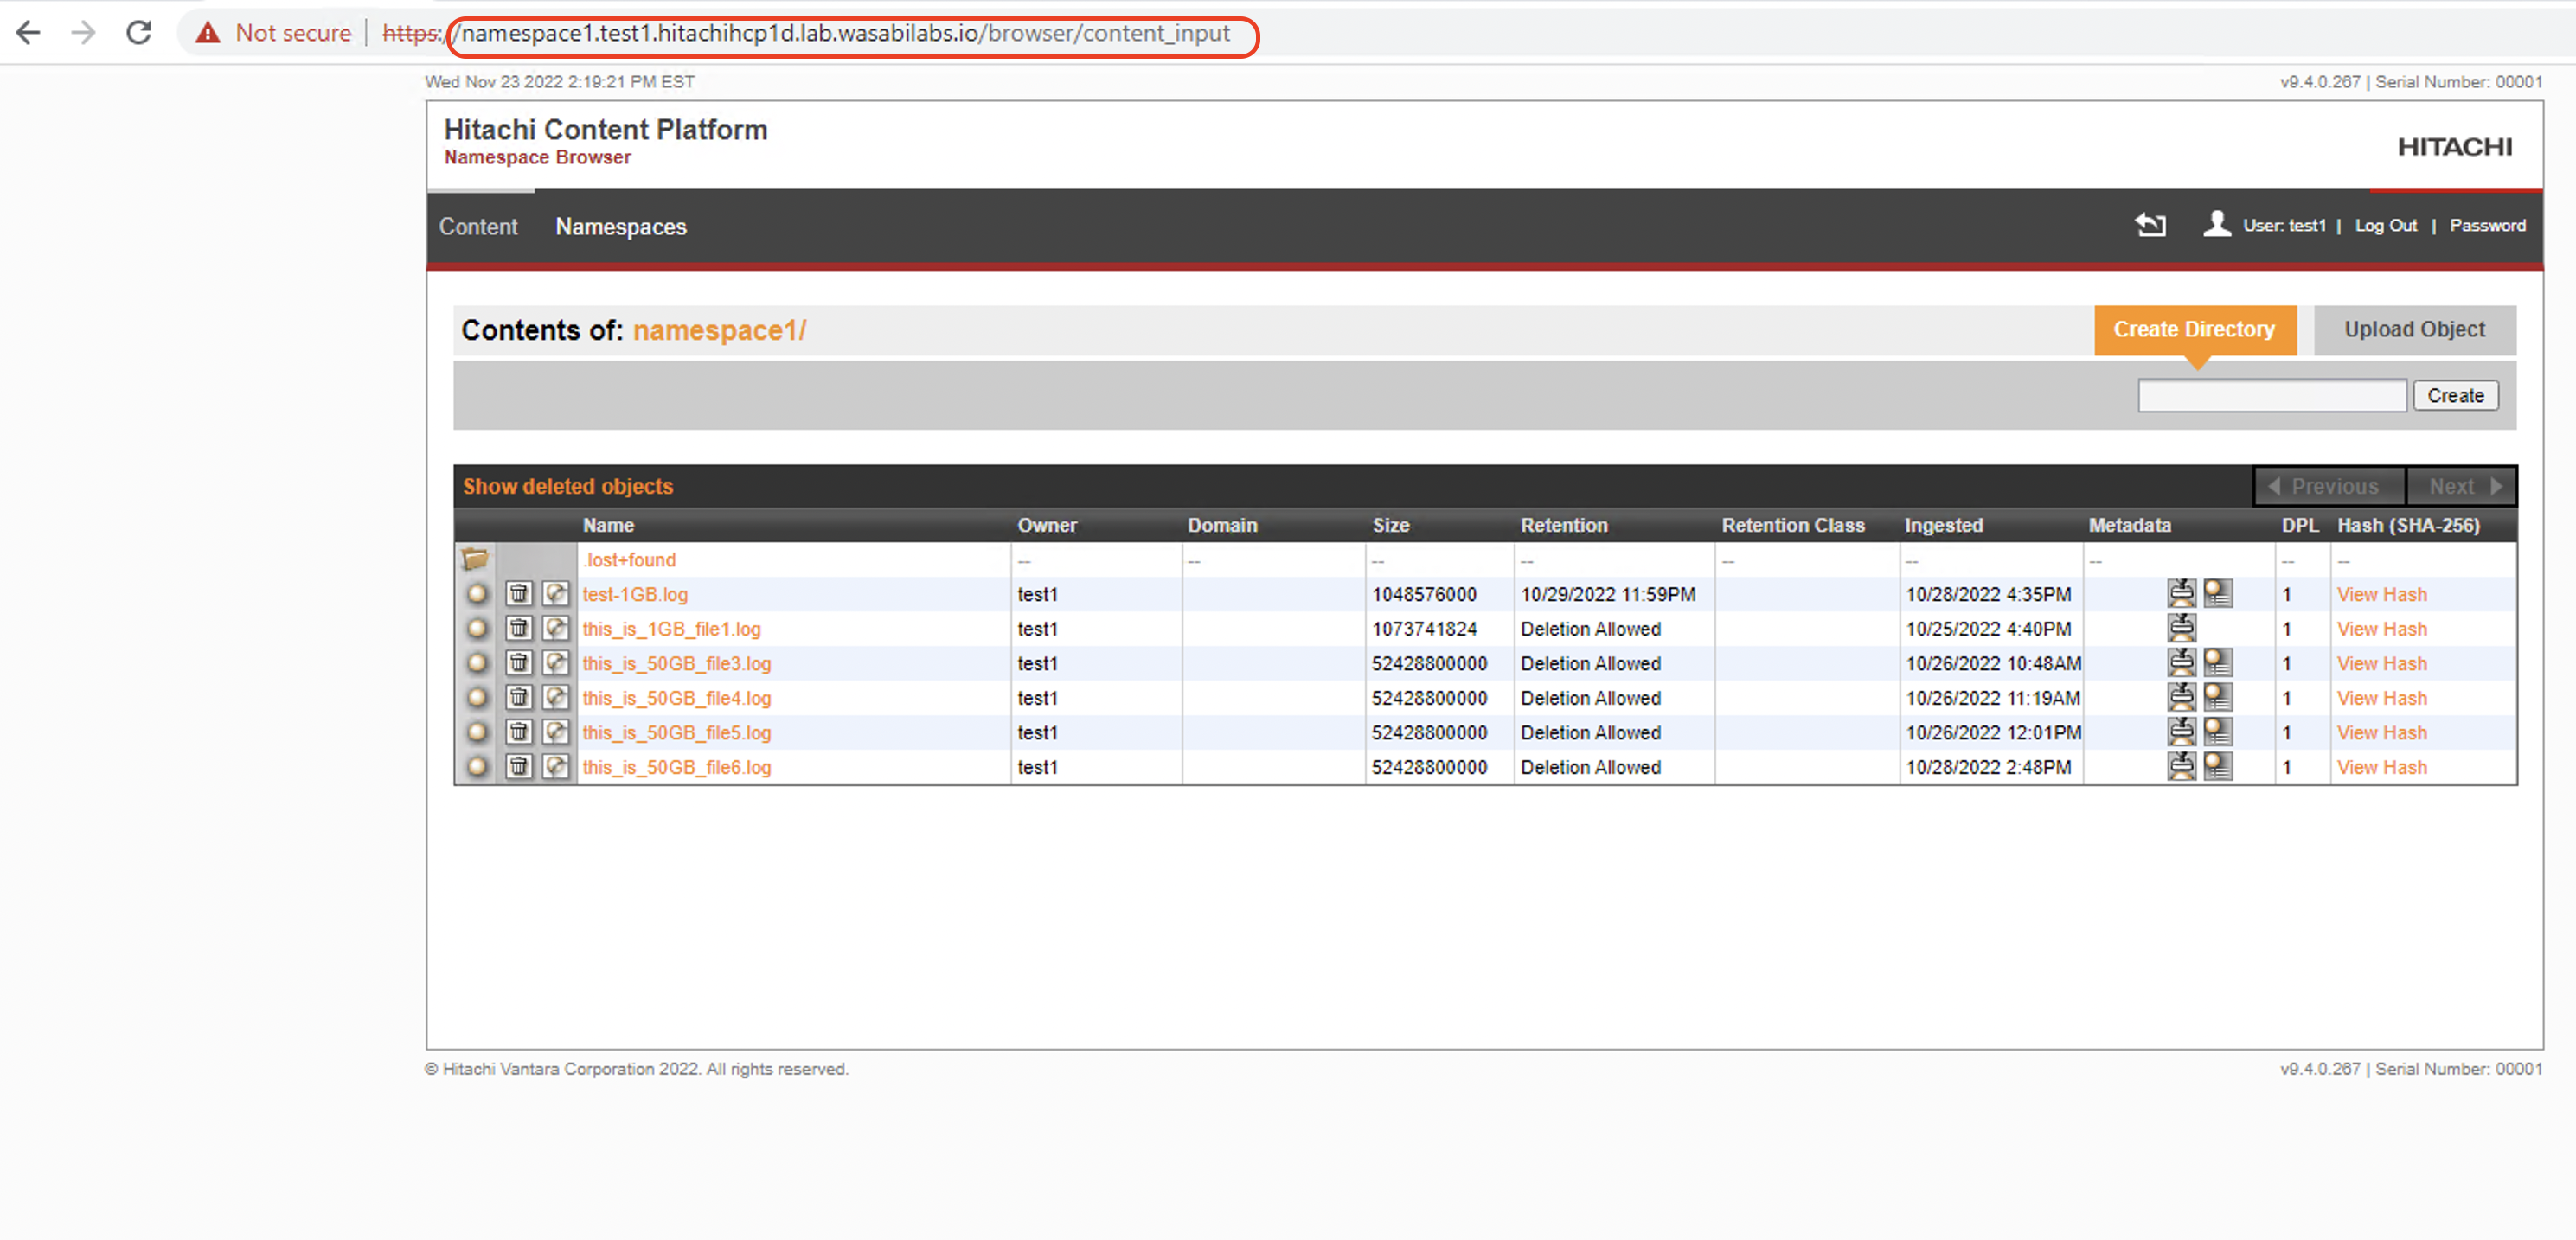
7.1 User can login to the namespace web UI using the namespace url. The namespace url can be found in the tenant management console under namespaces.
7.2 Create user credentials to use S3 clients for accessing HCP namespaces.
Users can access HCP namespaces using various S3 clients. The following steps describe how to generate access key and secret key for accessing HCP namespaces.
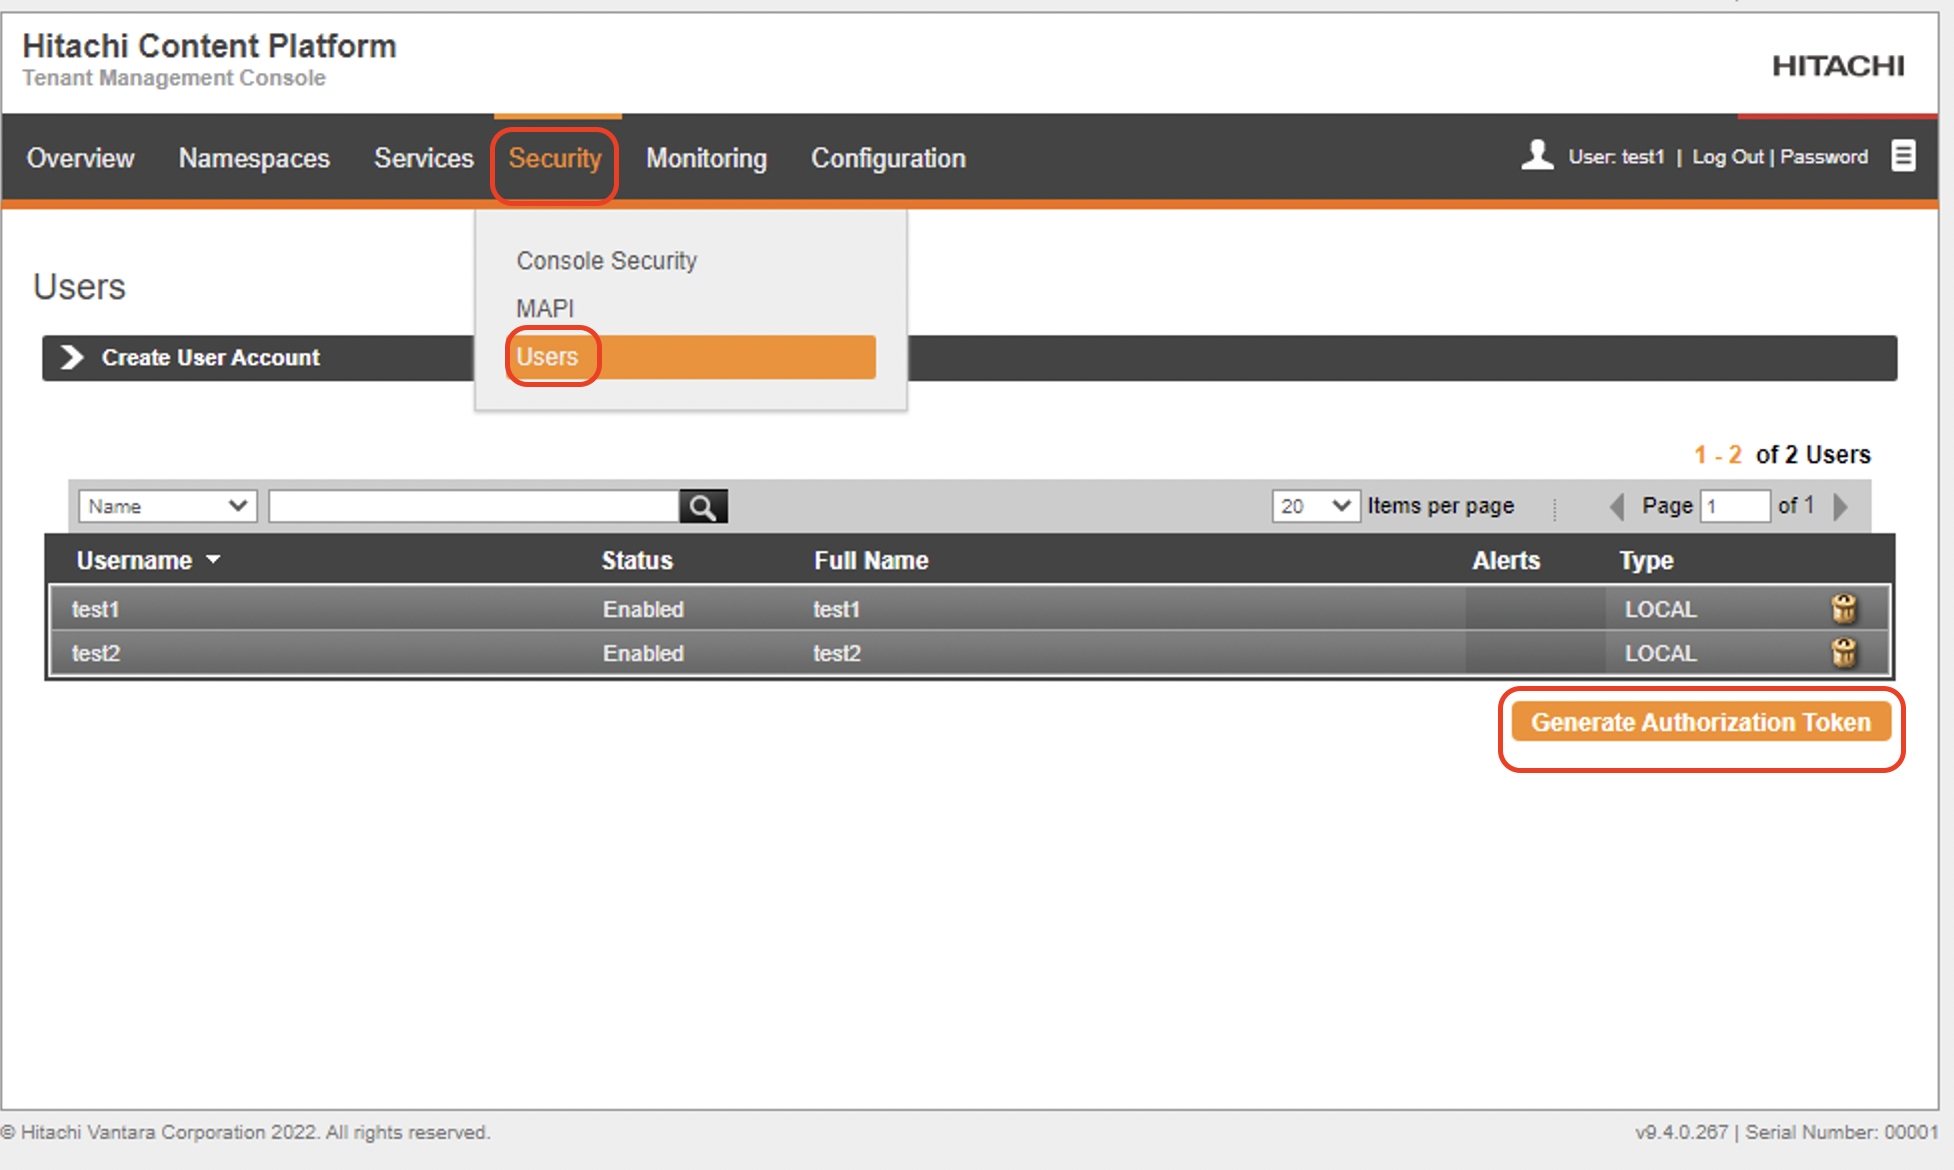
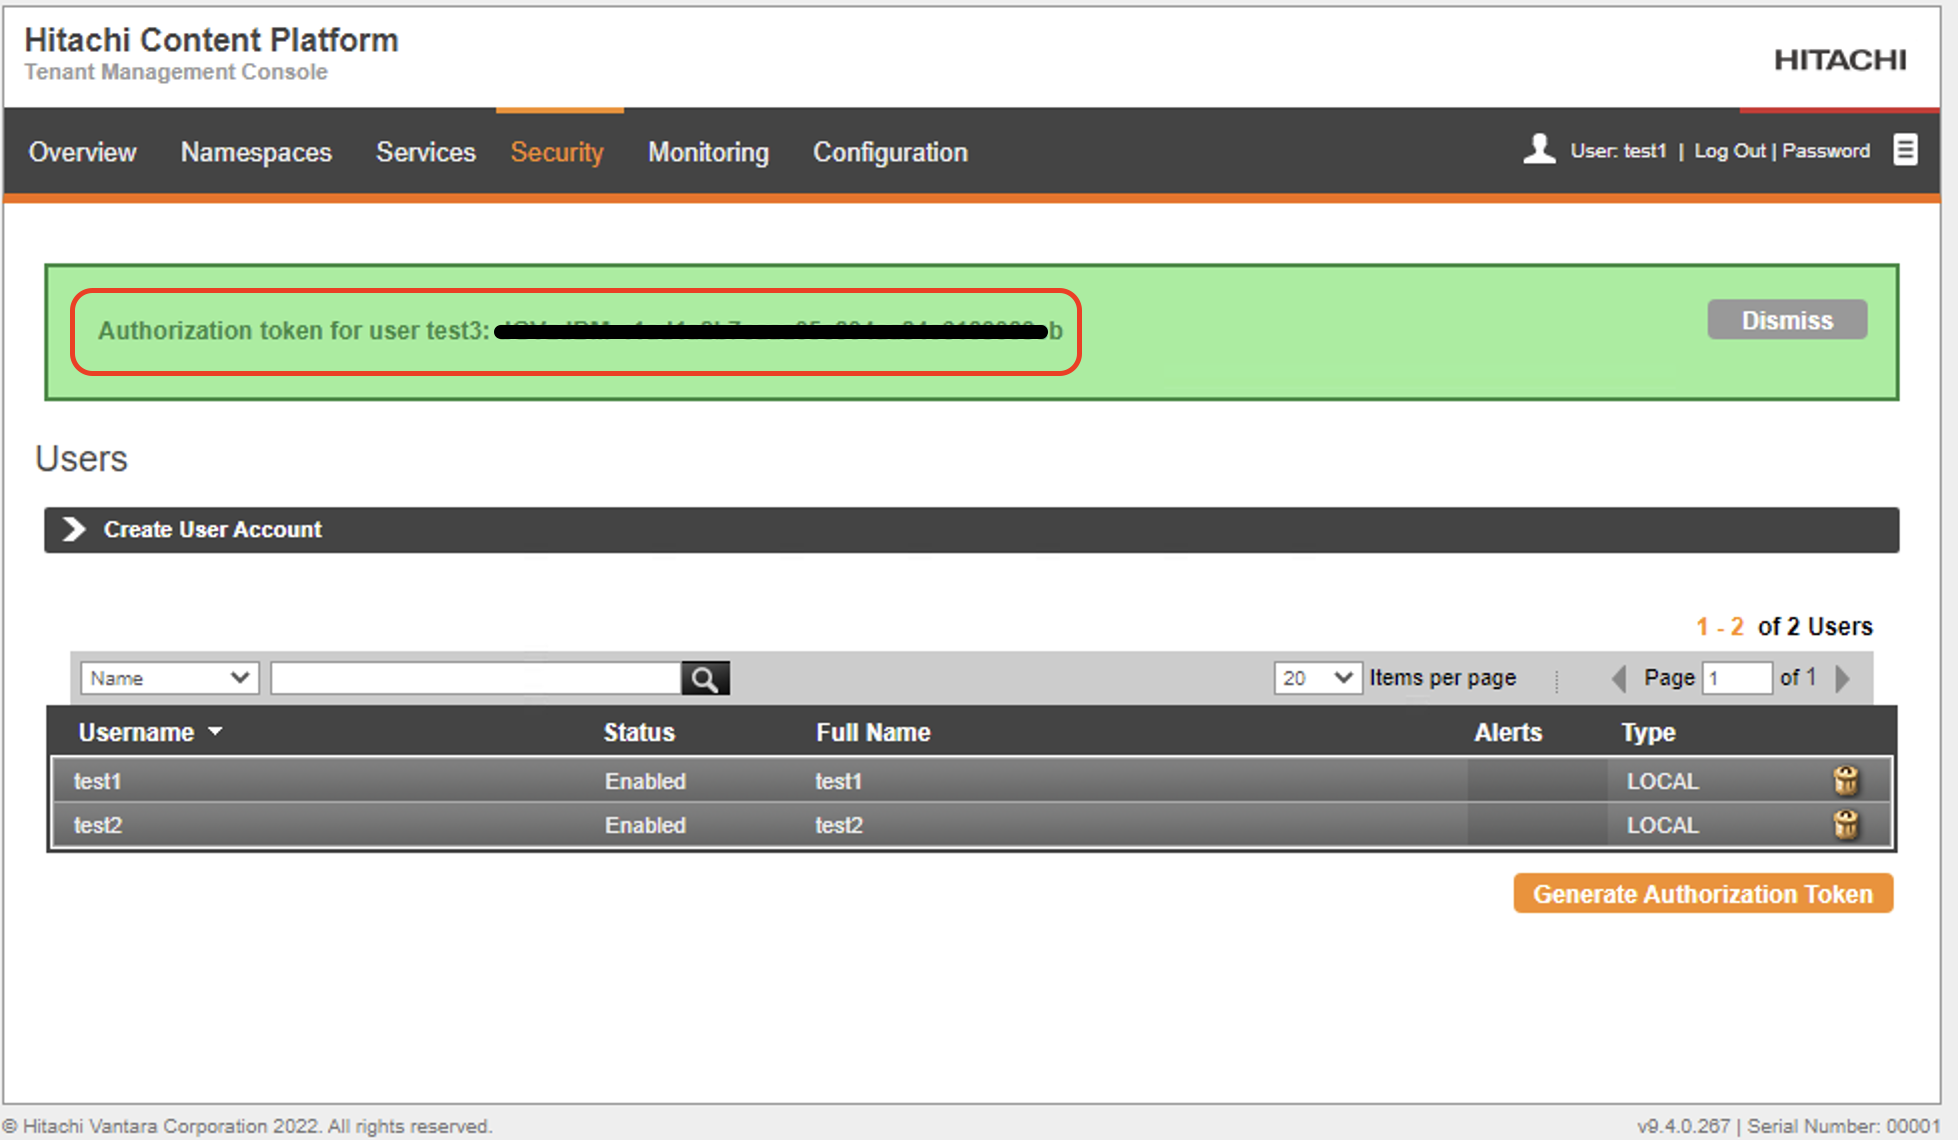
7.2.1 Credentials for HCP can be found in the Tenant Management Console under Security, then Users. Click Generate Authorization Token.
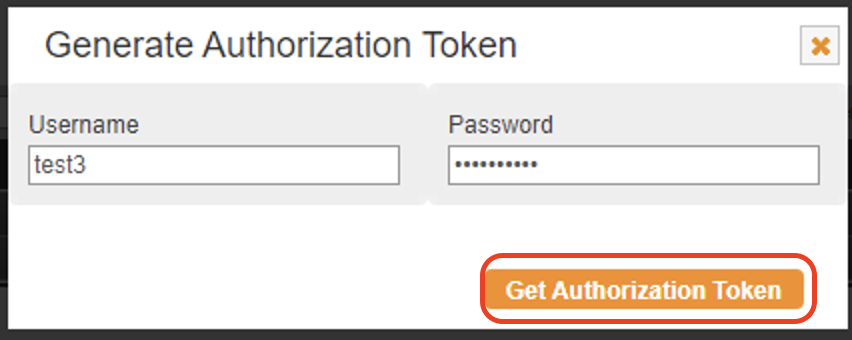
7.2.2 Enter the username and password for the namespace user and click Get Authorization Token to get the S3 credentials.
7.2.3 The S3 credentials will be displayed on the page and can be saved for use with S3 clients to login to the namespace.
8. Monitoring and Generating Reports
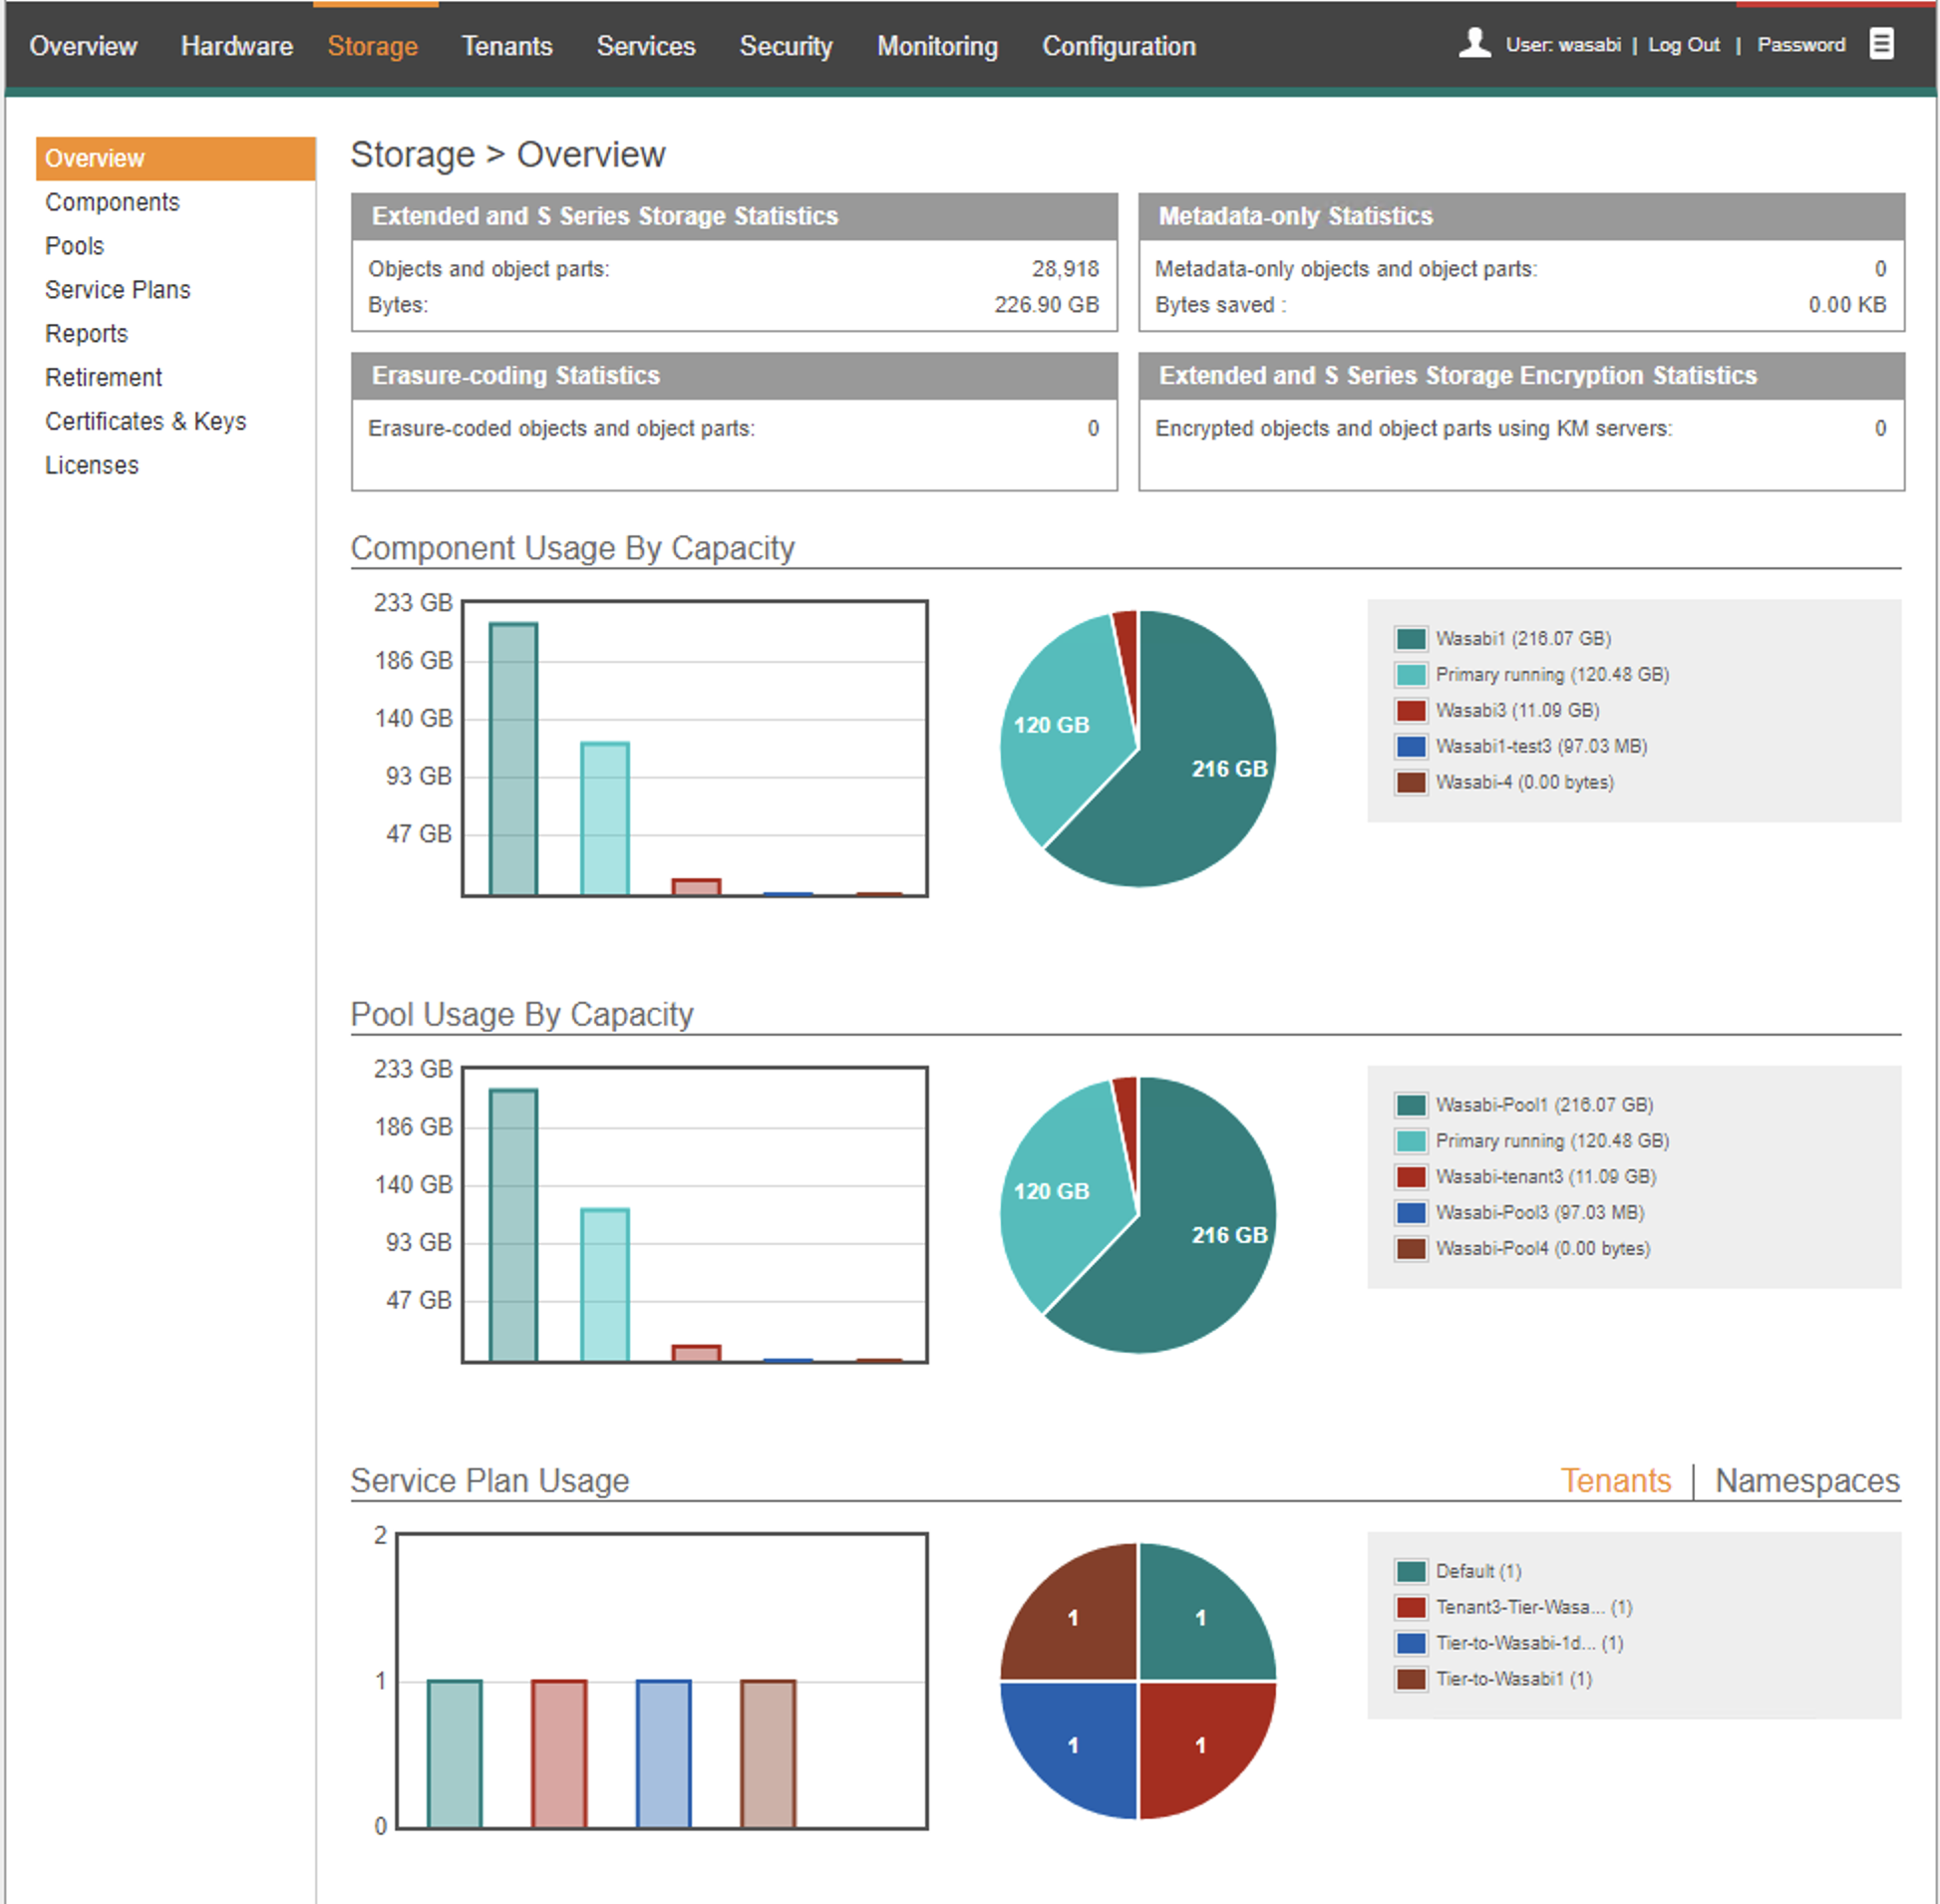
8.1 Users can monitor the status and usage of storage components, storage pools and service plans from the Storage Overview page.
On the System Management Console click Storage and then click Overview. HCP console displays storage usage graphs for components, pools and service plans and also lists usage per bucket.
8.2 Users can generate storage reports containing statistics on use of extended storage and service plans for analysis and monitoring storage usage patterns.
To generate a storage report login to the HCP System Management Console. Click Storage and click on Reports. Then specify the following:
Report For- Select whether the report is for a component, pool, service plan or everything.
Reporting Interval- Interval for statistics for the report- hourly, daily or total.
Start Date- Specify the start date for report
End Date- Specify the end date for report
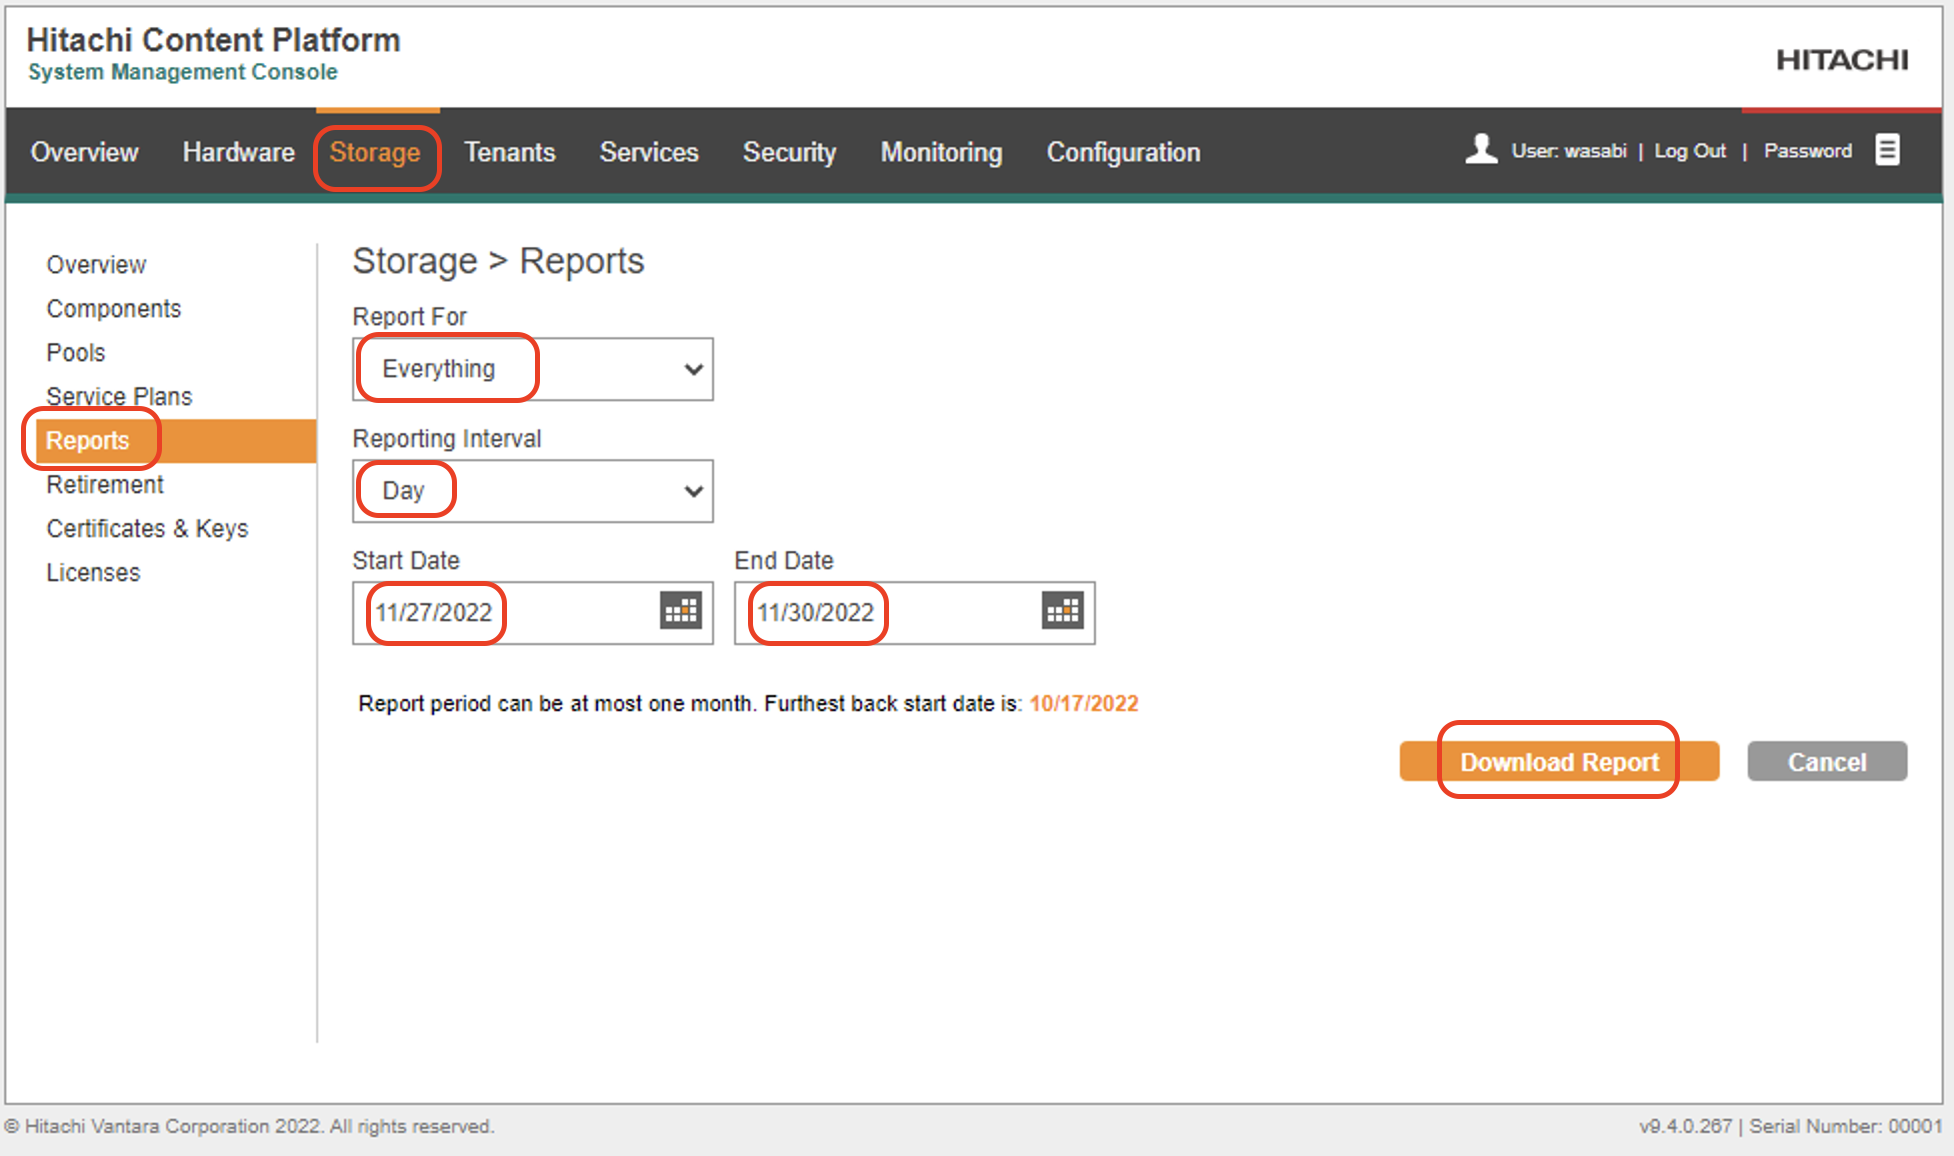
Click Download Report to generate and download the report. The report is a CSV file containing the following statistics.
systemName,tenantName,namespaceName,target,startTime,endTime,bytesWritten,bytesRead,writes,reads,deletes,deleted,valid