Komprise Intelligent Data Management has been validated for use with Wasabi. Follow steps outlined below to configure Wasabi as a cloud storage target.
Note: The data restoration process is handled by your specific backup software application. As there are many potential variables that will affect your unique environment, it is strongly recommended that you seek the guidance of your backup software's technical support team in the event that you encounter difficulty or have application-specific inquiries.
Log in to your Komprise account.
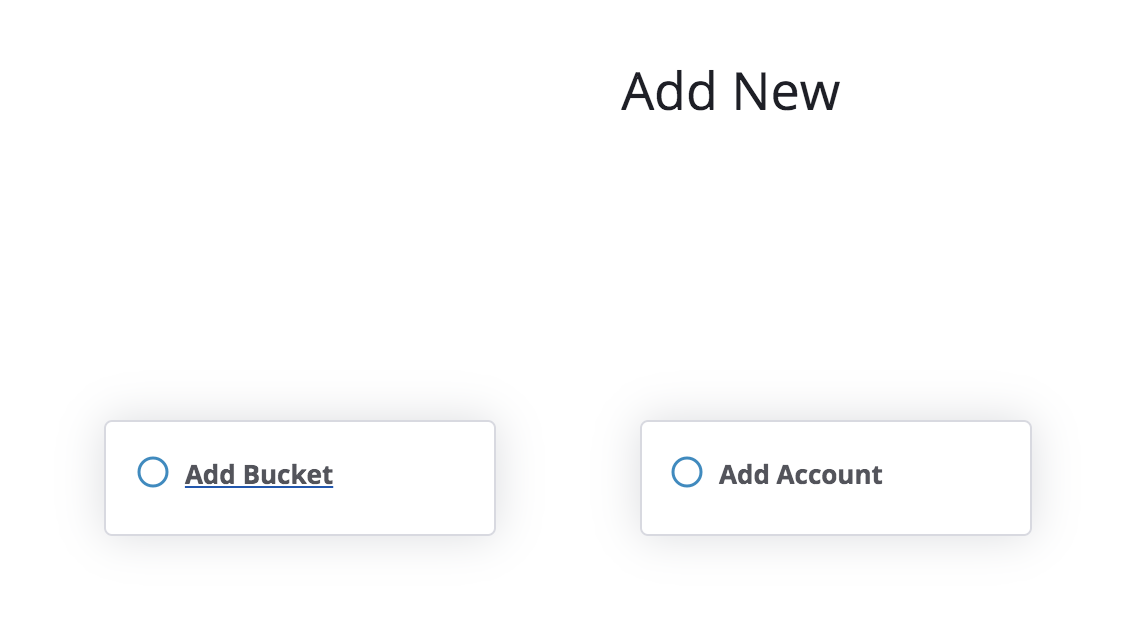
Click Data Stores, then click Add New.

If one bucket needs to be migrated via Komprise, choose Add Bucket, if multiple buckets need to be analyzed and migrated, Add Account.
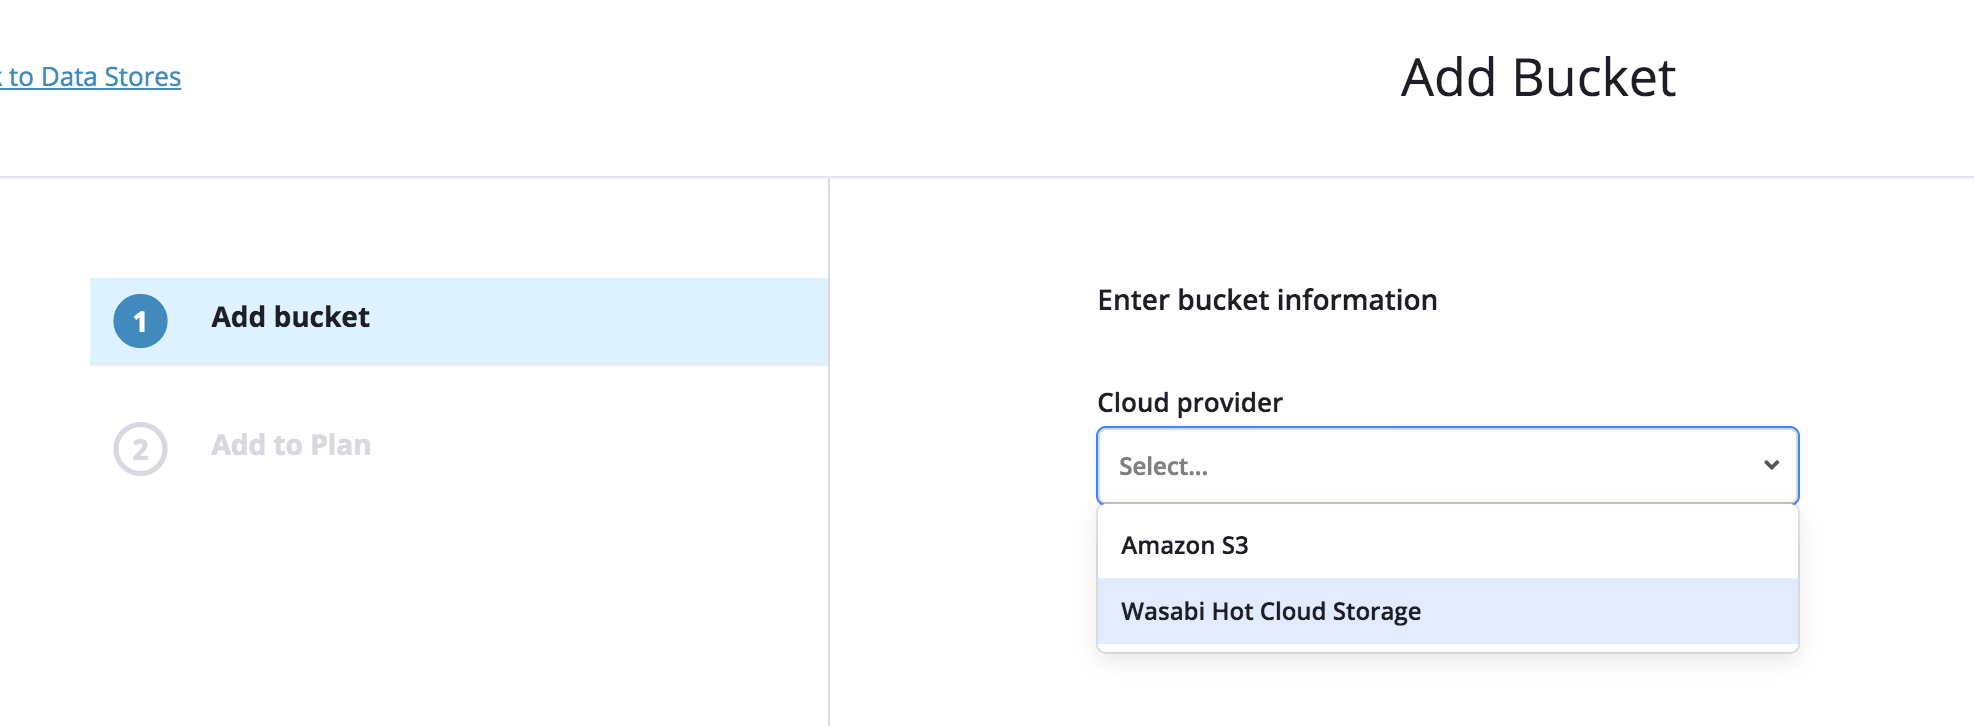
Choose Amazon S3 from drop-down option.
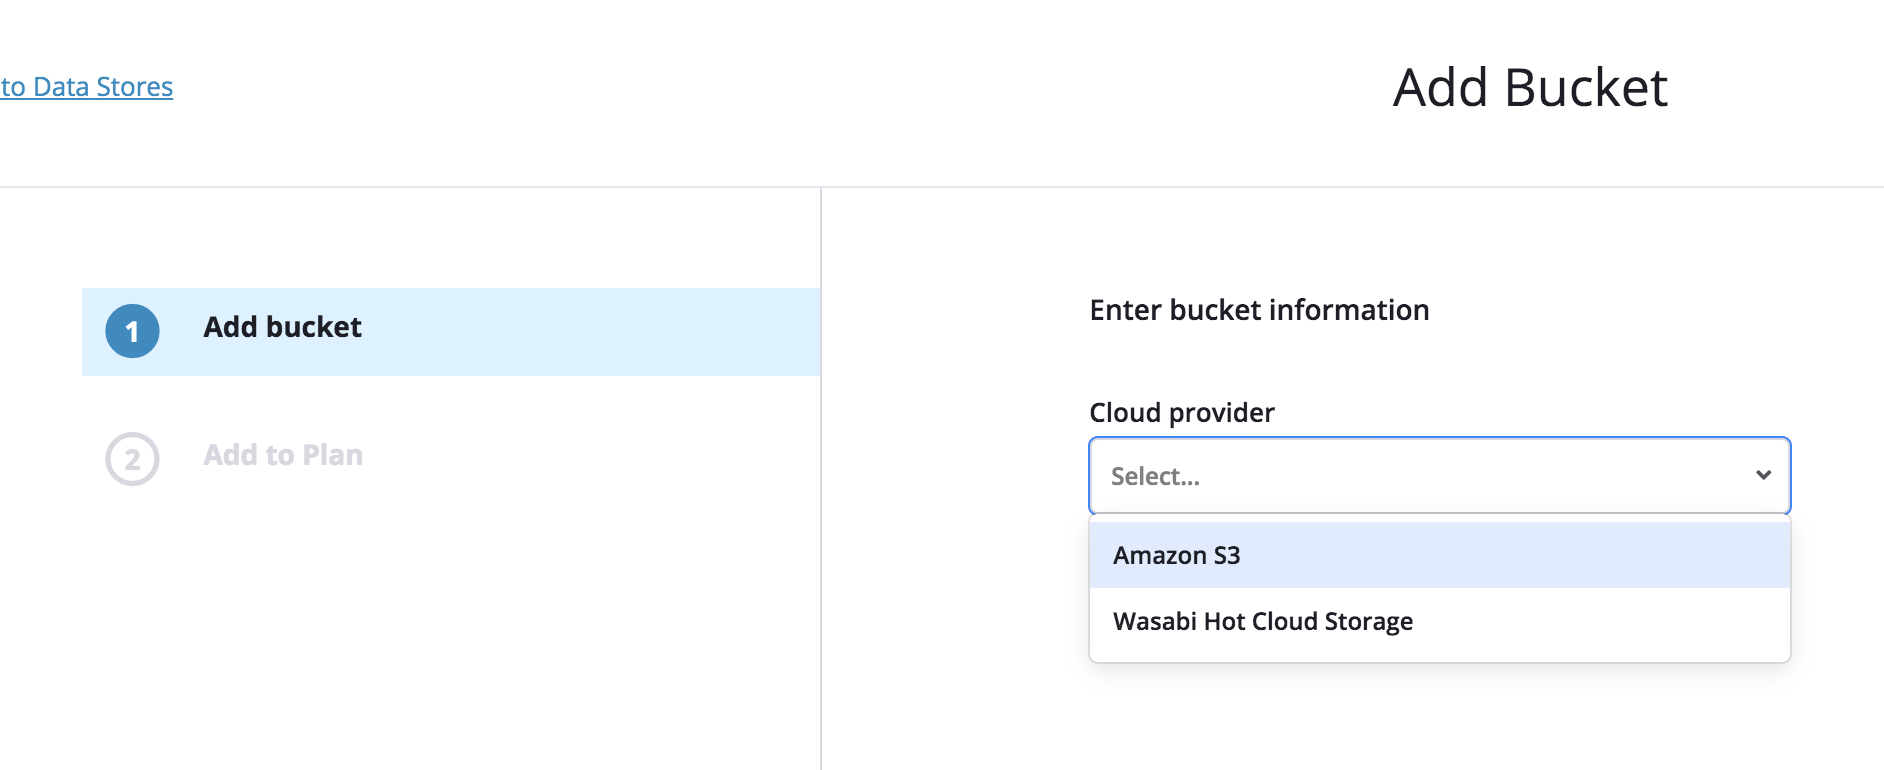
Provide the following information and click Add.
Bucket Name
Key ID
Secret Key
Display name

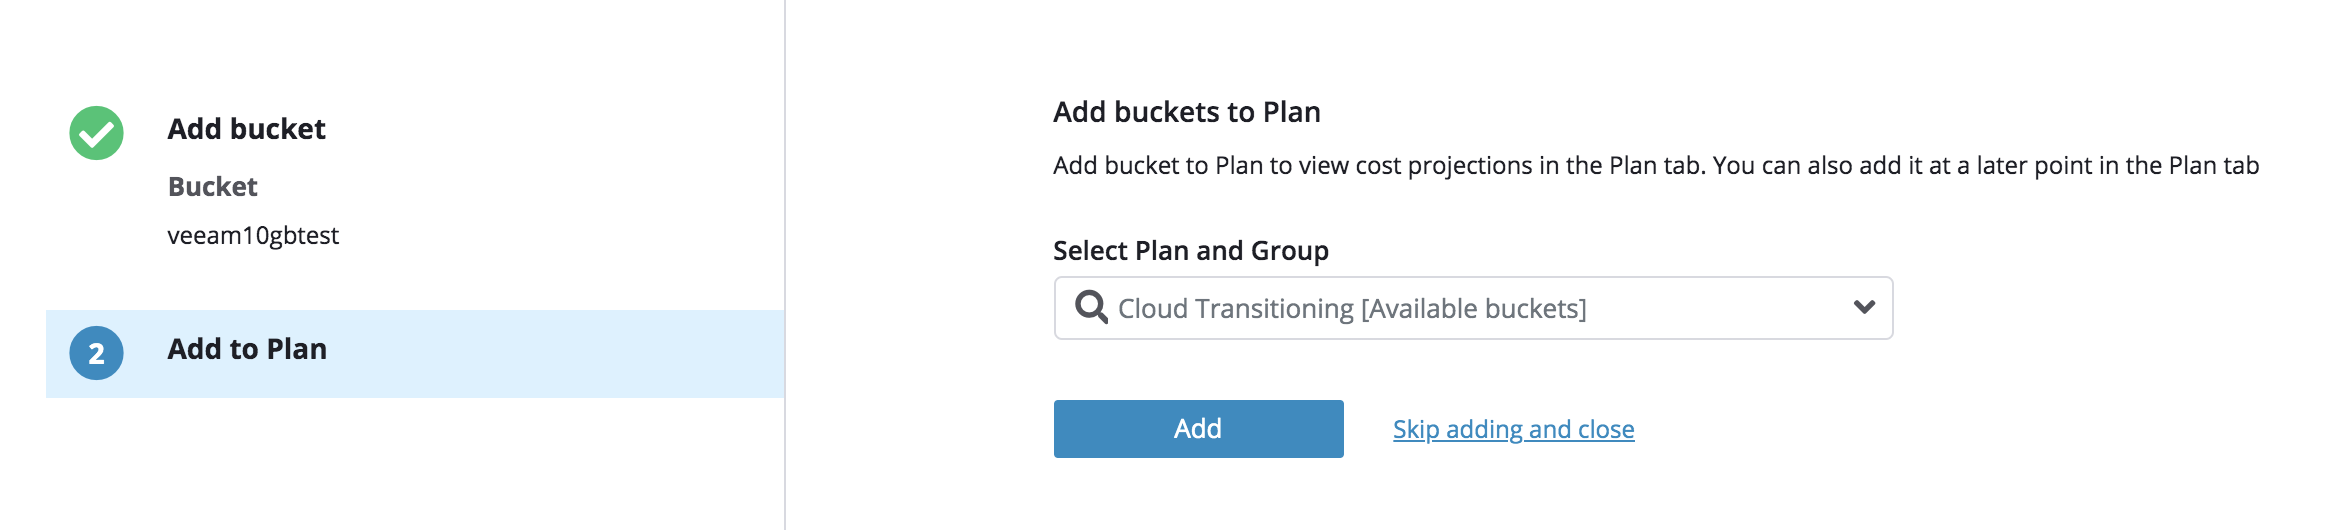
Optionally choose a plan Cloud Transitioning (Available buckets) and click Add.
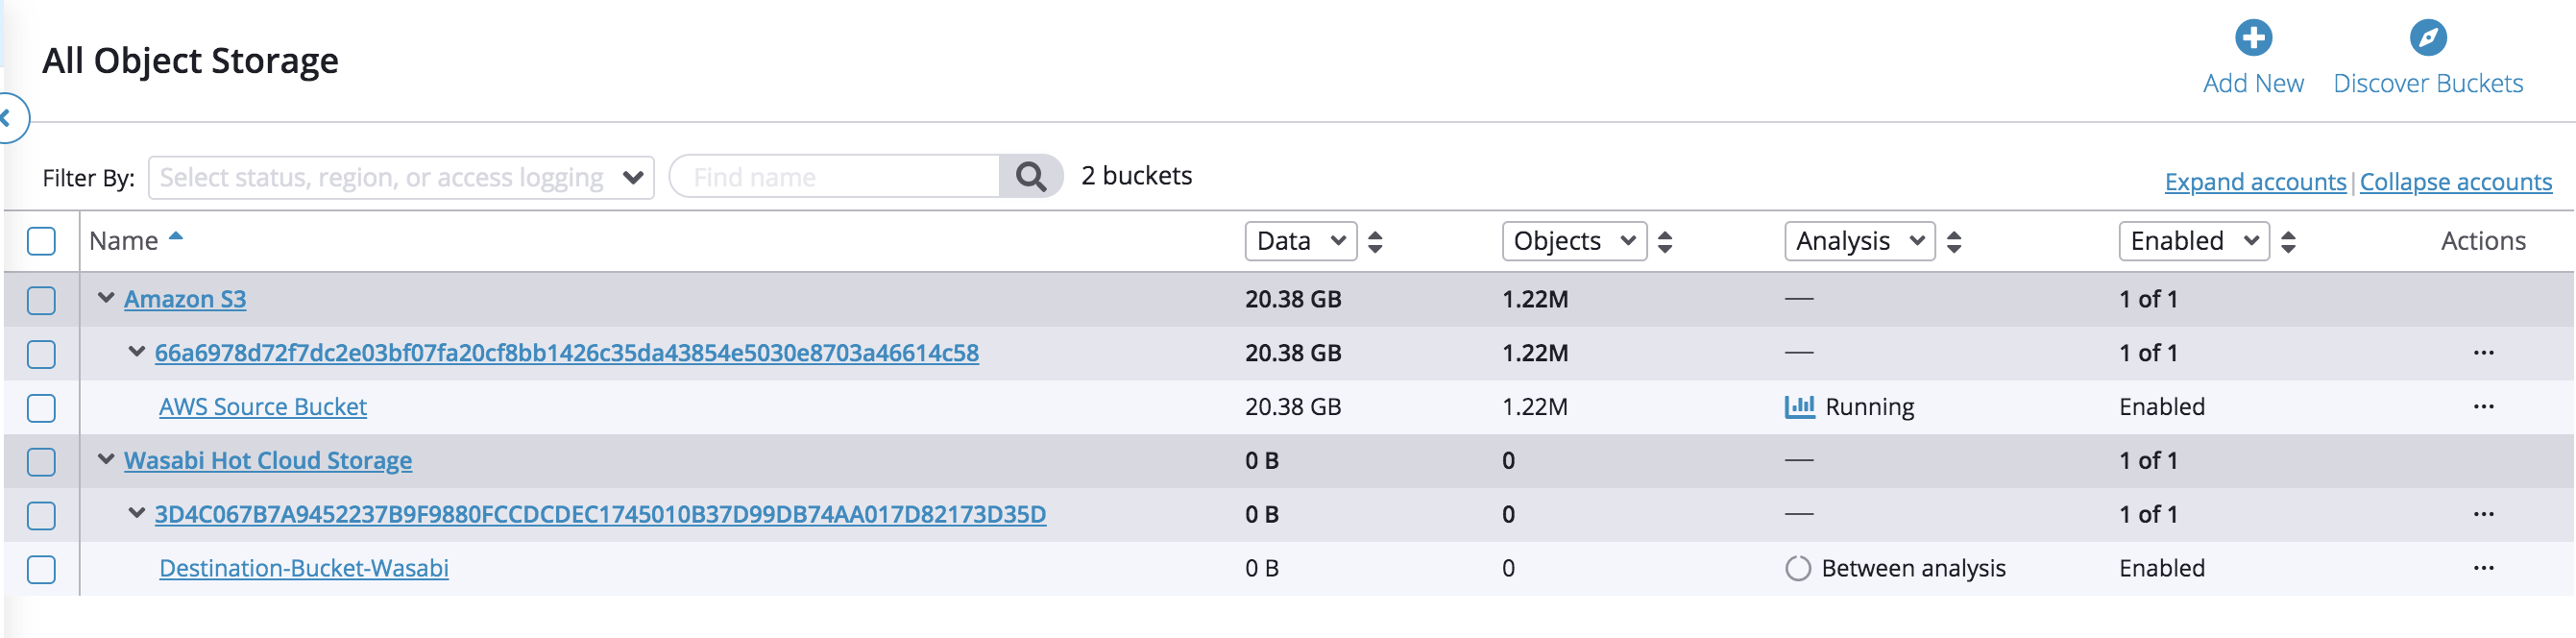
Once added, Komprise will analyze data inside your bucket.

Note: Komprise auto generates a random Canonical ID for every bucket/account added to the service. This randomly generated ID is not searchable.
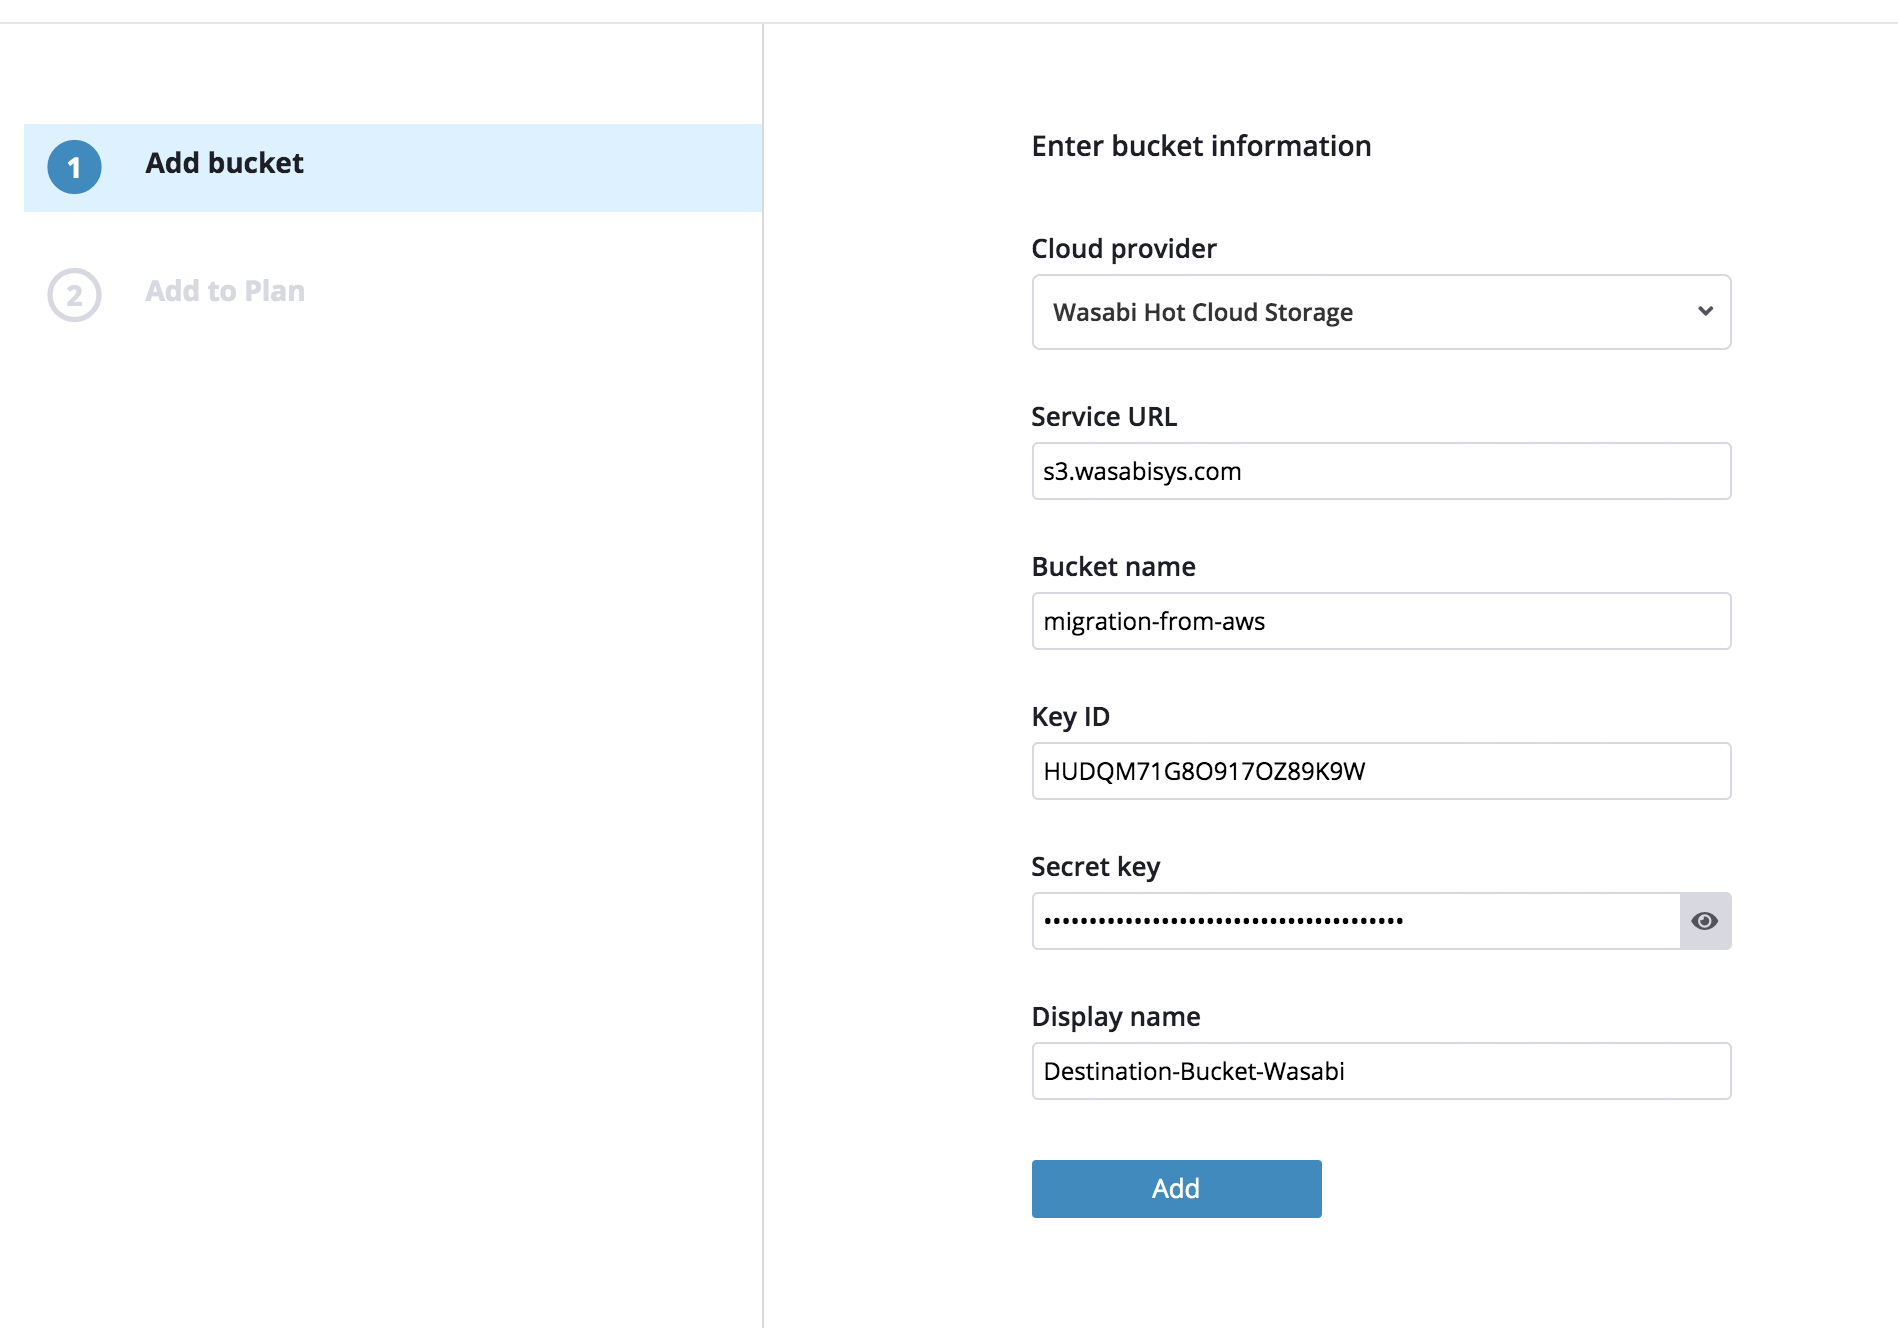
8. Click + Add New to add Wasabi as the destination bucket.
Provide the following info and click Add.
Service URL
Bucket name
Key ID
Secret Key
Display name
Note: This config example uses Wasabi's us-east-1 storage region. To use other Wasabi storage regions, please use the appropriate Wasabi service URL as described in this article.
Once added Komprise will run analysis on the destination bucket as well.
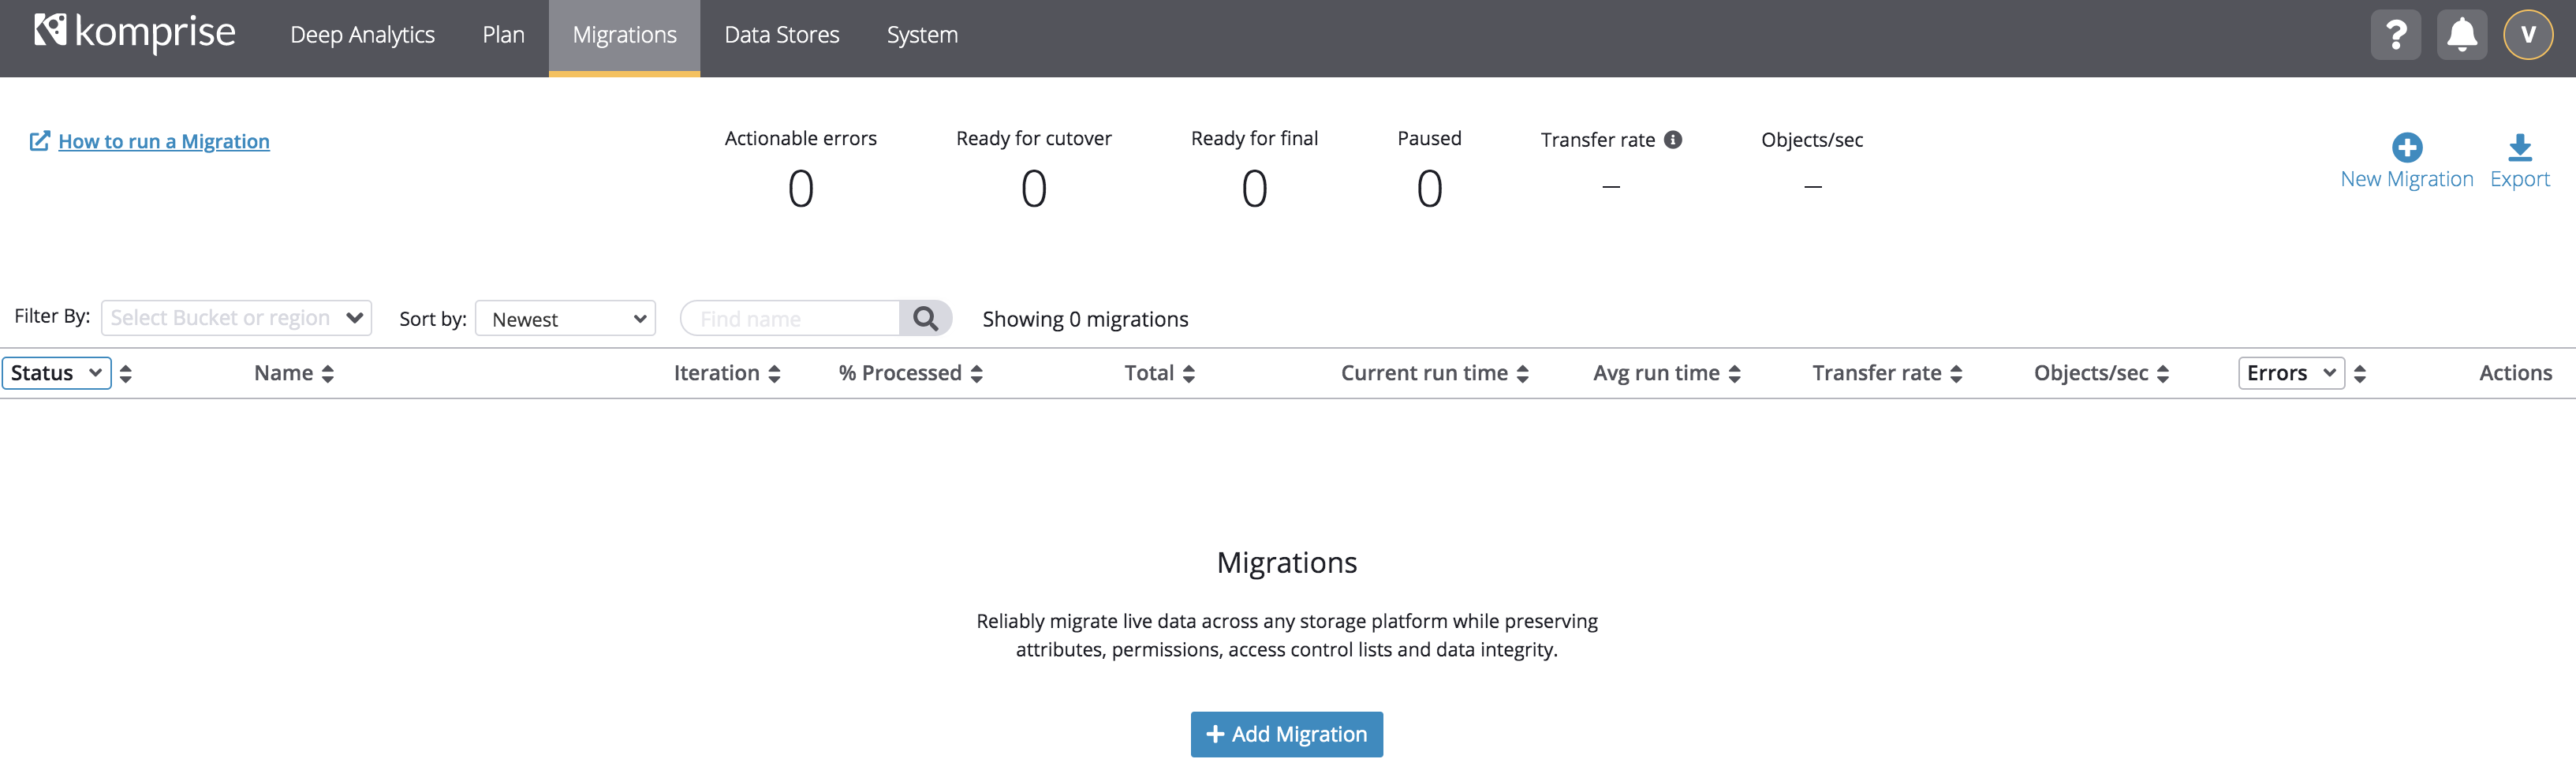
Navigate to Migrations and click New Migration.
Choose source AWS bucket and click Next.
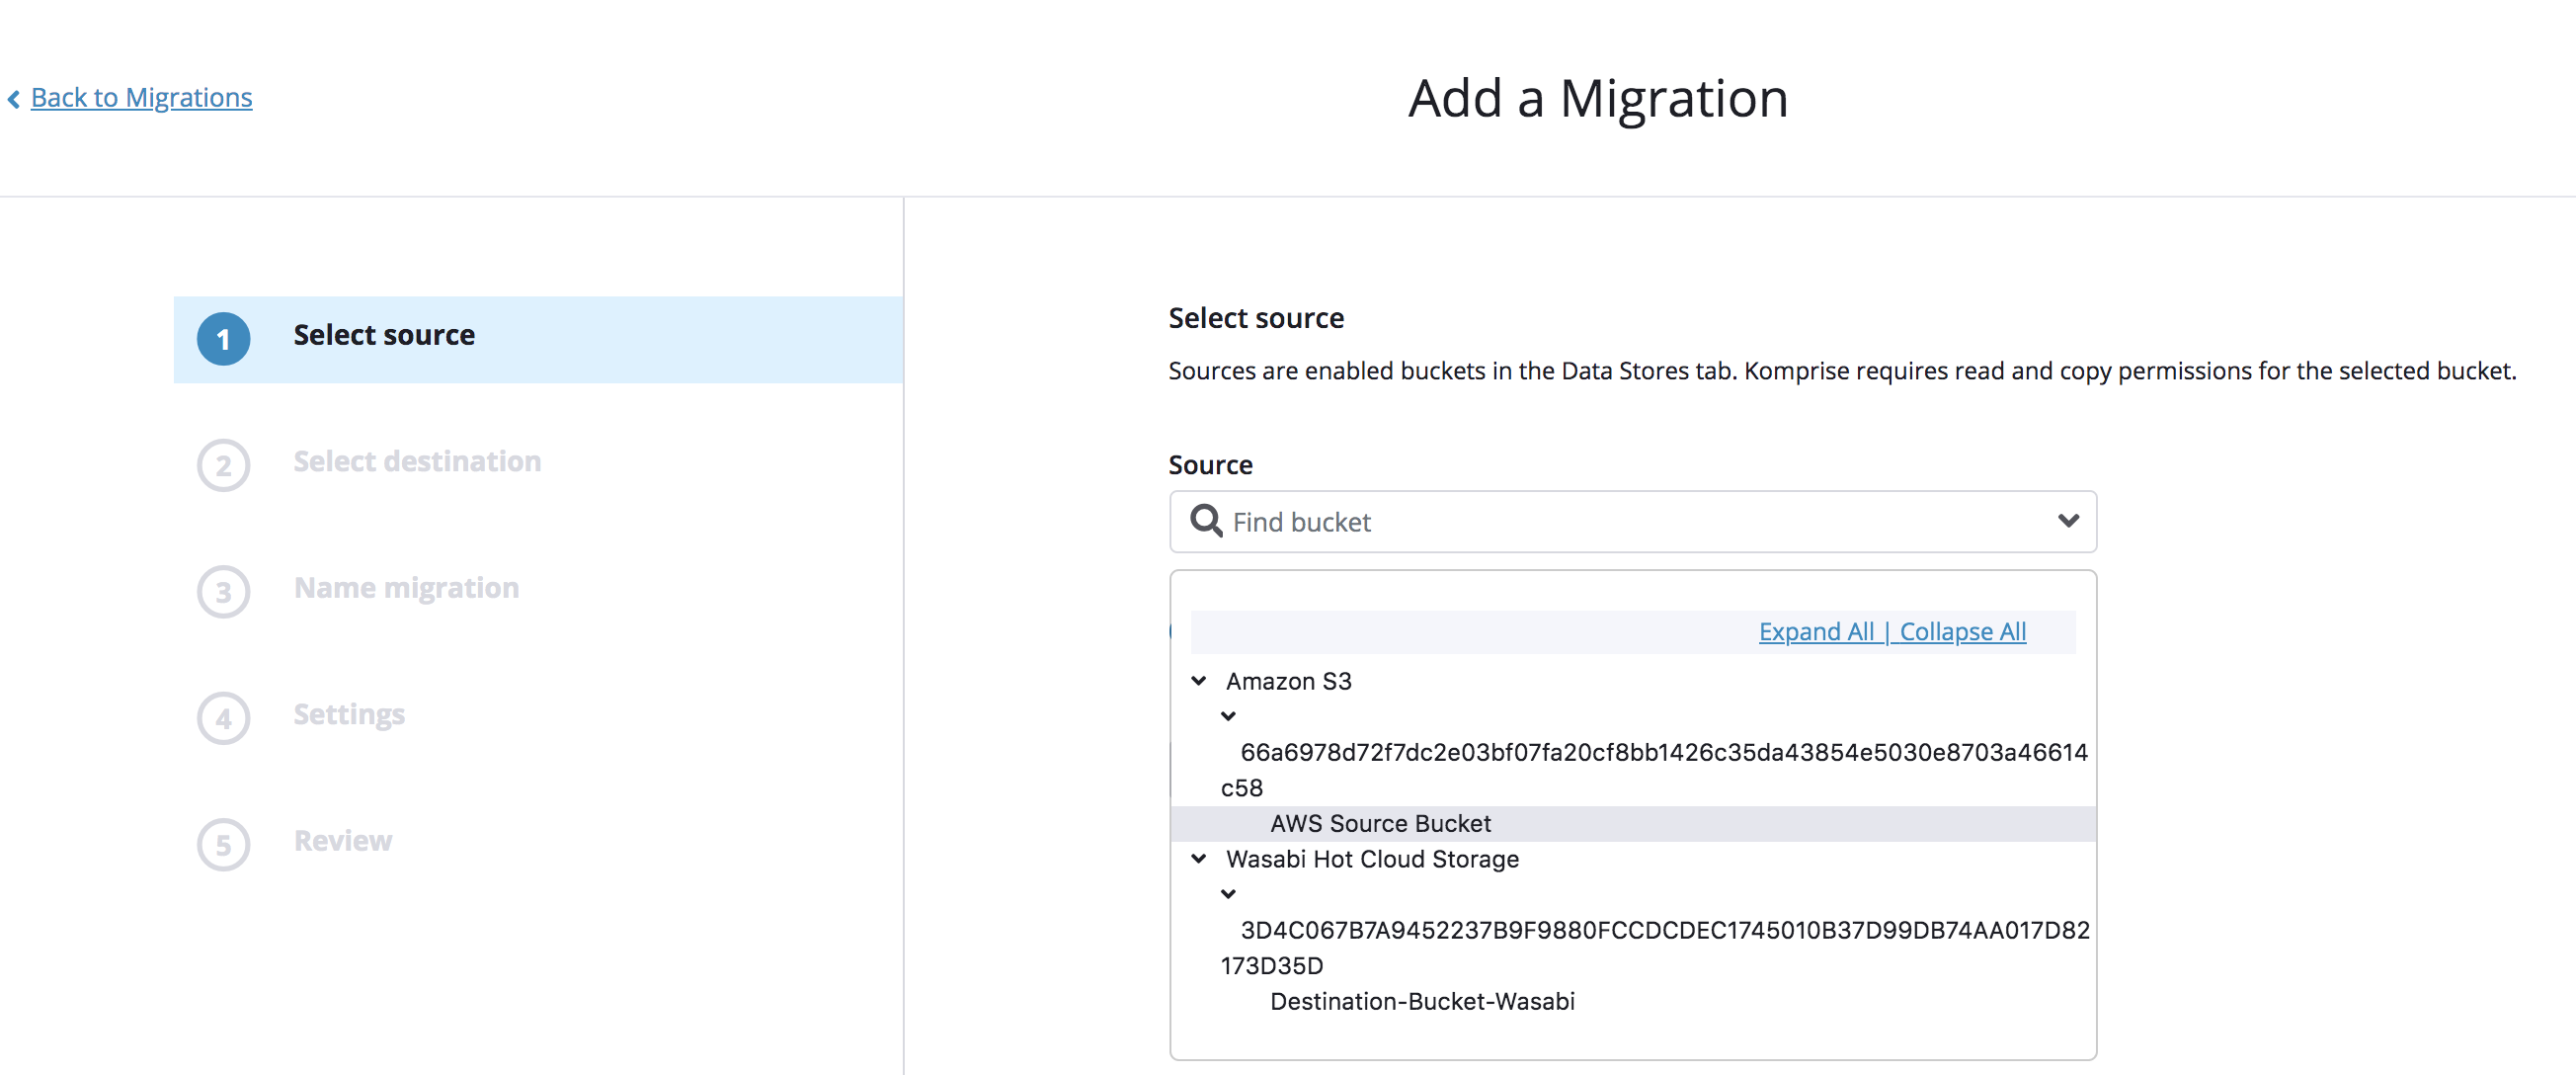
Note: Optionally data with a set prefix could also be configured as part of the migration.
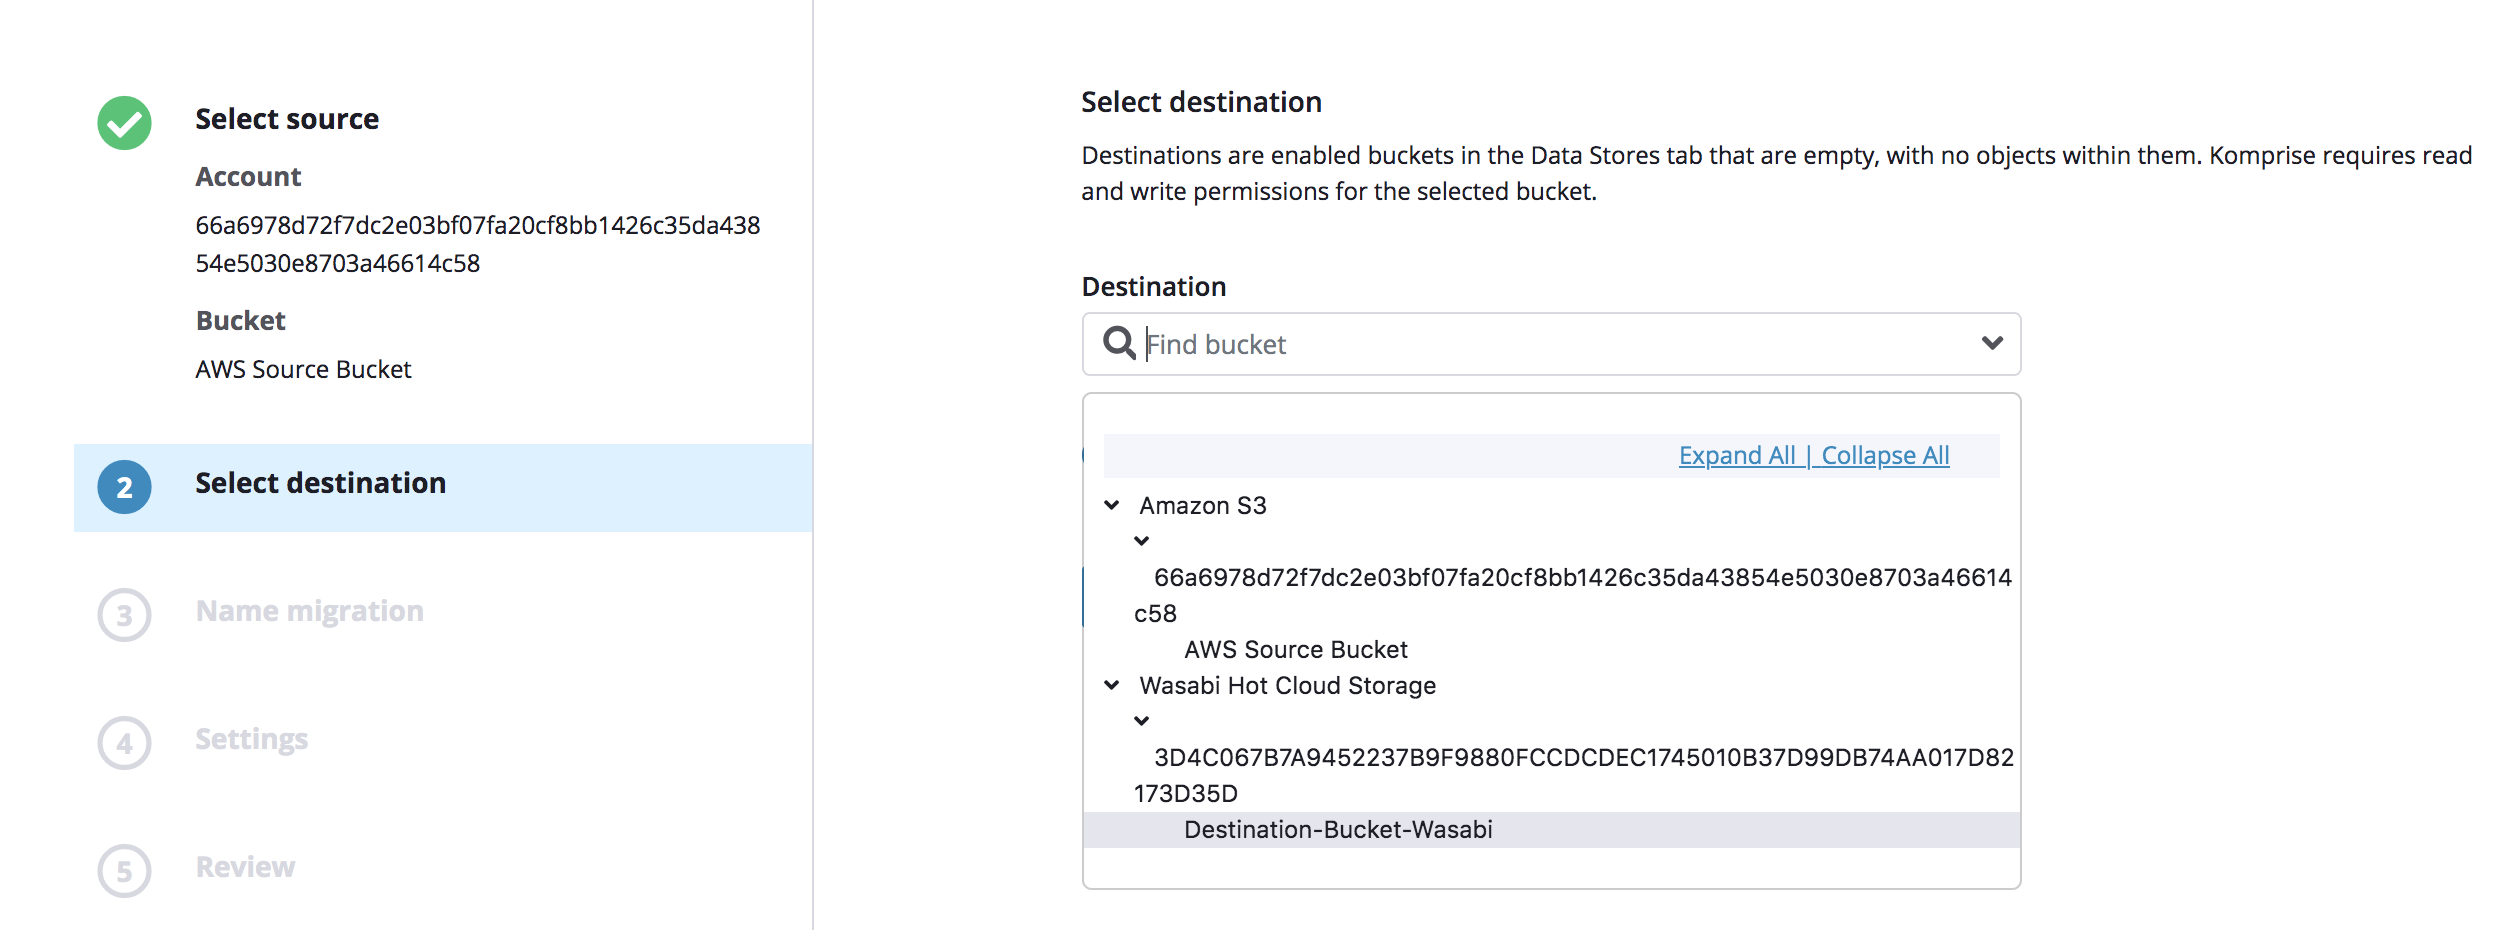
Choose destination Wasabi bucket and click Next.
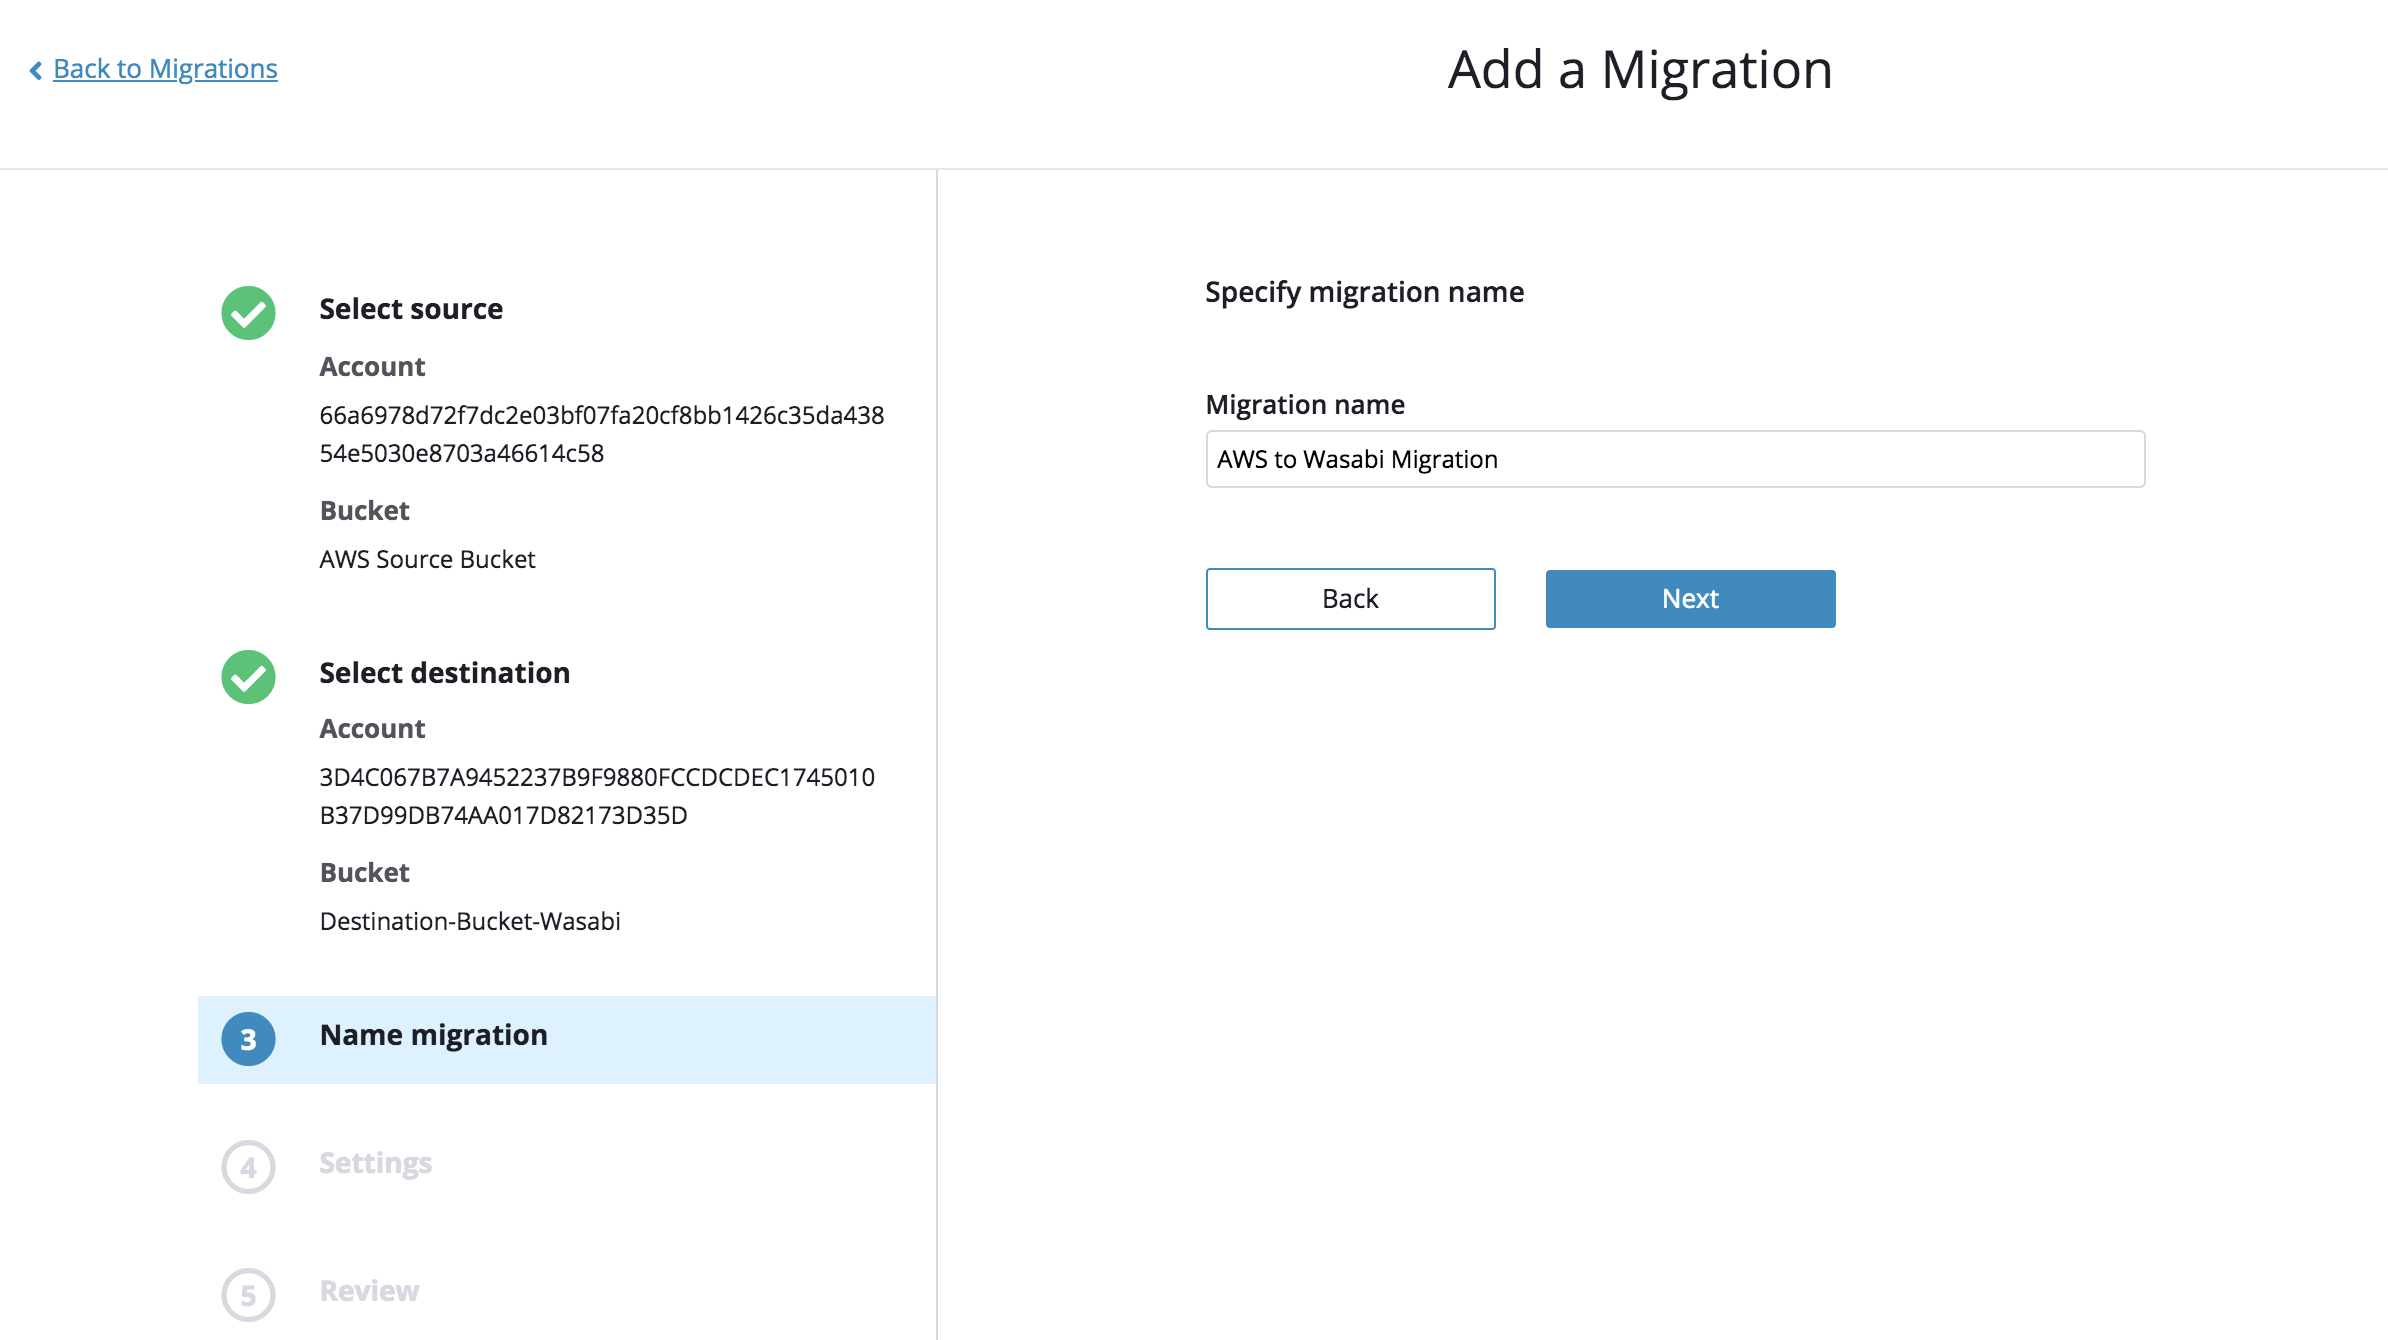
14. Provide the migration a name.
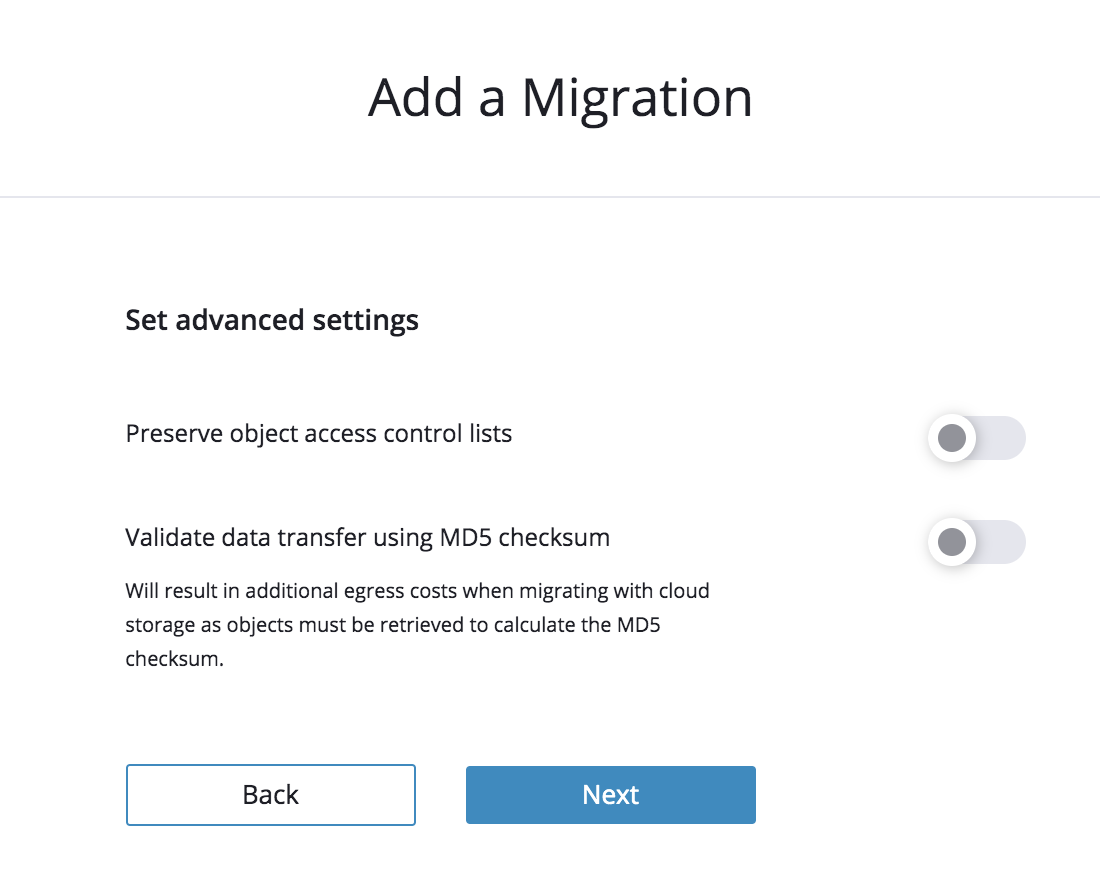
Uncheck Preserve object access control lists and click Next.
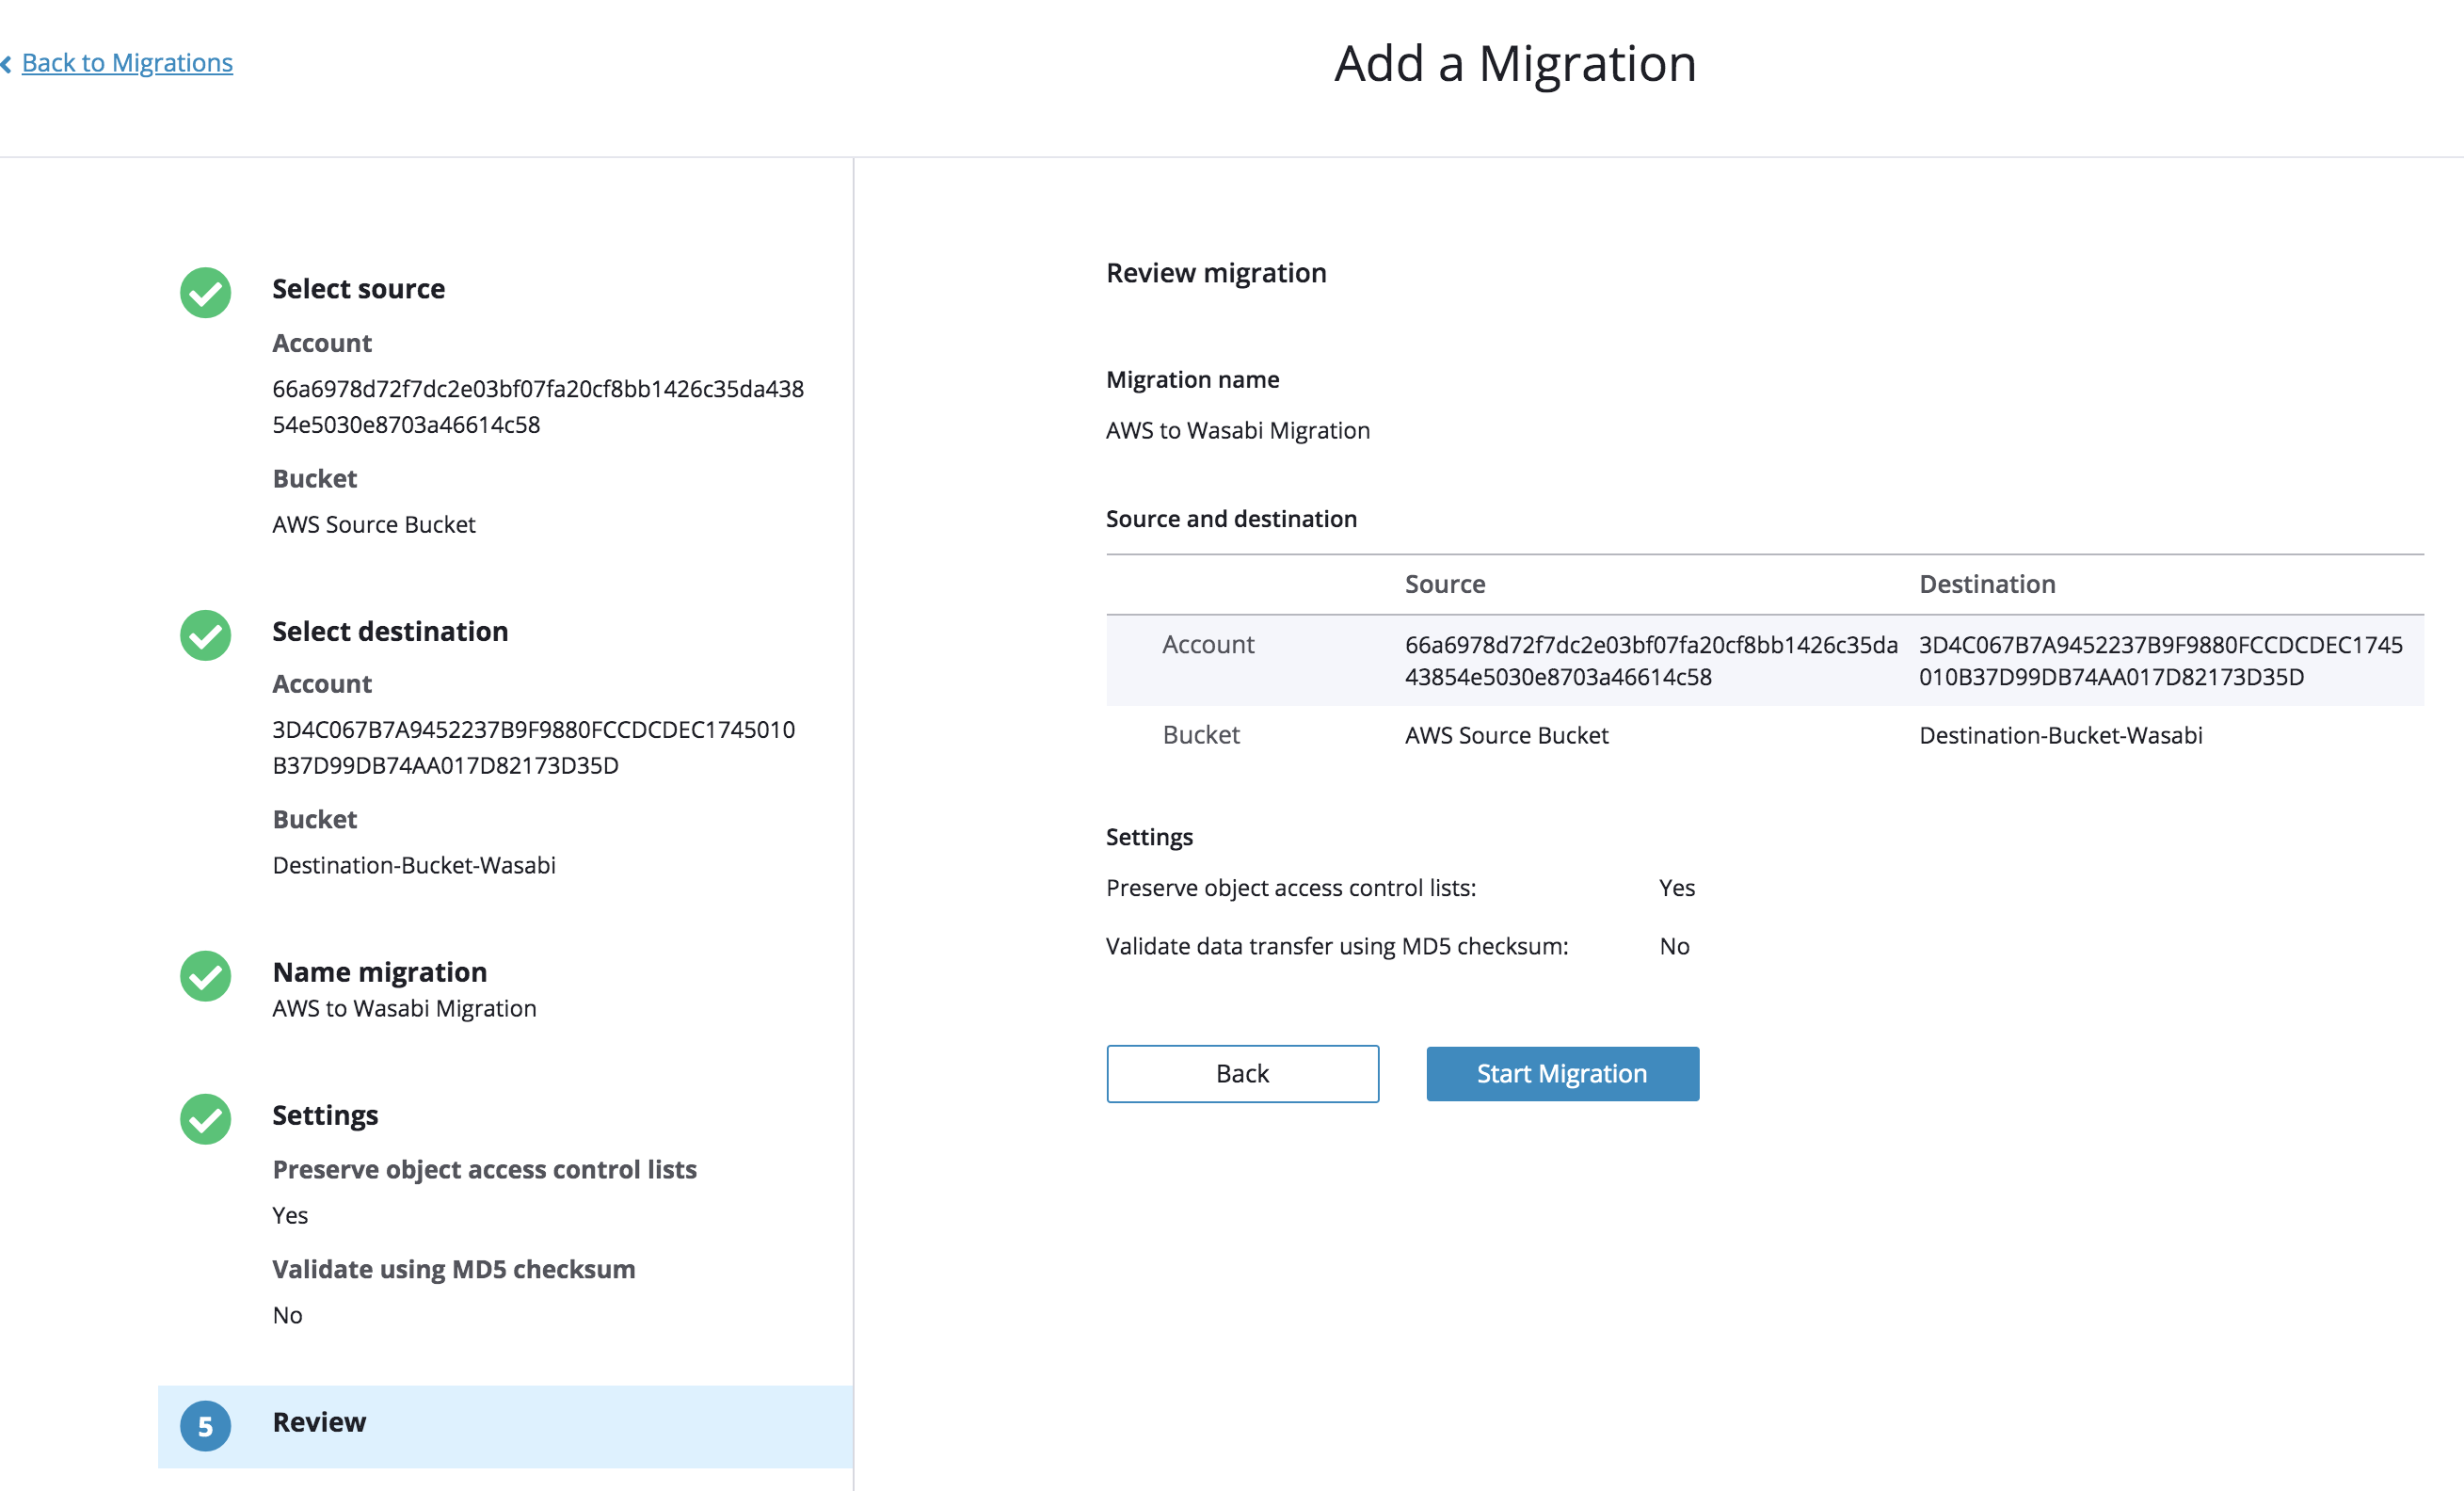
Review the migration details and then click Start Migration.
Once the migration starts, progress report is available for review:
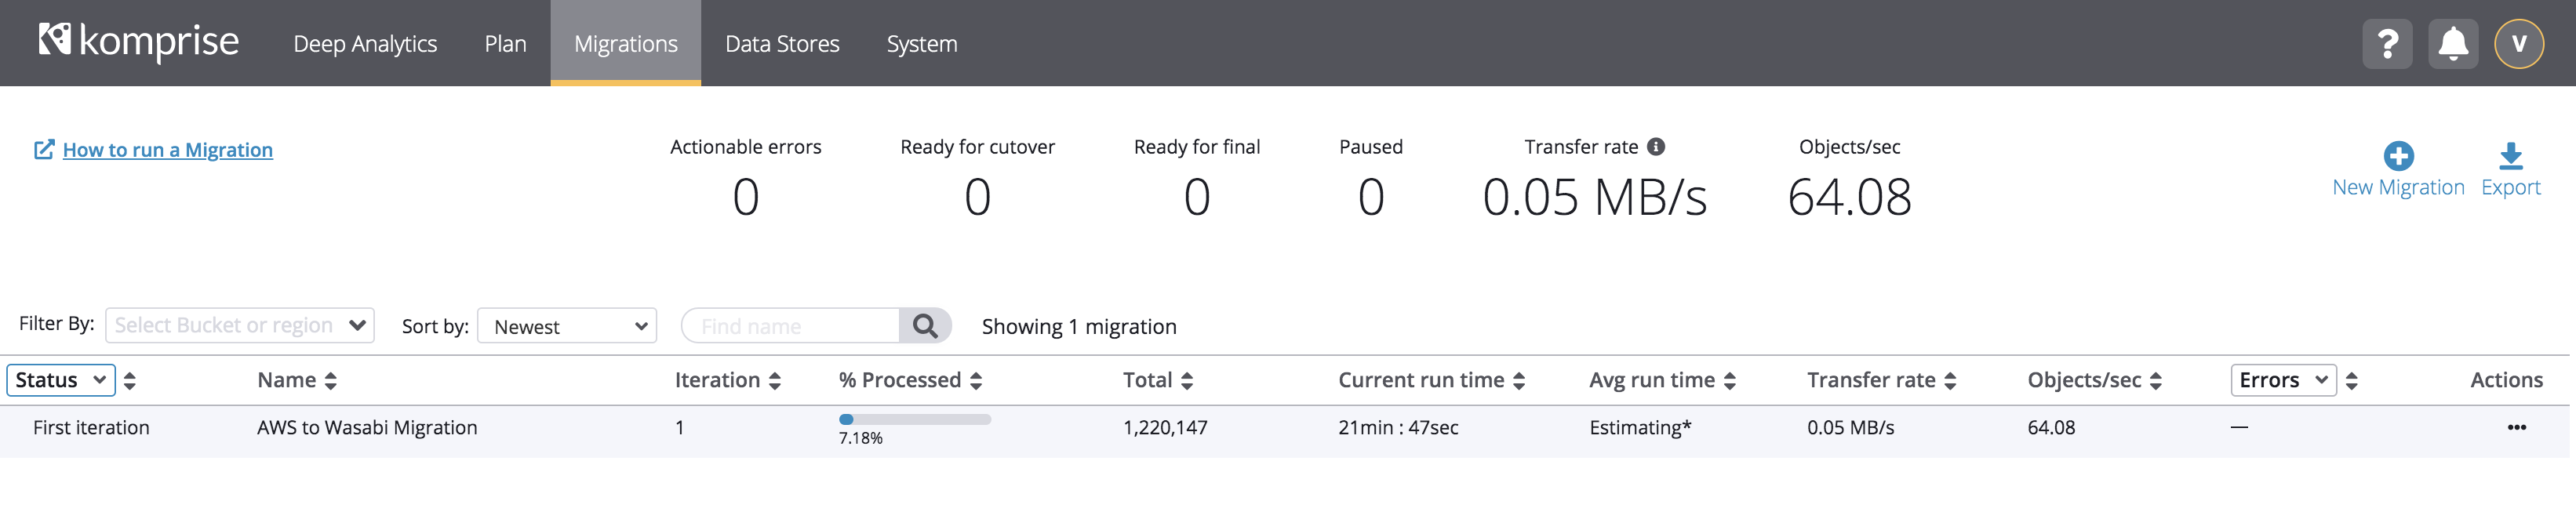
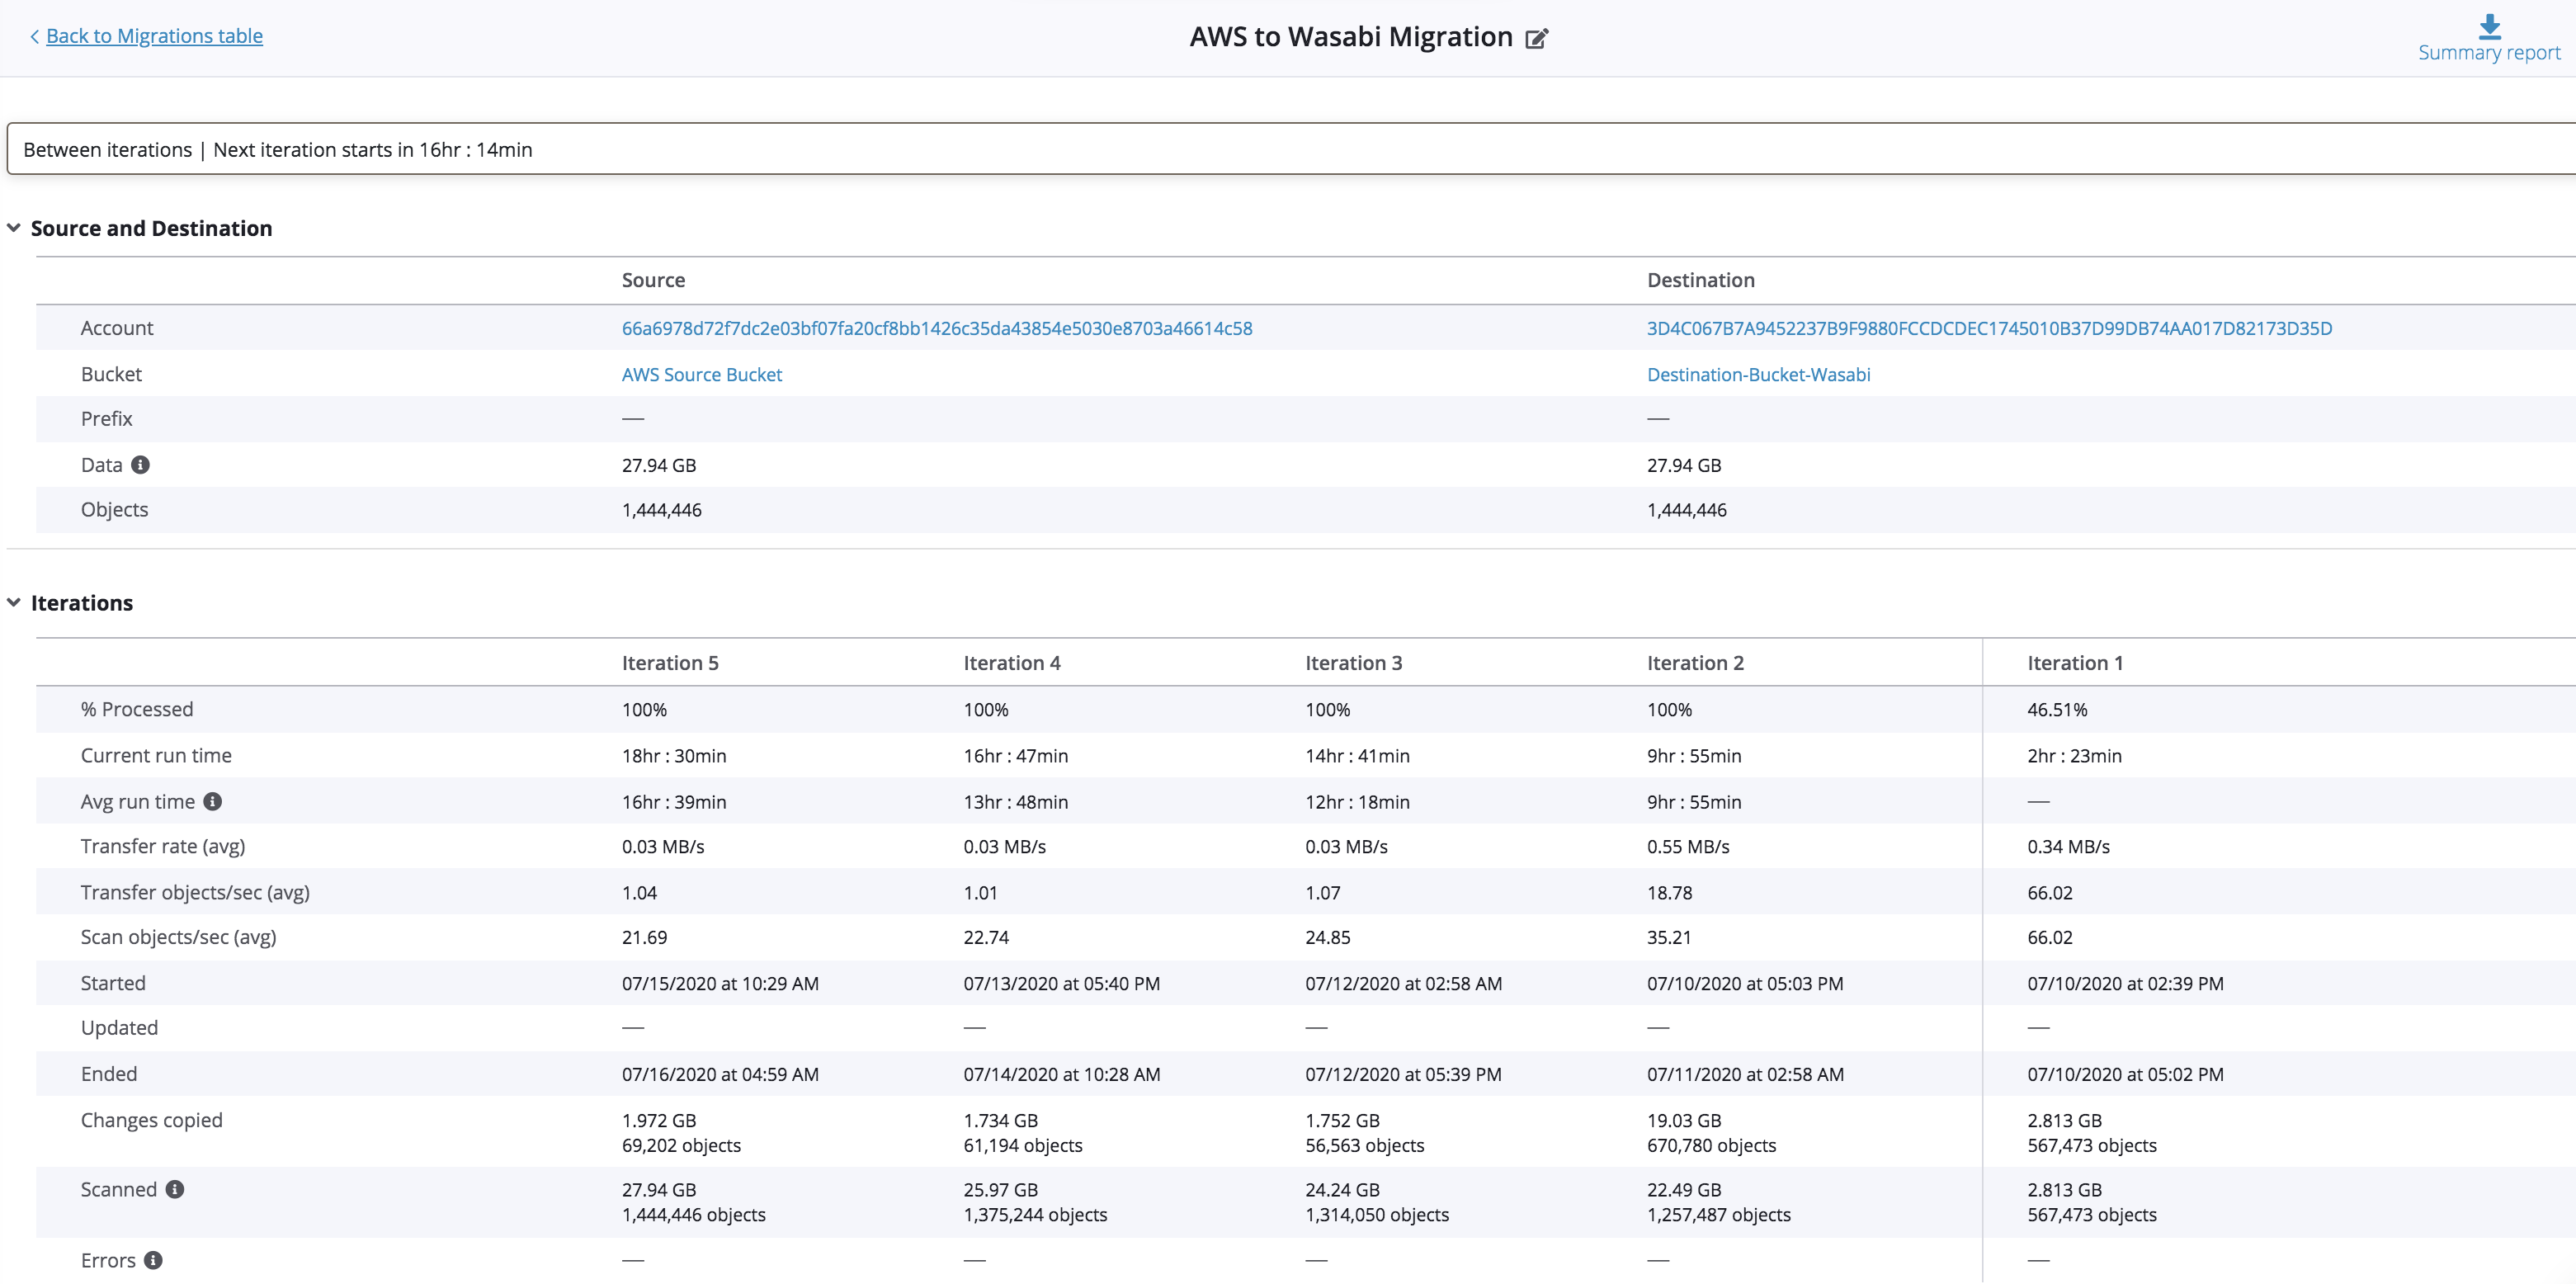
Optionally, click on "..." and choose View details to review a detailed summary of the migration job.
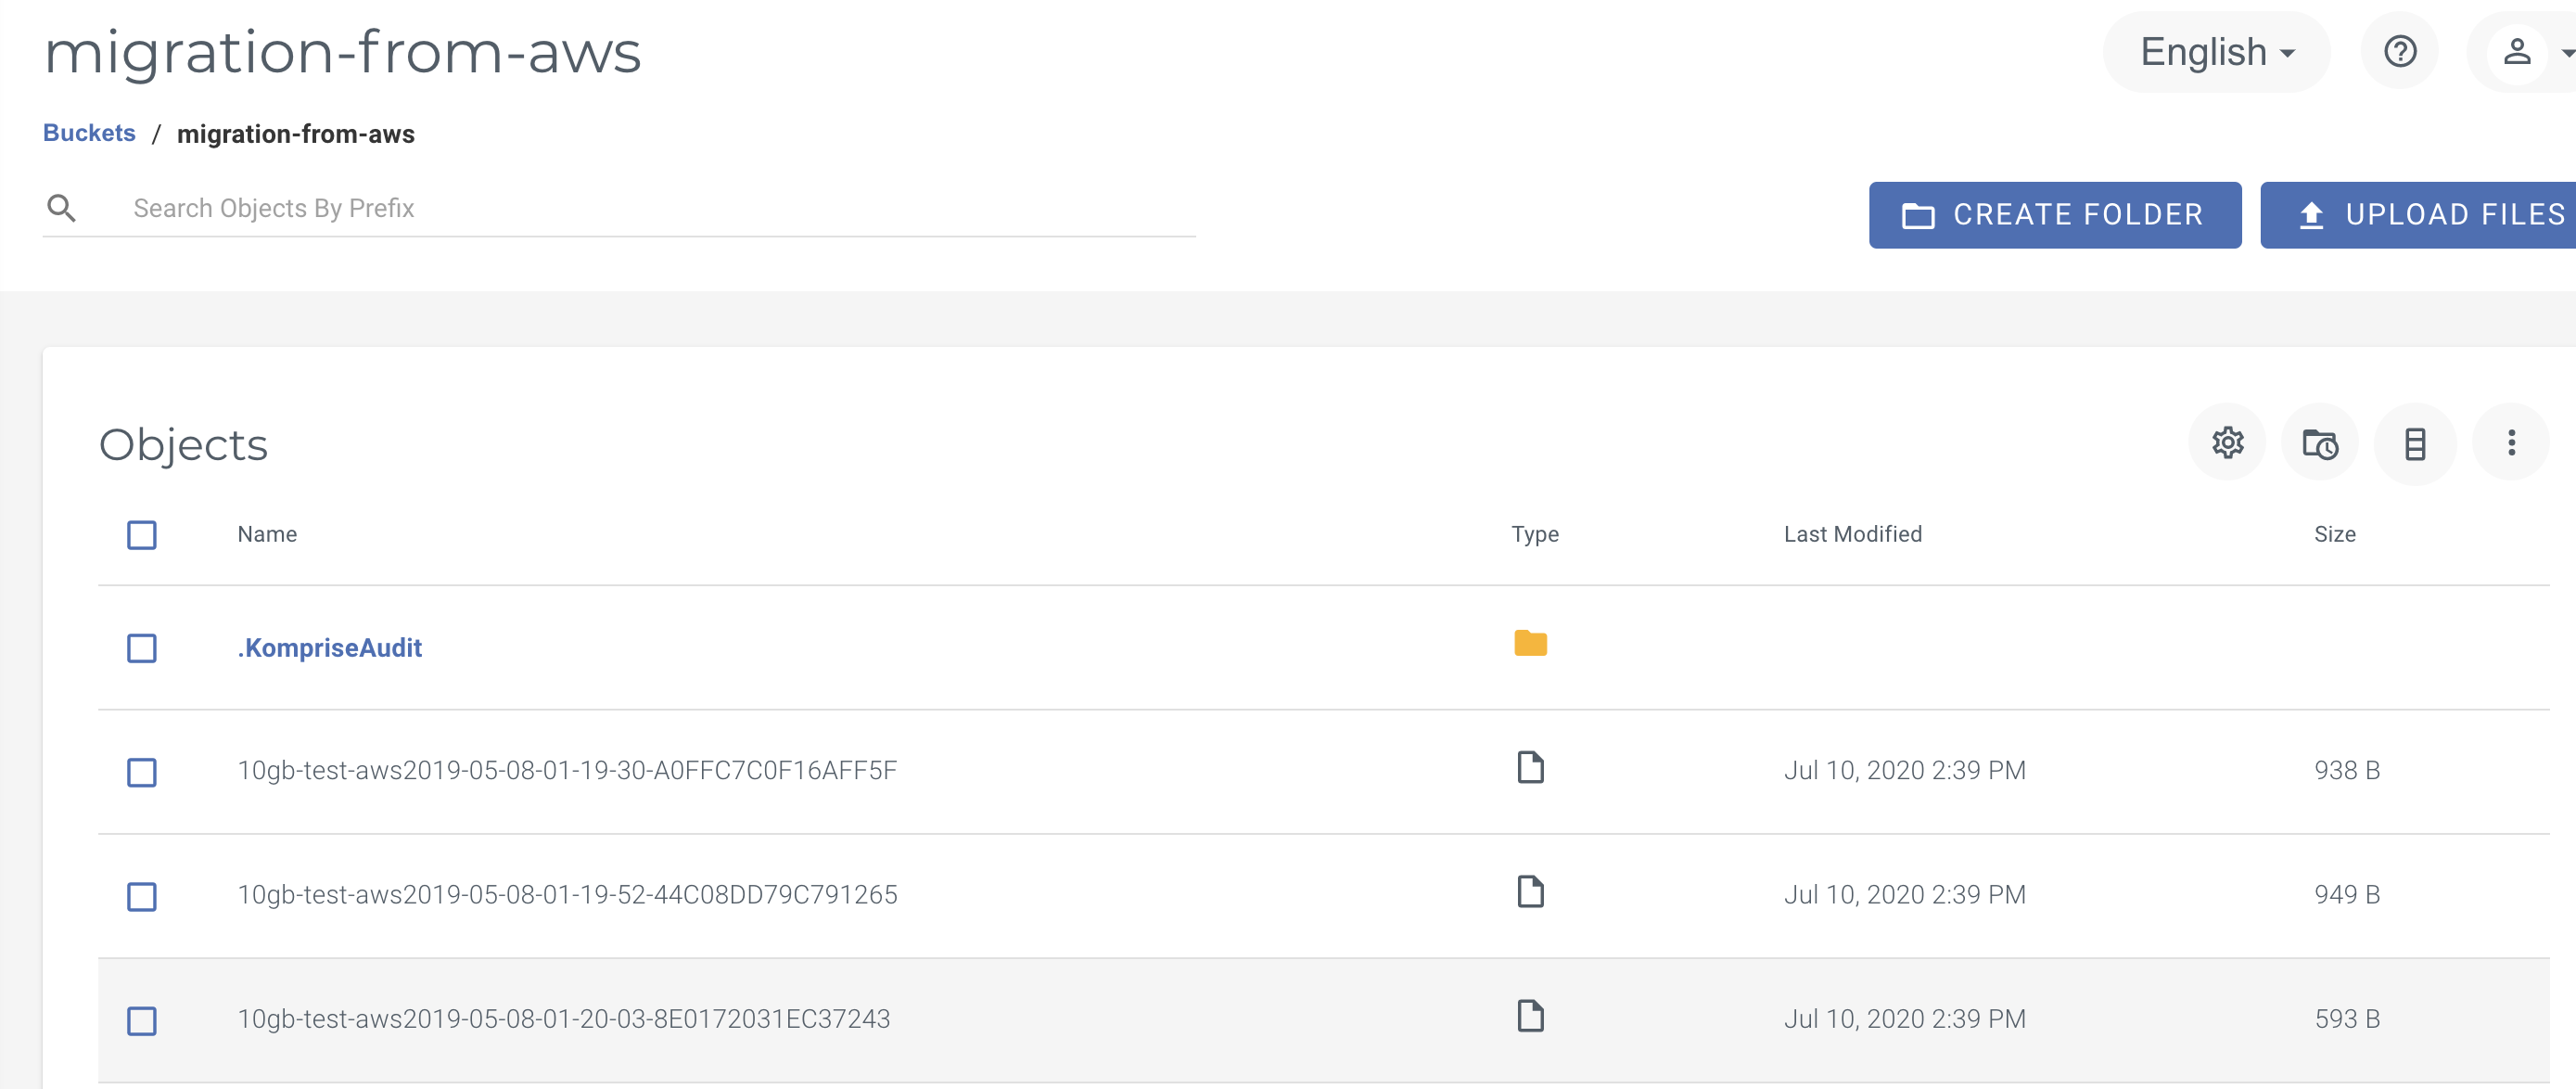
Once migration completes, all of the objects migrated will be found in Wasabi bucket: