Wasabi has been validated for use with Marquis Broadcast’s Project Parking. Project Parking enables archiving of Avid Media Composer projects and media to Wasabi storage.
Project Parking understands the relationship between the Avid projects and media files, allowing it to identify exactly what is used within a project, or even individual bins within a project. Users can then set the application to create archives of their projects, either individually or as recurring scheduled actions. Users can then restore either complete projects or a selection of bins back into their systems when required.
Note: The data restoration process is handled by your specific backup software application. As there are many potential variables that will affect your unique environment, it is strongly recommended that you seek the guidance of your backup software’s technical support team in the event that you encounter difficulty or have application-specific inquiries.
1. Requirements
Project Parking v 7.5 installed and licensed
S3 plugin installed in Project Parking
An active Wasabi account
Wasabi Bucket - See our Bucket Creation Guide
Access & Secret Key Pair - See our Access Keys Guide
2. Configure Wasabi as an Archival Location
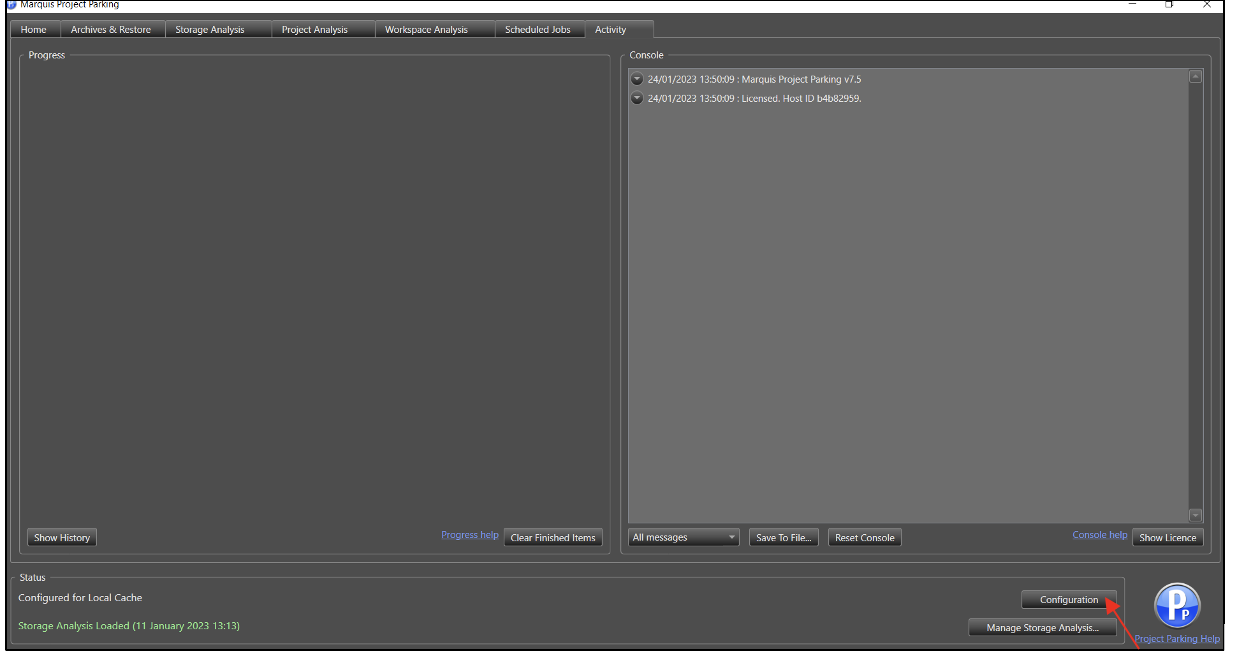
2.1. Log in to Project Parking and click Configuration at the bottom right corner.
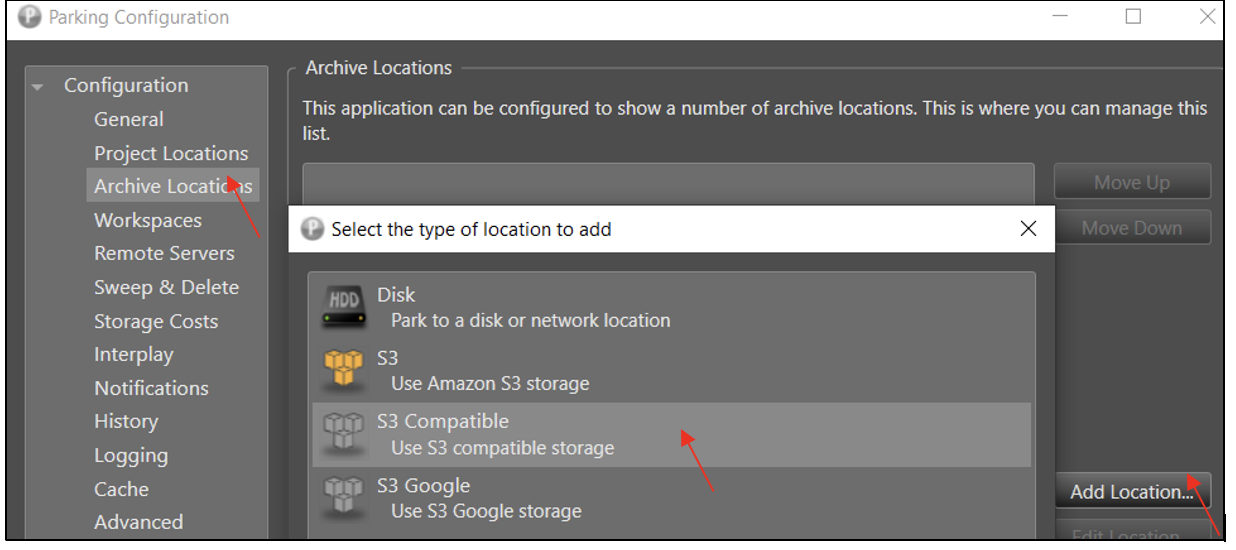
2.2. In the Configuration menu, navigate to Archive Locations, select Add Location. Select S3 Compatible to configure Wasabi storage.
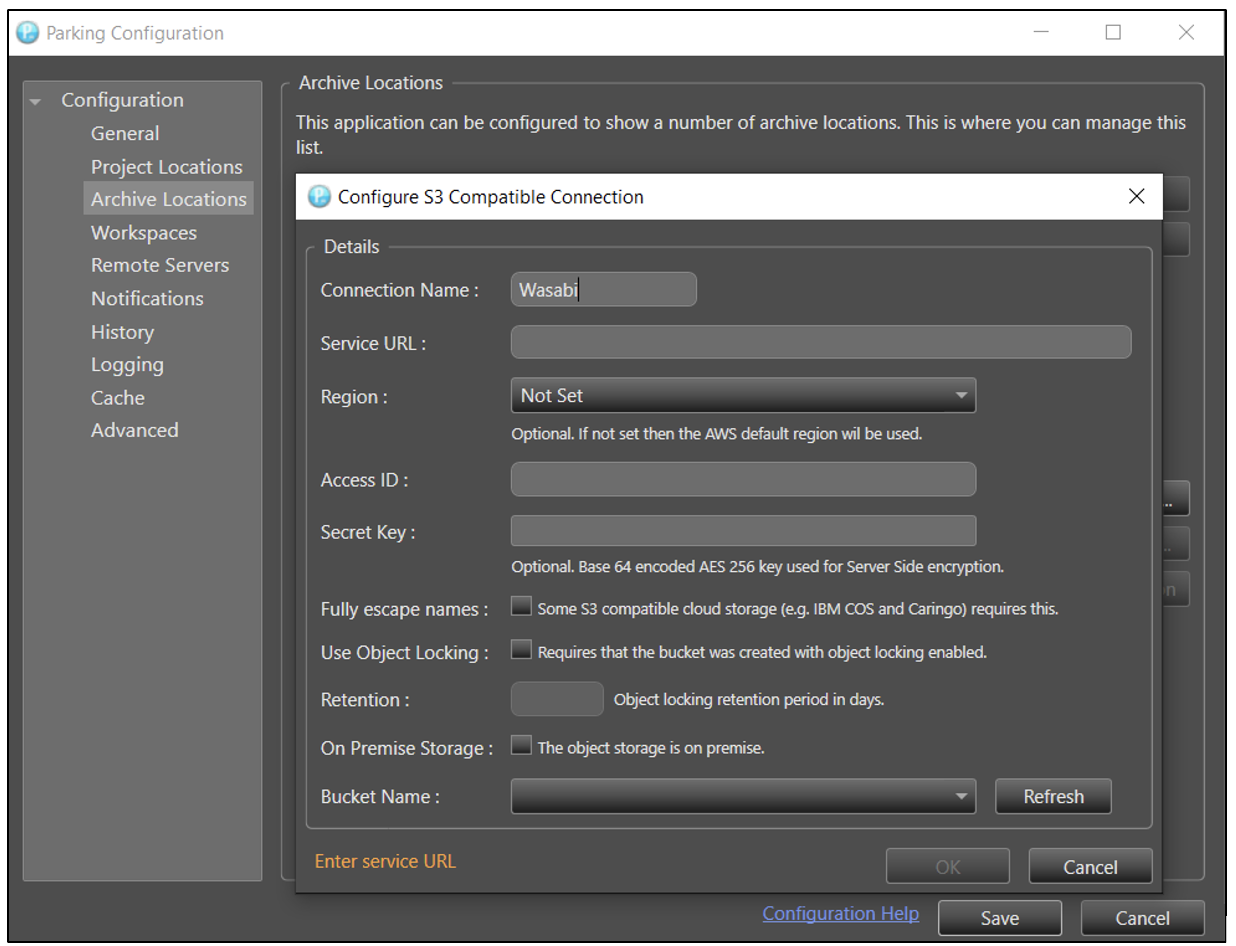
2.3. Provide the following details and click OK.
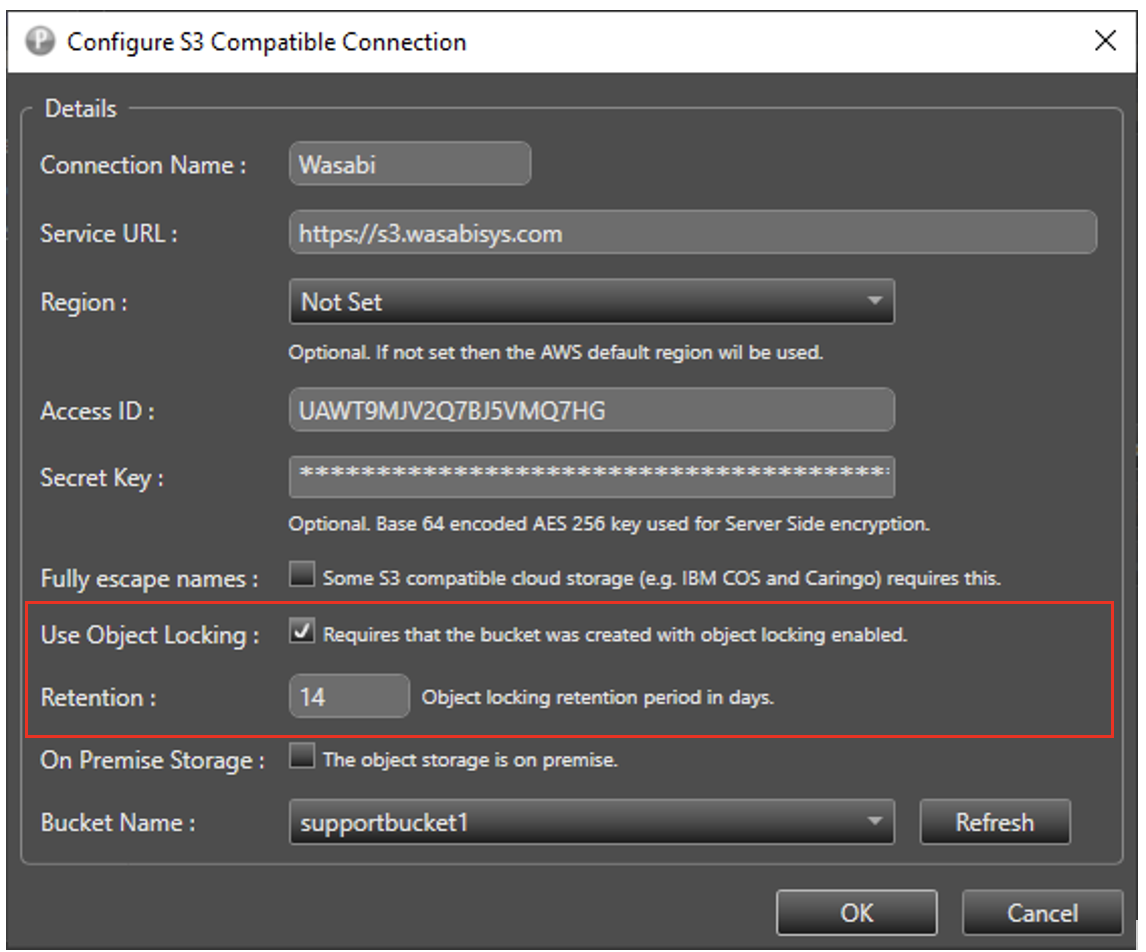
Connection Name - provide a name for the connection
URL - endpoint URL of the Wasabi region where the bucket is located
Access ID - the Wasabi Access Key
Secret Key - the Wasabi Secret Key
Retention - retention period, if Object Lock is configured
Bucket name - the name of the bucket created to store the files
Click Save to close the Configuration menu.
Note: For information on the Wasabi service URLs, refer to our Wasabi Service URLs article.
3. Configure an Archive Job
3.1. Navigate to the Home page. Your Project Locations will be listed.
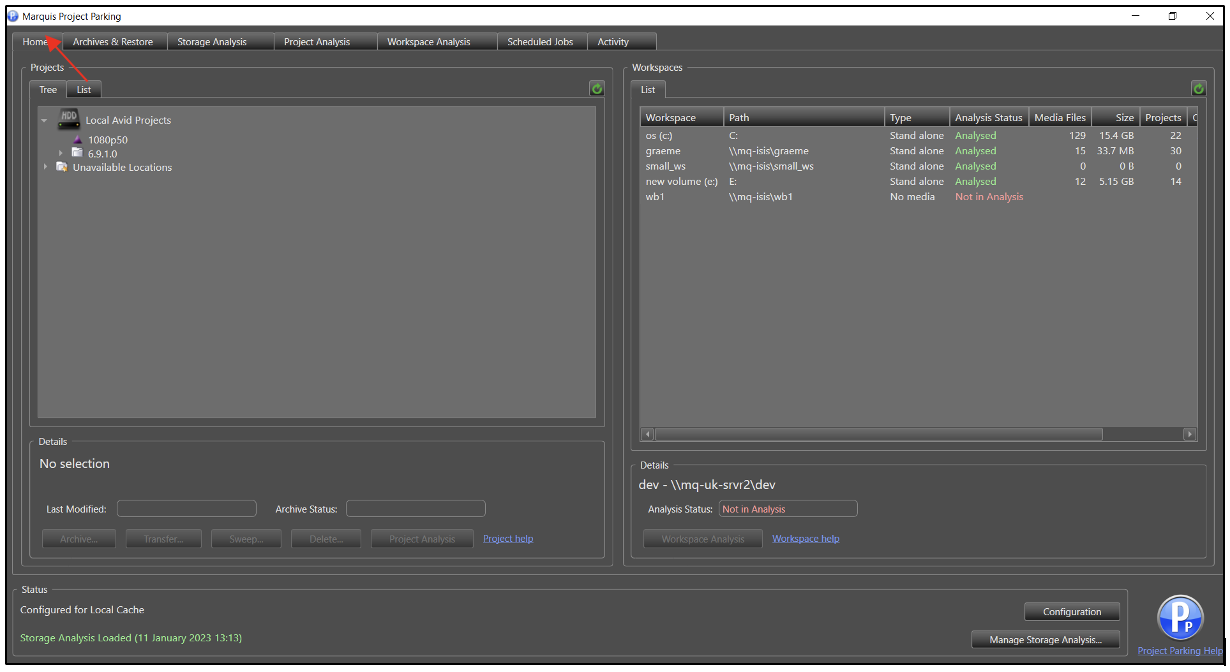
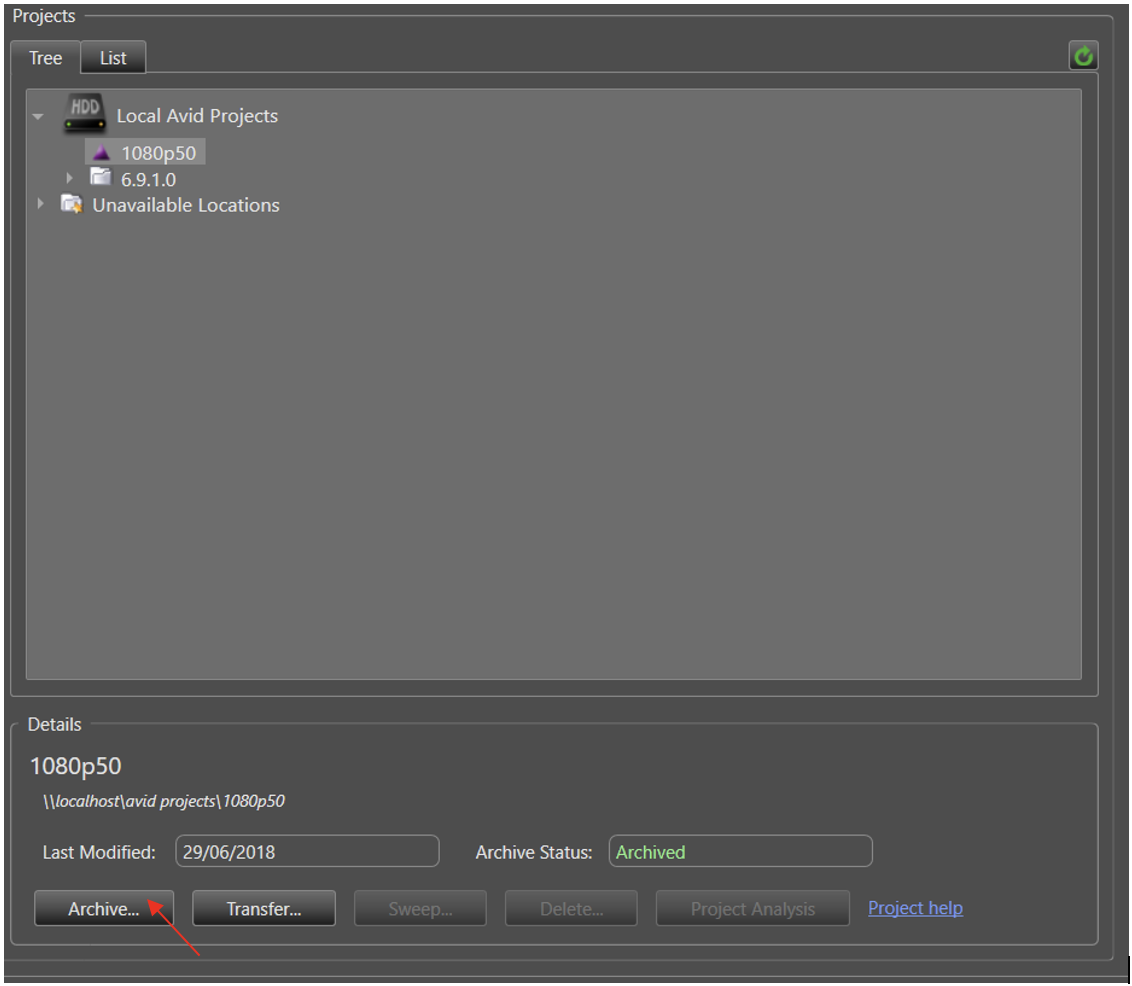
3.2. Select a project and then press the Archive button on the Projects screen.
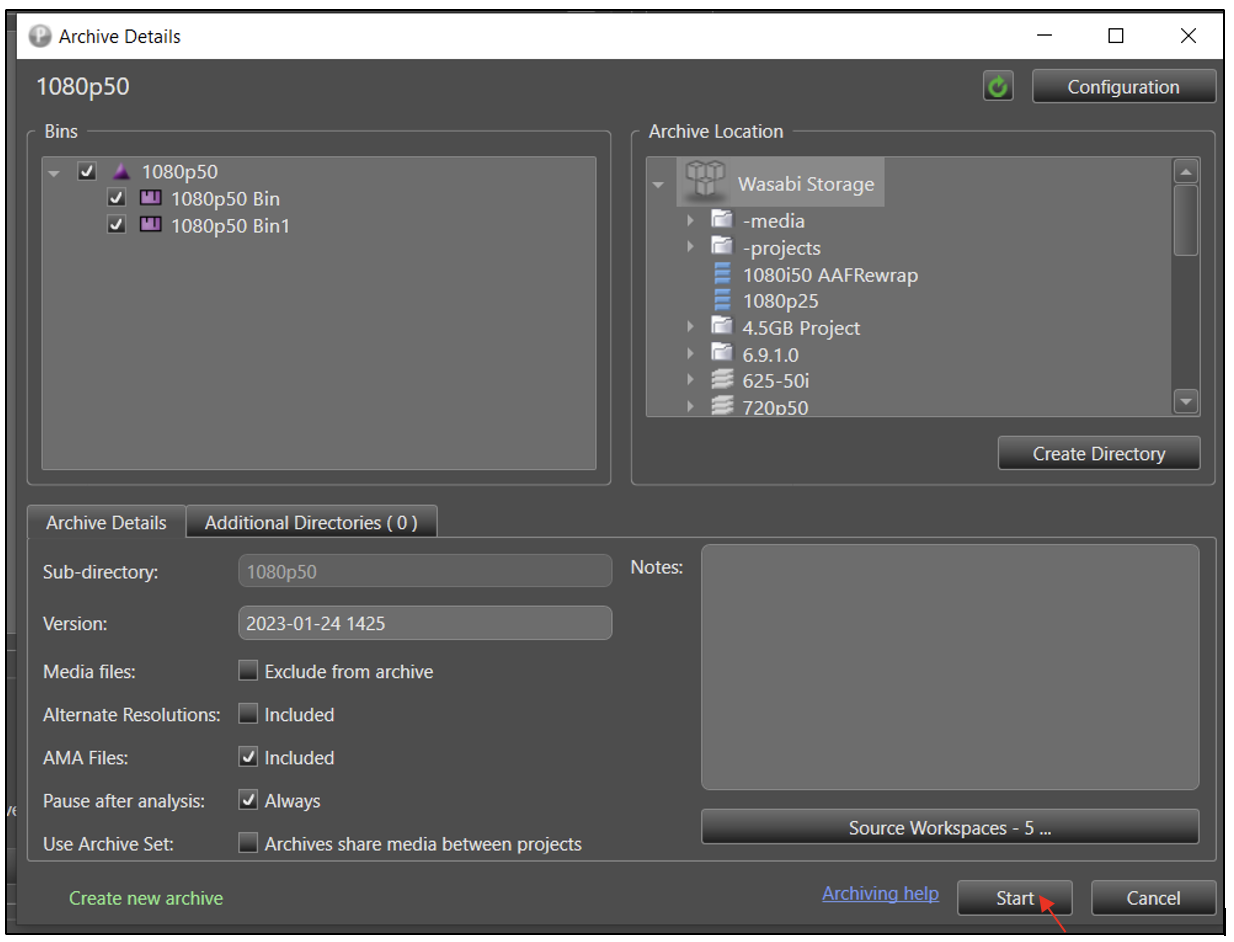
3.3. Select/Deselect every bin in the project you wish to archive, and then make sure you select your Wasabi Storage as the destination. Press Start.
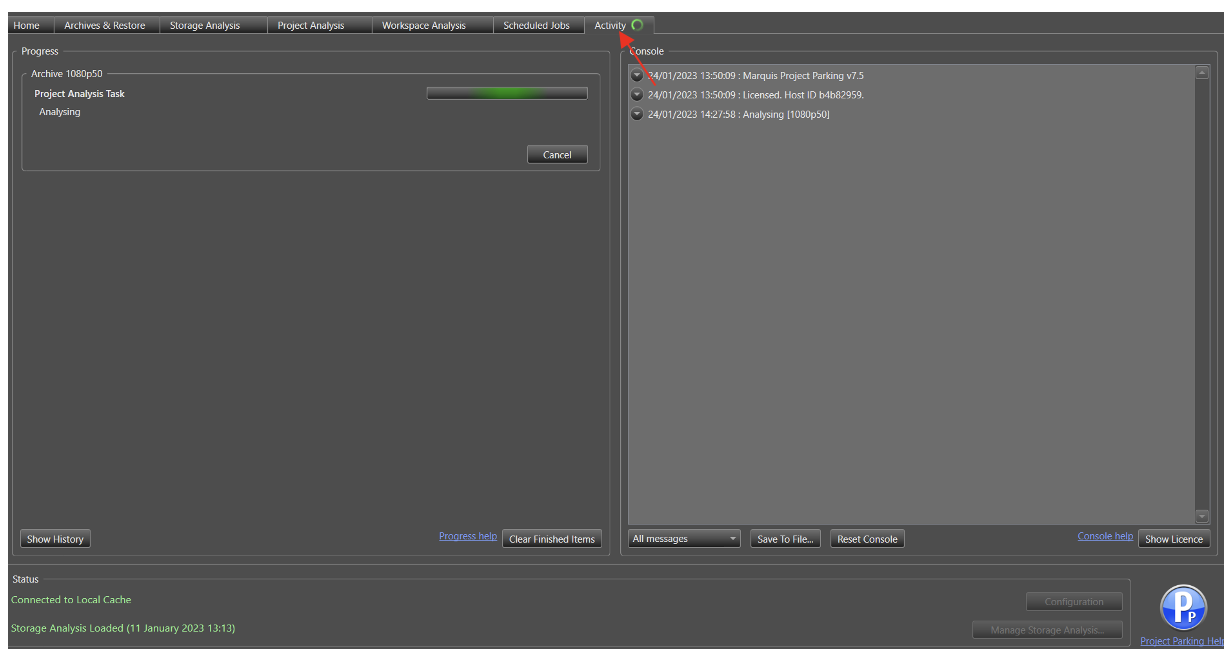
3.4. To monitor the archive, navigate to the Activity tab, and the project being analyzed will be displayed, then click on the archive.
4. Performing a restore
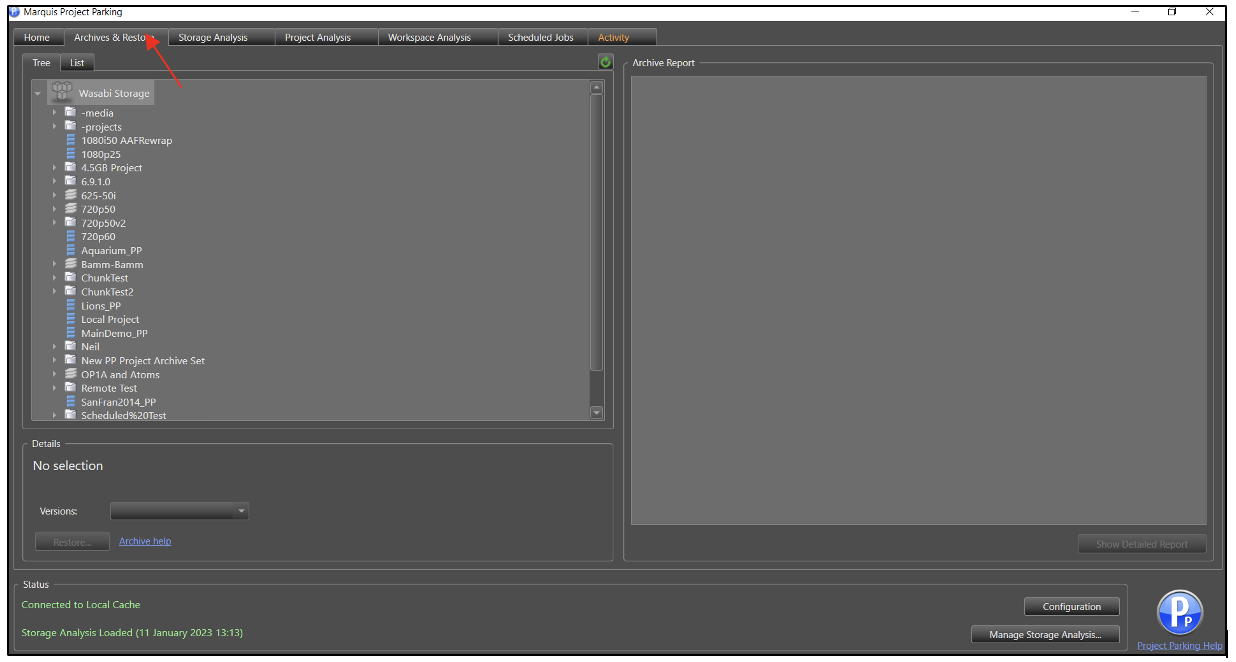
4.1. Navigate to the Archive & Restore tab. You will see your Wasabi storage and all projects you have archived.
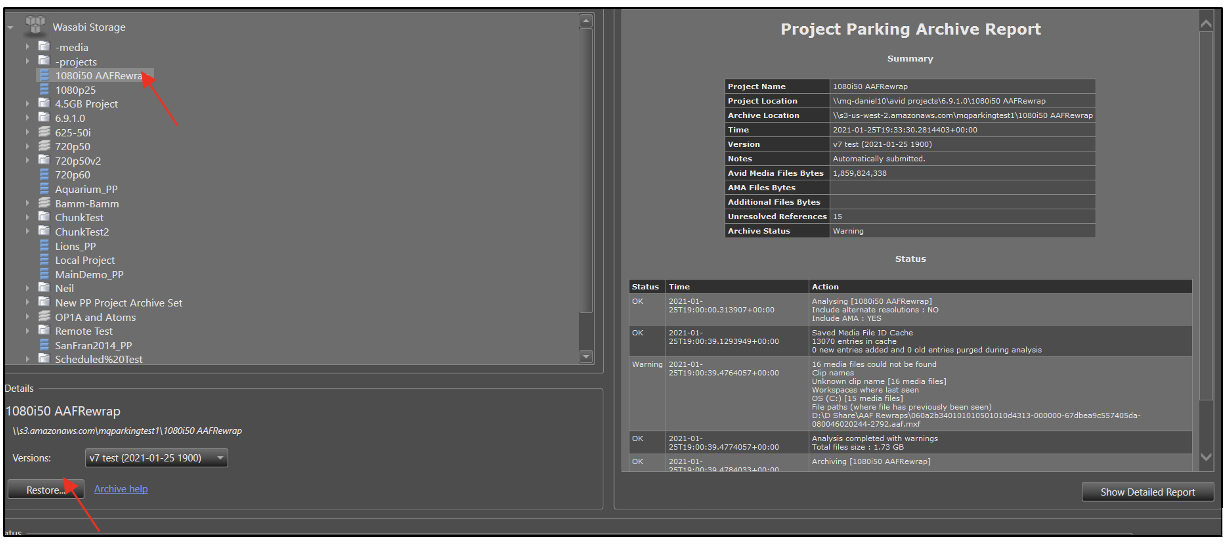
4.2. Select the Project you wish to restore, and it will load the Archive Report for that project. To start the restore, click Restore.
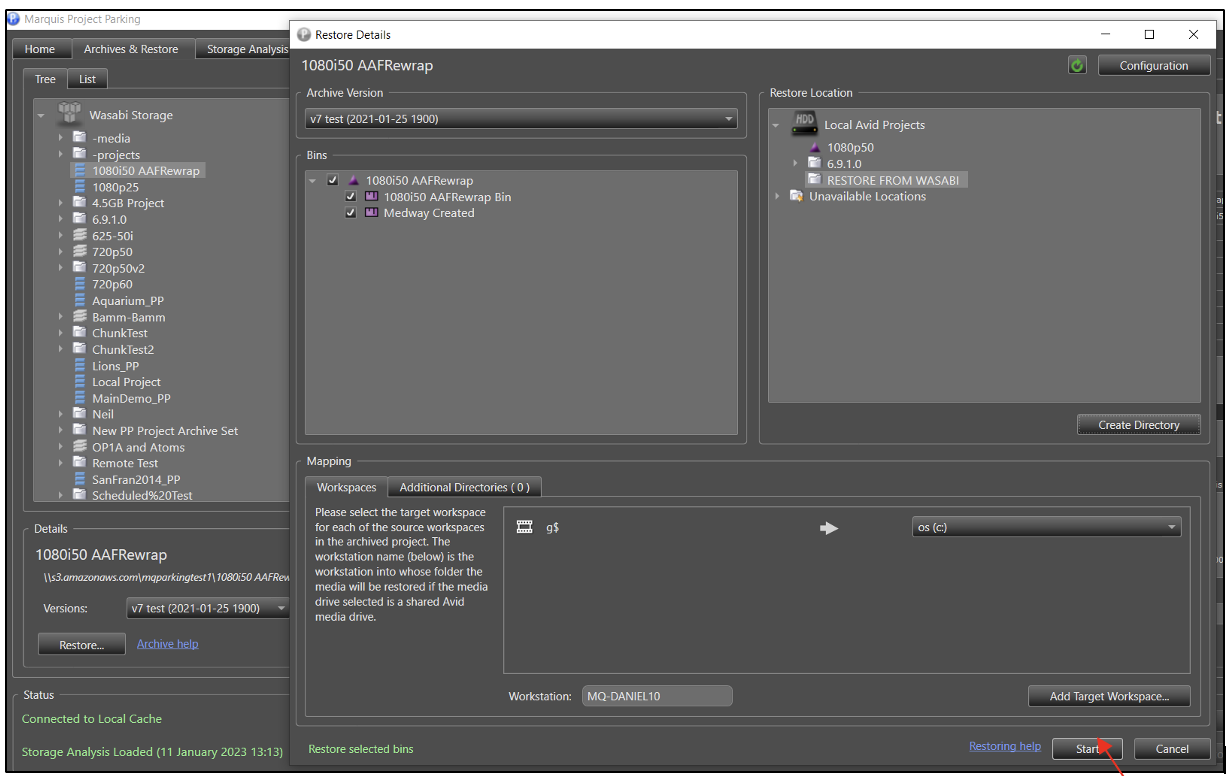
4.3. Once this menu has opened, select all the bins to restore, and the Project Location to restore the project to. Then, the target workspace for each source workspace in the archived project. Once configured, click Start.
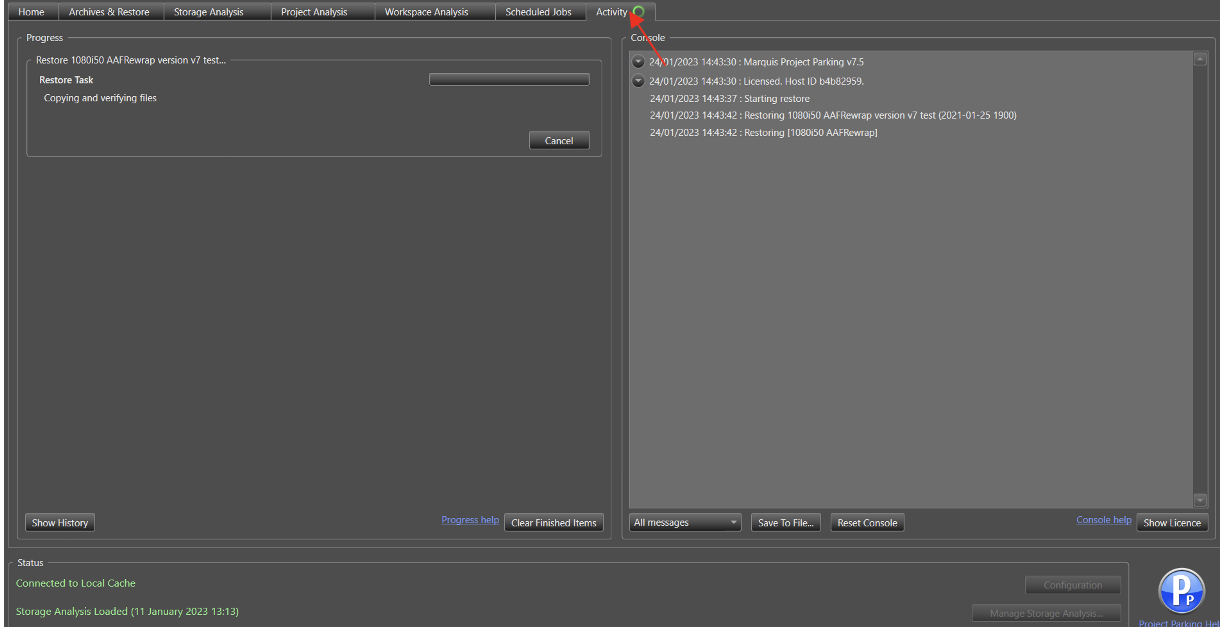
4.4 Navigate to the Activity tab, and the restore will take place.
5. Object Lock Configuration
Project Parking now supports Object Lock with release 7.5. Object Lock is supported in Compliance mode.
To enable Object Lock, follow the instructions below.
6.1. Log in to the Wasabi console and create an Object Lock-enabled bucket.
6.2. Follow steps 2.1 - 2.3 in the section Configure Wasabi as an Archival Location to add a new archival location.
6.3. Select the Use Object Lock check box to enable object lock. Configure the Object Locking Retention Period (days) and click Submit.