Nakivo has been validated for use with Wasabi. Follow steps outlined below to configure Wasabi as a cloud storage repository and start running backups. Nakivo supports Object Lock starting version 10.7, which is documented in Section 7 of this article.
1. Requirements
The following prerequisites apply to this document-
For Object lock support Nakivo software version 10.7 or higher is required.
Nakivo is installed and licensed. For this KB we have deployed Nakivo on Windows 2019 server.
An active Wasabi account.
2. Create a Wasabi bucket
2.1 Log in to Wasabi Console to create a new bucket.
Click Create Bucket to create a new standard bucket. Refer to Creating a Wasabi bucket for information on creating a bucket.
3. Add Wasabi account in Nakivo Inventory
To use Wasabi cloud storage on Nakivo, we start by adding the Wasabi account in Nakivo inventory. Follow the below steps to add your Wasabi account:
3.1 Launch Nakivo Backup & Replication
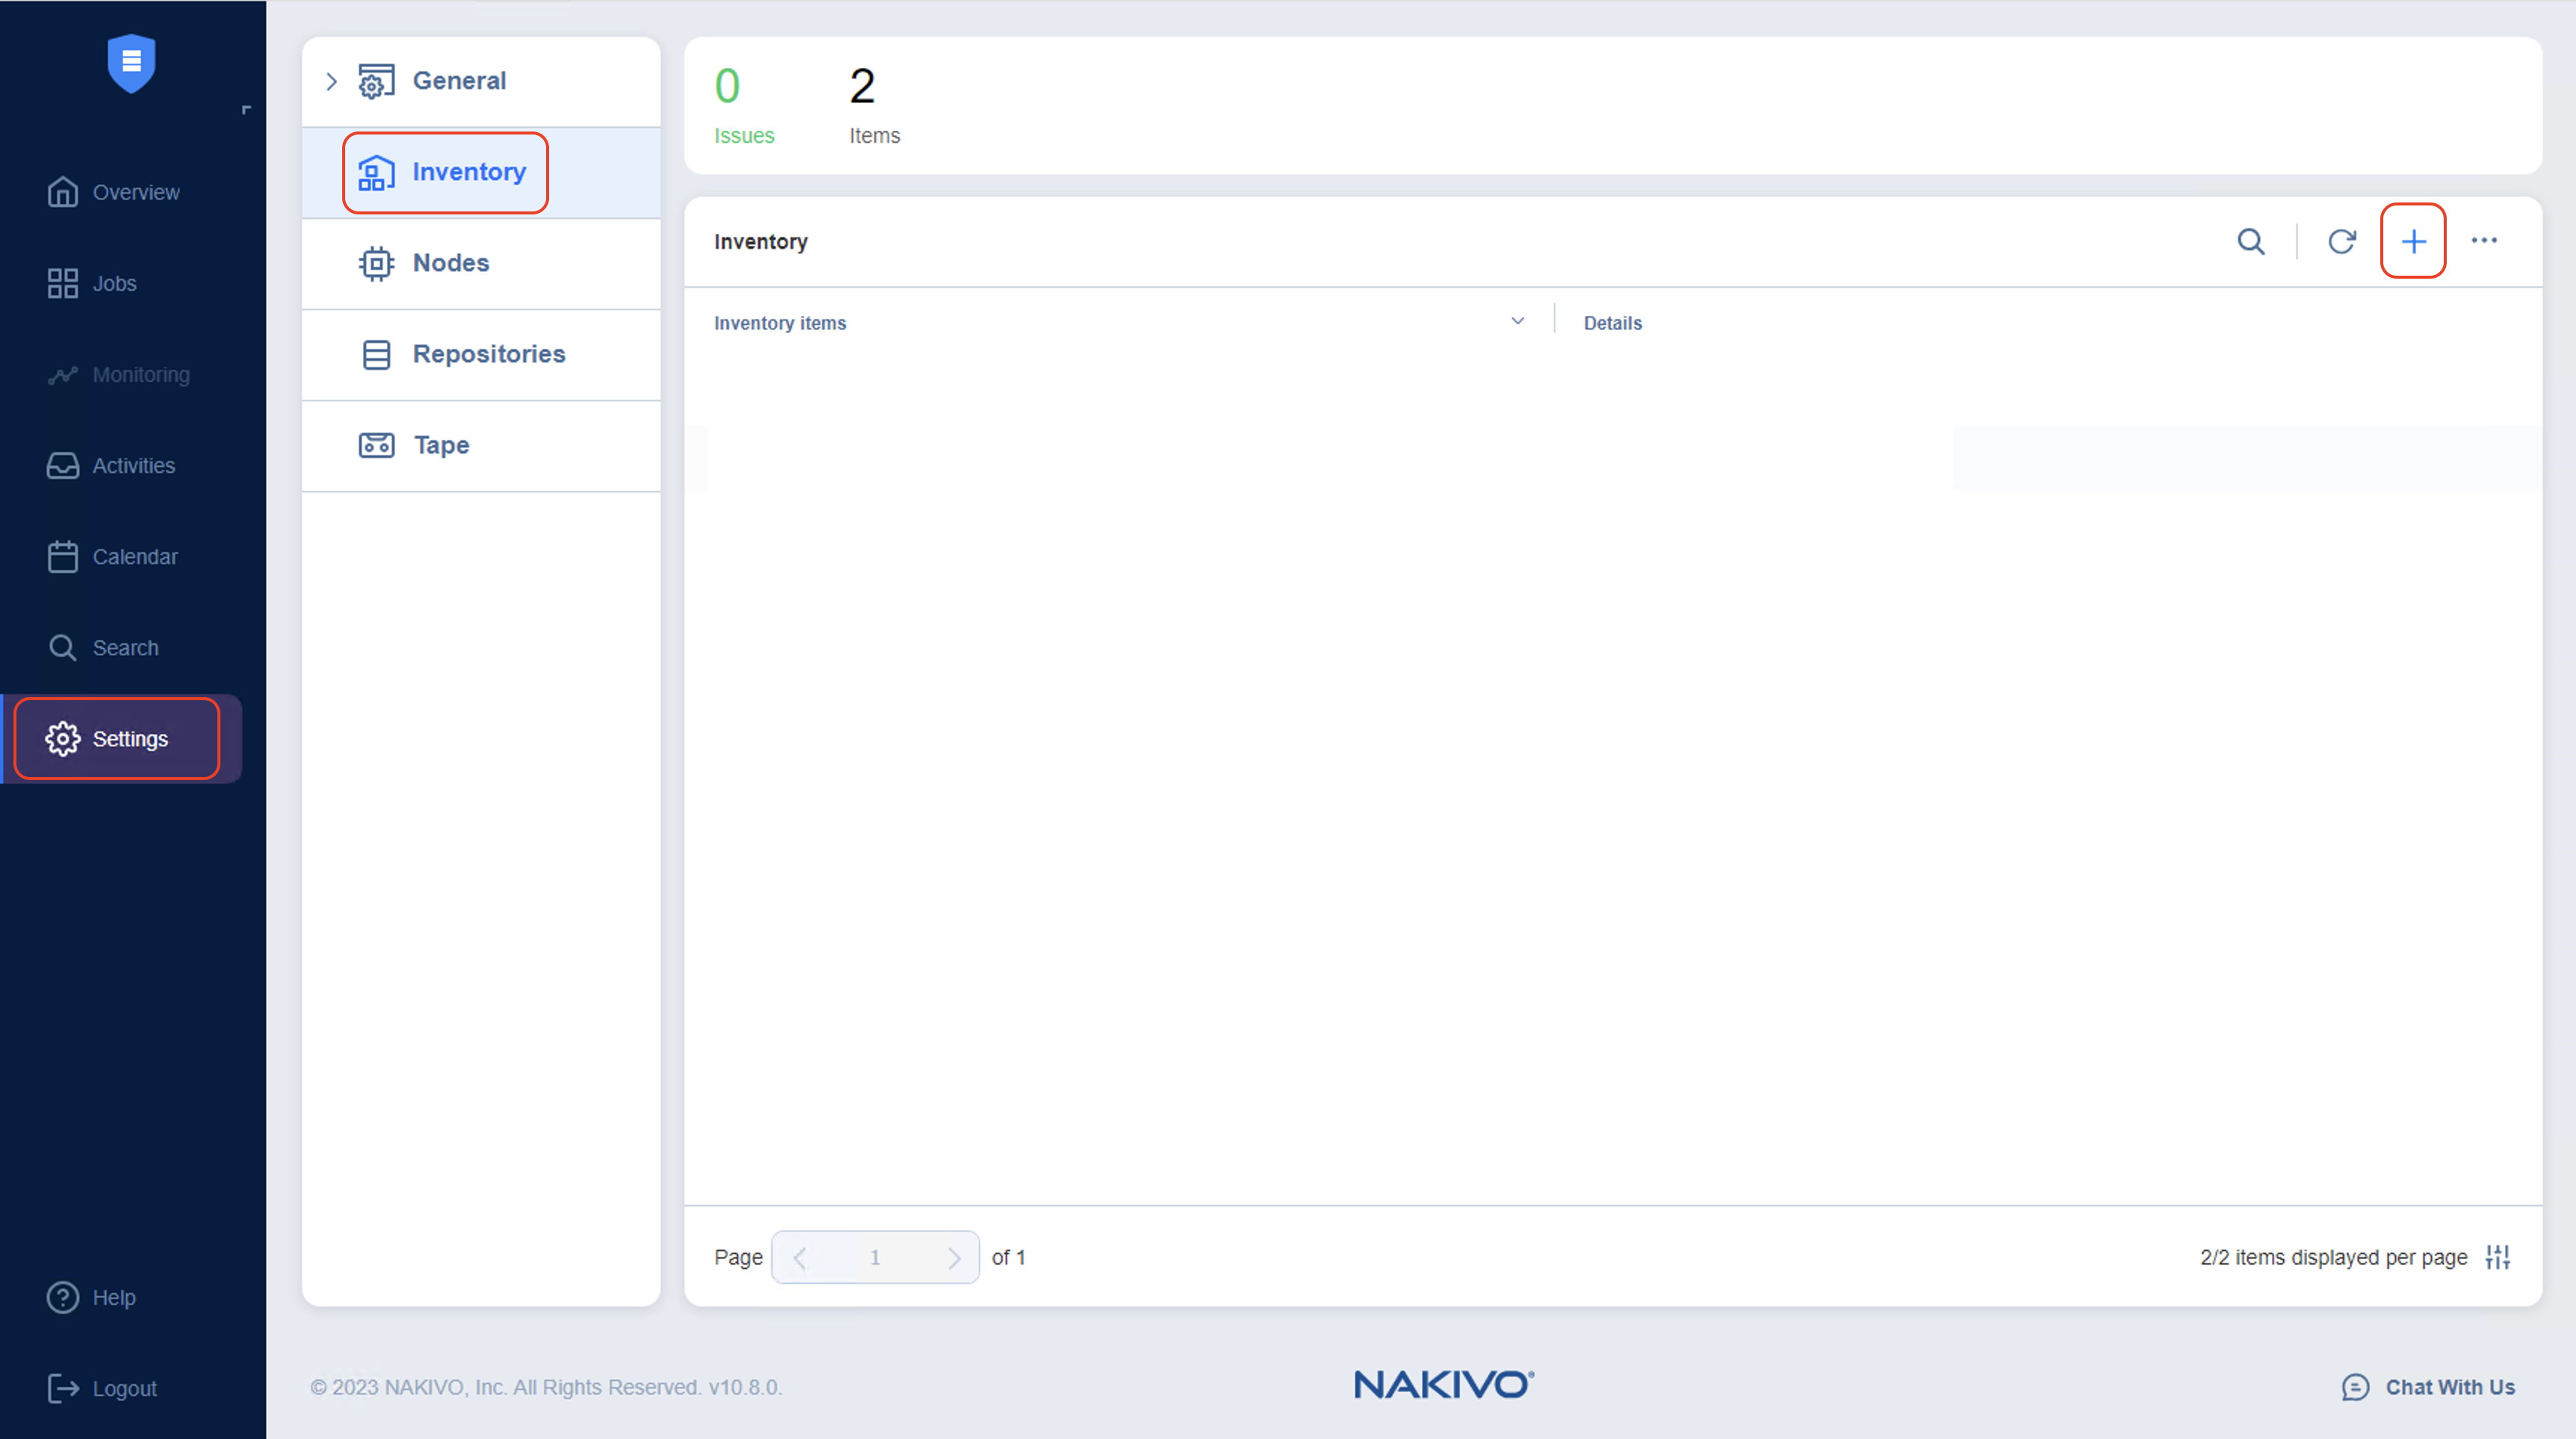
3.2 Navigate to Settings. Click Inventory, then click + to add a new inventory item.
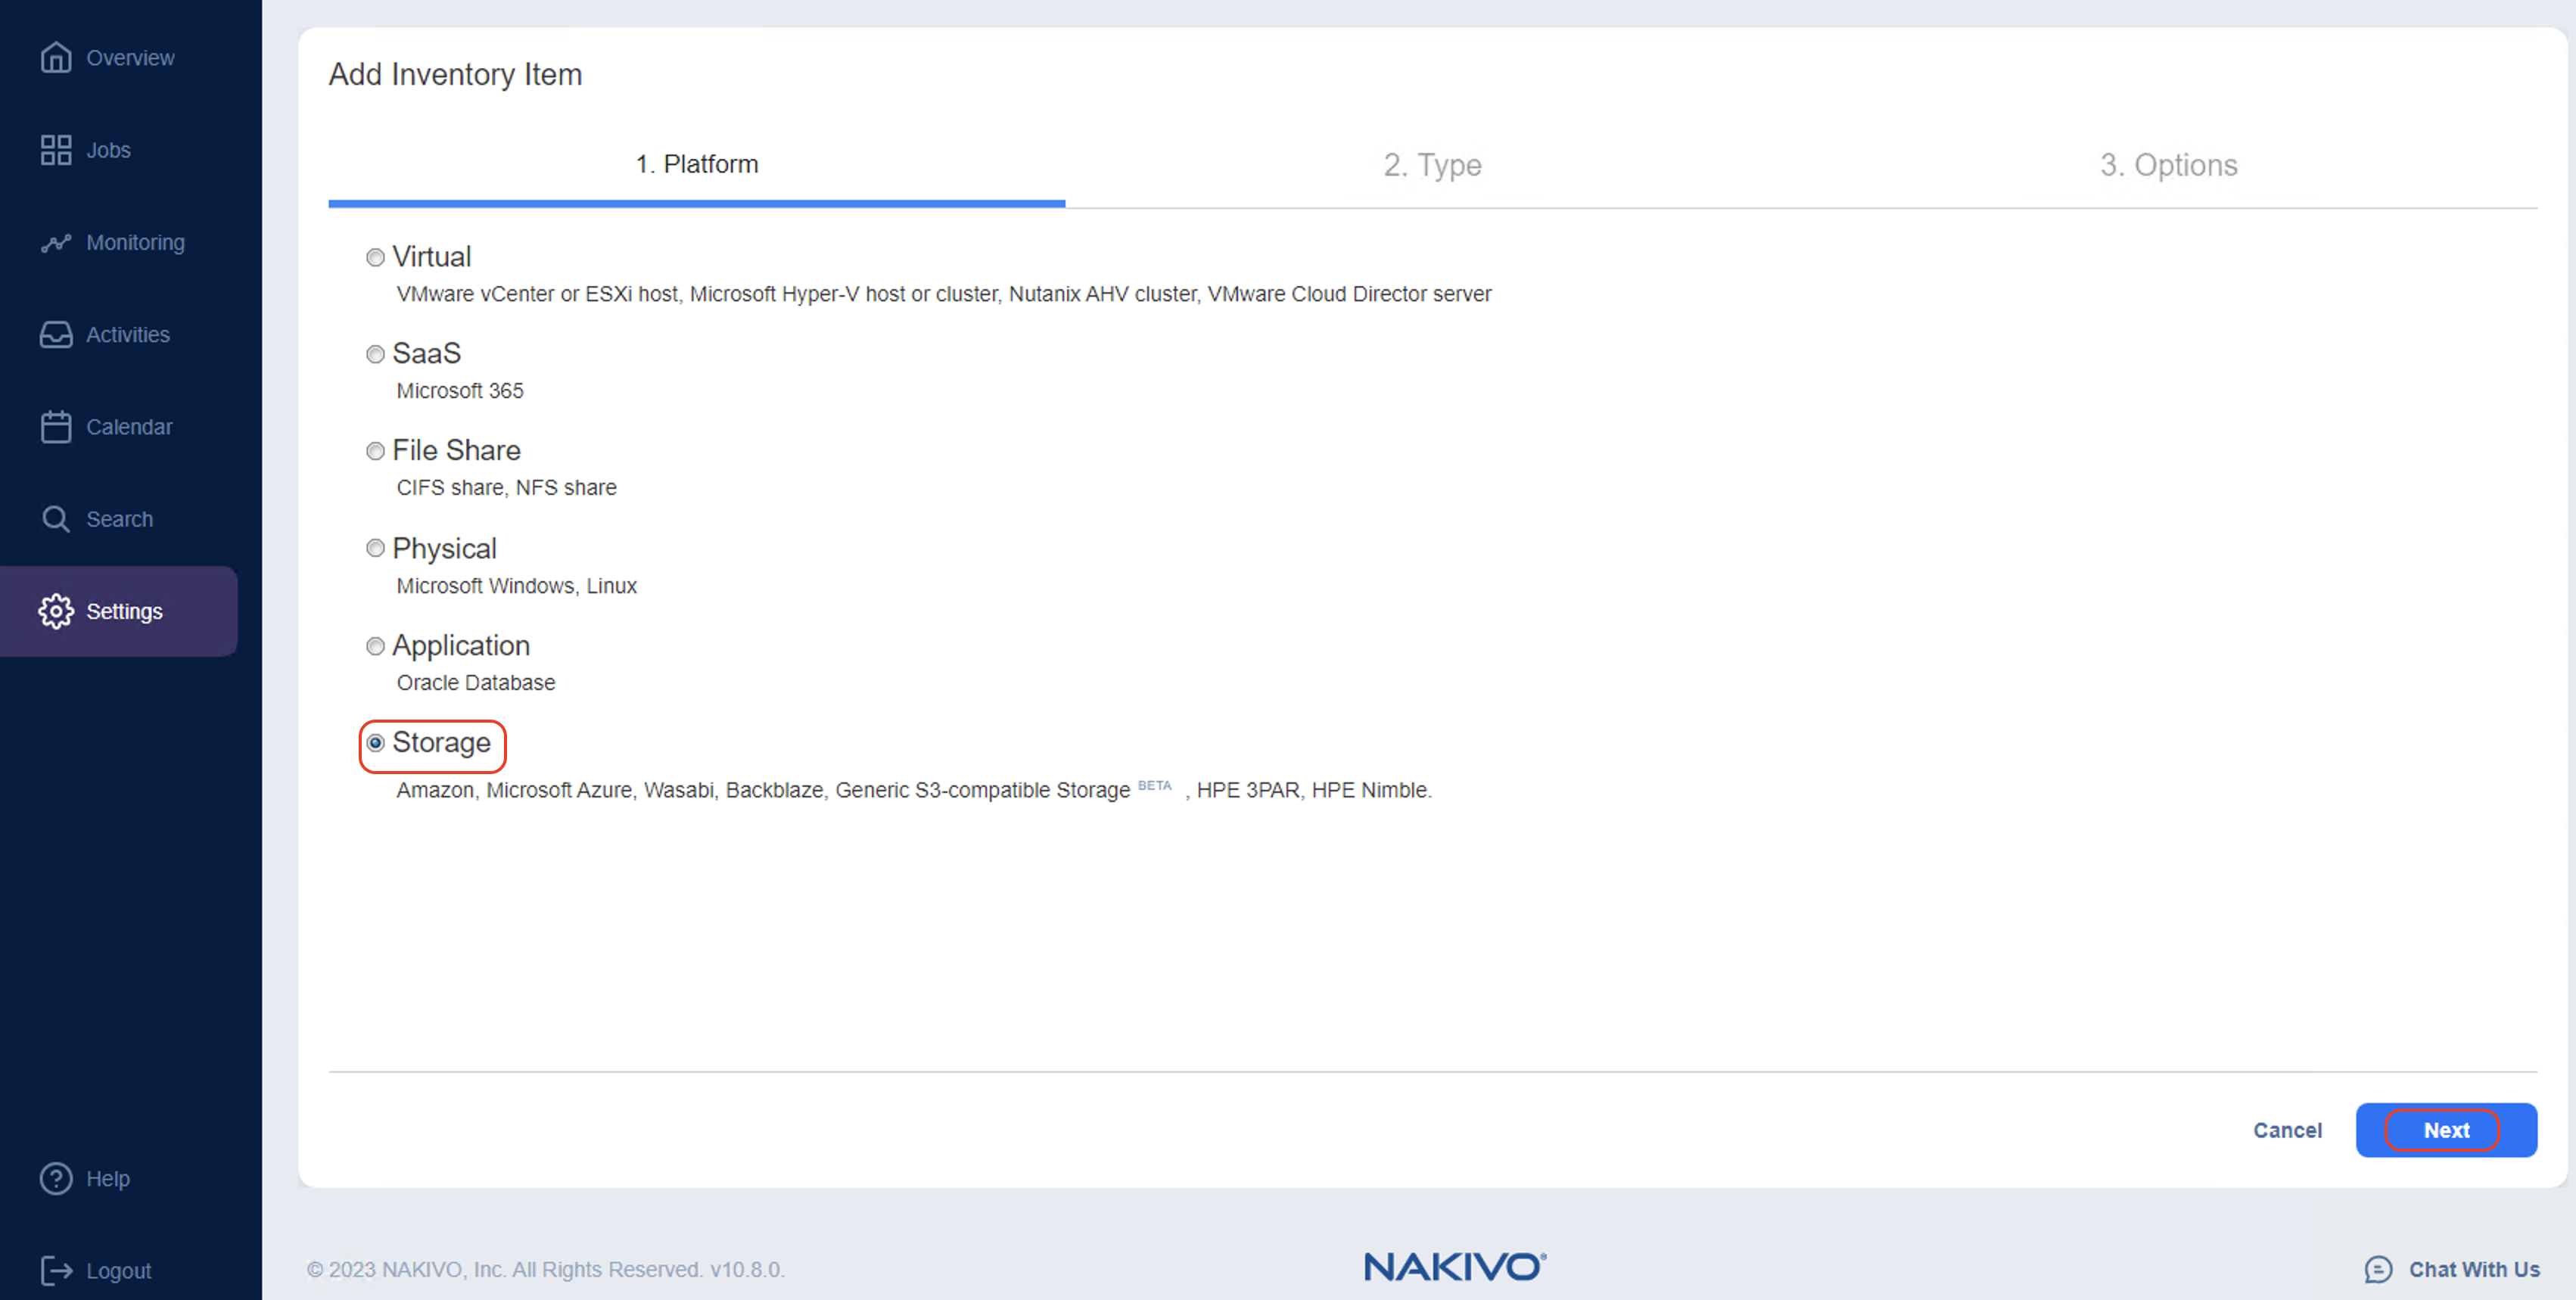
3.3 In the Add Inventory Item’s Platform tab, select Storage. Click Next.
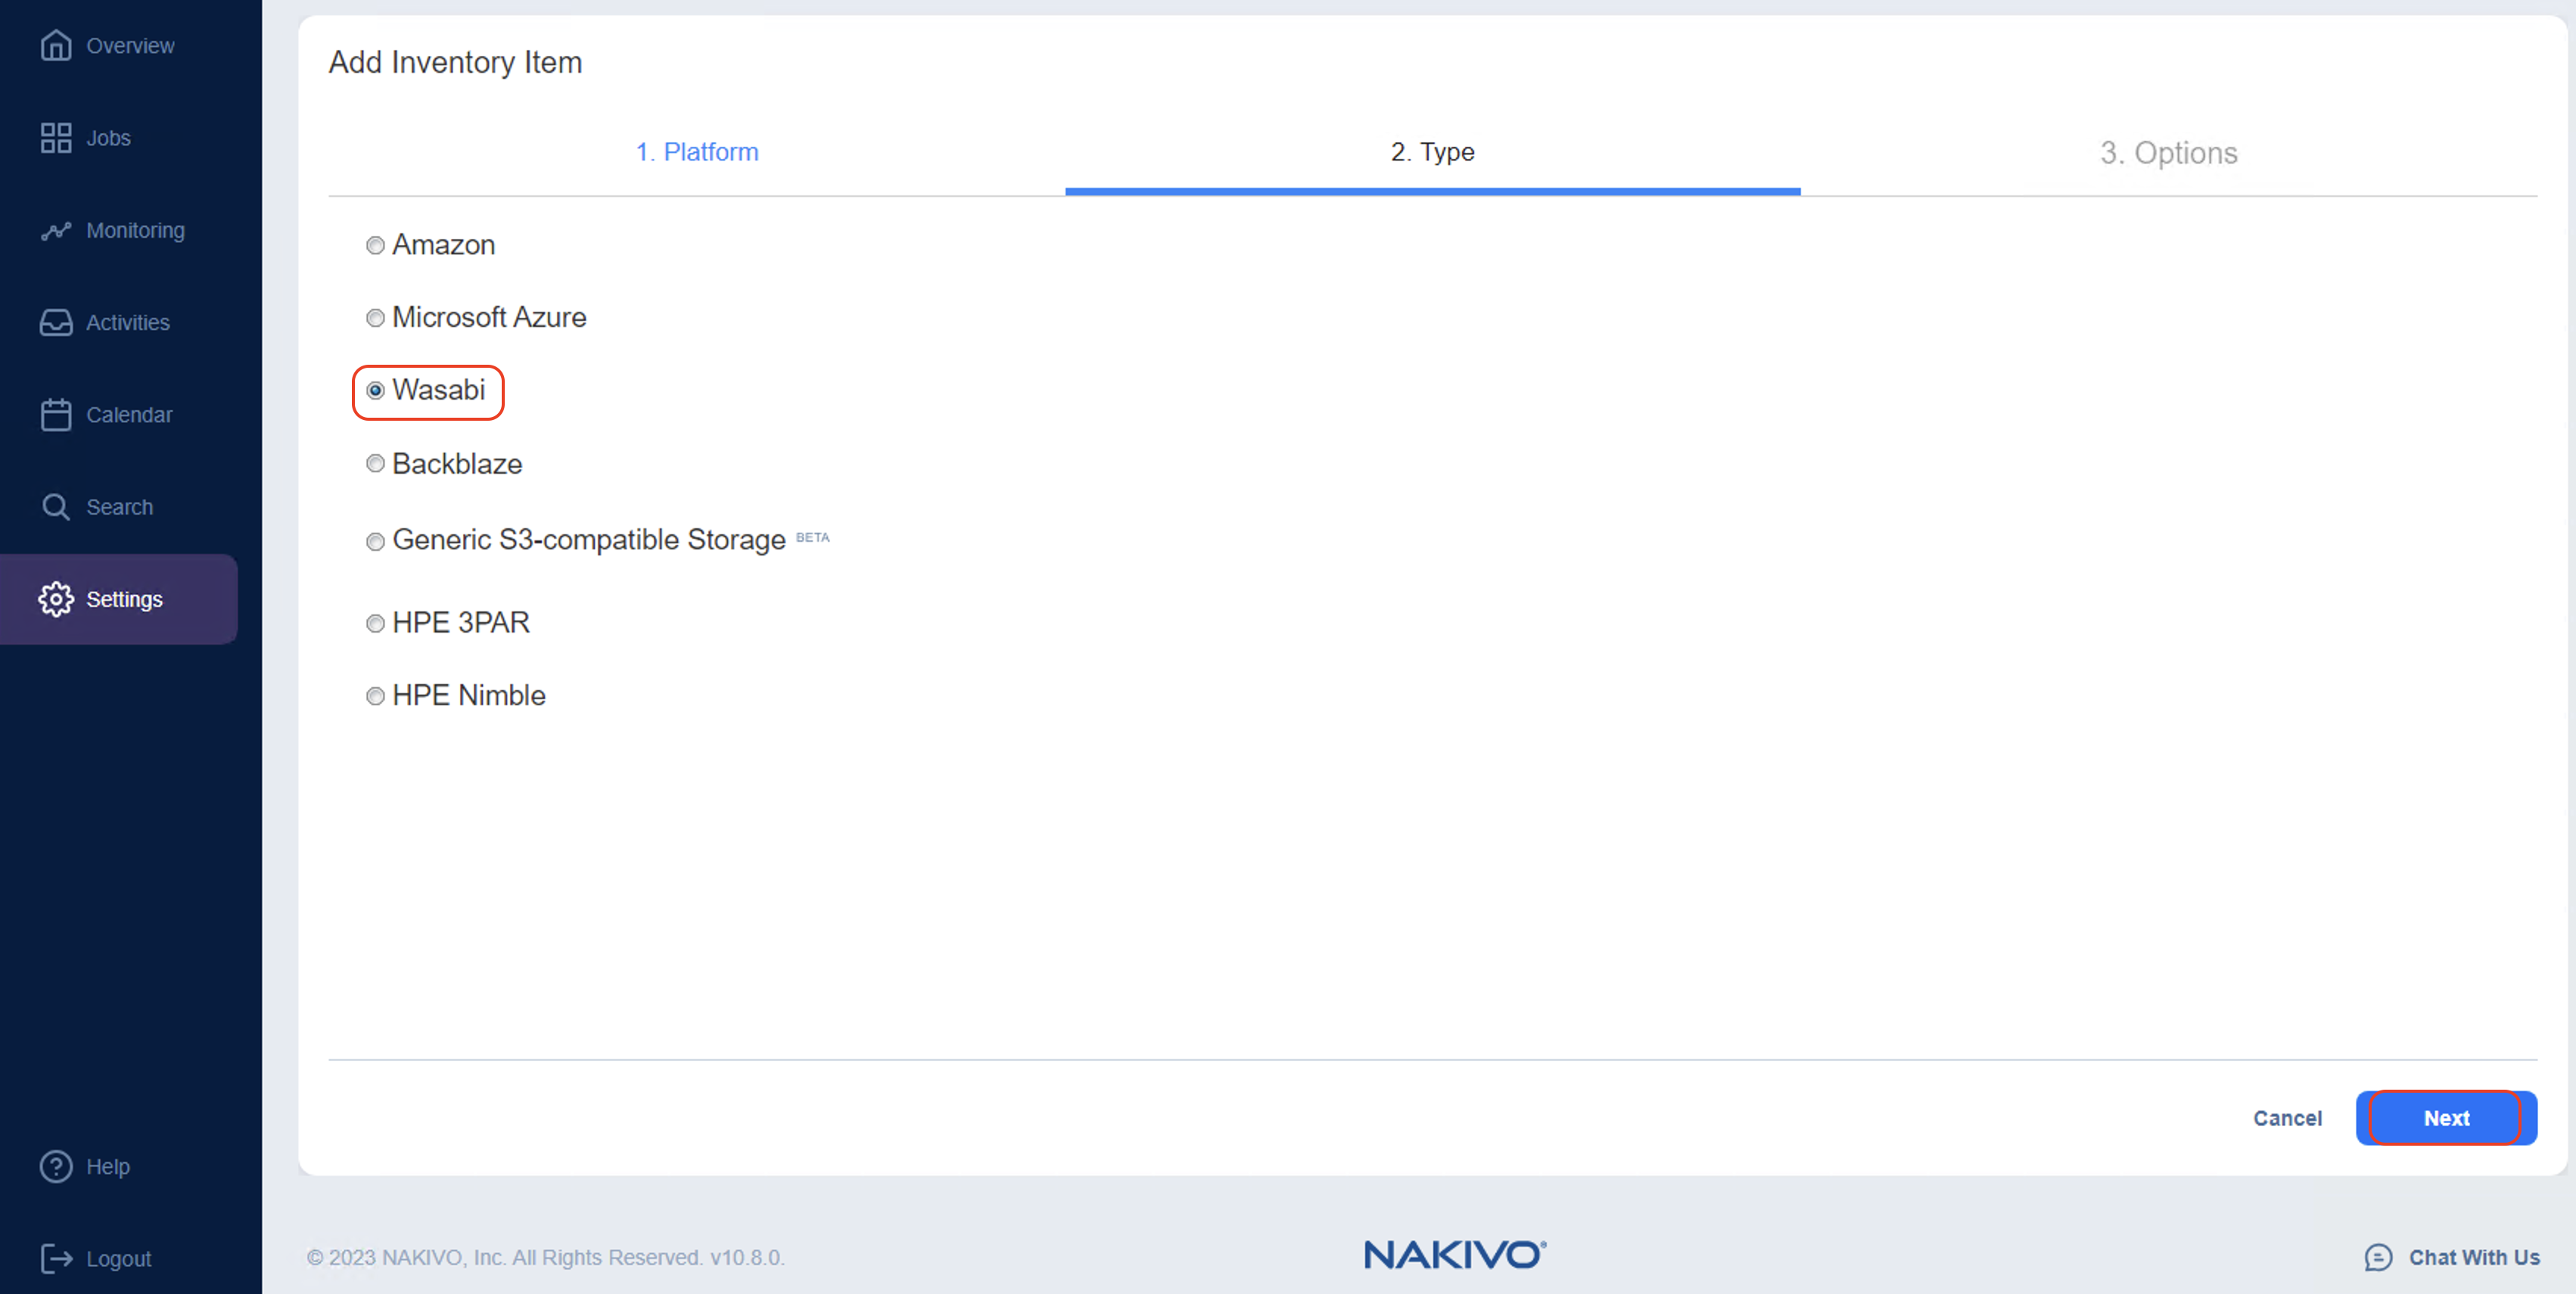
3.4 Select Type as Wasabi. Click Next.
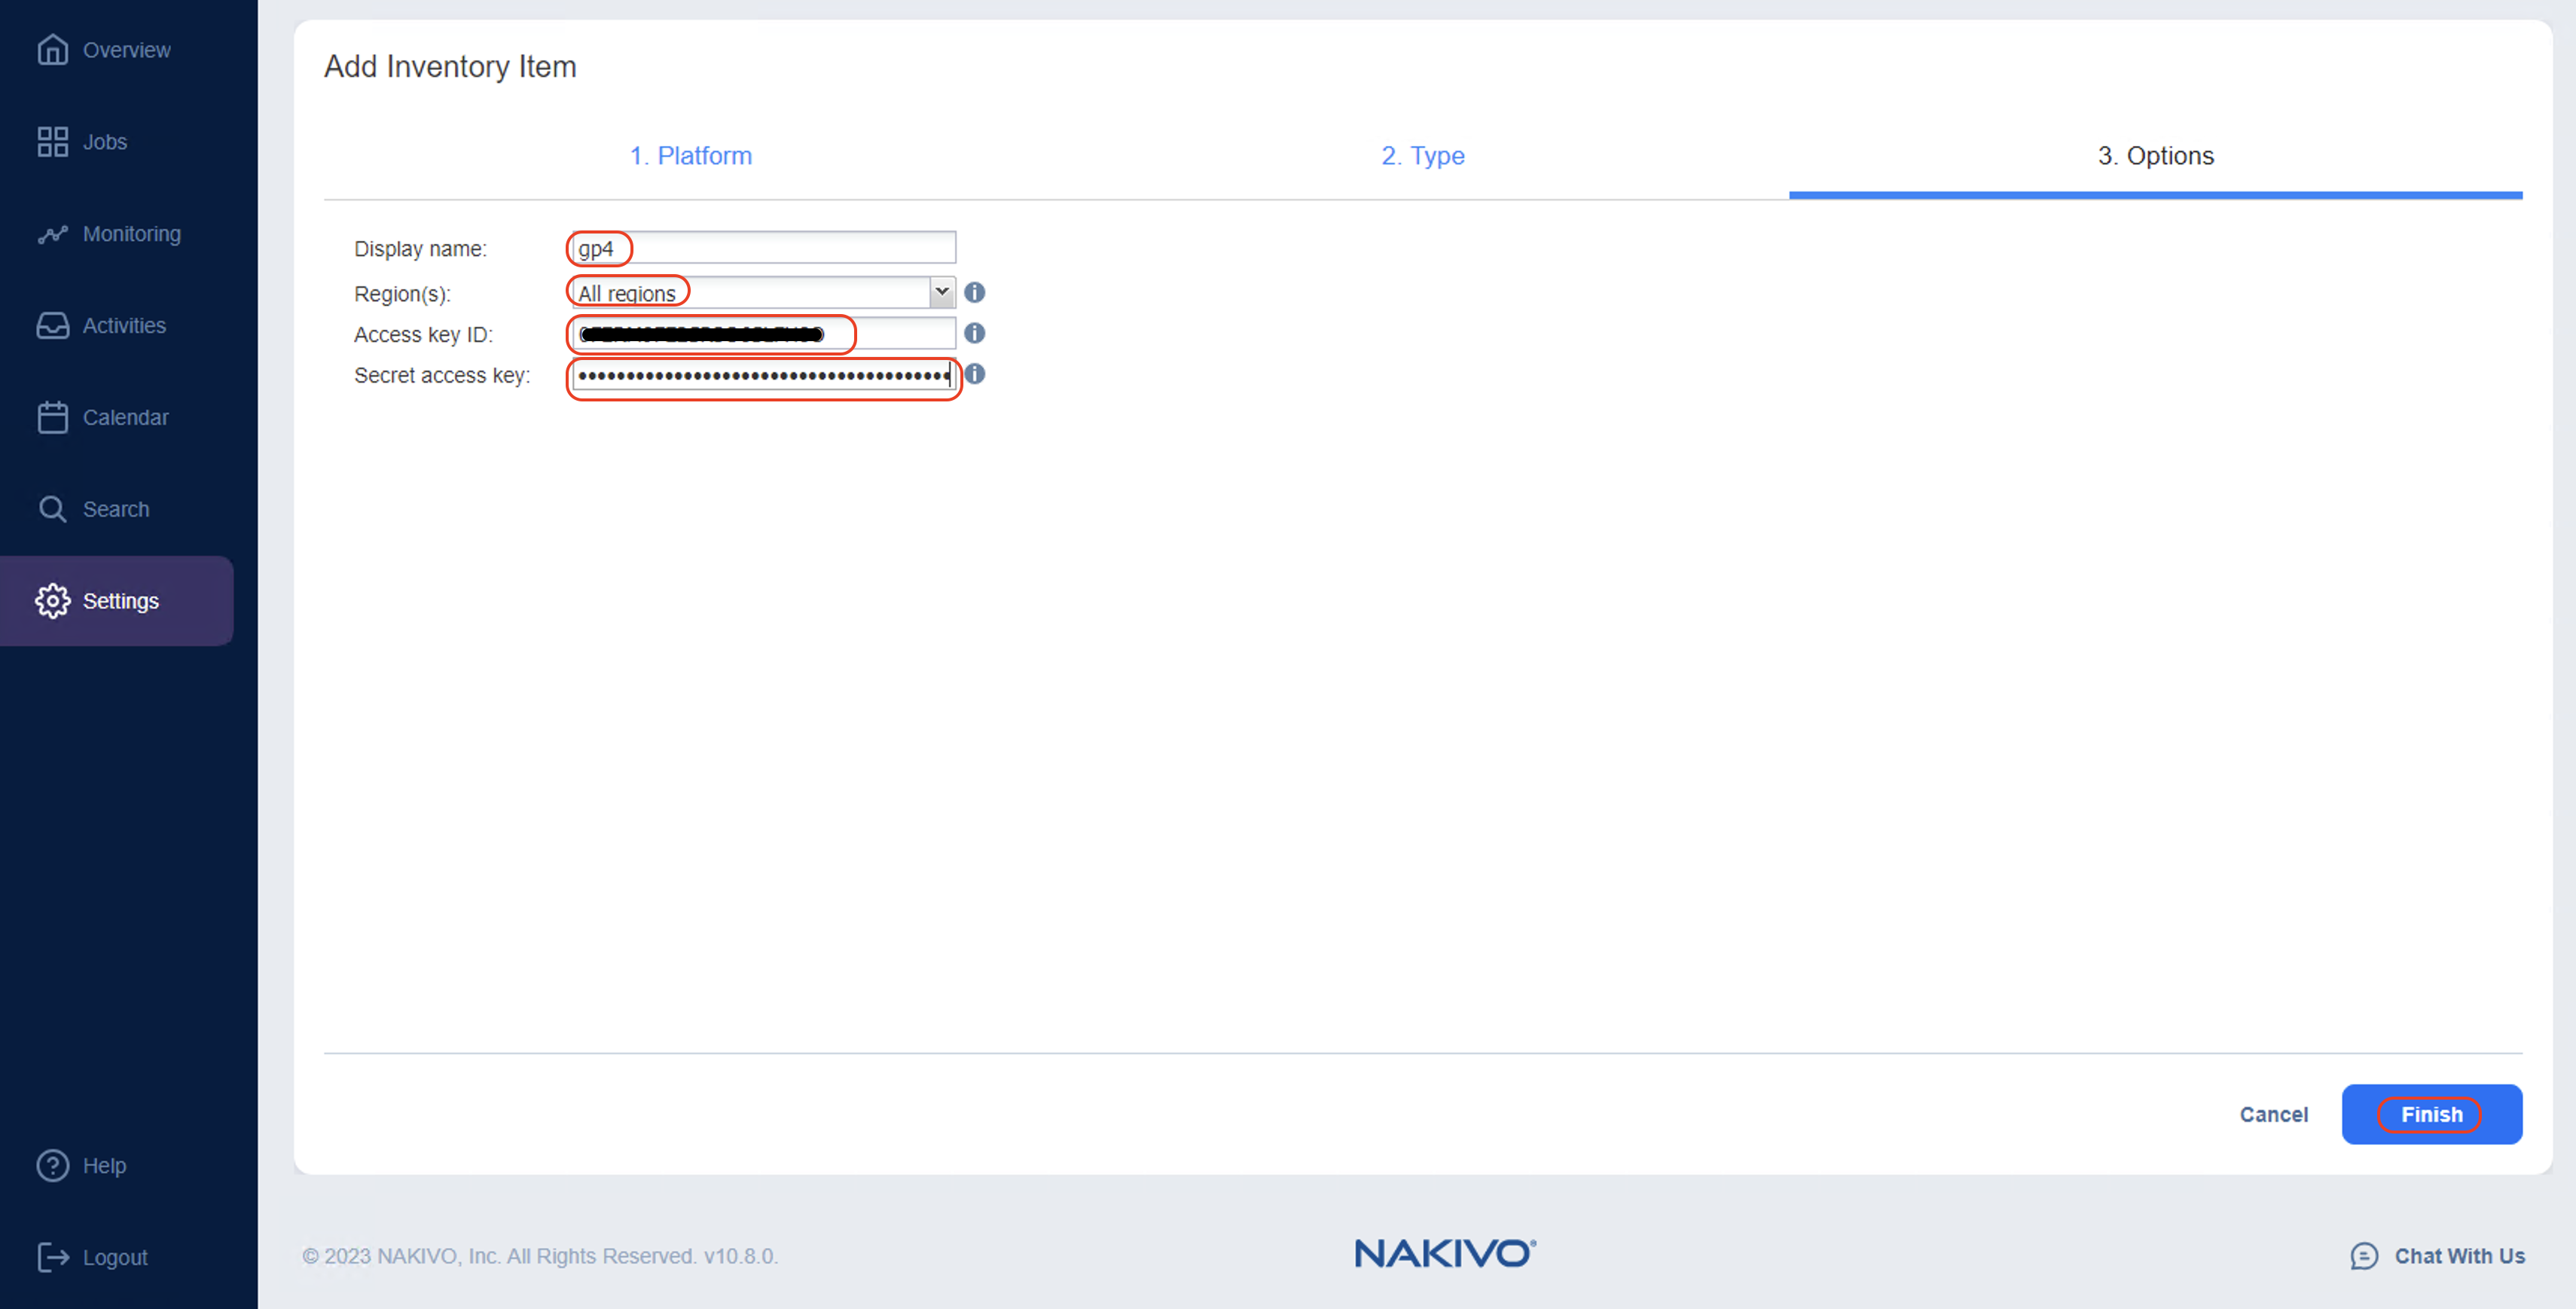
3.5 Provide the following and click Finish.
Display Name- Enter the name for the Wasabi account
Regions- Select All regions or select a specific region as per your requirements
Access ID- Enter the Access ID for the Wasabi bucket from section 2.2
Secret access key- Enter the Secret access key for the Wasabi bucket from section 2.2
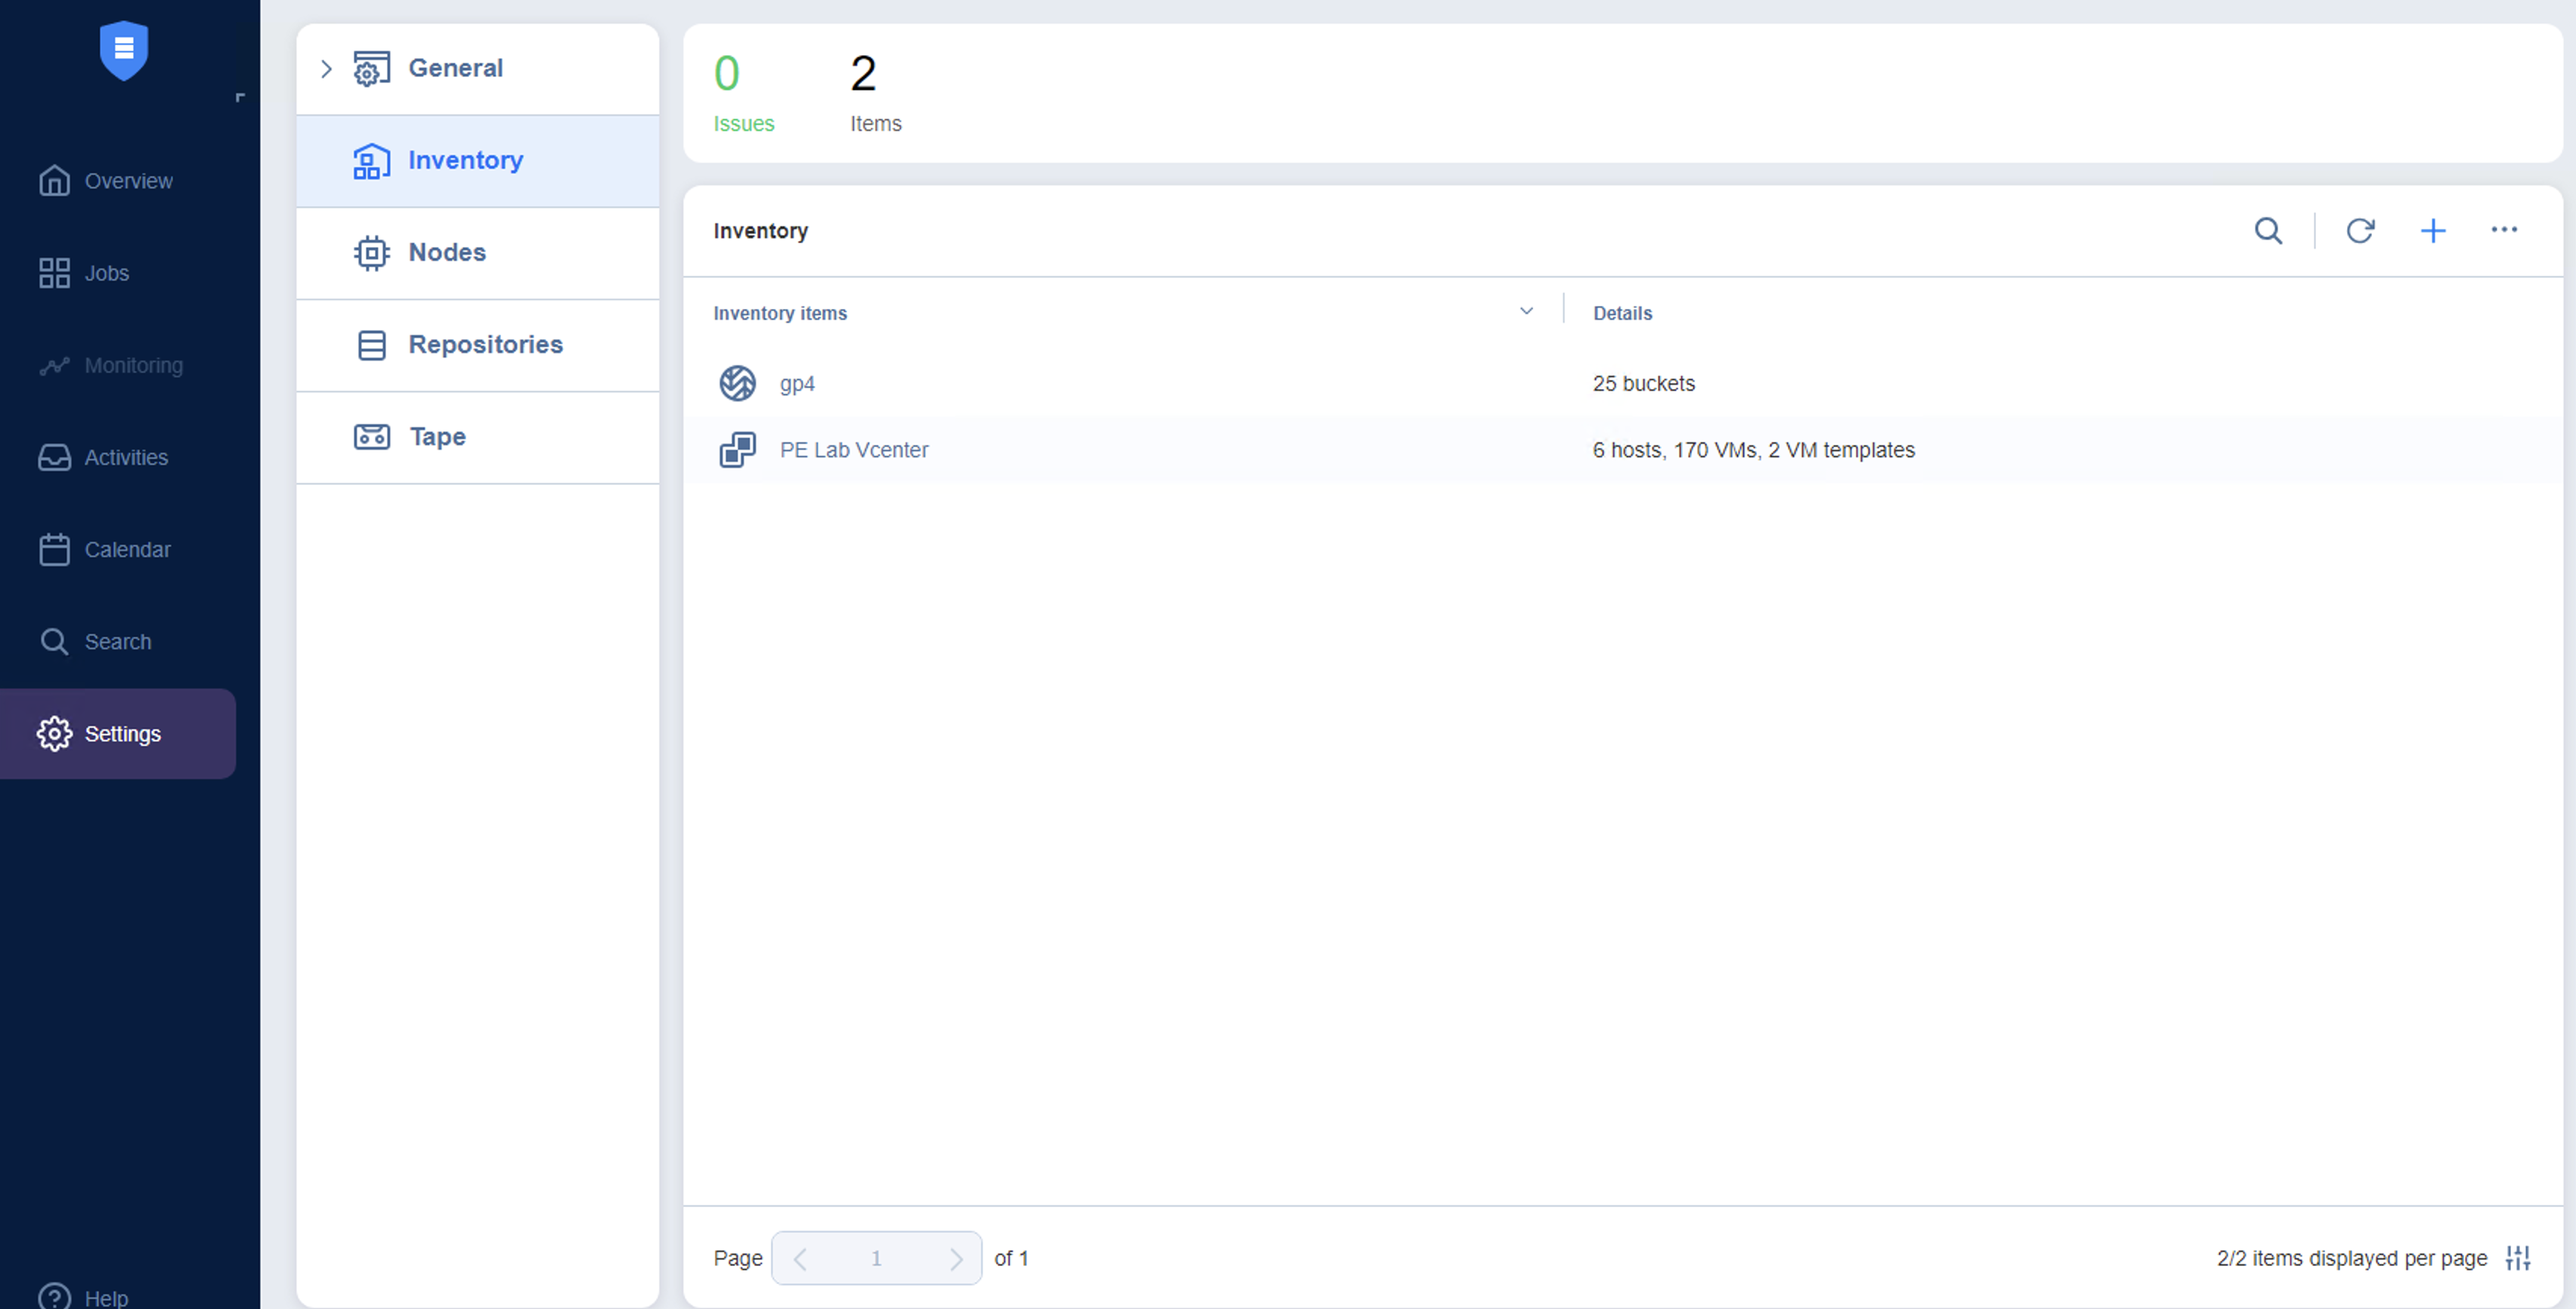
3.6 Wasabi account added. Once you click Finish in the step above, you should see the Wasabi account listed in the Inventory.
4. Create a Wasabi cloud repository on Nakivo
A Backup Repository is the Wasabi bucket (created in step 2 above) where Nakivo application stores the backups and metadata related to the backups. Follow the steps below to add a repository.
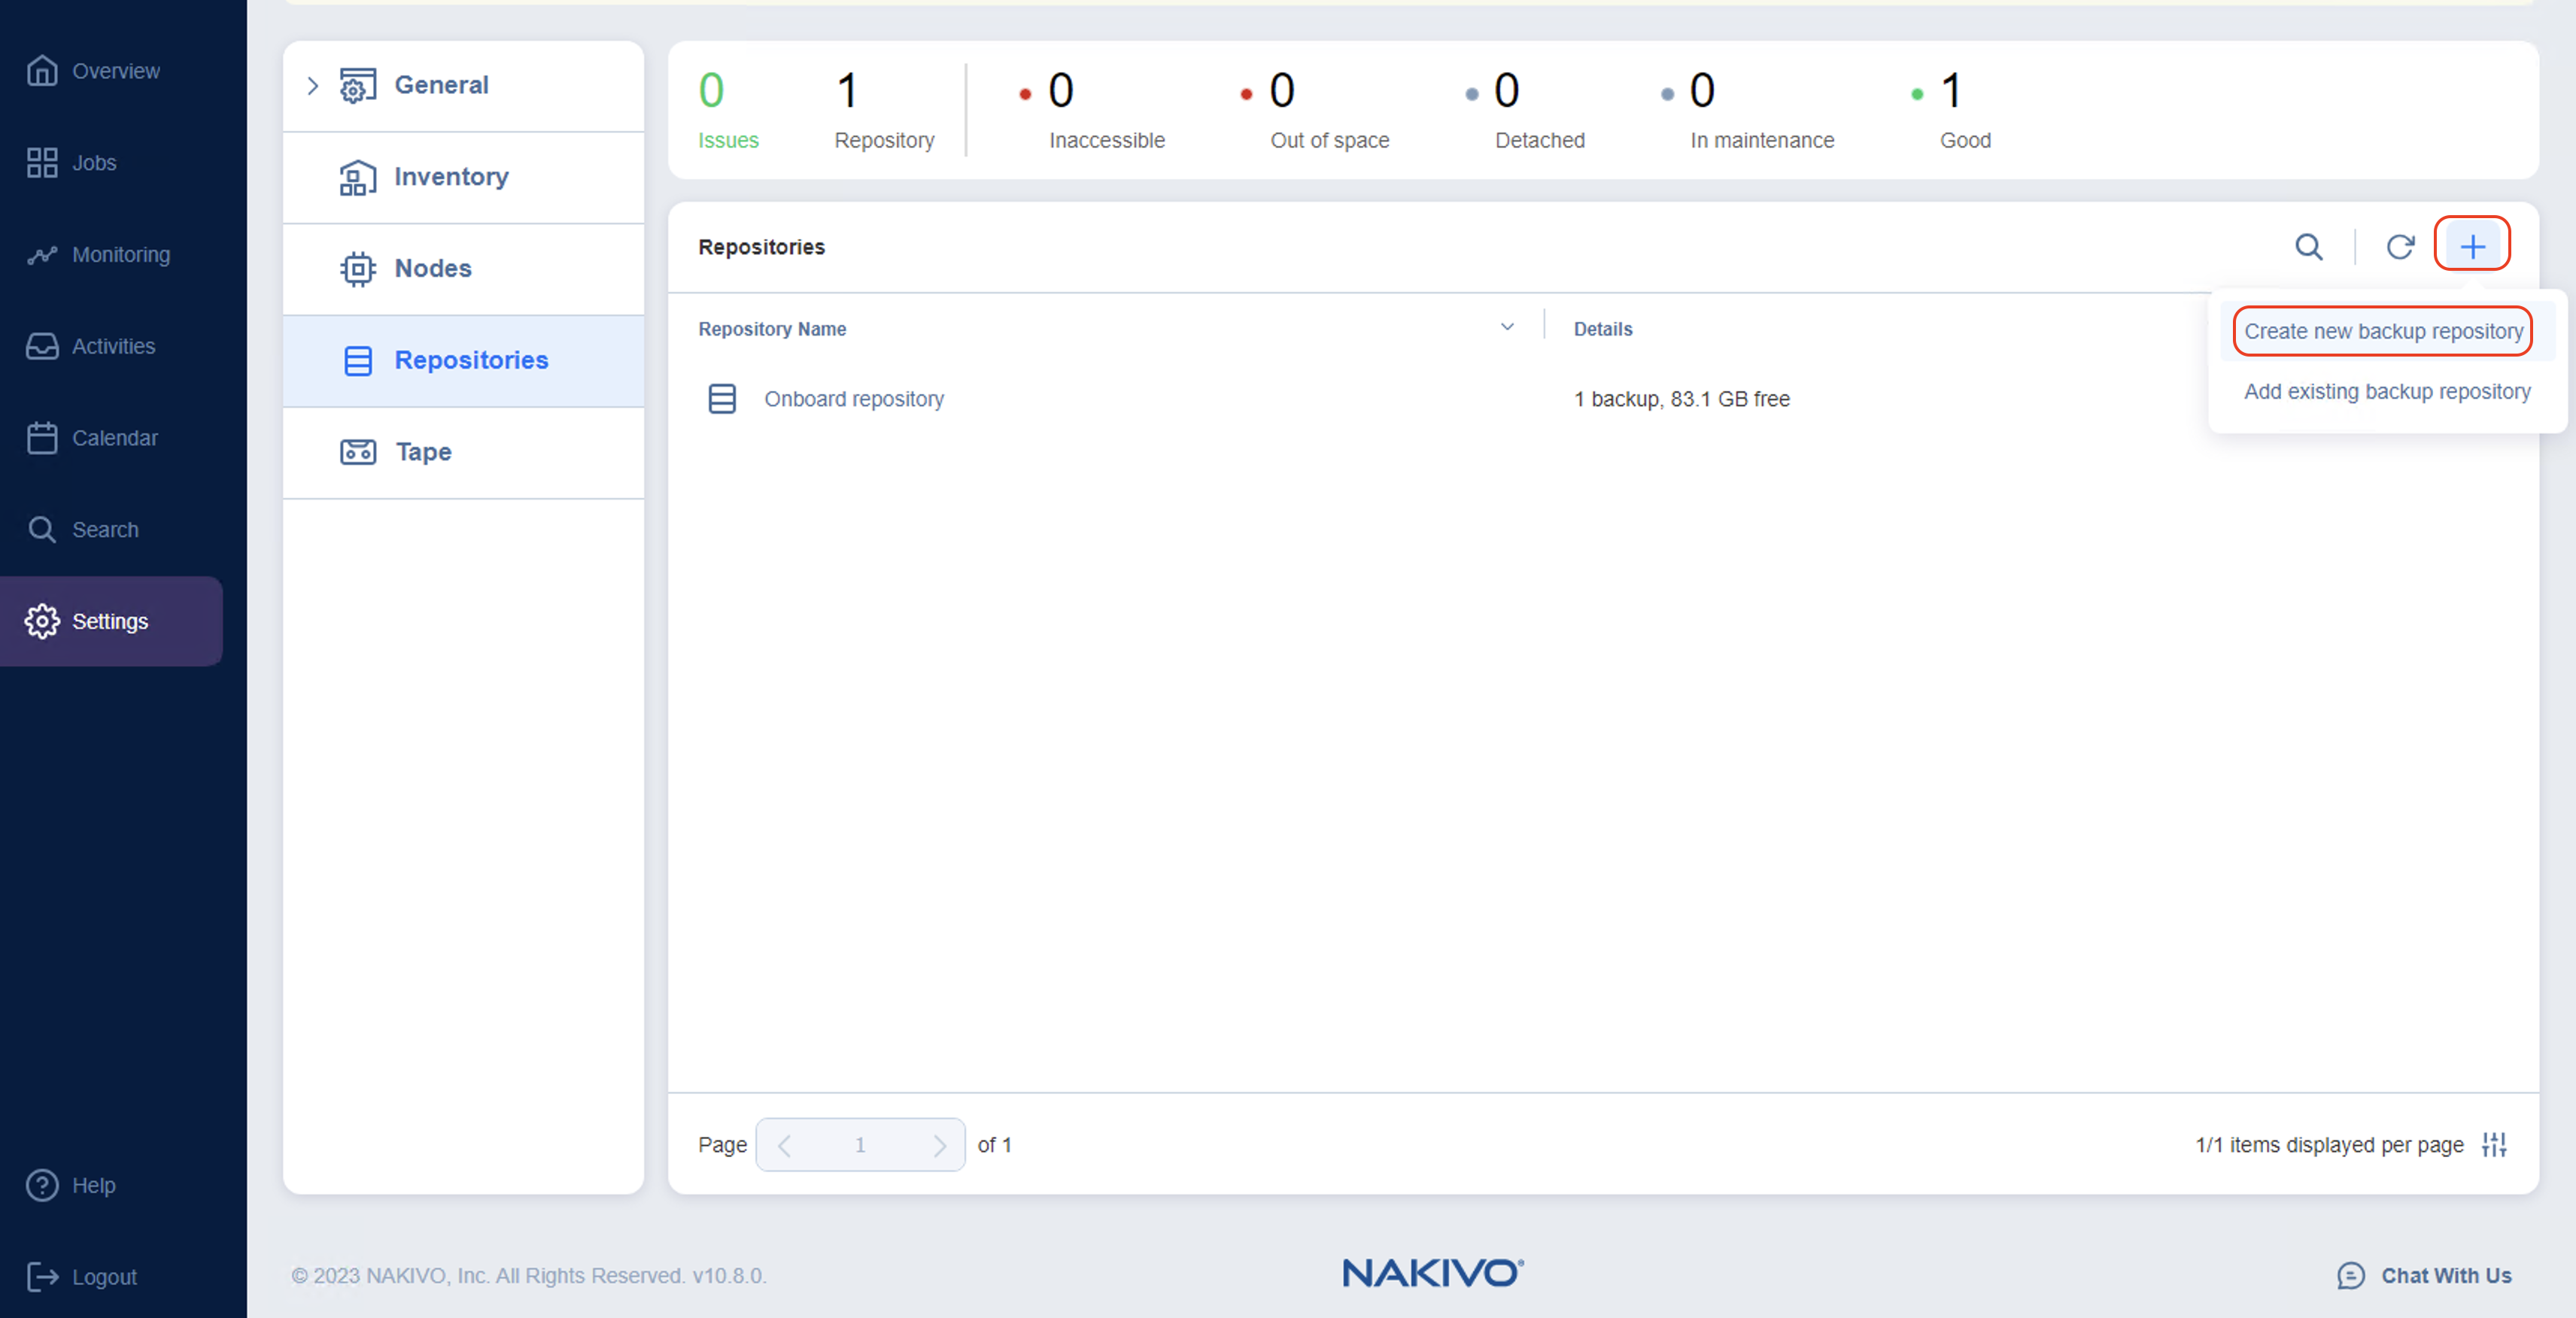
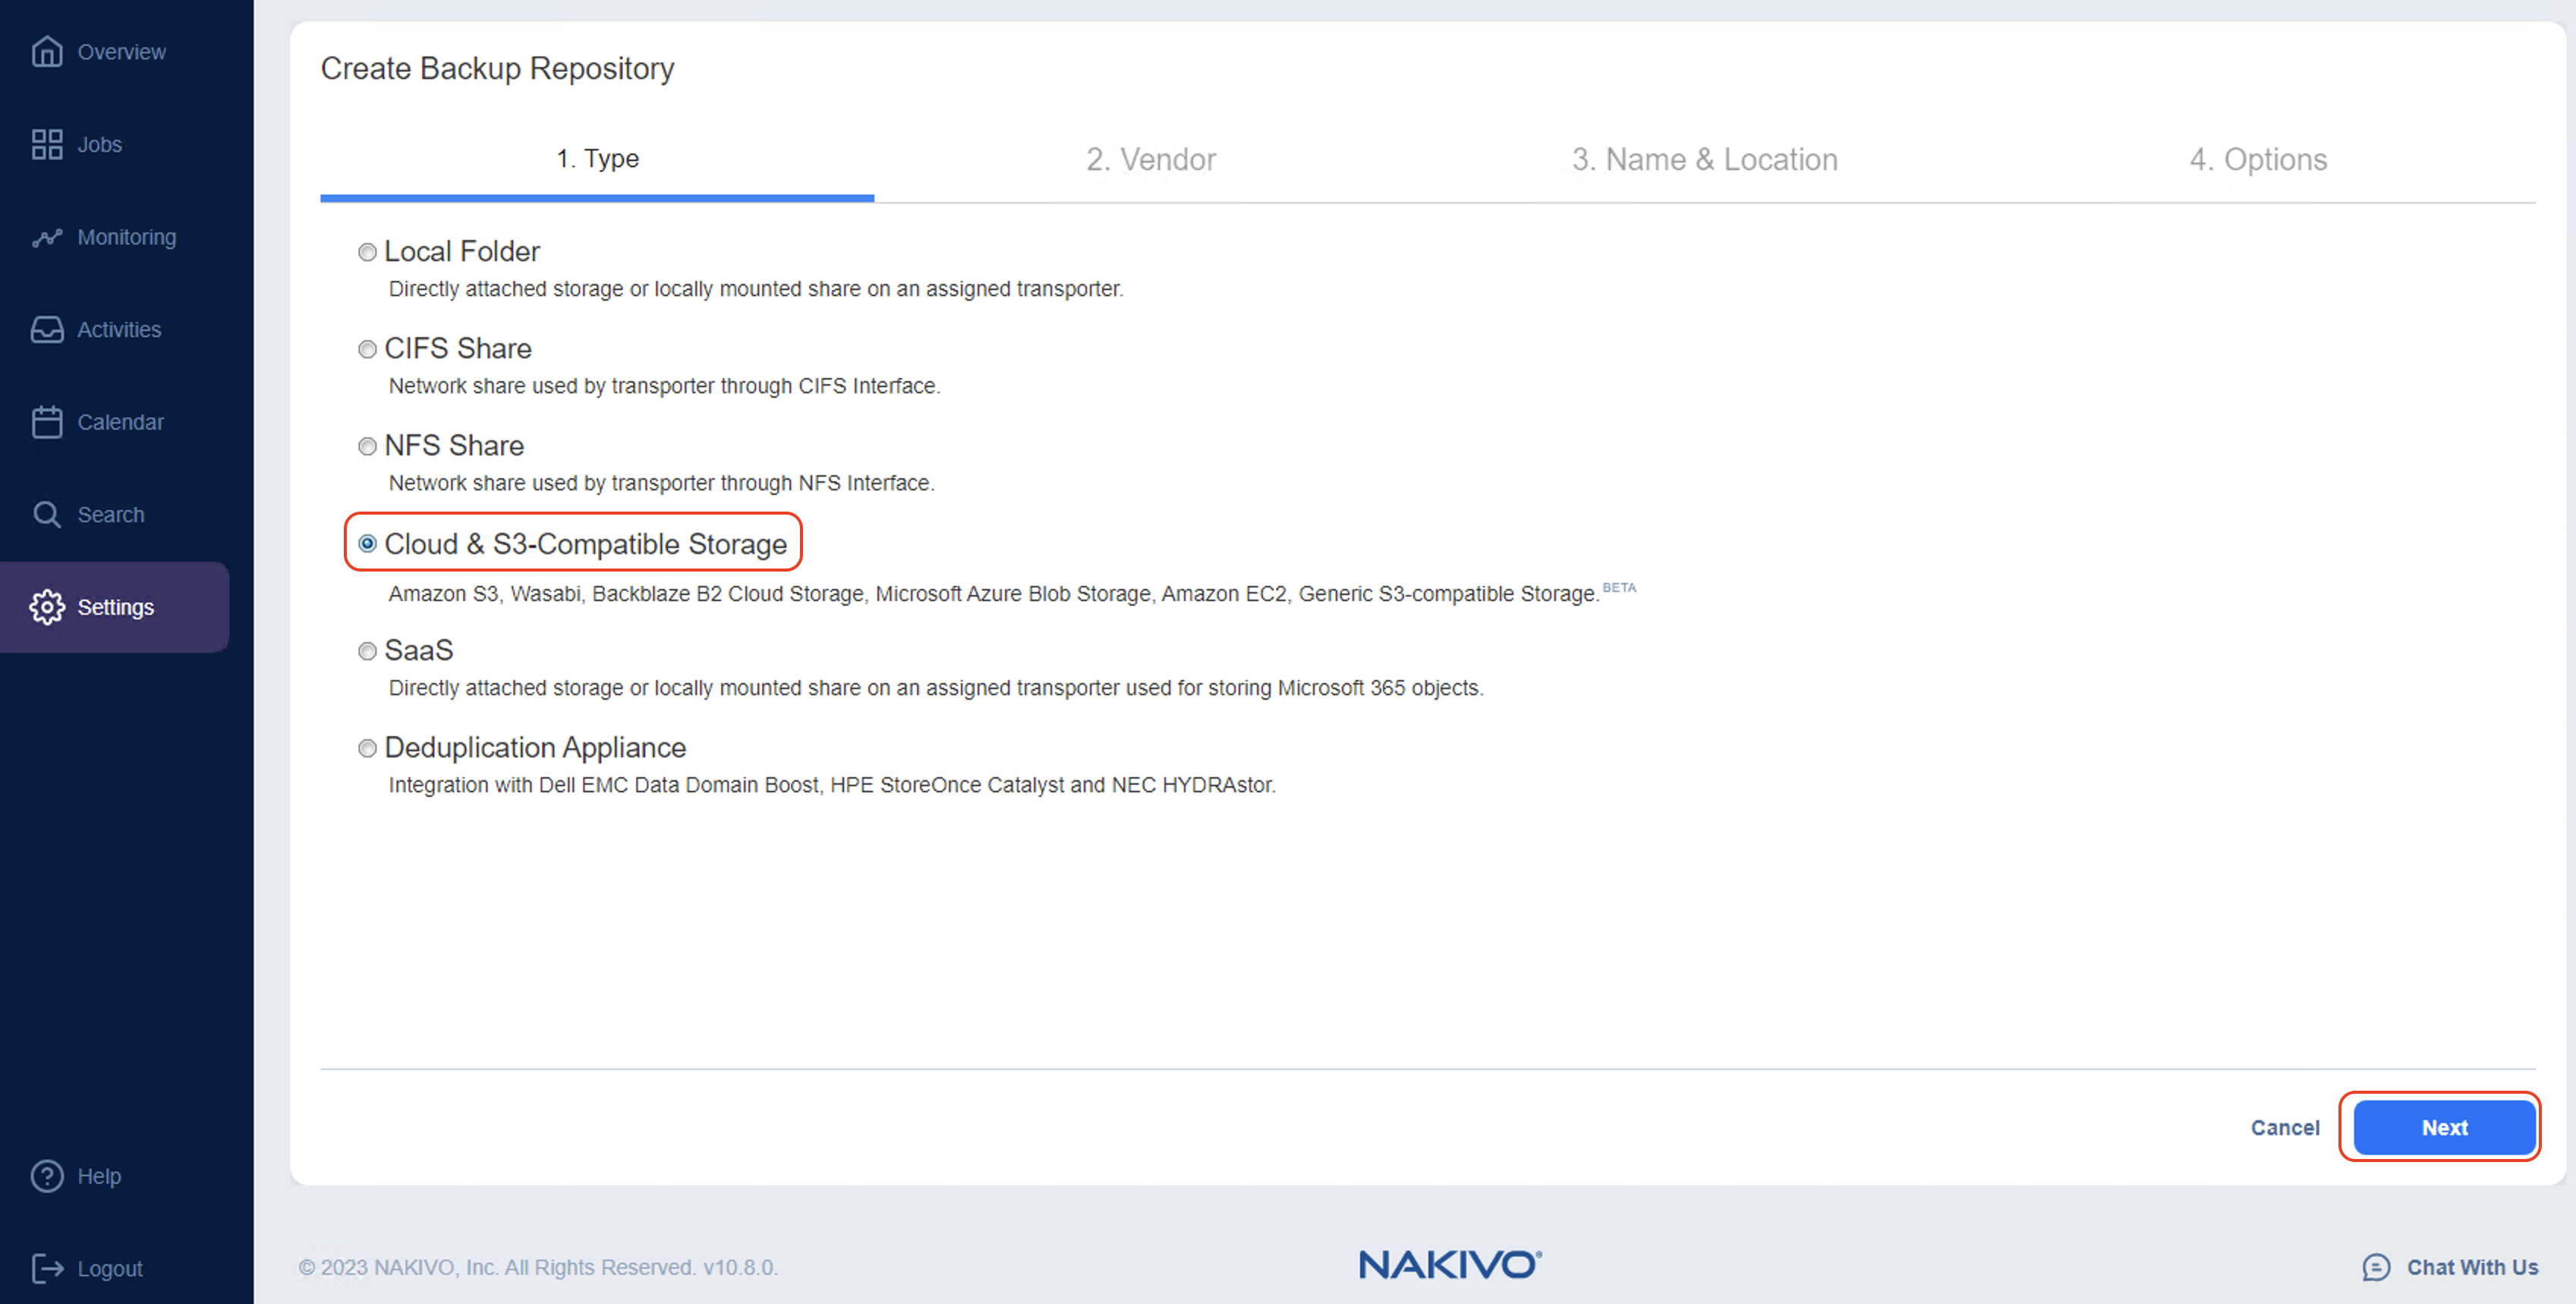
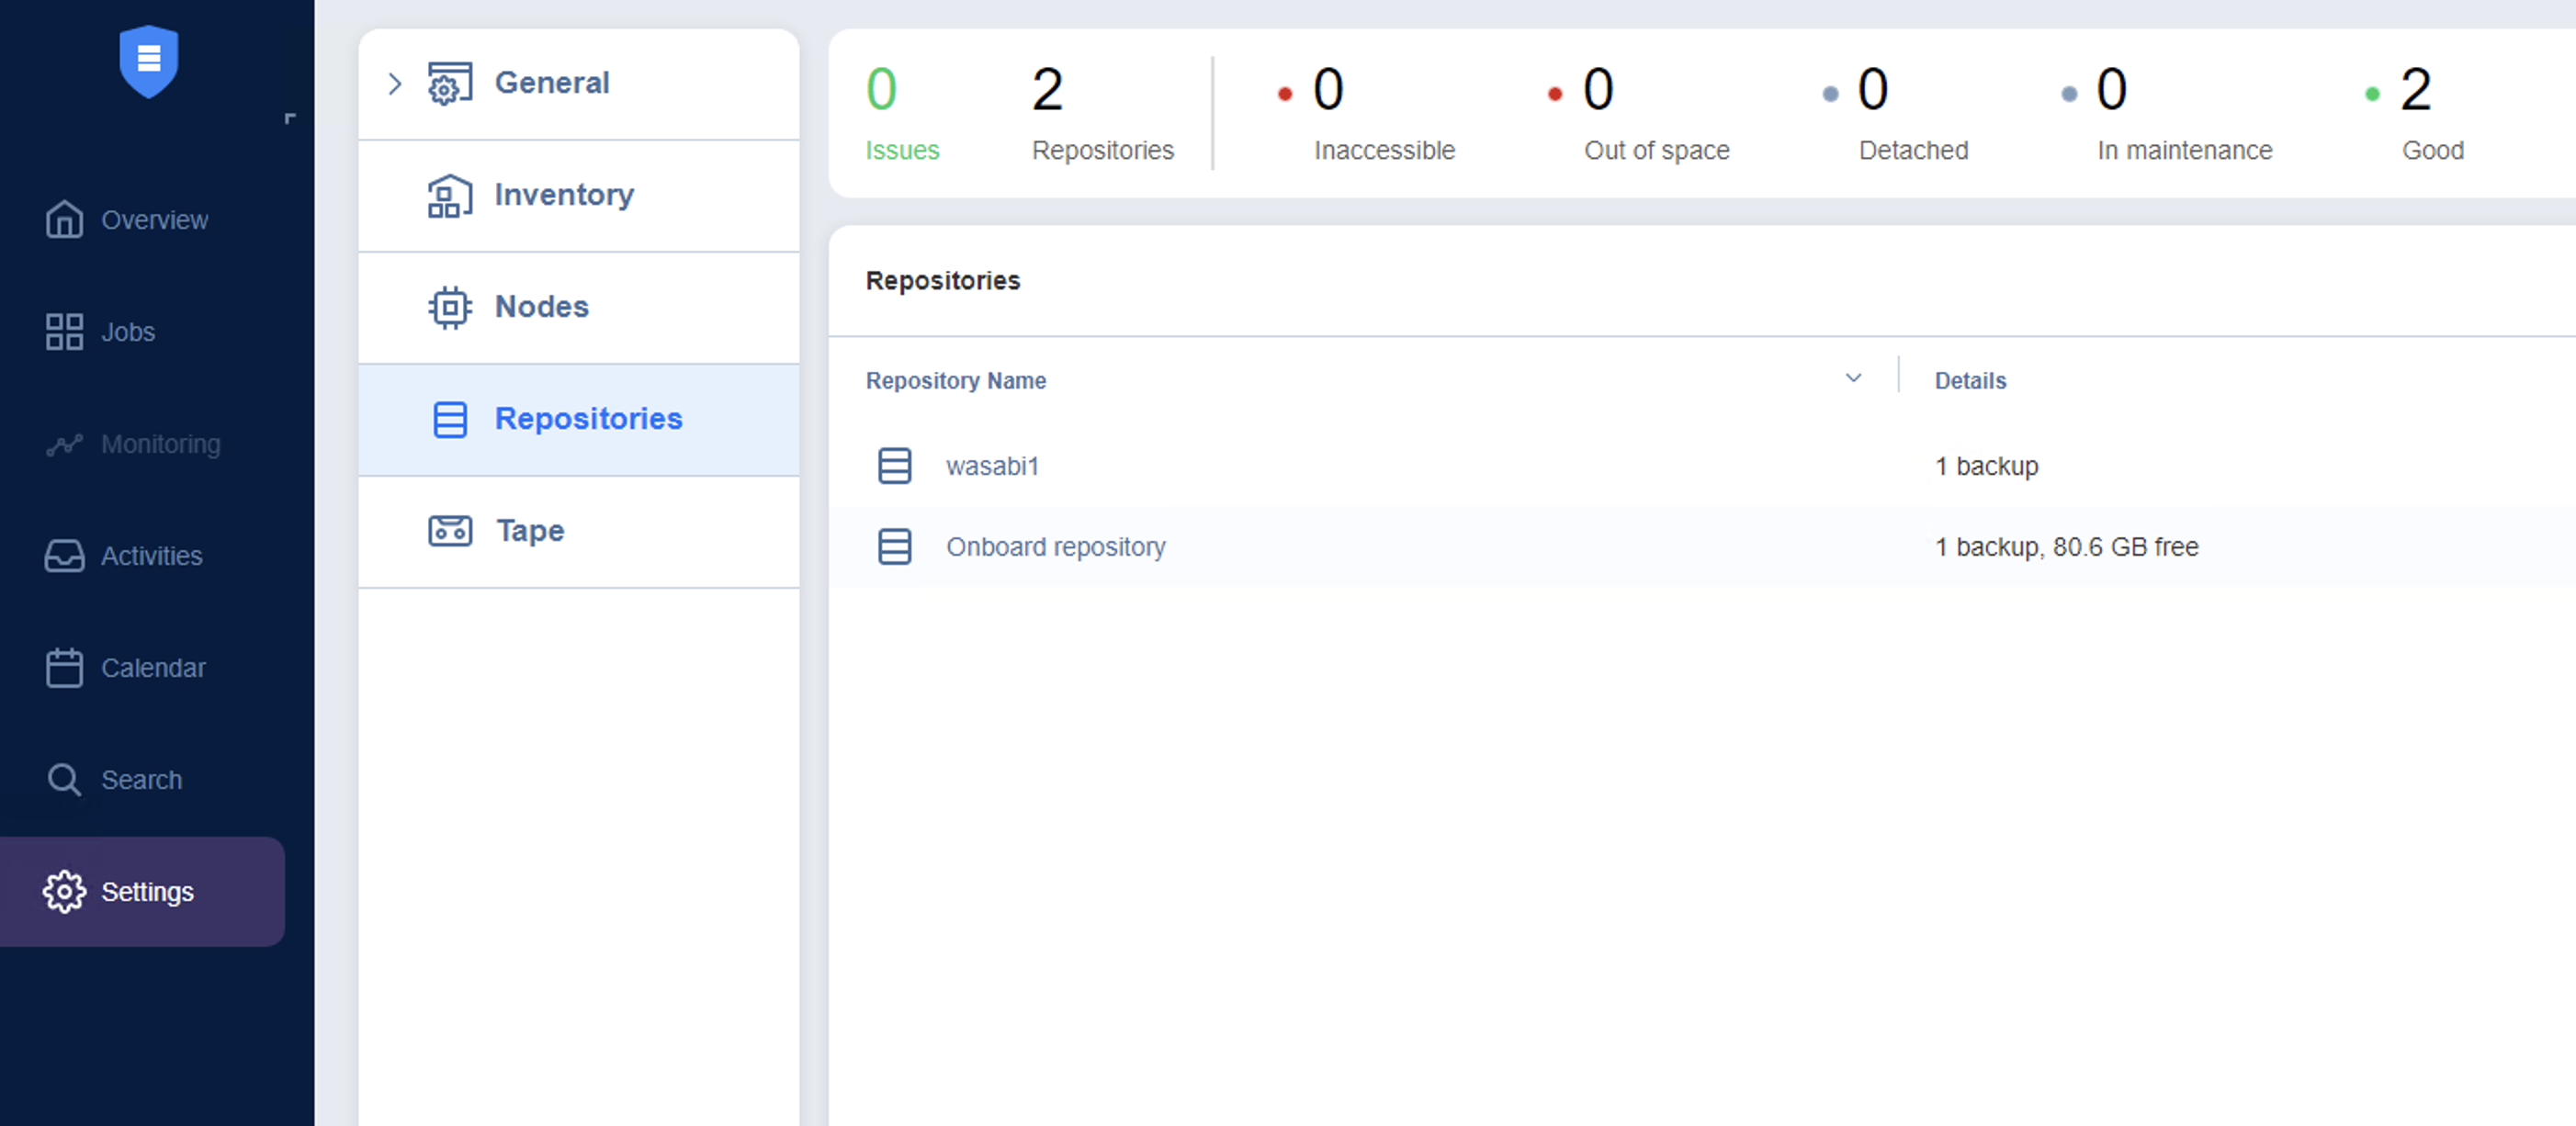
4.1 Click Settings, then Repositories. Click on + and then click on Create new backup repository to create a new backup repository.
4.2 Choose Cloud & S3-Compatible Storage, click Next.
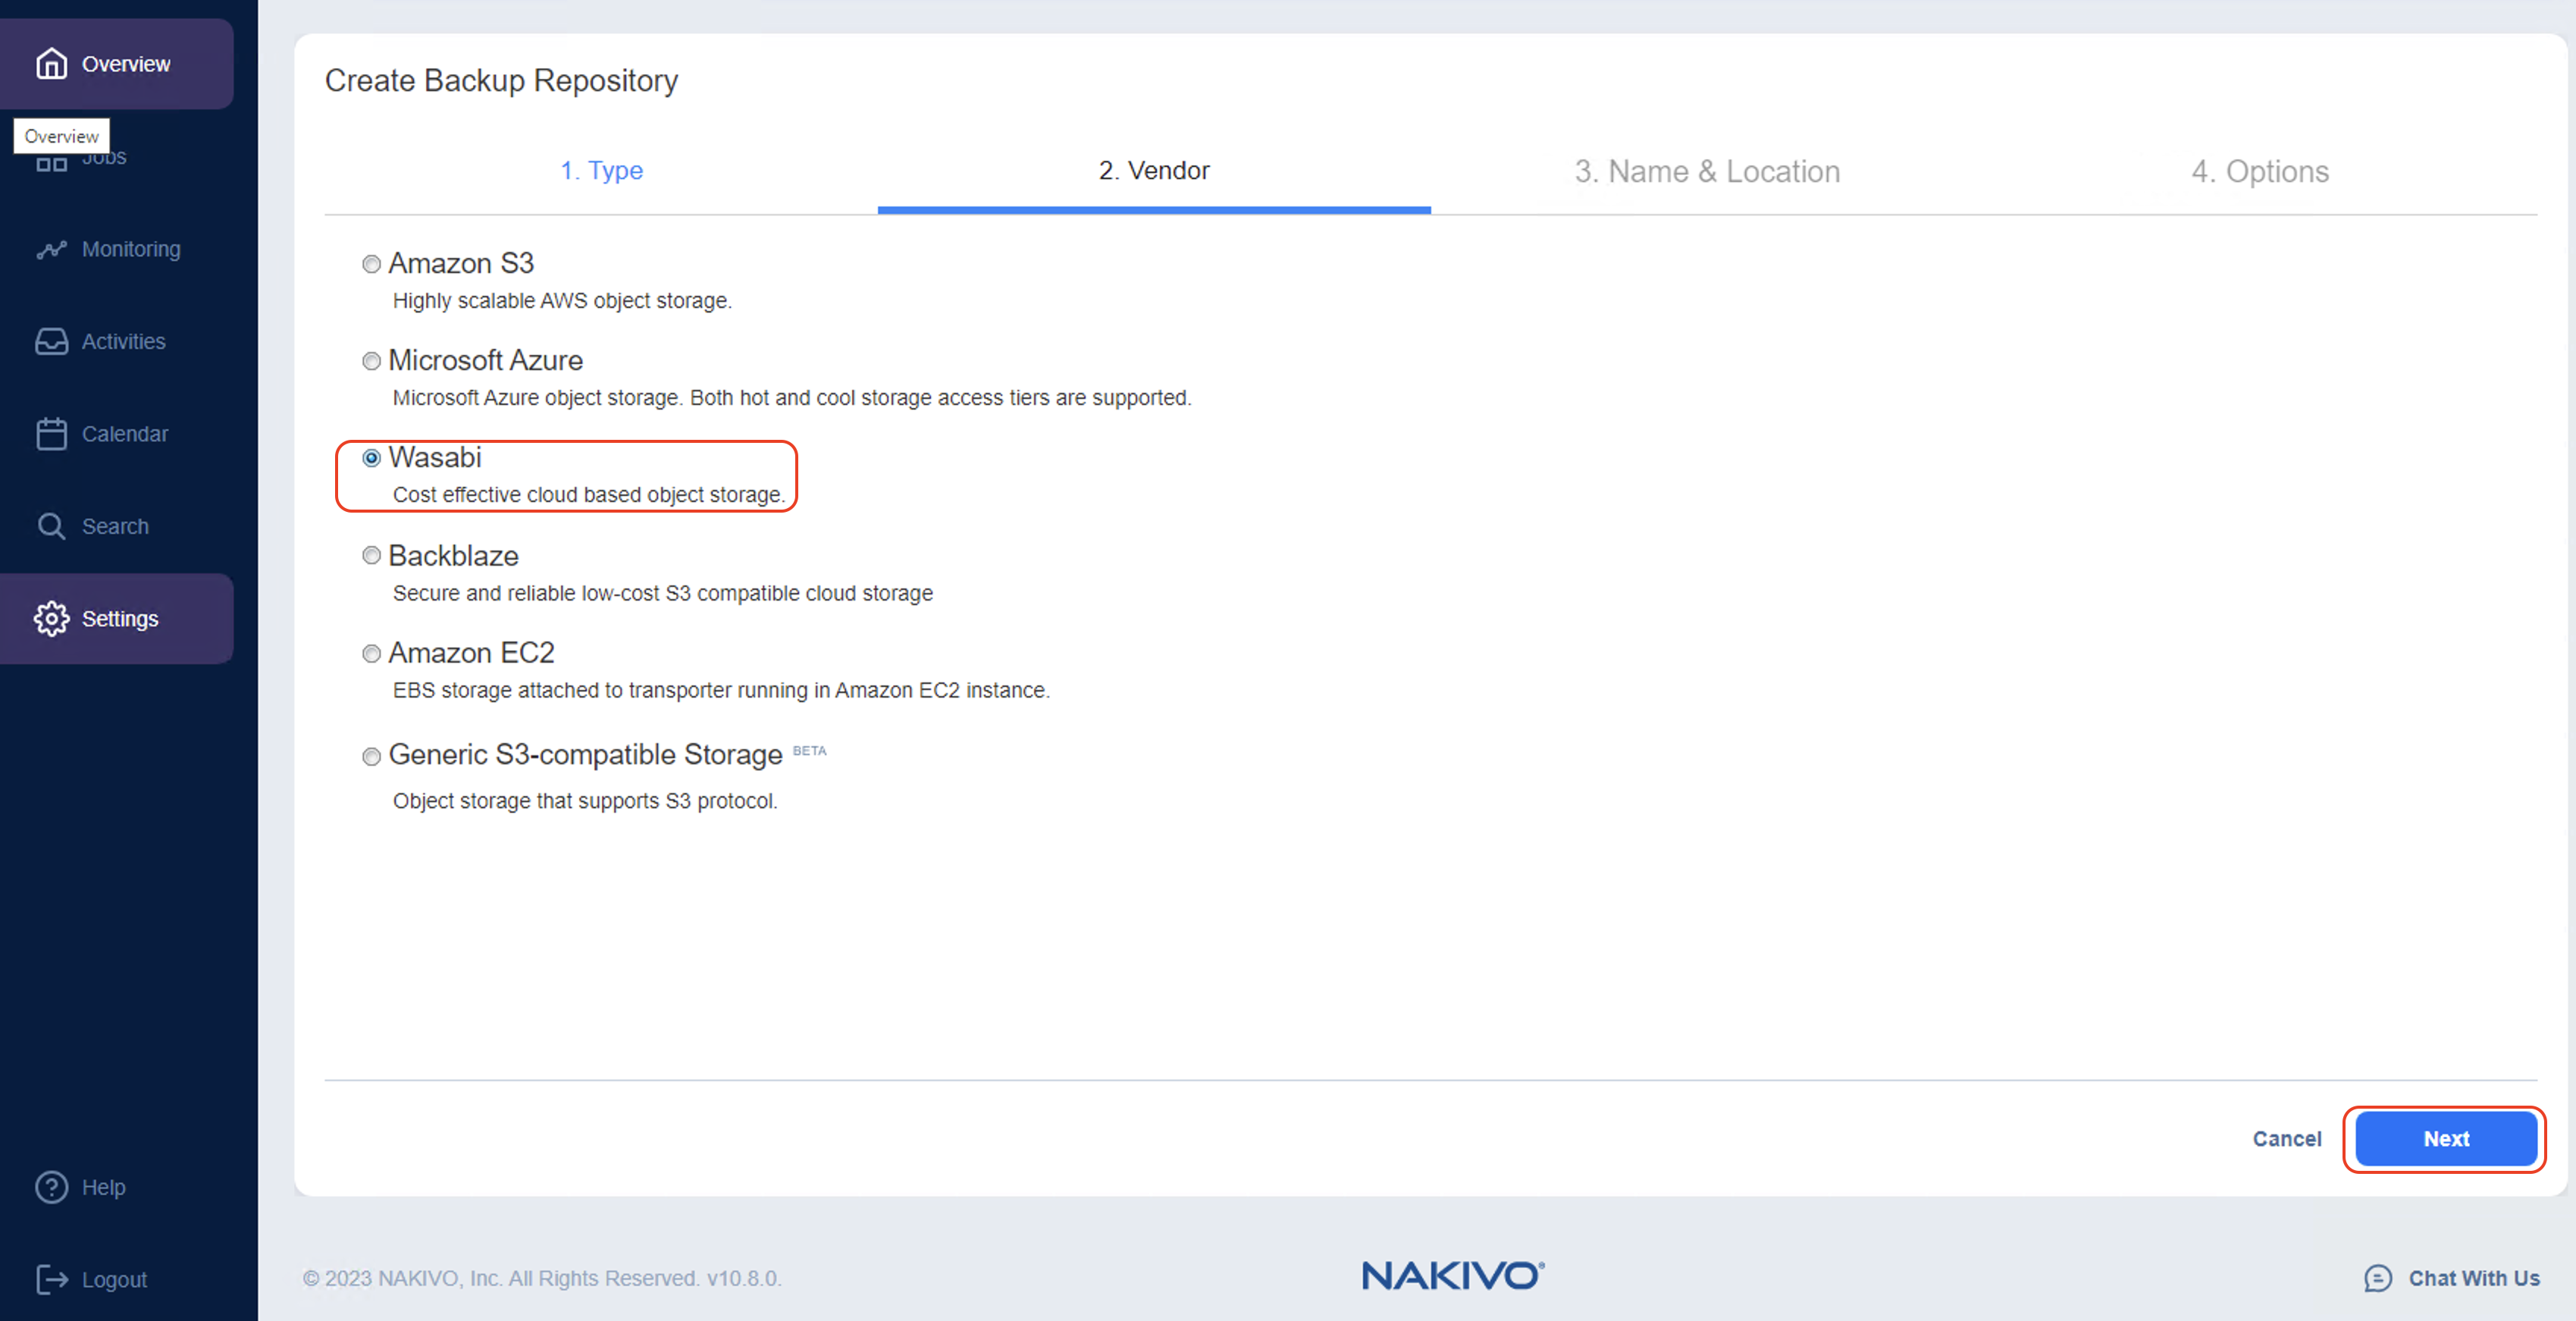
4.3 Choose Wasabi, click Next.
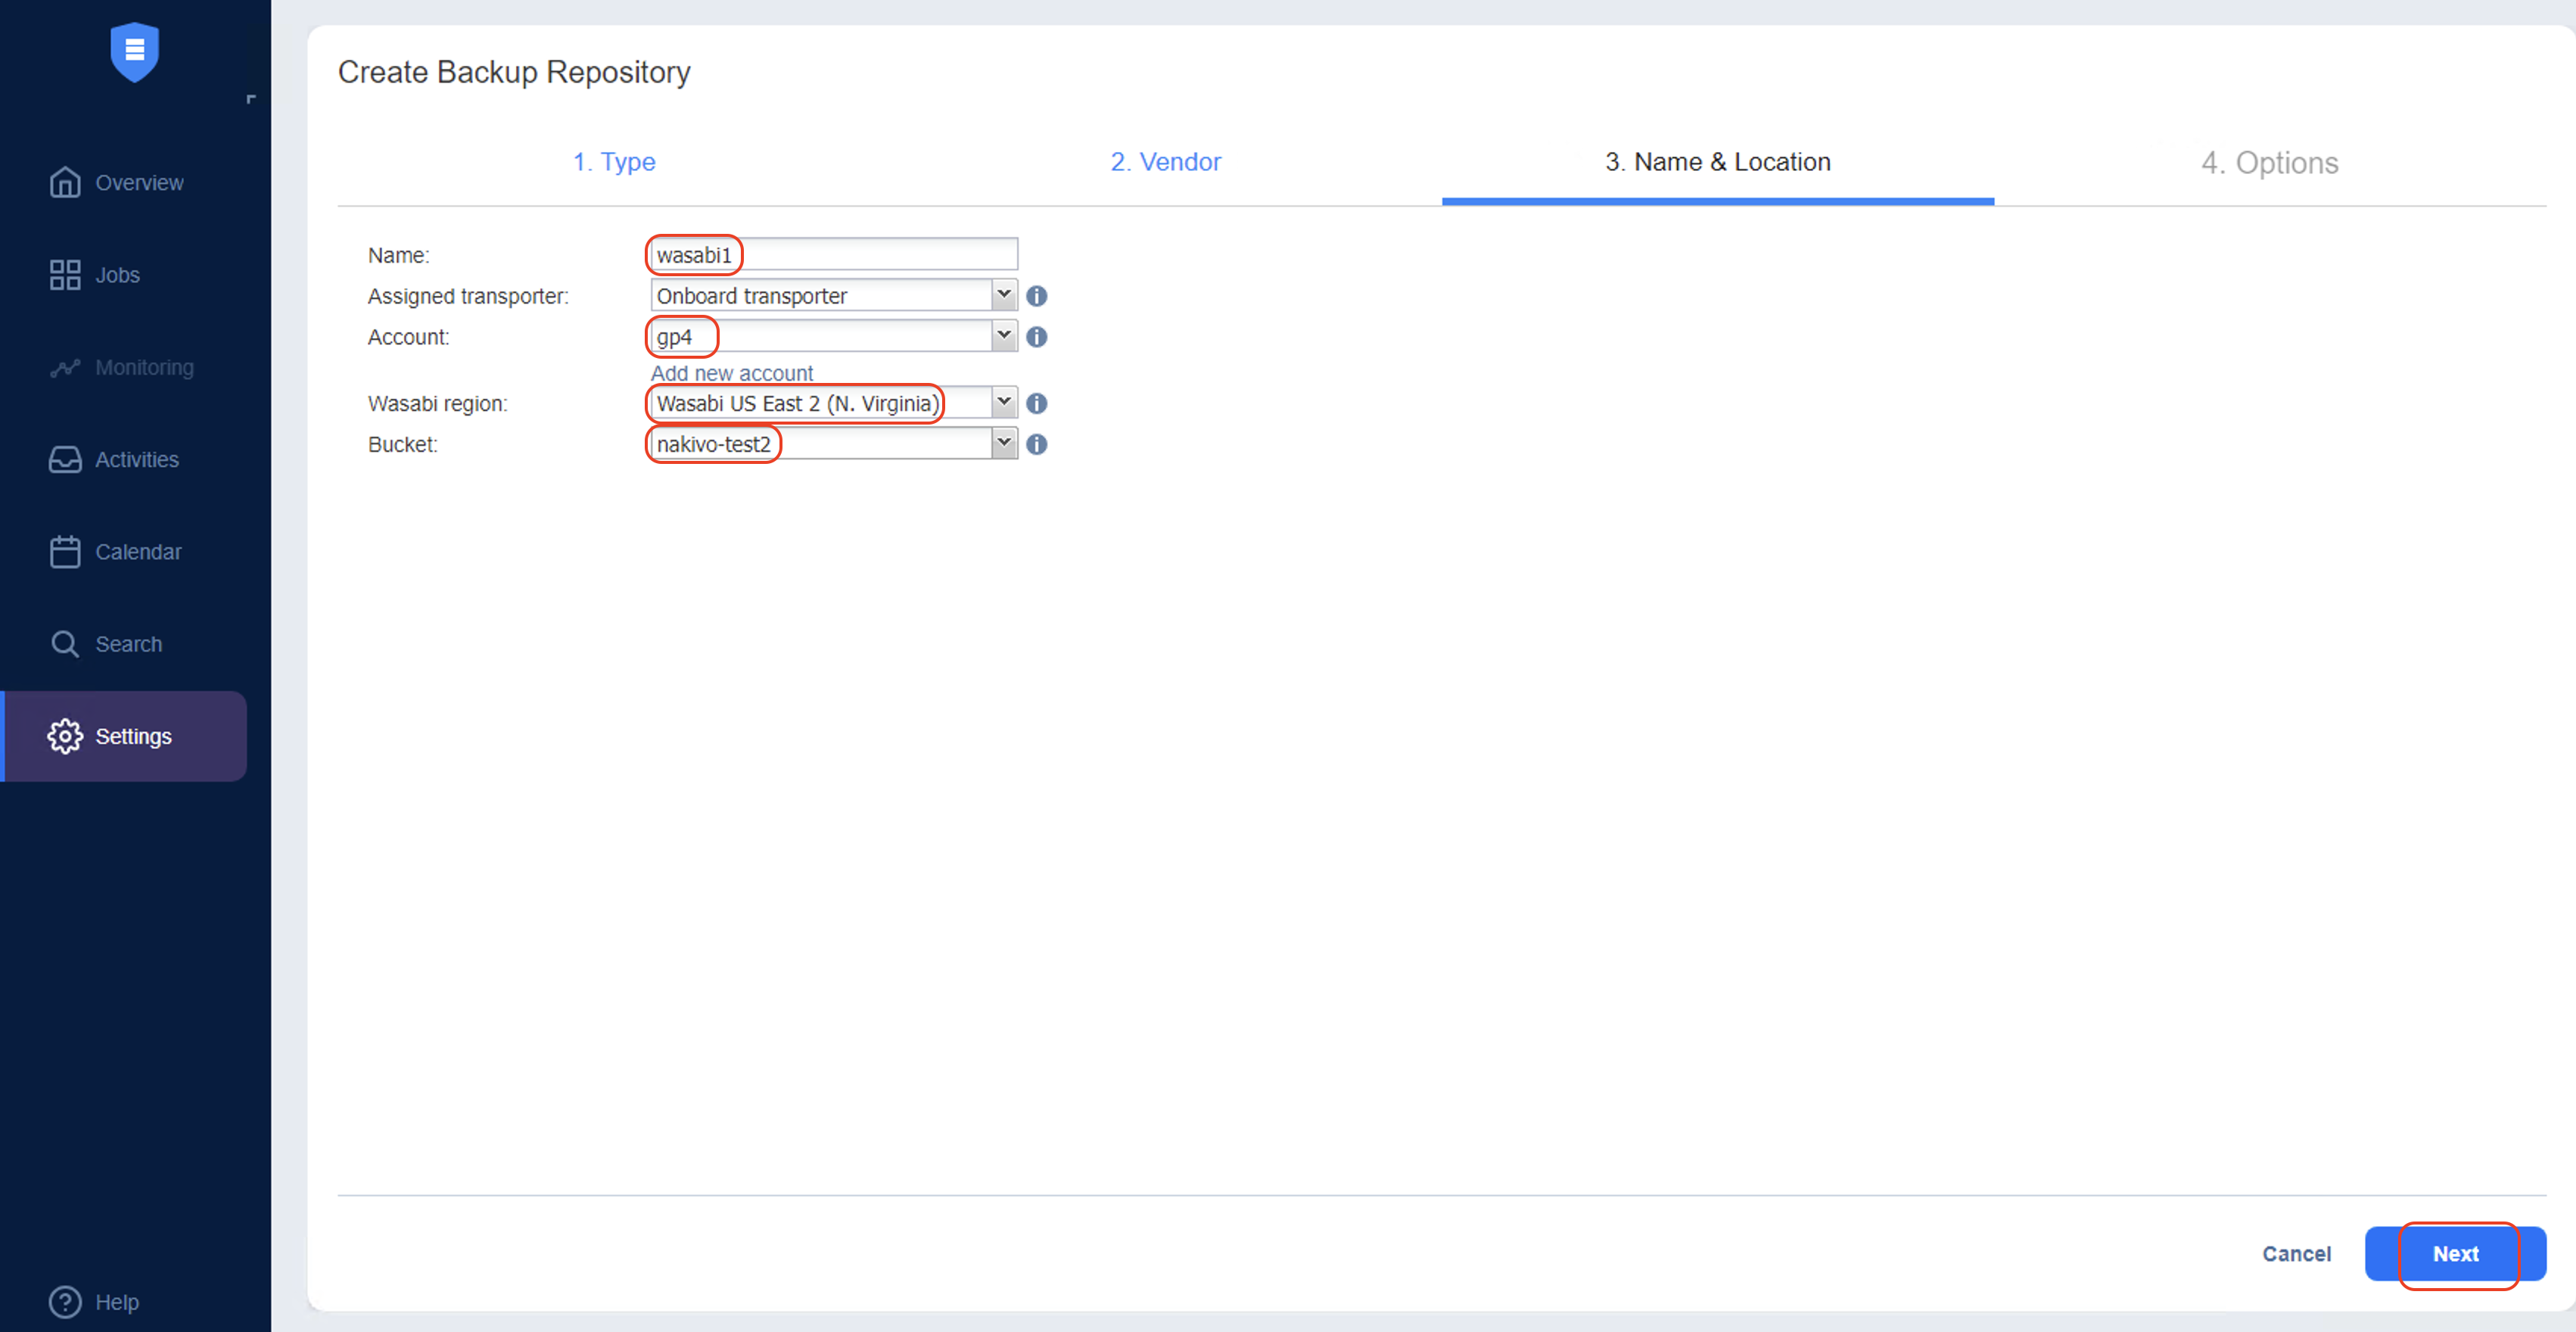
4.4 Provide the following and click Next.
Name- Name for the repository
Assigned Transporter- Choose default
Account - Select the Wasabi storage account that was created in Section-3 above
Wasabi region- Select the Wasabi region where you created the Wasabi bucket in section 2
Bucket- Select the Wasabi Bucket created in Section-2.1 above
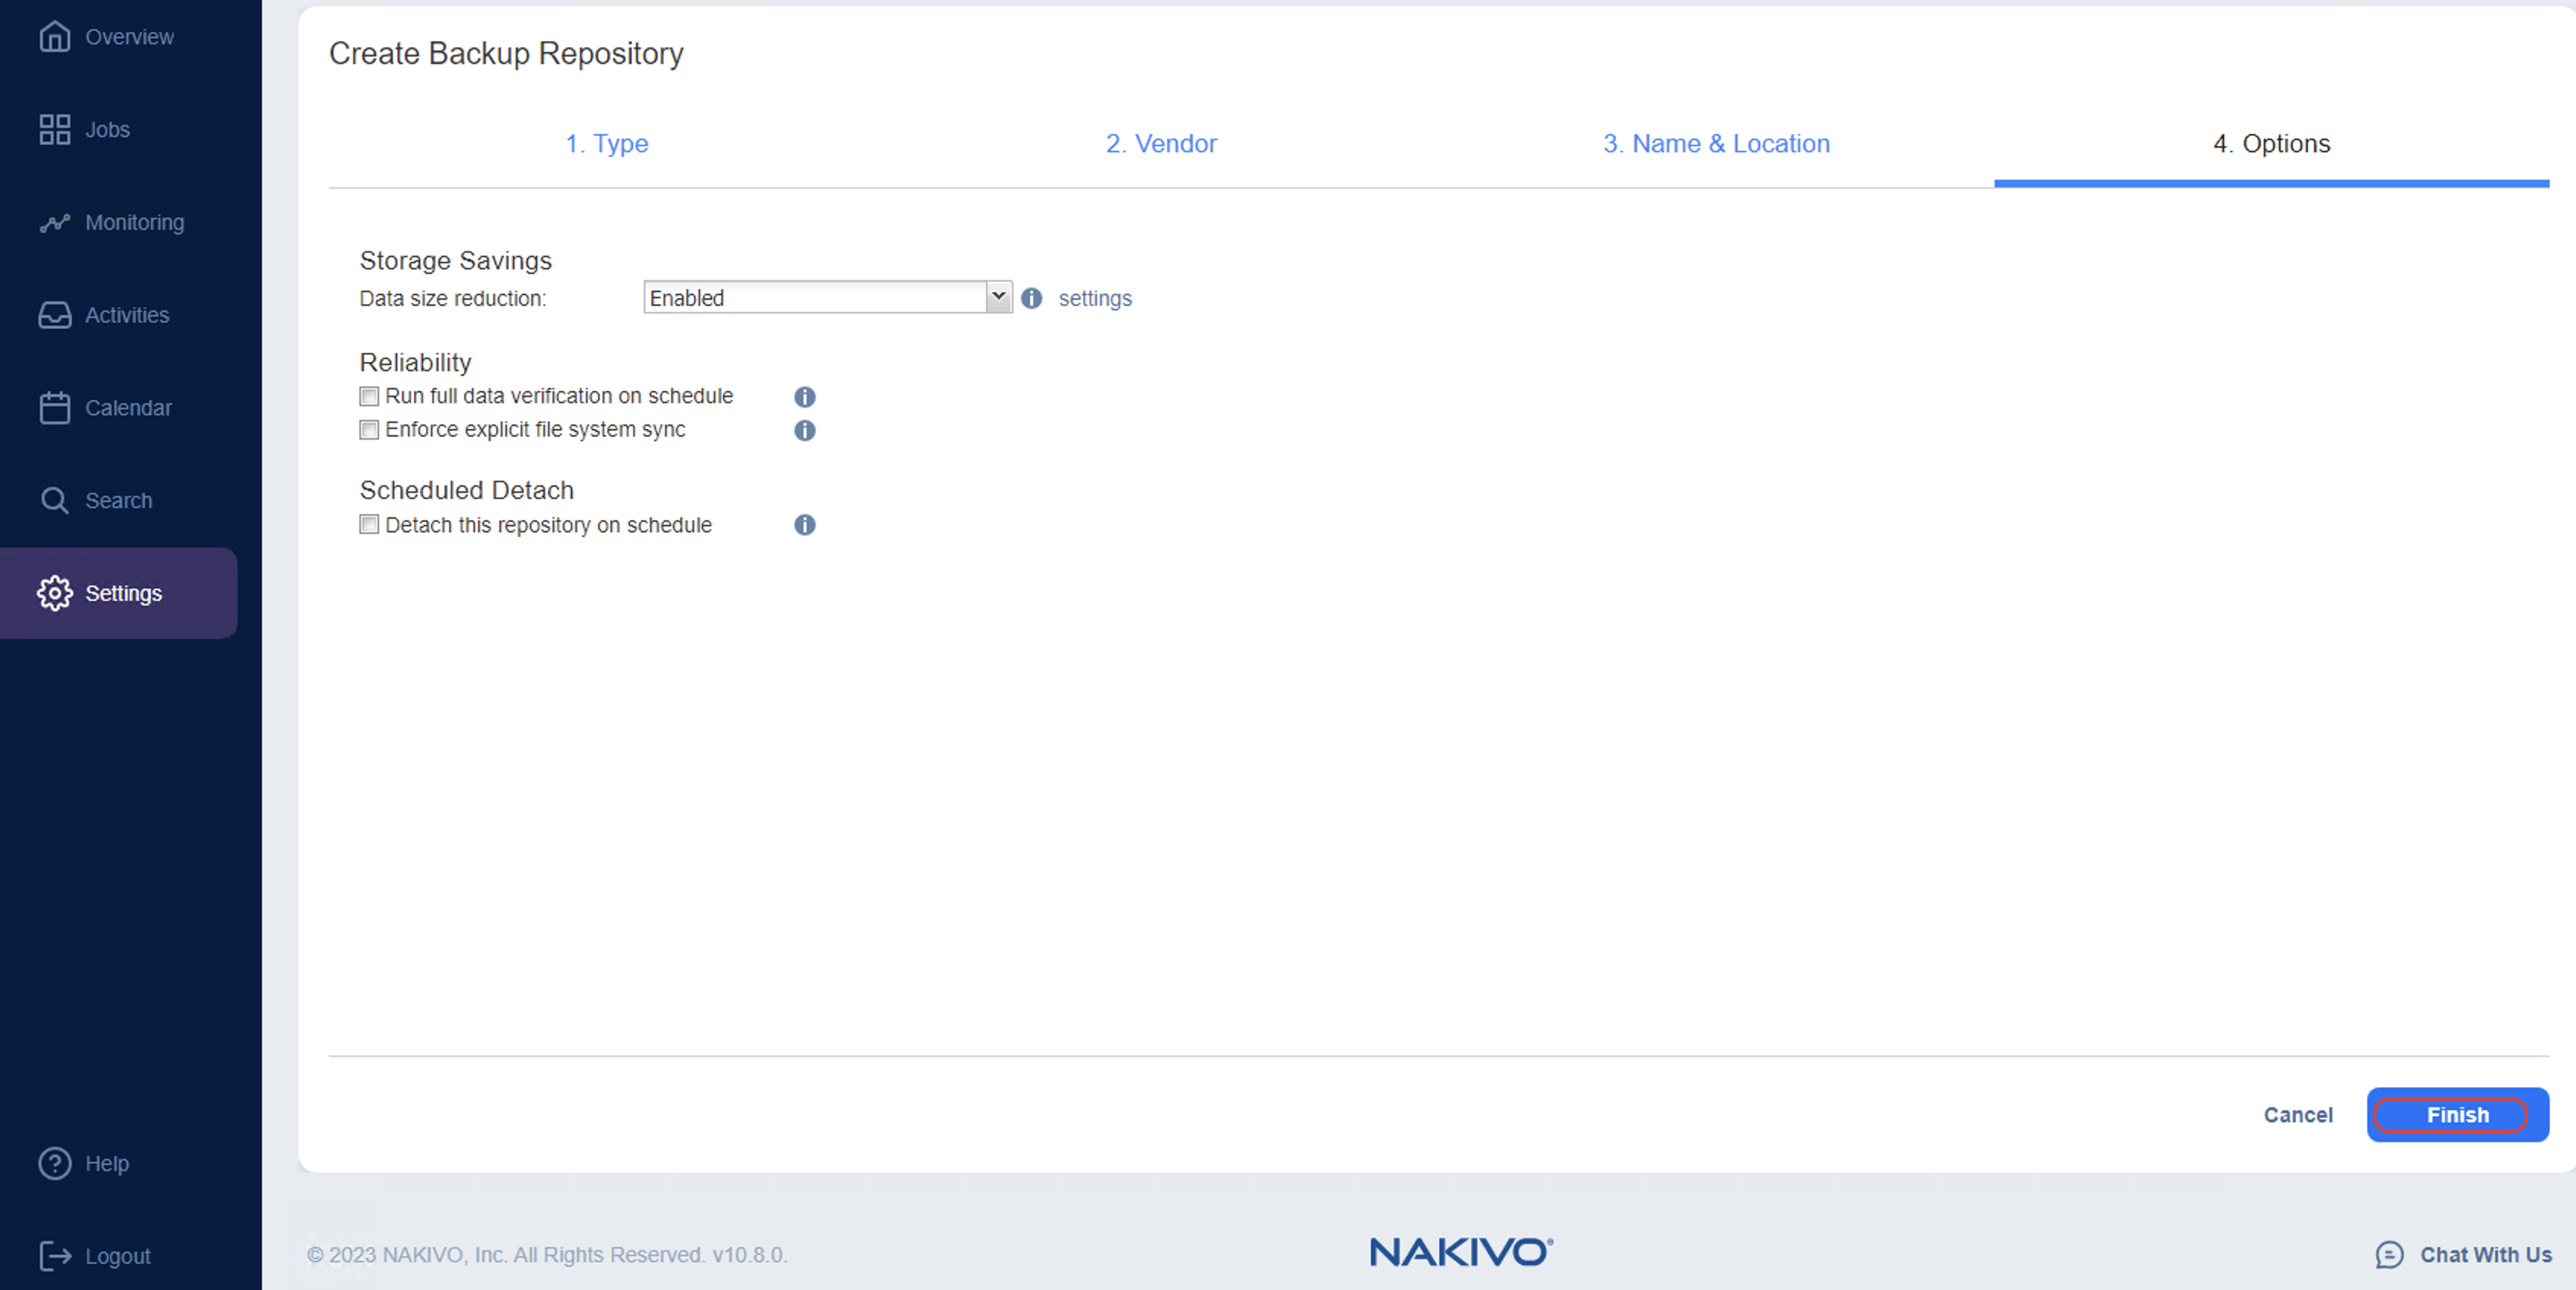
4.5 Keep the default settings on Options page and click Finish to create the repository.
4.6 Once you click Finish above, you will see the new repository in the list. Nakivo will scan all buckets in the account.
5. Add infrastructure to be backed-up on Nakivo (optional)
This section provides steps to add your VMware infrastructure that you need to backup using Nakivo Backup and Recovery. Follow the steps below to add VMs to your inventory.
5.1 Navigate to Settings. Click Inventory, then click + to add to inventory.
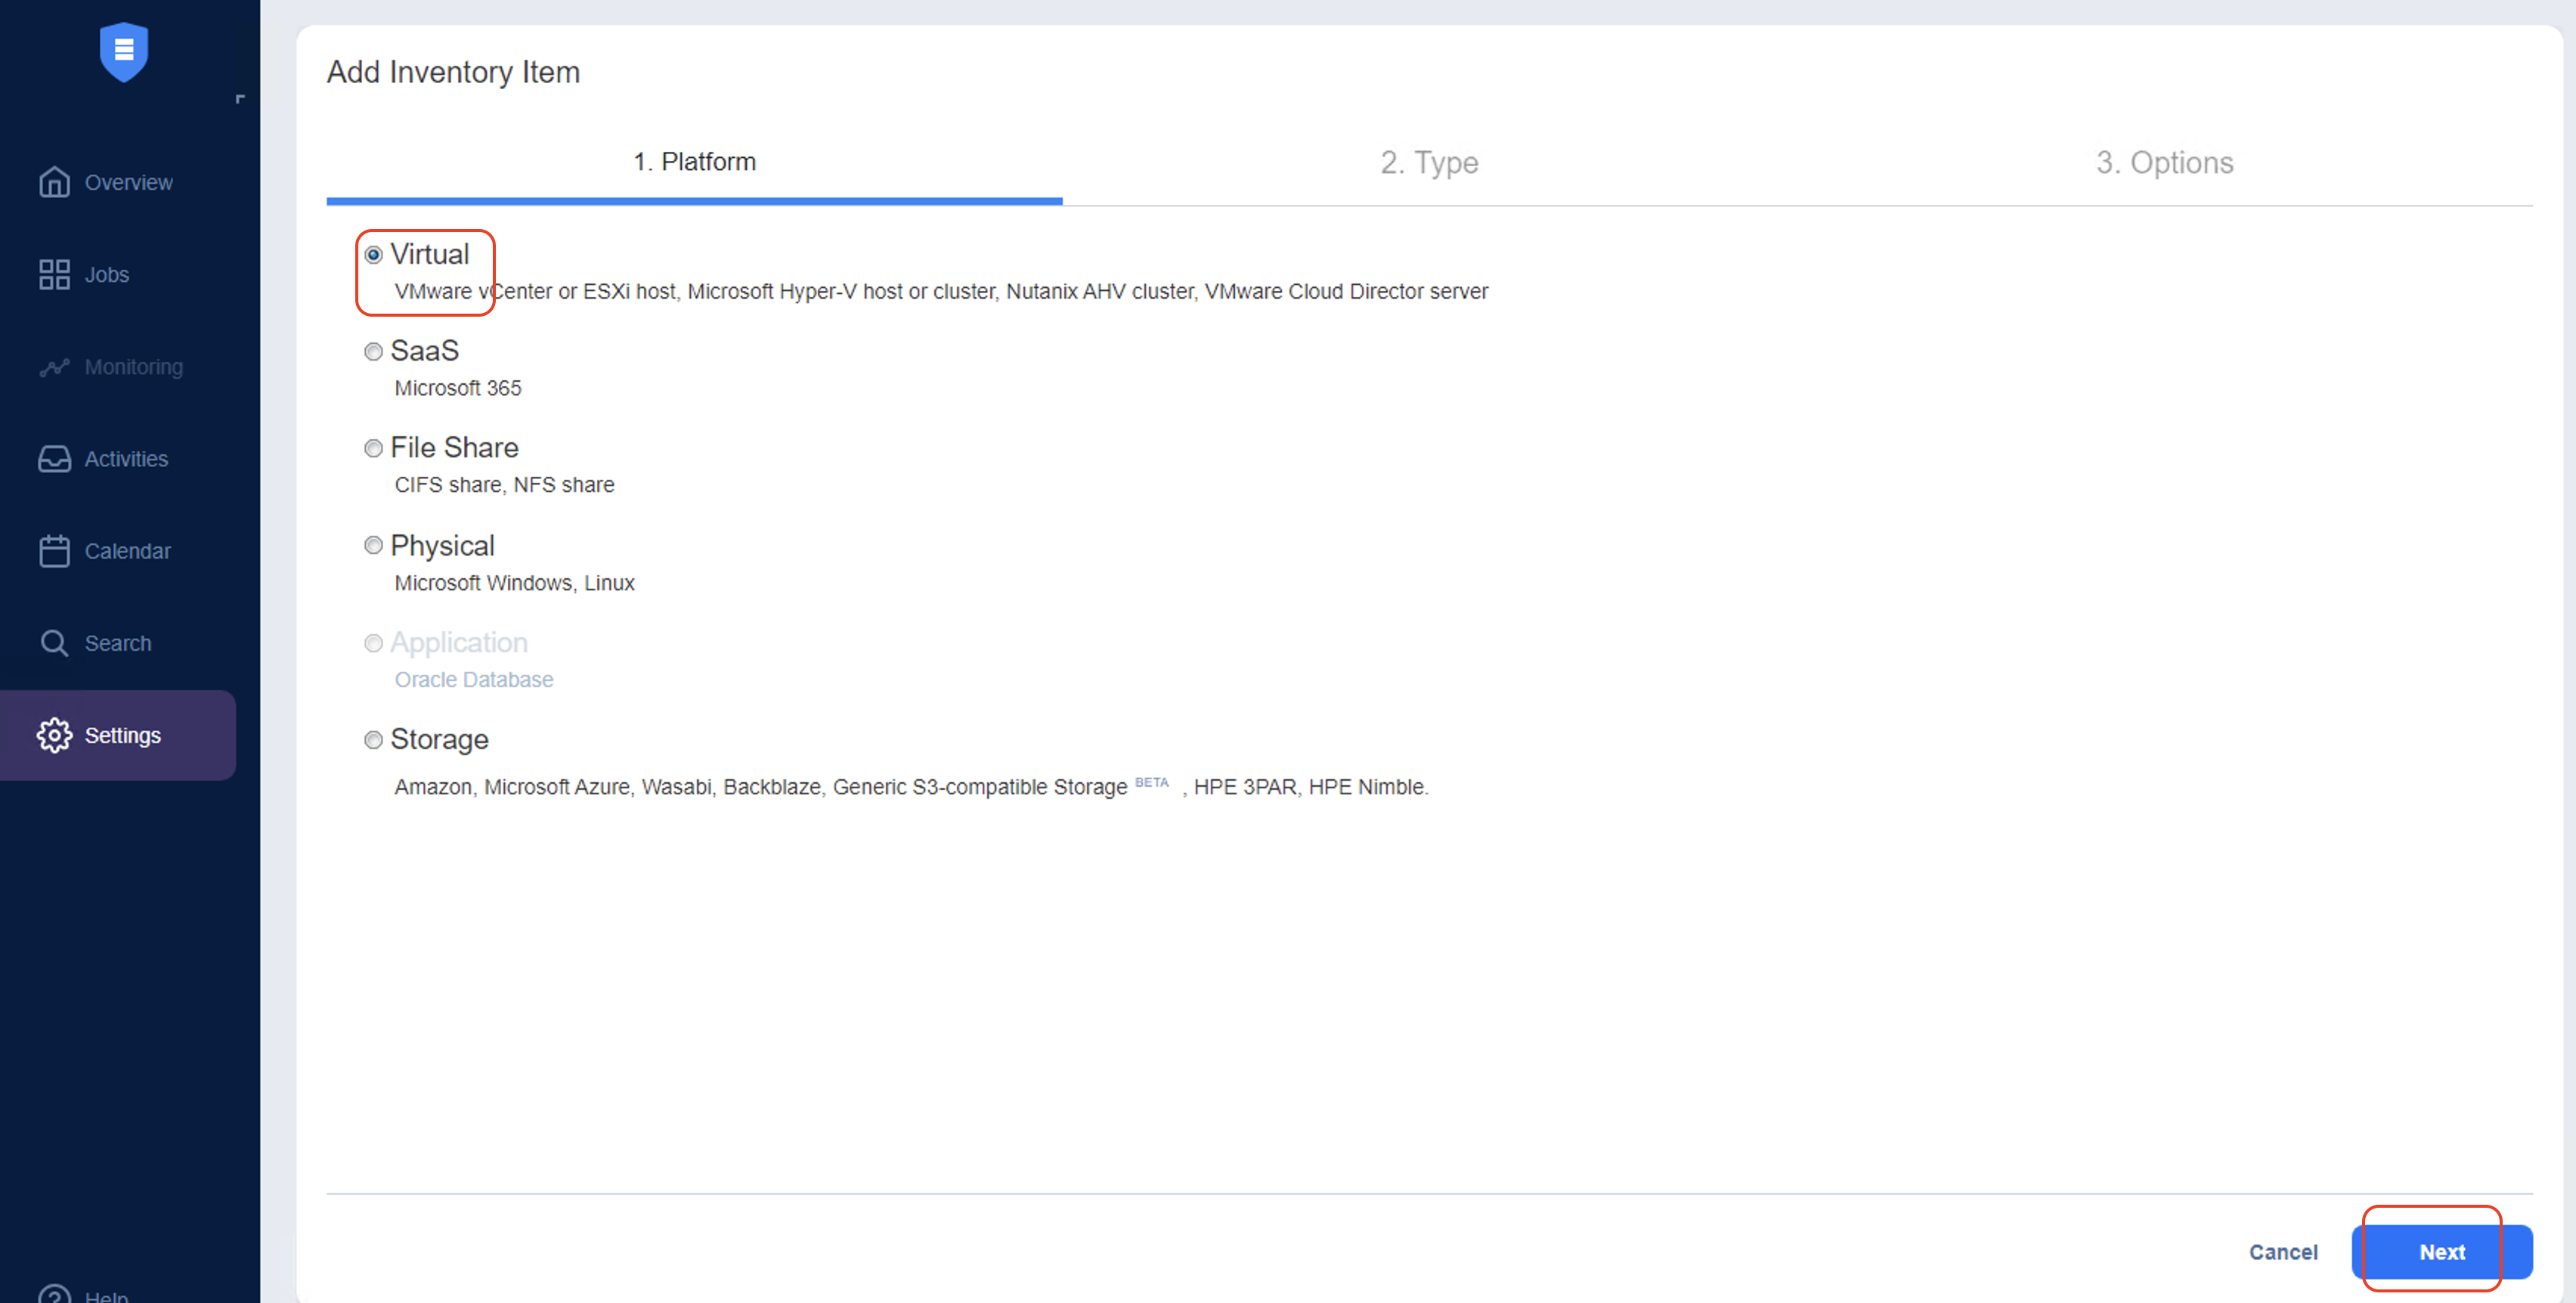
5.2 Choose Virtual, then click Next.
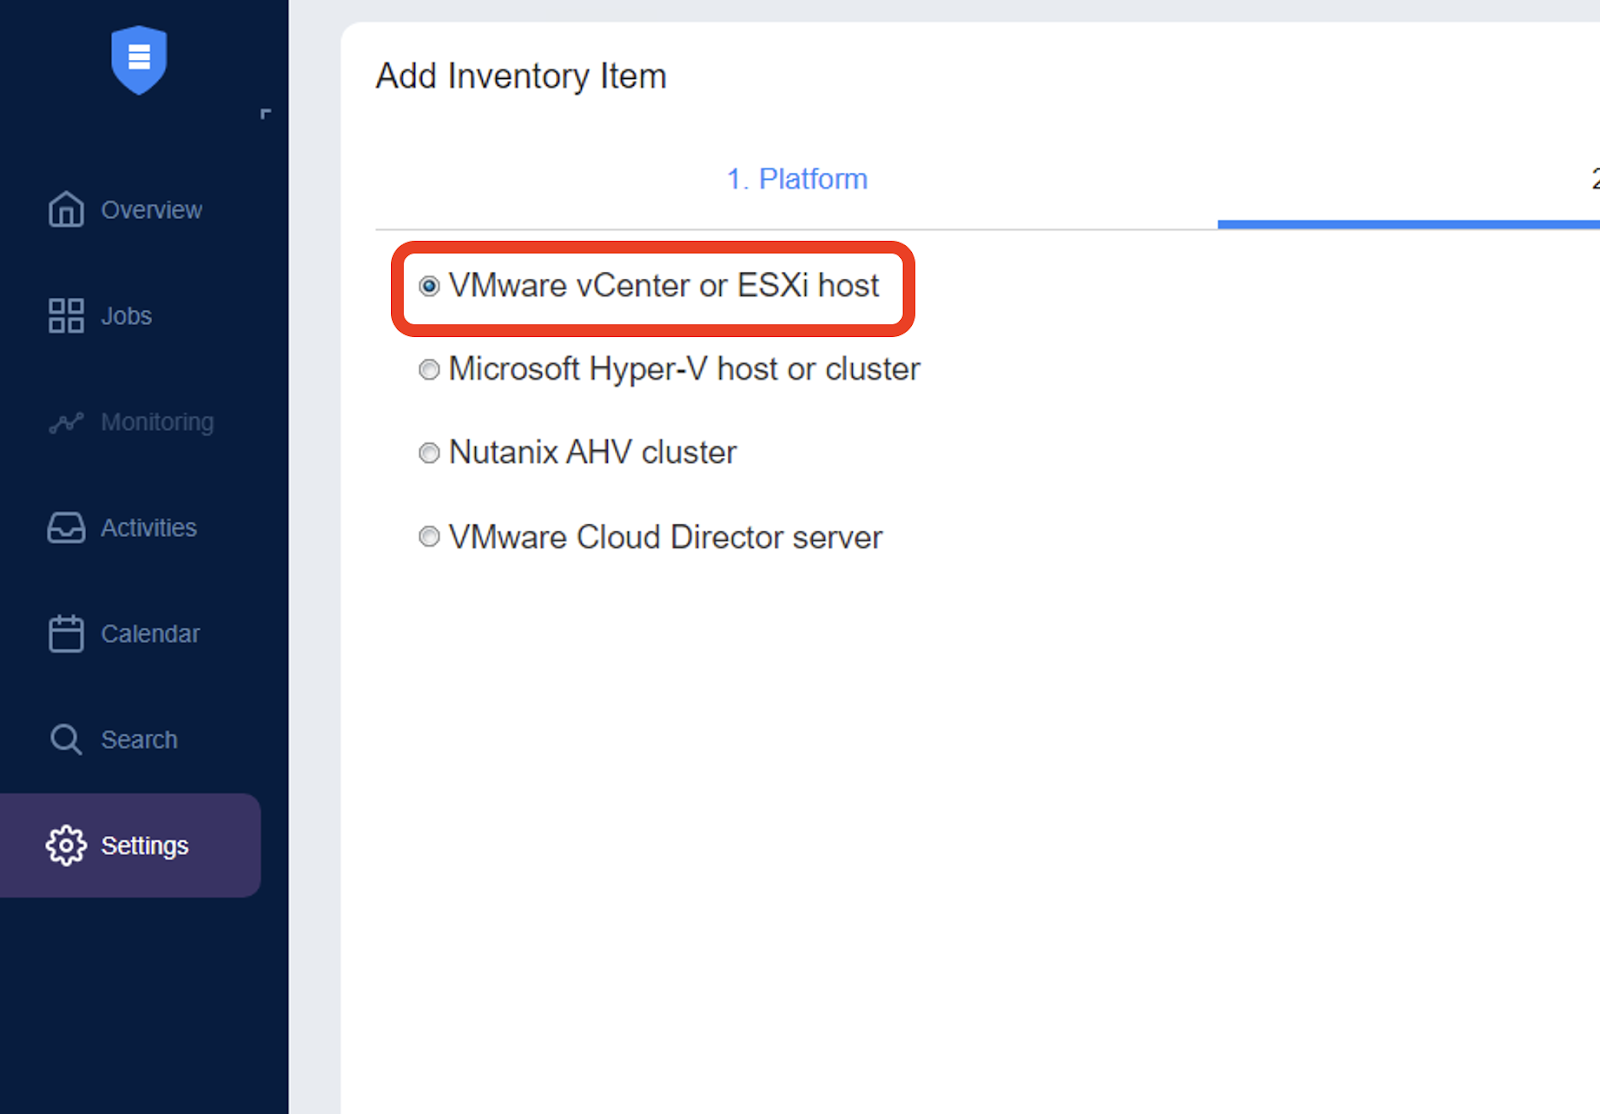
5.3 Choose VMware vCenter or ESXi Host or any other asset to backup. In the example below we are adding a VMware vCenter cluster.
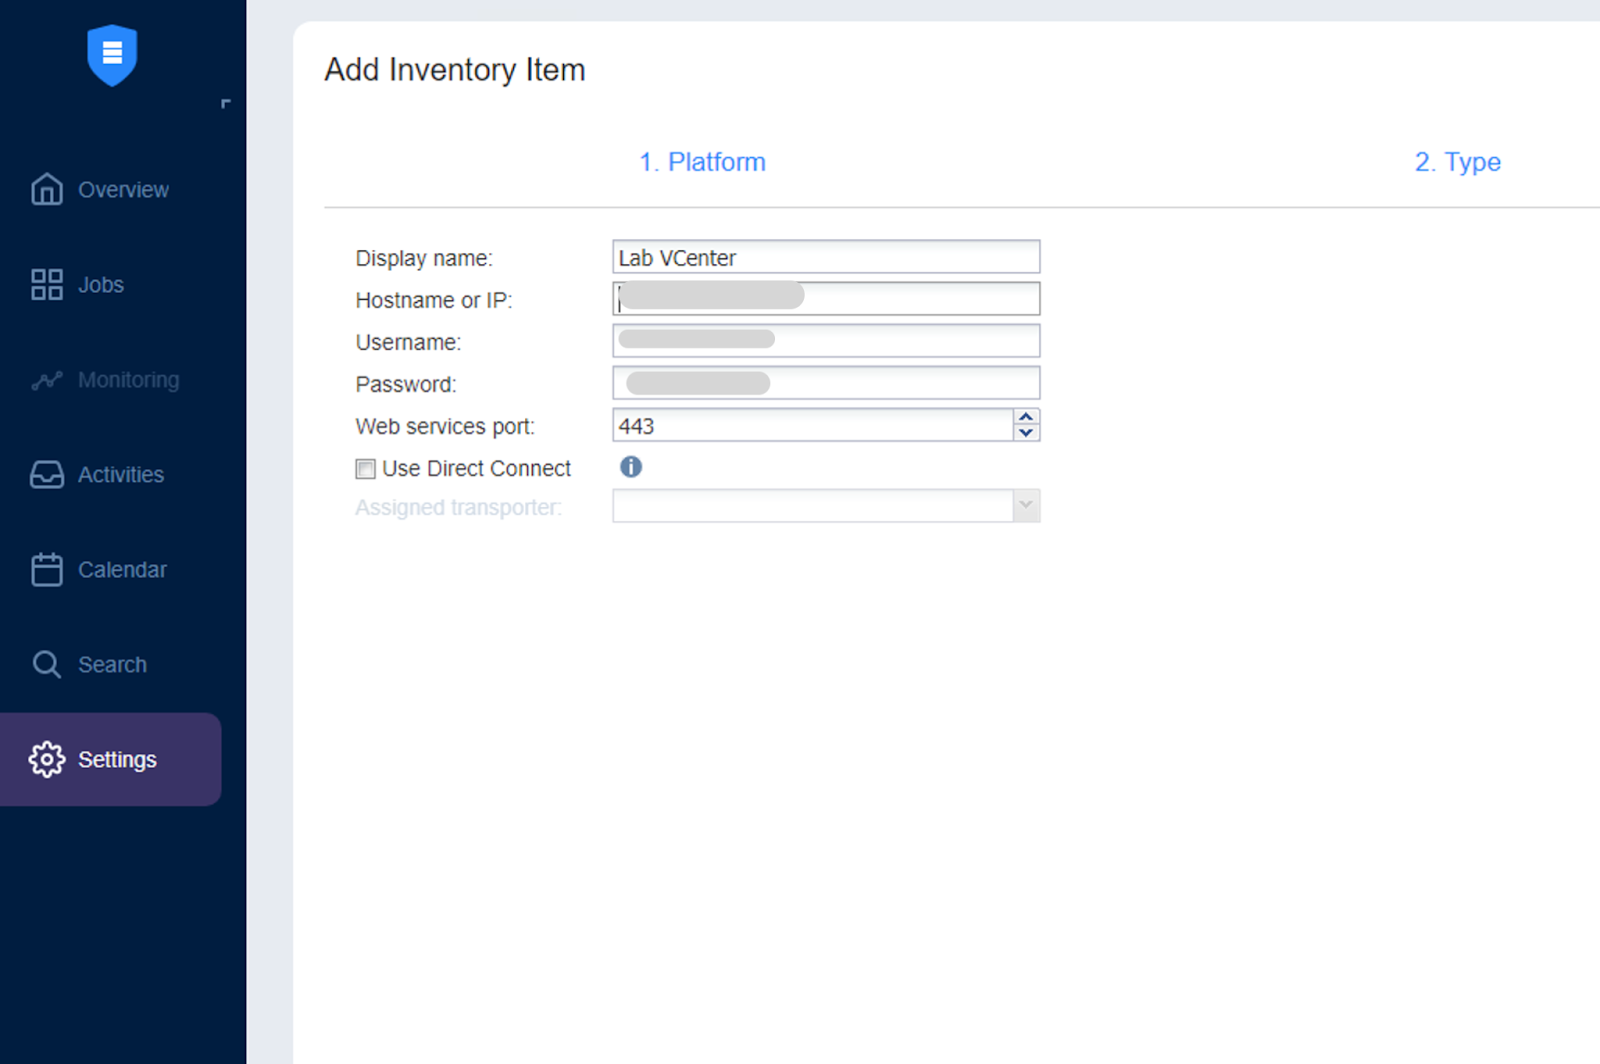
5.4 Provide the following details and click Finish.
Display name- Name for the vCenter in Nakivo inventory
Hostname or IP- vCenter hostname or IP
Username- Username to access vCenter. Refer to Nakivo documentation regarding access policies needed for users
Password- Password for the vCenter user
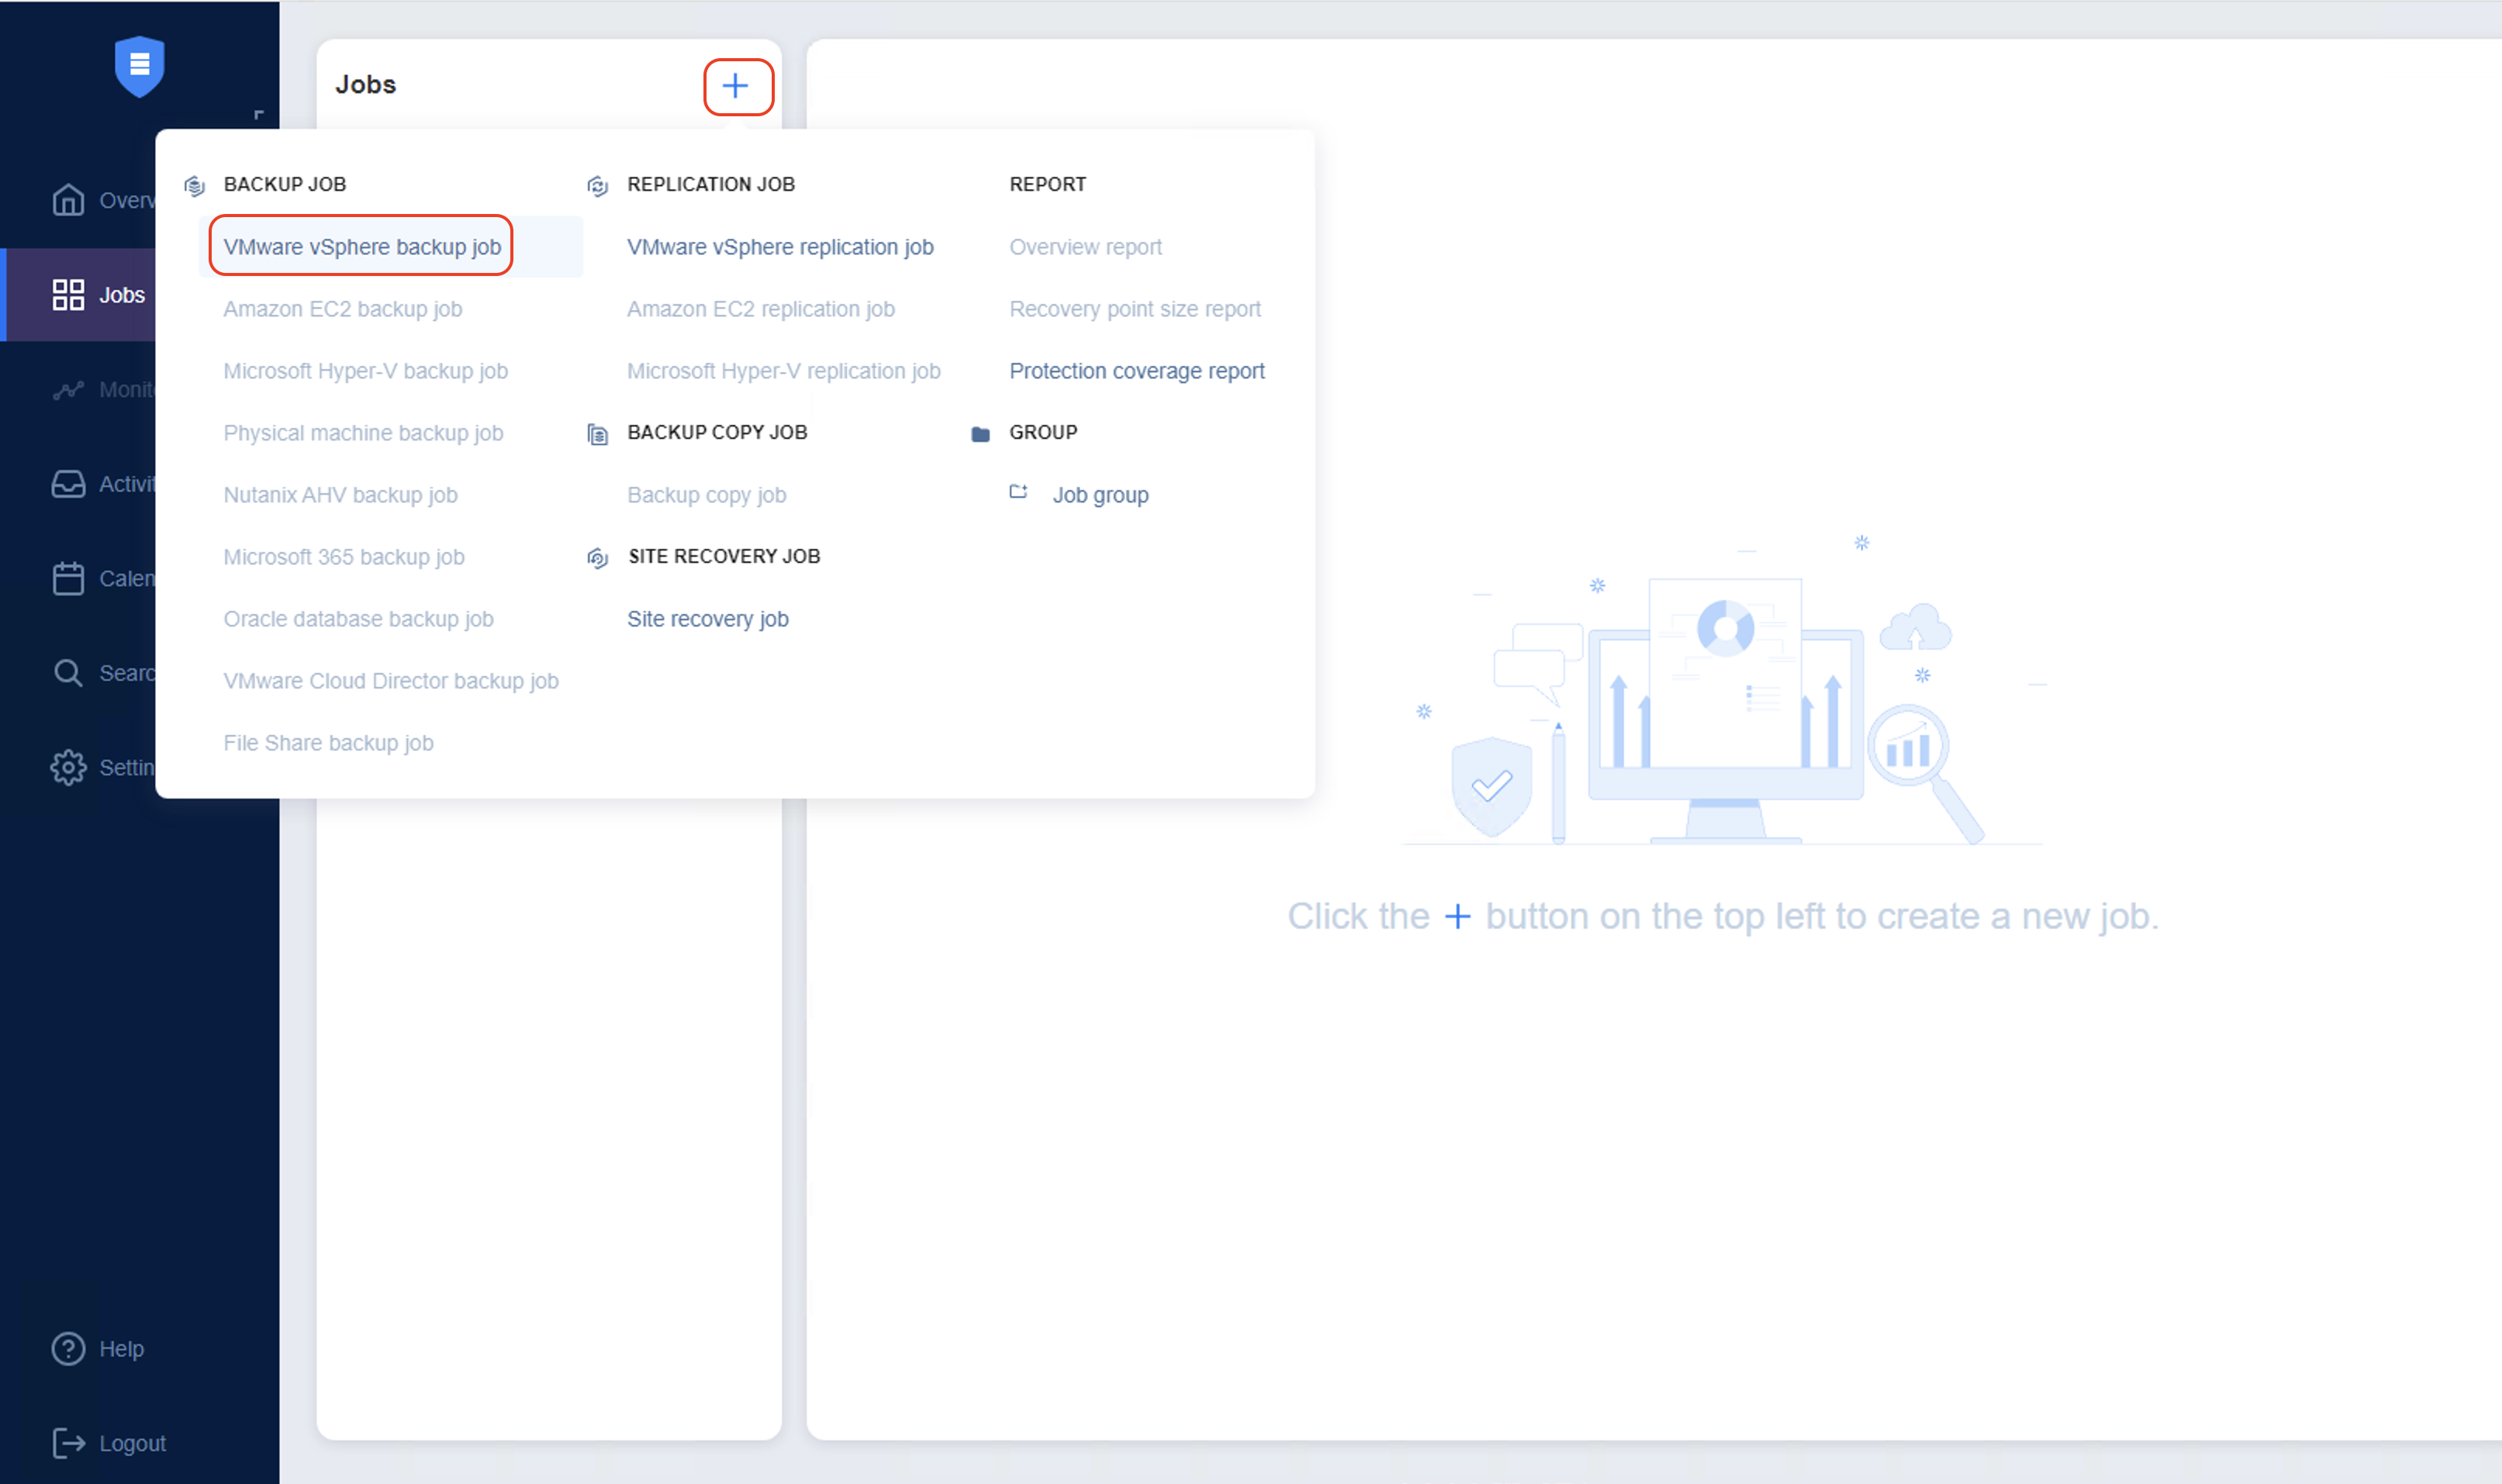
6. Create a job to back up in Nakivo to run backups
This section outlines steps to create a backup job that specifies which VMs are to be backed up, where and when to back them up, and sets other backup options.
6.1. Navigate to Jobs, then click + and choose VMware vSphere backup job under Backup job.
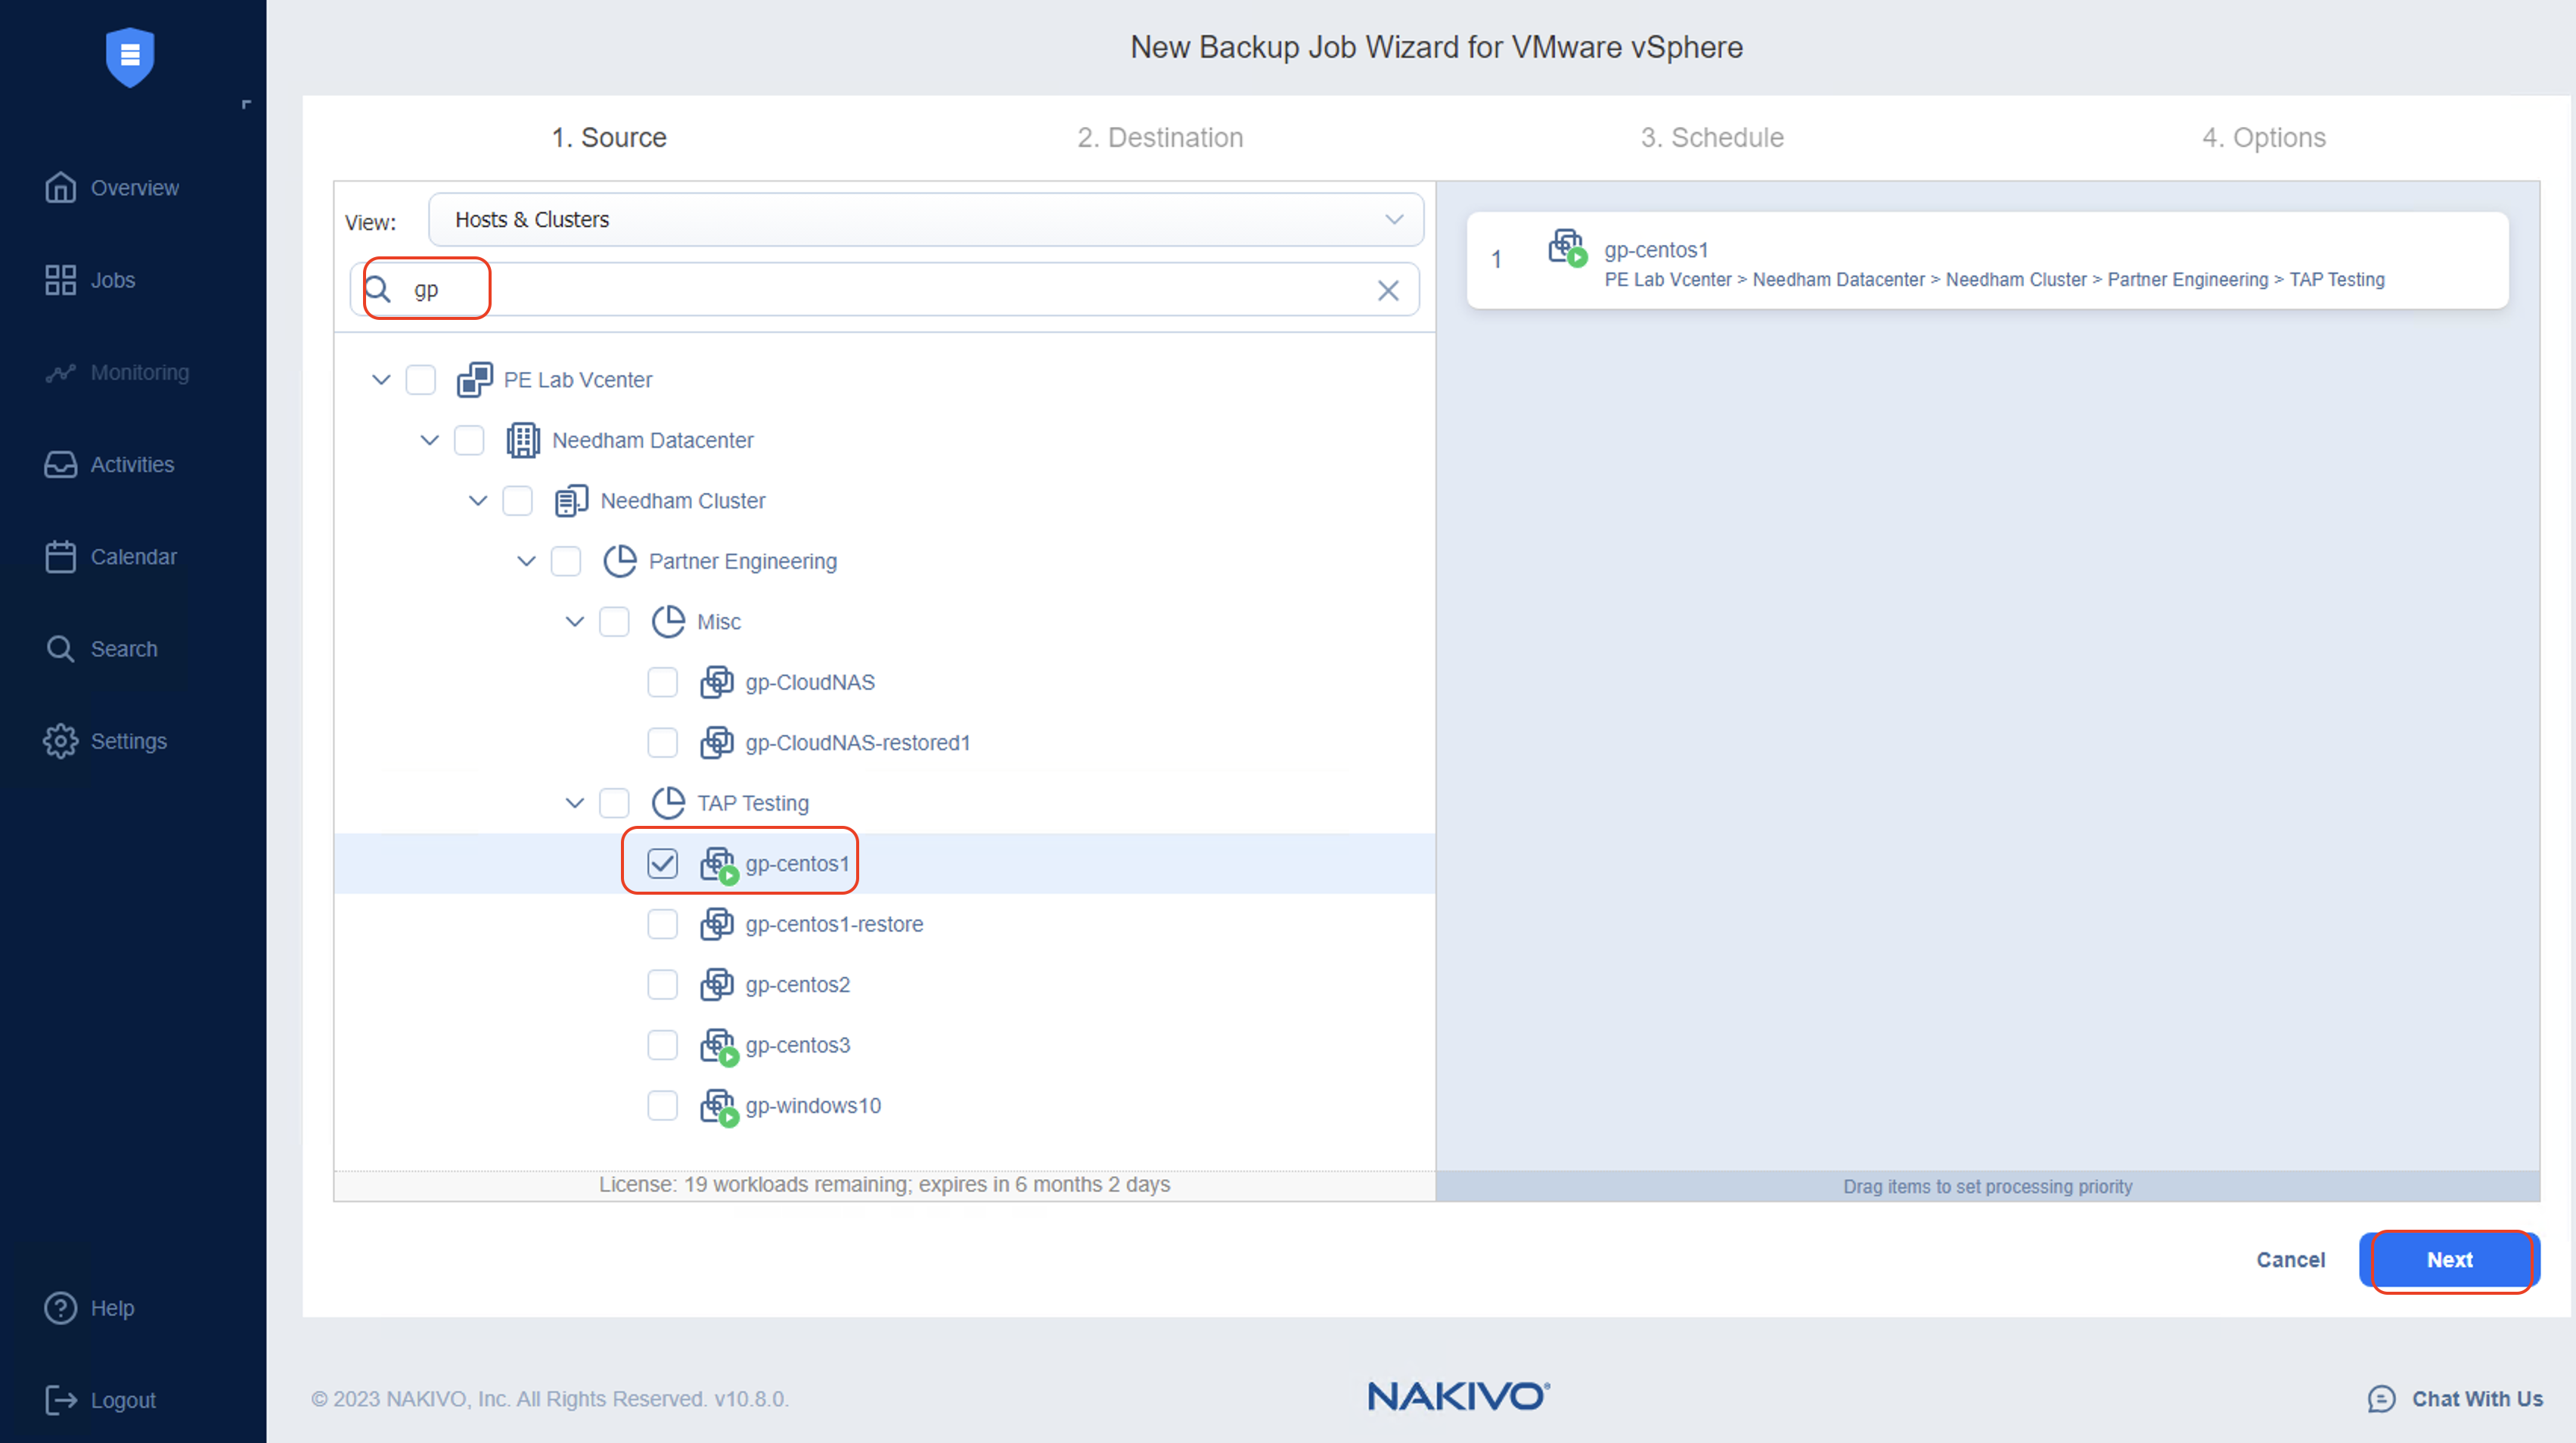
6.2. Select the VM to backup, then click Next.
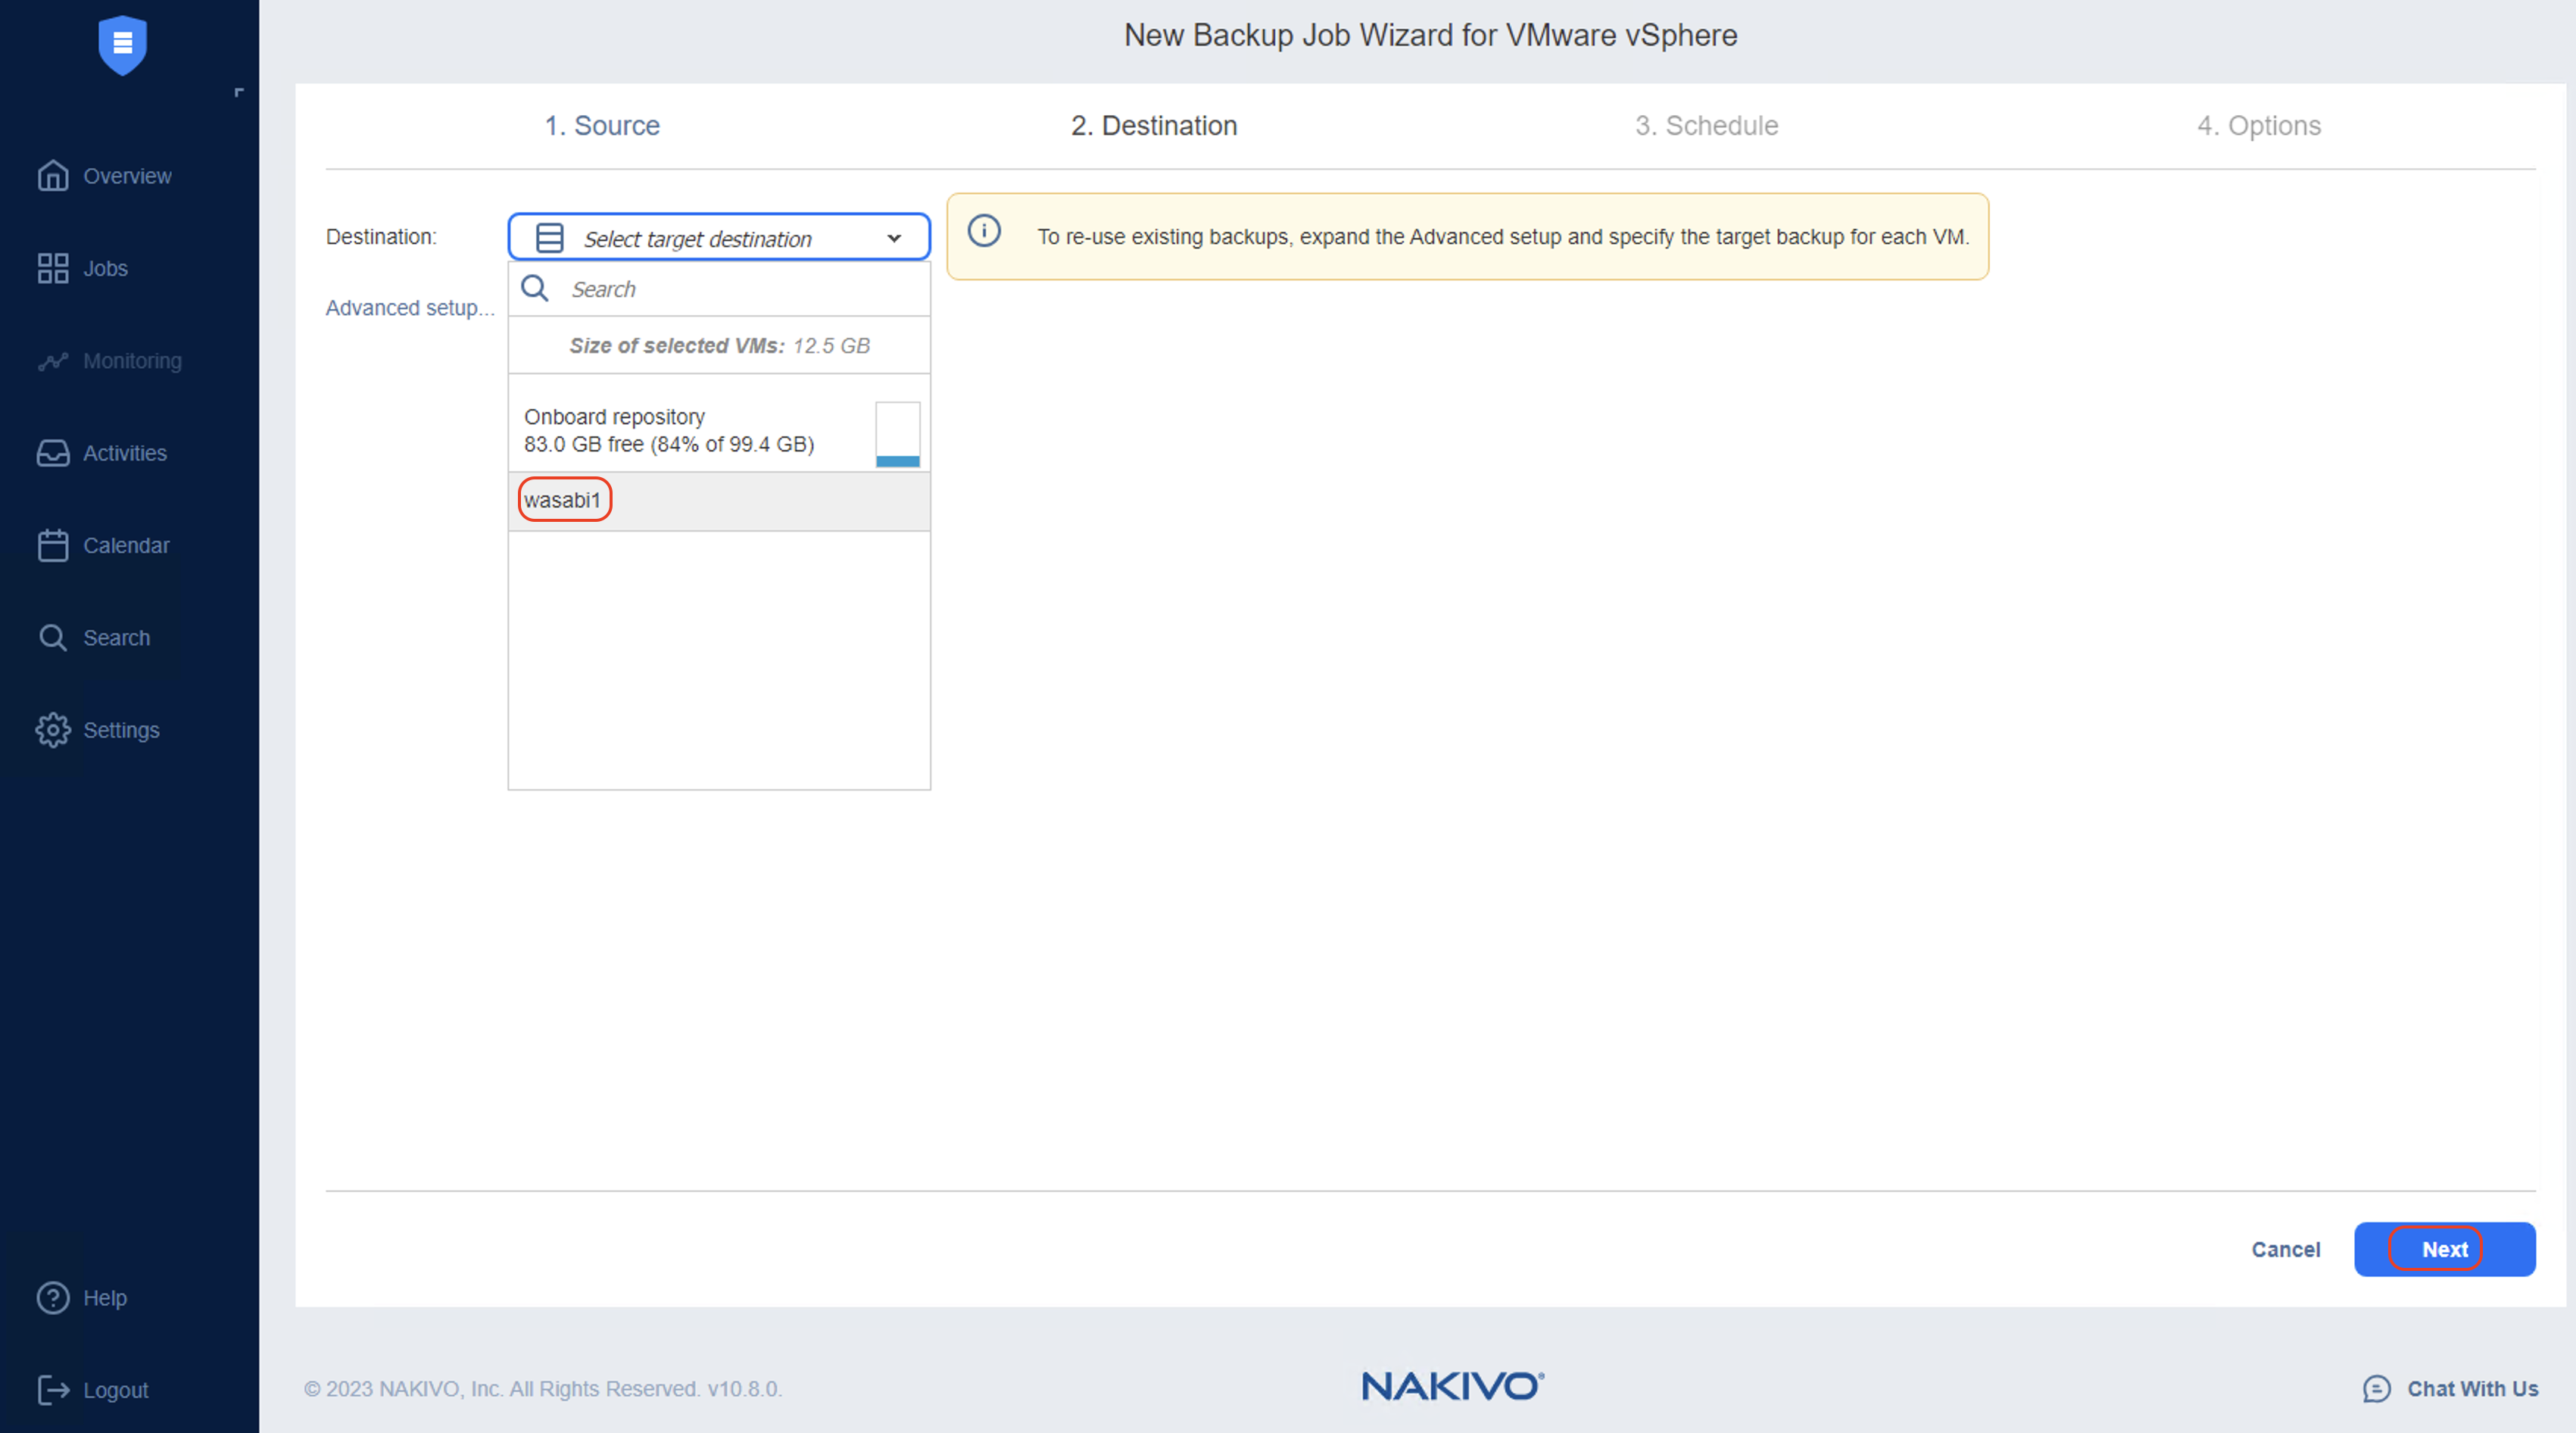
6.3. From the “Destination” pull down list, select the repository that was created in the above steps. Click Next.
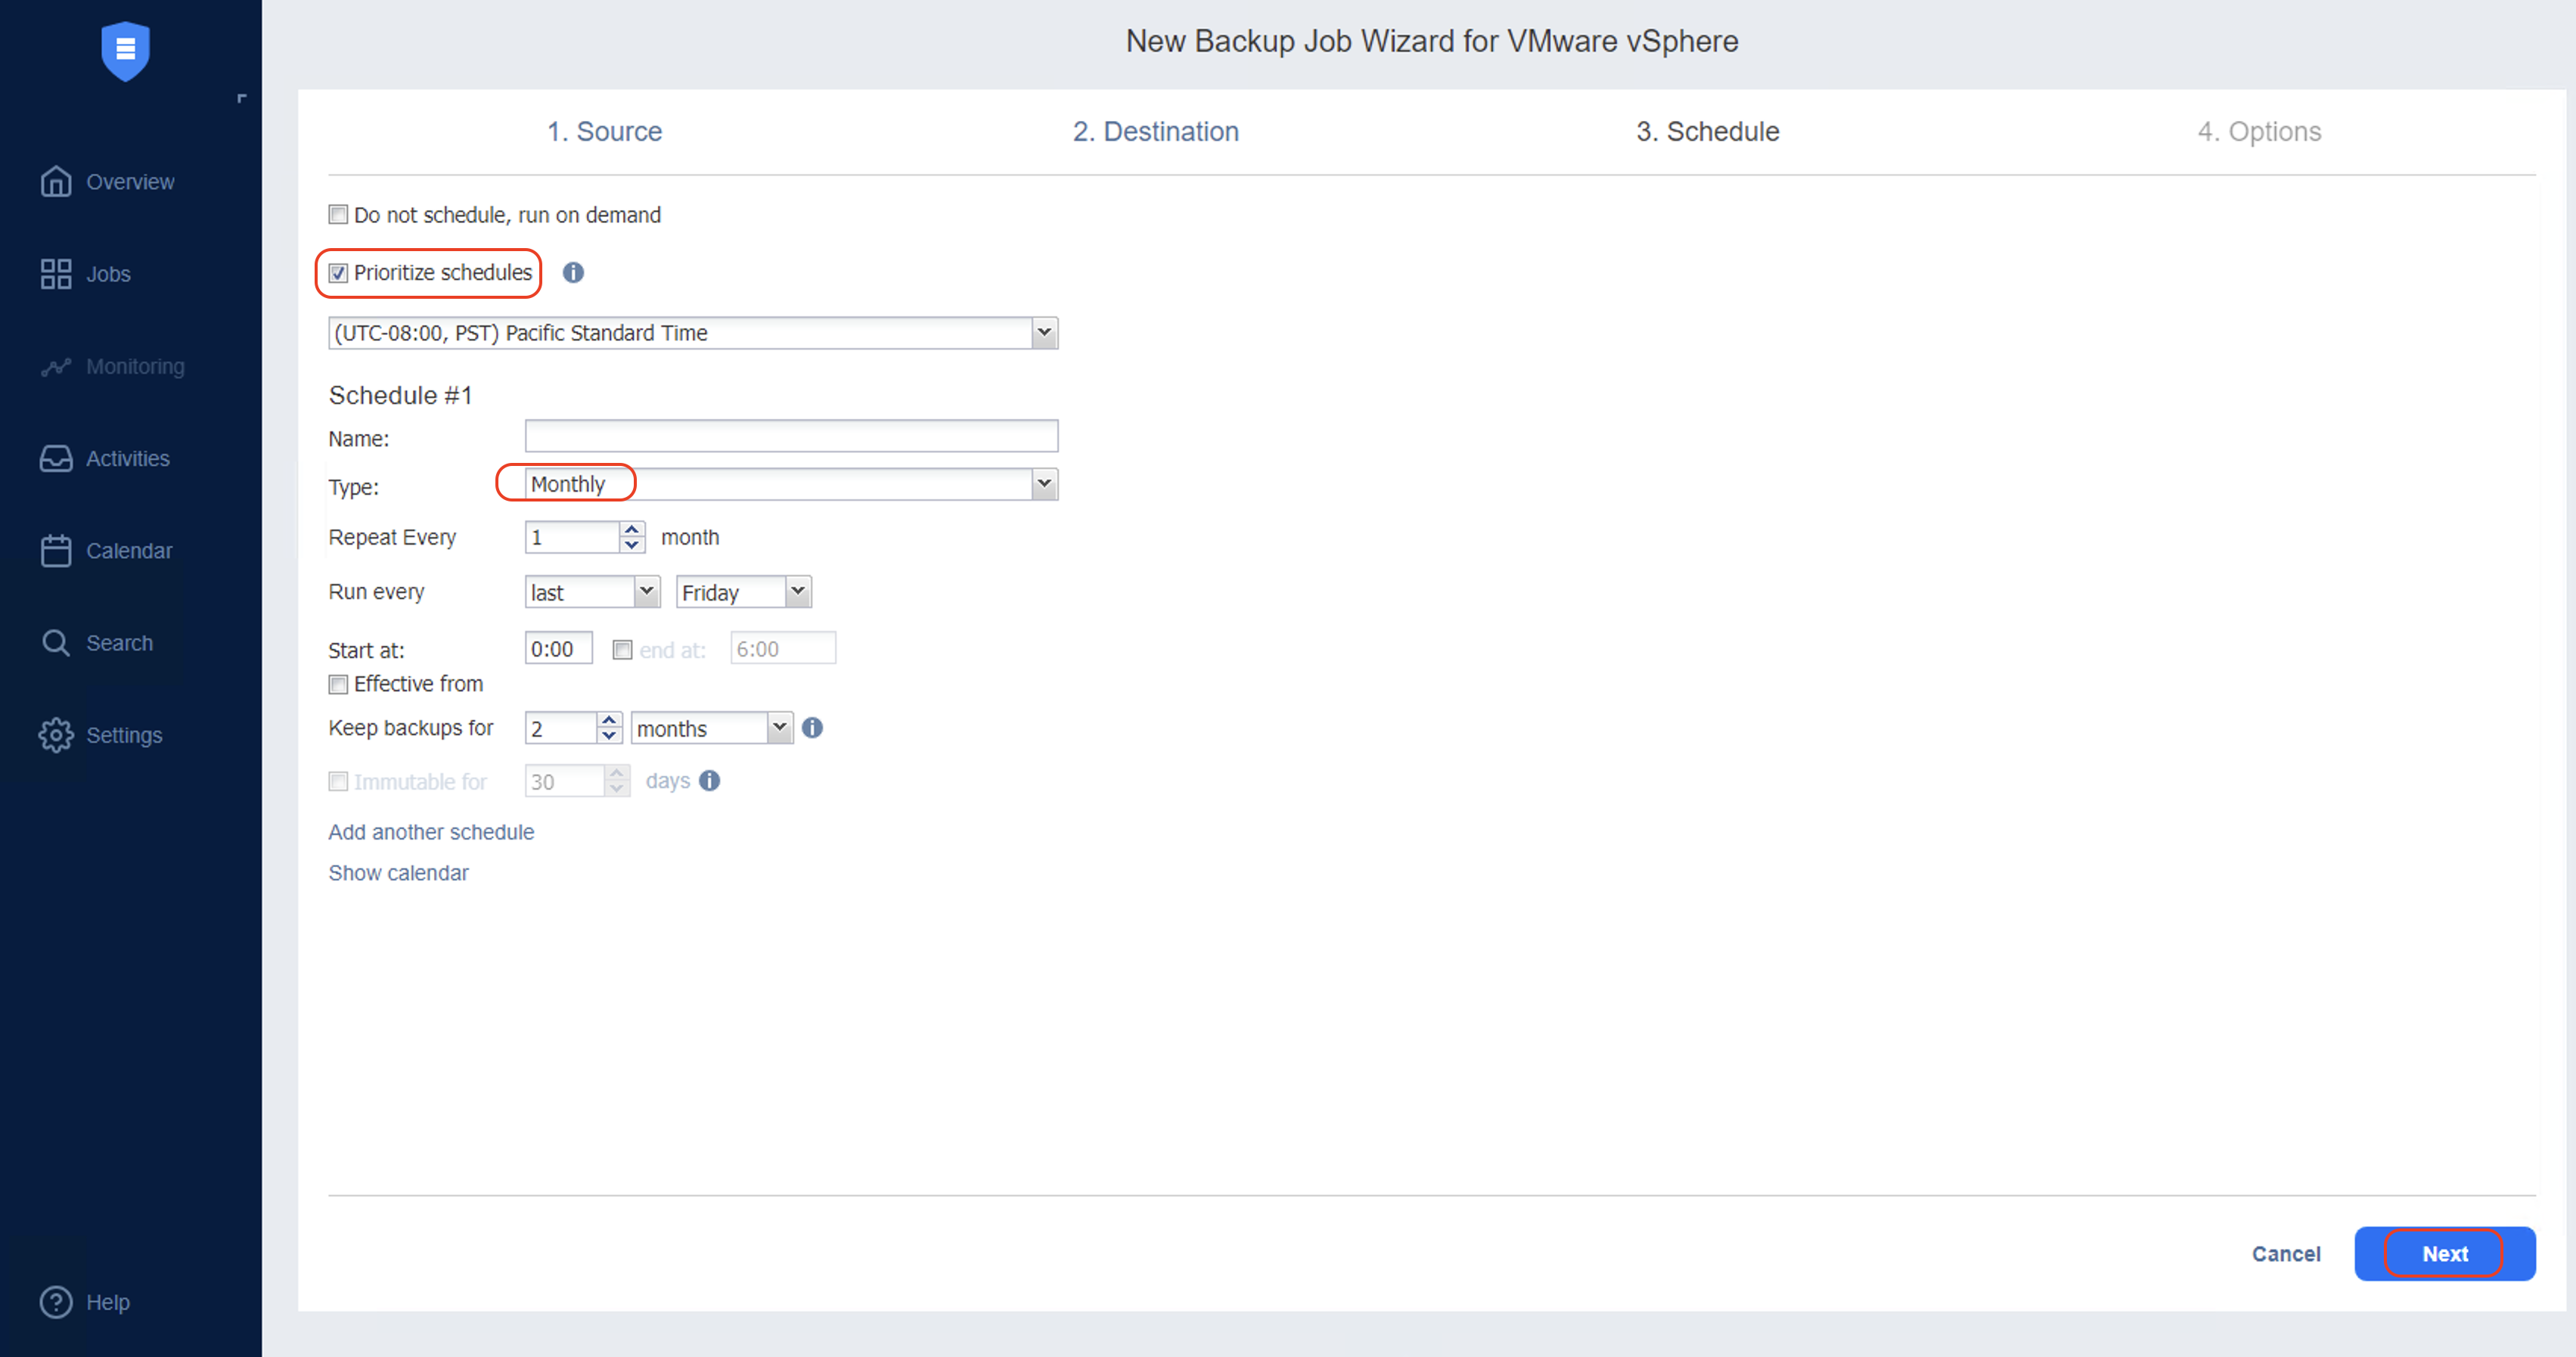
6.4. Set the schedule as required, or if you want to run the job manually, choose Do not schedule, run on demand. Set the retention policy by configuring the retention period in keep backups for section. Click Next.
6.5. On the Options page, configure the settings as needed and click Finish & Run.
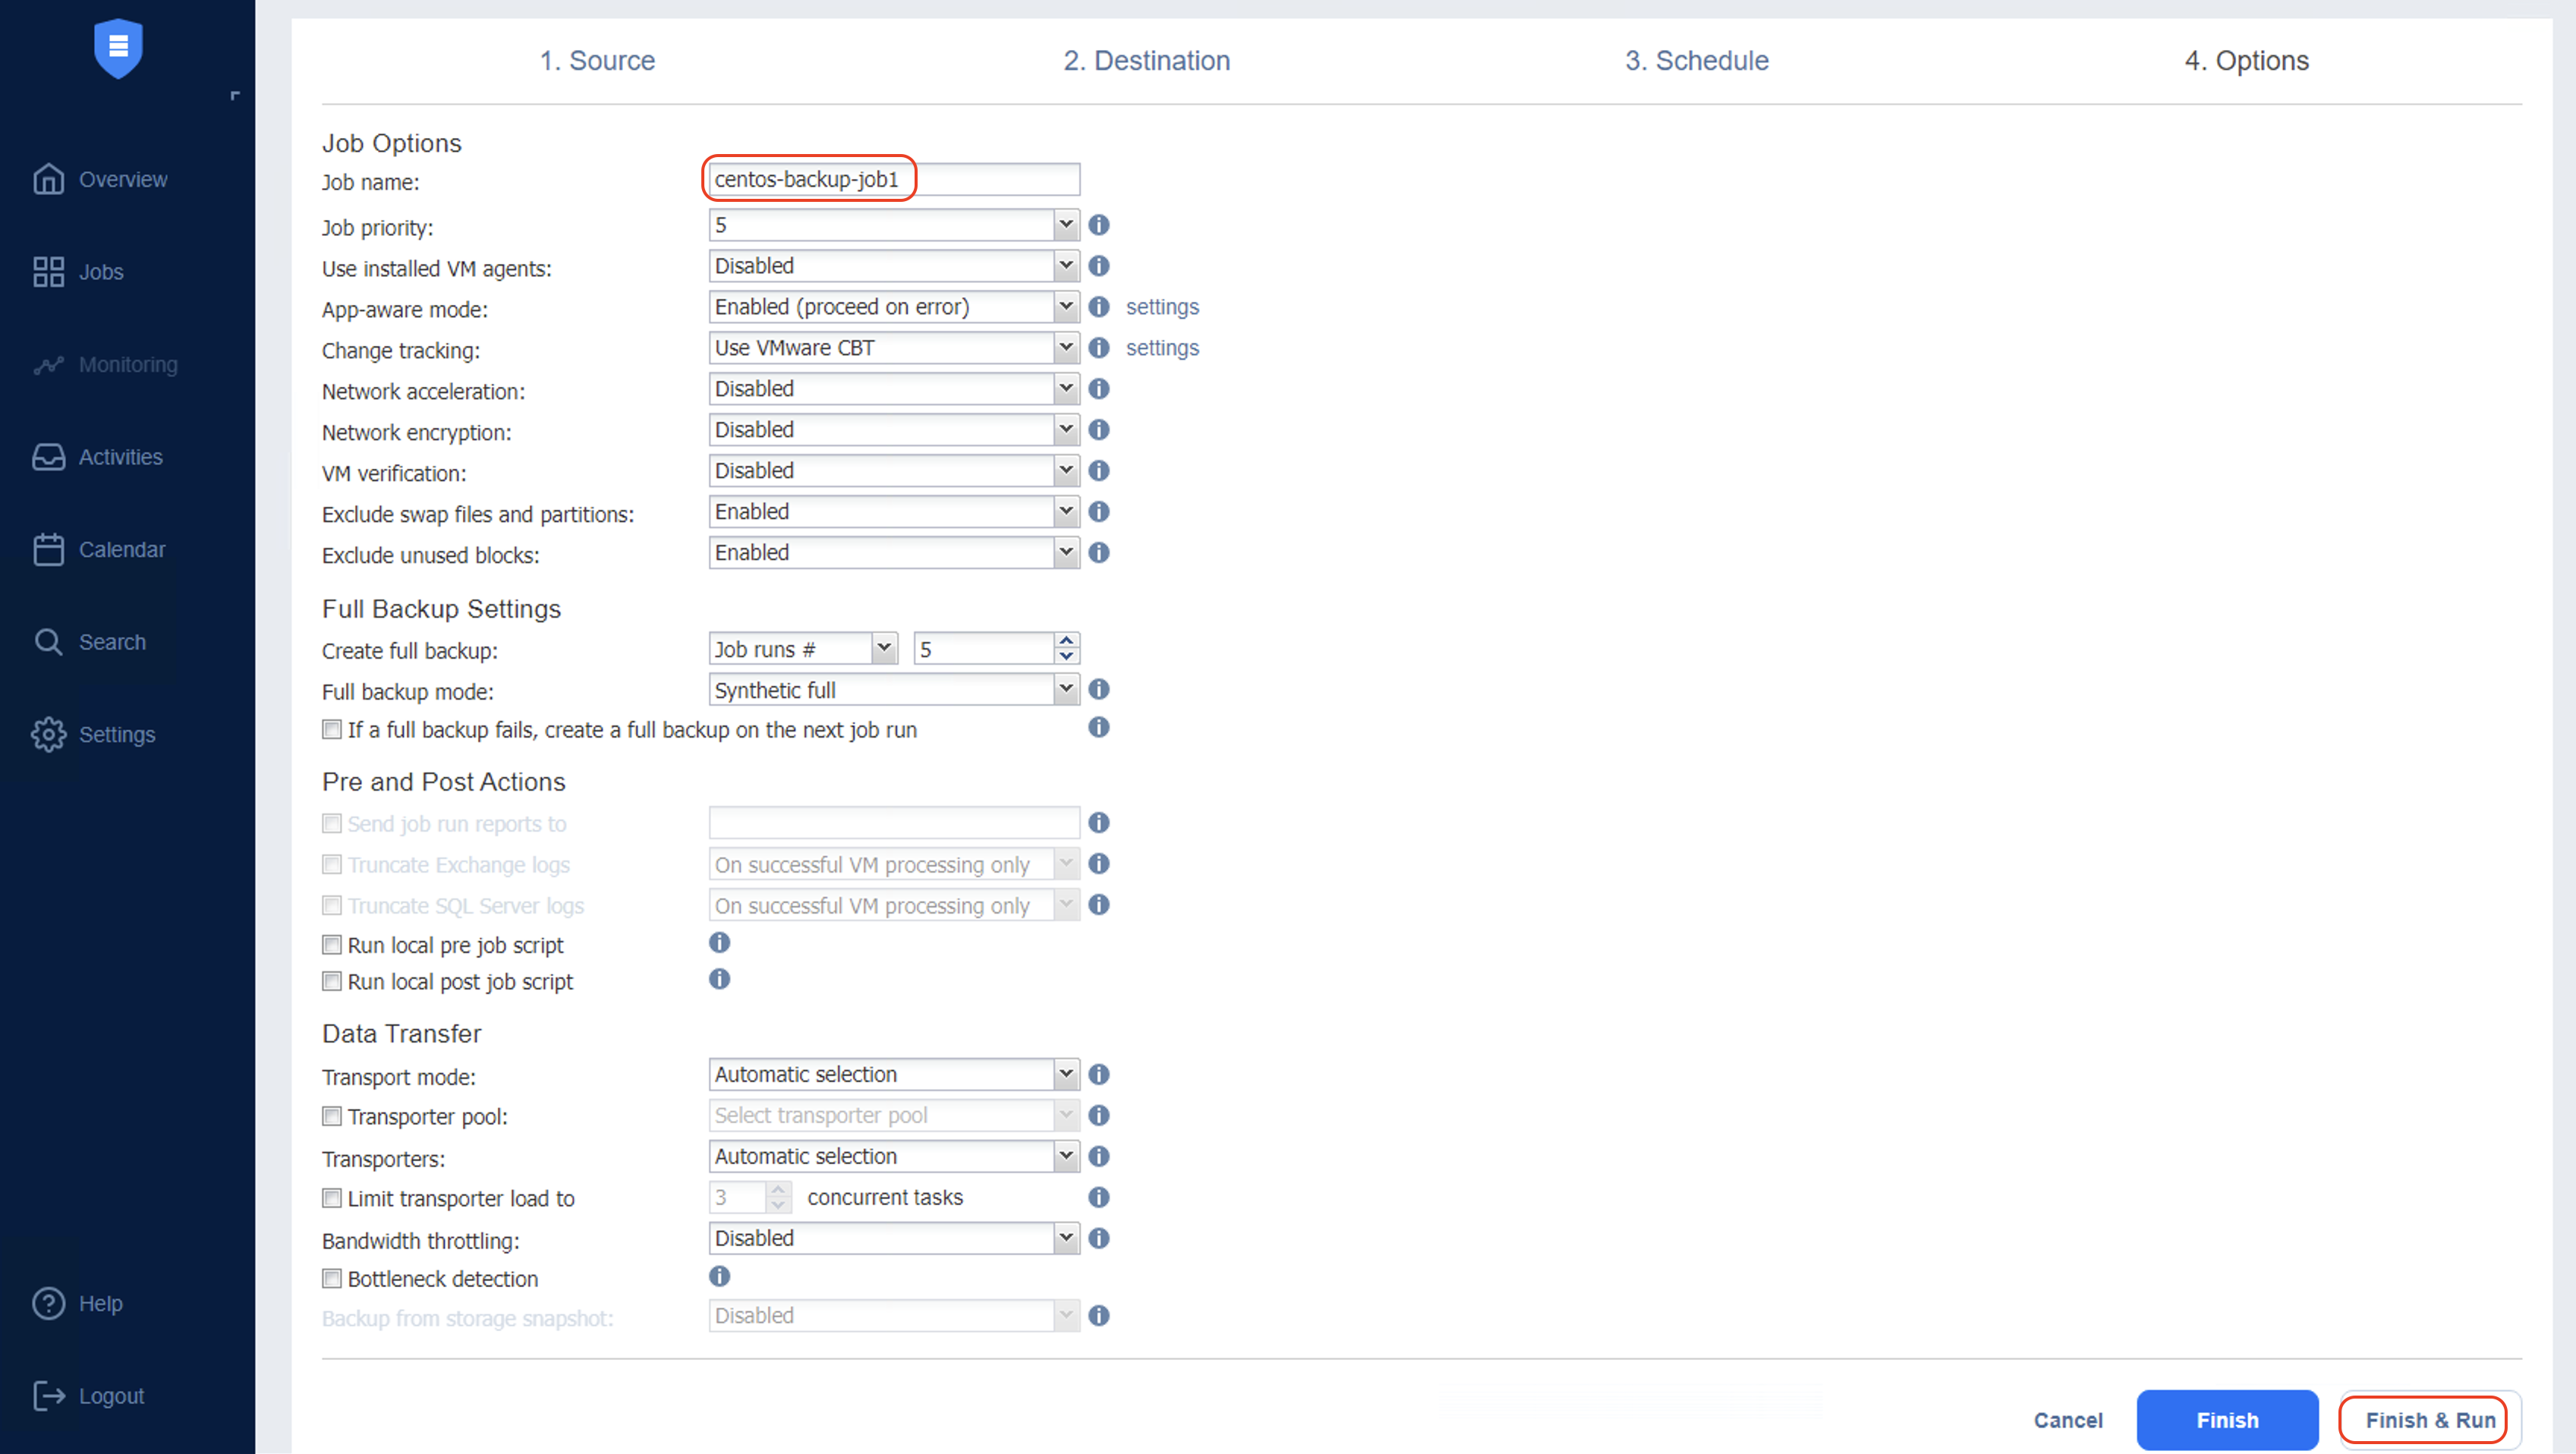
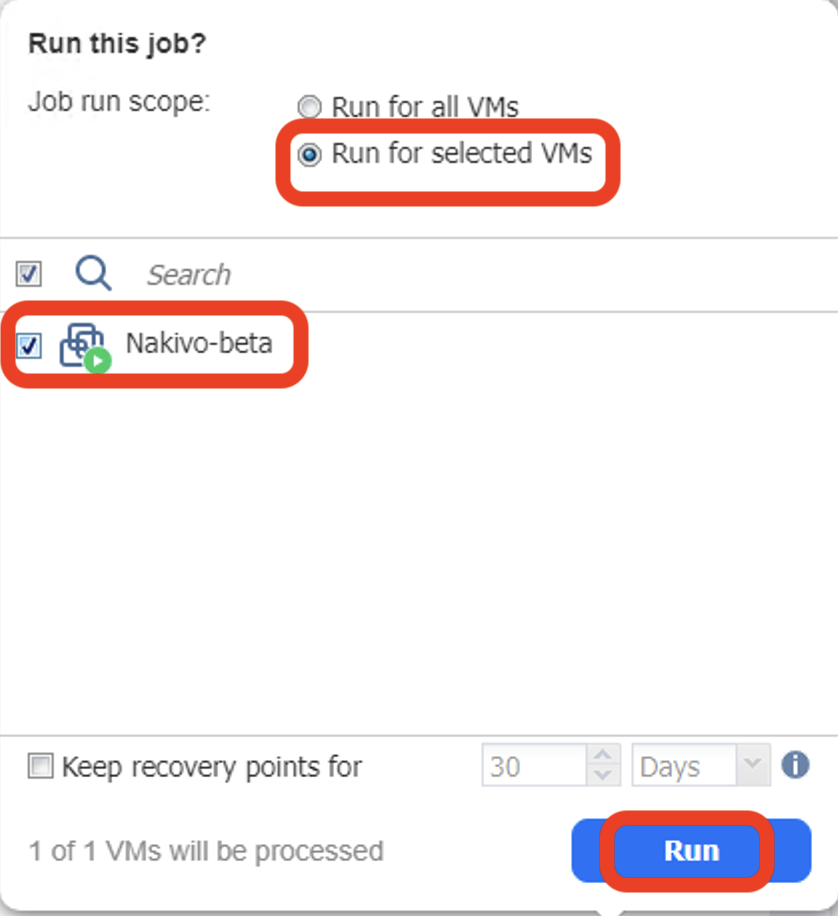
6.6. Once you click Finish & Run a pop-up opens up, select the VM you are looking to backup and click Run.
6.7. The backup job starts at this point, and the summary can be reviewed on the Jobs page.
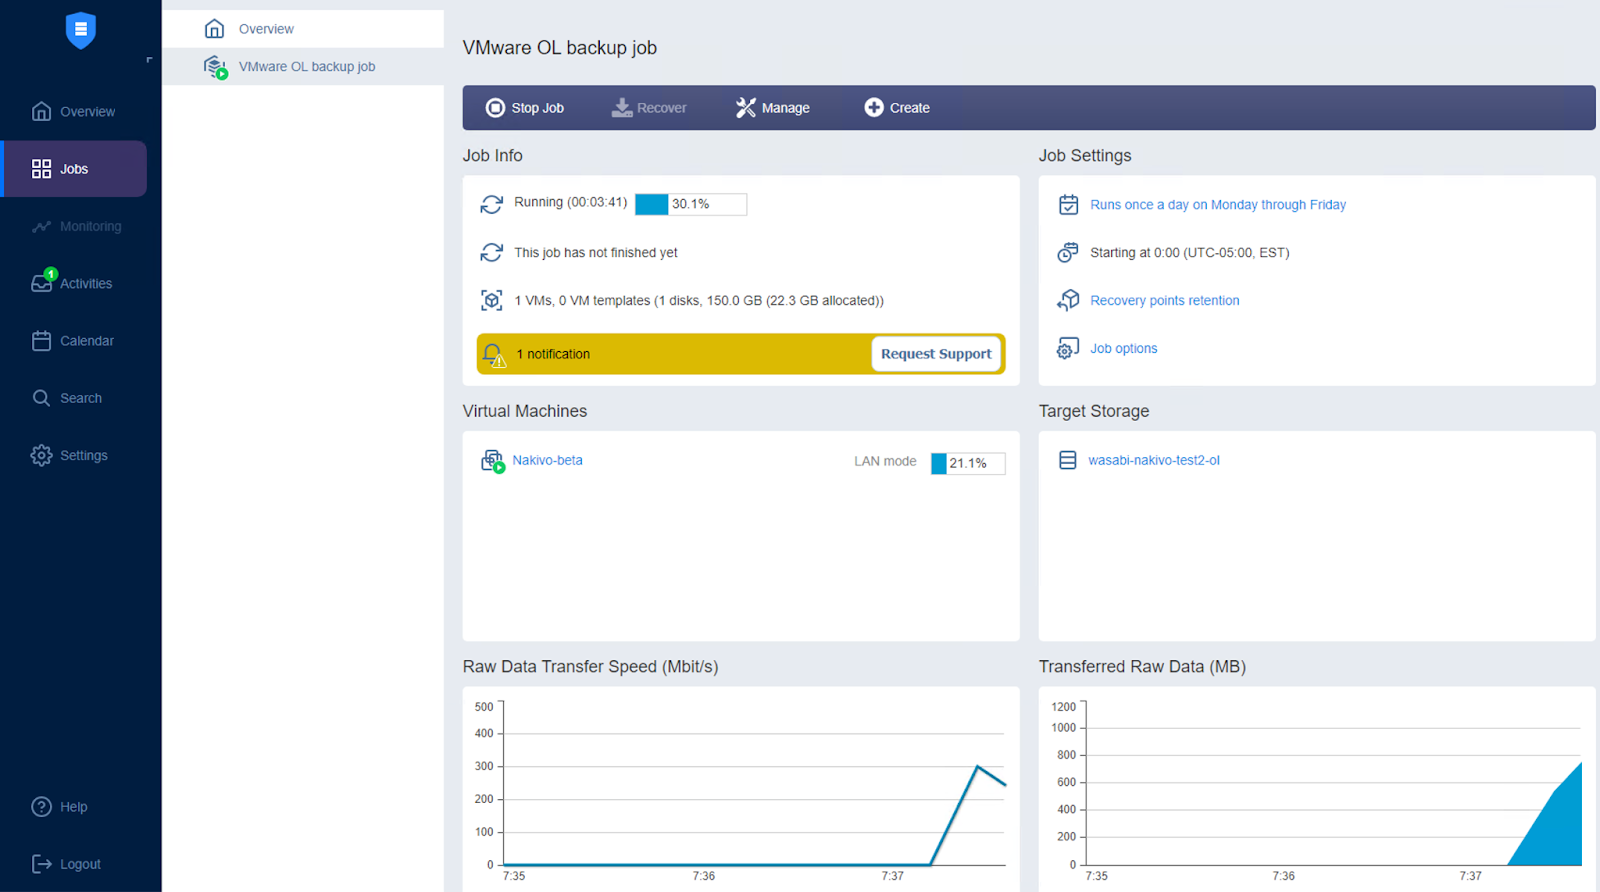
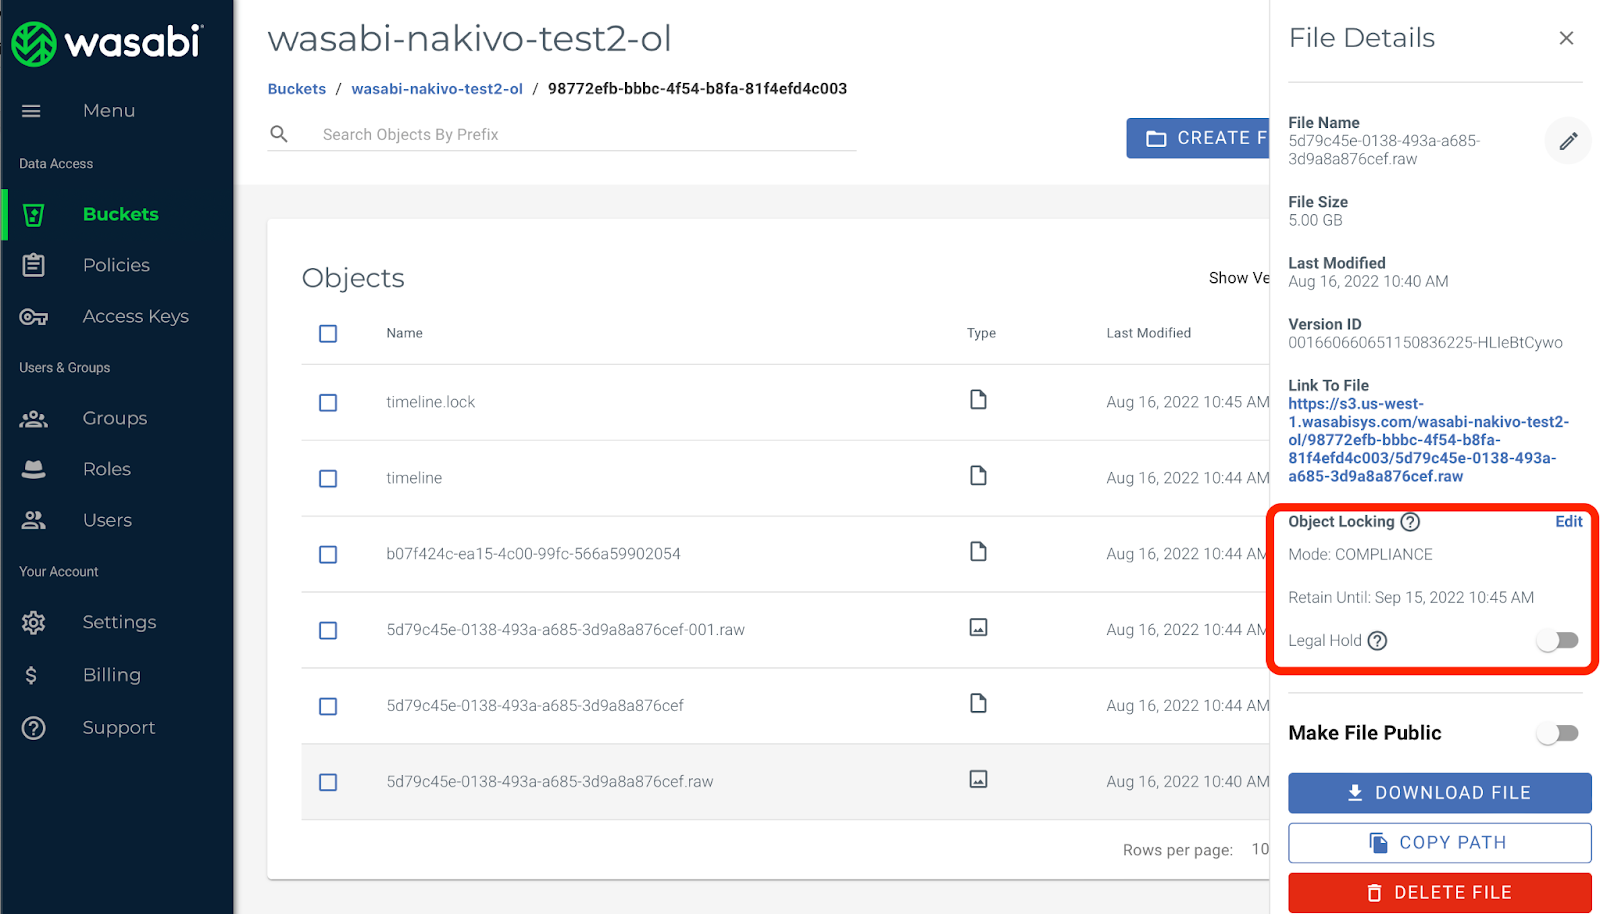
6.8. Backup chunks will start moving to wasabi. Nakivo writes backups in 5GB chunks. On Wasabi console, you can view backup files being added to the Wasabi bucket.
7. Object Lock
Nakivo supports Immutability by allowing customers to store the recovery points using the Write-Once-Read-Many (WORM) model. Immutability is supported in compliance mode. The Wasabi bucket used for the backup repository should be Object-enabled.
Follow the steps below to run immutable backups using Nakivo
7.1 Create an Object Lock enabled Wasabi Bucket.
Log in to Wasabi Console to create a new bucket. Click on Create Bucket to create a new Object Lock bucket. Refer to Creating an Object Lock-enabled Wasabi Bucket for information on creating a bucket.
7.2 Add Wasabi account as a cloud Inventory item in Nakivo
If the Wasabi account is not already in Nakivo Inventory, follow the steps in Section 3 to add it.
7.3 Create a Wasabi cloud repository on Nakivo
While creating the cloud repository, ensure that the object-locked Wasabi bucket is used to create the repository. Follow the steps in Section 4 and ensure that you select the object locked bucket (in Section 4.5).
7.4 Add infrastructure to be backed-up on Nakivo (optional)
If you need to add VMs that need to be backed up, follow section 5 above.
7.5 Create a job to back up in Nakivo to run backups and store immutable recovery points.
Follow the steps in Section 6 to create a backup job to store immutable recovery points.
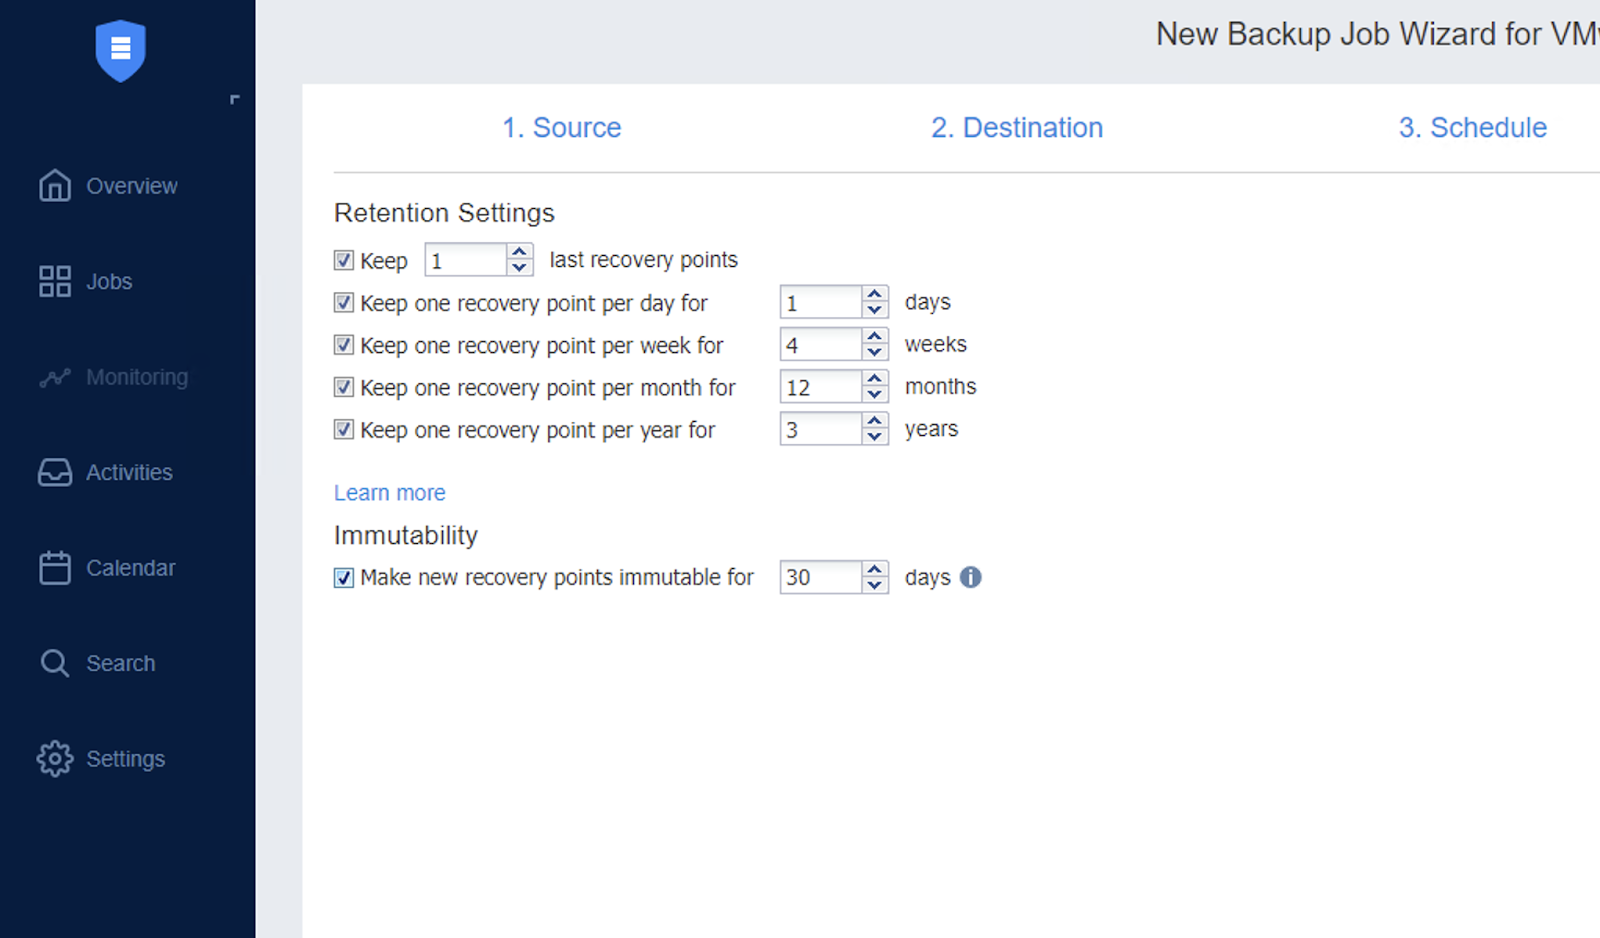
In step 6.5, Enable immutable backups by selecting Make new recovery points immutable and input the number of days you want the recovery point to be immutable for. Click Next.
Follow the remaining steps in Section 6 to complete the backup job and run it.
7.6 On the Wasabi console, you can enable show version to view the file retention details by navigating to the backup folder and clicking on the files.