Wasabi's object storage has been validated to be used with NirvaShare.
NirvaShare is a Secure File Sharing & Access Management Solution for Wasabi's object storage. It provides an easy SSO integration with identity providers like Active Directory, Okta, etc.
1. Prerequisites
NirvaShare version 2.4.0 and above is installed.
An active Wasabi cloud storage account.
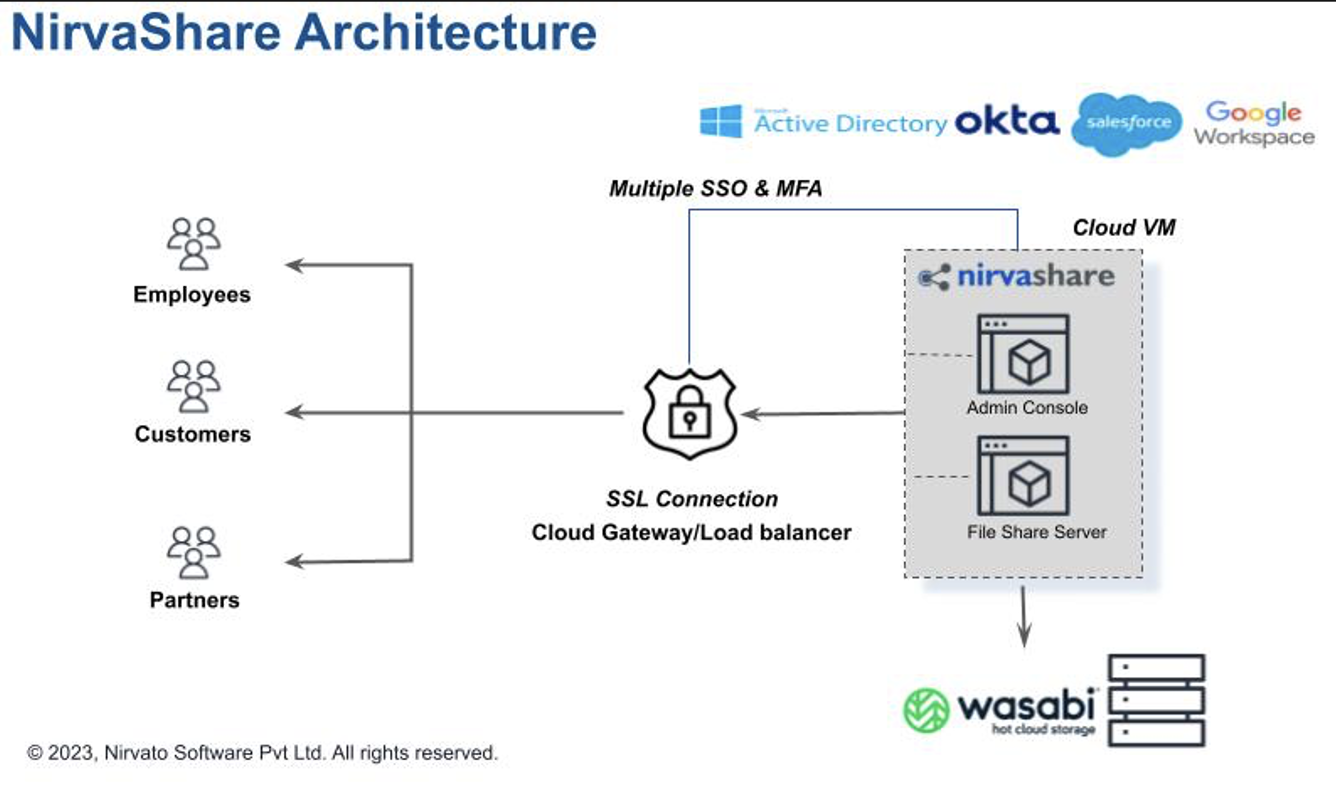
2. Architecture Diagram
3. Create Wasabi Sub-user and Access Keys
It is recommended to create a Wasabi sub-user to use with NirvaShare. Follow the steps in the article Create a sub-user with Access and Secret Keys.
4. Add Your Wasabi Bucket as a Storage Share on NirvaShare
Follow the steps below to configure NirvaShare manage access to files in your Wasabi bucket.
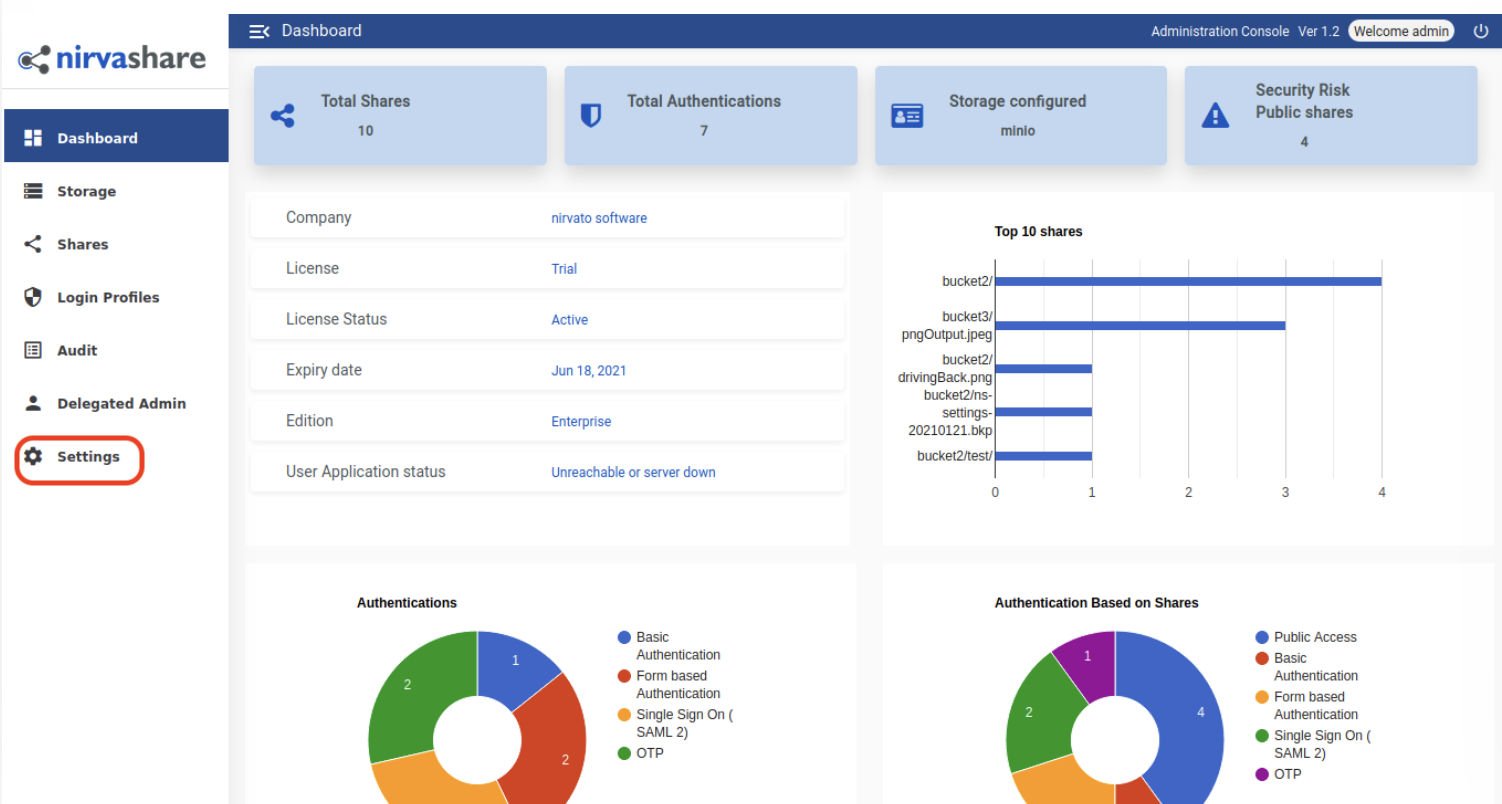
4.1 Log in to the admin console of your NirvaShare deployment and click Settings.
4.2 Click Edit File Storage and enter the following.
Select Storage Type as Wasabi S3.
Provide the Access and Secret keys for your Wasabi bucket.
Click Save to save the configuration.

4.3 In the next section, User Application/File Server URL, click Edit. Enter the user application URL click SAVE.
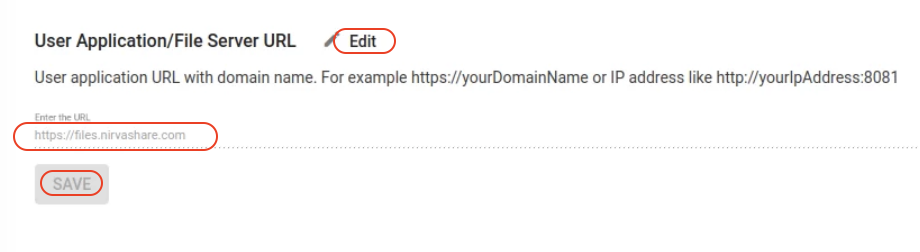
Other settings are option. Refer to Settings for more details.
5. File/Folder Sharing with Username and Password Authentication
After the Wasabi bucket is added, the next step is to browse the storage file/folder and share it with users. Follow the steps below to create a Share for a folder with simple Form-based authentication.
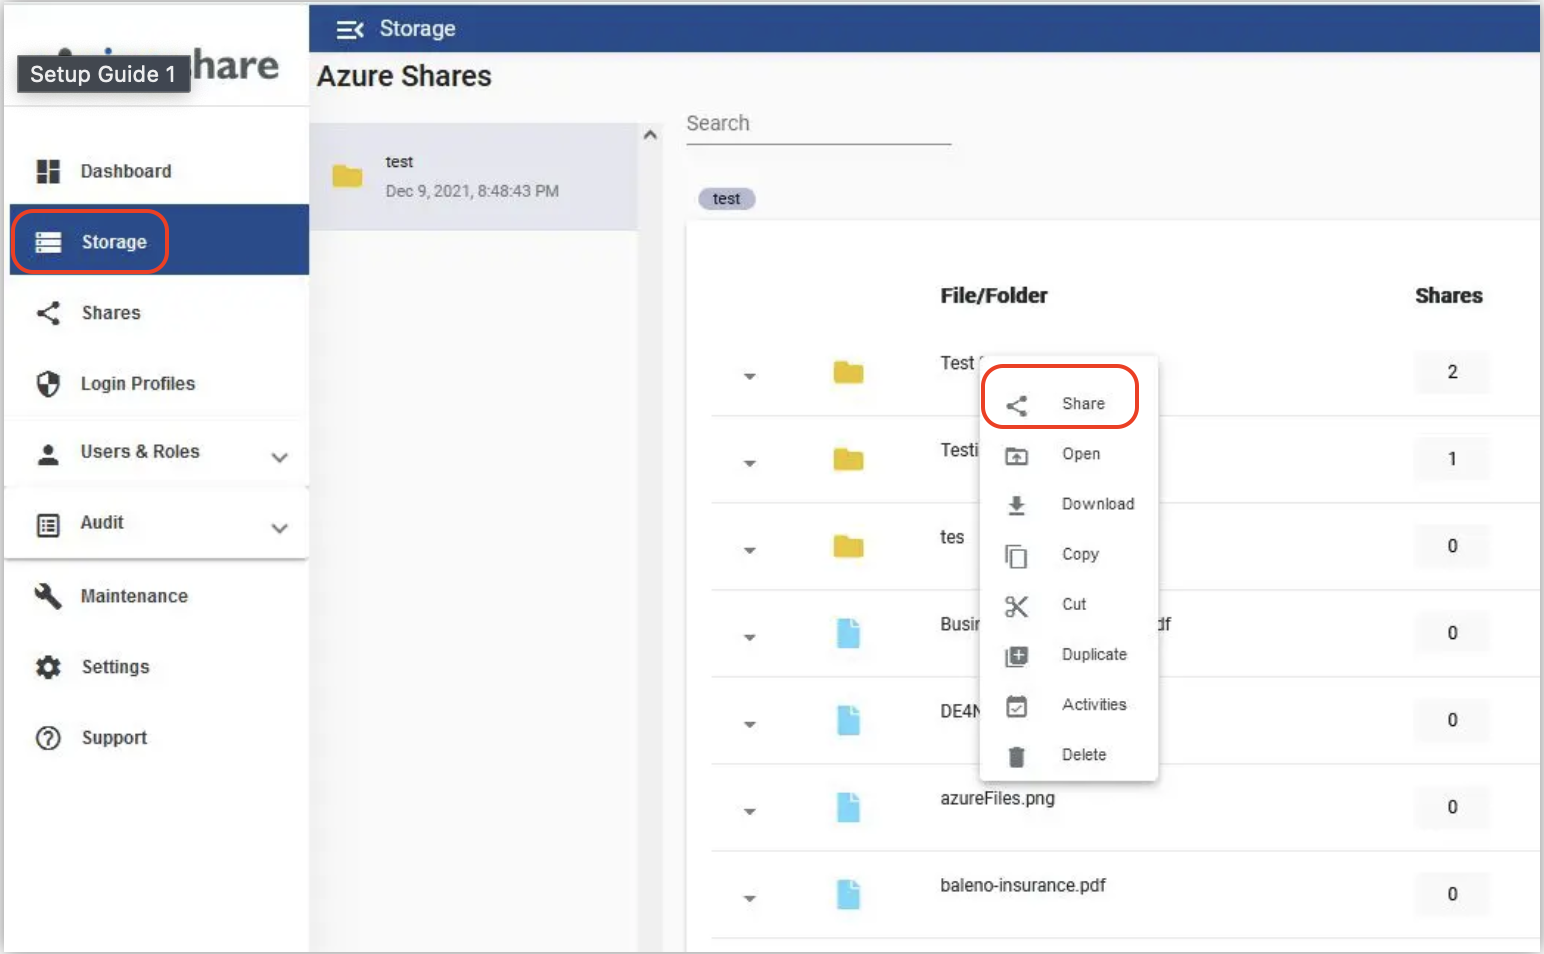
5.1 Click Storage. The storage files will be listed here, browse through any file or folder, and select Share by right clicking. Click Create New Share to create a new file share.
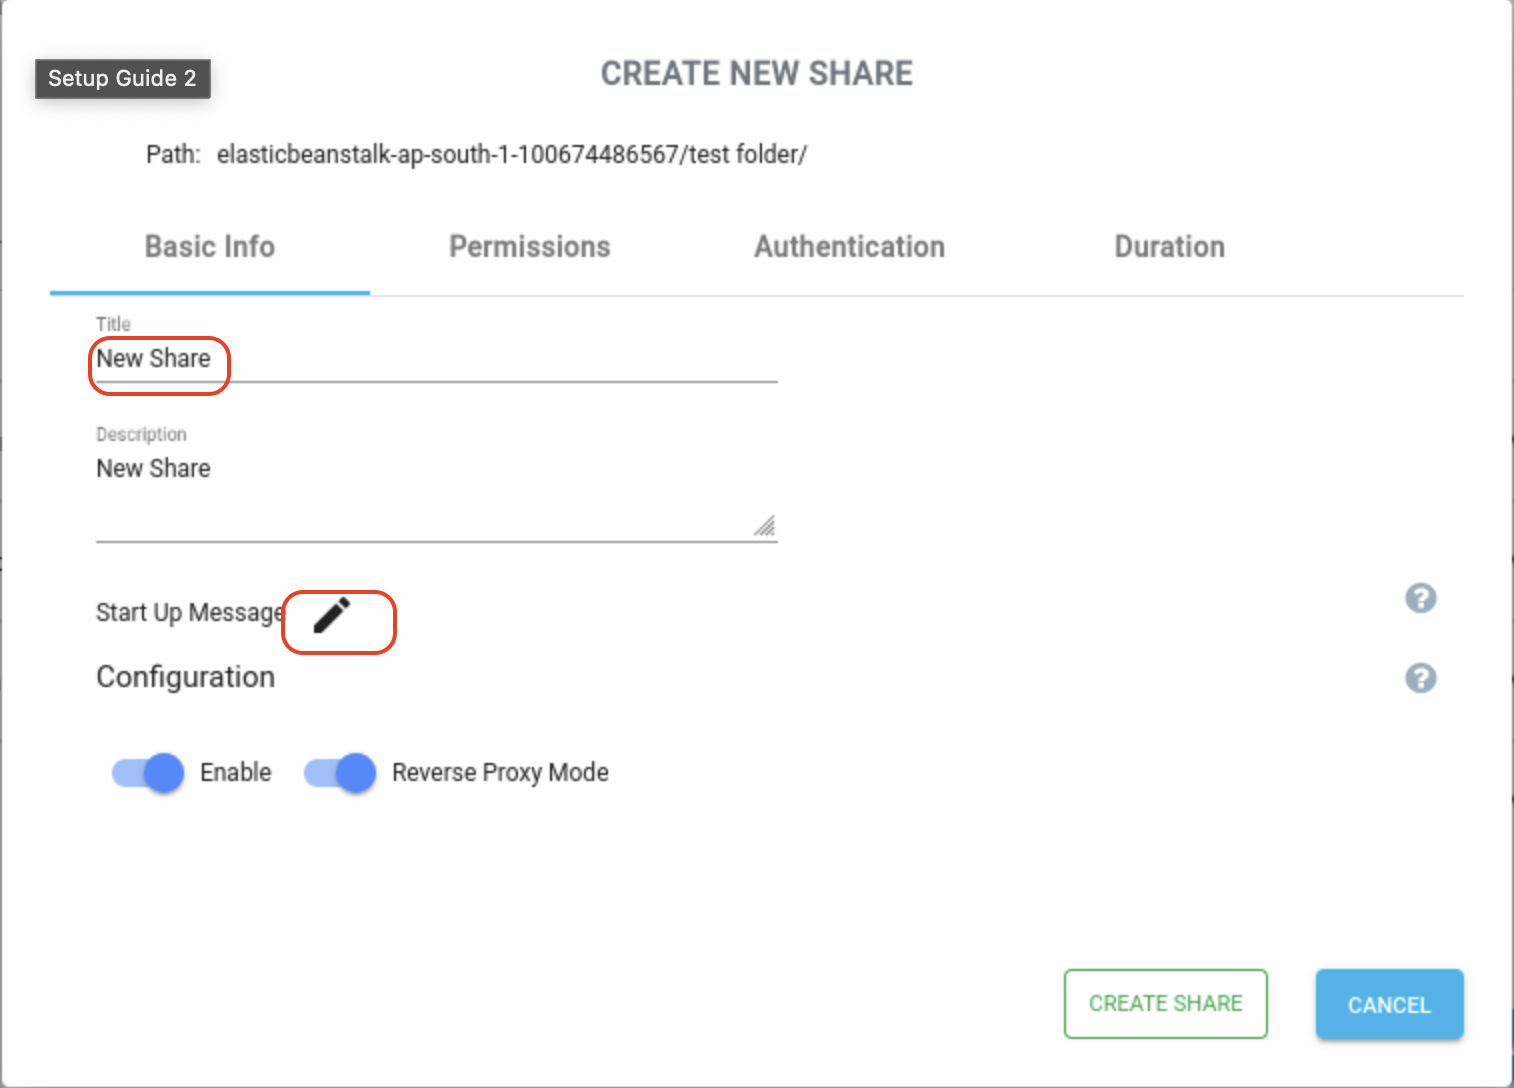
5.2 Input the required fields in the Basic Info tab.
Title- Name for the share.
Description- Optional description for your share.
Start-Up Message- Click Edit on Start-Up Message if you want this message to appear when the user opens the Share.
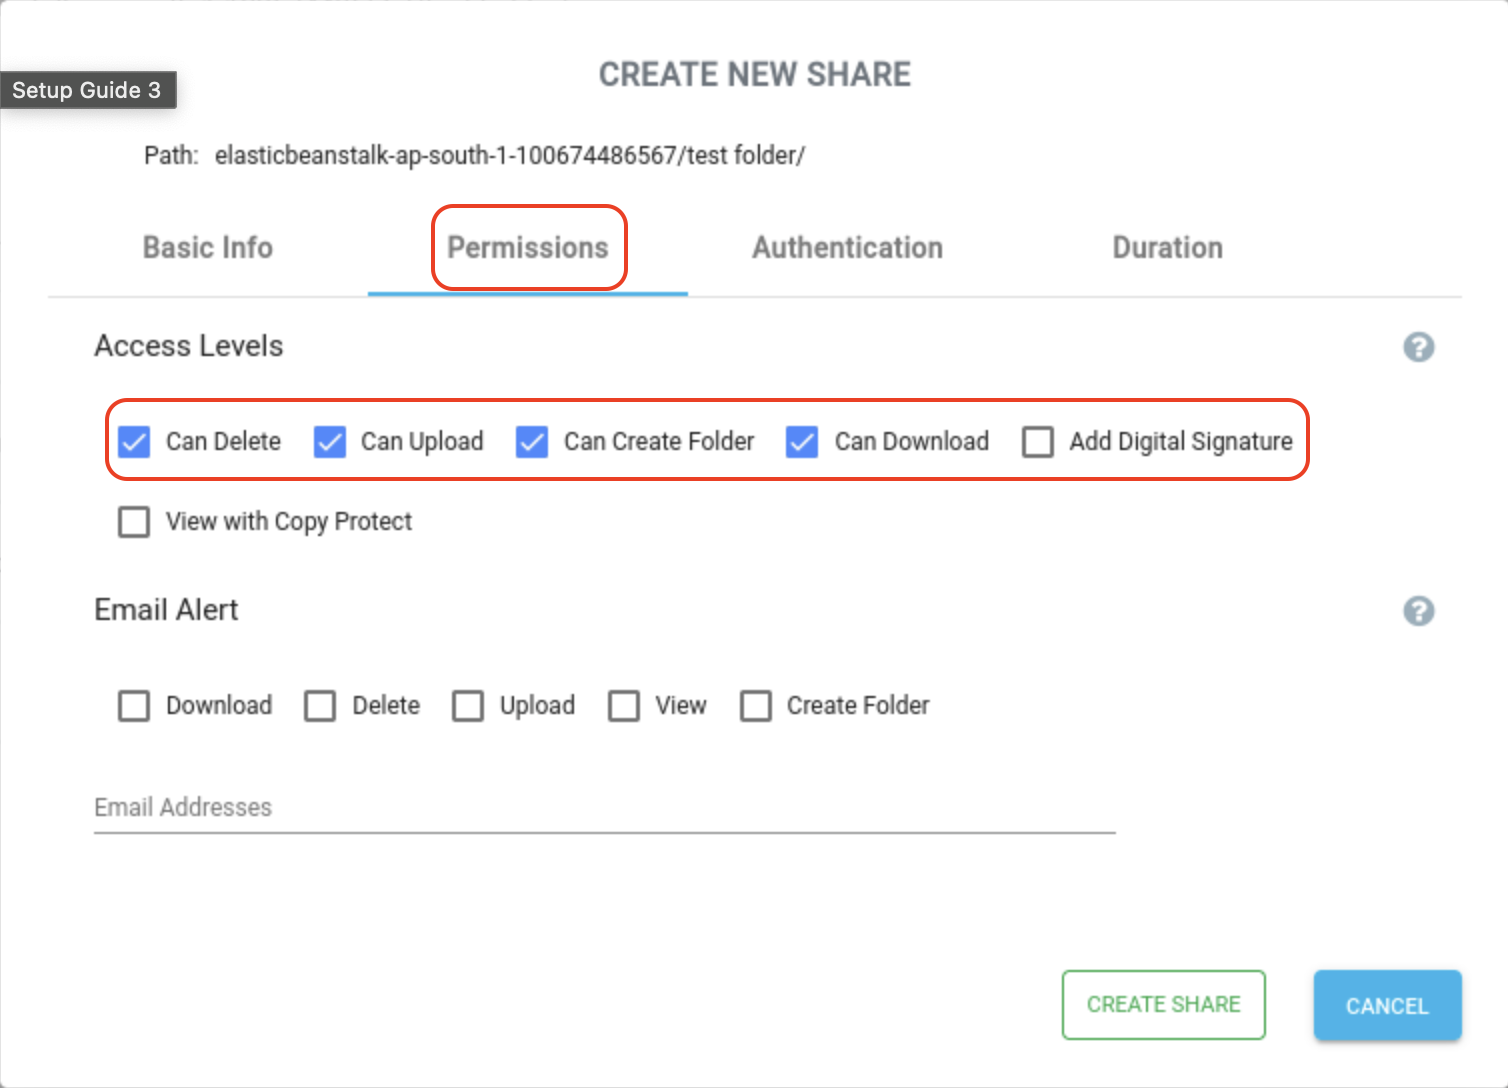
5.3 Click on the Permission tab to configure permissions for the share.
Enable access as required for for the share by checking the access levels as needed.
Email Alerts can be configured here by checking the event(s) for notification and adding an email address to be notified for each of the events.
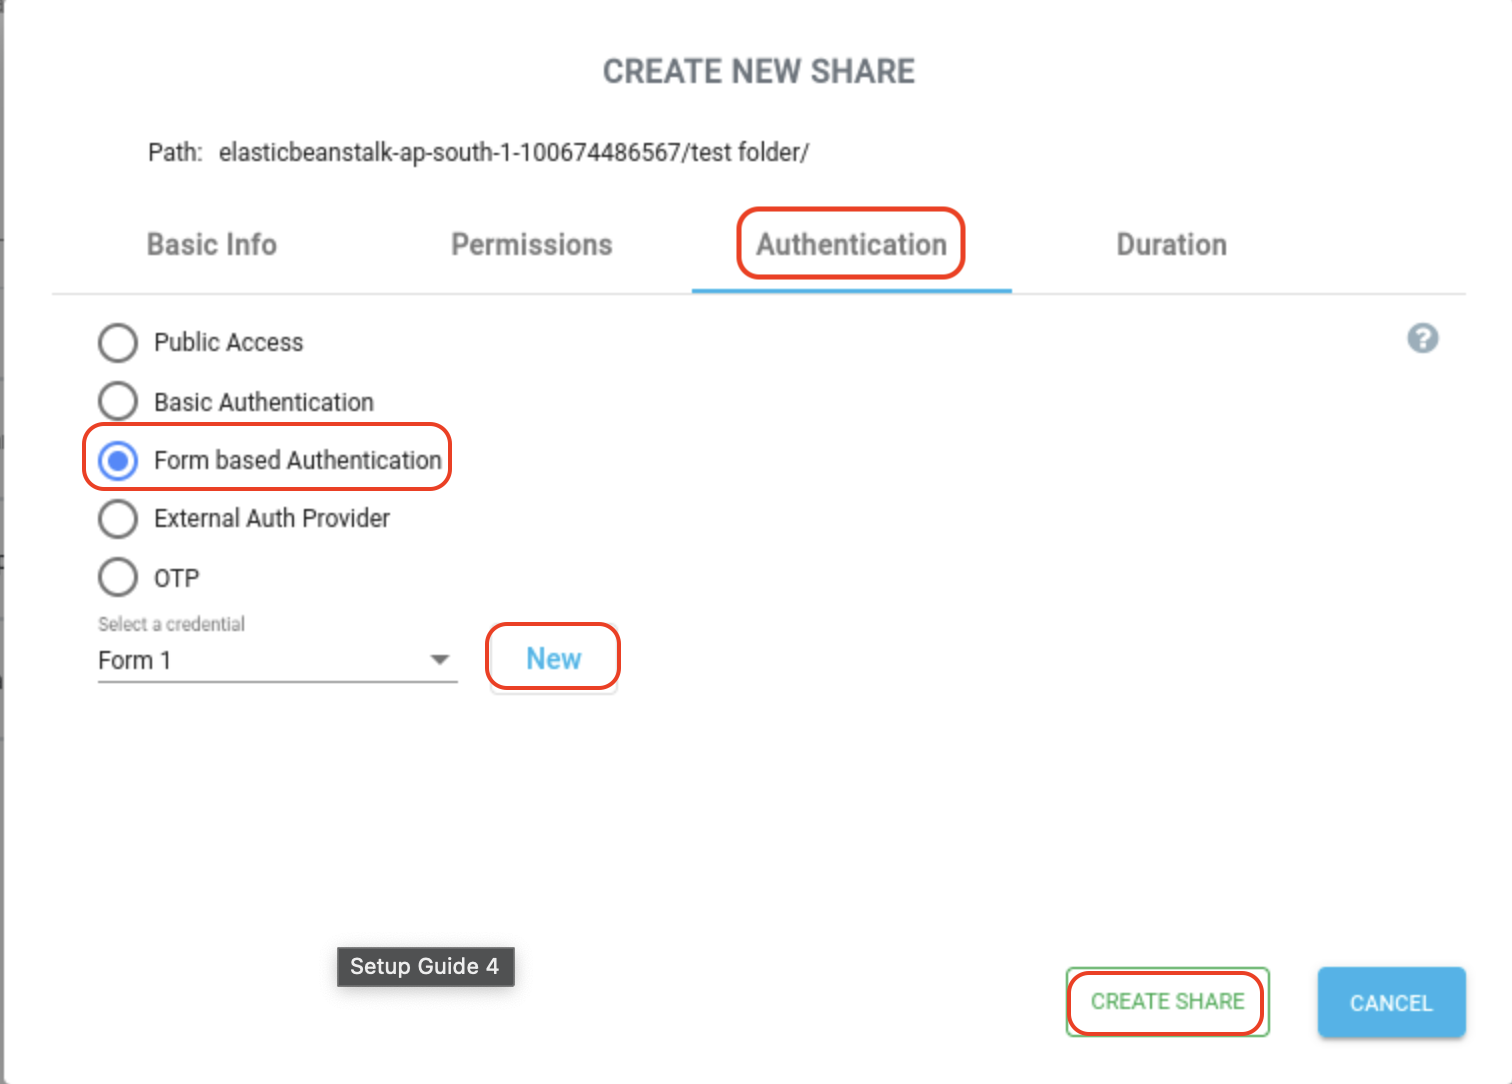
5.4 Click on the Authentication tab, to configure authentication for the share.
In this example we are selecting "Form Based Authentication". Click on "New" to create a new login profile. Input the credentials and save it. Once saved, select the newly created authentication profile for the this share. Click on "Create Share" to create it. This share is now ready to be shared with users.
Note: For other types of authentication please refer to Authentication Mechanism.
Optionally, you can also set a specific duration for the share after which it becomes inactive by specifying the from and to dates in the duration tab.
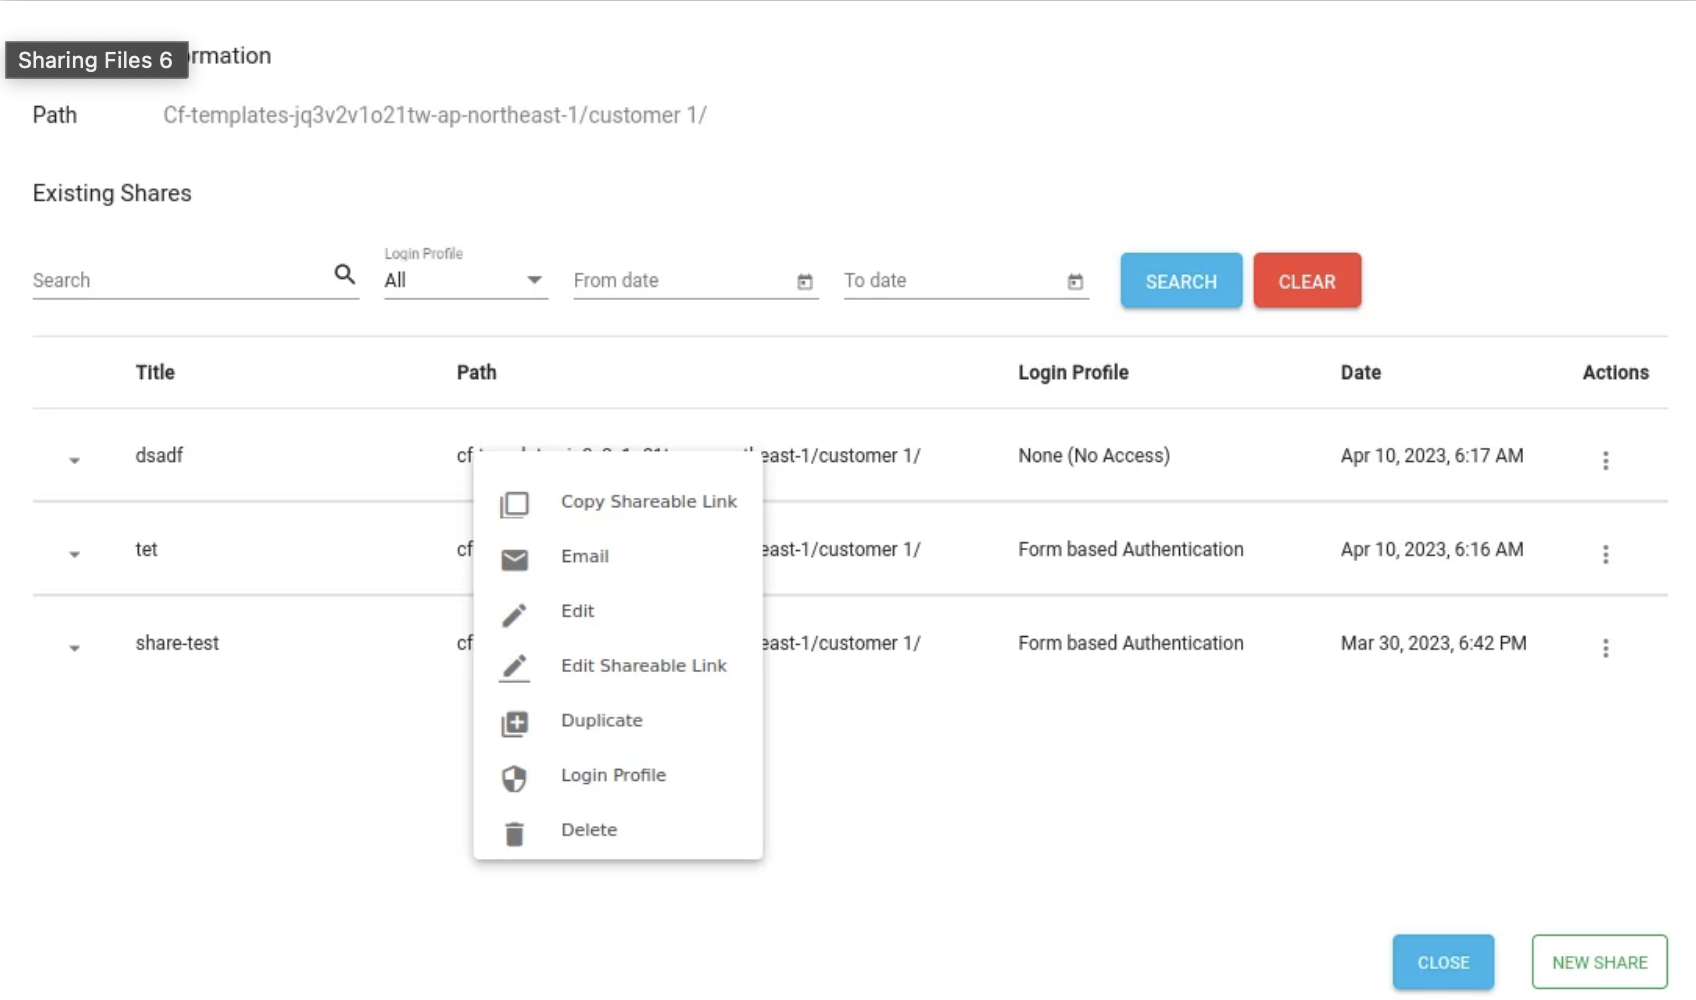
5.5 Once a Share is created, right-click on it to view a list of actions, that you can perform. You can send the link for the share as in email from here or copy the shareable link to the share for sending it to the users.