How do I use OPSWAT MetaDefender Storage Security (MDSS) with Wasabi?
MetaDefender Storage Security has been validated for use with Wasabi. MDSS provides robust protection for on-premises and cloud storage, safeguarding enterprise data from breaches, downtime, and compliance violations across various platforms like Wasabi Hot Cloud Storage and more by leveraging multiple OPSWAT technologies, including Deep Content Disarm and Reconstruction and Proactive Data Loss Prevention, to protect against zero-day attacks, advanced threats, and sensitive data loss.
Prerequisites
- Active Wasabi Cloud Storage account, with the Access and Secret keys available.
- Bucket with Object Lock and Versioning disabled
- Minimum MDSS version: 3.3.4
- MDSS license that supports Wasabi
- It is strongly recommended to enable HTTPS on your MDSS web server UI. See Enabling HTTPS for details.
Architecture Diagram

Adding Wasabi Storage to MDSS
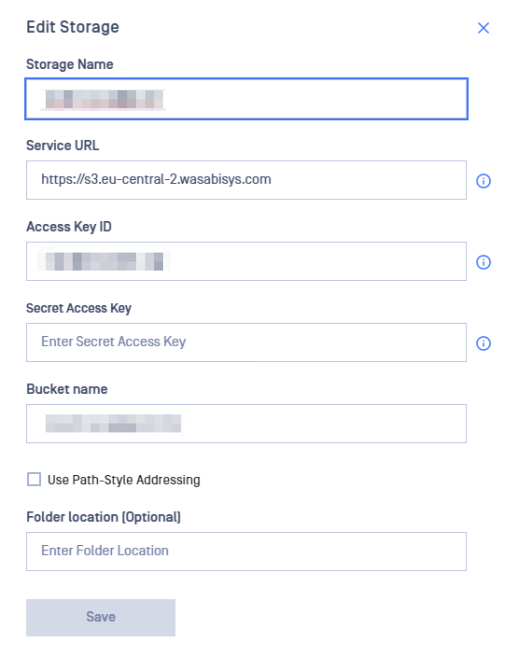
Go to your MDSS web page, Storage Units page, click "Add Wasabi Storage" and fill the form with the following details:
- Give your Wasabi storage a name
- Enter the Service URL for the region your bucket is in. See Service URLs for Wasabi's Storage Regions for more details.
- Your Wasabi Access key in the Access key ID field and your Wasabi Secret key in the Secret key ID field. See Assigning an Access Key for information.
- Your Wasabi bucket name.
- Leave "Use Path-Style Addressing" unchecked.
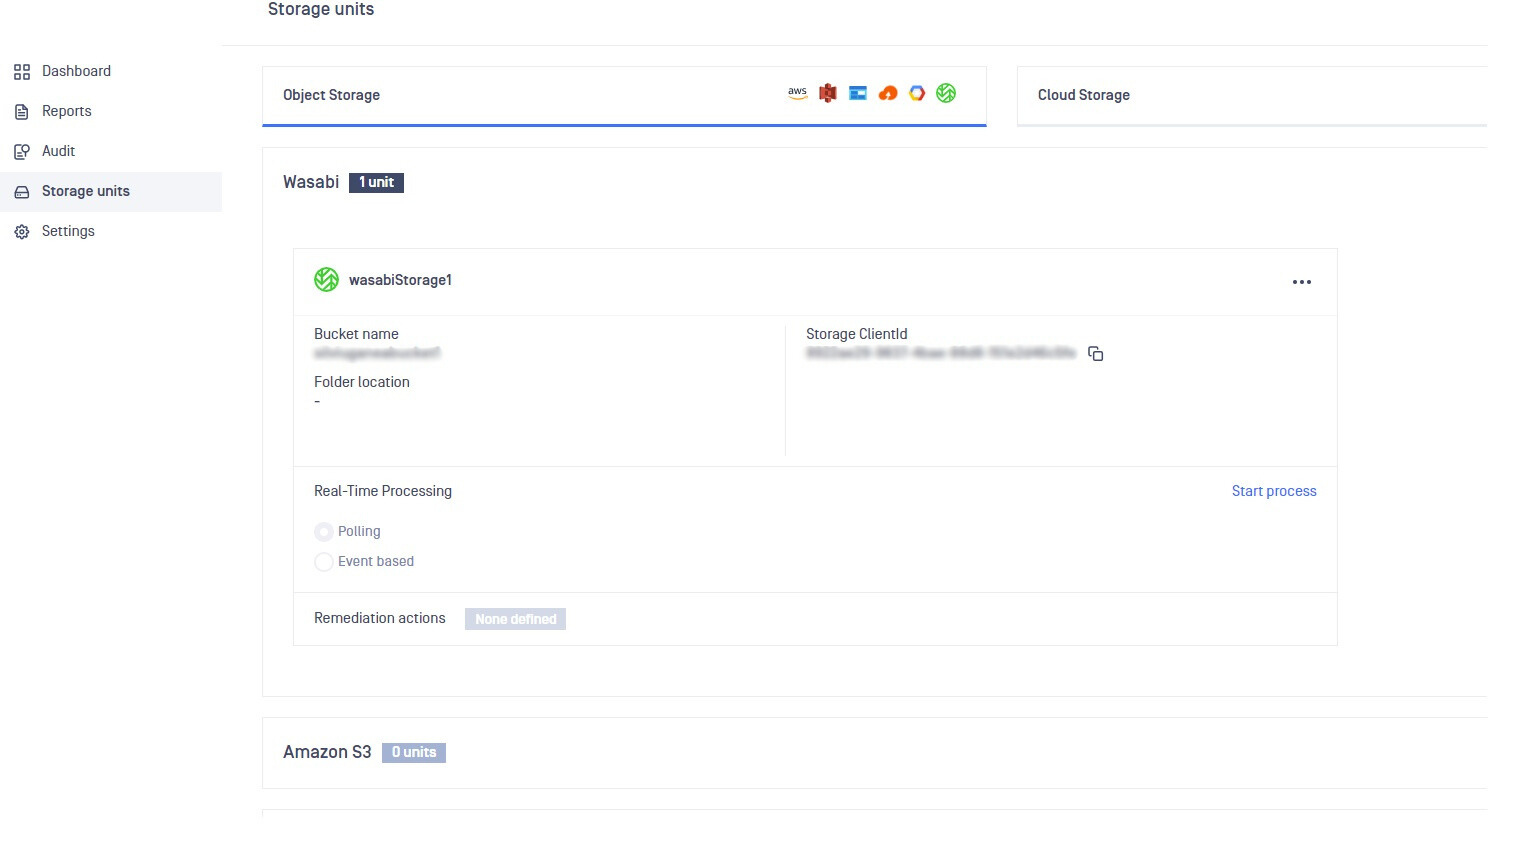
The Wasabi storage is now added:
Scanning Your Wasabi Bucket with MDSS
1. Set up Scan Pools
MetaDefender Storage Security uses scan pools to group MetaDefender Core or Cloud instances.
These two types of scan pools can be used to balance the load of scan requests: Core Scan Pool and Cloud Scan Pool. To set up Scan Pools, please go to Settings and choose Scan Pools.

2. Set up Scan Configuration
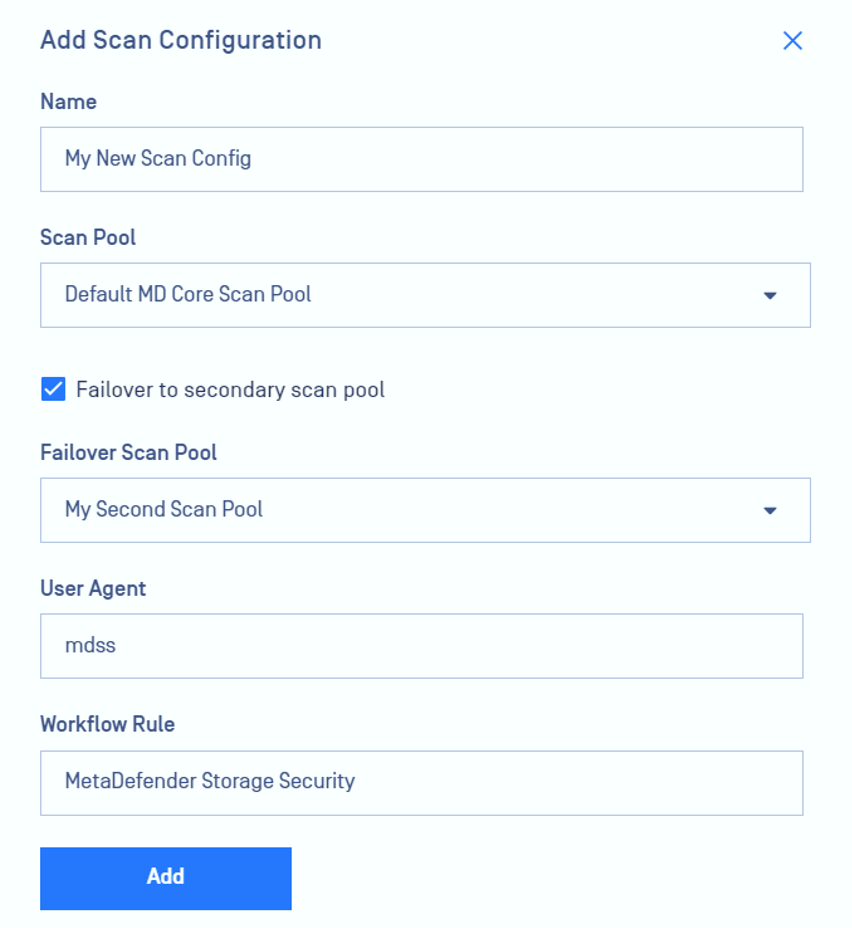
MetaDefender Storage Security employs scan configurations to offer a versatile method for initiating scanning processes using various workflow rules from either MetaDefender Core or MetaDefender Cloud.
Scan configurations are linked with scan pools to ensure uniform configuration across all instances of MetaDefender Core/Cloud.
To set up Scan Configuration, please go to Settings, choose Scan Configuration.

Note: The default workflow rule for MetaDefender Core is 'MetaDefender Storage Security'.
For MetaDefender Cloud rules, please check the OPSWAT documentation.
When creating a new scan configuration, you can select a name, associate it with a scan pool, and optionally designate a secondary scan pool for failover in cases where all scan instances from the primary pool are unavailable or unresponsive.
3. Enable real-time processing
Real-Time Processing ensures that files are processed as soon as they are uploaded.
Real time processing supports two handling types for files discovery:
- Polling: Regular checks for new files to scan.
- Event Based: Triggered scans based on specific events.
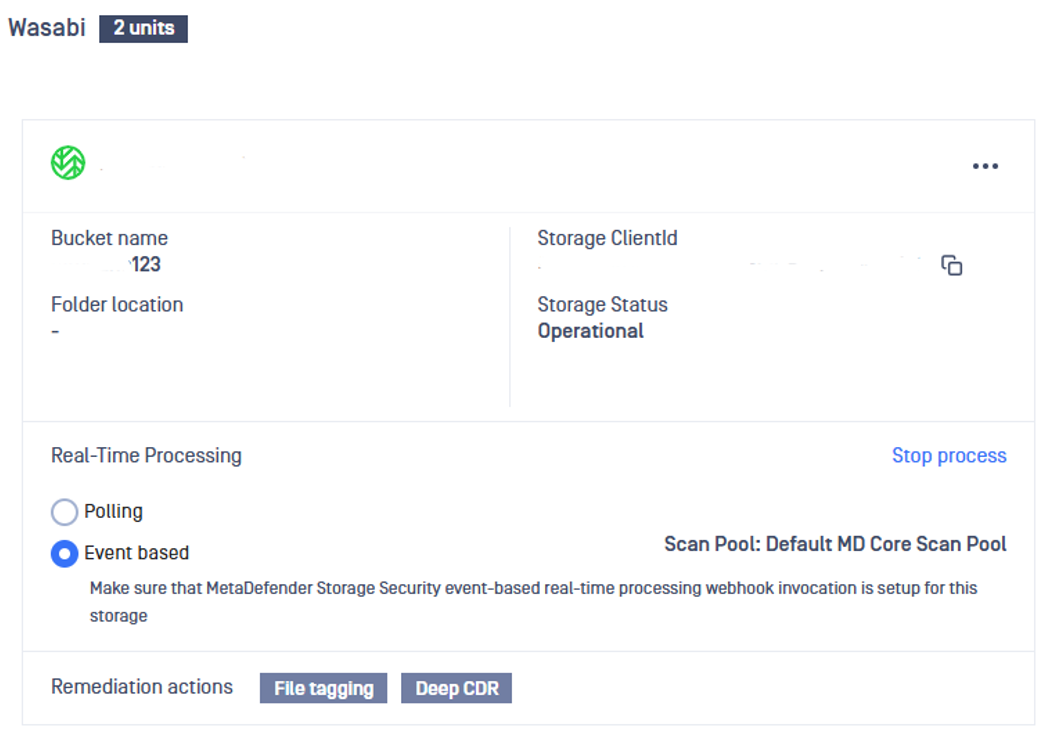
By default, this feature is not turned on. If you wish to enable it, please follow these steps:
- From the MetaDefender Storage Security web interface, navigate to Storage units
- Select the storage for which you wish to enable Real-Time Processing and then click Start Process
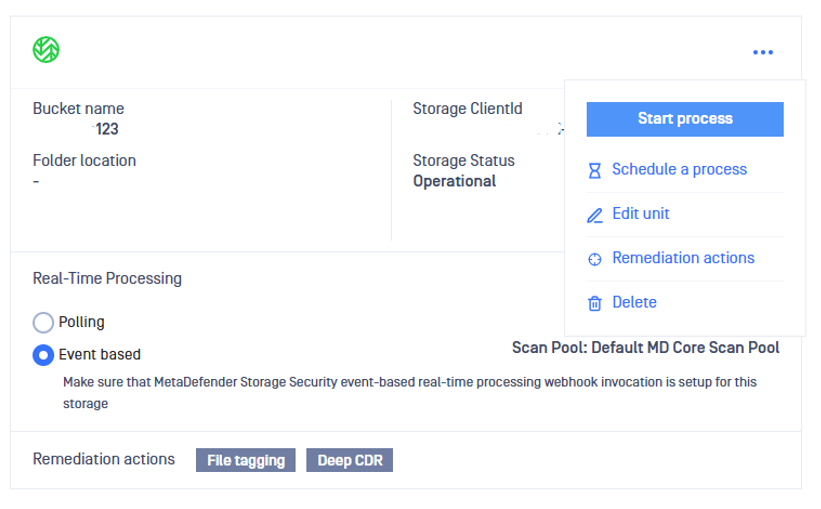
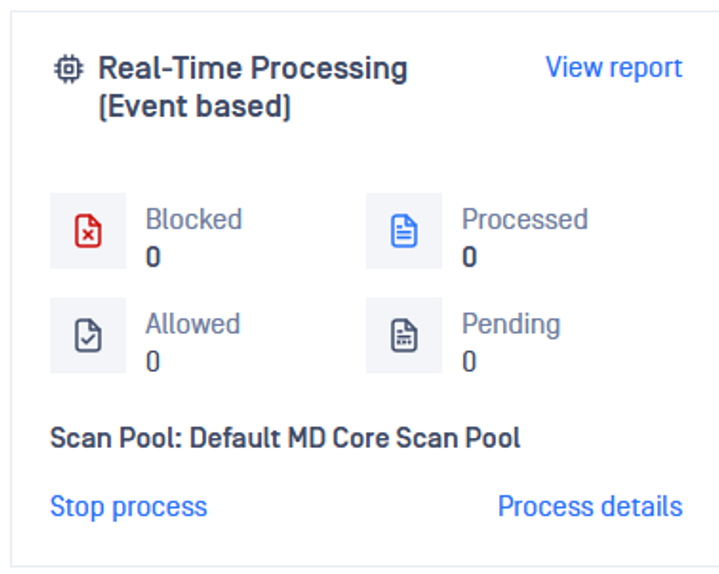
- In order to see what is being processed, go to the Dashboard, scroll down to the Real-Time Processing card and then click Process Details.
4. Set up remediation actions
- From the MetaDefender Storage Security web interface, navigate to Storage units.
- Select the storage for which you wish to enable Remediation feature and then click Remediation actions
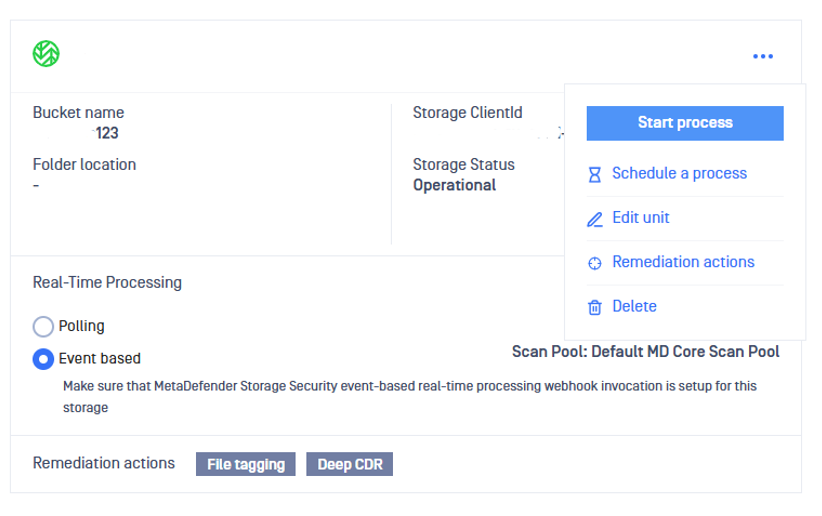
A remediation represents a post action that happens automatically after the file is processed. The following remediation options are currently available:
- File Tagging: Adds information about file processing as tags.
- Deep CDR: Applies OPSWAT’s Deep CDR (file sanitization) technology to files.
- Move or delete: Move or delete files according to the configuration like if the file is blocked or after it is sanitized.
4.1 Enable File Tagging
- Toggle File tagging from the Remediation Actions window.
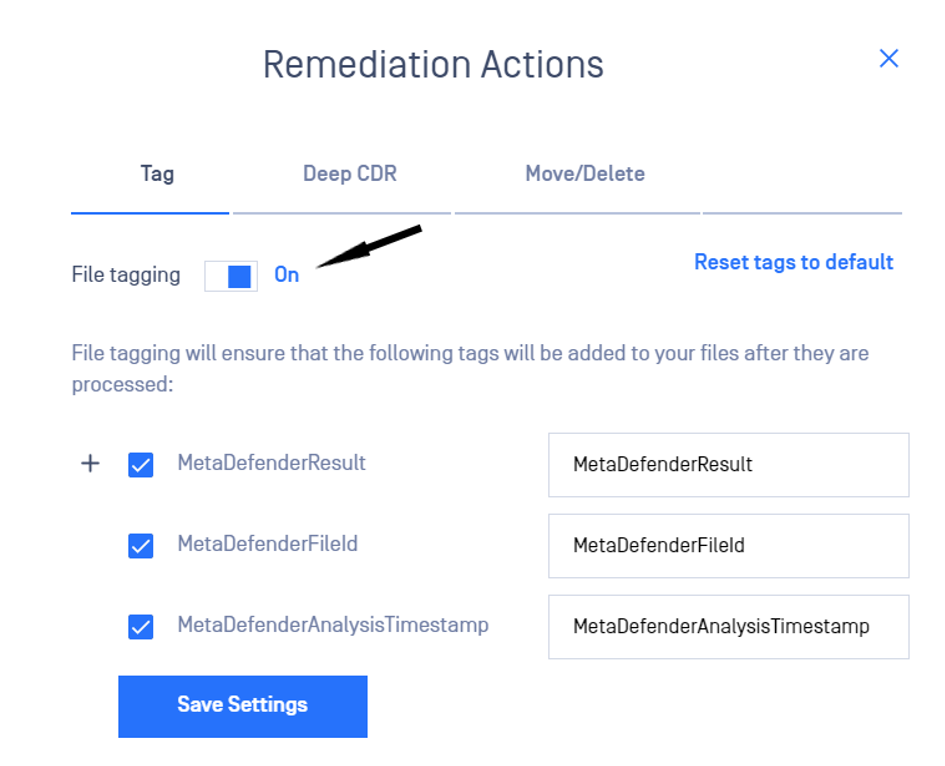
- Select which tags to be added by checking/unchecking the boxes. (Note: at least one tag should be enabled if File Tagging is on).
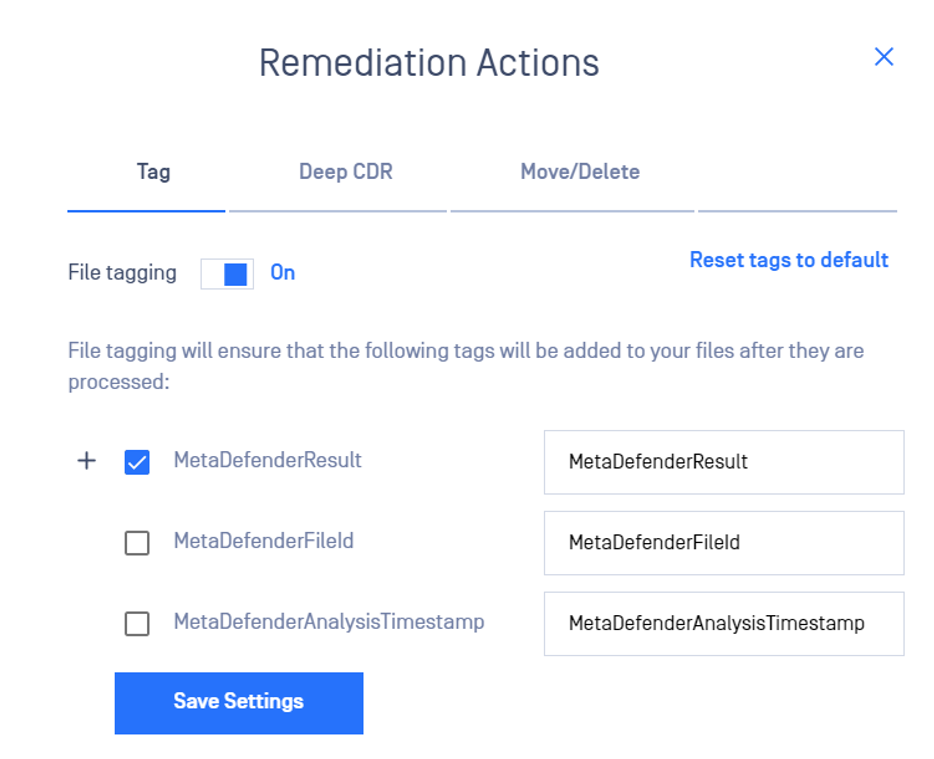
There are three tags which can be customized and added to the file:
a. MetaDefenderResult
b. MetaDefenderFileId
c. MetaDefenderAnalysisTimestamp
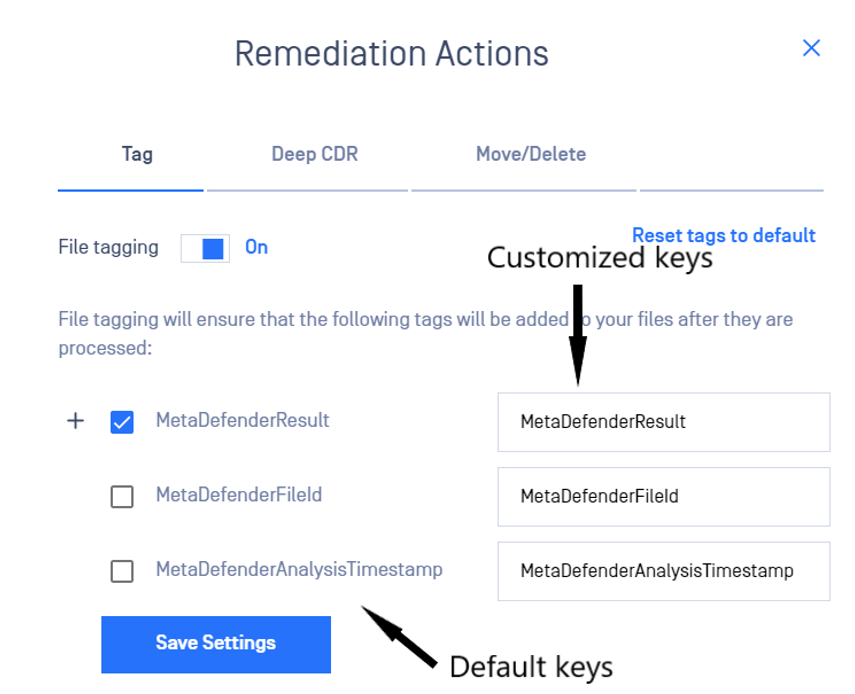
To customize the key of a tag, please modify the values next to the default key.
By clicking on the + icon, the values of tags which can be customized will be expanded:
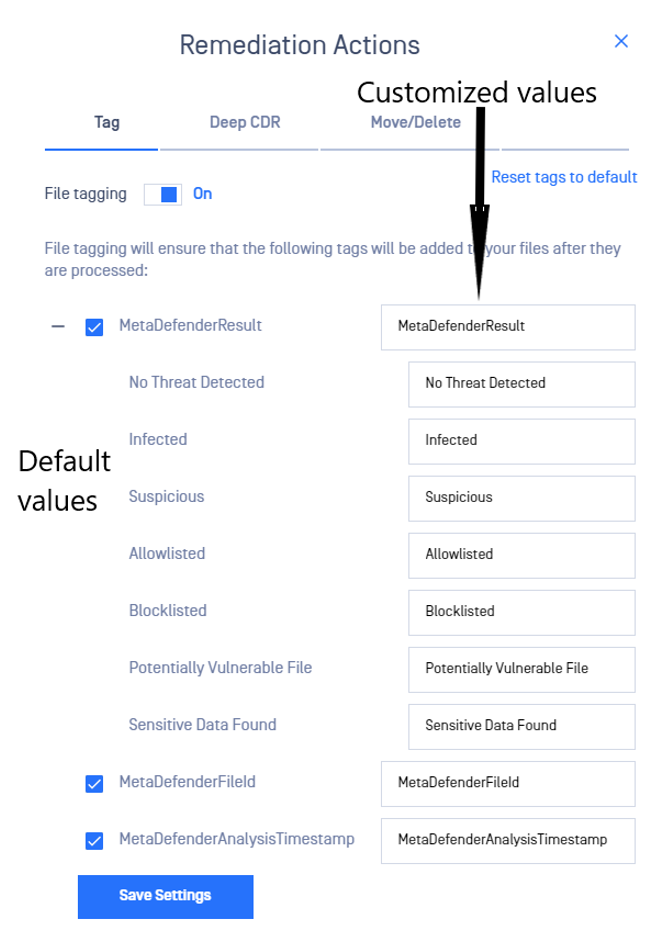
This remediation action adds all or some of the following tag names and respective values:
Name | Value | Description |
MetaDefenderResult (or the customized key associated with this name) | No Threat Detected / Infected etc (or the customized value associated with each result) | The final result of the processing |
MetaDefenderFileId (or the customized key associated with this name) | 5e7e15f132efdd0006b0e132 | A unique file identifier that can be used for further REST API queries |
MetaDefenderAnalysisTimestamp (or the customized key associated with this name) | 2020-03-28T21:43:40.1500000Z | Date and time in UTC format when file processing has started |
4.2 Enable Deep CDR/ File Sanitization
- From the left-side navigation menu, go to Storage units
- Select the storage for which you wish to enable Deep CDR
- Click on Remediation actions in the action dropdown
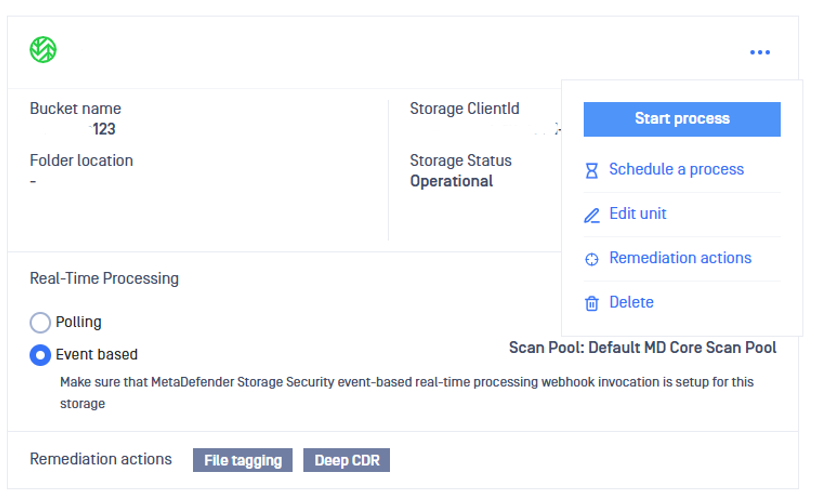
- Go to Deep CDR tab in the Remediation Actions menu
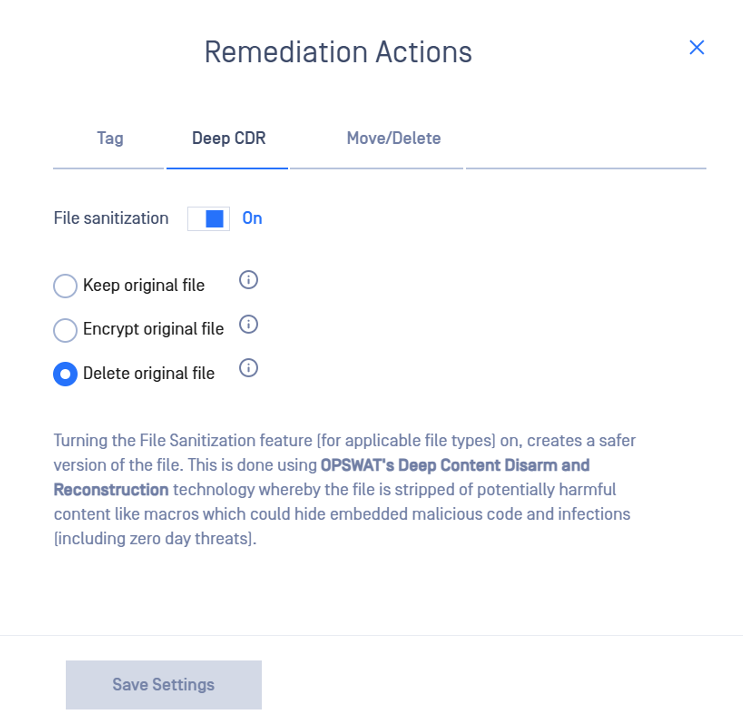
- Toggle File sanitization
- Choose how the original file should be treated after sanitization by selecting one of the three available options
- Keep original file - the original file will be retained as is
- Encrypt original file - the original file will be encrypted and retained as a backup. This is useful because later you could decrypt it and revert to the original file if needed
- Delete original file - the original file will be deleted and only the sanitized version will be available to users (NOTE: You will not be able to revert to the original file anymore)
4.3 Enable Move/Delete Files feature
- From the left-side navigation menu, go to Storage units
- Select the storage for which you wish to configure Move/Delete post actions
- Click on Remediation actions in the actions dropdown
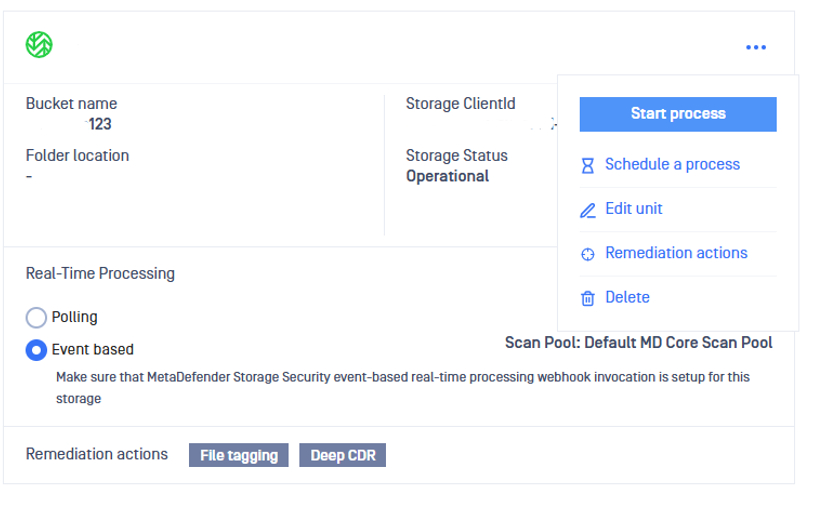
- You can choose from the following:
- Move sanitized files
- Move allowed files
- Move / Delete blocked files
Move sanitized file:
Sanitized files created by OPSWAT’s Deep CDR technology can be moved to another storage unit. Please note that in order to configure this post action, the File Sanitization Feature should be enabled (check step 4.2).
- Go to the Move/Delete tab in the Remediation Actions menu
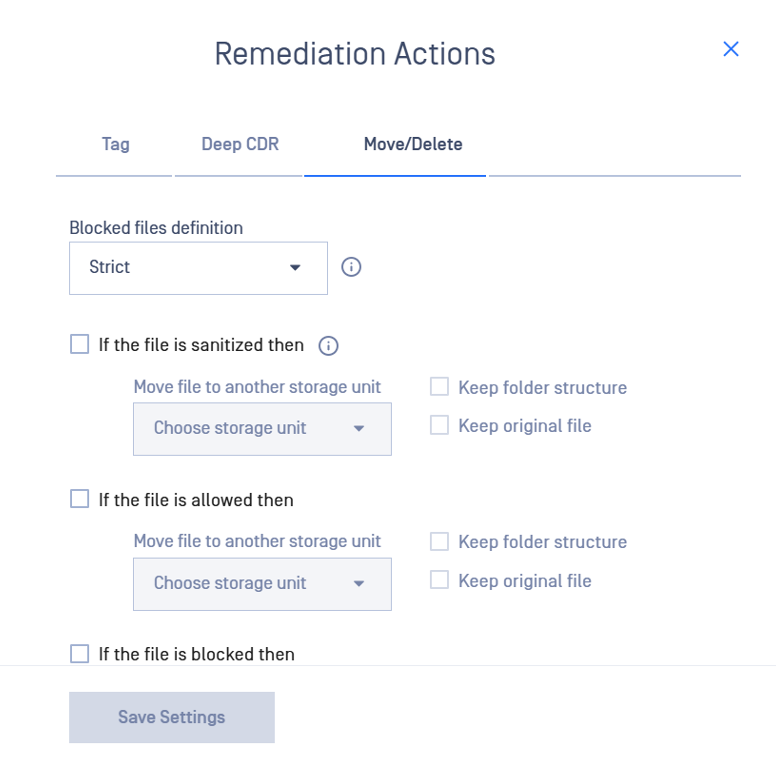
- Check If the file is sanitized then remediation option.
- Configure the destination storage - select the destination storage and select whether you want to keep the initial storage's folder structure or move the files either in root or the specified folder of the destination storage, if configured (please note that a valid connection should be established beforehand with the destination storage in order to proceed with this post action). Select to keep the original file, this will copy instead of moving the file to the destination storage.
Move allowed files:
Files that were marked as allowed during file processing can be moved to another storage unit.
- Go to Move/Delete tab in the Remediation Actions menu.
- Check If the file is allowed then remediation option.
- Configure the destination storage - select the destination storage and select whether you want to keep the initial storage's folder structure or move the files either in root or the specified folder of the destination storage, if configured (please note that a valid connection should be established beforehand with the destination storage in order to proceed with this post action). Select to keep the original file, this will copy instead of moving the file to the destination storage.
Move / Delete blocked files
Files that were marked as blocked during file processing can be deleted or moved to another storage altogether.
- Go to Move/Delete tab in the Remediation Actions menu
- Check If the file is blocked then remediation option
- Choose how the blocked file should be handled by selecting one of the two available options
- Delete file - the blocked file will be deleted from your storage
- Move file - the blocked file will be moved to another storage; select the destination storage and select whether you want to keep the initial storage's folder structure or move the files in root or the specified folder destination, if configured (please note that a valid connection should be established beforehand with the destination storage in order to proceed with this post action.). Select to keep the original file, this will copy instead of moving the file to the destination storage.
- There are 2 options to treat blocked files:
- Strict - any file deemed as blocked by MetaDefender Core such as malware, encrypted archives, blocklisted, etc will be treated as blocked files in MetaDefender Storage Security.
- Configurable- choose if other types of files should be treated as blocked file
- Files with malicious content - always checked. Any file marked Infected, Suspicious or Blocklisted by MetaDefender Core will be considered malicious
- Files with sensitive data - if checked, files containing sensitive information will also be deleted or moved to the configured storage, depending on the selected post action
- Files with vulnerabilities - if checked, files containing vulnerabilities will also be deleted or moved to the configured storage, depending on the selected post action
For technical details/concerns regarding the Move/Delete remediation action, please visit OPSWAT Move or Delete Files.