Panzura CloudFS with Cloud Mirroring is validated for use with Wasabi hot cloud storage. To learn more about the Panzura - Wasabi joint solution, please review the partner solution brief.
This article covers how to install cloud mirroring to write to a secondary object store, as an actively maintained copy of the primary object store.
1. Prerequisites for Cloud Mirroring
A Wasabi storage account
Bucket name of the primary bucket
Bucket name of the secondary bucket
Panzura CloudFS version 8.1.0.0+ (Hardware appliance, VMware OVA, AWS/AMI, Azure/VHD or Google/GCE instance)
Panzura Cloud Mirroring license
The following instructions describe how to configure the Panzura CloudFS Cloud Mirroring deployed in VMware environment to use the Wasabi cloud storage as the back-end object store for storing your data.
The configuration of the Panzura filer to use Wasabi cloud storage is done during the initial setup using the setup wizard or the main WebUI configuration page.
Note: Refer to the Panzura Admin Guide and platform appropriate installation guide for detailed prerequisites and instructions.
2. Configuring Cloud Mirroring during CloudFS deployment
For new deployments of CloudFS, you can enable Cloud Mirroring for the entire cluster via the setup wizard of the Master Configuration node. This can be accomplished with a Group License, which should come with your initial bundle of licenses. The Group License simplifies configuration by propagating the object store parameters (e.g. Access Key, Bucket, Path, Object Store account information) to all subordinate and HA nodes.
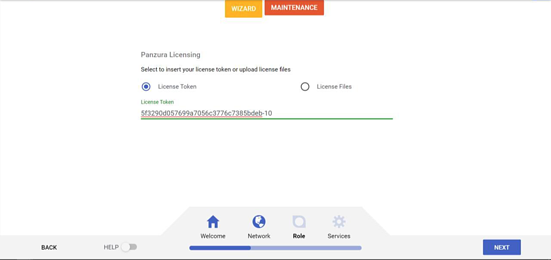
2.1. In the Installation Wizard, enter the token provided by Panzura Support.
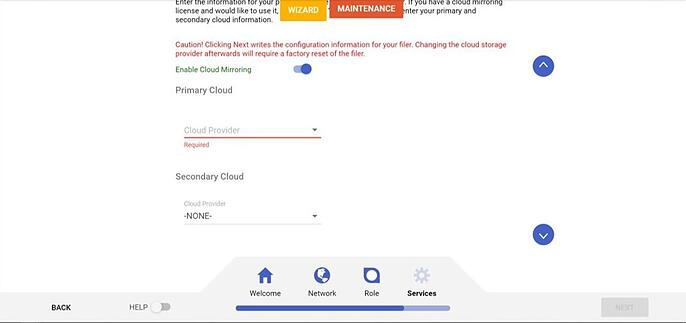
2.2. In the Cloud Storage Provider section of the Installation Wizard, click Enable Cloud Mirroring.
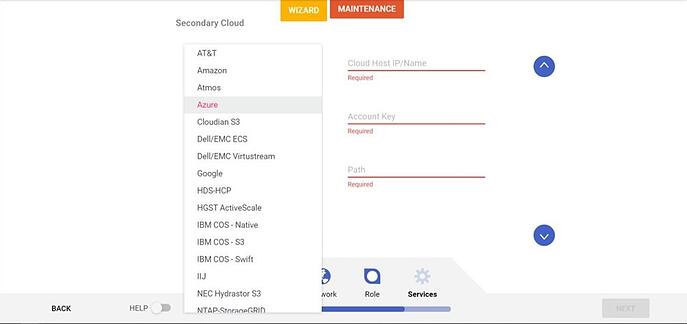
2.3. Select an object store provider from the Secondary Cloud list.
You may select the same object store provider for Primary and Secondary cloud. For example, the same provider may provide object store services in different regions.
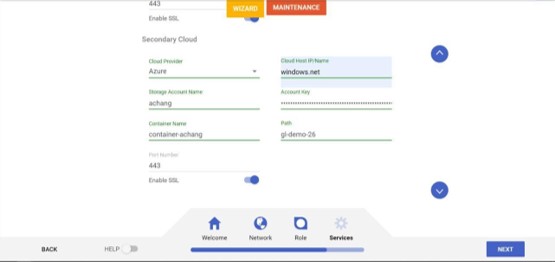
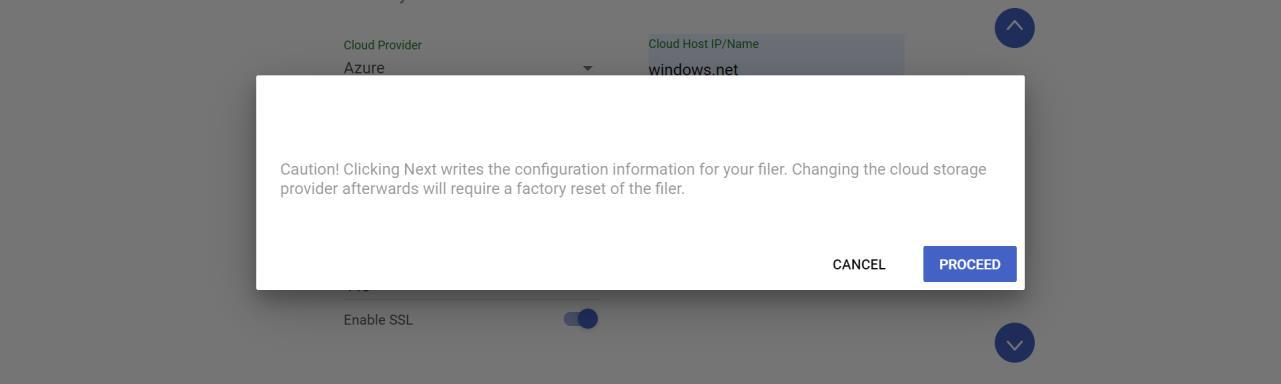
2.4. Once you have entered all the relevant information, click NEXT.
2.5. Read the popup notification. If you agree, click PROCEED.
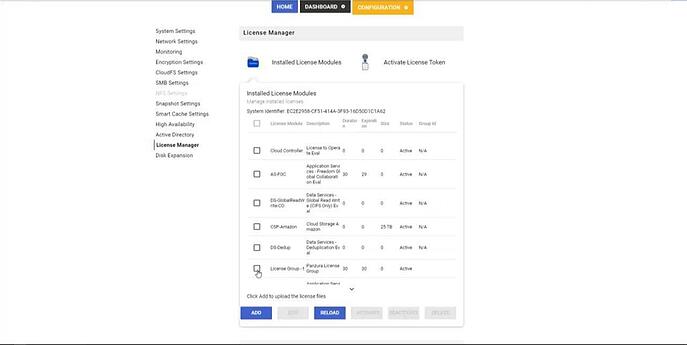
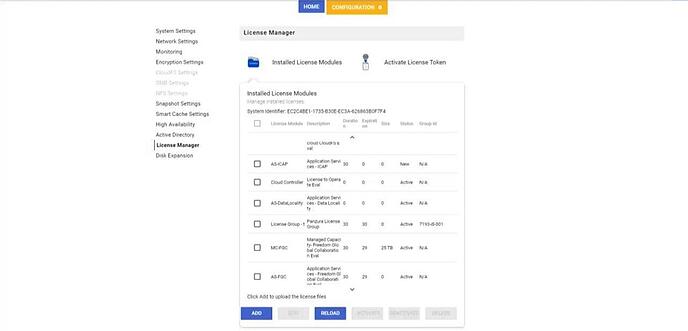
2.6. Cloud Mirroring will be enabled when the Master Configuration node completes deployment. Choose Configuration, then License Settings. Click Installed License Modules.
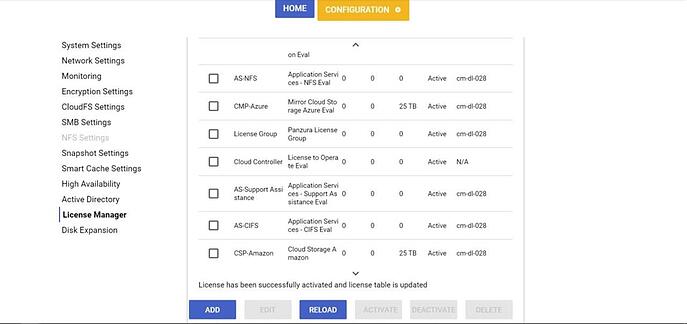
You can see that the CMP license status is Active, verifying that Cloud Mirroring is enabled.
You can see that the Group License status is “Active”, and that the CMP license has the same “Group ID” as the Group License. This ensures that Cloud Mirroring and secondary object store configuration will be propagated to subordinate and HA nodes. The default Group ID value is the Master Configuration node hostname.
3. Configuring Cloud Mirroring after Upgrading
For existing deployments of CloudFS, you must first upgrade to CloudFS v8.1.0.0 or later. Then, you can enable Cloud Mirroring for the entire cluster via the Master Configuration node. This can be accomplished with a Group License, which should come with your Cloud Mirroring license. The Group License simplifies configuration by propagating the object store parameters (e.g. Access Key, Bucket, Path, Object Store account information) to all subordinate and HA nodes.
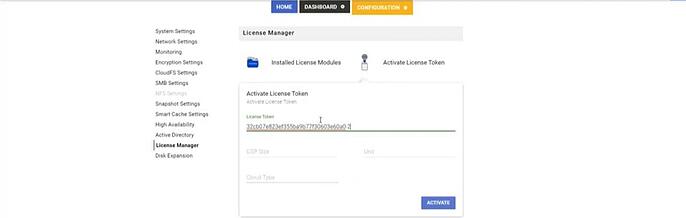
3.1. In the Master configuration node UI, choose Configuration, then License Settings. Click Activate License Token. Enter the License Token provided by Panzura Support and click ACTIVATE.
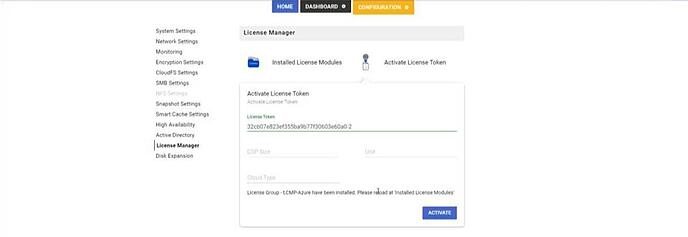
3.2. You can see the notification once the licenses have been installed.
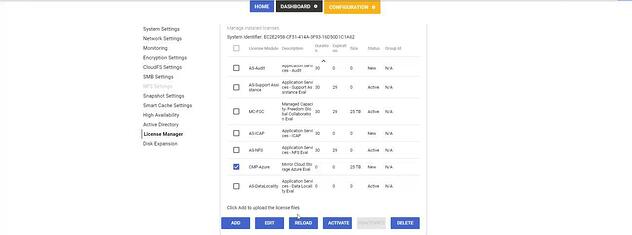
3.3. Choose Configuration, then License Settings. Click Installed License Modules. You can see that the status for the group license is Active.
3.4. The status of the CMP license is New. Once you complete installation, the CMP license status will become Active. Check the box next to the license that begins with CMP, and click EDIT.
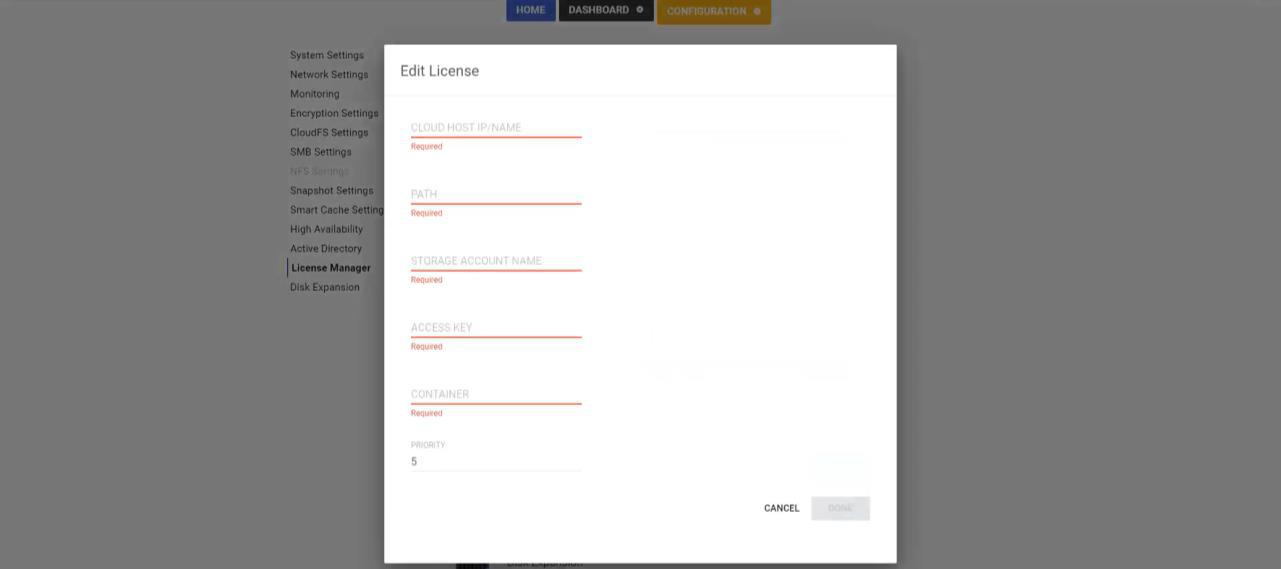
3.5. Enter the configuration information for your secondary object store.
3.6. Once completed, you can see the status of the license is Active. The Cloud Mirroring feature is now enabled on your node.
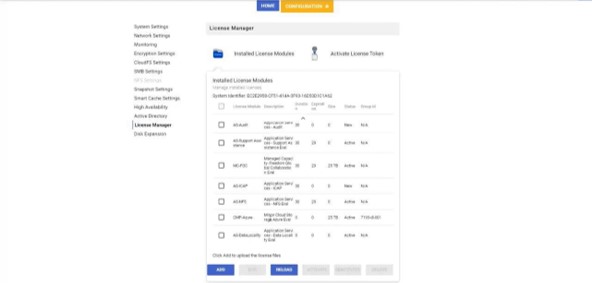
3.7. You can also see that the Group License status is Active and the Group ID matches the CMP license Group ID. This ensures that Cloud Mirroring and secondary object store configuration will be propagated to subordinate and HA nodes. The default Group ID value is the Master Configuration node hostname.
Group License is not required to enable Cloud Mirroring.
If Group License is used on the Master Configuration node (as in the above example), the Group License and CMP license will AUTOMATICALLY propagate all Cloud Mirroring settings and secondary object store configuration to subordinate and HA nodes within the same CloudFS cluster. No further configuration is required to enable Cloud Mirroring for your CloudFS cluster.
If Group License is NOT used, you must install the Cloud Mirroring license onto and configure each subordinate and HA node separately.
For additional details, please contact your local Panzura representative.