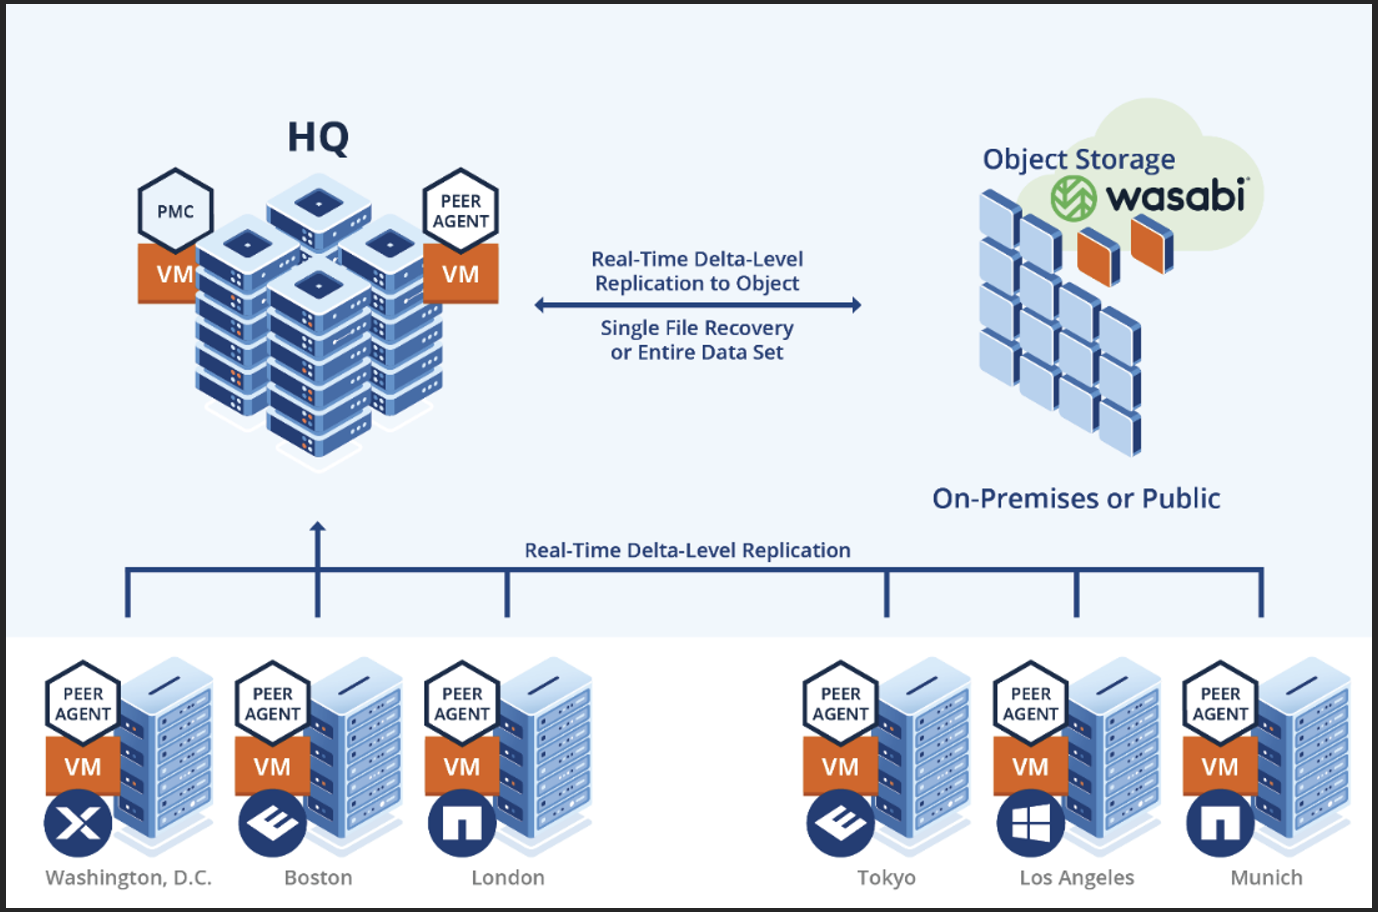
Wasabi has been validated to work with Peer Global File service (PeerGFS). Cloud Backup and Replication brings file-to-object replication into Peer Software’s capabilities for enterprise NAS environments. Leveraging the same real-time engine that powers Peer Software’s multi-site, multi-vendor replication, Cloud Backup and Replication efficiently pushes data into Wasabi Hot Cloud Storage in an open format that is immediately consumable by other applications and services.
To learn more about our solution, refer to our joint solution brief.
Note: The data restoration process is handled by your specific backup software application. As many variables can affect your unique environment, it is strongly recommended that you seek guidance from your backup software’s technical support team if you encounter difficulties or have application-specific inquiries.
Requirements
Peer Global File Service v5.1.0.20230105 and newer.
License for Peer Global File Service v5.1 or newer required.
Contact your Peer Software Support representative to enable the S3 Compatible destination.
Microsoft SQL Server or SQL Server Express database.
An active Wasabi cloud storage account.
Architecture Diagram
Creating a Cloud Backup and Replication Job
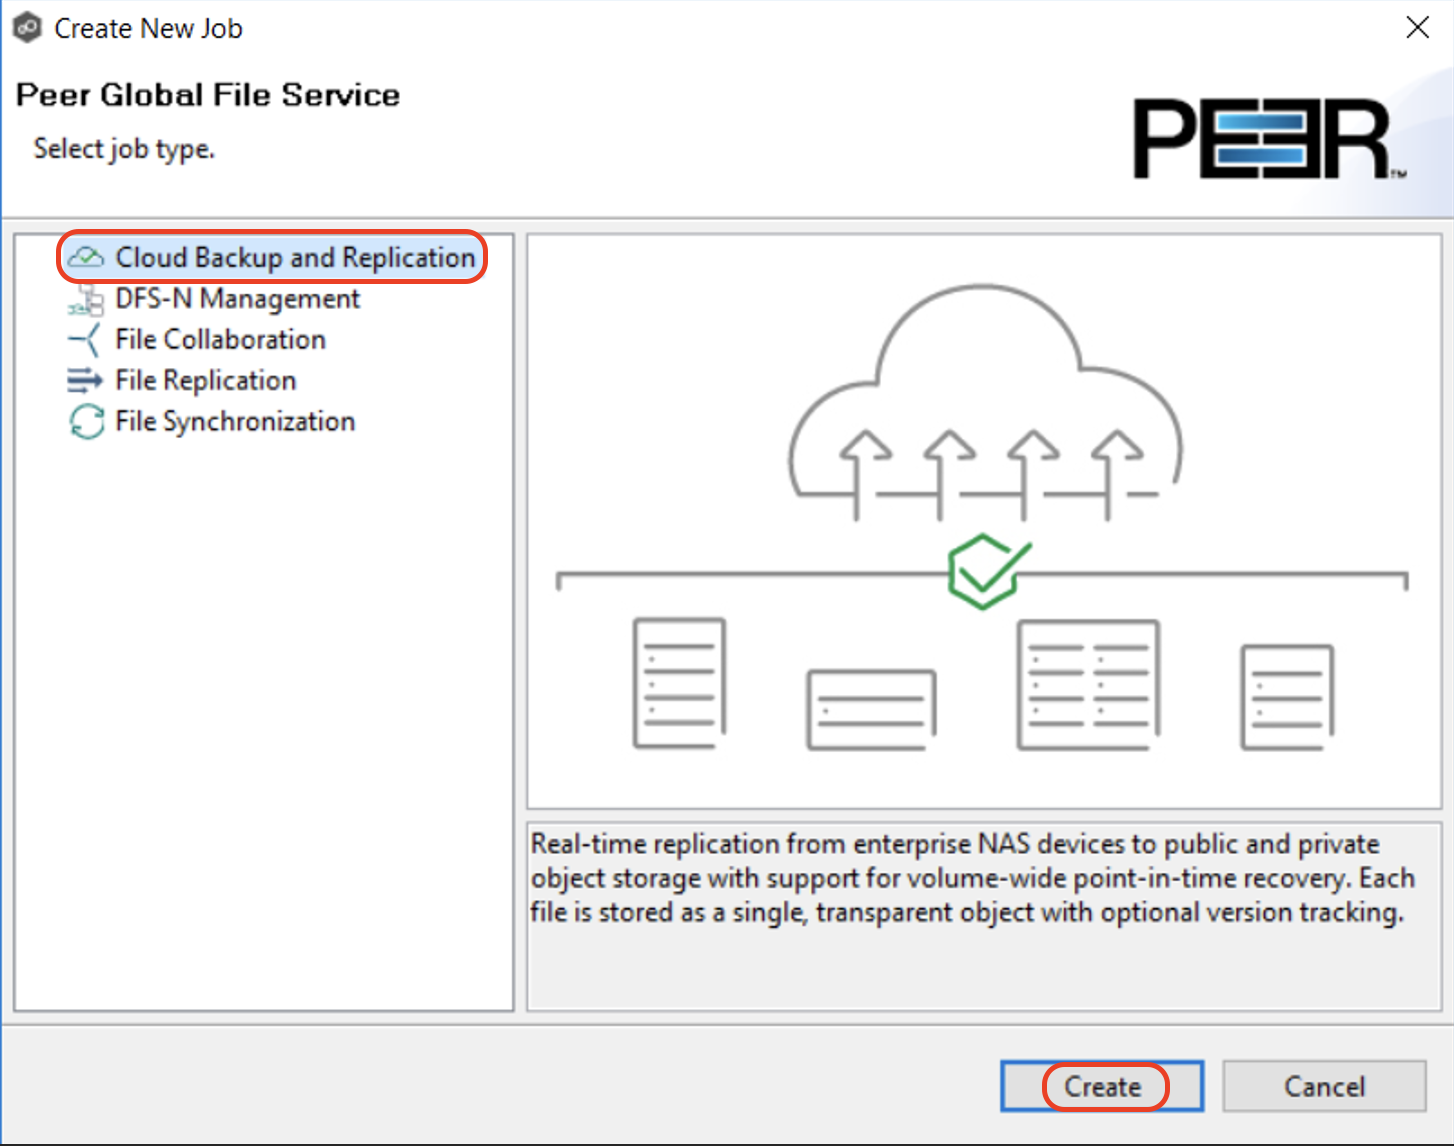
Open the Peer Management Center. From the File menu, select New Job (or click the New Job button on the toolbar). The Create New Job wizard displays a list of job types you can create. Select Cloud Backup and Replication and click Create.
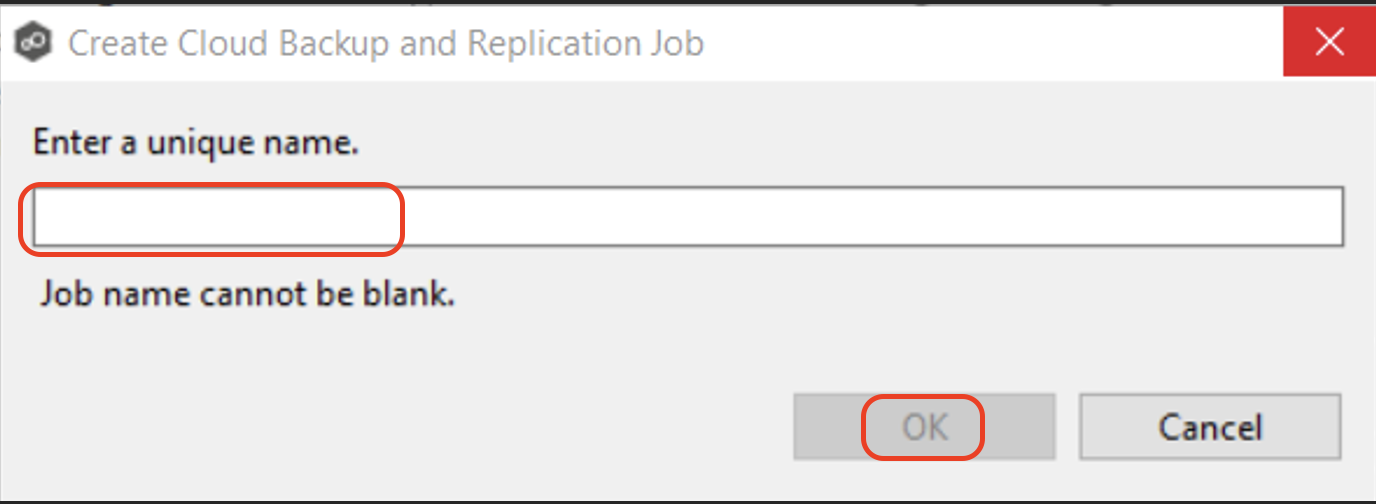
Enter a name for the job in the dialog that appears. Click OK.
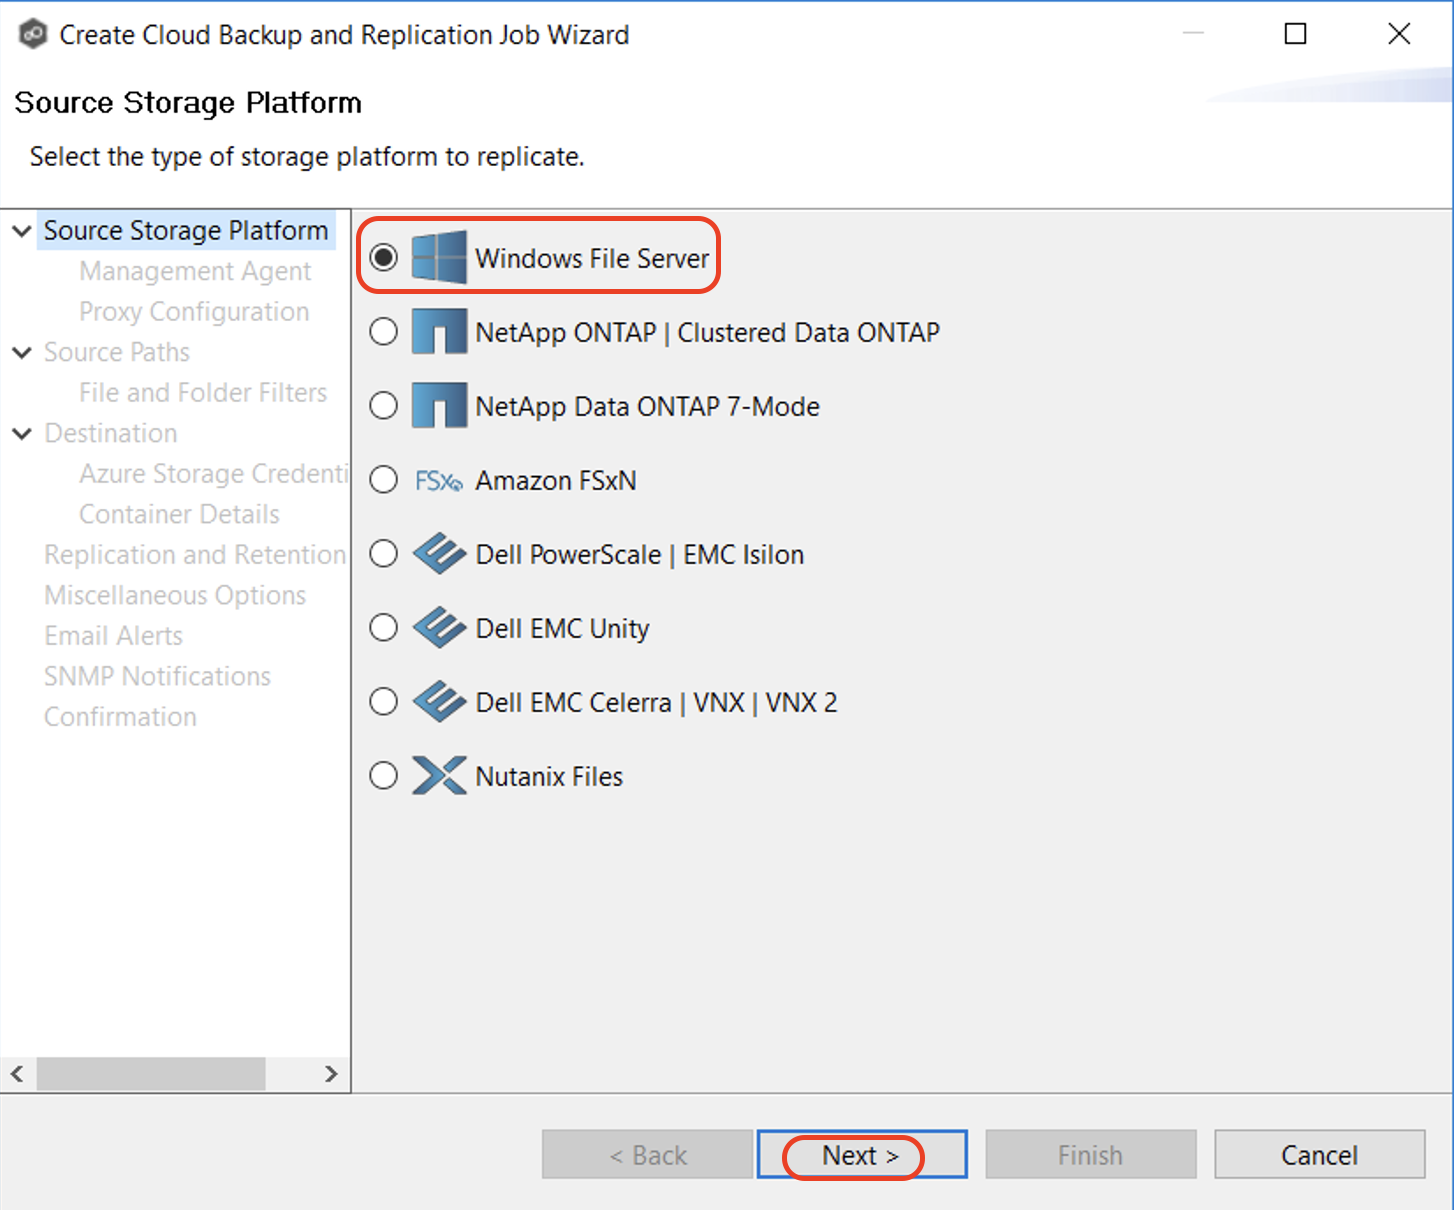
On the Source Storage Platform page, select the storage platform type you want to replicate. Click Next to continue. This page lists the types of source storage platforms supported by Cloud Backup and Replication. The source storage device hosts the data you want to replicate.
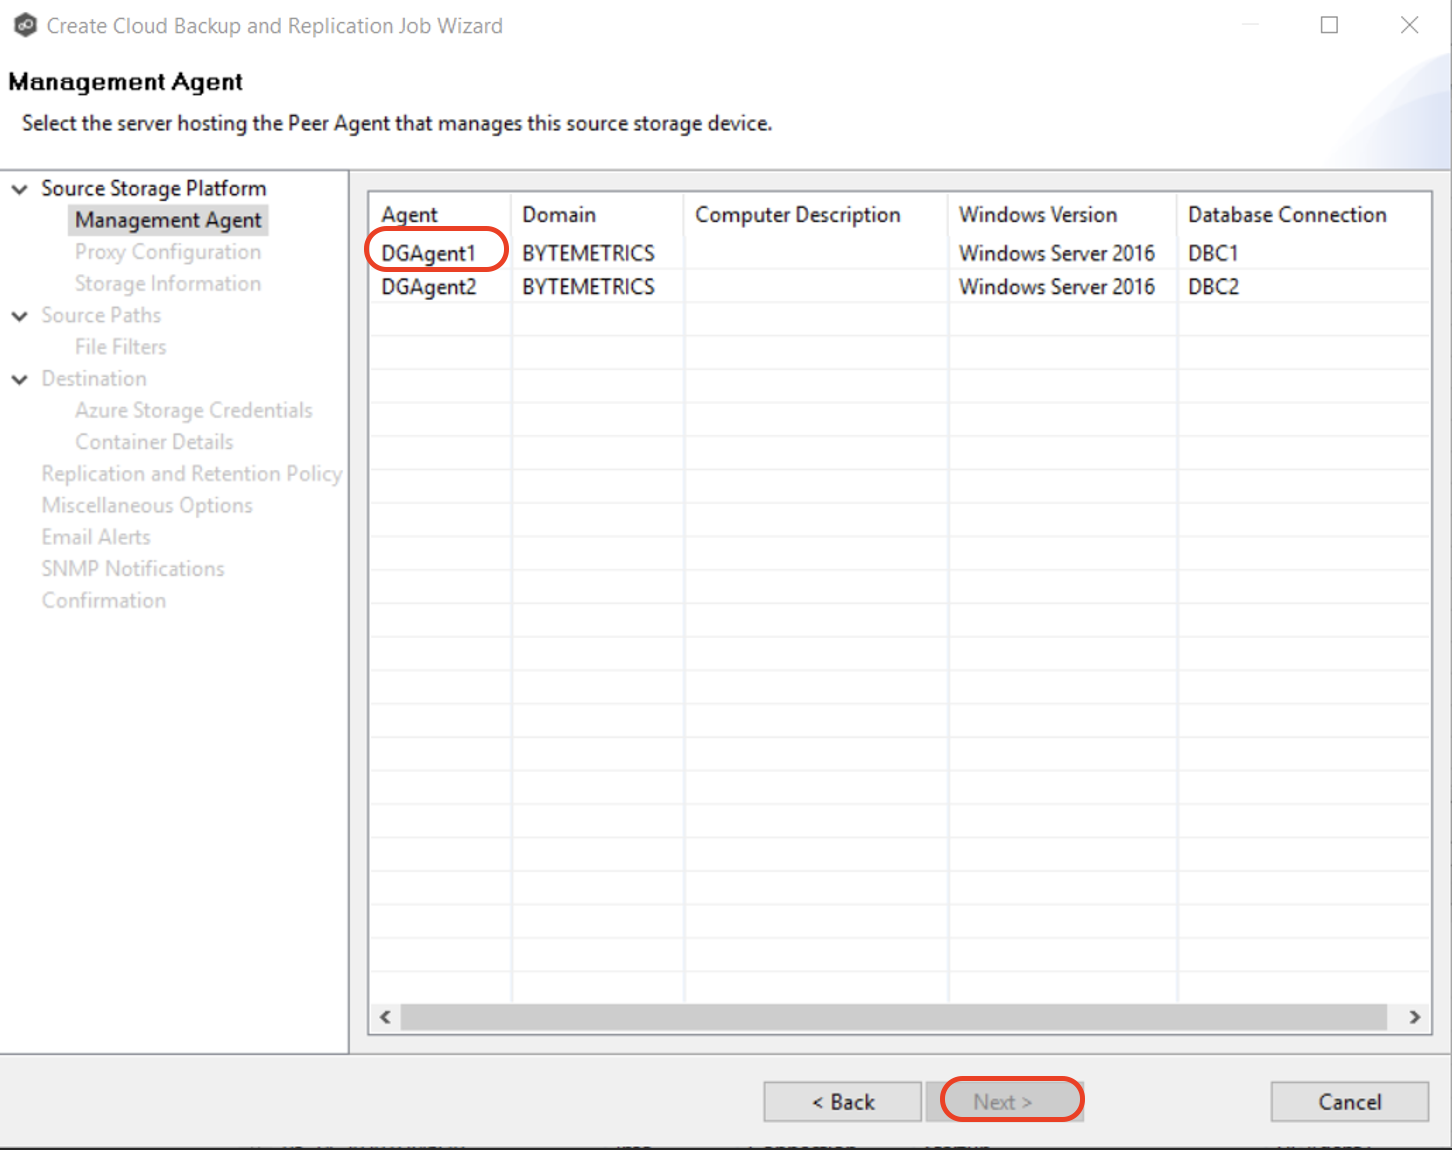
Select the Management Agent for the volume/share/folder you want replicated. Each storage device you want to replicate must have a Peer Agent managing it. The Peer Agent that manages a device is known as its Management Agent.
Note: If you select an Agent that does not have a database connection listed in the Database Connection column, a message prompts you to create the connection:
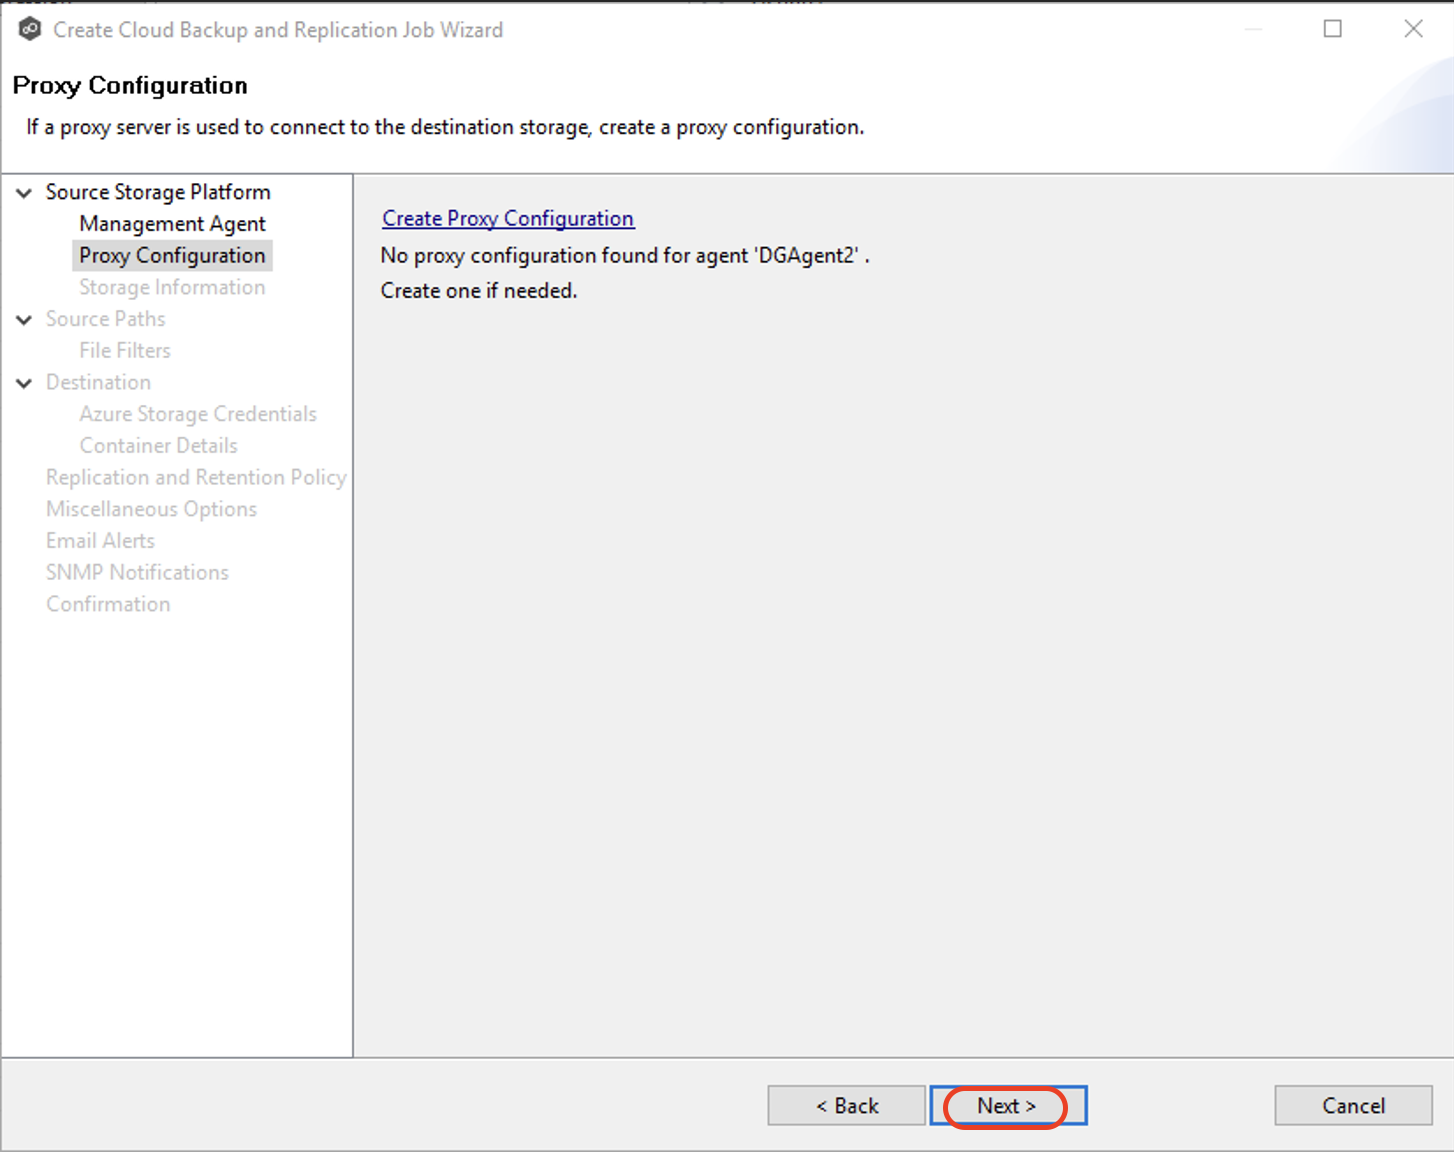
Proxy Configuration. If you do not need a proxy server to connect to outside networks, click Next.
If you do need a proxy server to connect to outside networks, you have three options.
Create a new proxy configuration.
Use the existing proxy configuration. If there is an existing proxy configuration, its details will be displayed on the page. You may have created one in advance through Cloud Back and Replication Preferences or when you created another Cloud Backup and Replication job. Once a proxy configuration is created for a source storage platform, it is used for all Cloud Backup and Replication jobs that use that agent.
Edit an existing proxy configuration. Click Edit Proxy Configuration to edit the existing proxy.
Review Proxy Configuration for more details.
Note: If you edit the proxy configuration, it affects other jobs using the same agent. Editing an existing proxy configuration can cause problems with other jobs.
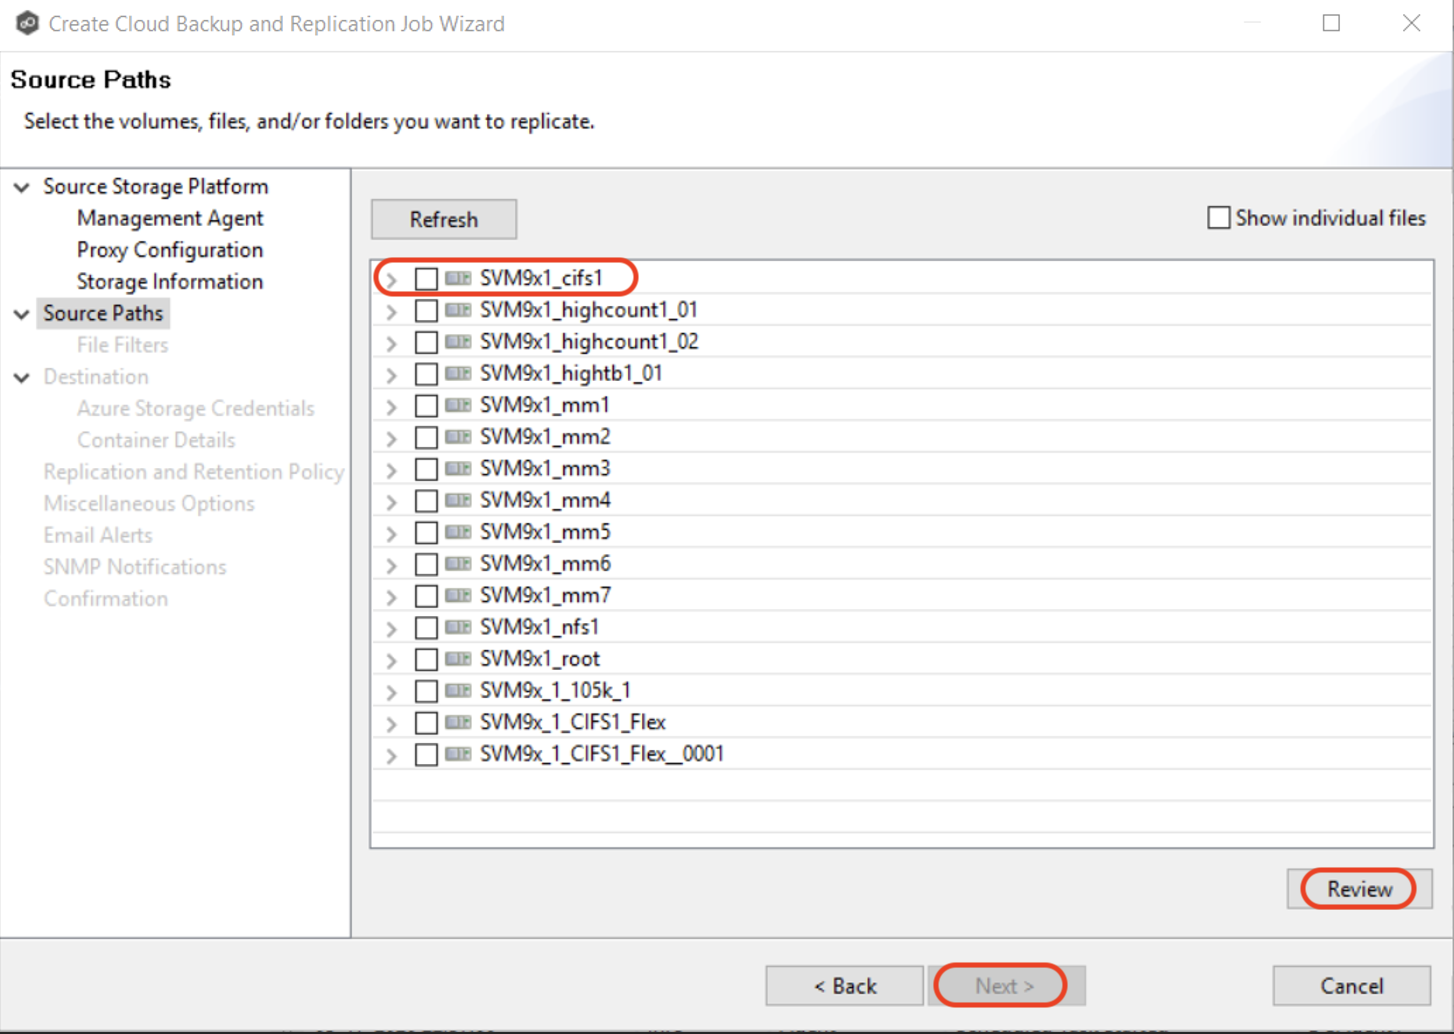
Select the paths to the files/folders/volumes you want to replicate. Click Review to review your selections. Click Next.
The Source Paths page displays a list of available volumes to replicate. You can choose to replicate an entire volume or selectively replicate files and folders. The files/folders/volumes selected for replication are referred to as the watch set.
Select the volume checkbox to replicate the entire volume (all files and folders, including subfolders and their files).
Expand the volume, scroll to the bottom of the expanded list, and select All Files to replicate all files at the volume’s root level (but not folders).
Expand the volume, locate the desired folder, and select its checkbox to replicate the folder and its contents (including subfolders and their files).
Expand the folder, then select All Files to replicate all files within it (but not the folder itself).
To replicate specific files and folders, select the Show individual files checkbox, expand the folders, and select the files and folders you want to replicate.
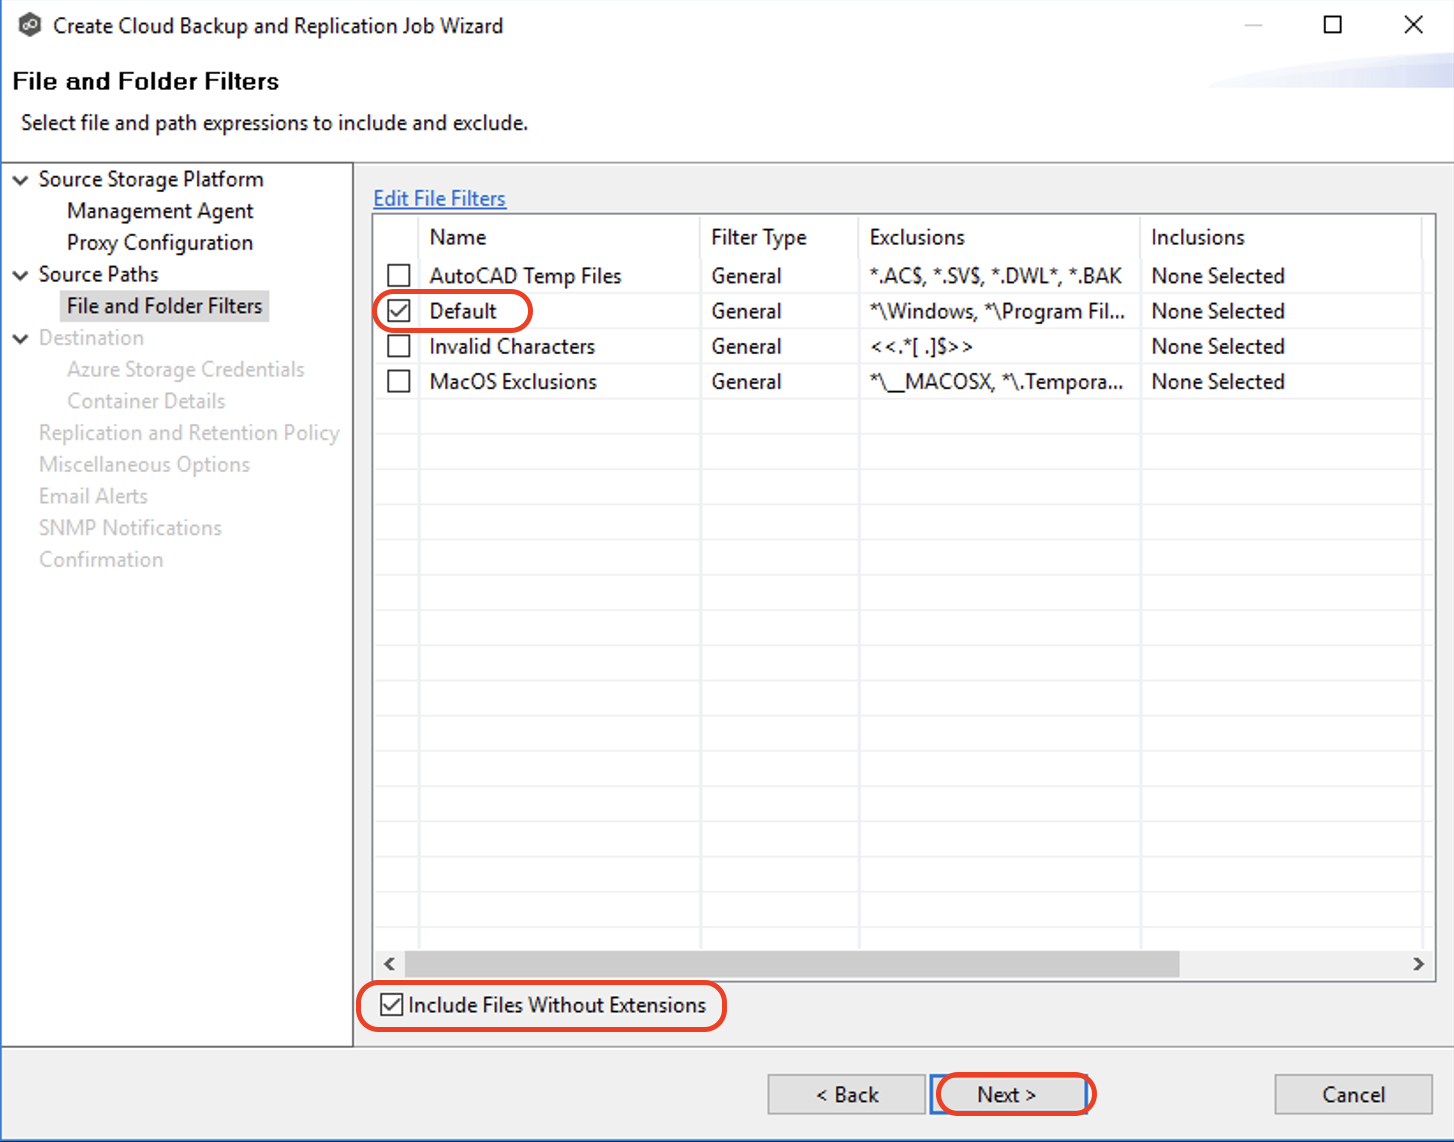
Select the file and folder filters you want to apply to the job. Select the Include Files Without Extensions checkbox if you want to replicate files that do not have extensions. Click Next.
The File and Folder Filters page displays a list of file and folder filters. By default, all files and folders selected in the Source Paths page will be replicated. A file or folder filter enables you to exclude and/or include files and folders from the job based on file type, extension, name, or directory path. Any file or folder that matches the filter is excluded or included from replication, depending on the filter’s definition.
Note: Files without extensions are ignored during replication unless you select this checkbox.
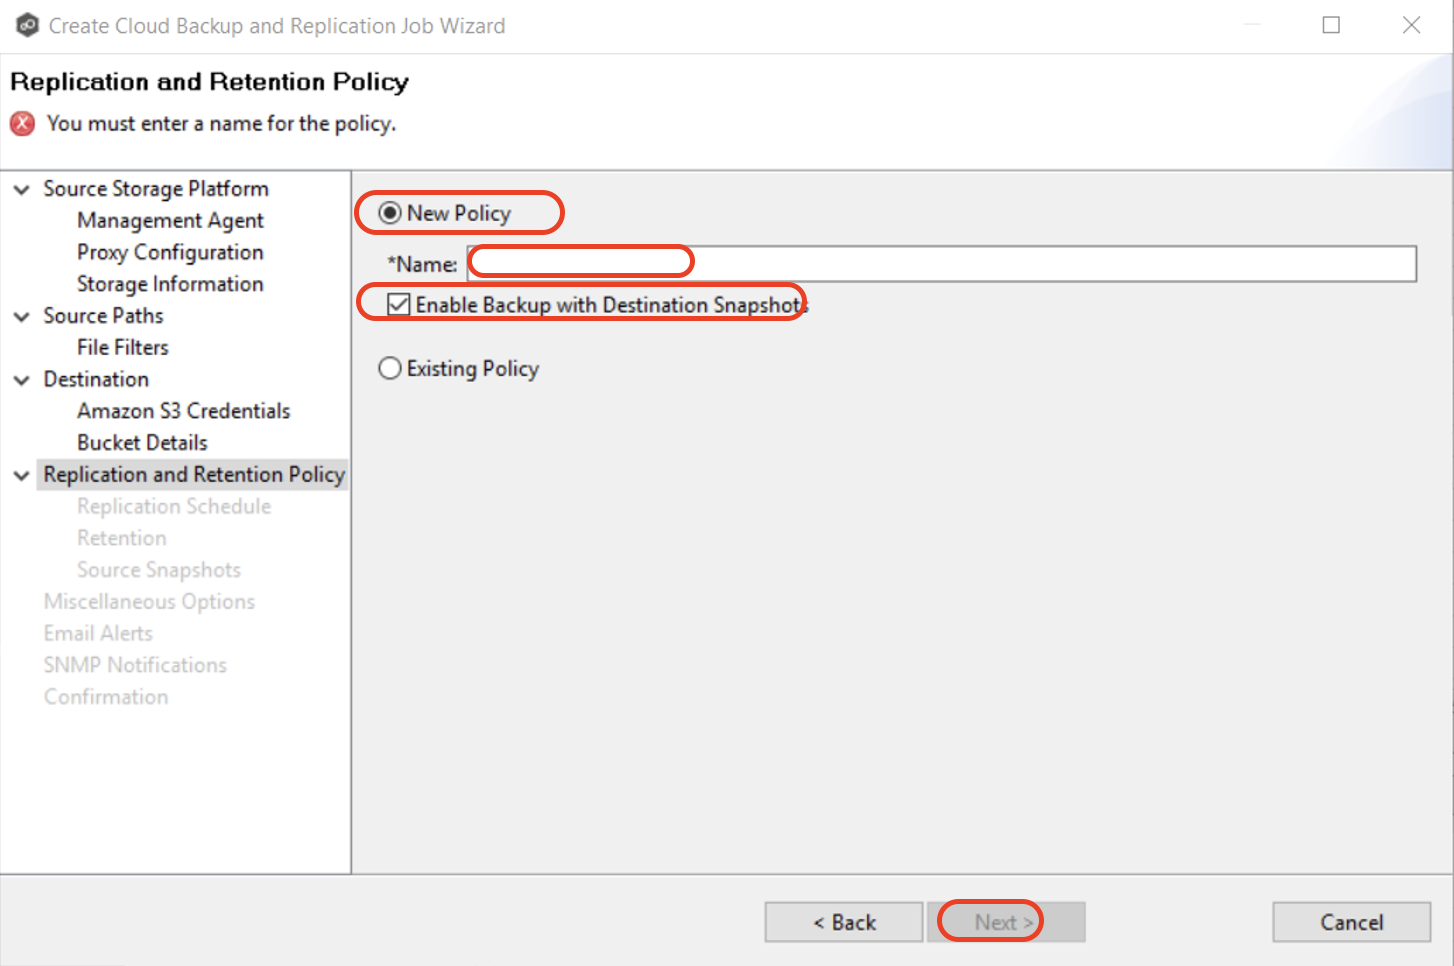
On the Destination page, select the S3 Compatible destination. Click Next.
Note: Contact your Peer Software Support representative to enable the S3 Compatible destination.
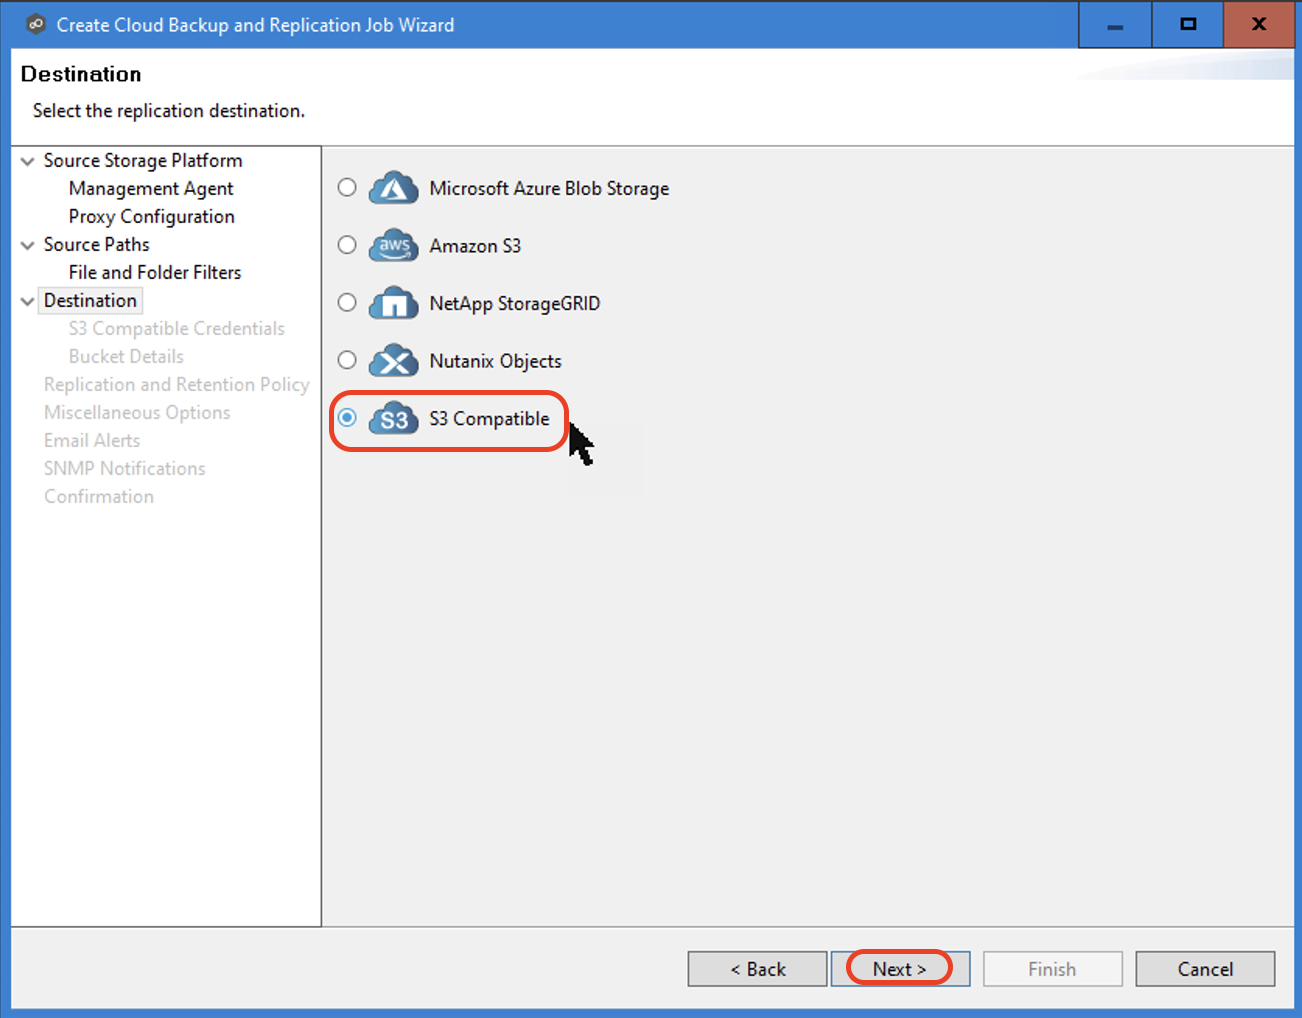
Input the following credentials.
Description–Wasabi or any name you’d like to apply.
Access–Access key for the Wasabi bucket. Refer to creating a sub-user, access, and secret keys.
Secret keys- Secret key for the Wasabi bucket. Refer to the instructions for creating a sub-user, access, and secret keys.
Service Point–Enter the appropriate Wasabi service URL (should end in .wasabisys.com). Use the appropriate Wasabi service URL as described in our Wasabi Service URLs article.
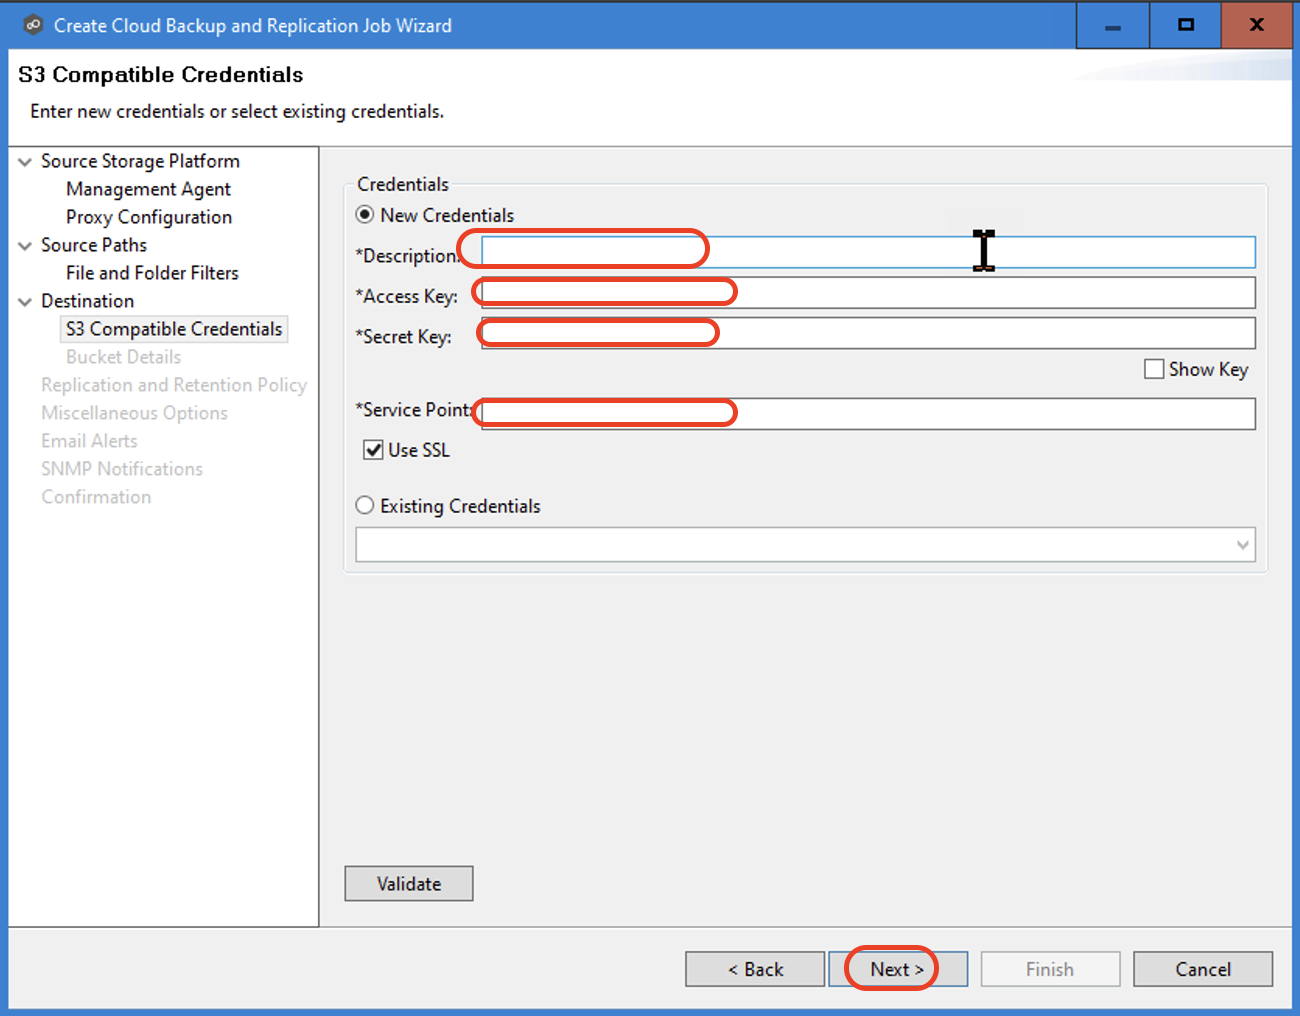
Create a new Wasabi bucket or choose an existing one from the drop-down list. Click Next.
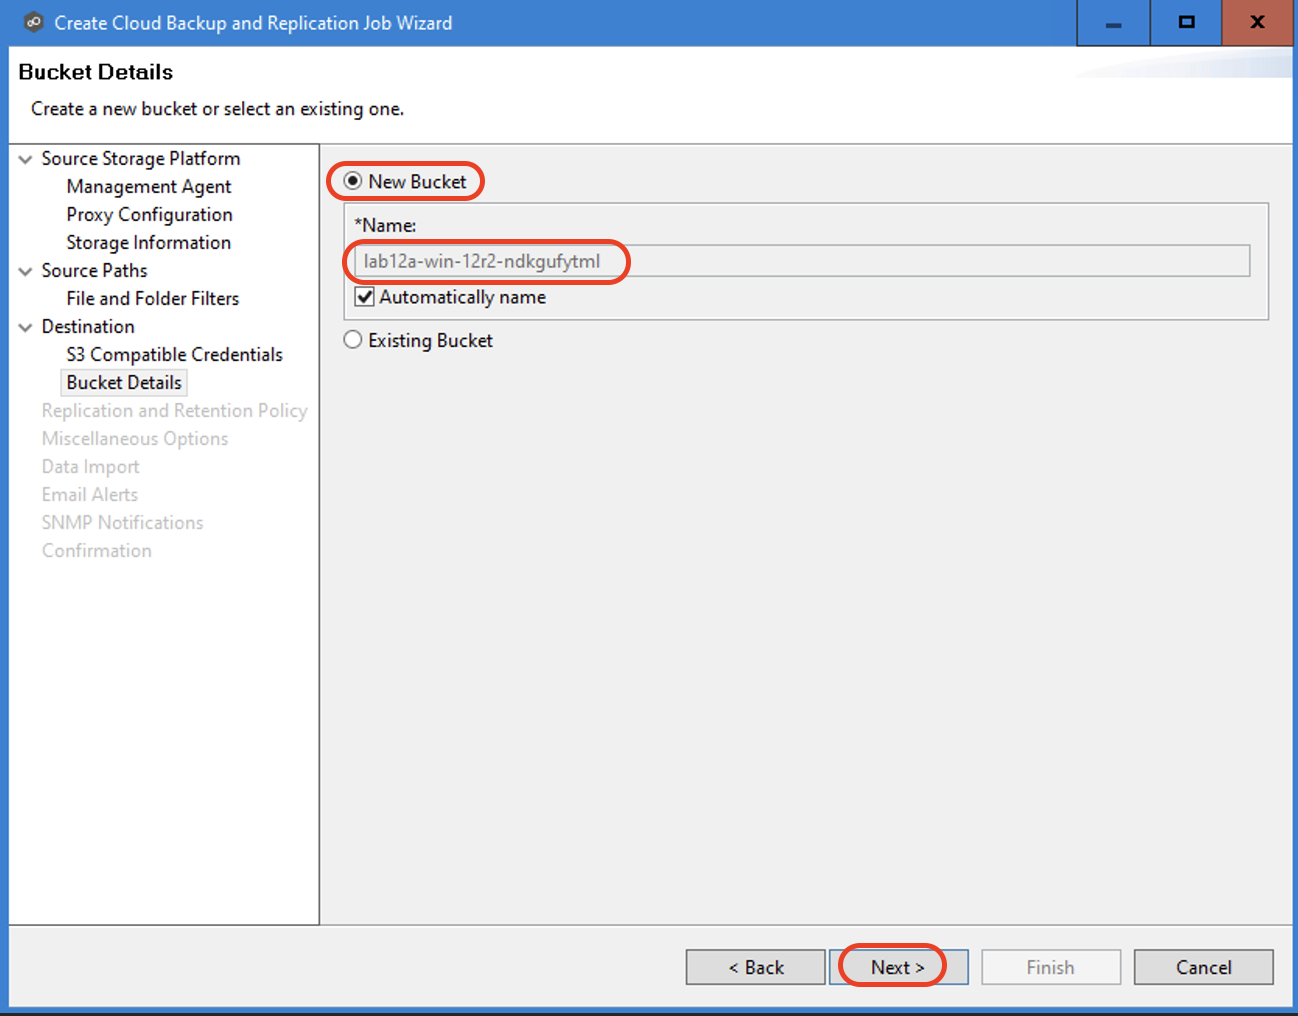
On the Replication and Retention Policy page, select New Policy or Existing Policy from the dropdown list. If you select a new policy, input a Name for the new policy.
Select Enable Backup with Destination Snapshots to replicate on-premises data to the destination storage device and take destination snapshots at specified points in time. Then click Next to continue.
Each Cloud Backup and Replication job must have a Replication and Retention policy. A Replication and Retention policy specifies:
How often do you want to scan the storage device for replication, or replicate in real time?
Whether you want to take snapshots of the data. A snapshot captures the state of a file system at a point in time. There are two types of snapshots.
A destination snapshot captures an image of the data on the destination storage device immediately after replication. Destination snapshots are useful for recovering data from different time periods. Destination snapshots track versions of changed files and the file system structure, which can be used for data recovery. For more information about recovering data, see Recovering Data.
A source snapshot captures an image of the on the source storage device immediately before replication. Source snapshots are useful for replicating open and locked files, which otherwise may not be replicated. A source snapshot also ensures that the replicated data is coming from a static version of the source file system. For details about using source snapshots, see Step 14.
How long do you want to retain destination snapshots?
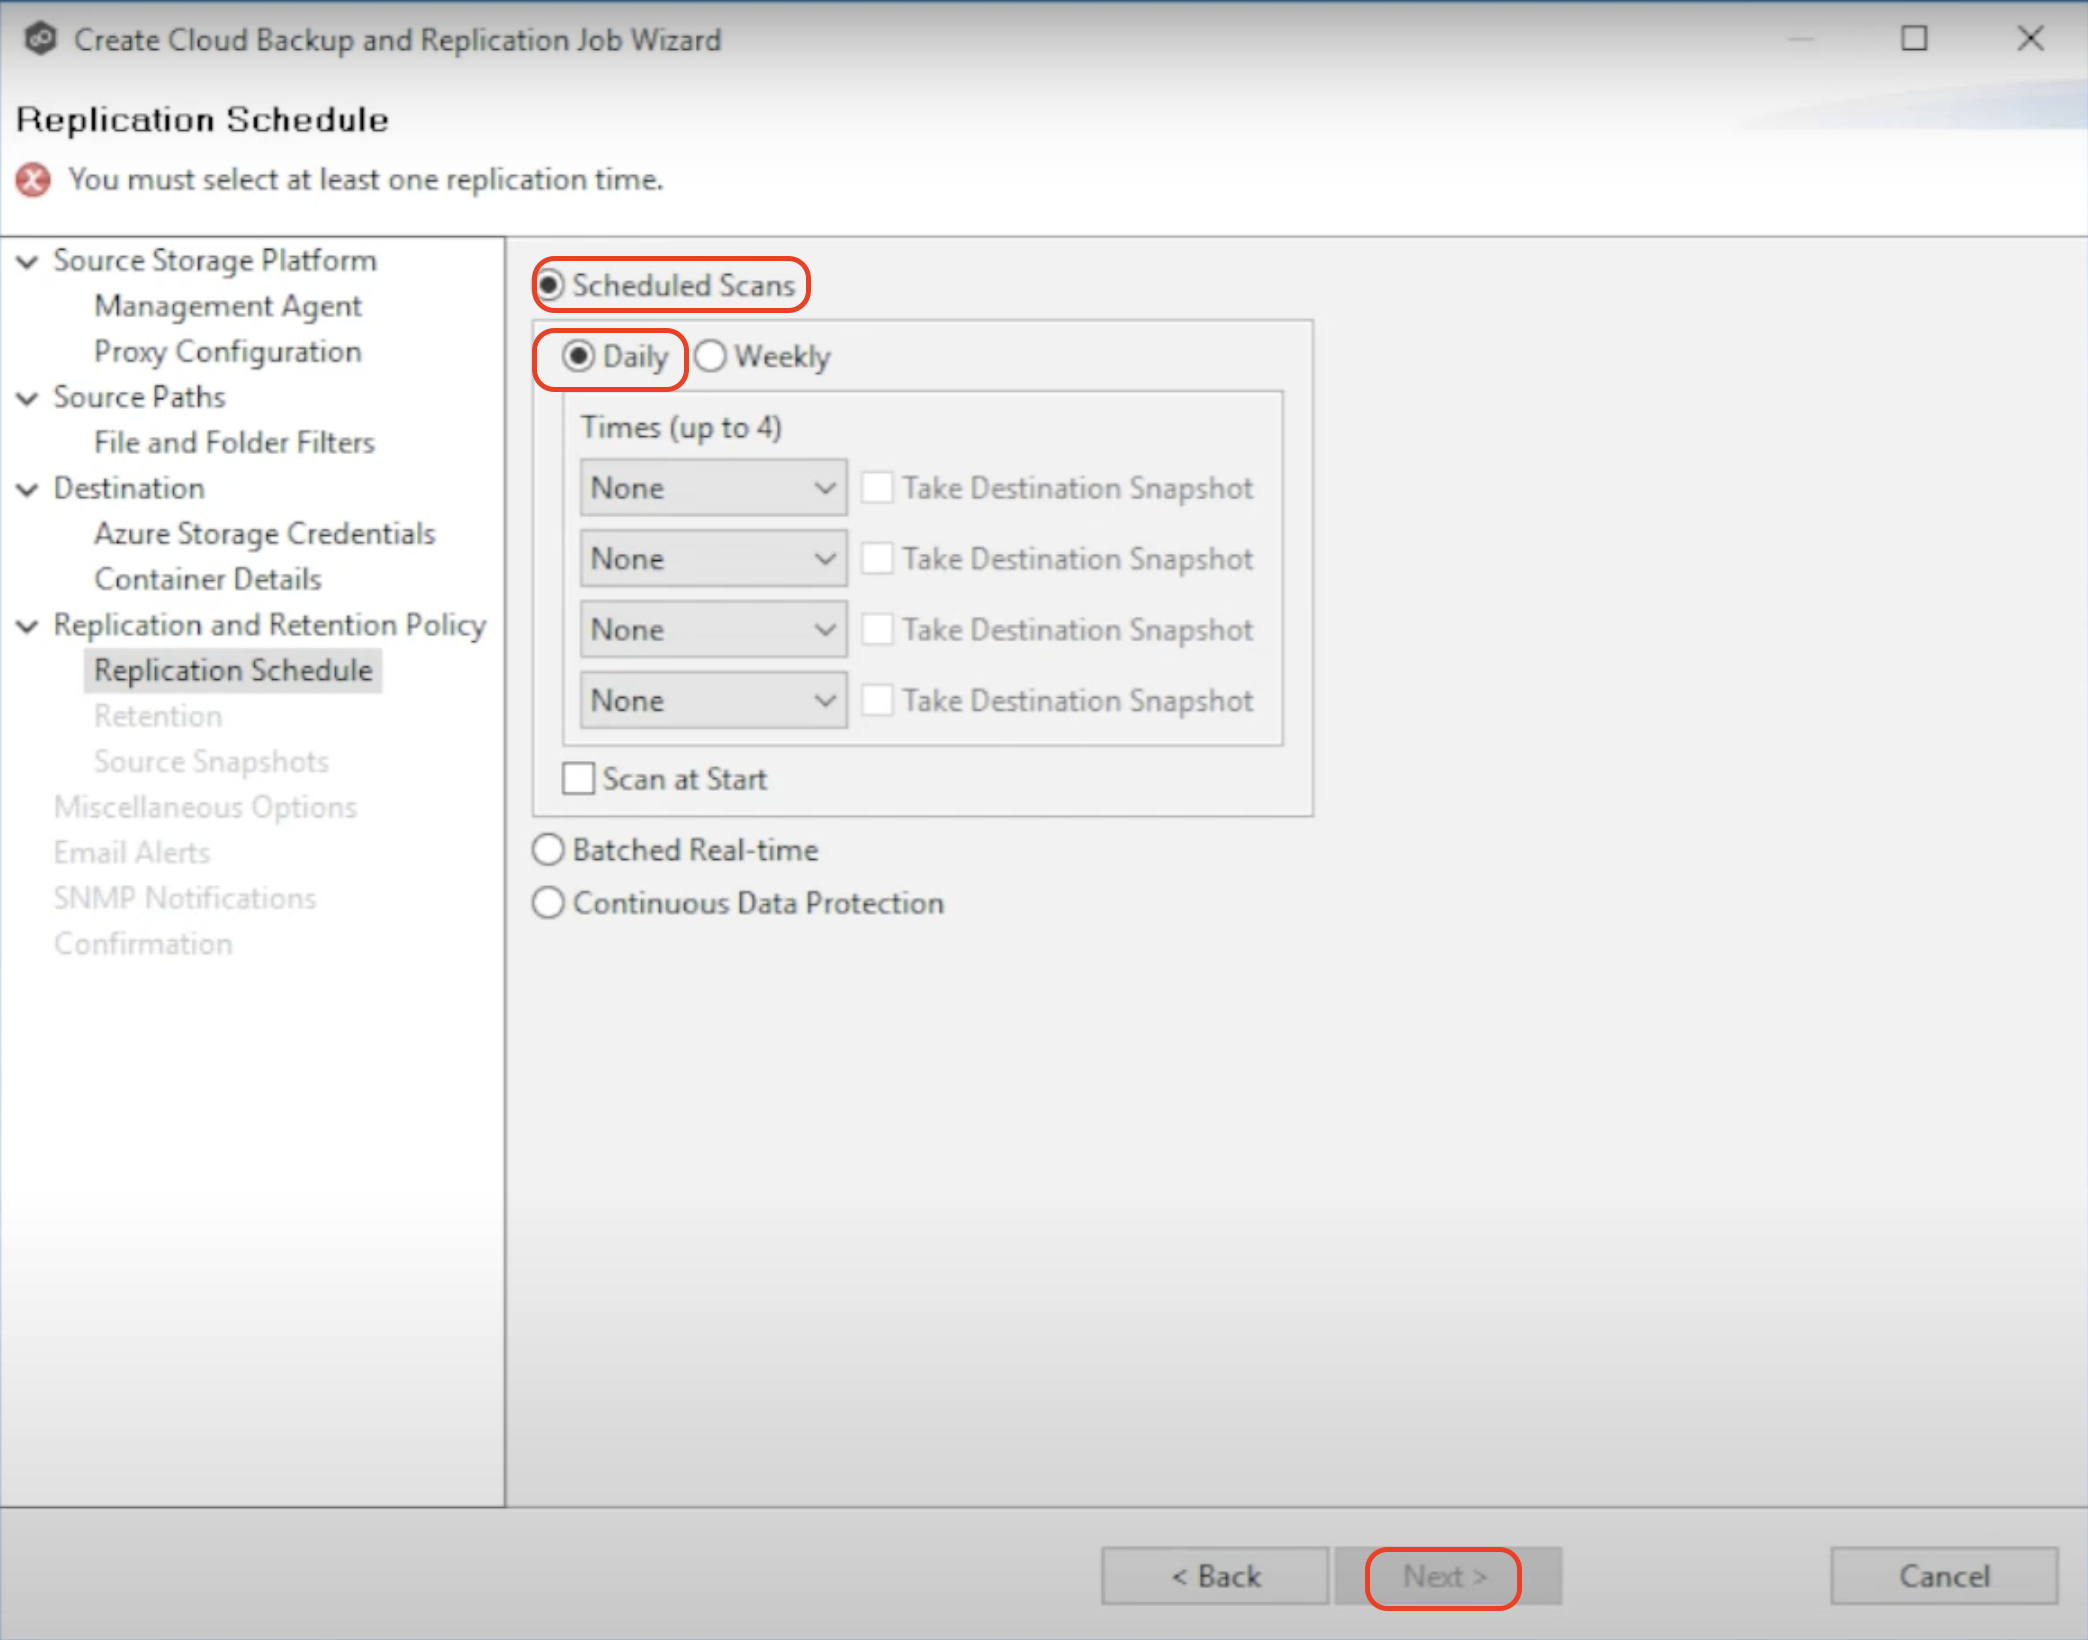
On the Replication Schedule page, select the replication frequency. Click Next. The Replication Schedule page lets you select the replication frequency and the times when snapshots should be taken.
Scheduled Scans- Select this option if you want to replicate files on a scheduled basis. A scan of the file system runs on a scheduled basis, either daily or weekly, and changes are replicated as the scan progresses.
Batched Real-time -Select this option if you want to continuously monitor changes to the file system but replicate changes on a scheduled basis. Changes are monitored in real-time, and only the latest version of the changed file is replicated at scheduled times. An initial scan can be performed to establish a baseline.
Continuous Data Protection- Select this option if you want to continuously monitor changes and replicate changes in real-time. Whenever a file changes, the change is replicated in real-time.
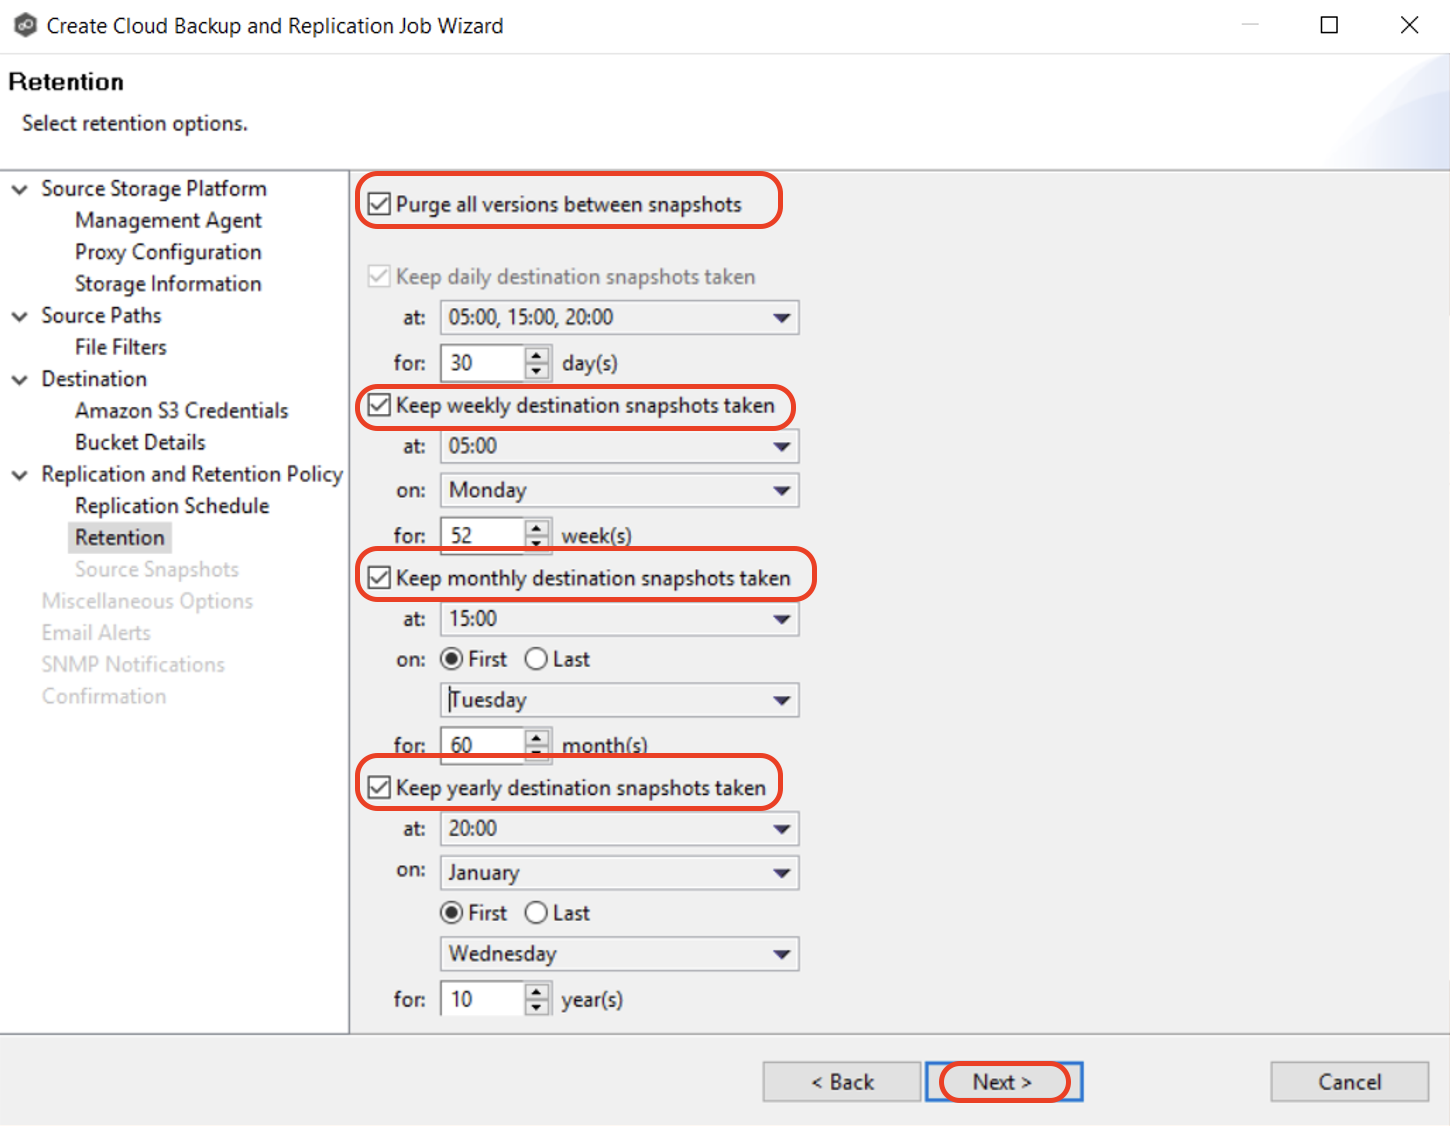
Select the retention options. Click Next. The Retention page lets you set how long you want to retain destination snapshots. You have the option to retain destination snapshots on a daily, weekly, monthly, and yearly basis.
Note: The options vary according to the replication schedule you selected. If you did not select the Enable Backup with Destination Snapshots in Step 11, the Retention page will not appear.
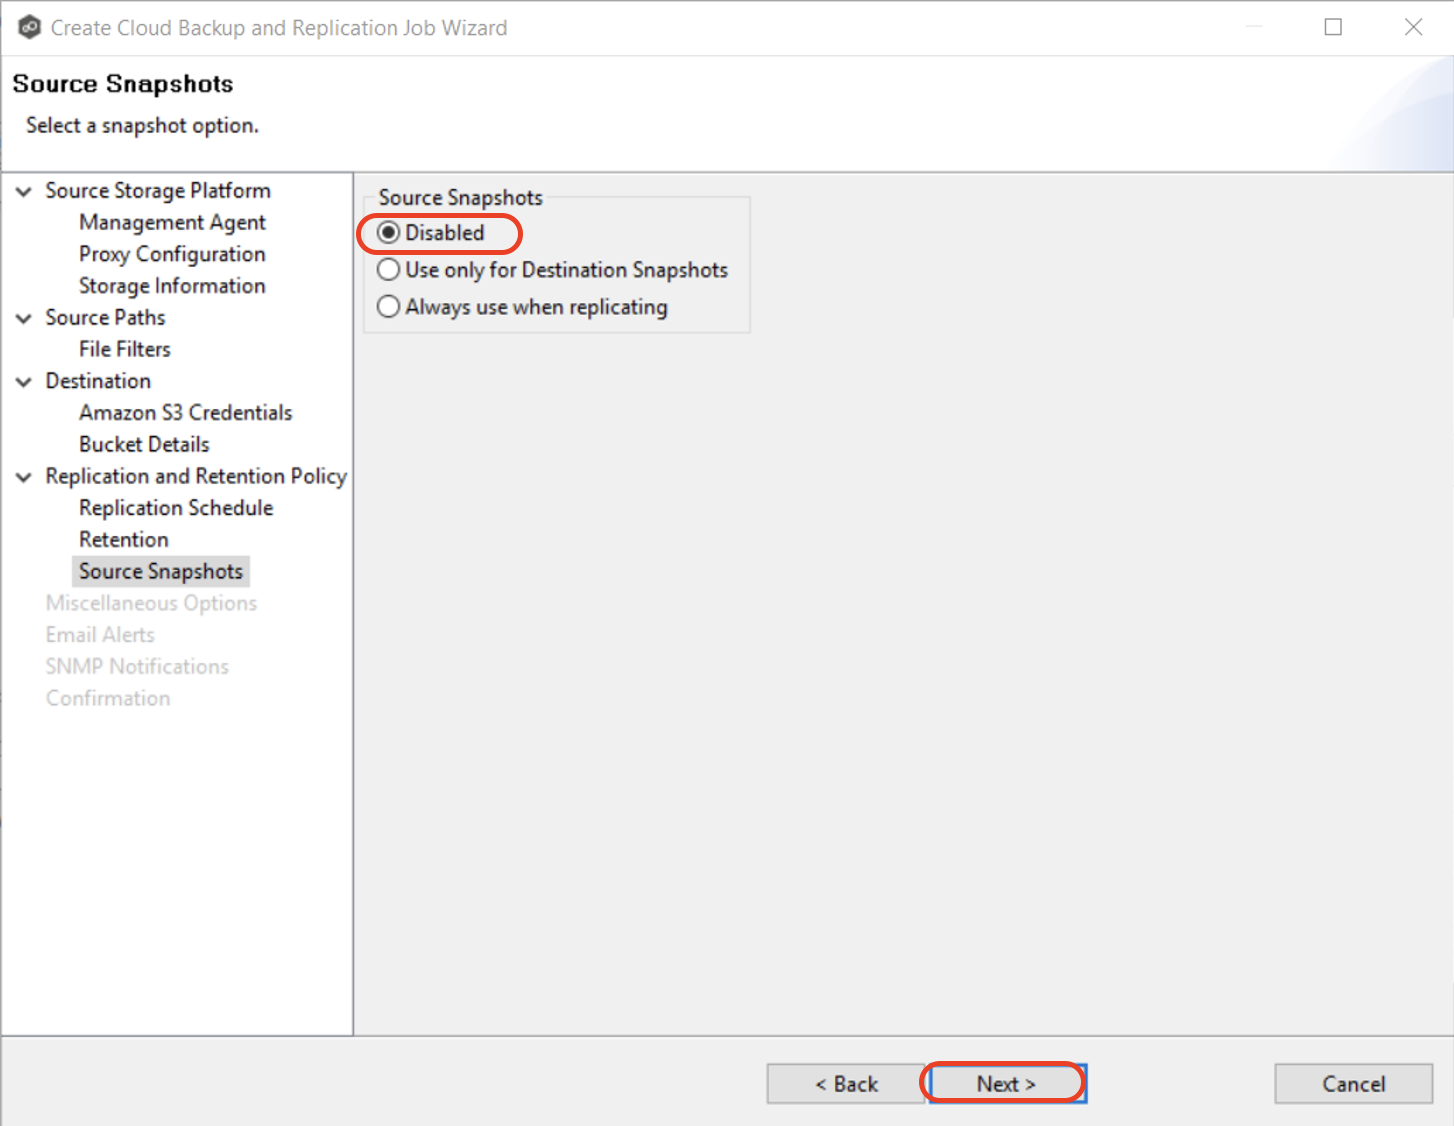
Select a source snapshot option and click Next.
A source snapshot is a read-only point-in-time version of the volume.
Select the Disabled option if you do not want to take source snapshots.
Select the Use only for Destination Snapshots option when you want the source snapshot to be stored on the destination storage as the destination snapshot rather than an actual destination snapshot. To use this option, you must have selected Enable Backup with Destination Snapshot in Step 11.
Select Always use when replicating when you want to replicate, always using source snapshots.
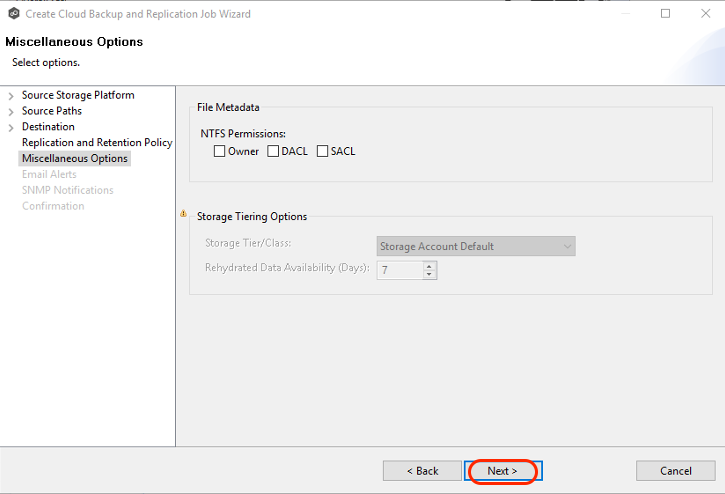
Select the options to apply to this job. The available Miscellaneous options depend on the selected destination storage platform.NTFS Permissions: If you want NTFS permissions metadata included in the replication, select the elements to include.
Owner – The NTFS Creator-Owner who owns the object (which is, by default, whoever created it).
DACL – A Discretionary Access Control List identifies the users and groups that are assigned or denied access permissions on a file or folder.
SACL - A System Access Control List enables administrators to log attempts to access a secured file or folder. It is used for auditing.
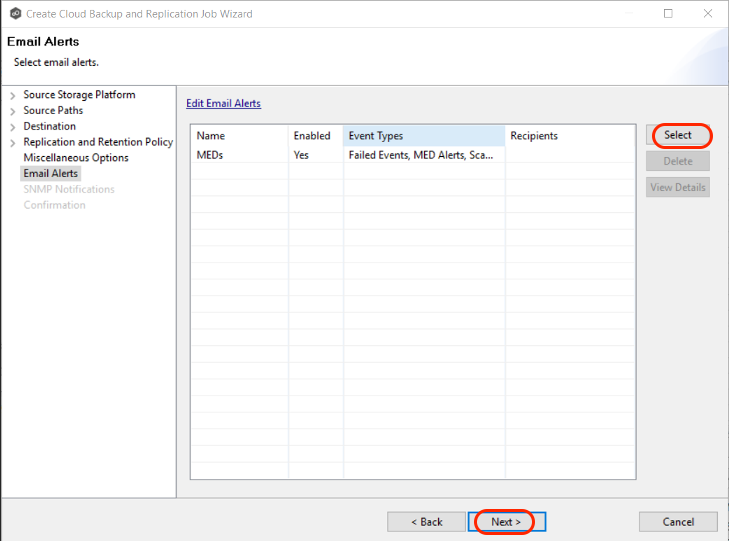
On the Email Alerts window, click Select to select existing email alerts from the drop-down list. Click OK, then click Next.
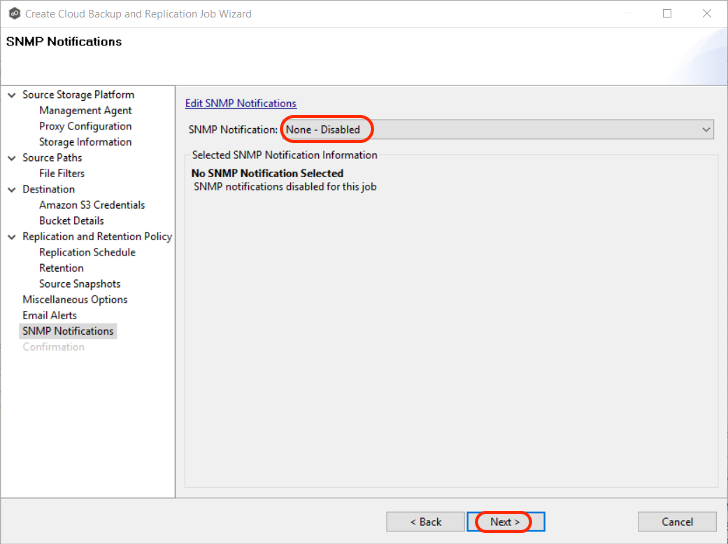
Select an SNMP notification (optional) from the drop-down list. To disable, select None - Disabled. Click Next.
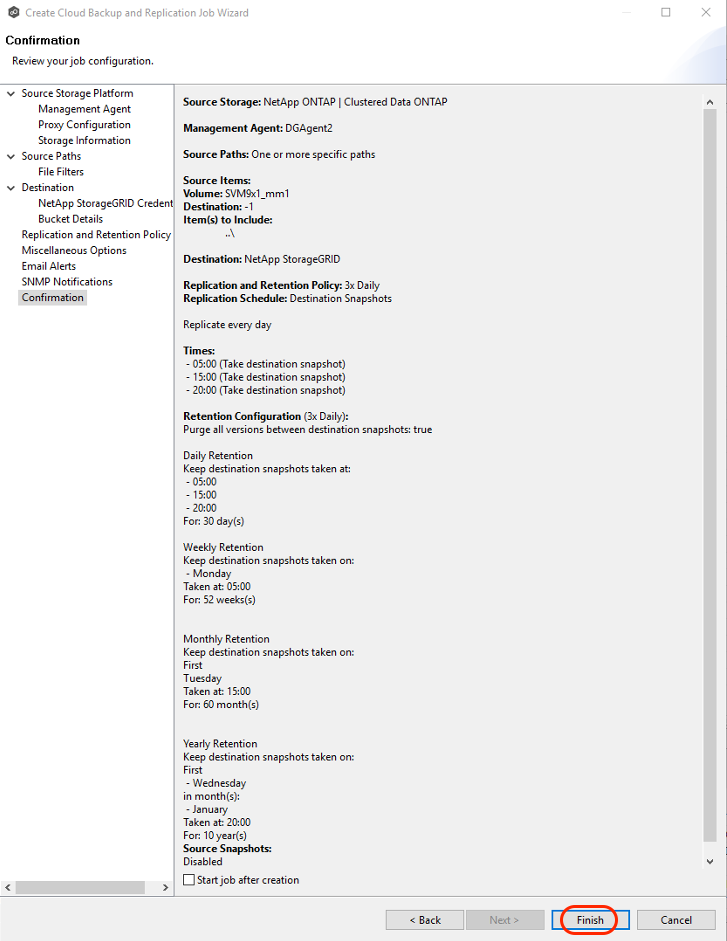
Review the job configuration on the Confirmation page. Select the Start job after creation checkbox if you want the job to start immediately. Click Finish.
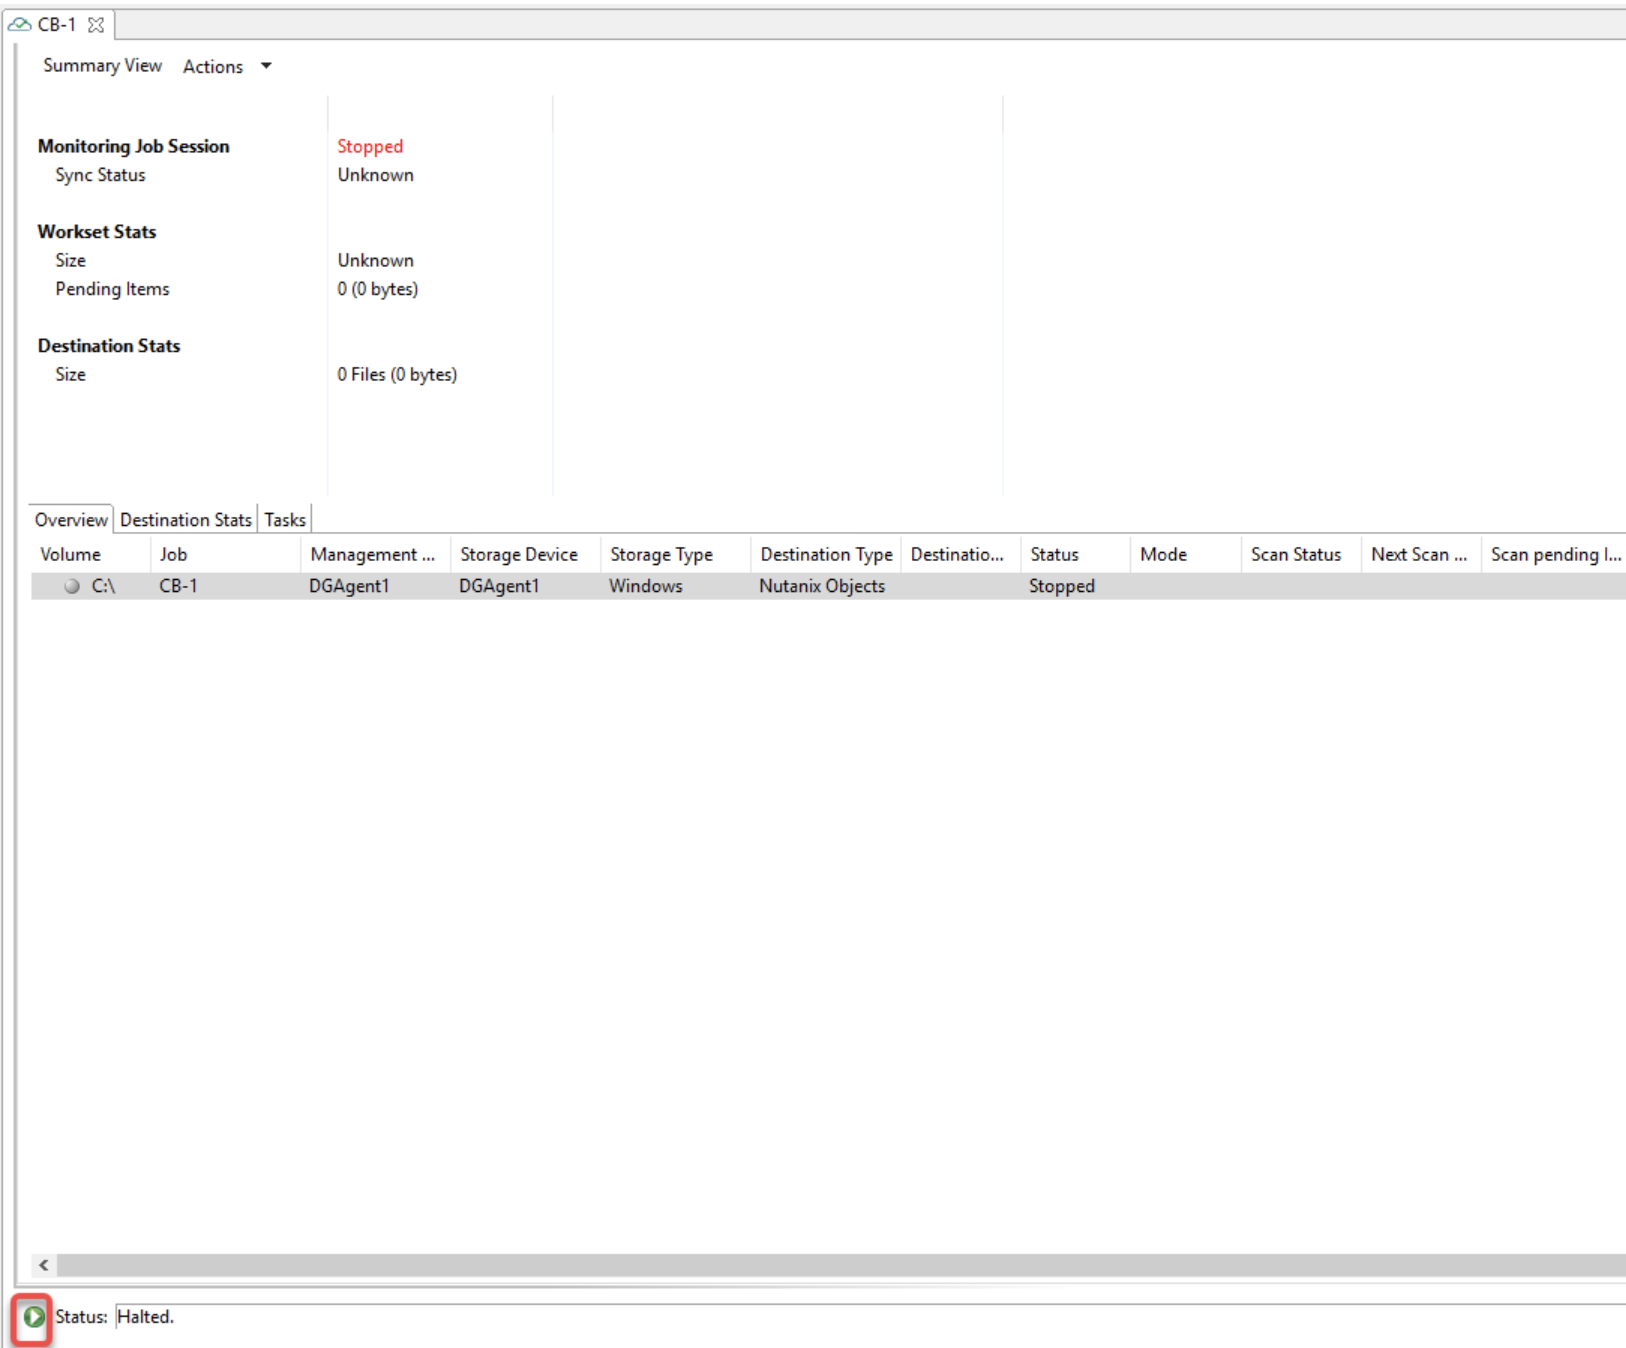
The Summary tab in the Cloud Backup and Replication Job runtime view displays the job status.
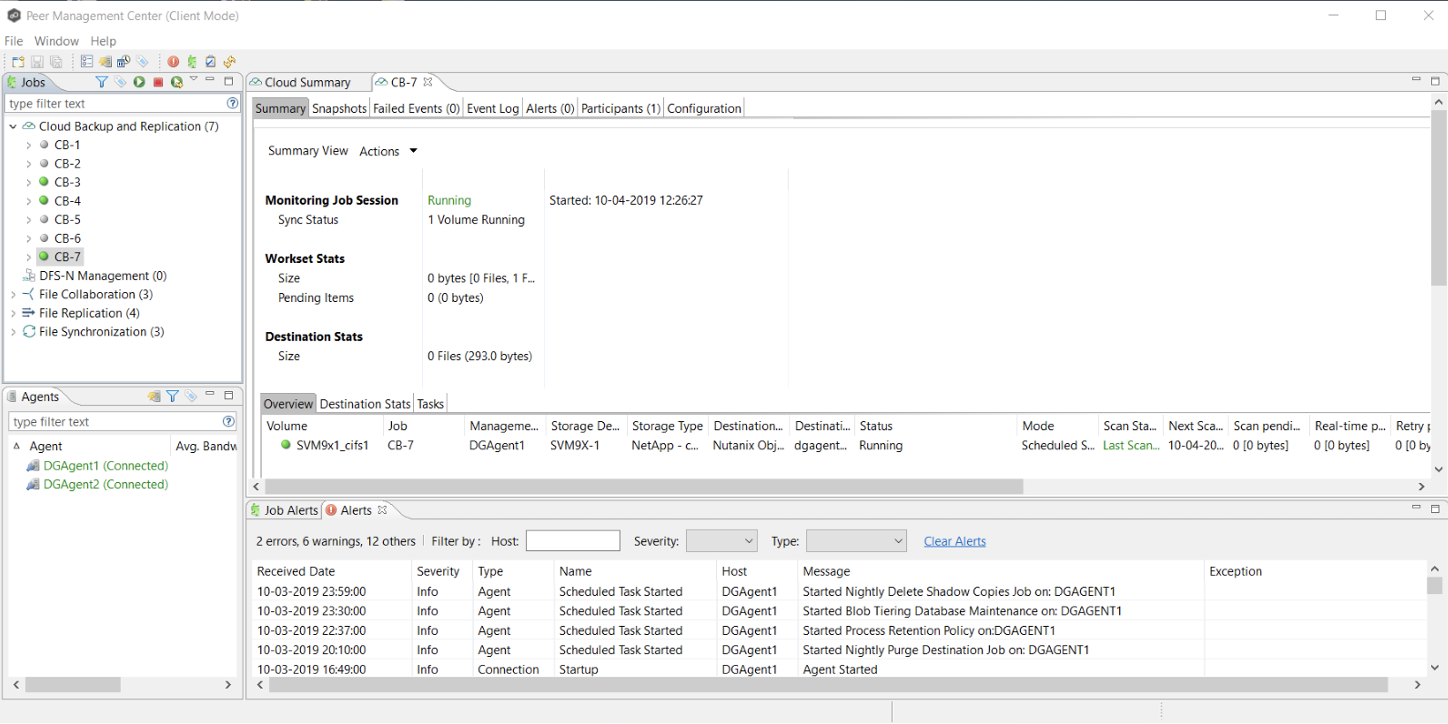
Jobs can be manually started by right-clicking the job name in the Jobs view and opening the job. Then click the Start/Stop button next to the status at the bottom-left of the job’s view. Click Yes in the confirmation dialog box. When the job starts running, the icon next to the job’s name turns green in color.
Recovering Data from Backups
For the procedure to recover data, refer to Recovering Data.
Contact Peer Software Support (support@peersoftware.com) for more information or to report an issue.