s3cmd is validated for use with Wasabi. To use S3cmd with Wasabi, please follow the config tips below.
Note that this example uses Wasabi's us-east-1 storage region. To use other Wasabi storage regions, please use the appropriate Wasabi service URL as described in this article.
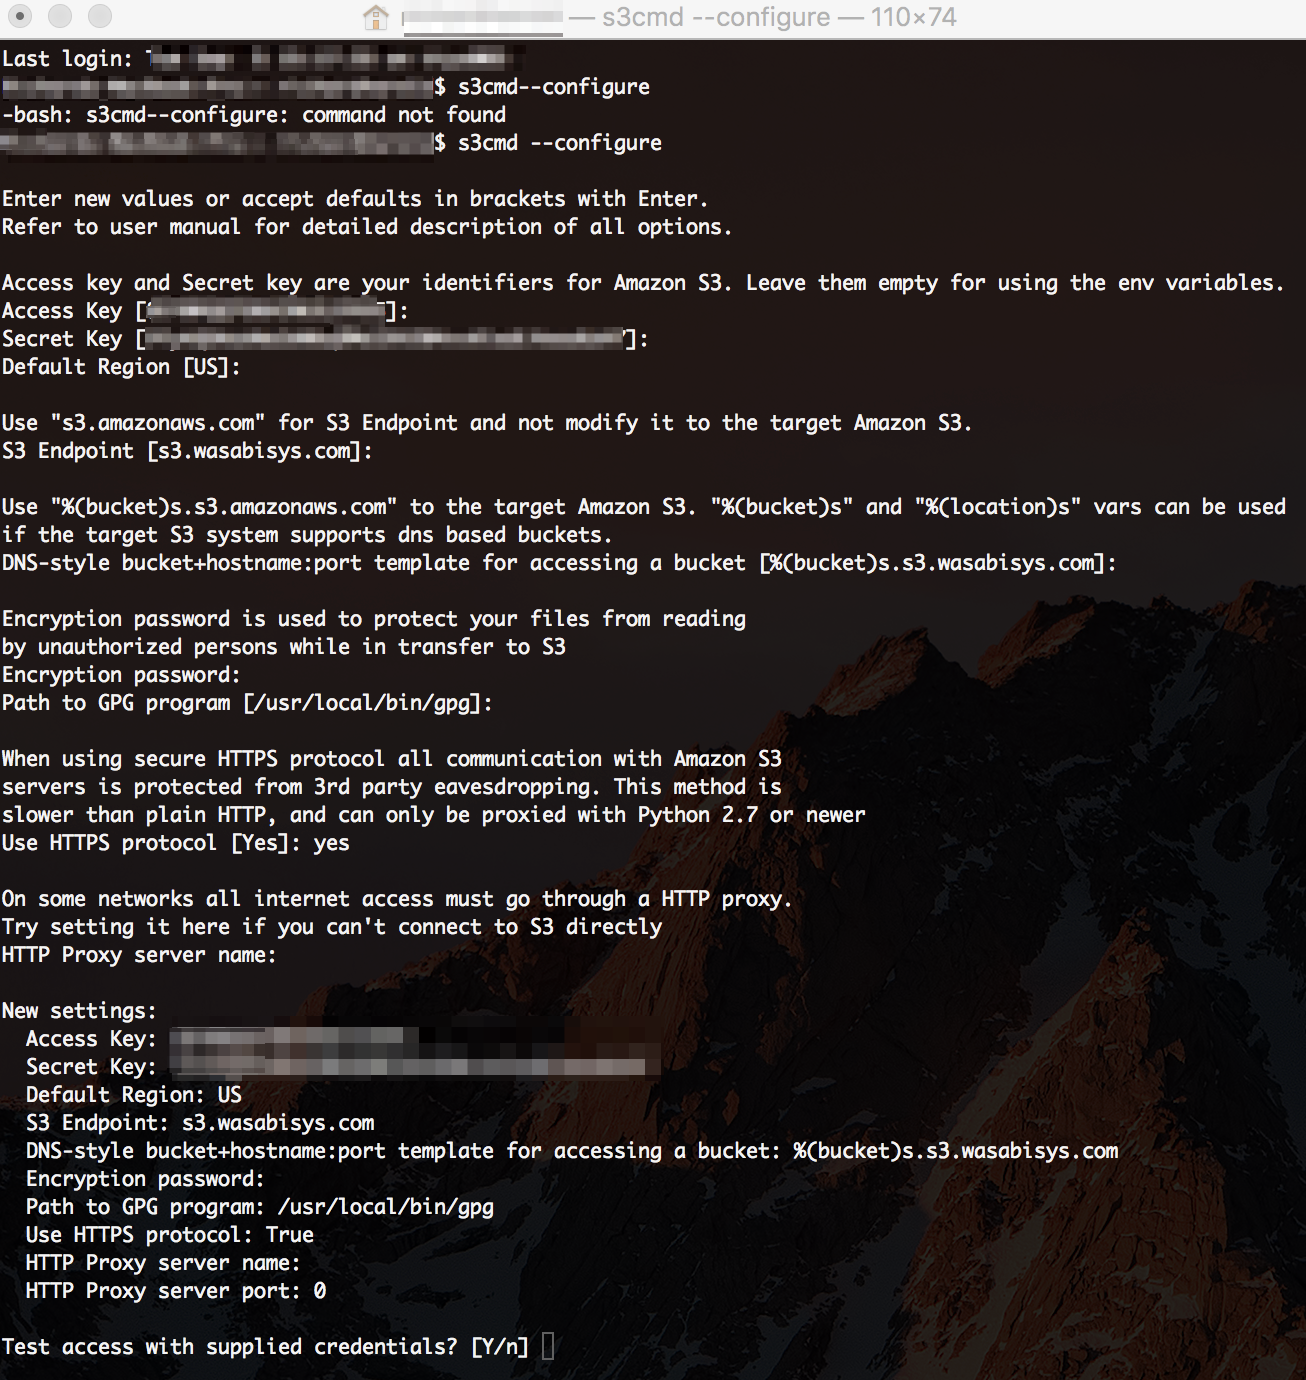
Once s3cmd is installed, run the following
~$ s3cmd --configureYou will then go step by step through the configuration process to set it up with Wasabi. The image below details the process in its entirety.
The key modifications to make it work with Wasabi are as follows.
Use your Wasabi access and secret access keys when asked.
Default region, then us-east-1.
Change s3.amazonaws.com to s3.wasabisys.com for the s3 endpoint.
Change %(bucket)s.s3.amazonaws.com to %(bucket)s.s3.wasabisys.com in the following step.
Note that this example uses Wasabi's us-east-1 storage region. To use other Wasabi storage regions, please use the appropriate Wasabi service URL as described in this article.
The rest should be the same.
Once configured, enter
~$ s3cmdTo get a list of available actions you can perform.
~$ s3cmd laThis will list all of your buckets with their amount of objects and the total size.
For more info on how to use s3cmd go to http://s3tools.org/s3cmd-howto
Using S3cmd for cloud-to-cloud migration scenarios
Install and configure the CLI using --configure switch and enter the AWS Access Key and Secret Key when prompted.
Transfer files from the AWS bucket to the local directory by running the following command:
~$ s3cmd get --recursive s3:/// To transfer files from the local directory to the destination bucket at Wasabi, simply run the command.
~$ s3cmd put --recursive / s3:///