Wasabi has been validated for use with SEP sesam. SEP sesam offers a huge set of agents supporting a wide range of operating systems, hypervisors, databases, and applications with efficient online backup or granular snapshot technologies. To learn more about the SEP sesam and Wasabi joint solution, please refer to our joint solution brief. To use this product with Wasabi, please follow the instructions below.
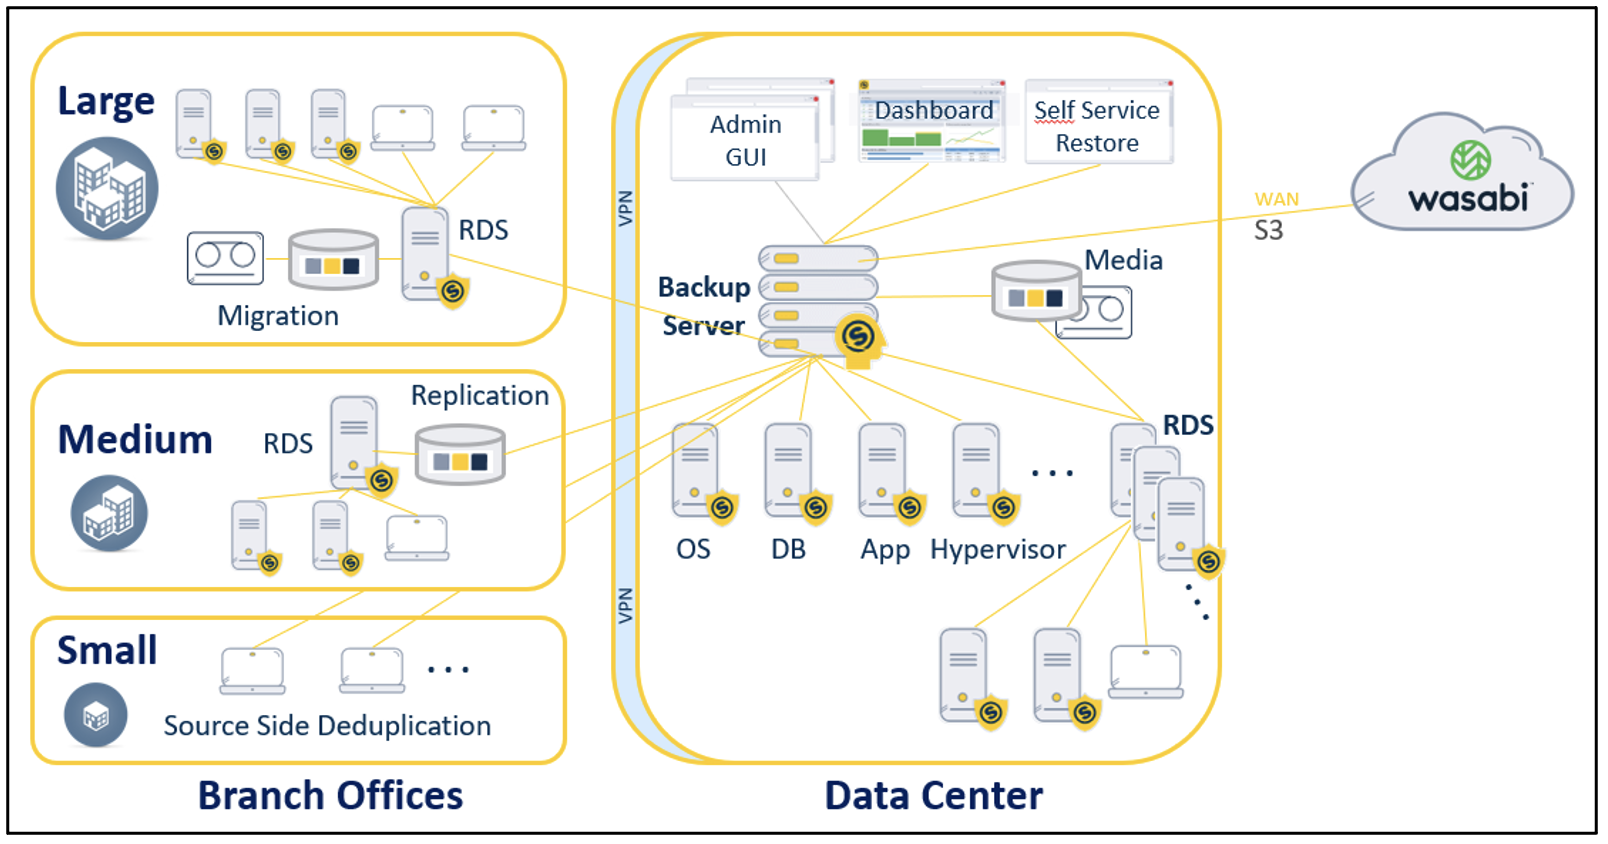
1. Reference Architecture
2. Prerequisites
Active Wasabi Cloud Storage Account
SEP sesam Jaglion
SEP volume licensing recommended
3. Configuration
This section describes how to configure and use a Wasabi S3 bucket as a target for backup data from the backup software SEP sesam. Using S3 as a backup target in SEP sesam always implicates the usage of the SEP Si3 NG deduplication functionality.
As the S3 bucket is represented in the SEP sesam UIs the same way as any other deduplication store (disk storage) it can be used for any kind of scenarios:
As a primary backup target
As a replication target from local to the cloud
As a target for source side deduplication
As a source for data migration to other targets for example, tape
As a replication source to another S3 target (local object storage or multi cloud strategy)
SEP sesam enables you to back up your data directly to S3 cloud storage using the Si3 NG deduplication store.
3.1 Configuring Si3 NG deduplication store
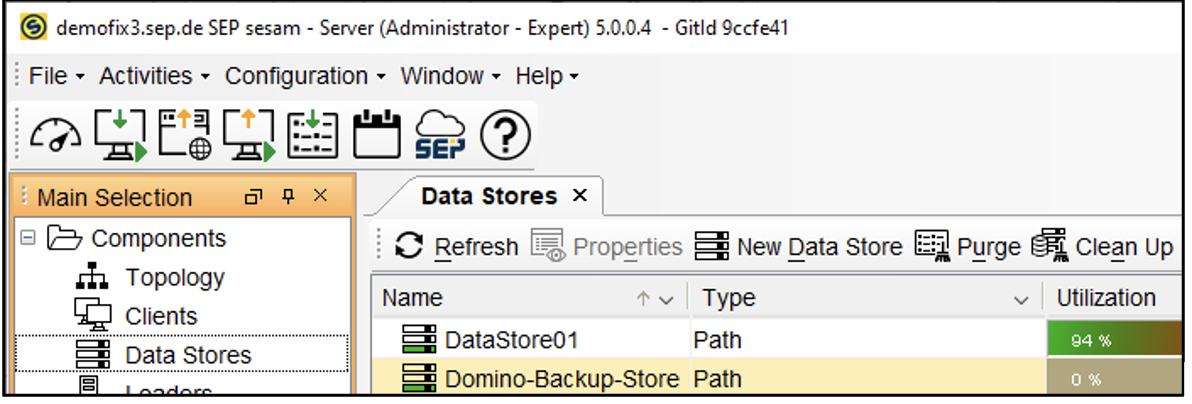
3.1.1 Login to the Sesam Si3 GUI. Navigate to Main selection, then Components. Click Data Stores to display the data store contents frame.
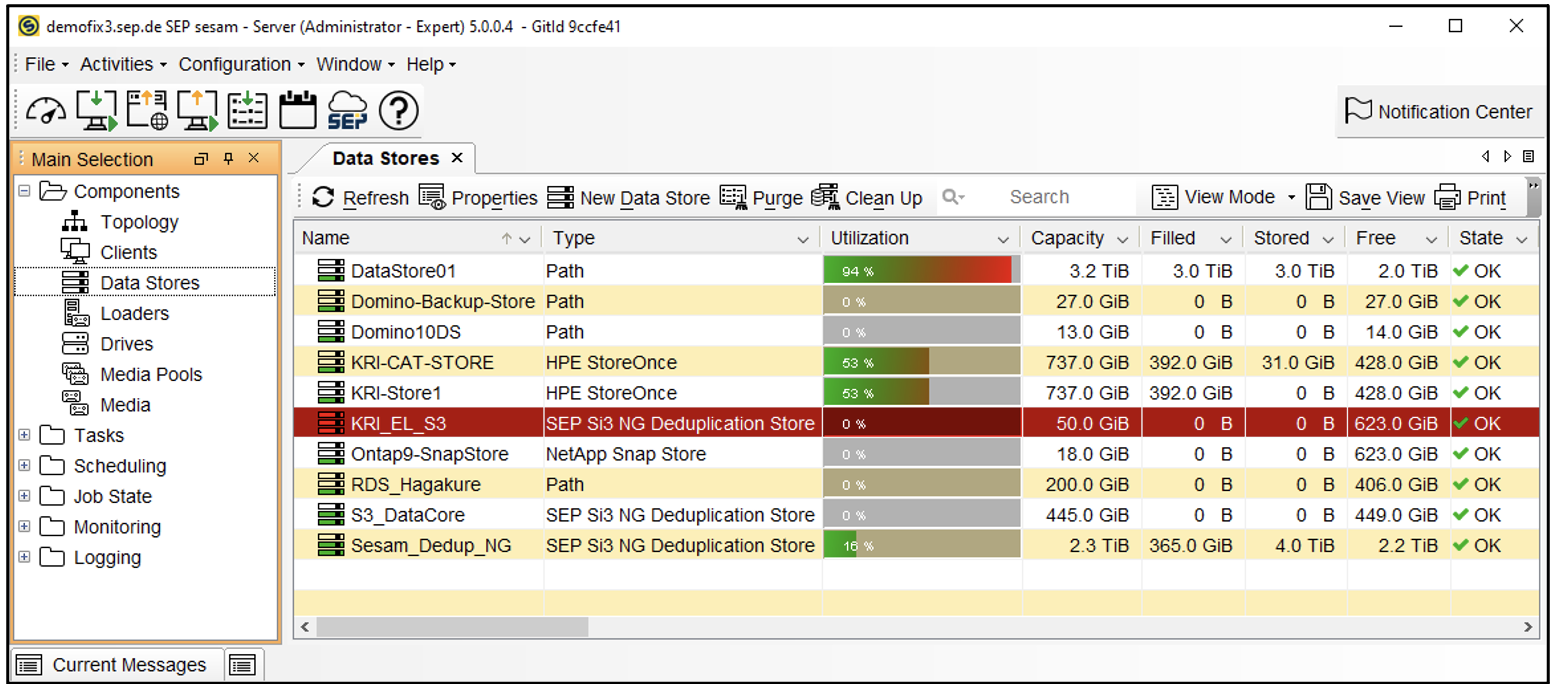
3.1.2 From the Data Stores menu, select New Data Store. A New Data Store dialog appears.
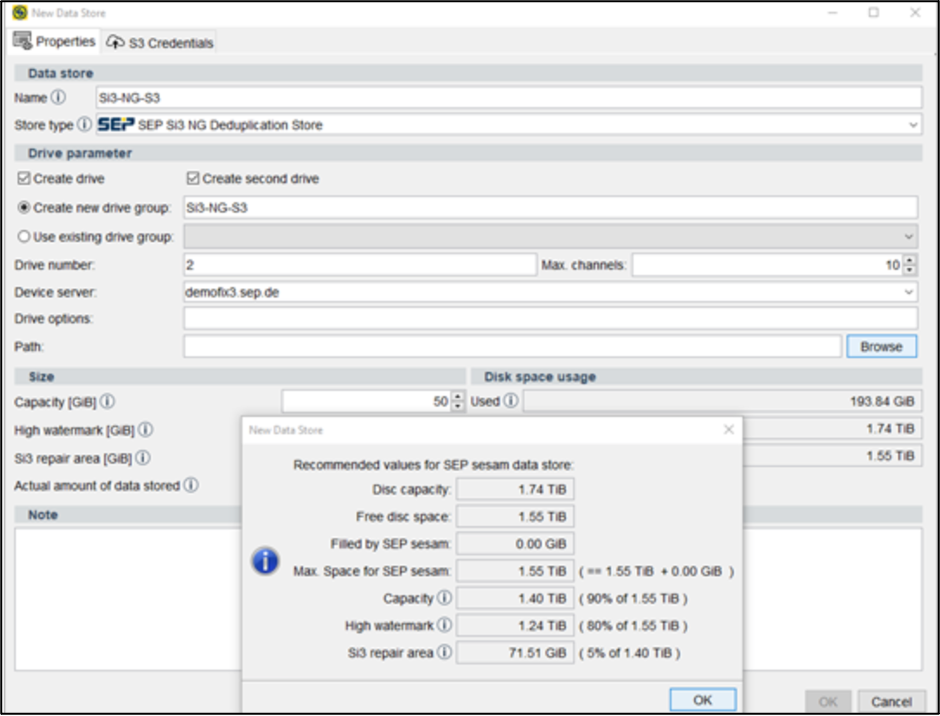
3.1.3 Under Data store properties, enter a meaningful name for the Si3 NG deduplication store in the Name field, e.g., Si3-NG-S3. Entering the name also creates the name of the drive group for your Si3 deduplication store in the Create new drive group
3.1.4 From the Store typedrop-down list, select SEP Si3 NG Deduplication Store.
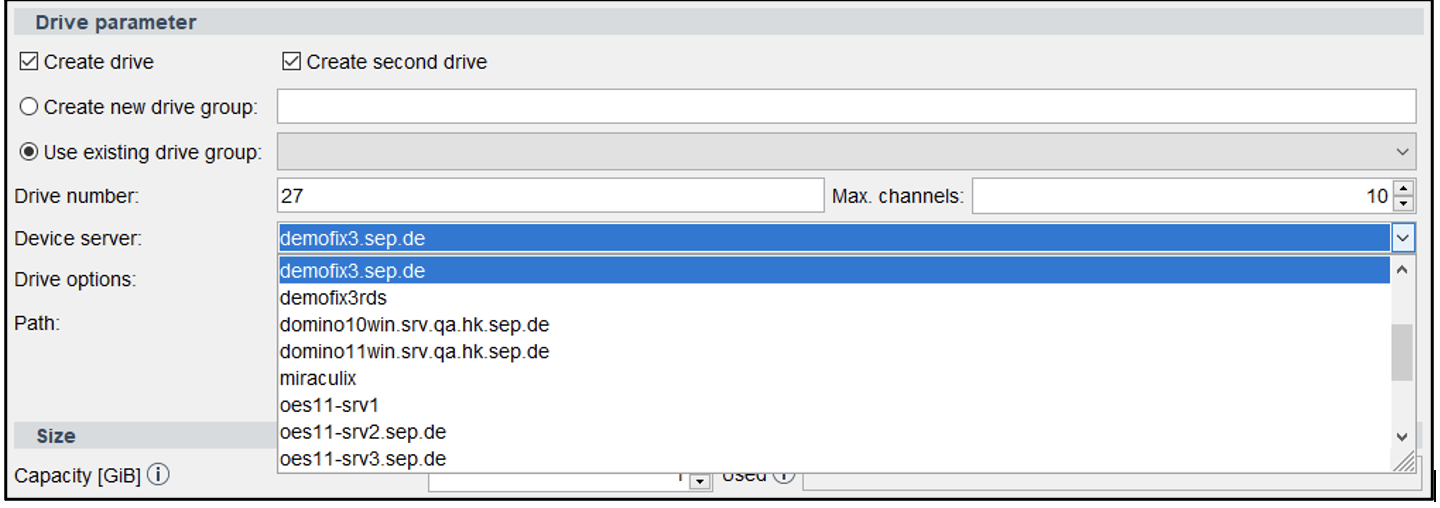
3.1.5. Under Drive parameter, leave checked the options Create drive and Create second drive The predefined value for the drive is automatically entered in the Drive number field.
Note: By using the additional dedicated drive for the restore, you can back up the first drive and restore your data from the second drive simultaneously. You can also add a third drive for migration.
3.1.6. The name in Create new drive group is already created. You can change it by simply entering a new name.
3.1.7. The predefined number of channels is already available in the channels drop-down list. The number of available channels depends on your SEP sesam Server package.
3.1.8. From the Device server drop-down list, select the device server for your data store.
3.1.9 In the Path field, enter the location or use the Browse button to select a directory on the local disk (as for local storage). This directory is only used to store metadata and temporary files for intermediate storage until the data is uploaded to S3. Ensure that there is sufficient disk-space available for this local storage, e.g., for 50 TiB in S3 or more, make sure it has 20 GiB free space. Click OK.
If you use the Browse button, the New Data Store information window appears with predefined recommended values for the size of your Si3 NG deduplication store, based on the size of the previously selected local disk (Path).
Important: Change these values manually under the Size properties, depending on how much storage space you want to use on S3.
Capacity: Set the size (in GB/GiB) of the storage for backups.
High watermark: The HWM defines the upper value for the used storage space. When this value is reached, the status of a datastore changes from OKto Warning, but backups continue to be performed. Make sure that you provide enough storage space for your backed up data.
Click OK. You can also change the size of your Si3 NG deduplication store later under Size properties.
3.1.10 Switch to the S3 Credentials tab and enter the S3 credentials you have received from your Wasabi S3 cloud provider.
Note: The S3 credentials are stored encrypted (not in plain text) in the ini file.
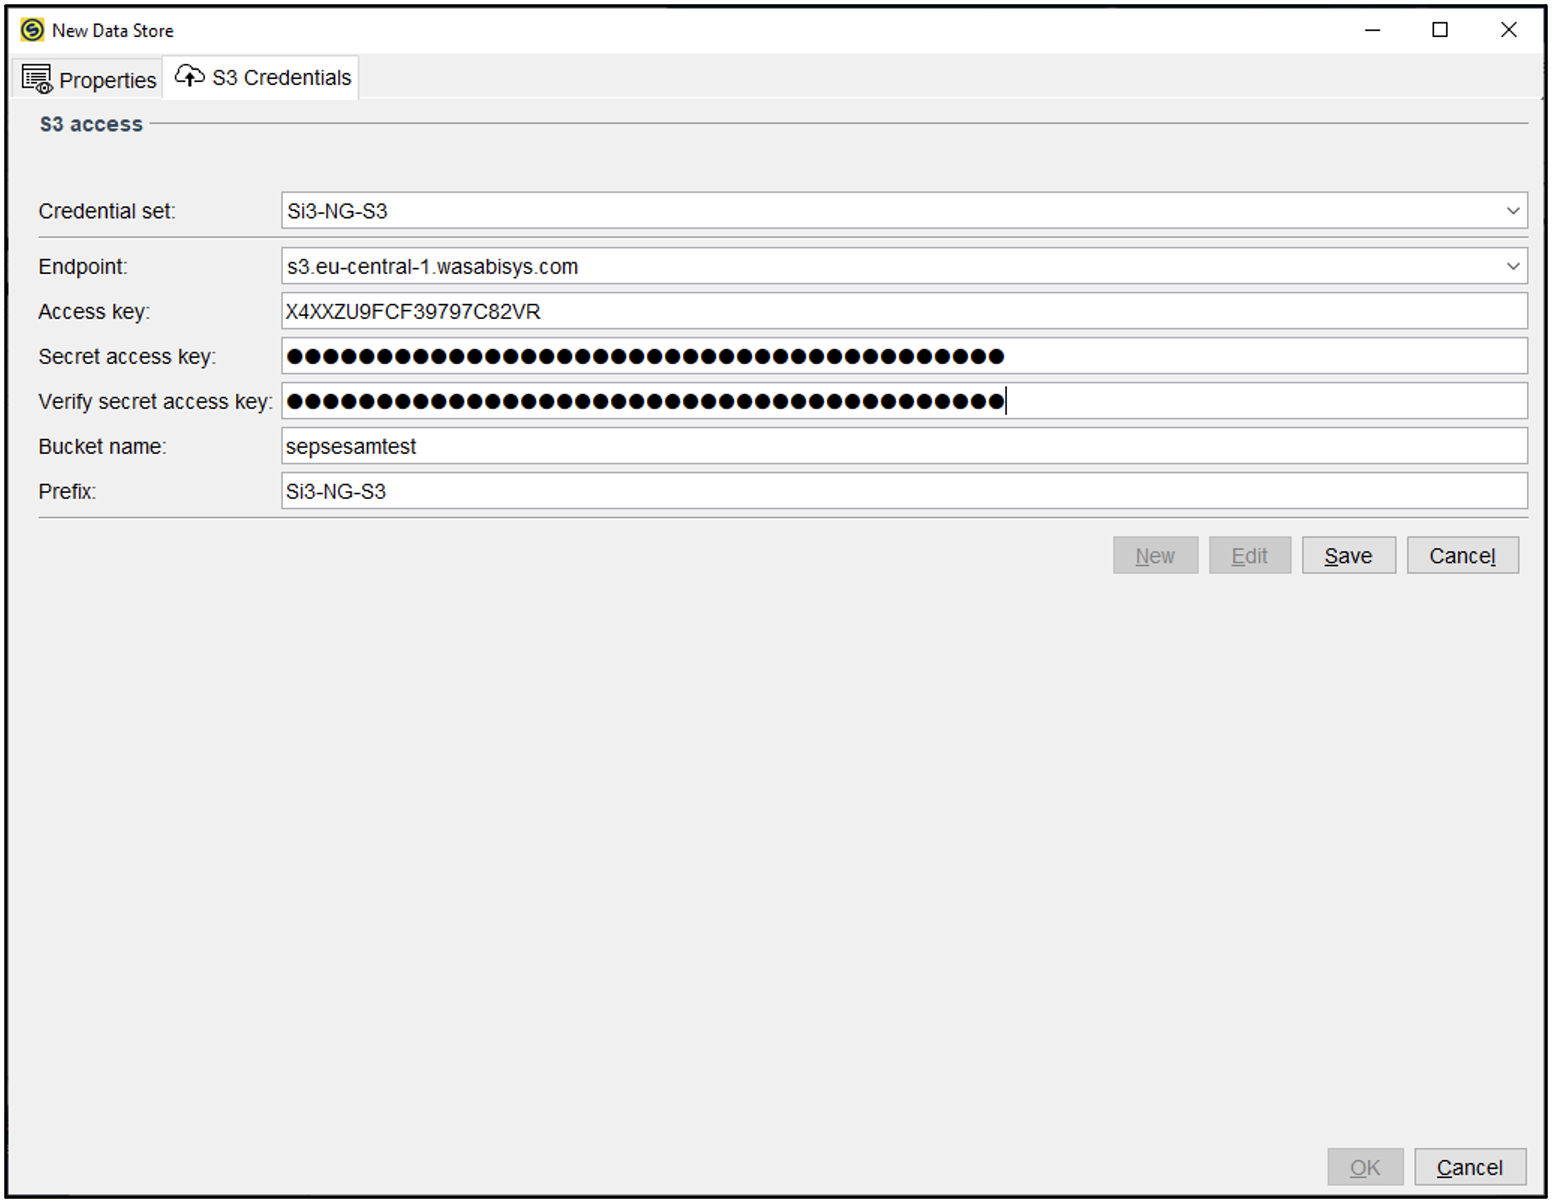
Note: This config example discusses the use of Wasabi's eu-central-1 storage region. To use other Wasabi storage regions, please use the appropriate Wasabi service URL as described in this article.
3.1.11 If you want to create a media pool for your Si3 NG deduplication store immediately, click Create Media Pool. Otherwise, click OK to configure your Si3 NG deduplication store. The Create Media Pool button will be visible after creating the Si3 NG deduplication store.

3.2 Configuring Media Pools for Si3 NG
A Media Pool is an element to structure your SEP backups. To learn more about the Media Pools, please click here.
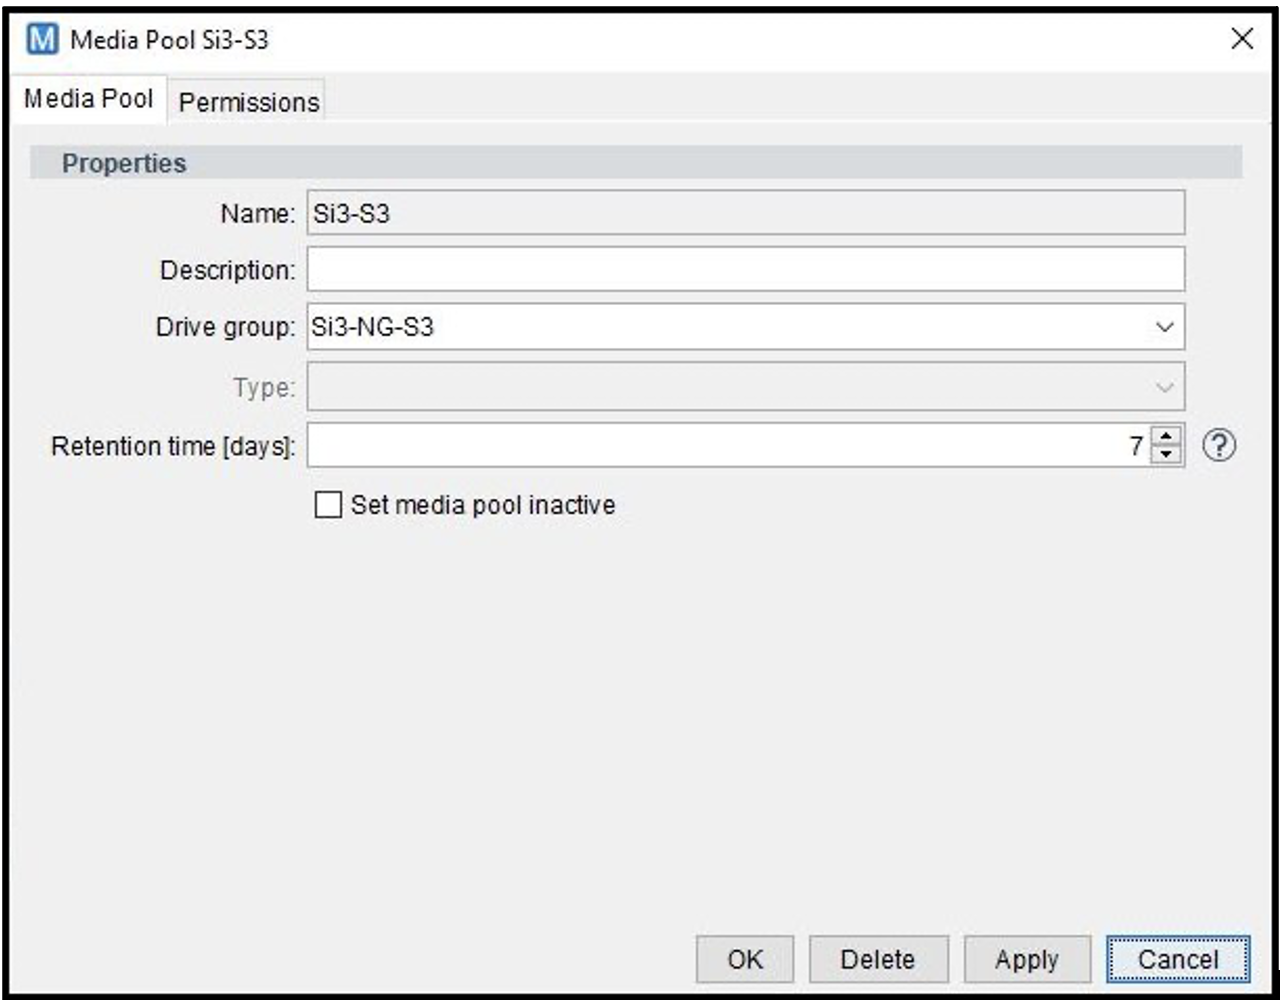
3.2.1 In the Media Pool window, specify the required fields.
Name: Enter a name for a media pool.
Description: Optionally, add a description of the pool.
Drive group: From the drop-down list of all available drive groups, select the relevant drive group to which a media pool will be attached.
Retention time [days]: Specify the media pool’s retention time. The retention period begins on the date a saveset is written to the media (at the end time of the first backup) and thus defines the expiry date of the saveset (EOL). When the protection (EOL) expires, SEP sesam can use the media for backups again.
You can repeat the procedure and create more media pools for Si3 NG according to your needs.
4. Configuring Backups
After you have configured an Si3 NG deduplication store and one or more media pools, proceed as follows:
Create a backup task to back up to S3 as described in Creating a backup task.
Configure a schedule as described in Creating a Schedule.
Once you have configured a task and schedule, create a backup event as follows.
4.1 Creating a Backup event
By creating a backup event, you select the backup level, set event priority, and specify where to back up your data. You can create an event for a specific task or for a task group. The latter enables you to trigger all the tasks in the task group with a single event.
4.1.1 From Main Selection, choose Scheduling, then Schedules, right-click the schedule you created earlier, and click New Backup Event.
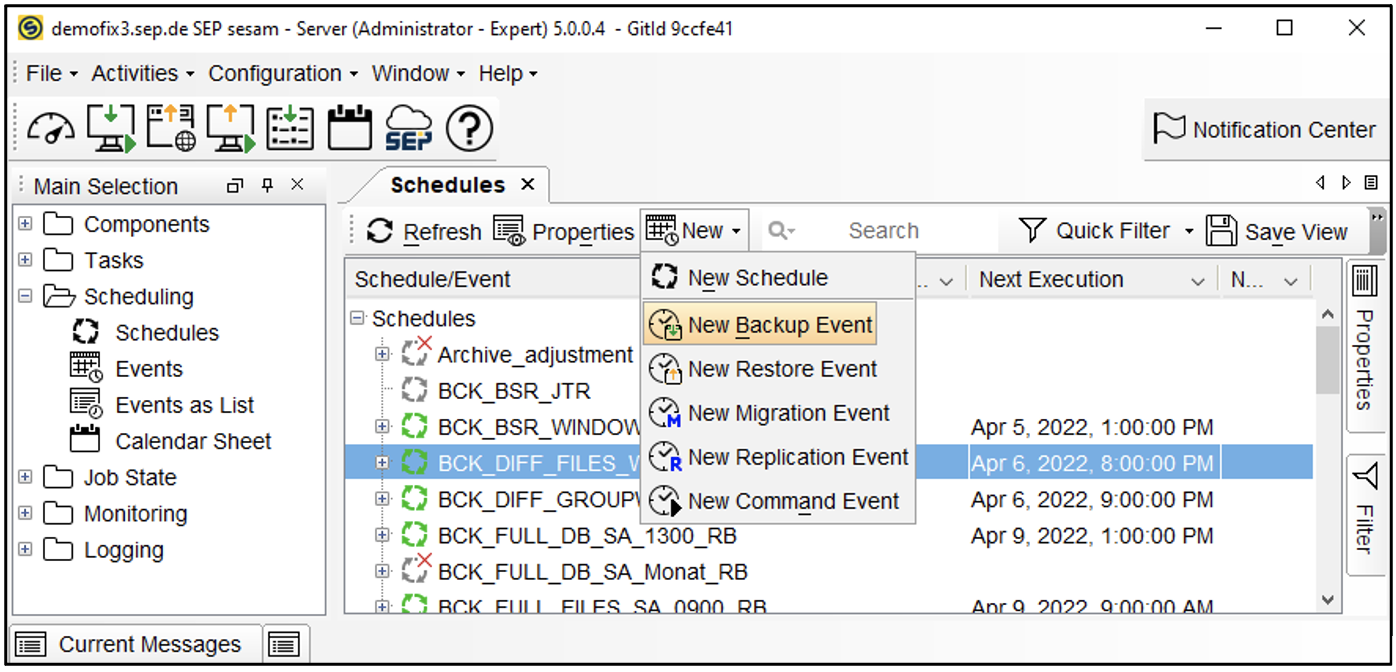
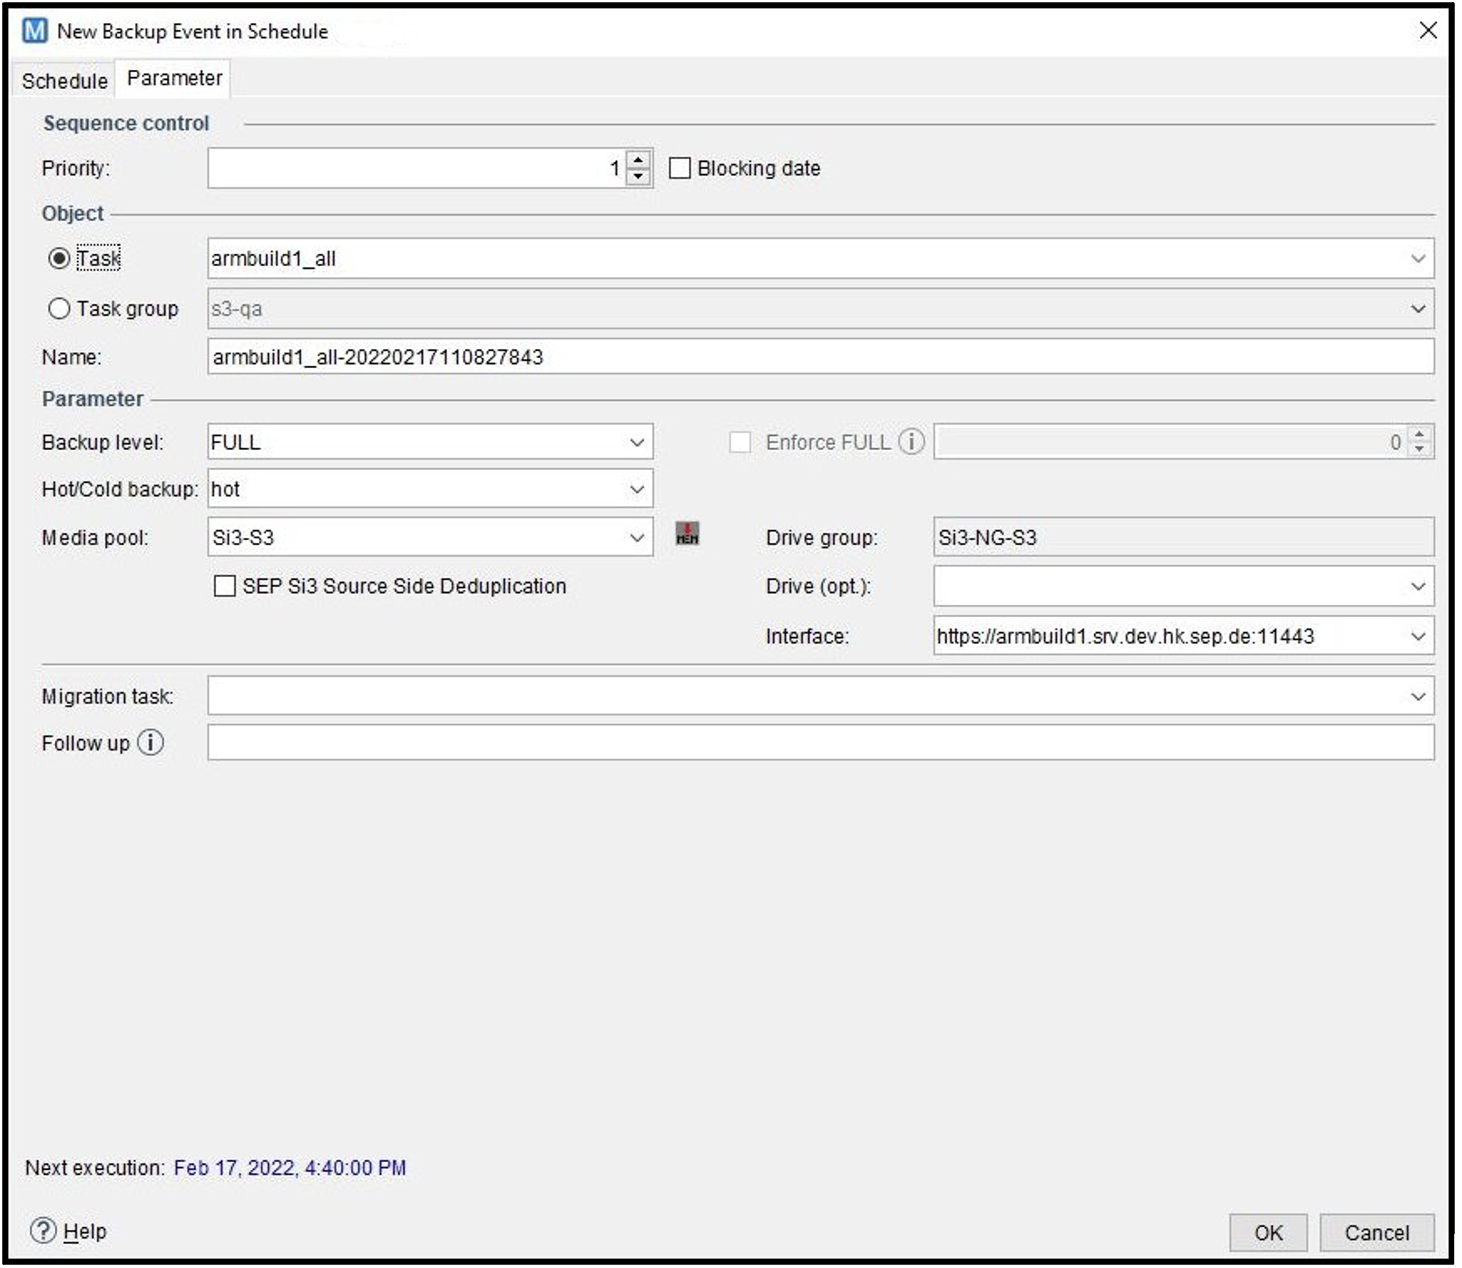
4.1.2 In the New Backup Event dialog box, provide the following details:
Under the Sequence control, set the Priority of your backup event. SEPuler always executes the schedules with the highest priority first. The default priority level is 1, the lowest priority (the highest is 99). The only exception is schedules with priority 0, which override all other priorities and are always executed.
You can also enable the Blocking date. This option should be used together with the high priority for special events. When this option is enabled, events of the same type with a lower priority are blocked, ensuring the backup executes even if other backups are scheduled for the same time.Under Object, select the task (or task group) you configured earlier and with which you want to link this event.
Under Parameter, specify the Backup level.
From the Media pool drop-down list, select the media pool you created for the Si3 NG deduplication store. The data is backed up to this pool. You can also activate the option SEP Si3 source-side deduplication.
Optionally, specify the drive number of the drive to be used to write the data. Typically, you use this option if you have configured additional drives and want to assign a specific drive exclusively for backup.
In the Follow up field, you can configure events (for example, migration) that are triggered on the SEP sesam Server as soon as the first event (for example backup) is completed.
Note: You can set a follow-up migration task by selecting the previously configured migration task
from the Migration task drop-down list.
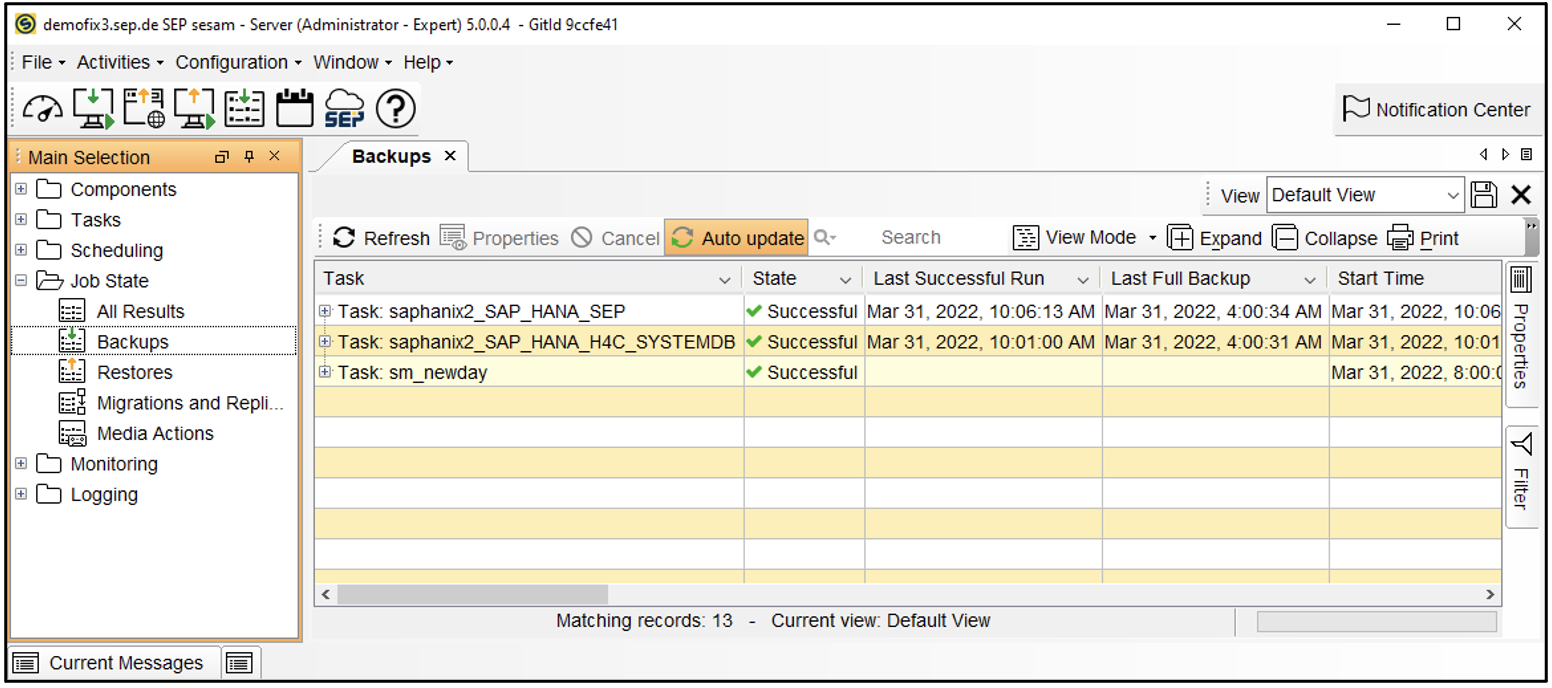
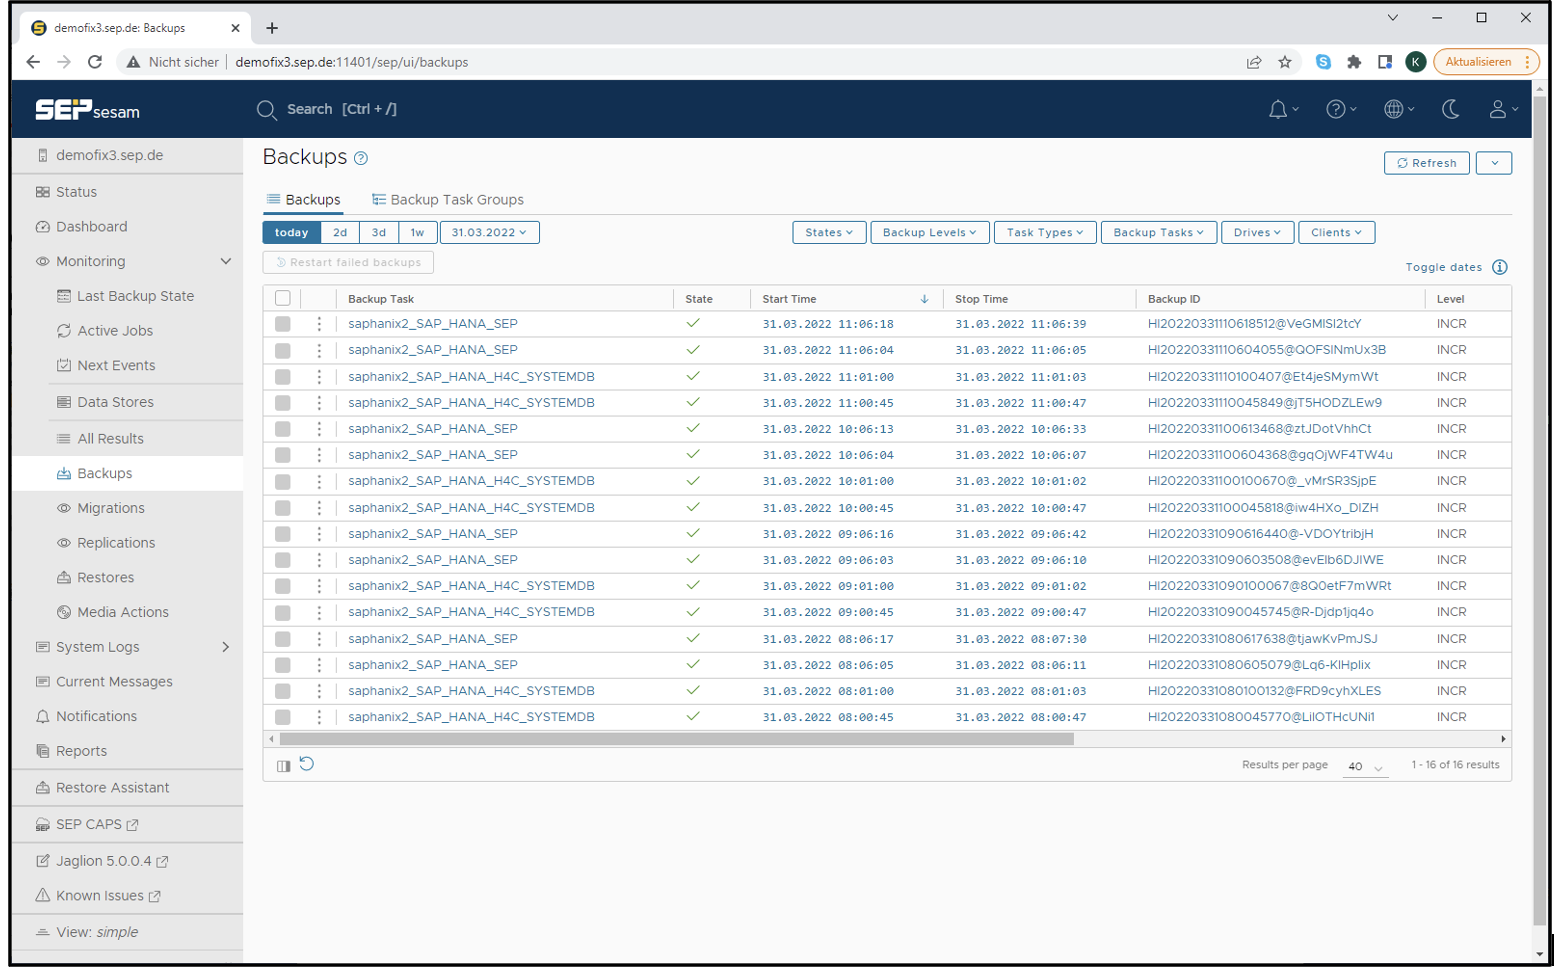
5. Monitoring Backups
You can view the status of your backup jobs in the GUI (Monitoring, then Last Backup State or Job State, then Backups) or SEP sesam Web UI. The backup status overview provides detailed information about the last run of backup jobs, including the task name, start and stop time of the last backup, backup level, data size, throughput, assigned media pool, etc.
5.1 SEP GUI
5.2 SEP Web UI
To learn more about Monitoring, please click here.
6. Purging Data on S3 Storage
Data purging is the process of permanently deleting obsolete (EOL-free) savesets from regular data stores. It works in the same way in the S3 cloud. The purge is automatically triggered and performed until all EOL-free savesets are deleted.
6.1 Automatically Purging Data
Strategies for data purging are based on the nature of your business, as well as regulatory, legal, and other requirements, and implemented with a defined data retention period. This is the period of time for which backup data is protected after it is written to the media, so that the savesets are preserved and available for restore. It is based on the media pool retention time you set when you created a media pool. SEP sesam provides automatic EOL (retention) management to ensure recoverability of the entire backup chain and protect against data loss, based on the backup chain dependencies.
When protection (EOL) expires, purging is done automatically, and SEP sesam can use the media for backups again.
Events that trigger the data store purge are:
NEWDAY
Manual start of the purge in the GUI
6.2 Manually Purging Data
6.2.1 You can manually adjust the EOL of your data or expire a saveset or backup
6.2.2 You can start the data store purge process in the GUI. Main Selection window, then Components, then Data Stores content pane, then Purge. Manually running the purge deletes the obsolete (EOL-free) savesets.
6.2.3 Another way to free up storage space is to remove orphaned savesets from the data stores by using the Clean up option: Main Selection window, then Components, then Data Stores content pane, then Clean up. This is useful if a data store seems to be inaccessible, its space is occupied, or SEP sesam space check shows non-sesam data
7. Immutability
Starting in version 5.1.0 (Apollon) S3 Object Lock is officially supported. SEP sesam is using object retention in governance mode. In governance mode, SEP sesam backup user can add or extend the retention period on an object, and cannot shorten or remove it.
SEP sesam enables you to configure the Si3 NG data store to use the Object Lock function. This section covers only the specific information needed to configure the Si3 NG data store that uses the Object Lock function. Further information can be found here.
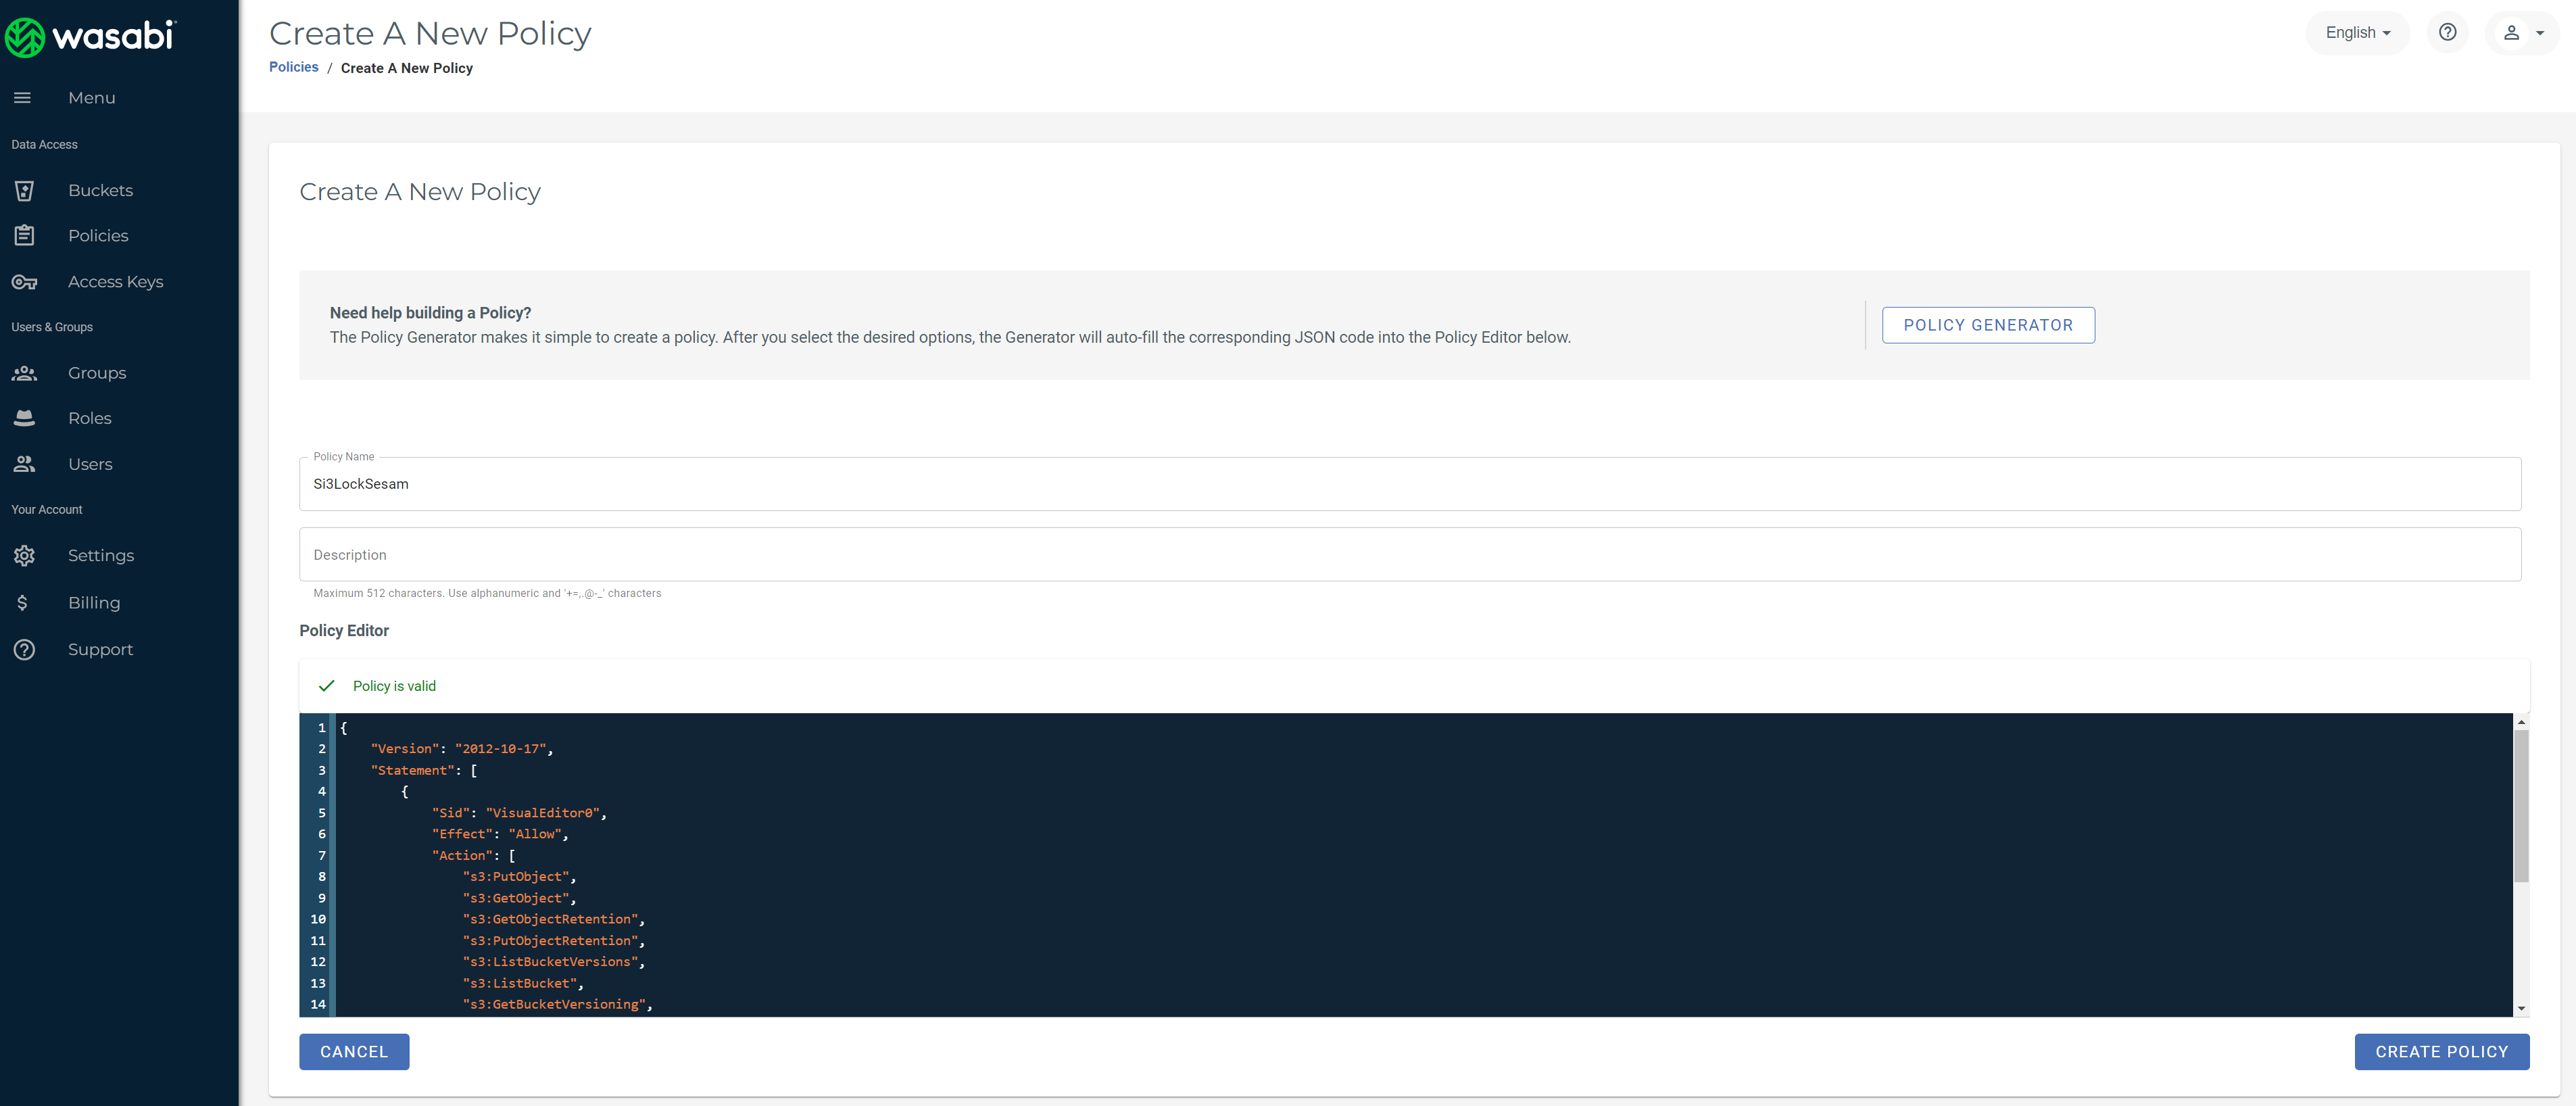
7.1 Create a policy
In your cloud storage management console, create a policy, for example, Si3LockSesam. SEP sesam requires the policy settings as shown below. Edit the JSON policy statement accordingly.
7.1.1 In your Wasabi Management Console, select Policies in the left hand menu and then click Create Policy.
7.1.2 Enter the and insert the SEP sesam policy statement below inside the policy editor.
{
    "Version": "2012-10-17",
    "Statement": [
        {
            "Sid": "VisualEditor0",
            "Effect": "Allow",
            "Action": [
                "s3:PutObject",
                "s3:GetObject",
                "s3:GetObjectRetention",
                "s3:PutObjectRetention",
                "s3:ListBucketVersions",
                "s3:ListBucket",
                "s3:GetBucketVersioning",
                "s3:DeleteObject",
                "s3:GetObjectVersion",
                "s3:DeleteObjectVersion",
                "s3:GetBucketObjectLockConfiguration",
                "s3:GetBucketLocation",
                "s3:ListAllMyBuckets"
            ],
            "Resource": "*"
        }
    ]
}
7.1.3 Click on Create Policy.
7.2 Create a user for backup
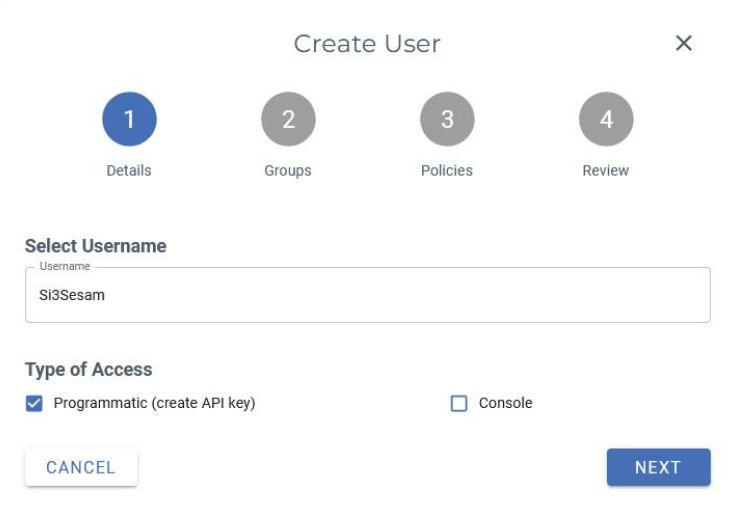
7.2.1 In your Wasabi Management Console, select Users in the left hand menu and then click on Create User.
7.2.2 Enter the and under Type of Access select the option Programmatic (create API key). Click Next.
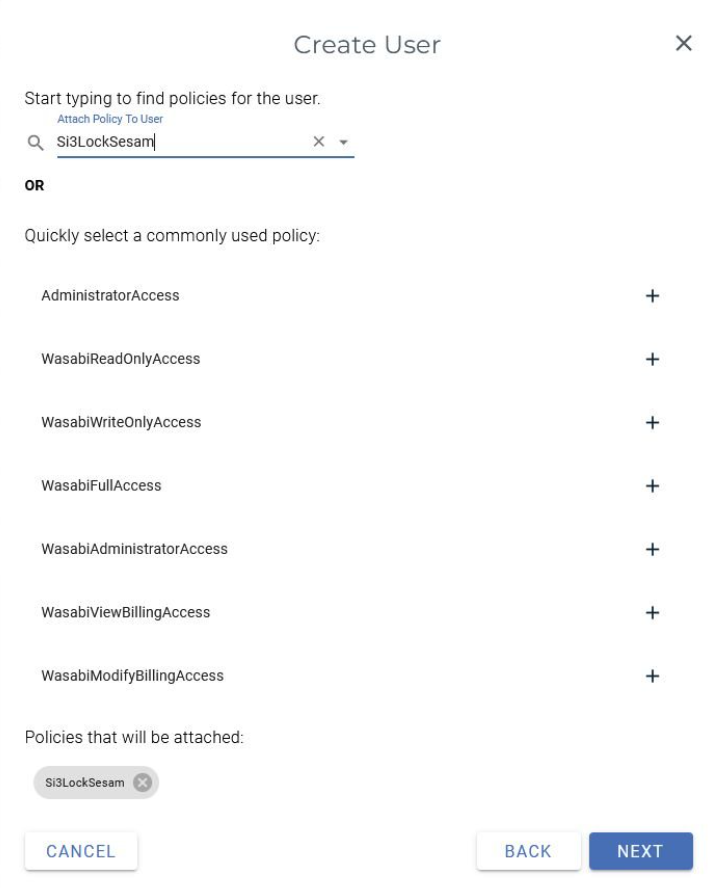
7.2.3 In the Policies window, find and select your policy (Si3LockSesam) to attach it to the user for backup. Click Next.
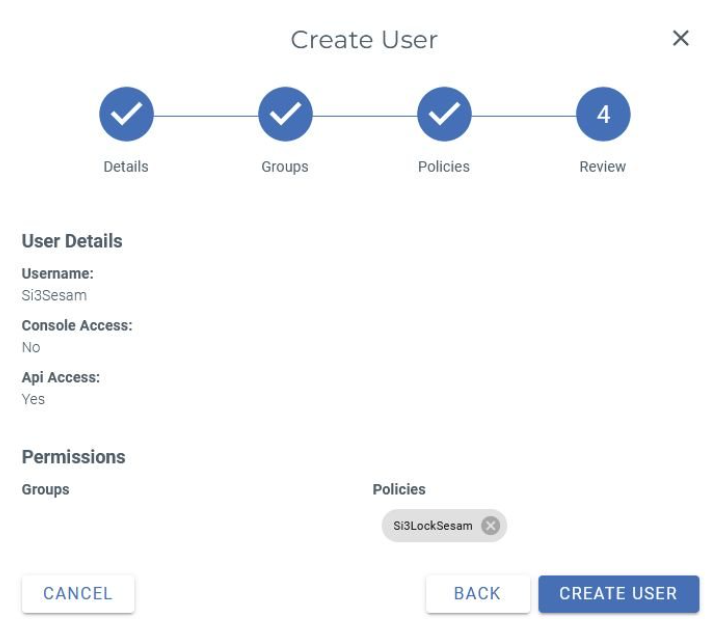
7.2.4 Click on Create User.
7.3 Create an Object Lock bucket
To use the Object Lock function, the cloud storage bucket must have versioning enabled.
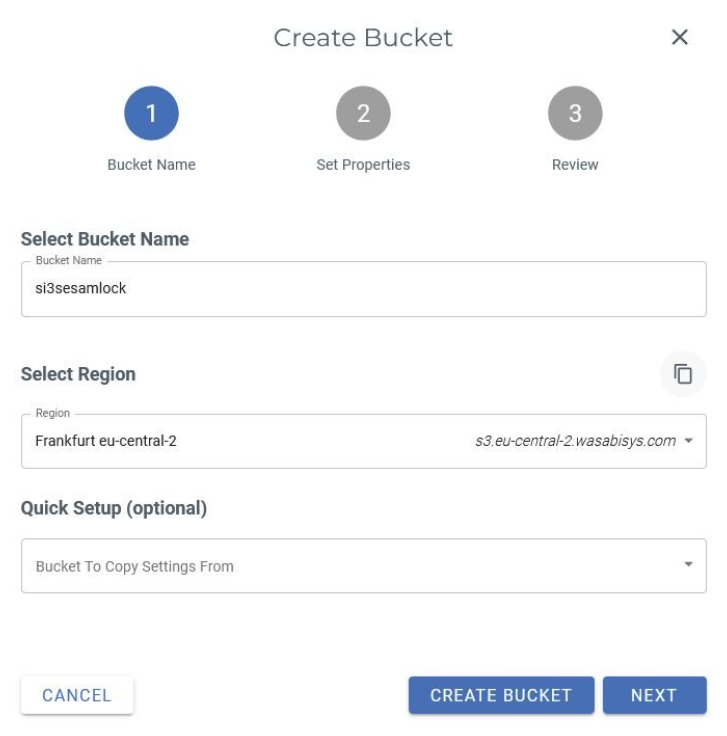
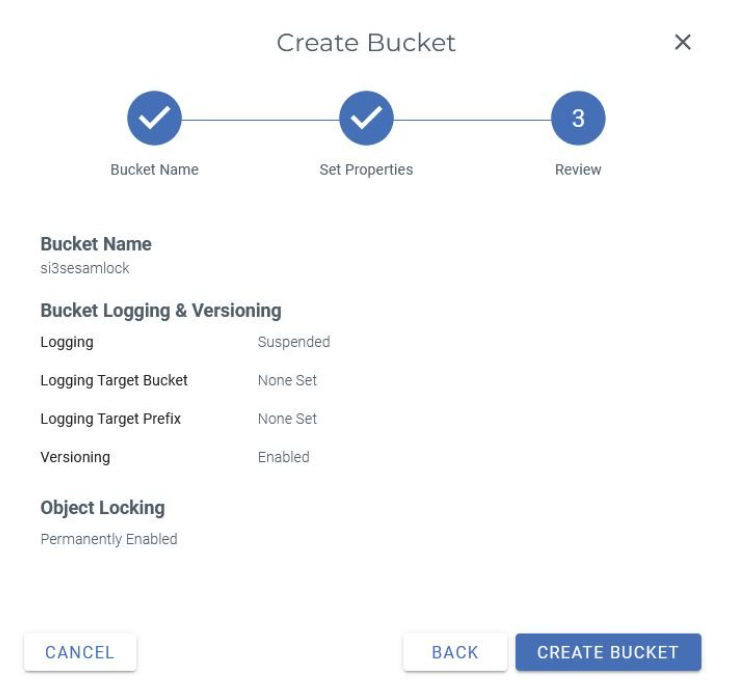
In your cloud storage management console create a bucket , for example, si3sesamlock. Enable bucket versioning and Object Lock functions.
7.3.1 In your Wasabi Management Console, select Buckets in the menu and then click Create Bucket.
7.3.2 Enter the and select the region (geographic location) where you want your bucket to reside. Click Next.
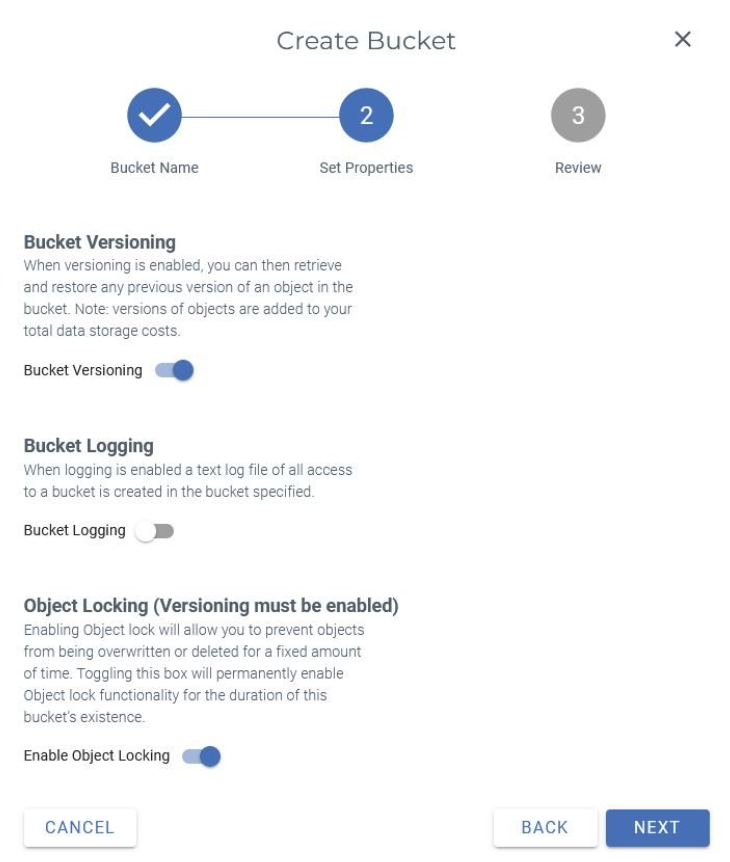
7.3.3 In the Set Properties window, enable Bucket Versioning and Object Locking. Click Next.
7.3.4 Click on Create Bucket.
7.4 Configure the Si3 NG deduplication store
Configuring the Si3 NG deduplication store that uses S3 with Object Lock function involves creating a new data store for your S3 bucket, setting the drive parameters and data store size properties. This section deals only with the specific information on configuring the Object Lock.
7.4.1 In the Main selection, then Components, click Data Stores. Select New Data Store.
7.4.2 From the Data Stores menu, select New Data Store. A New Data Store dialog appears.
7.4.3 Configure the data store as required. For details refer to Configuring Si3 NG Deduplication Store.
7.4.4 Right-click the newly created S3 data store and the click Properties.
7.4.5 In the Storage Backend tab, select the option Enable Object lock and then enter the retention time in days in the Object lock retention time field.

Note - Object lock retention time setting defines Object Lock retention period in days. Si3 periodically extends locks on objects and pages. Every version of objects and pages is preserved, and Si3 periodically removes versions older than the retention time in days.
Modifying Retention Period
SEP Sesam backup user can add or extend the retention period on an object. To extend the retention period, change the Object lock retention time setting in the Storage Backend tab. The retention period is recalculated for all objects in the S3 bucket.
You can also shorten the Object lock retention time setting. In this case, the new retention period is immediately valid for new objects, and the retention period on existing objects is recalculated only after the previously set retention period is shorter than the new one.