Wasabi offers Single Sign-On (SSO) functionality for Wasabi accounts using the Microsoft Entra ID (formerly Azure Active Directory) identity provider, based on SAML2 (Security Assertion Markup Language) integration.
This article provides configuration instructions for both the IdP administrator and the SSO user to properly configure and complete a Wasabi Console login using your organization's SAML2 SSO service.
Configuring the SAML App in Microsoft Entra ID (IdP Side)
Log in to your Azure (https://portal.azure.com) account.
Navigate to the Microsoft Entra ID.
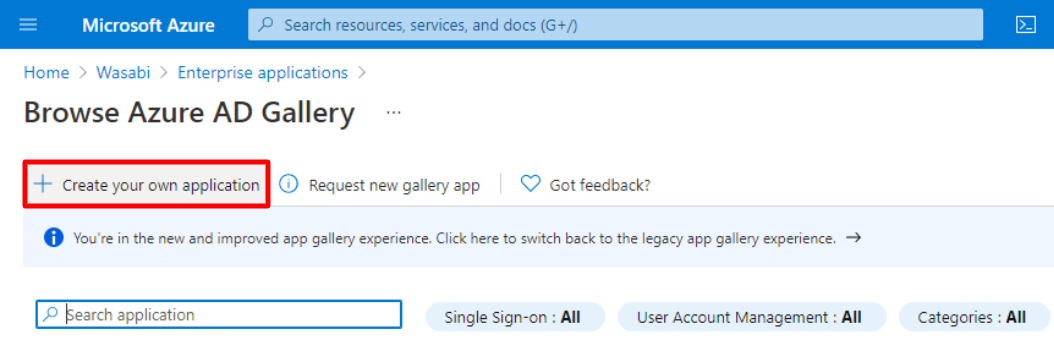
To create a new application, navigate to Enterprise applications, then click New application.
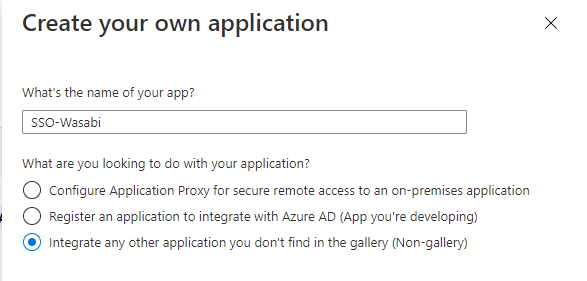
Click Create your own application. The Create Your Own Application dialog is displayed.
Enter the name of your application in the What’s the name of your app? box. Leave the preset defaults set. Click Create.
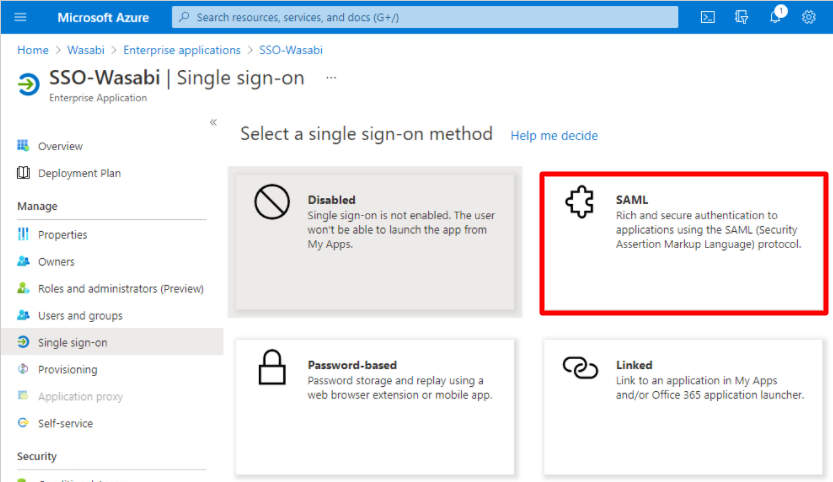
On the Single Sign-On page click the SAML tile.
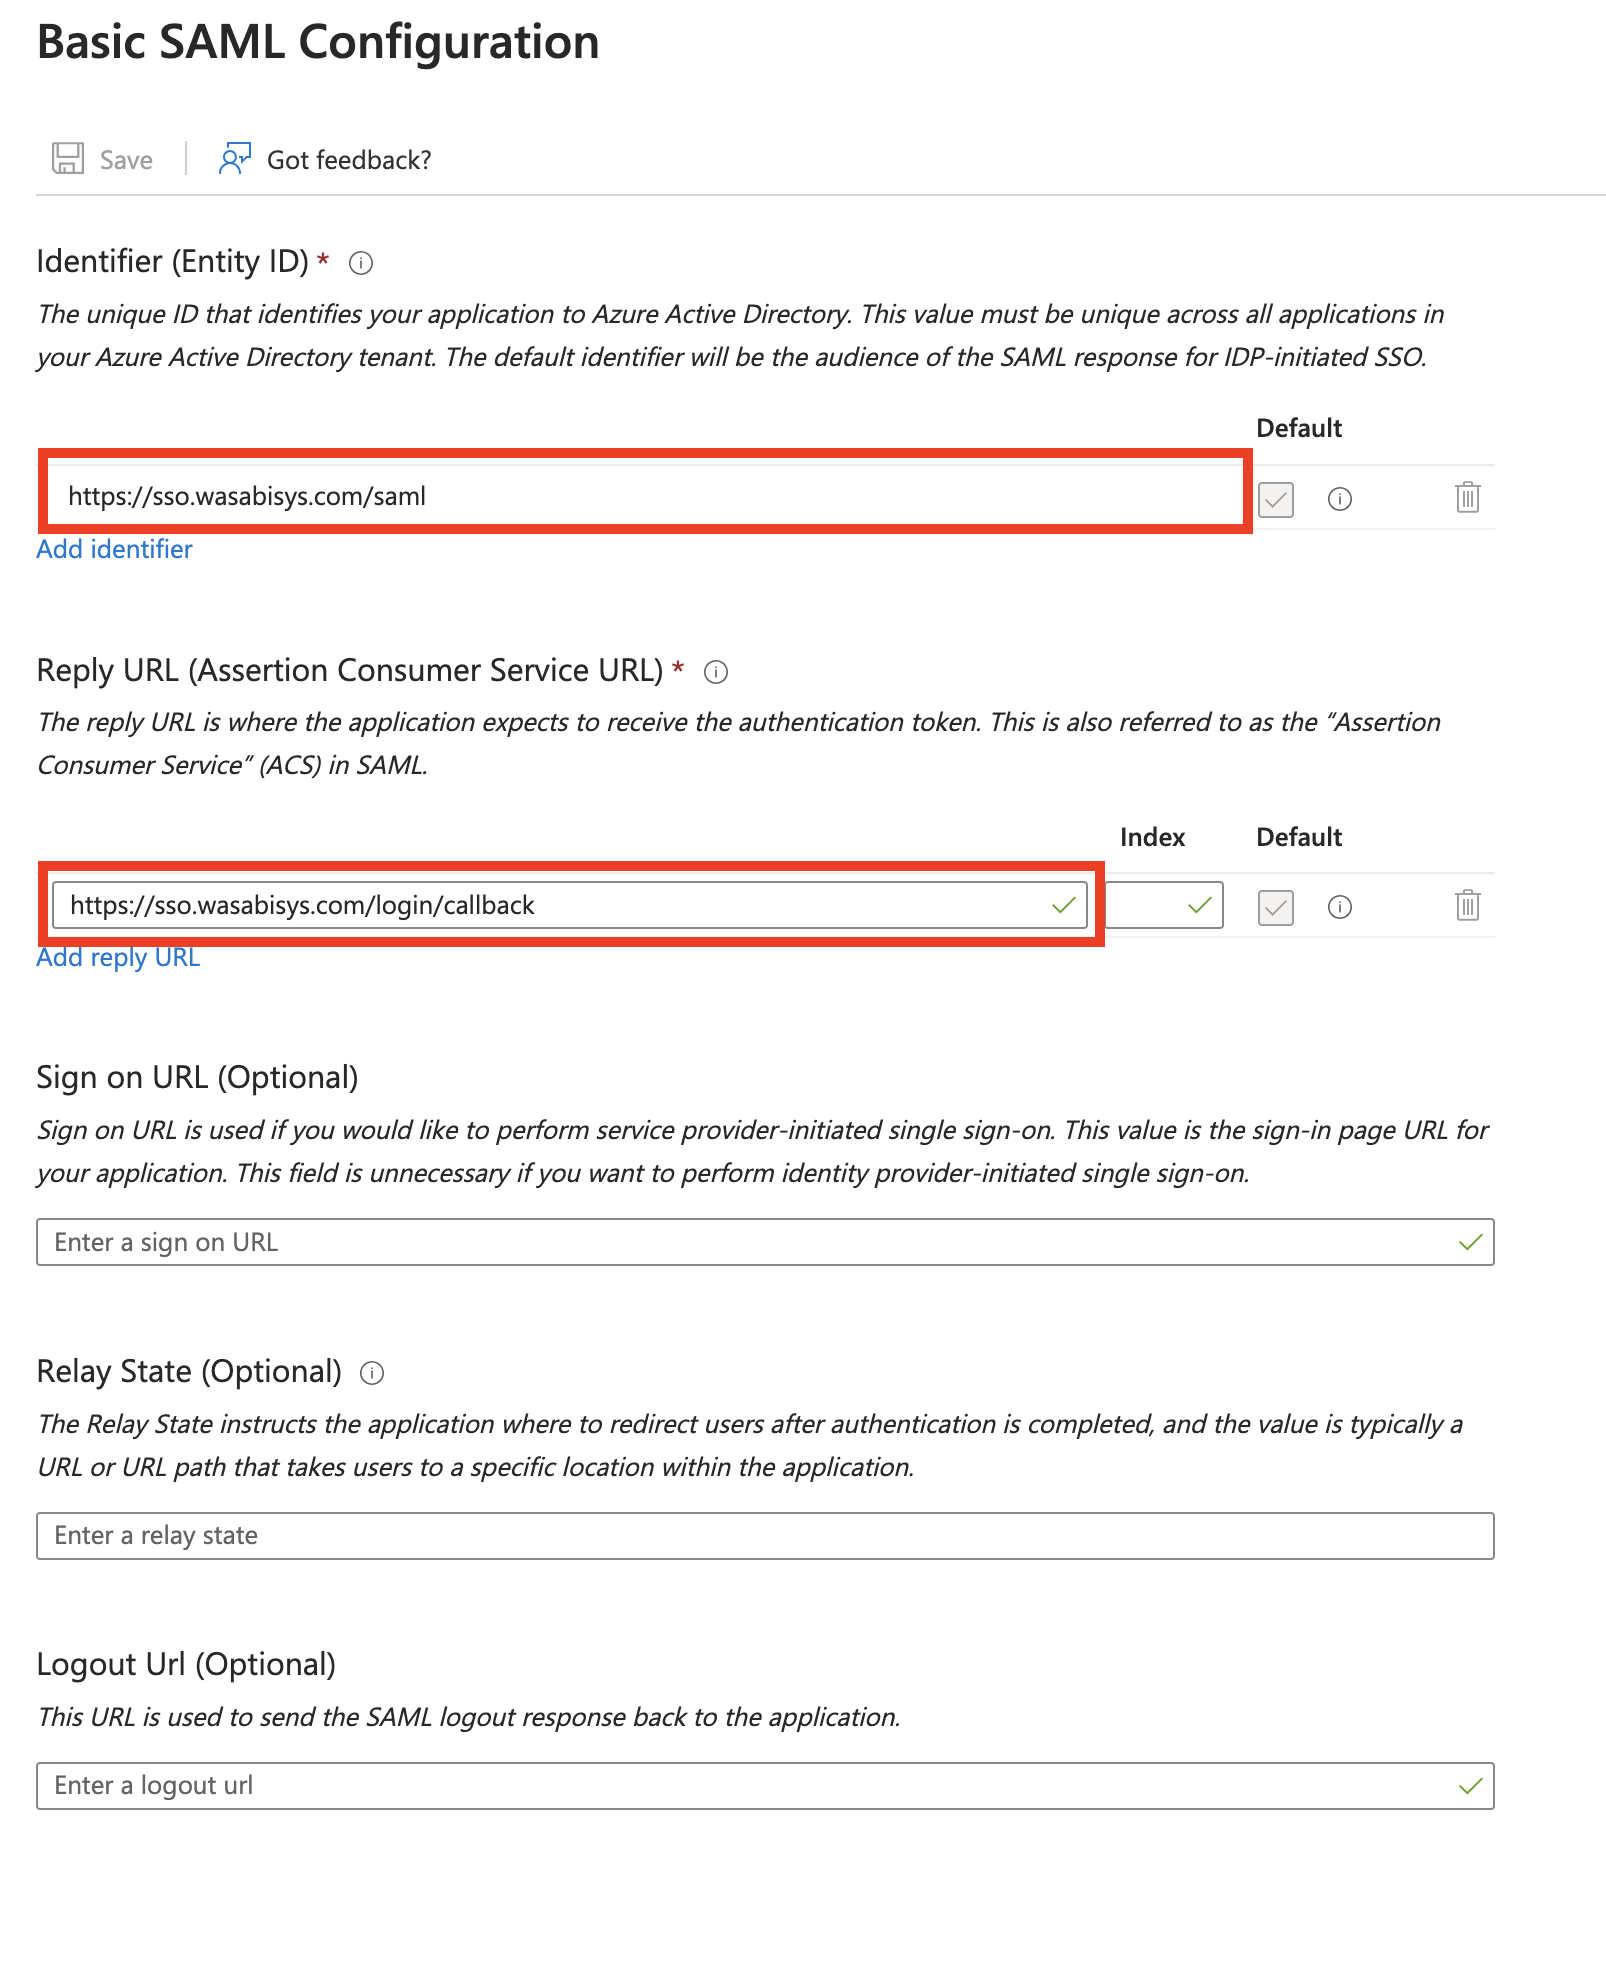
On the Basic SAML Configuration page, copy and paste the following URLs into the corresponding fields:
Audience URL (SP Entity ID) / Add Identifier (Entity ID)—https://sso.wasabisys.com/saml
Single Sign-On URL / Add Reply URL—https://sso.wasabisys.com/login/callback
In the SAML Certificates section, click Certificate (Base64) to download the certificate, then copy the Login URL. The Logout URL is optional. You will use the URLs later in the Wasabi Console. If you download the Federation Metadata XML, you do not need the Login/Logout URL.


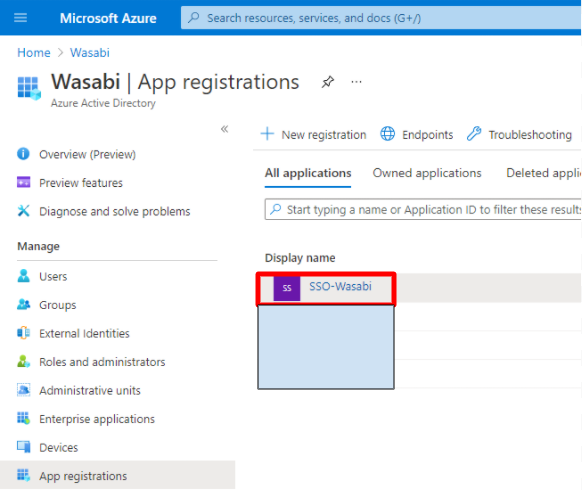
To create a role in the Azure application, select App registrations in the menu. In the All Applications section Display Name box, click SSO-Wasabi.
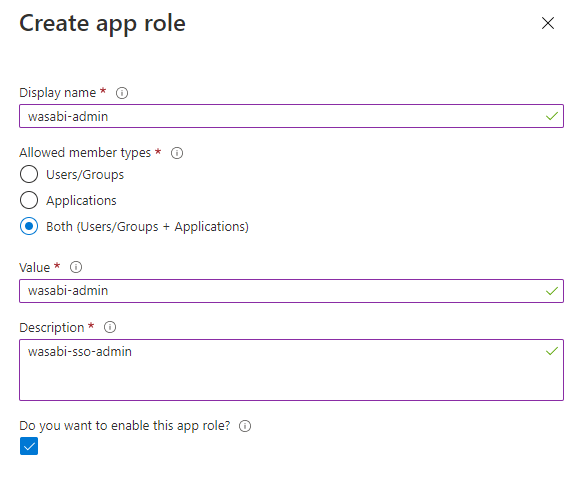
Create a new app role within this application, click Create app role, and enter a role name in the Display Name box. Make note of the role name you created.
Do not use any spaces in the role name because you will use the same role name in the Wasabi Console for authentication.
In the Value box, enter the display name you will use in the Wasabi Console, then click the Both Users/Groups + Applications option for the allowed member types.
In the Description box, enter a description for the role.
Check the box to enable the app role.
Navigate to Users and groups and add users or groups to assign the role created for the Wasabi Console.
Click back to Enterprise Application and select Users and groups. Click Add user/group to add users or groups to assign the role that you have created previously. Select the role wasabi-admin. Click Assign.

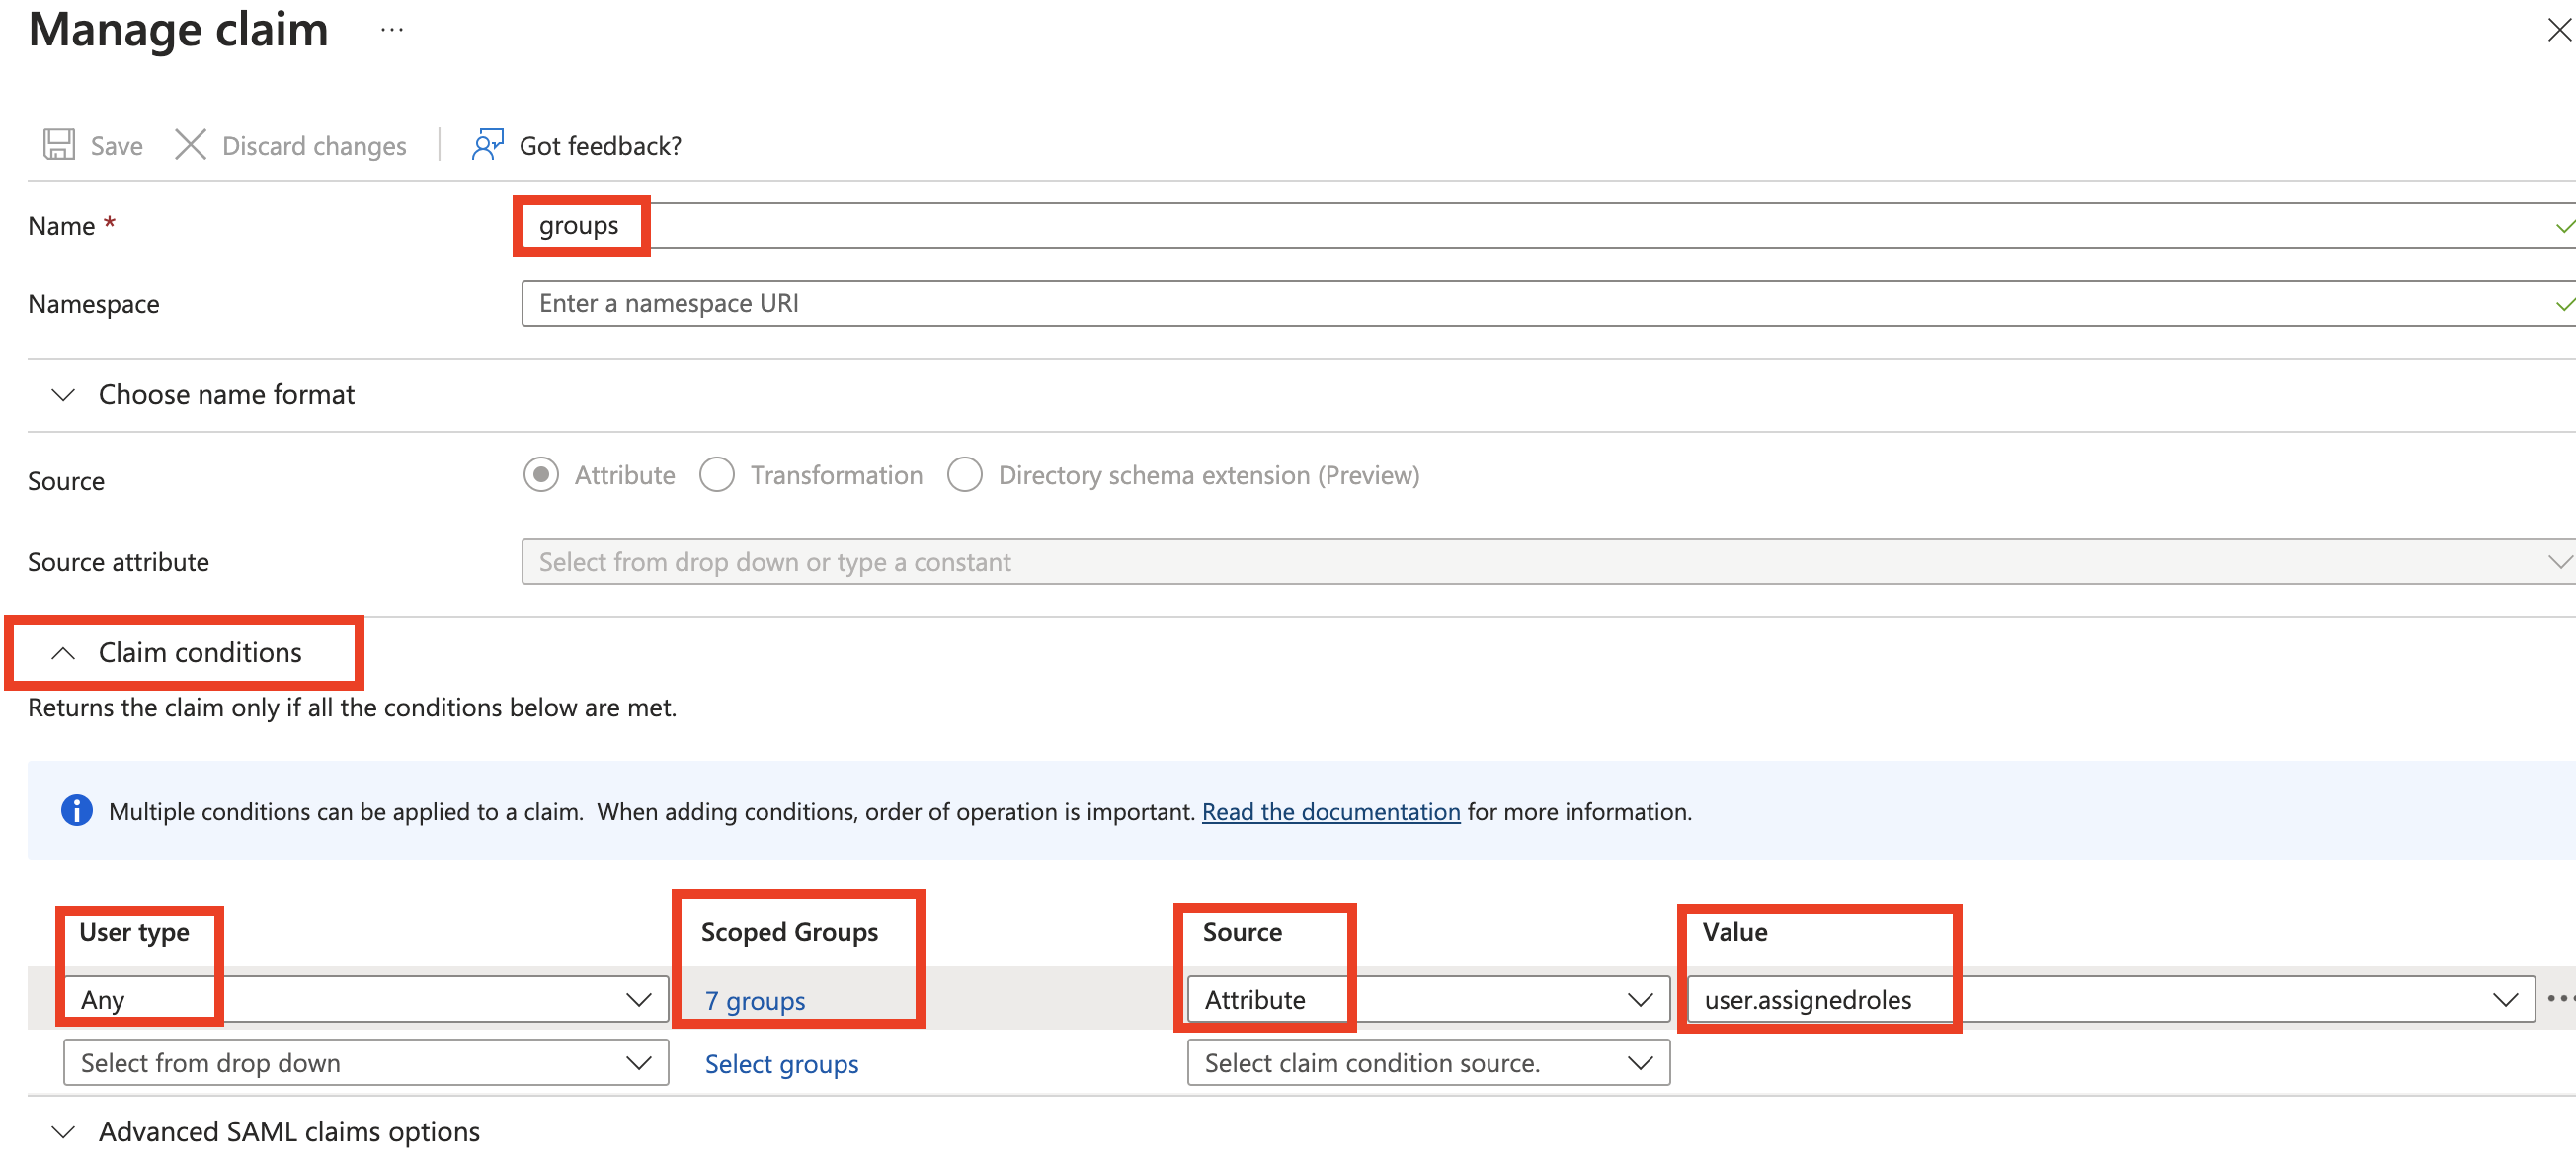
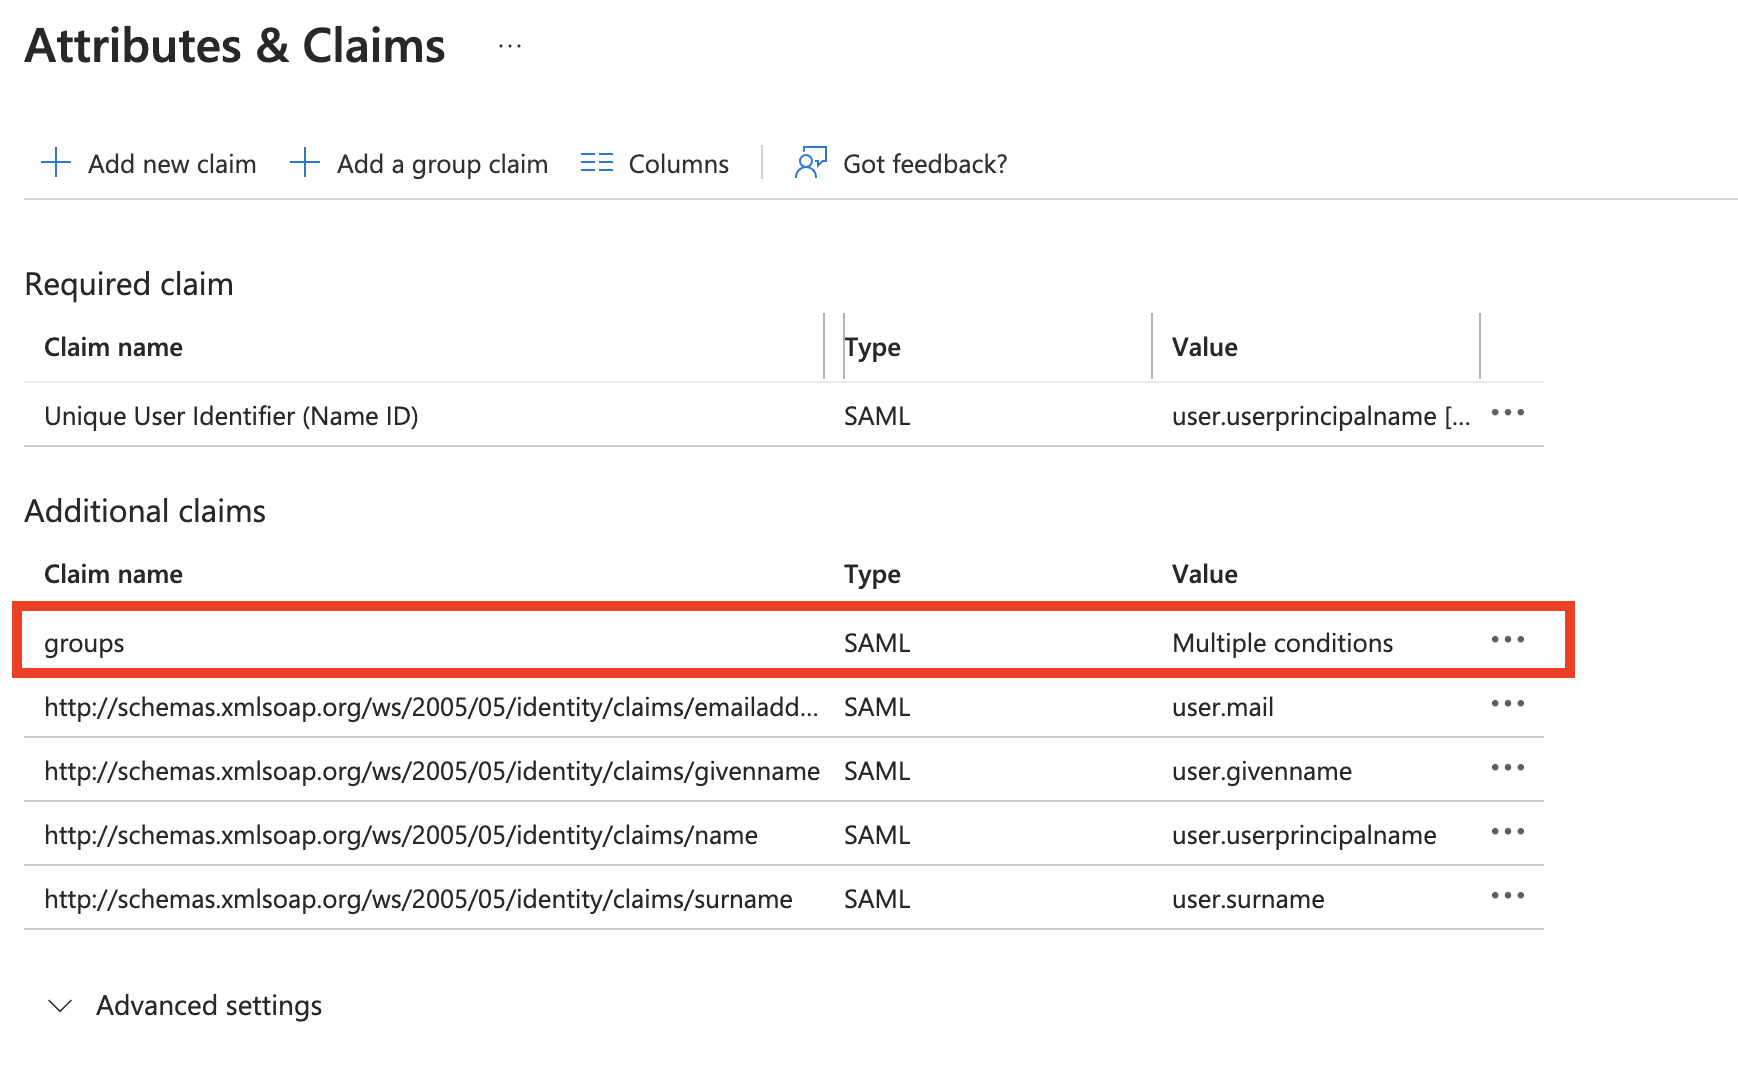
In the Single Sign-On tab in the Attributes and Claims section, click Edit. The Manage Claim section is displayed.
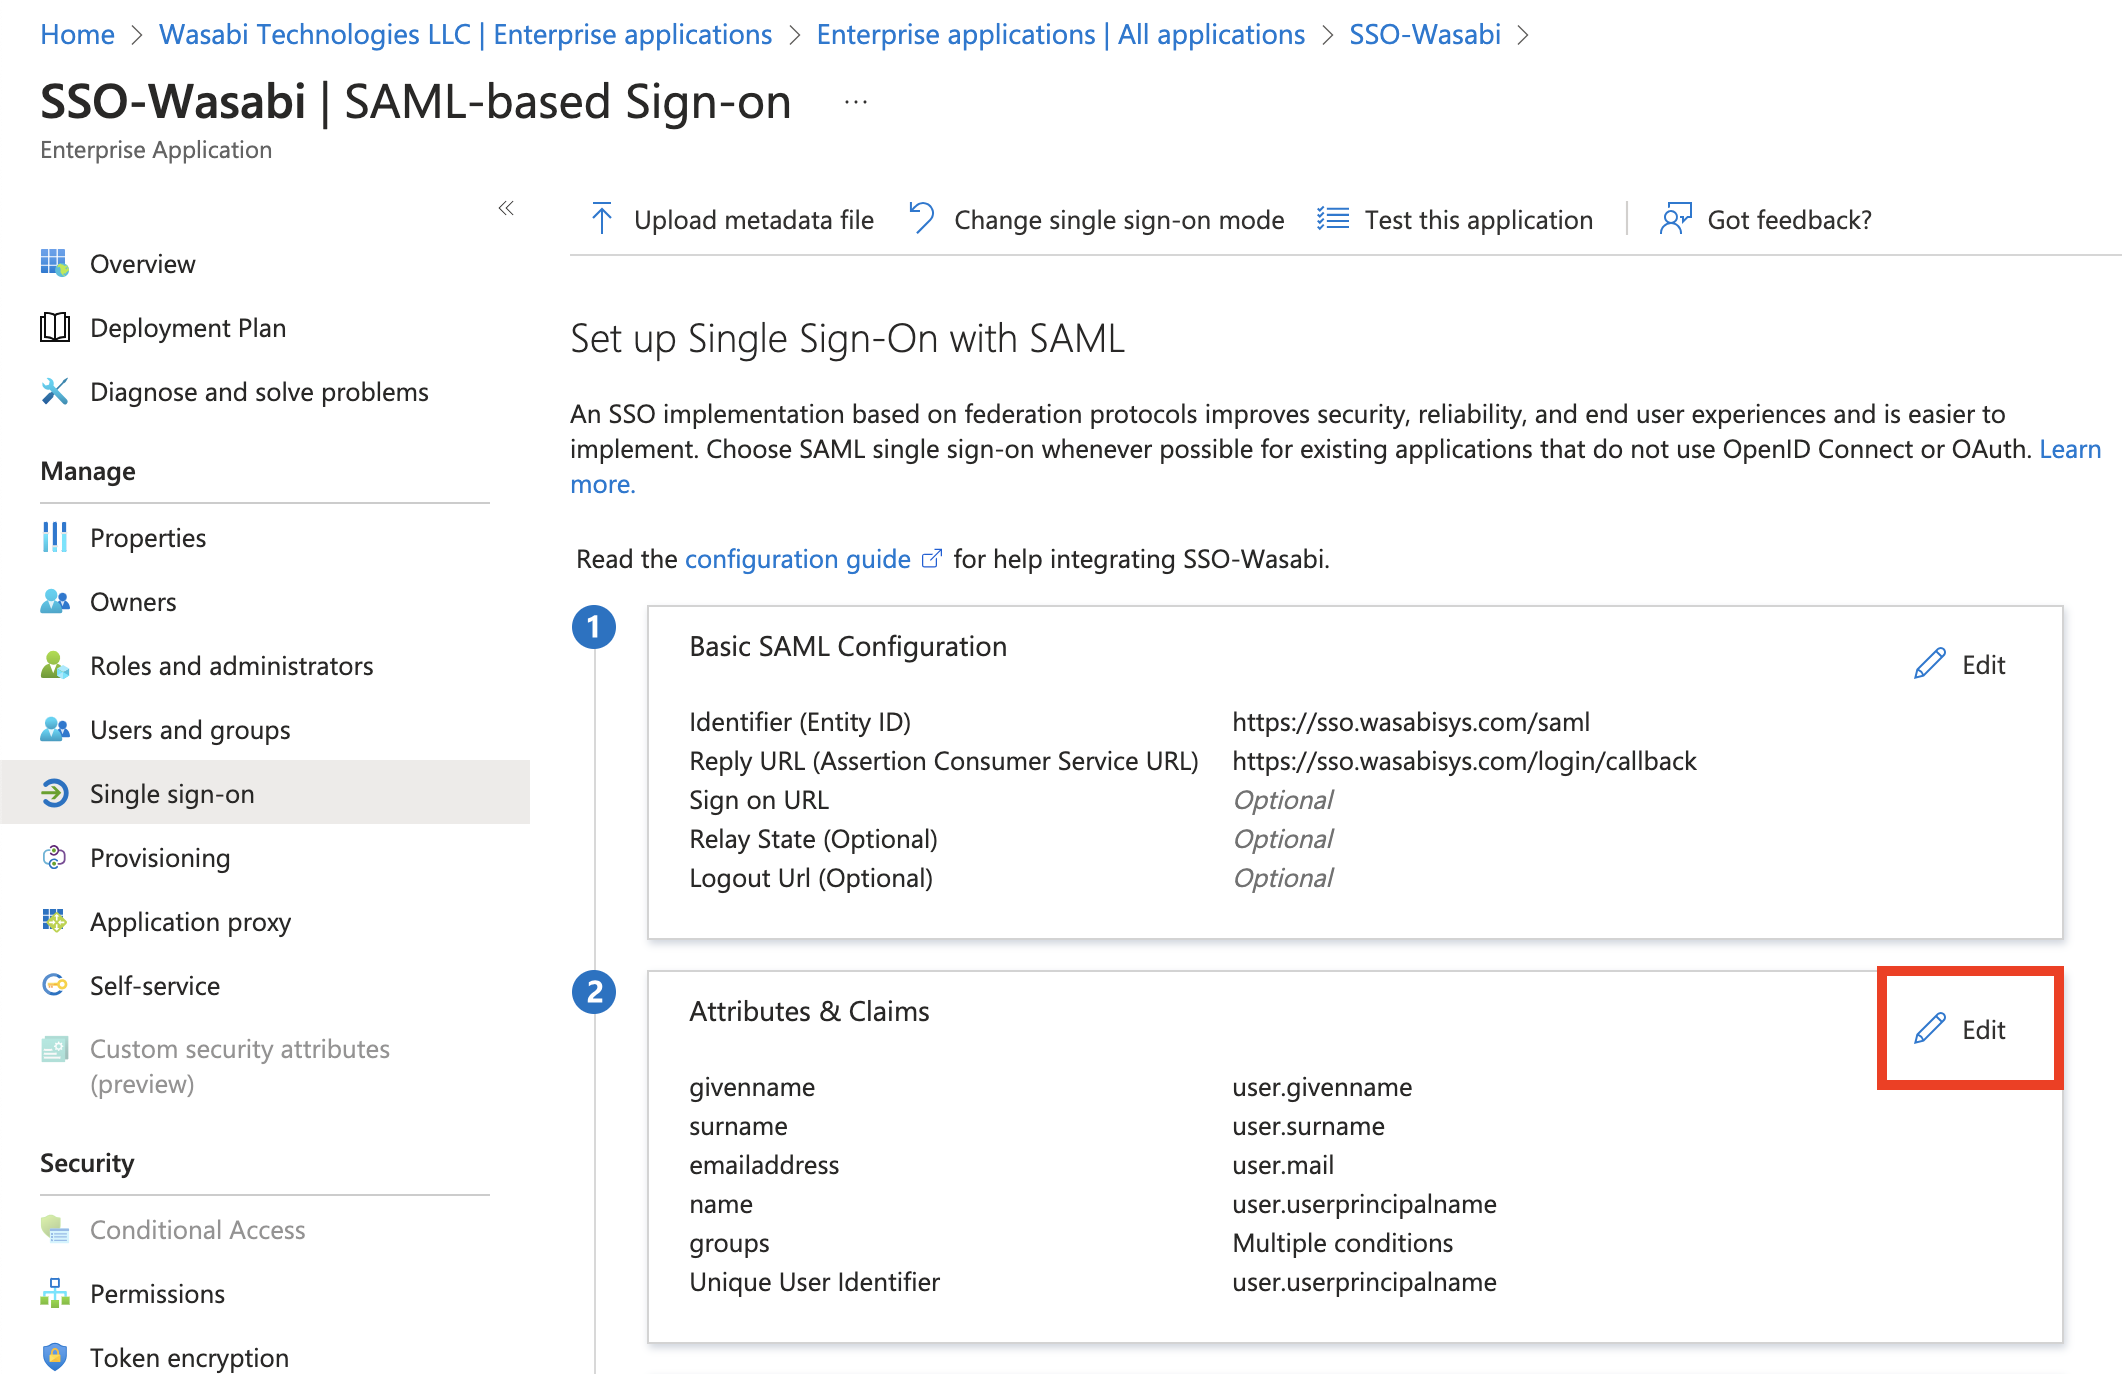
In the Manage Claim section, enter the following:
Groups—The group names
Claim conditions
User type—Any (or another value that will match your use case)
Scoped Groups—Select the Azure AD groups you want to add. Be sure to add the Wasabi Console users to the selected group.
Source—Attribute
Value—user.assignedroles
Once you have entered all the information, click Save.
Configuring SAML Settings in Wasabi Console (SP / Client Side)
Sign in to the Wasabi Console (https://console.wasabisys.com/login) using a Root account email.
Select Security in the left menu, then select SSO (Single Sign-On).
If you do not see the SSO (Single Sign On) tab, then you have a Wasabi Trial account. This feature is only available for paid accounts.
Click Start SSO Configuration. The Add an Organization Name dialog is displayed. Enter your organization’s unique name and click Add Organization.

If you previously downloaded the Federation Metadata XML, click Choose File in the SAML Connection for IDP Metadata XML section and select the file "<Azure EnterpriseAppName.xml" previously downloaded. Click Save.

If you previously downloaded the Certificate (Base64), you can manually enter the Azure Login URL:
Select the Enter details manually radio button.
Paste the Sign in URL, previously copied.
Upload the X509 Signing Certificate .cer file.
Paste the Sign Out URL (optional).
Click Save.

A Wasabi role is required for SSO roles to work in the Wasabi Console. Roles must be assigned to users within your organization's Identity Provider and returned to Wasabi in SSO claims to match a user with a role.
In the SSO Single Sign-On tab, select Settings and then click Create Role.
Do not create the role through the Role tab on the left. SSO roles must be created using the SSO tab in the Settings section.
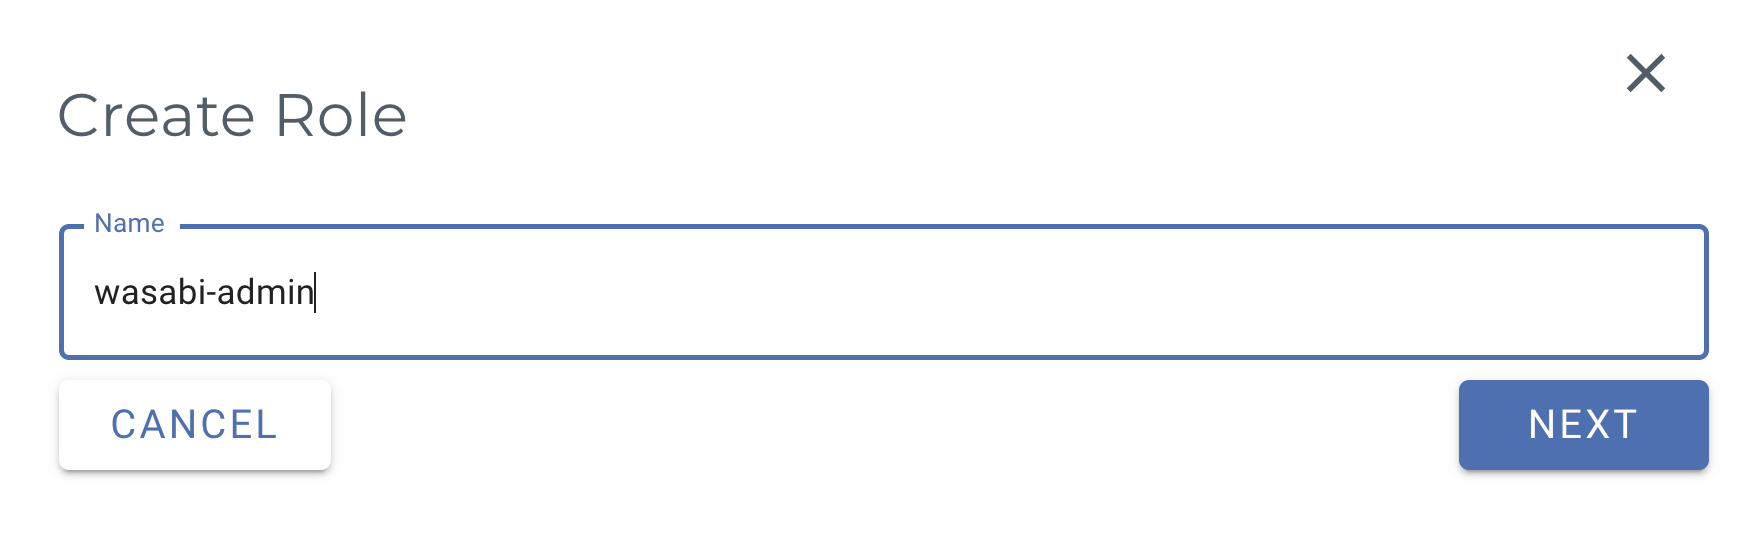
In the Create Role dialog Name box, enter the Azure role name you previously created, then click Next.
The Wasabi Console role name used must match the Azure role name.
In the Assign Role Policies dialog, select one or more roles for user-specific access.
For more information on default policies available in the Wasabi Console, or to create IAM policies through the Policy tab, see Policies in Wasabi Hot Cloud Storage.
Click Create Role.
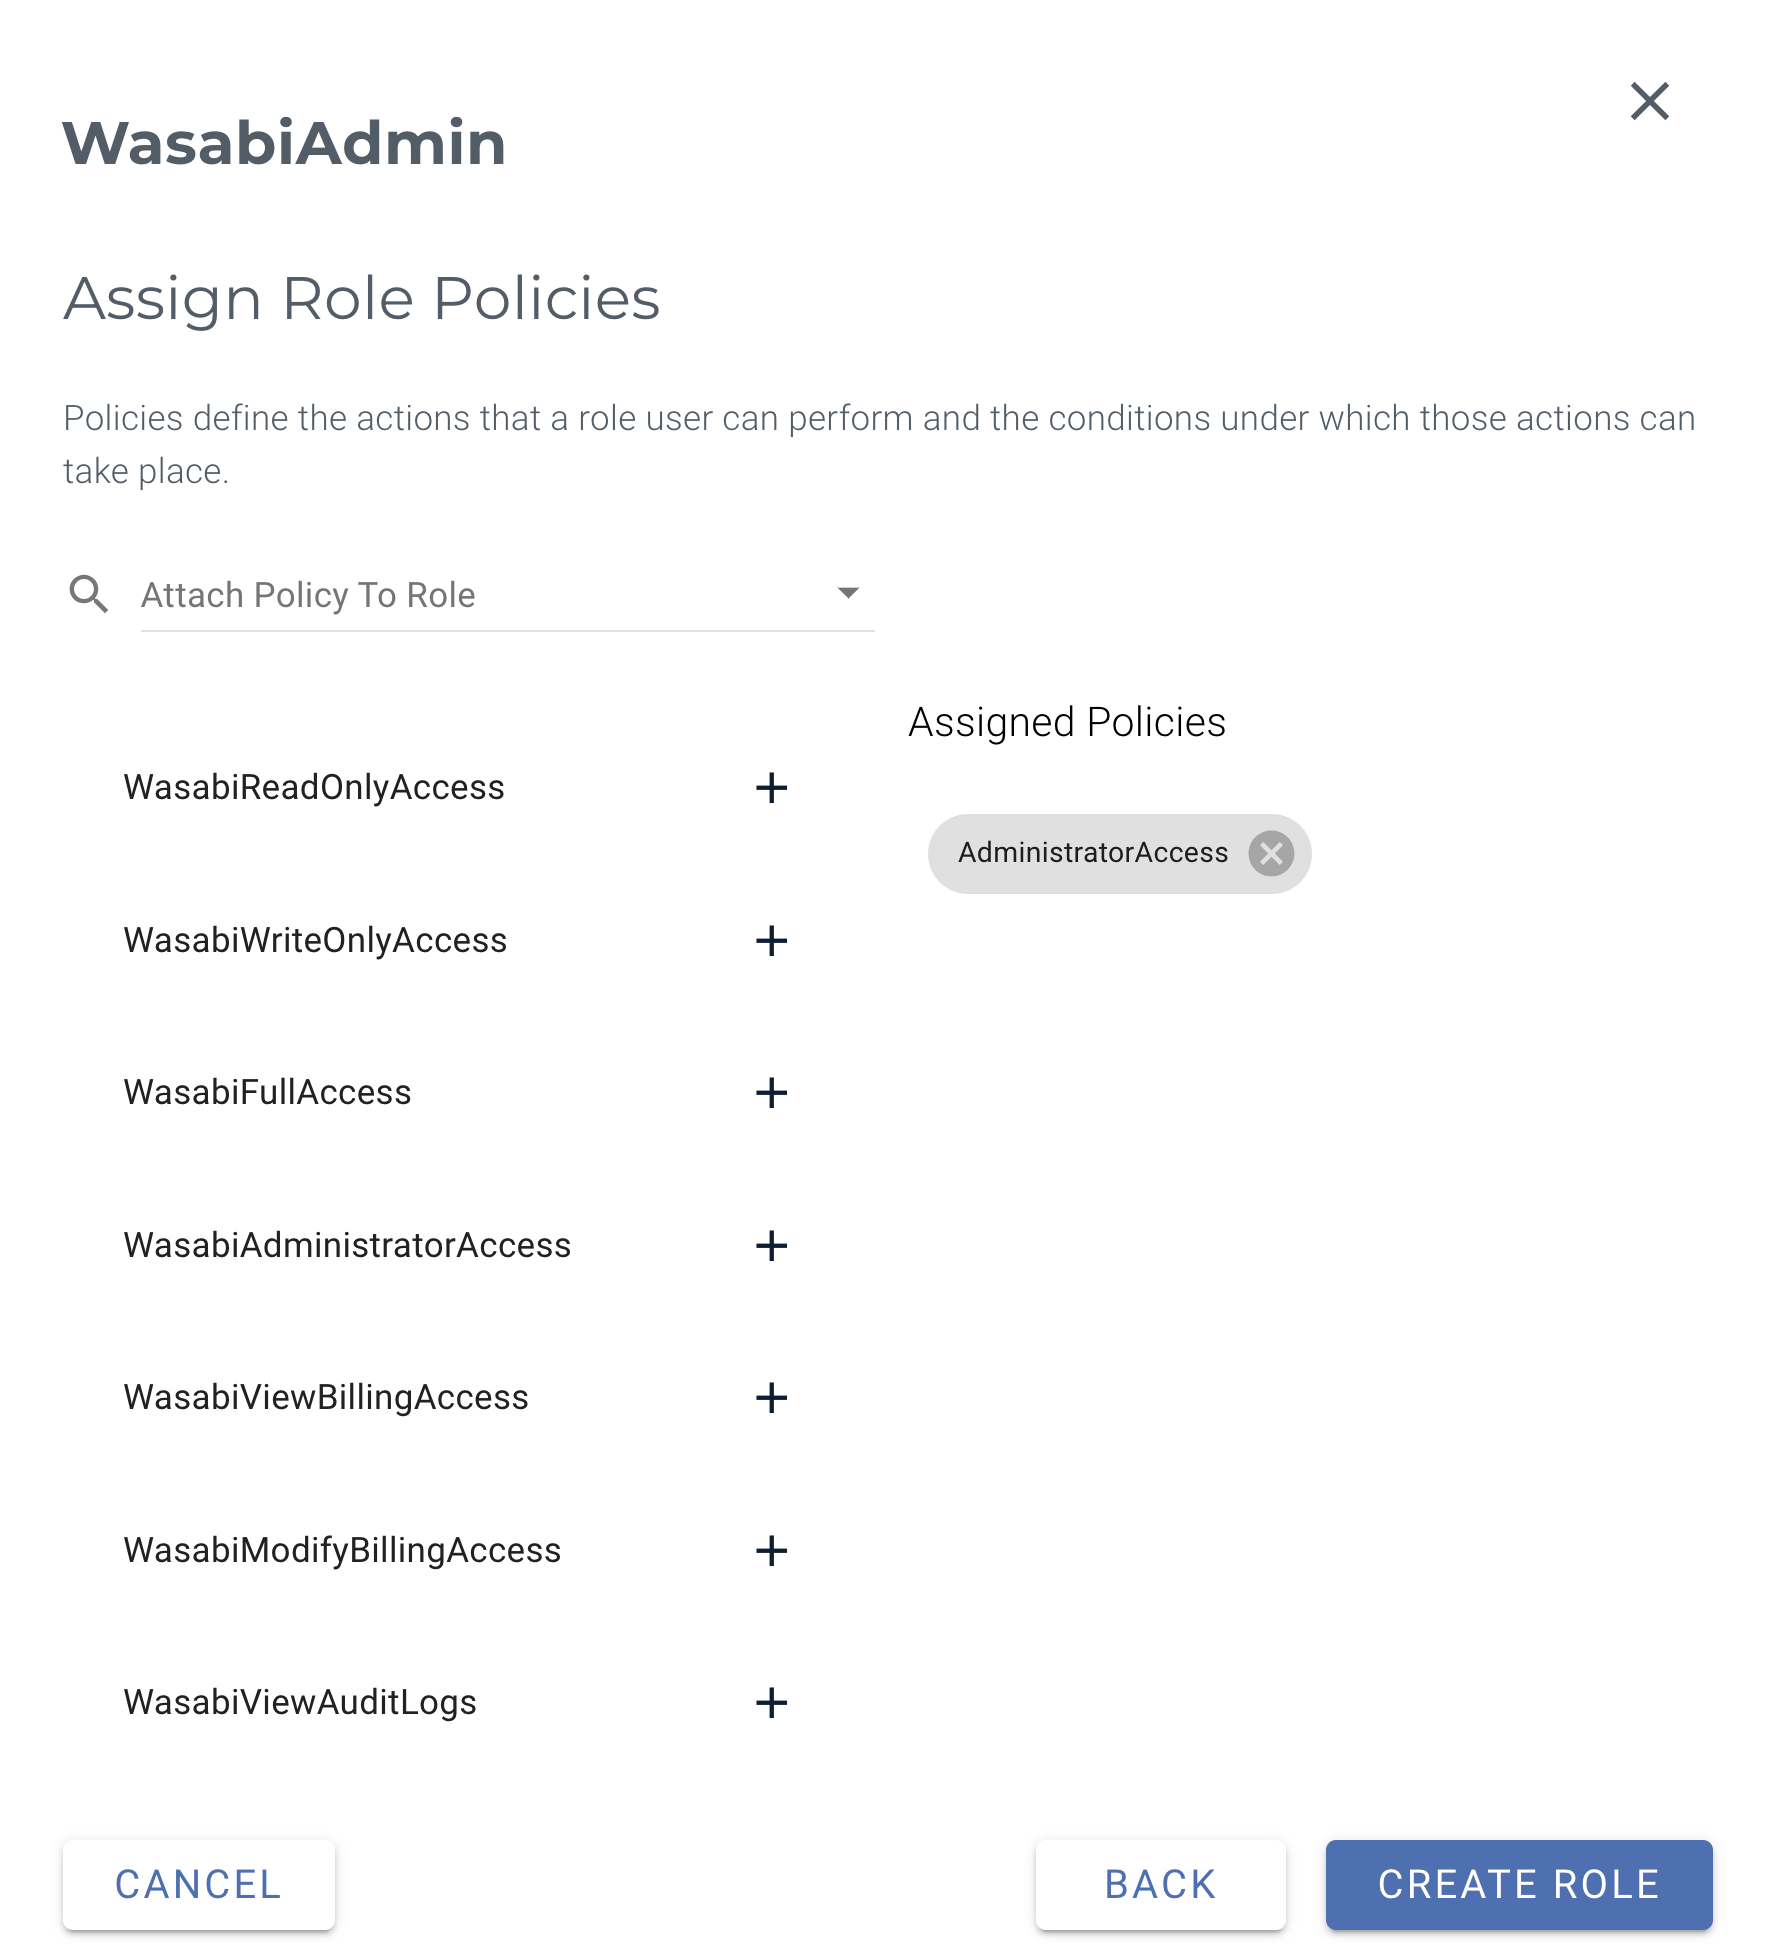
This example uses the WasabiAdministratorAccess policy. You may attach any Wasabi-managed policy/user-managed policy based on your requirements.
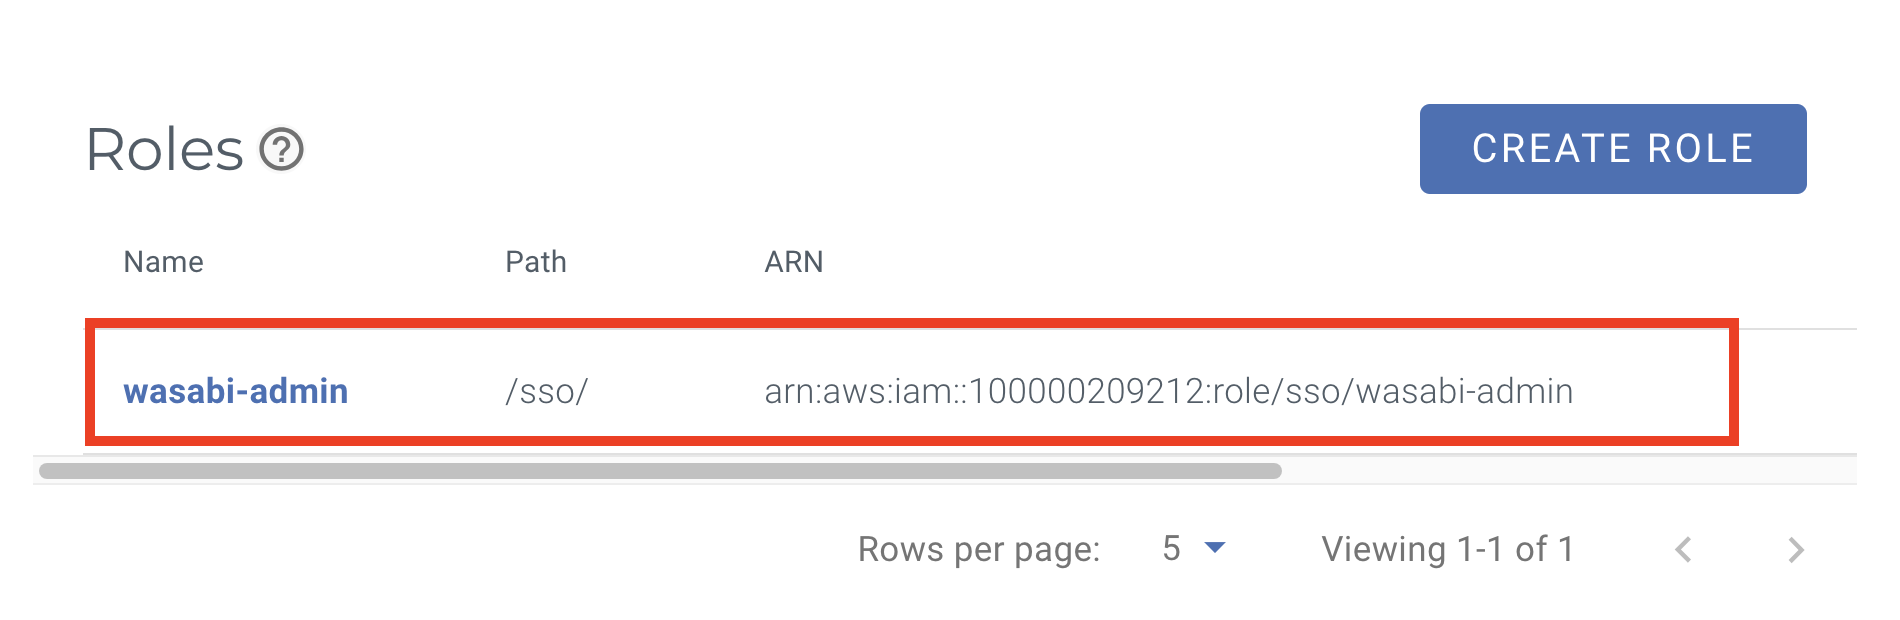
The Wasabi role is now available in the SSO (Single Sign-On) section in Settings.
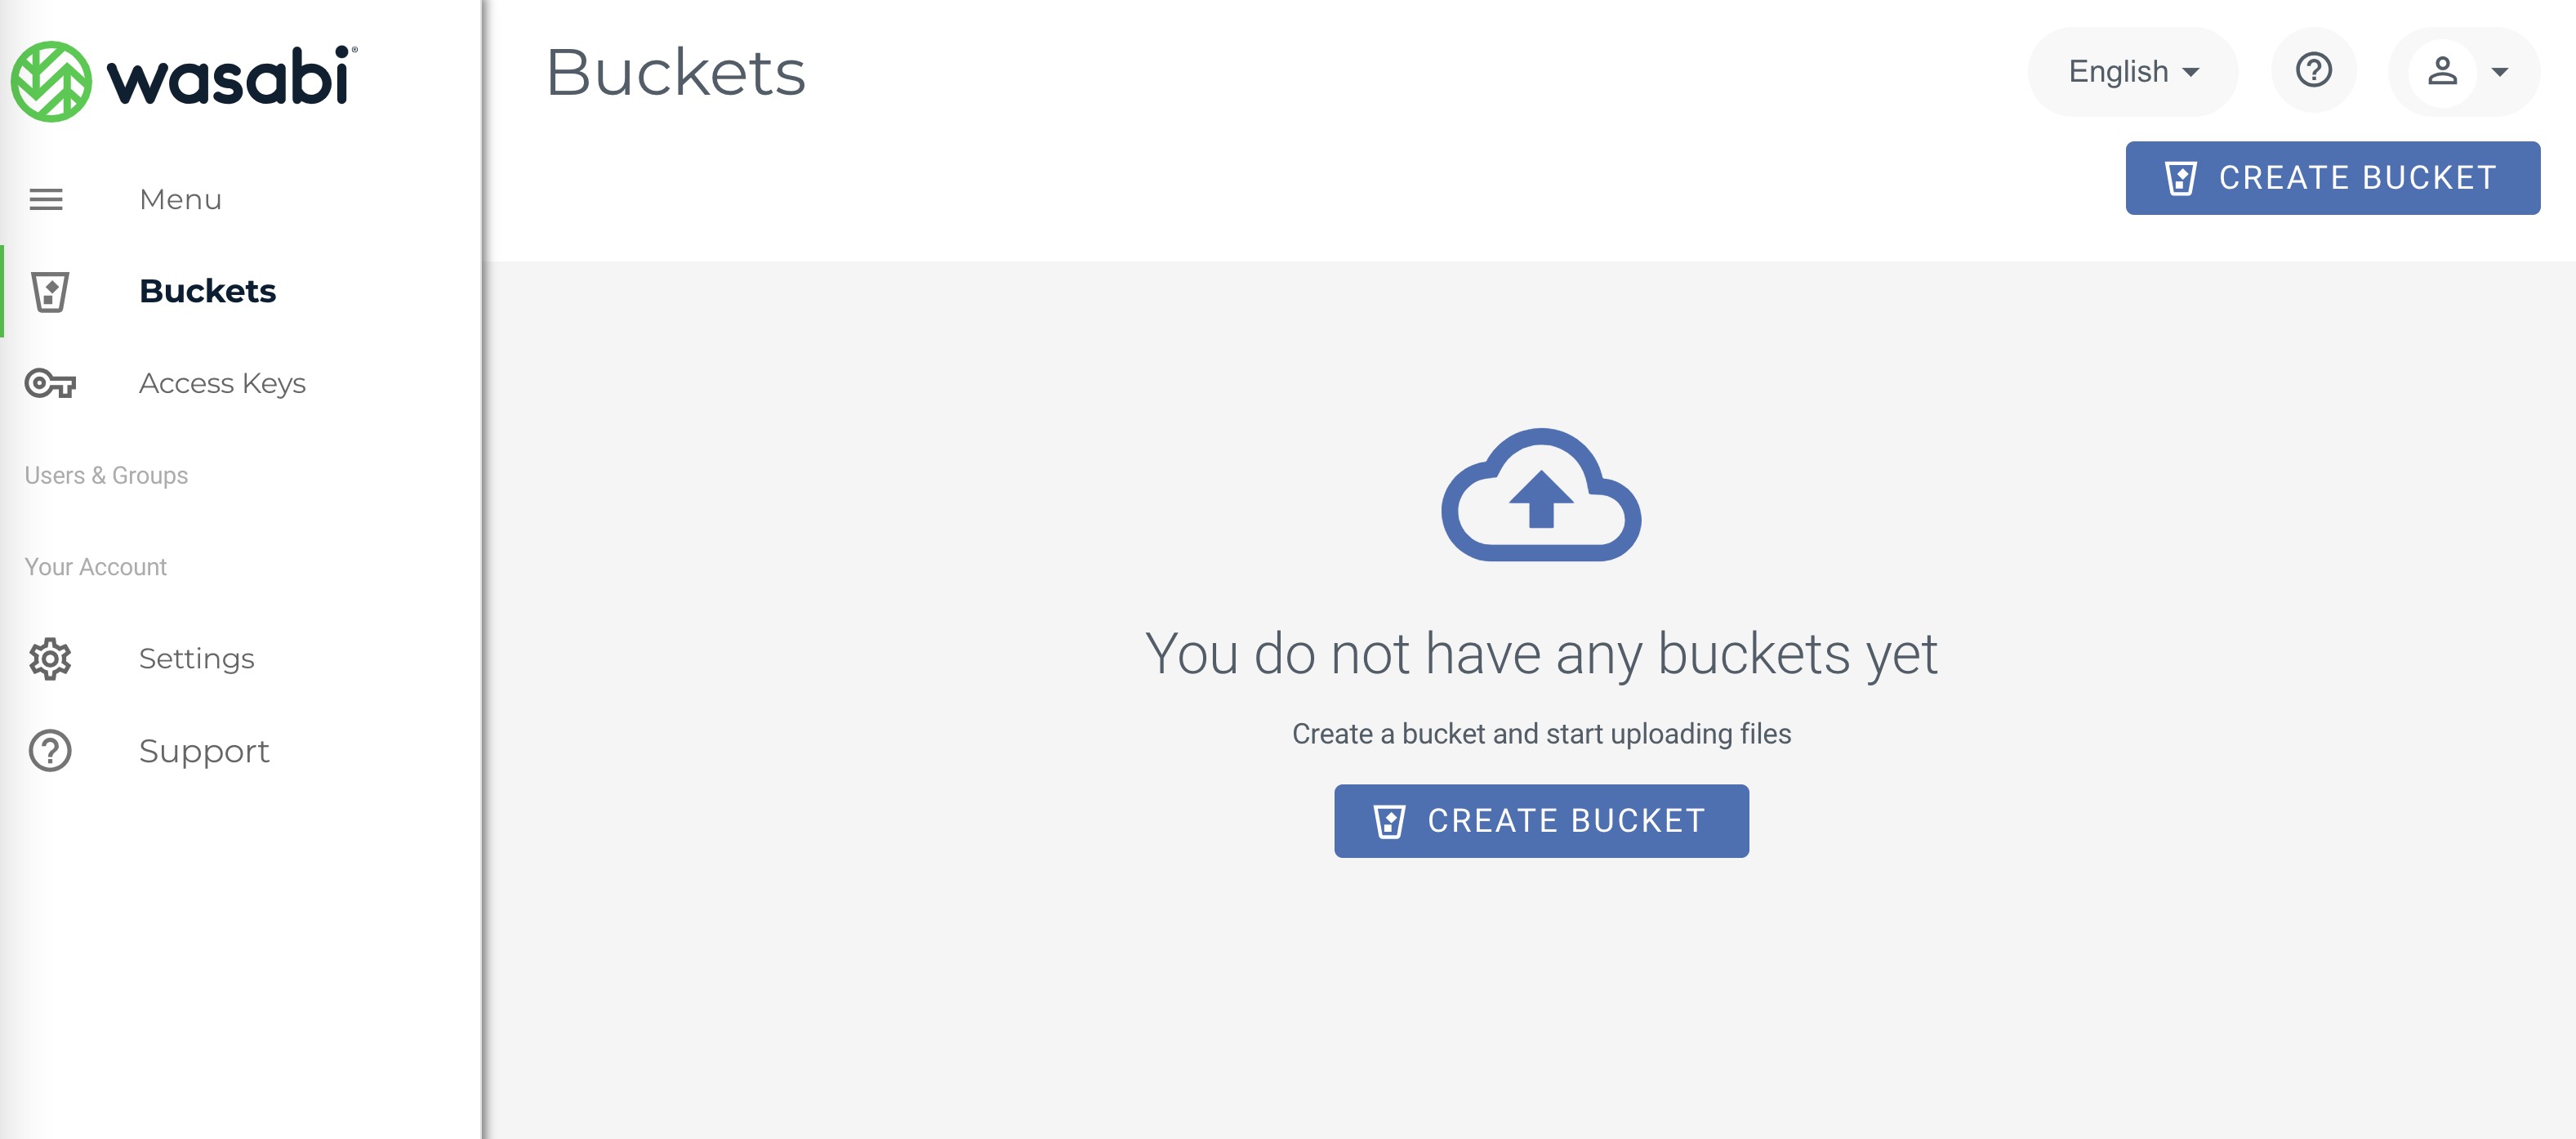
Testing the Integration
Sign in to the Wasabi Console (https://console.wasabisys.com) to test the SSO configuration.

Click SIGN IN WITH SSO. There are two methods you can use:
The organization’s name
The Wasabi Root account email address

You are redirected to the Azure AD login page.
Complete the Azure AD login. Once you are authenticated, you'll be redirected to the Wasabi Console, where you can perform the required functions based on your assigned role, such as creating a bucket.