Wasabi offers Single Sign-On (SSO) functionality for Wasabi accounts using the OneLogin identity provider, based on OpenID Connect integration.
This article provides configuration instructions for both the IdP administrator and the SSO user to properly configure and complete a Wasabi Console login using the organization’s OneLogin SSO service.
Configuring the OIDC App in OneLogin (IdP Side)
To connect your OpenID Connect-enabled app to OneLogin:
Create an OpenID Connect app for the Wasabi app catalog.
Create users and groups with access to OneLogin.
Creating the OIDC App for the Wasabi App Catalog
Log in to your OneLogin (https://www.onelogin.com/) account as Administrator.
On the OneLogin menu, select Applications and click Applications.

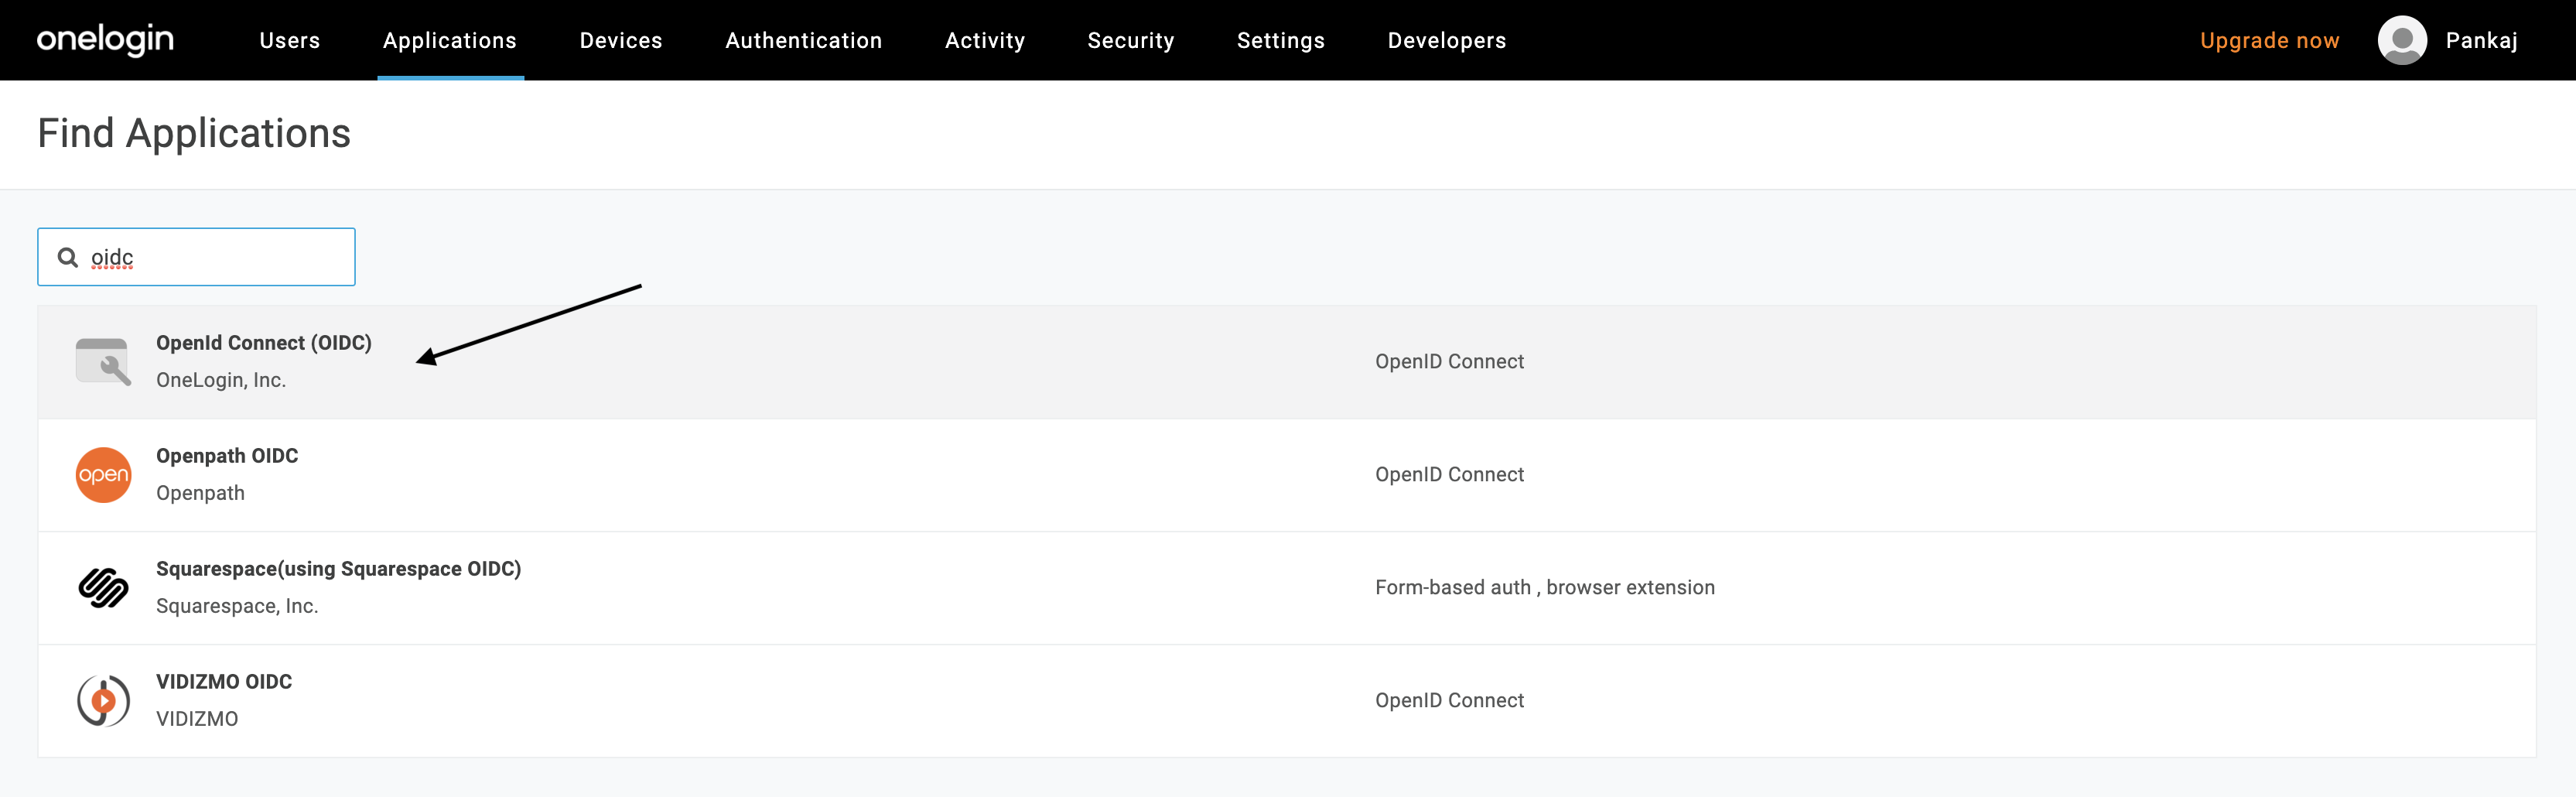
Click Add App. The Find Applications page is displayed.

Search “OpenId Connect” or “oidc”, then select OpenId Connect (OIDC). The Configuration page is displayed.
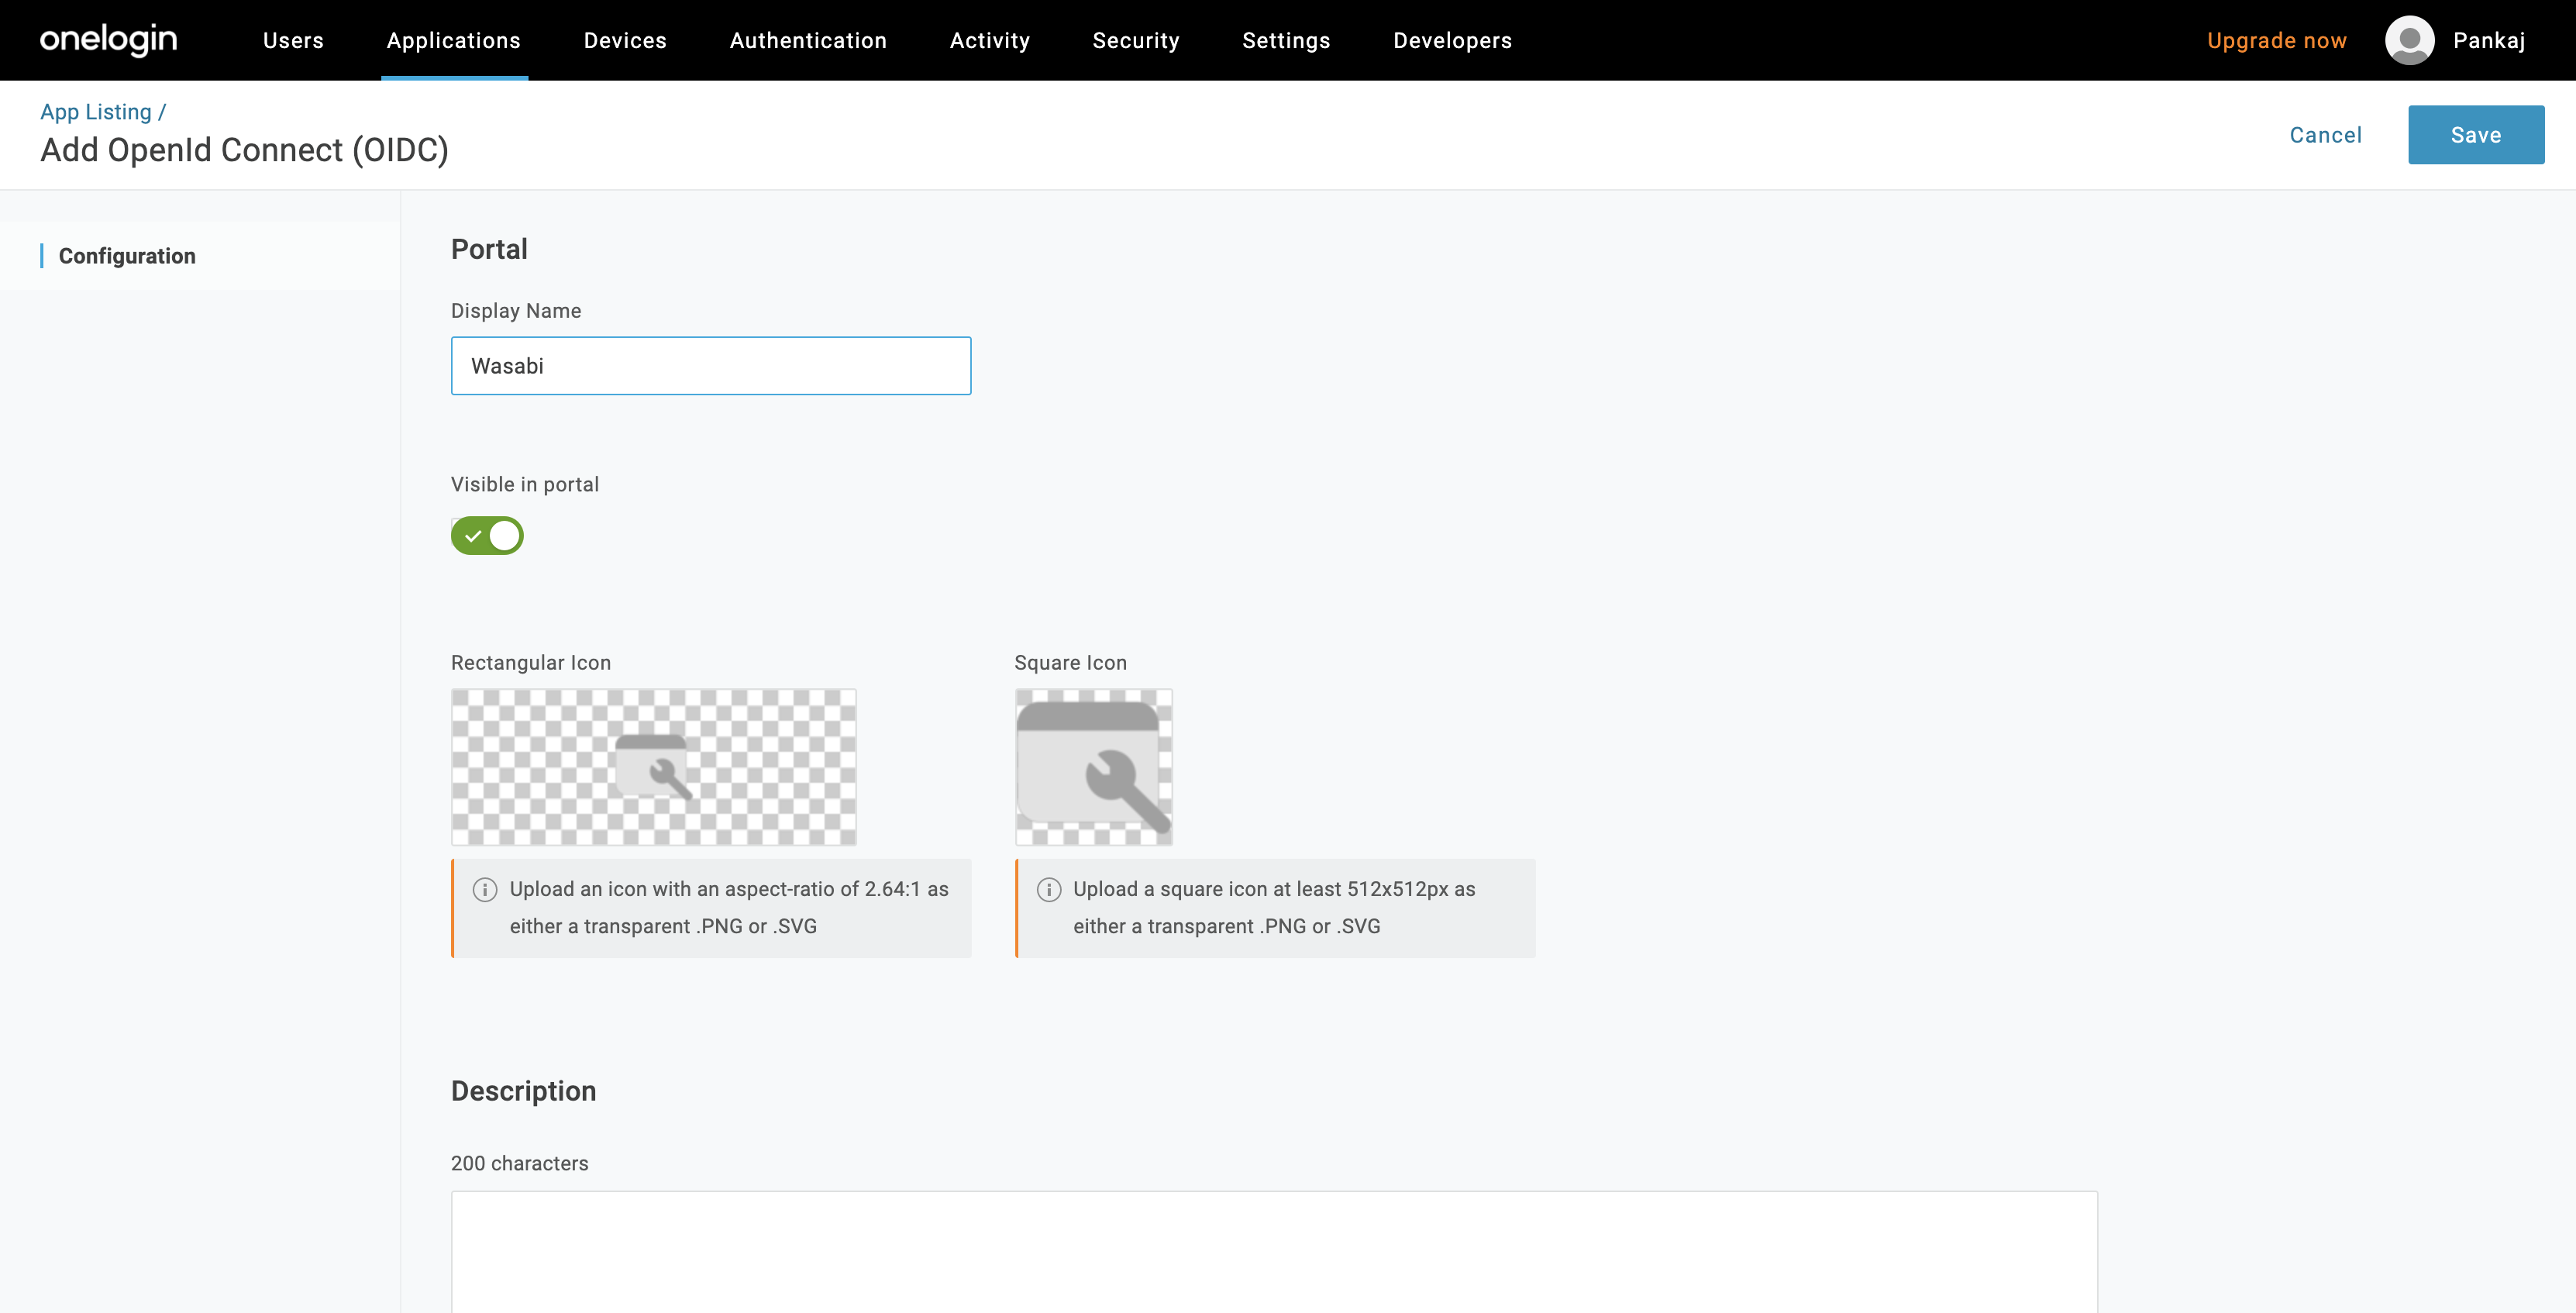
In the Portal section, enter a display name, such as Wasabi, and click Save.
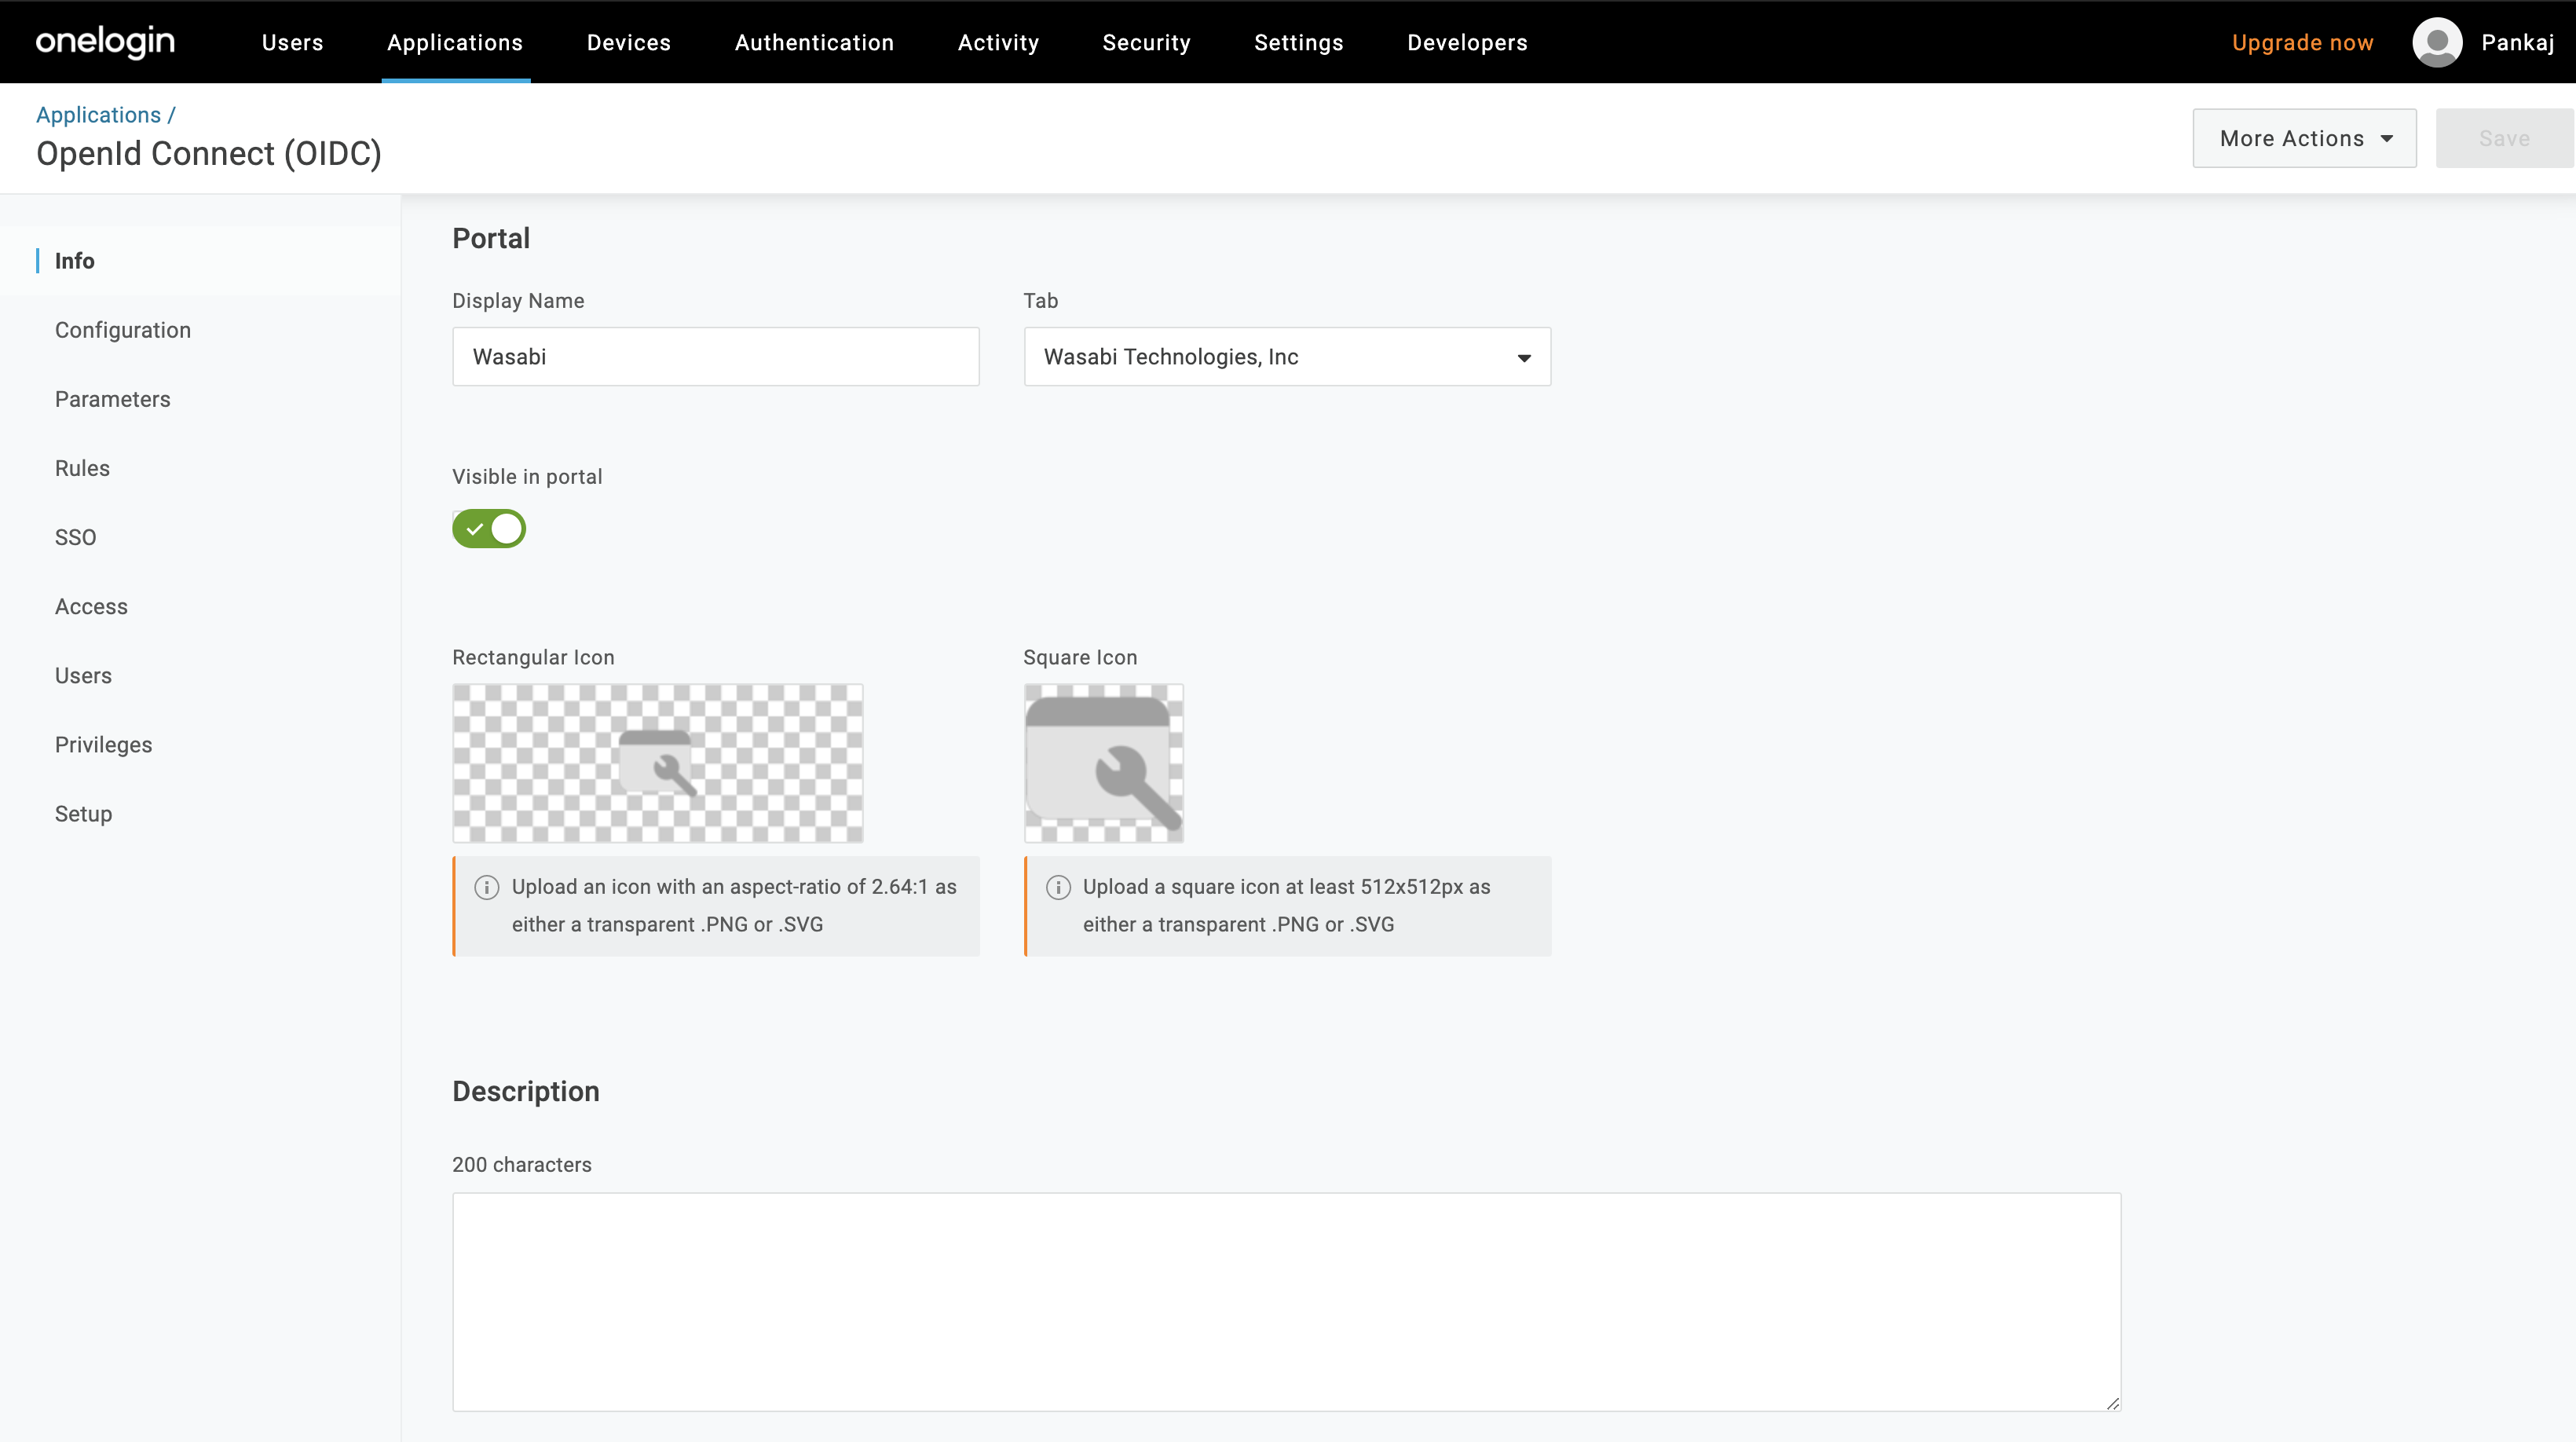
Once the application is created, you will see all the configurable settings on the Info page.
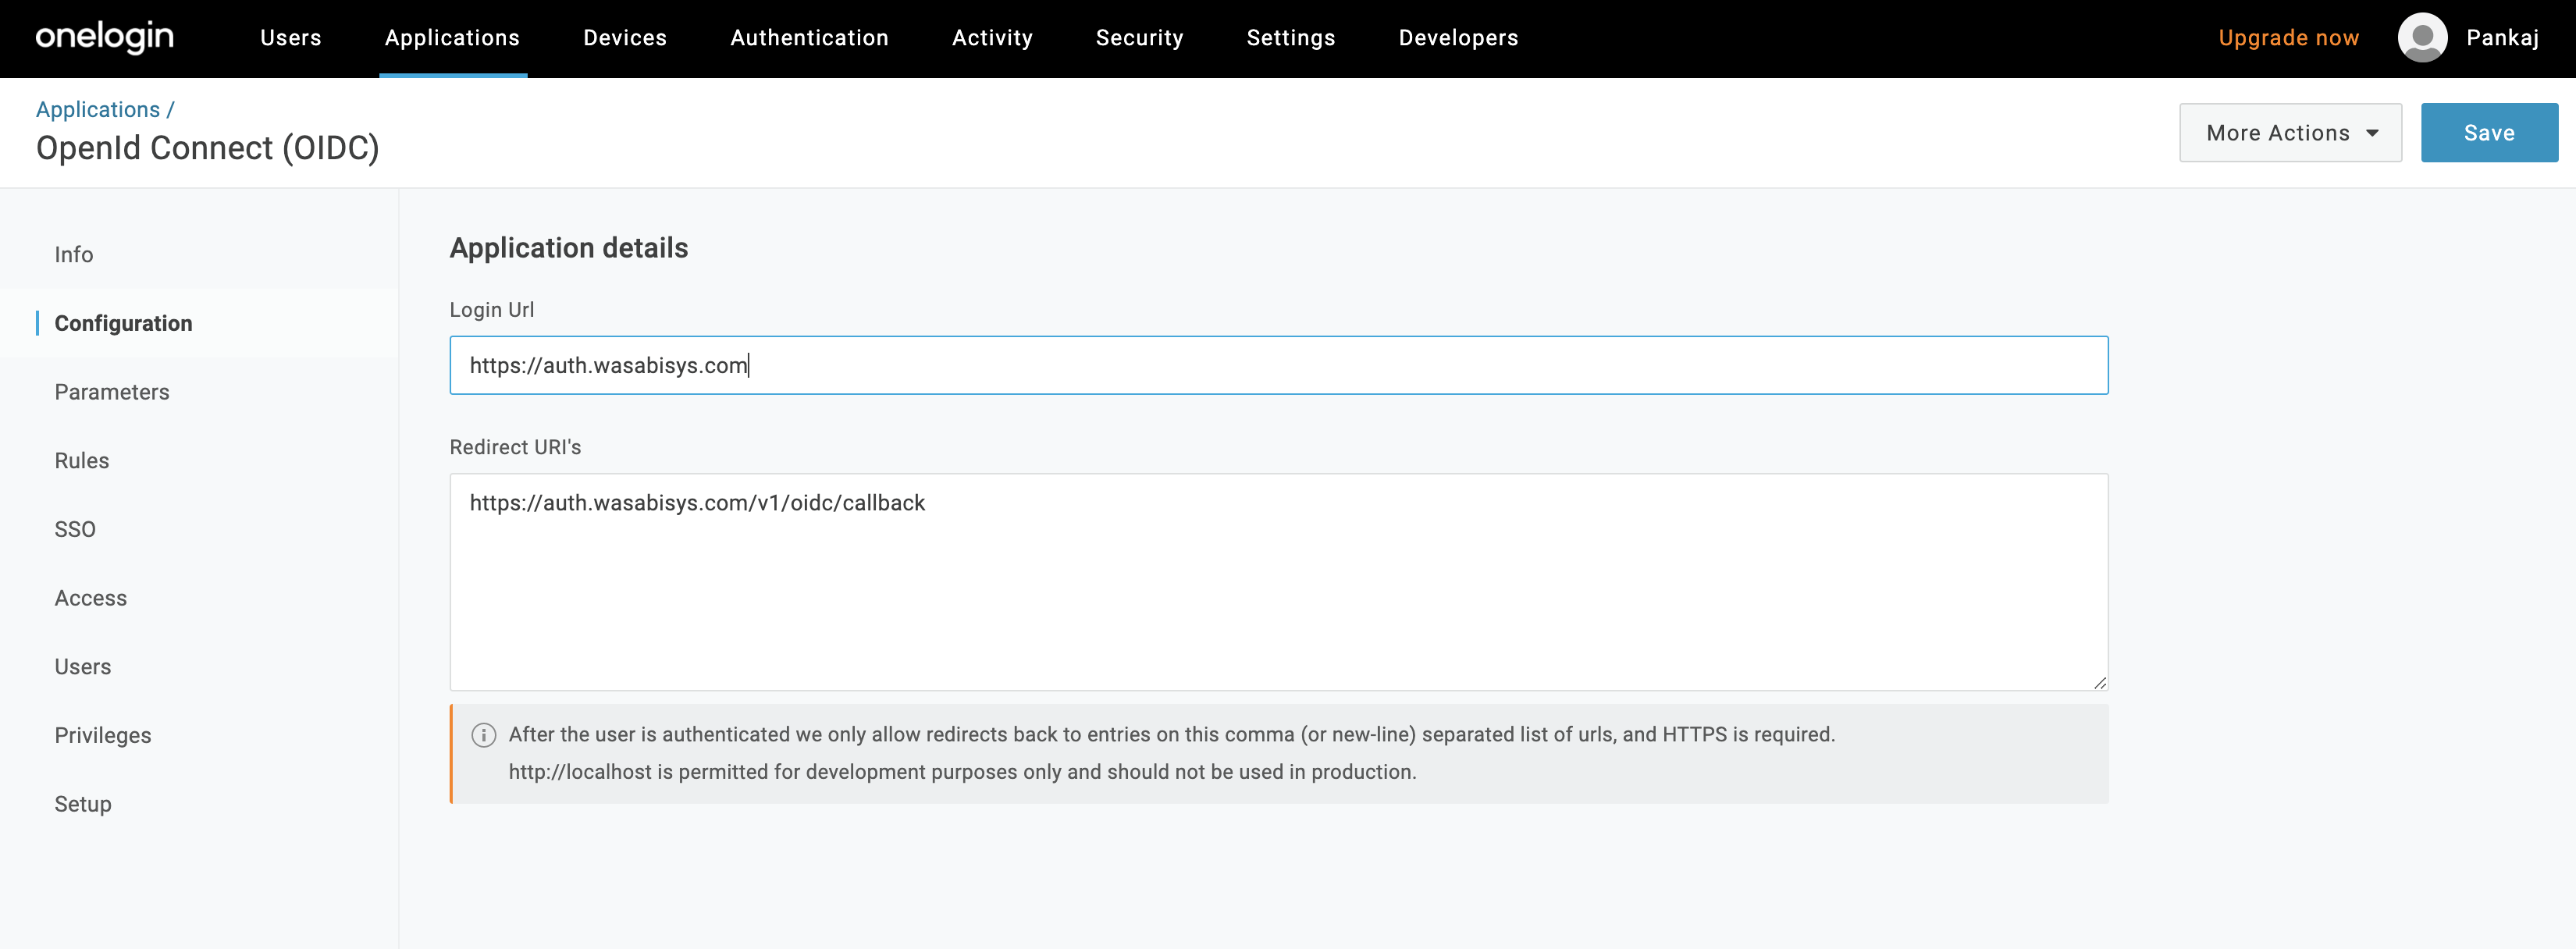
Select Configuration. In the Application details section, enter the Login URI and Redirect URI that your app uses as the callback endpoint. This is where OneLogin sends the authentication response and ID token. Paste the URIs shown below into the appropriate box:
Login URI—https://auth.wasabisys.com
Redirect URI—https://auth.wasabisys.com/v1/oidc/callback
Click Save.
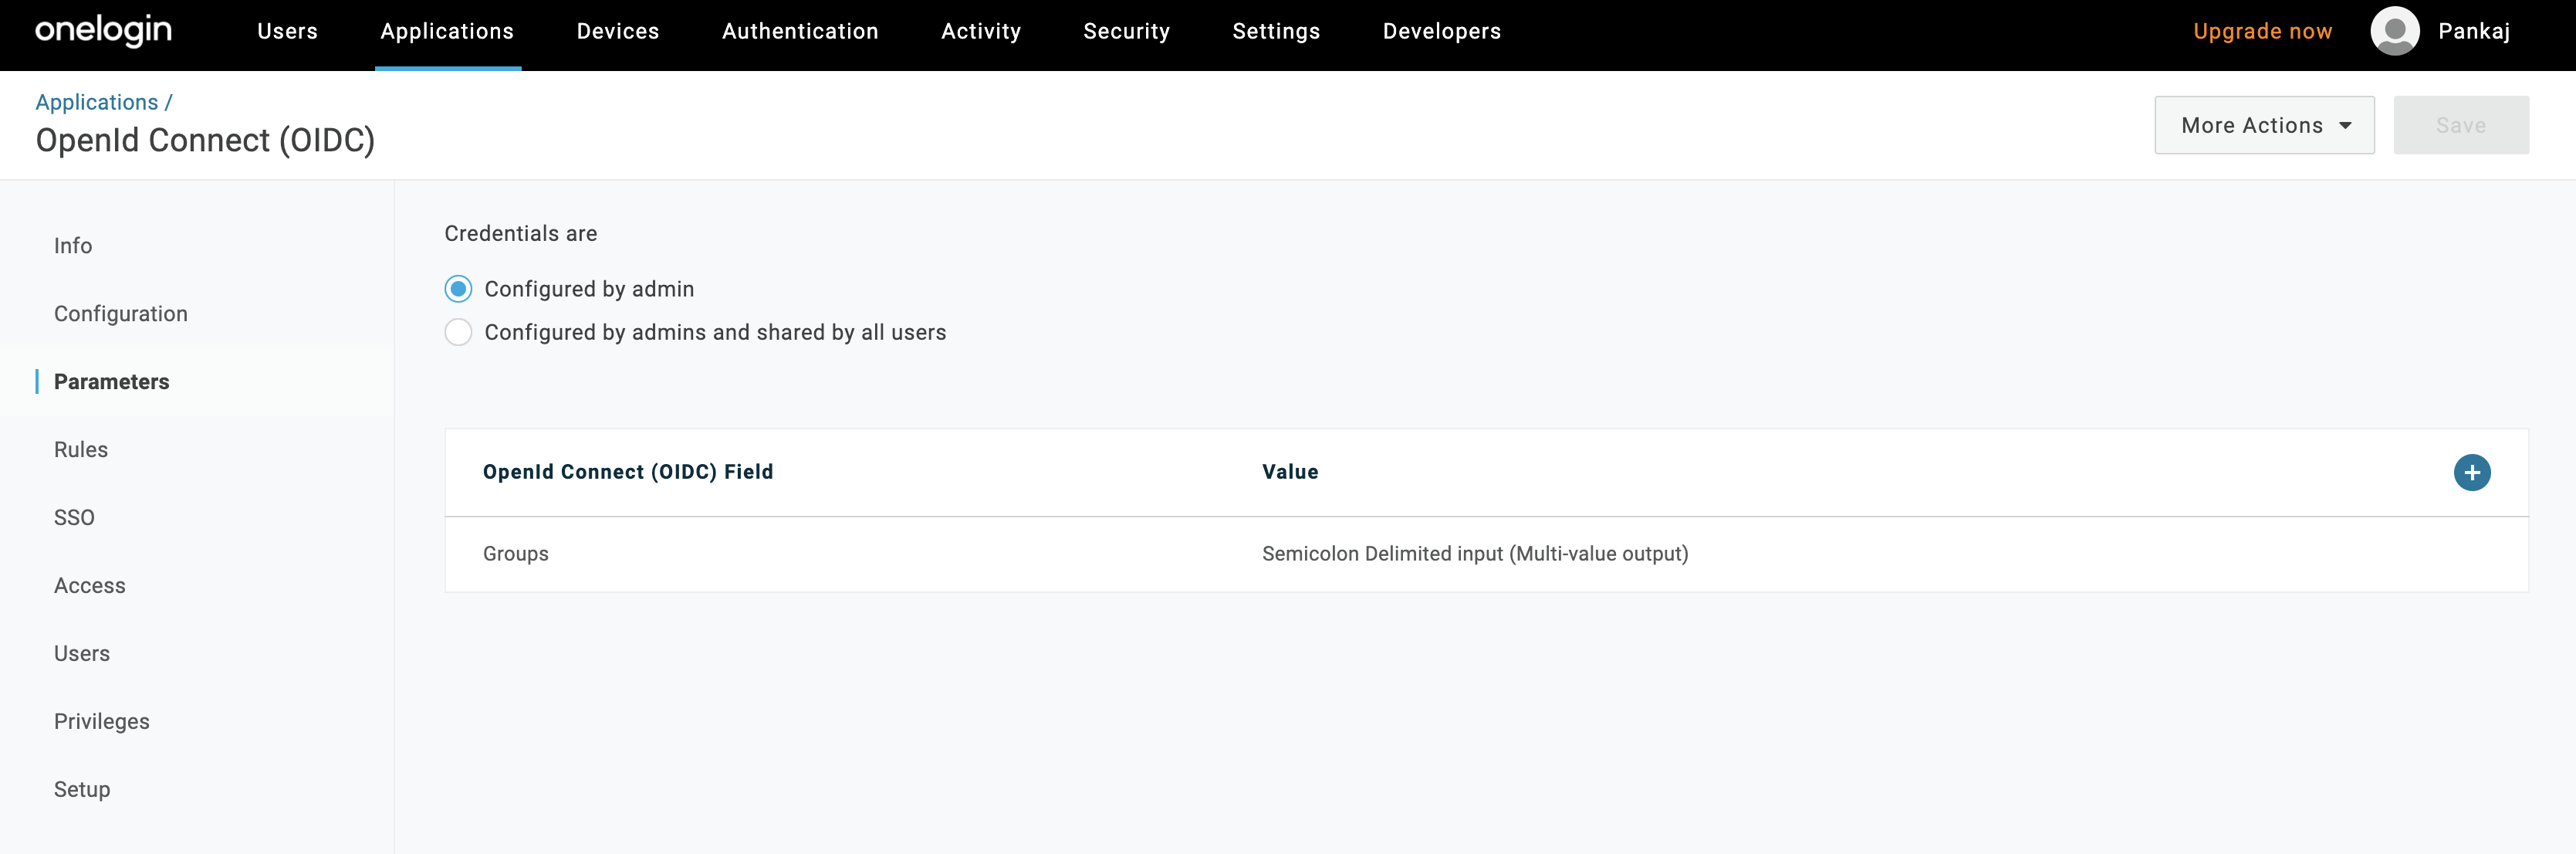
Select Parameters, then click the plus sign to save the value.
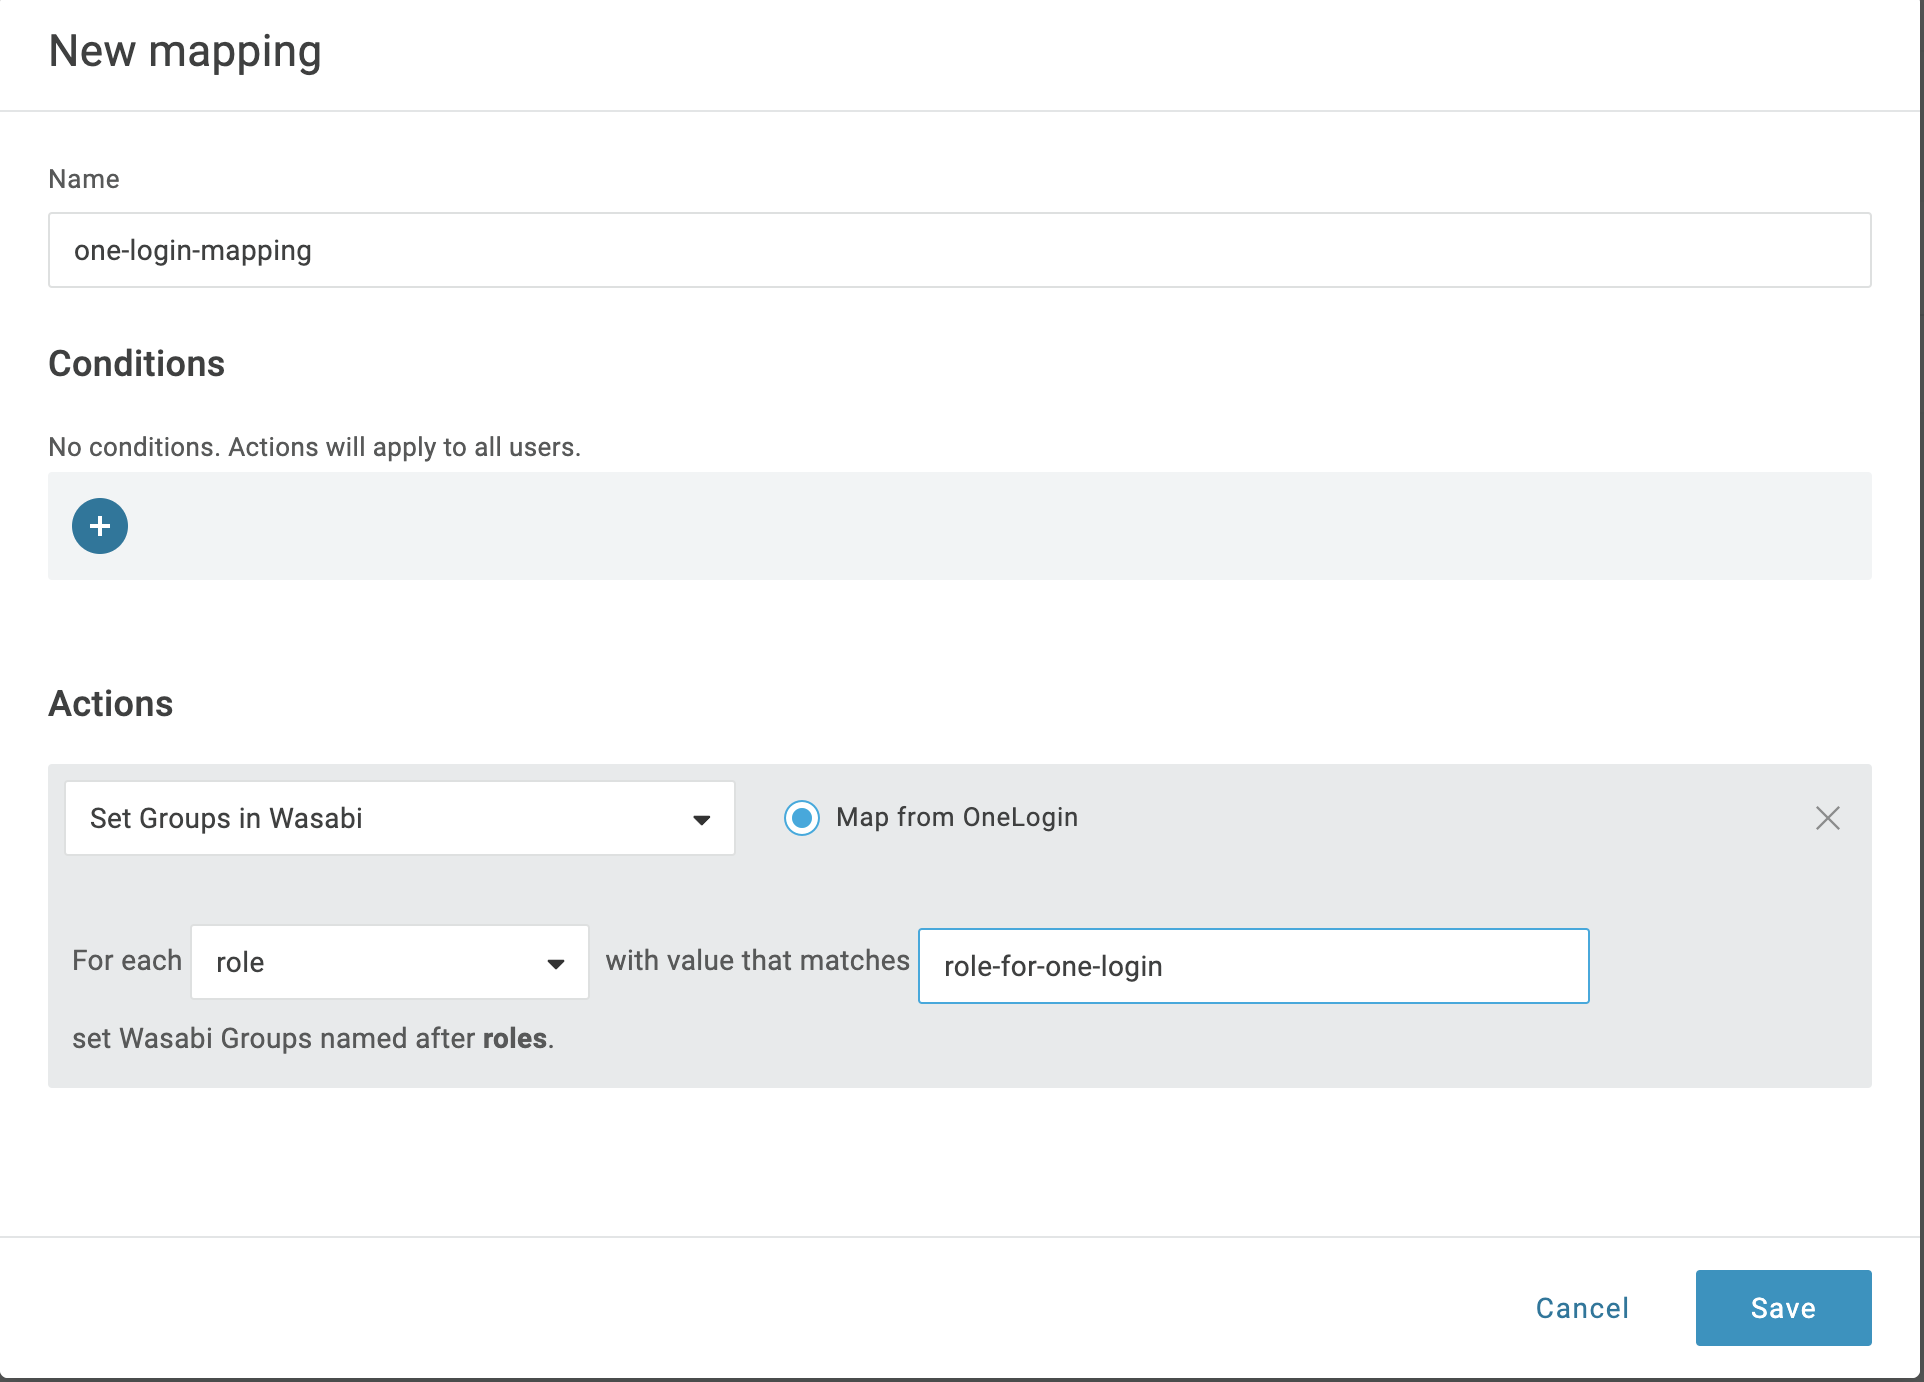
Select Rules and click Add Rules. The New Mapping dialog is displayed. In the Name box, enter a name for the rule, such as “one-login-mapping.” In the Actions section, with value that matches box, enter “role-for-one-login.”
You will reuse the “role-for-one-login” role in the Wasabi Console for this integration.
Click Save.
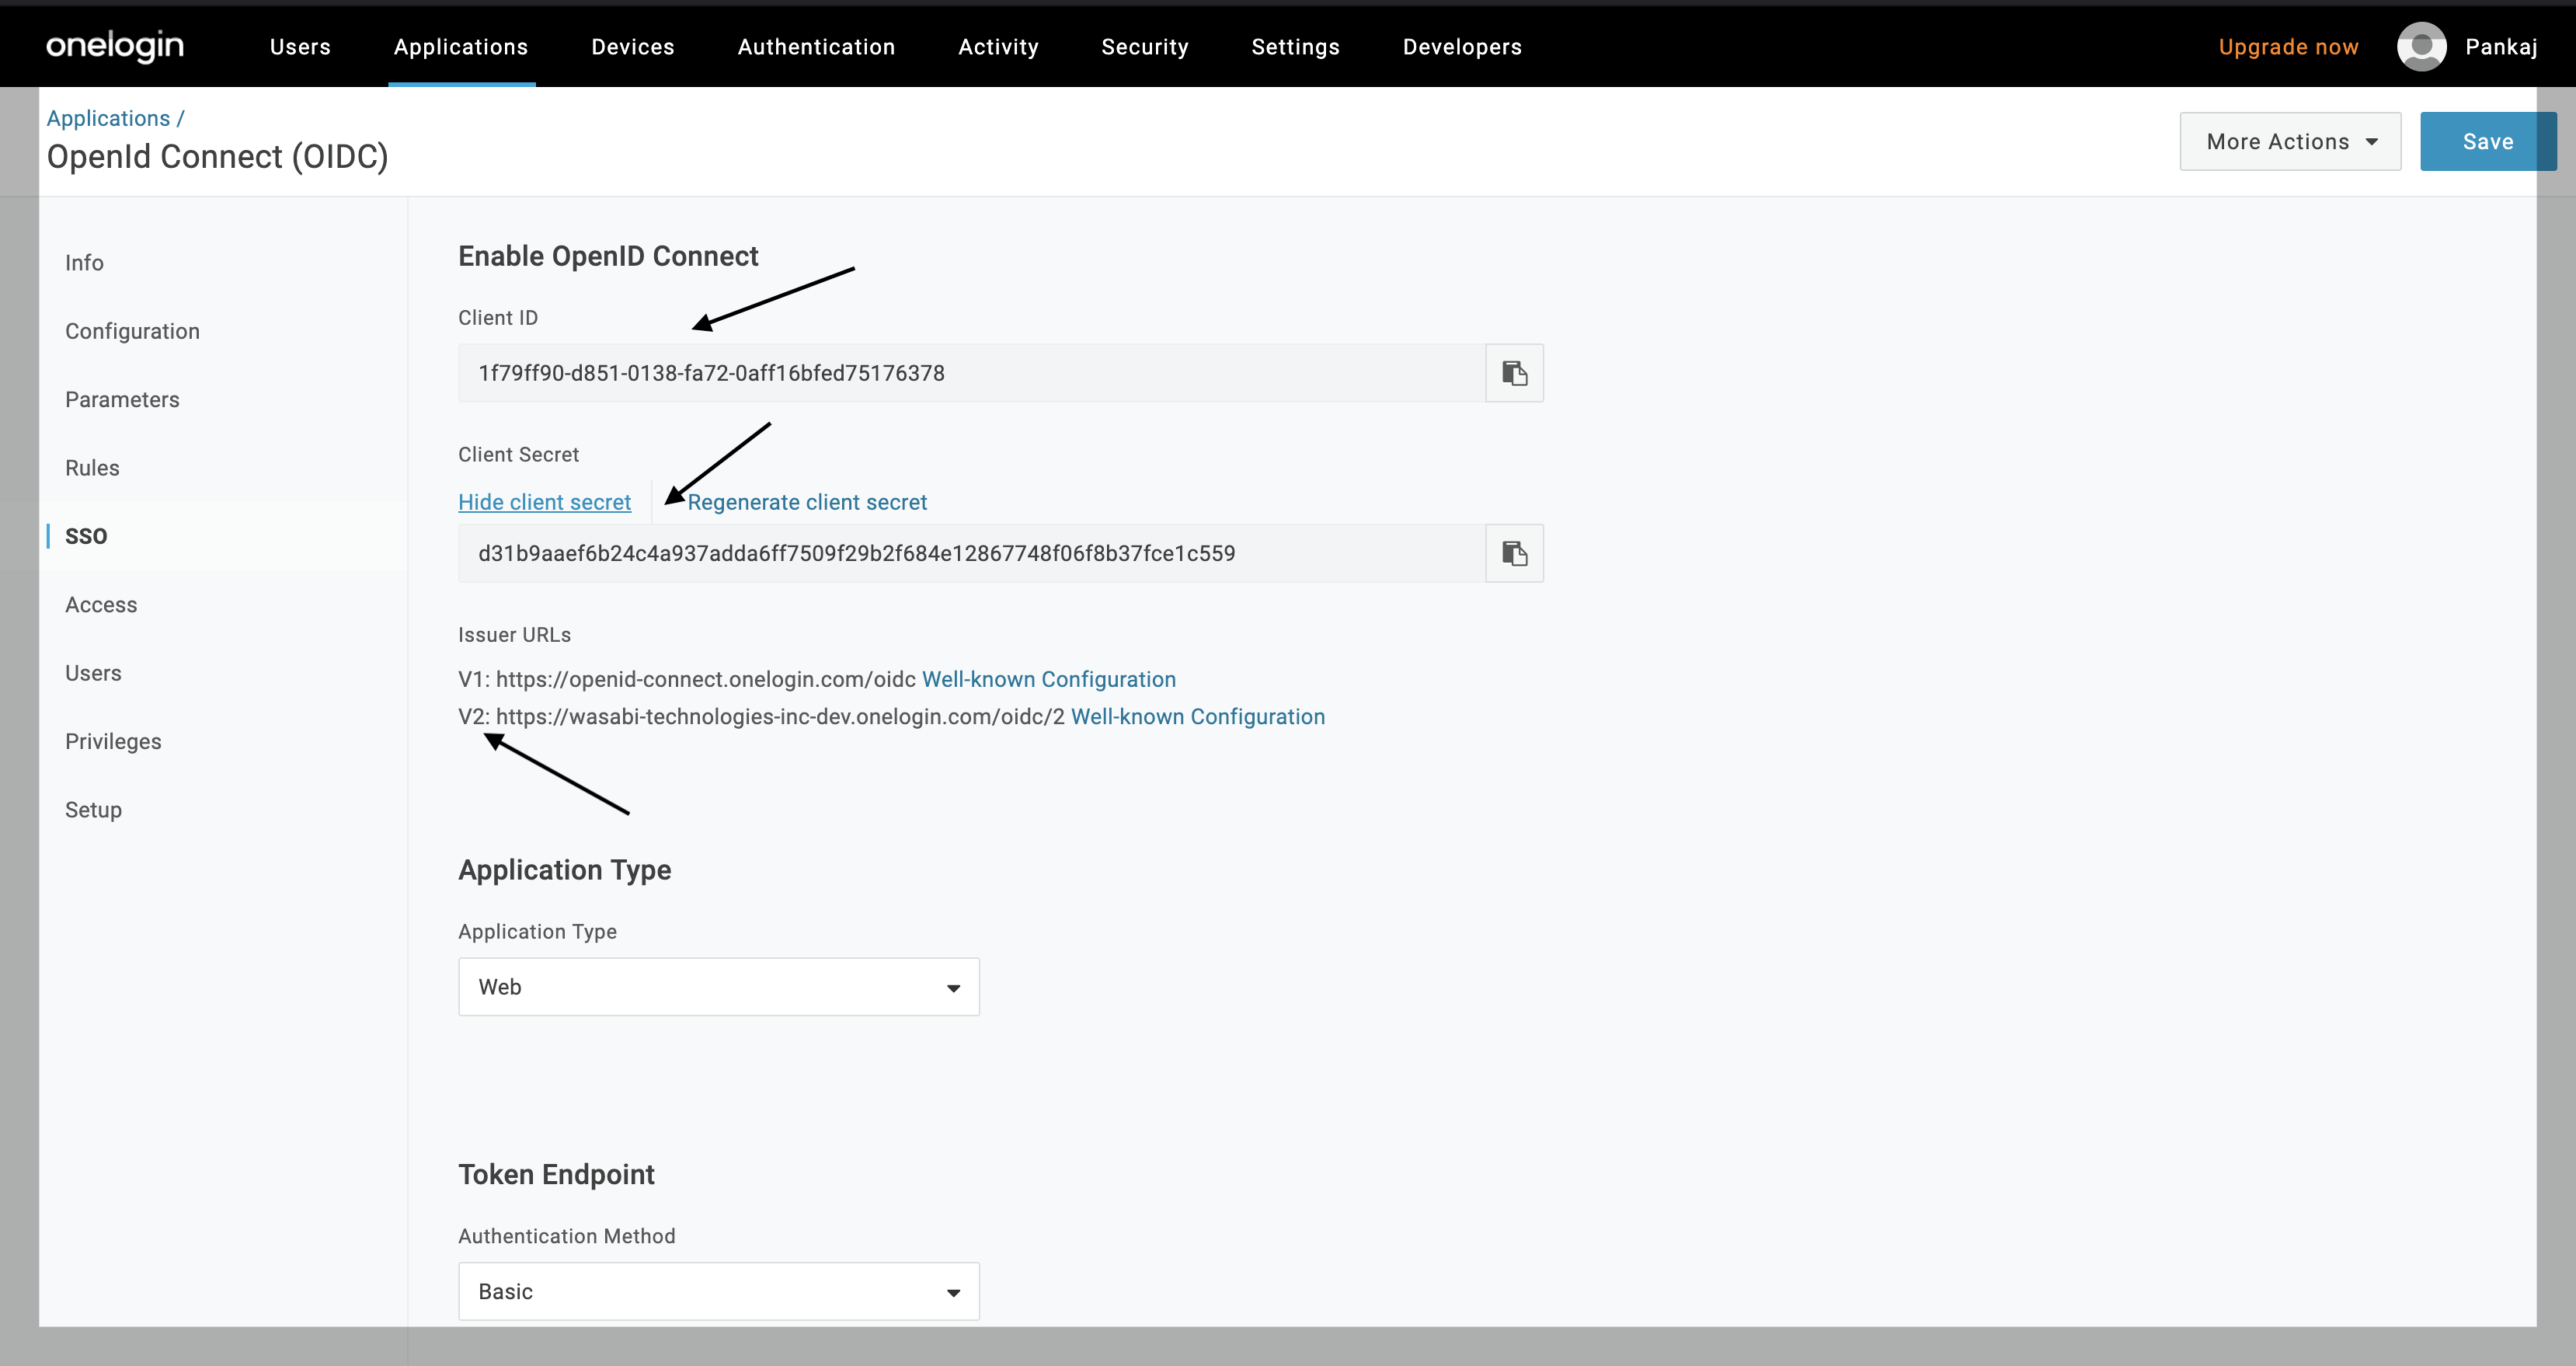
Select SSO. Copy the Client ID, Client Secret values, and the V2 Issuer URL and save them at a secure location. You will need these three values later to configure SSO in the Wasabi Console.
The Client ID and Client Secret are unique for each application, so it is essential that you use your own values.
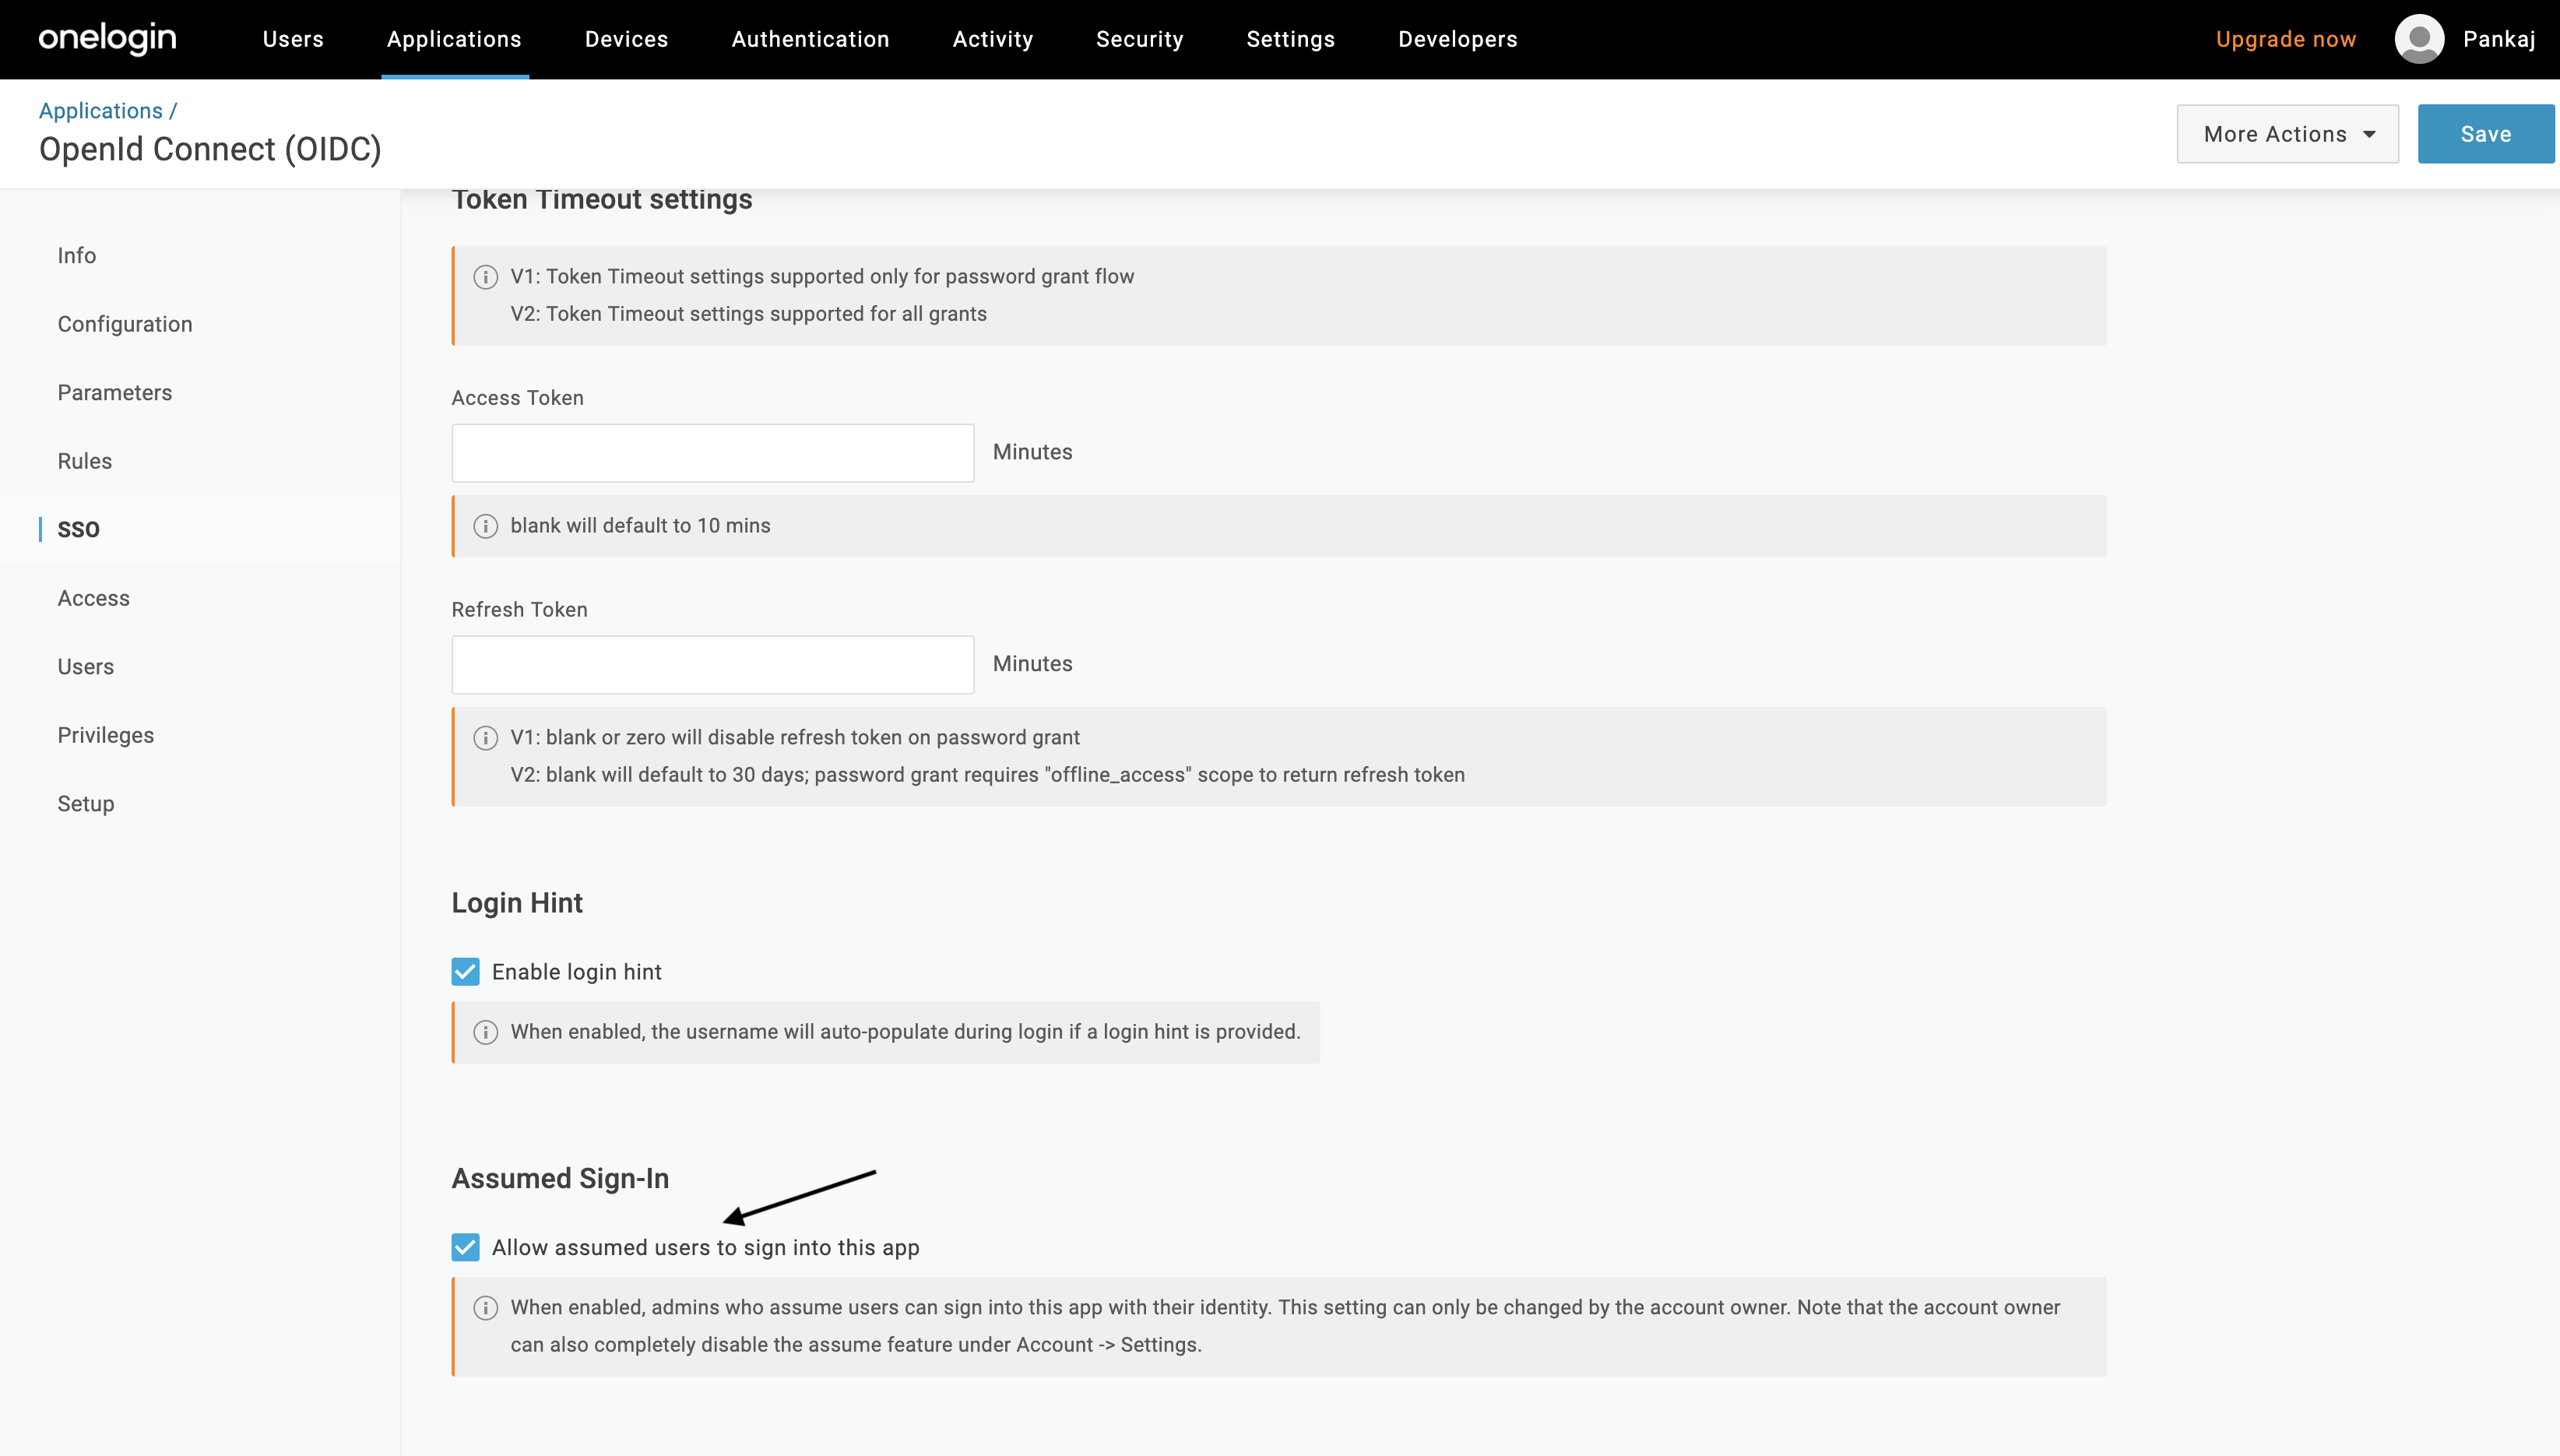
Once you have saved those three values, scroll down to the Assumed Sign-In section and check Allow assumed users to sign into this app.
Creating Users and Groups
Depending on your use case, you will create users and groups and map them to OneLogin. Settings will depend on your organization's requirement(s).
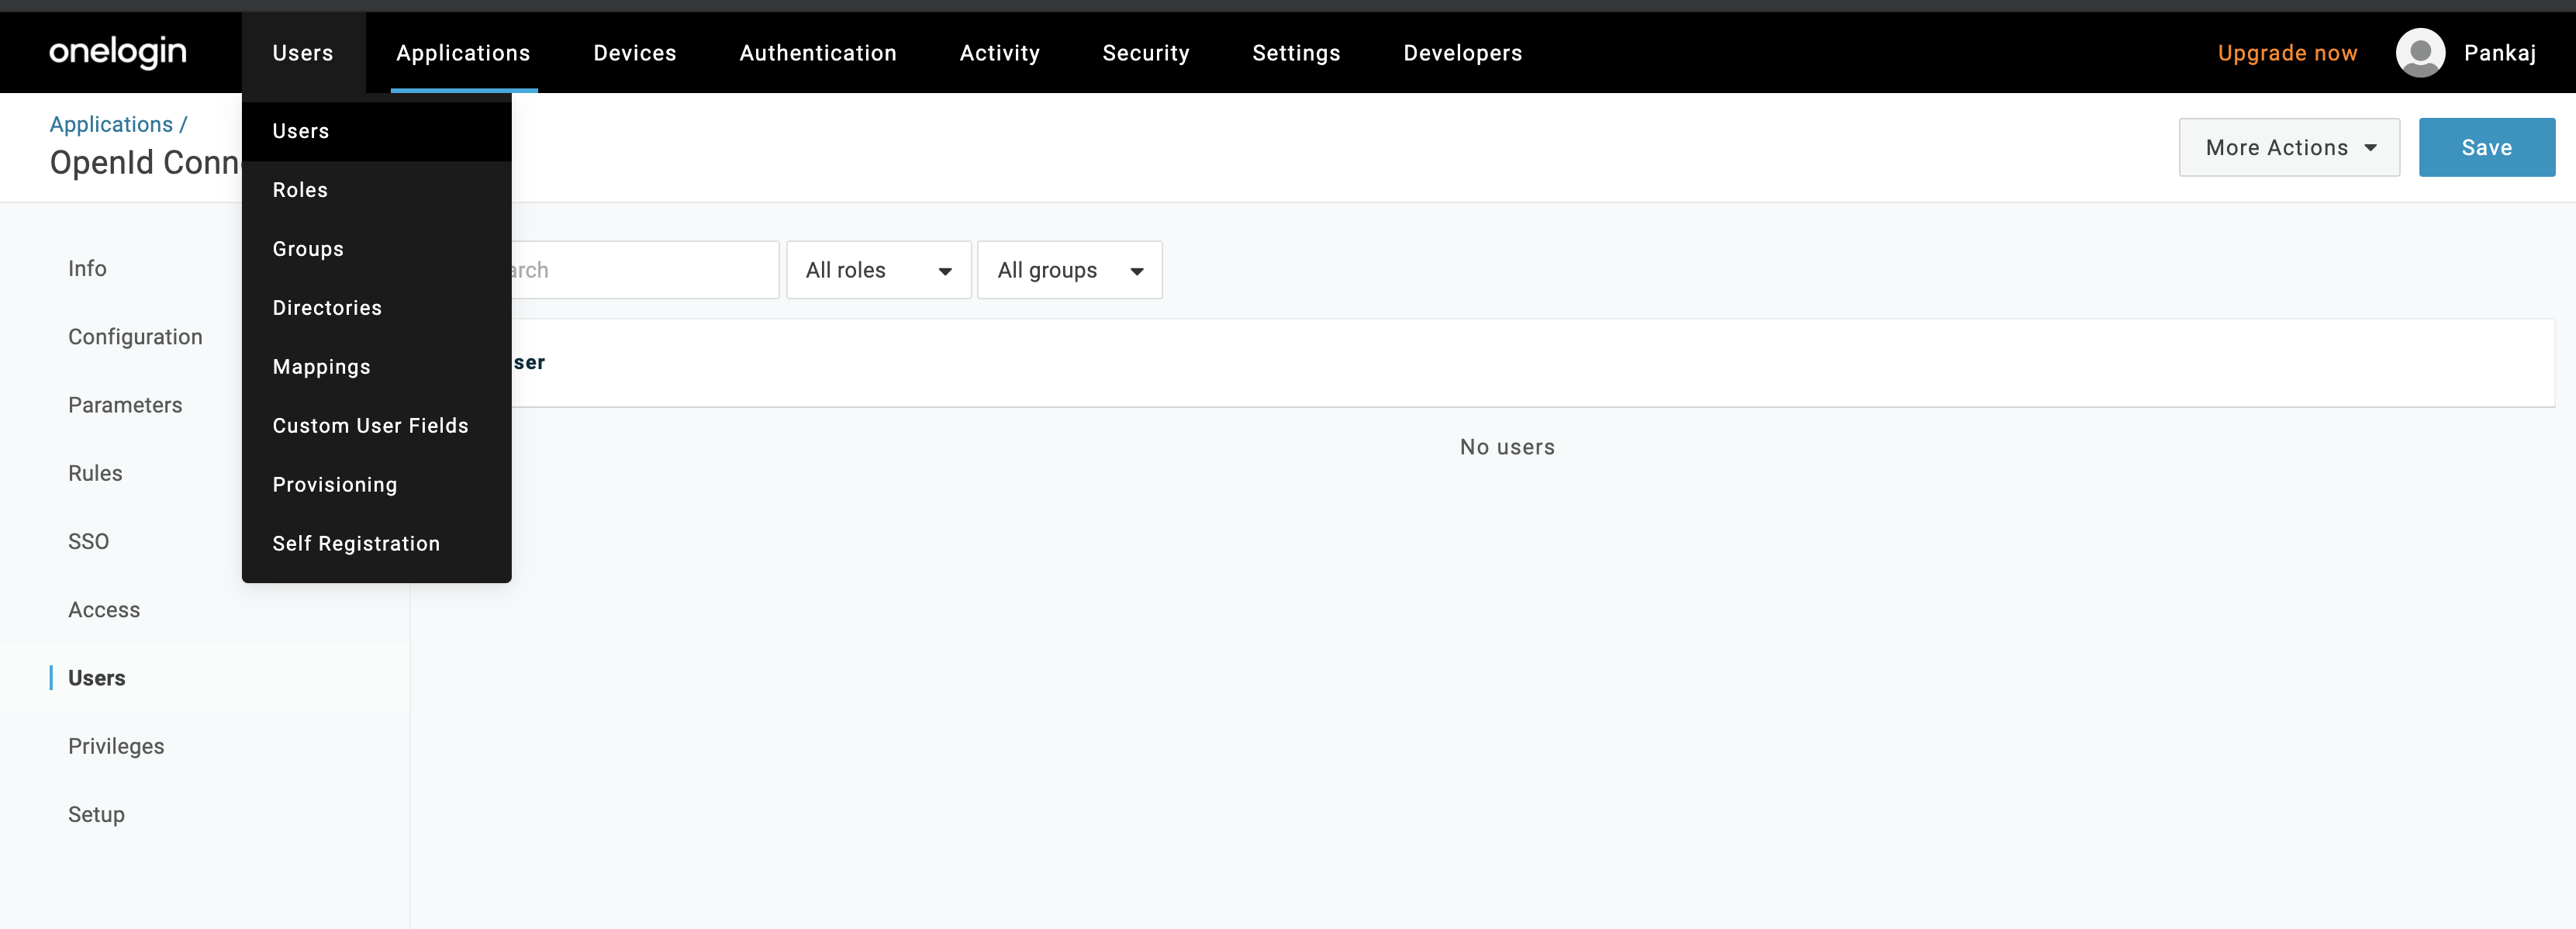
On the OneLogin menu, click Users and select the Groups option.
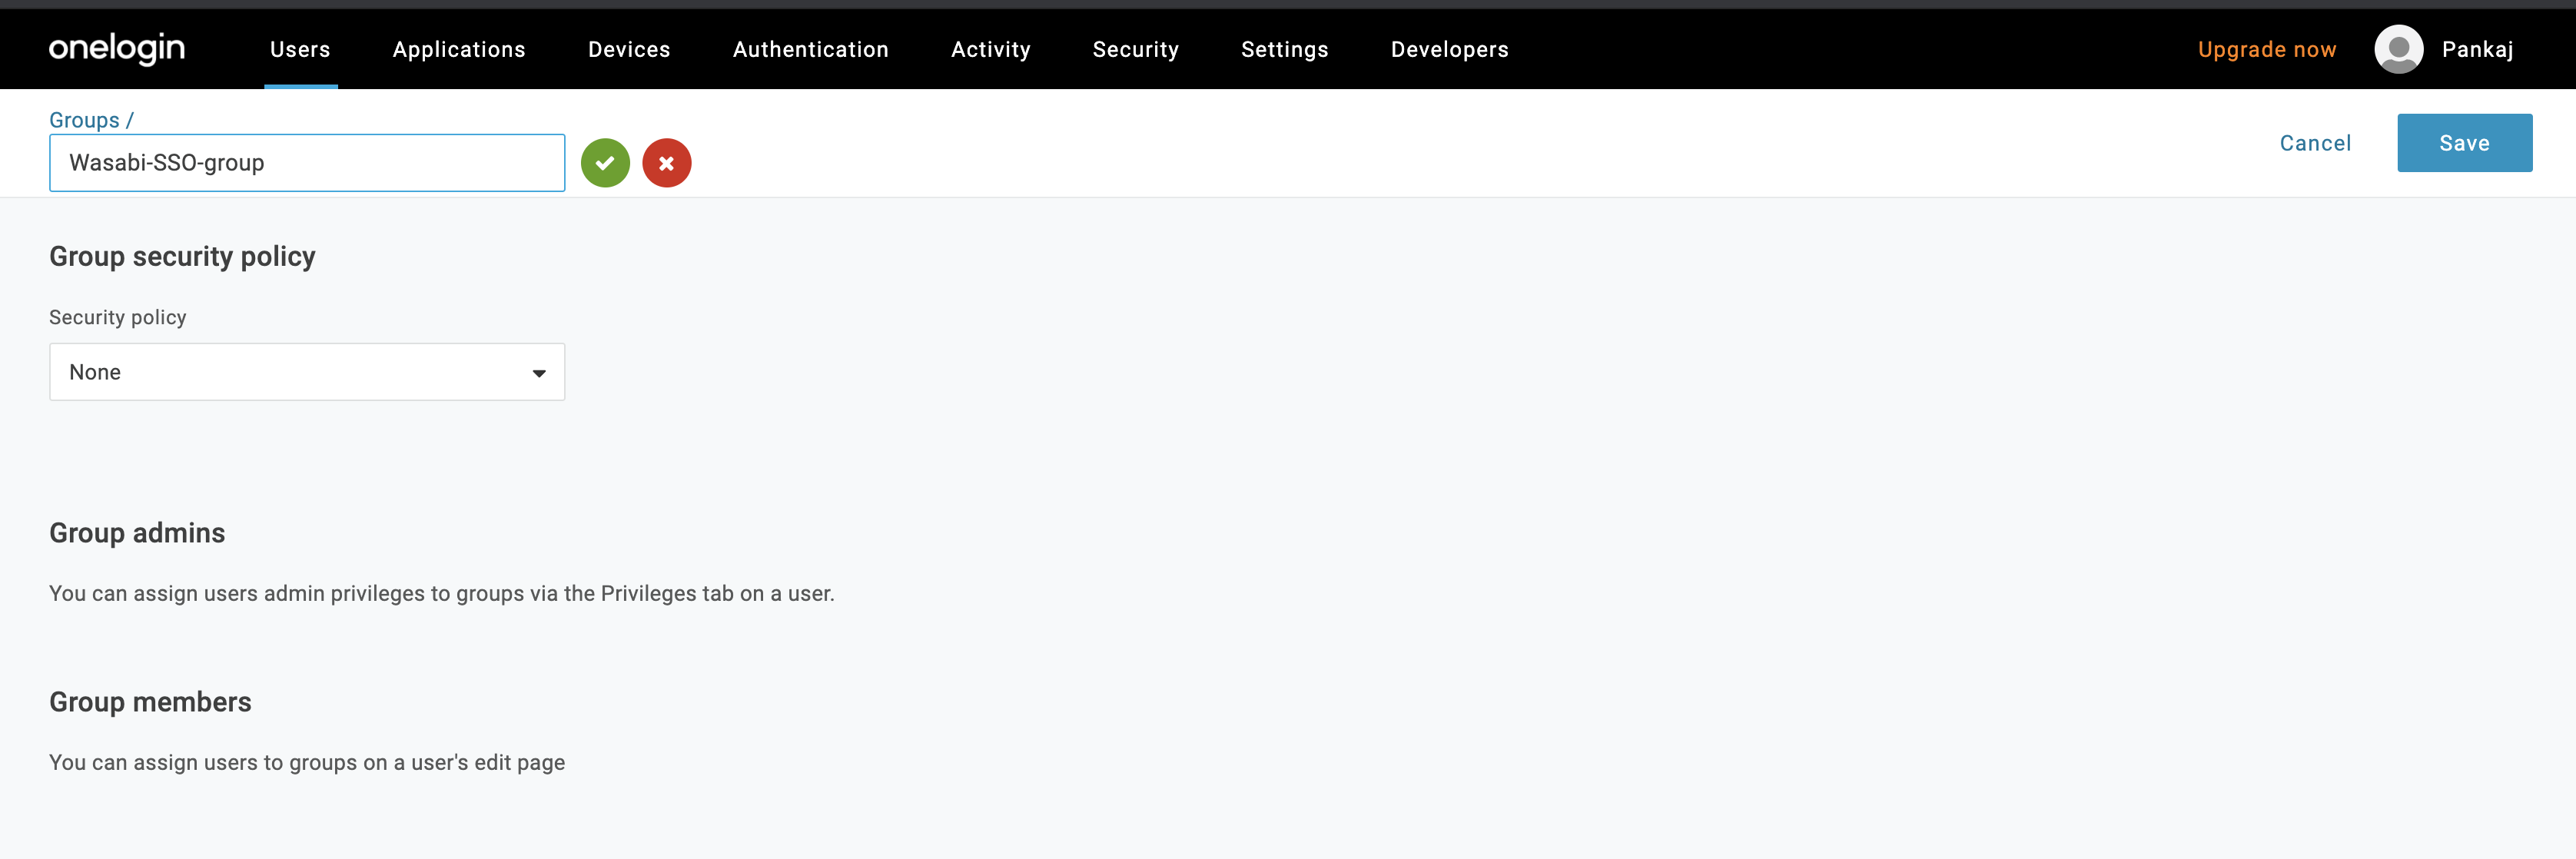
In the Groups box, enter a name, such as “Wasabi-SSO-group.” Click Save.
Select the Roles option and click New Role.

Enter the previously used role name, such as “role-for-one-login.”
In the Select Apps to Add section, check Wasabi. Click Save.

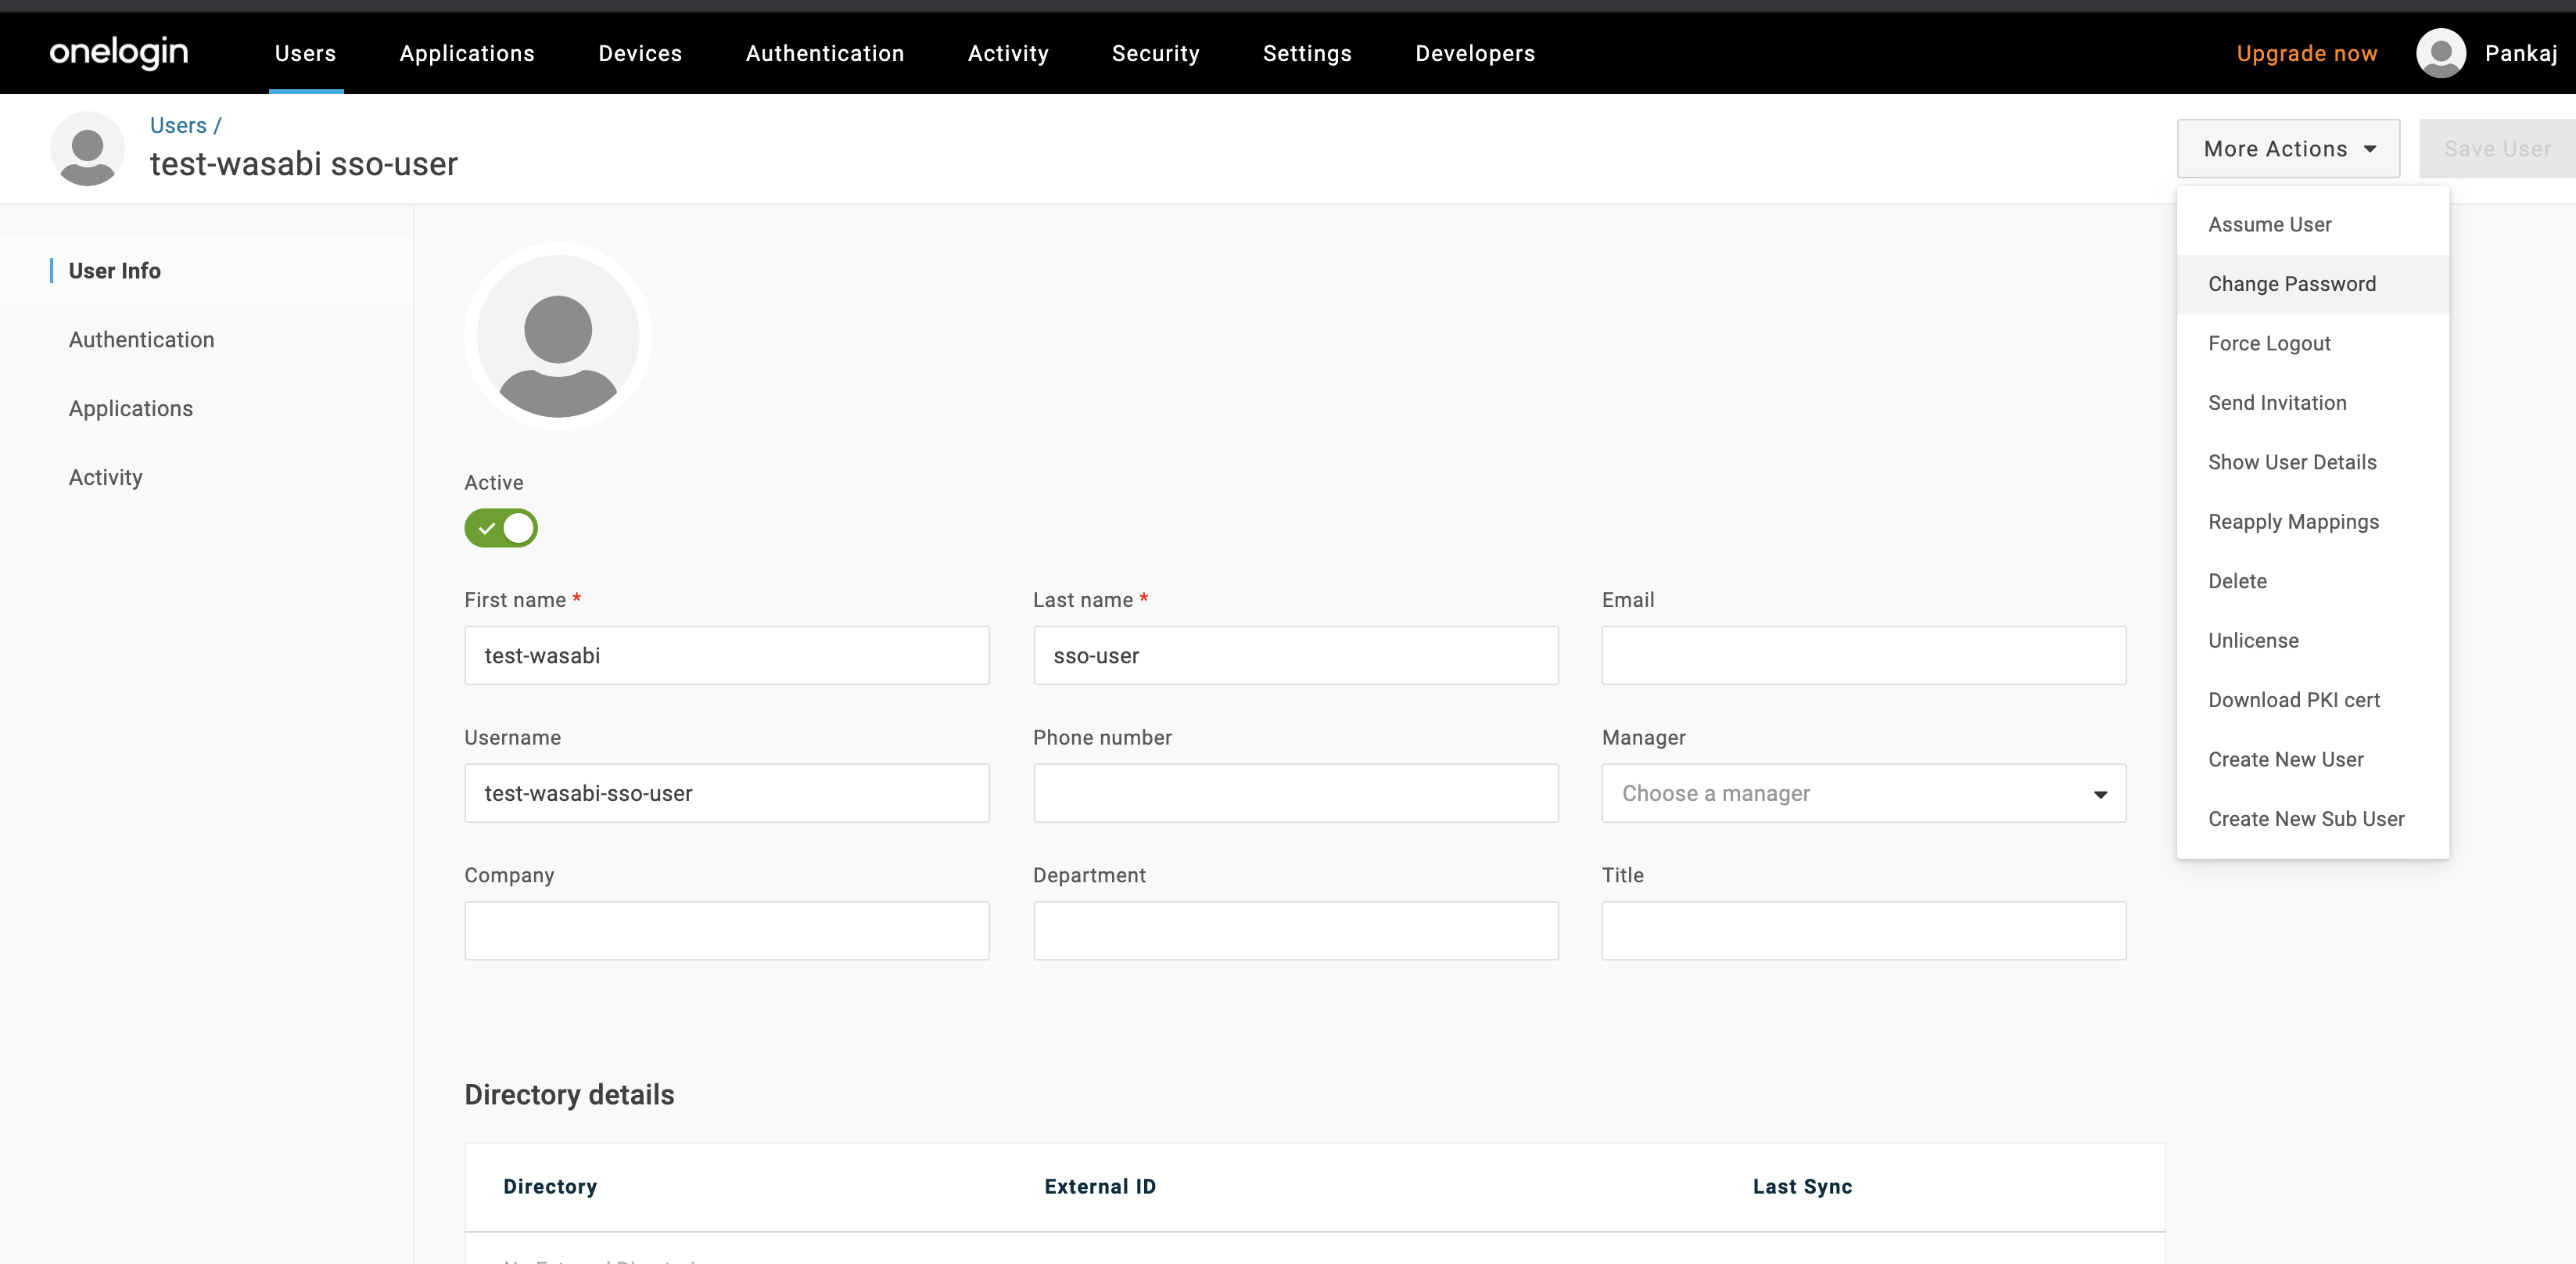
Select the Users option and click New User. The Users page is displayed.

Enter the new user’s information and set a password, then scroll down and add privileges based on your requirements for the OneLogin IdP.
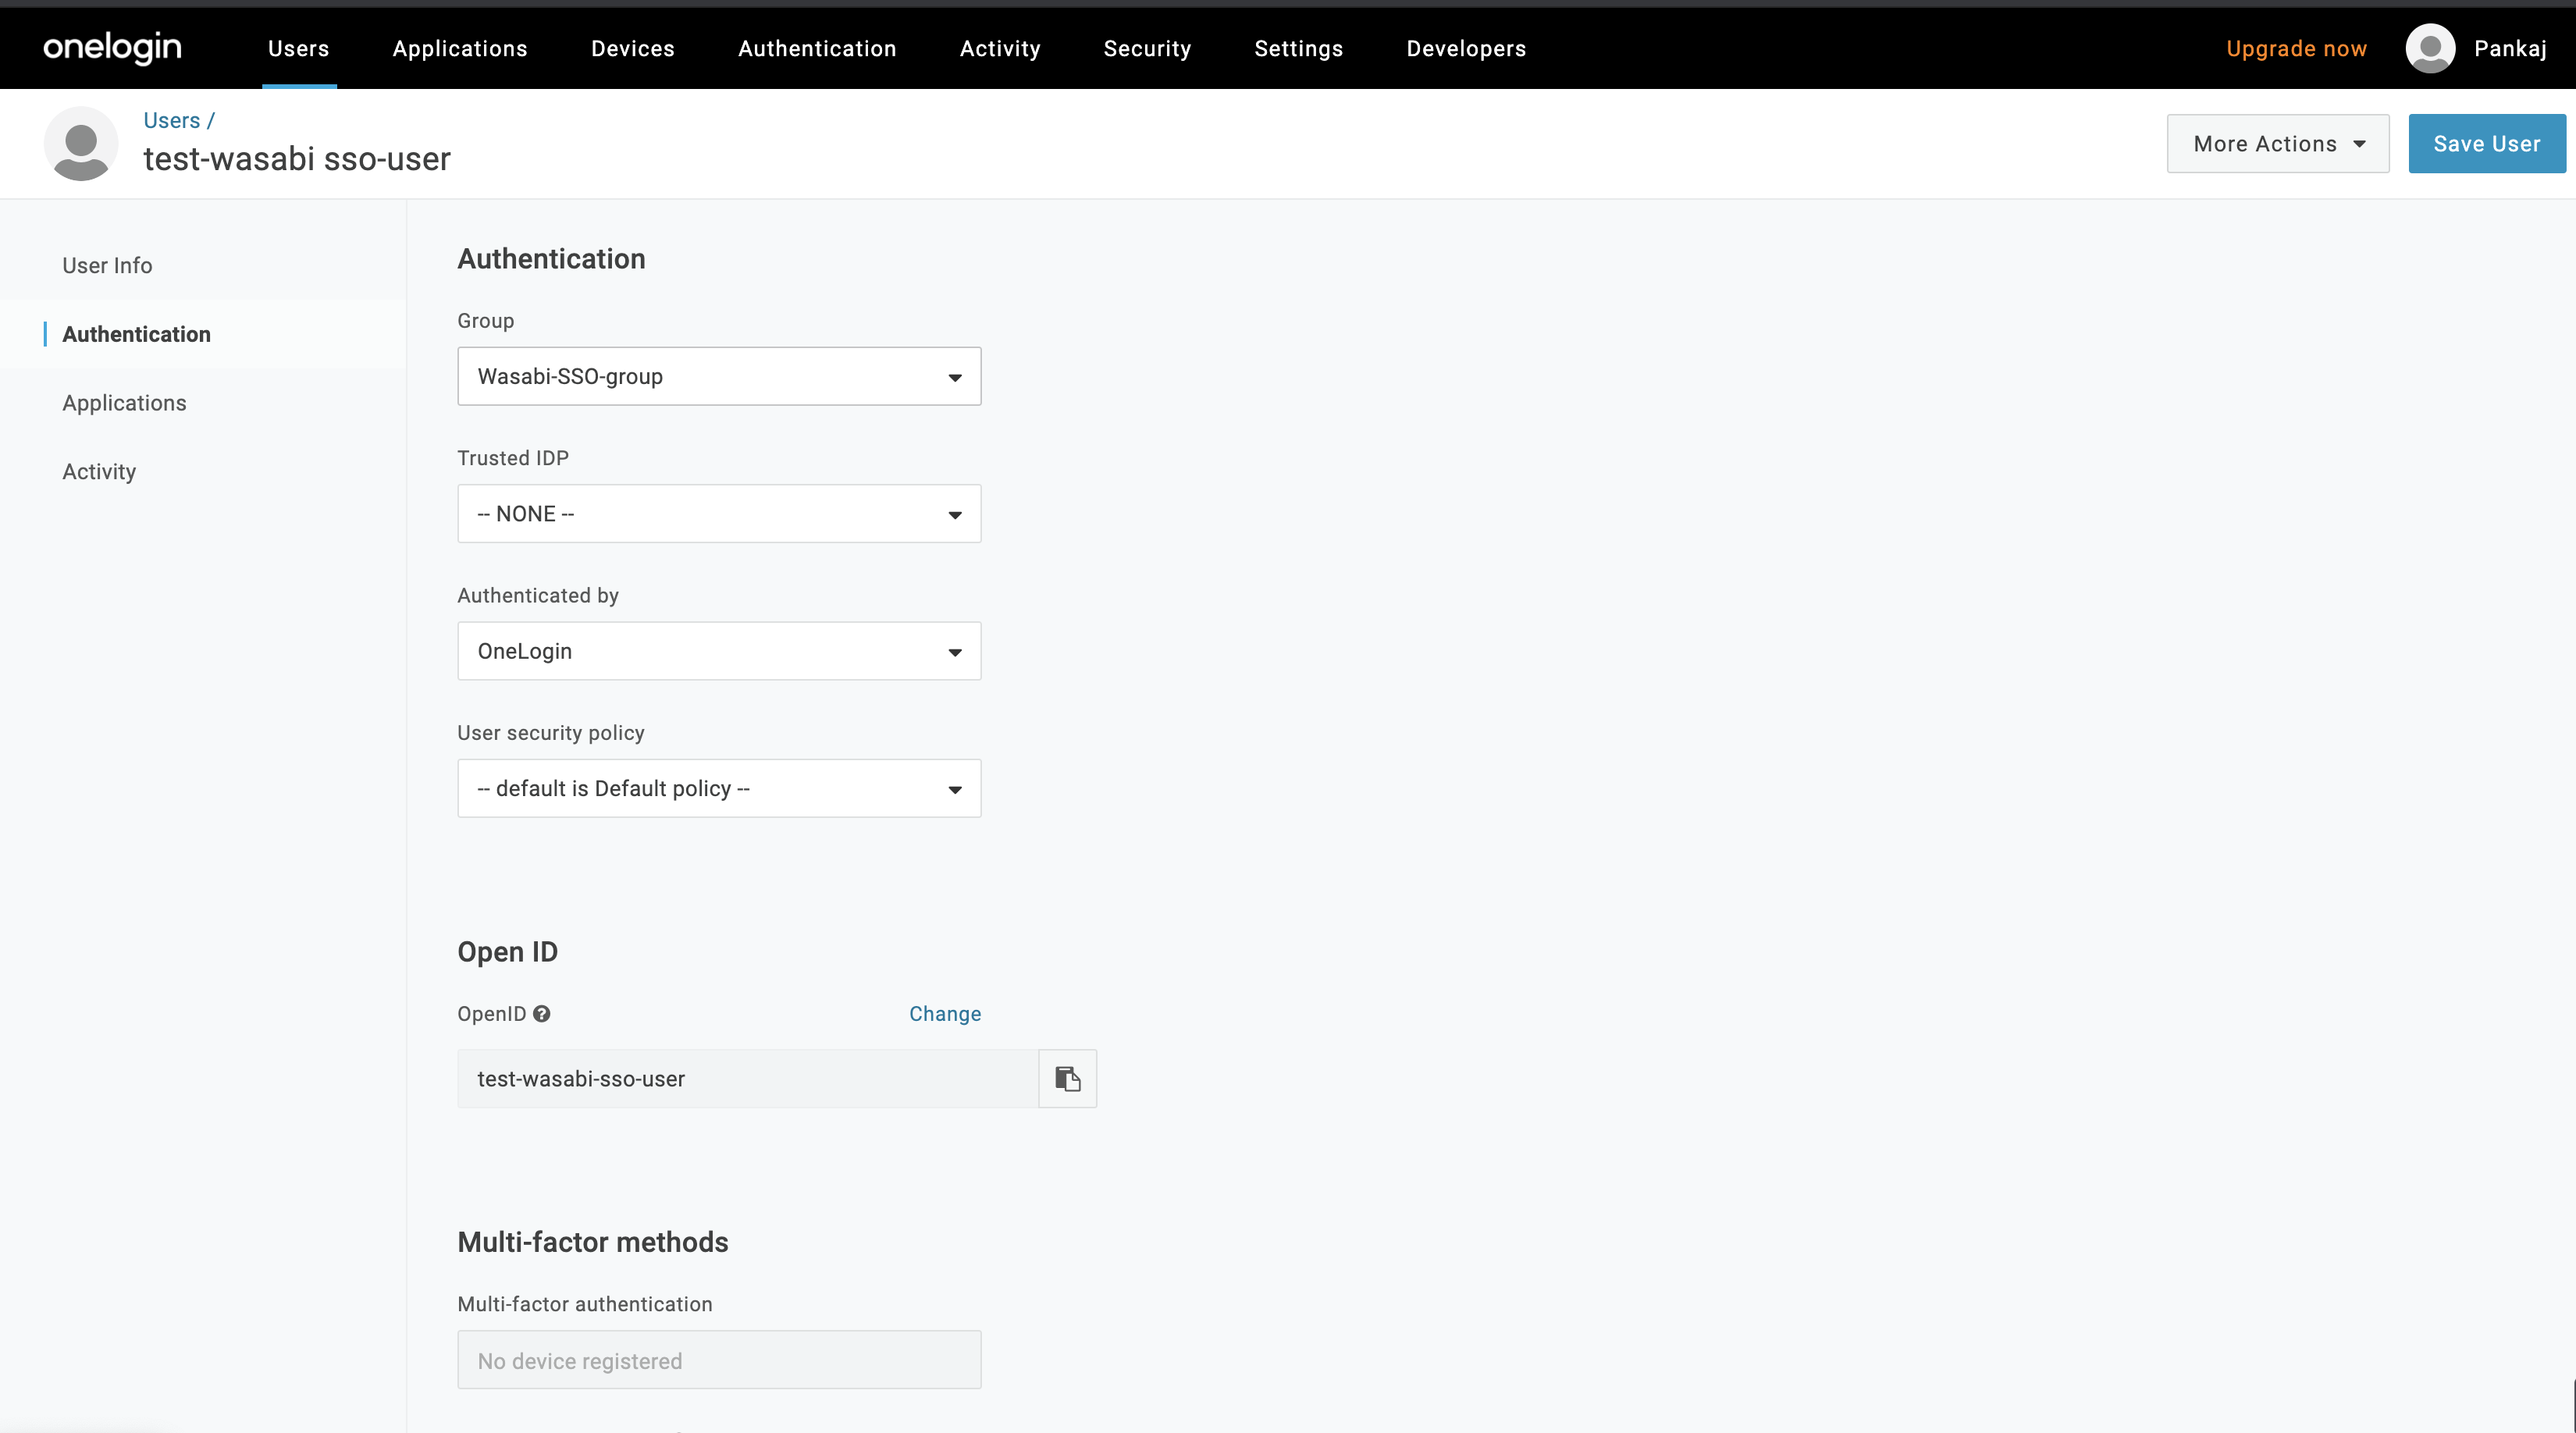
On the Authentication page in the Group box, select the previously created group for this user.
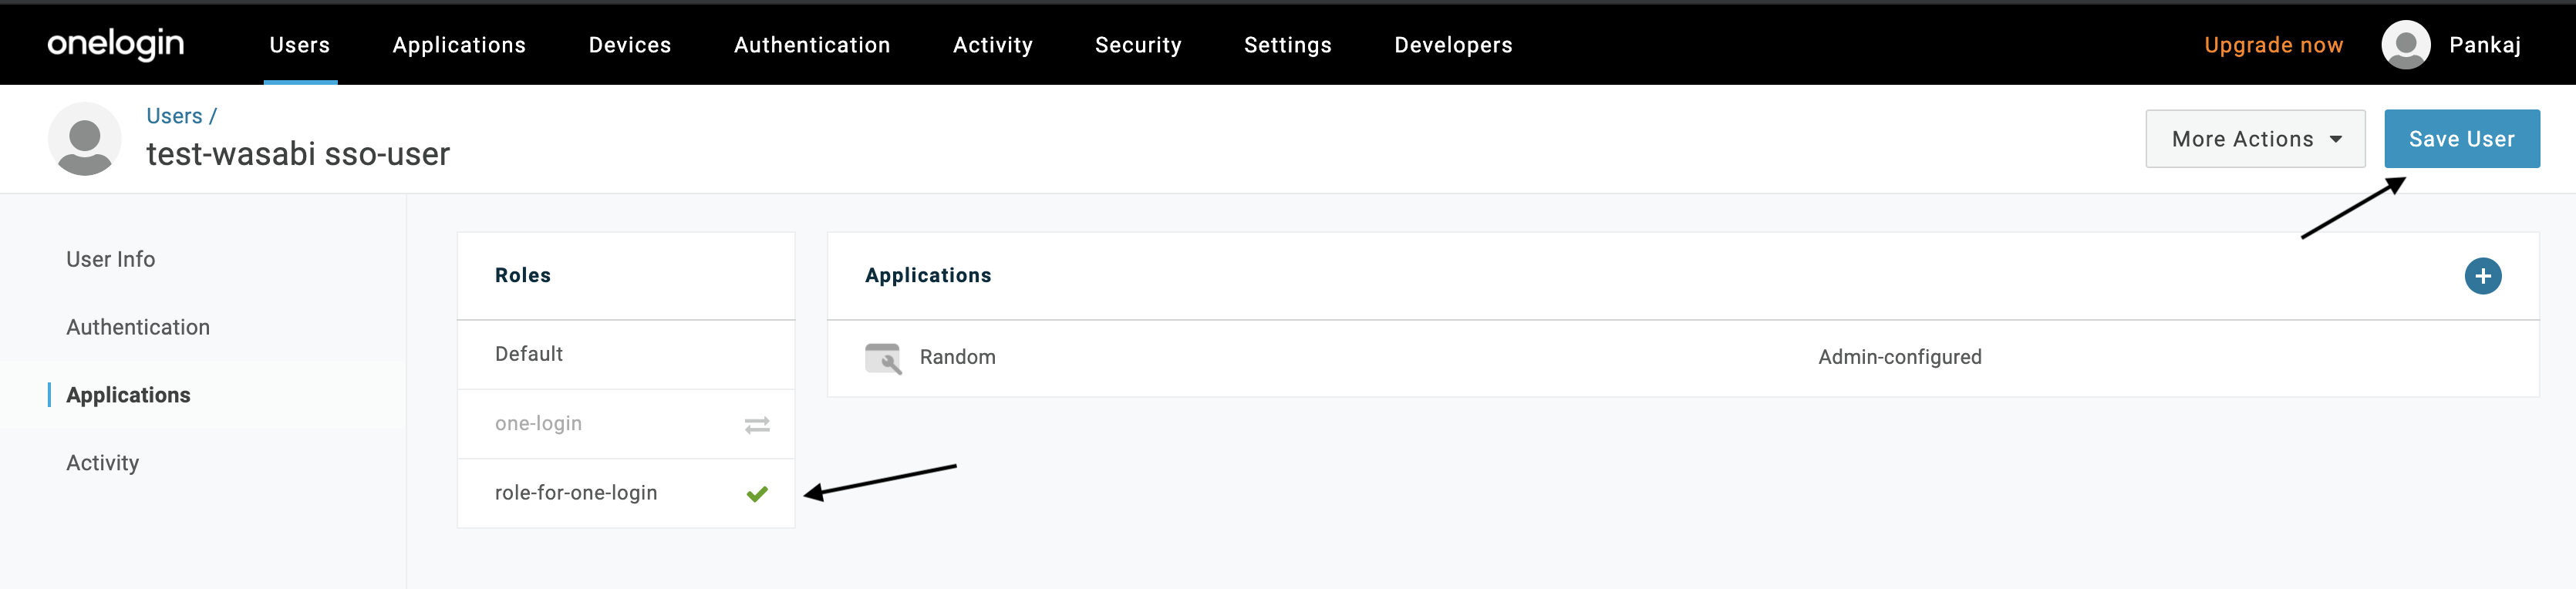
On the Applications page, check the role-for-one-login created earlier. Click Save User.
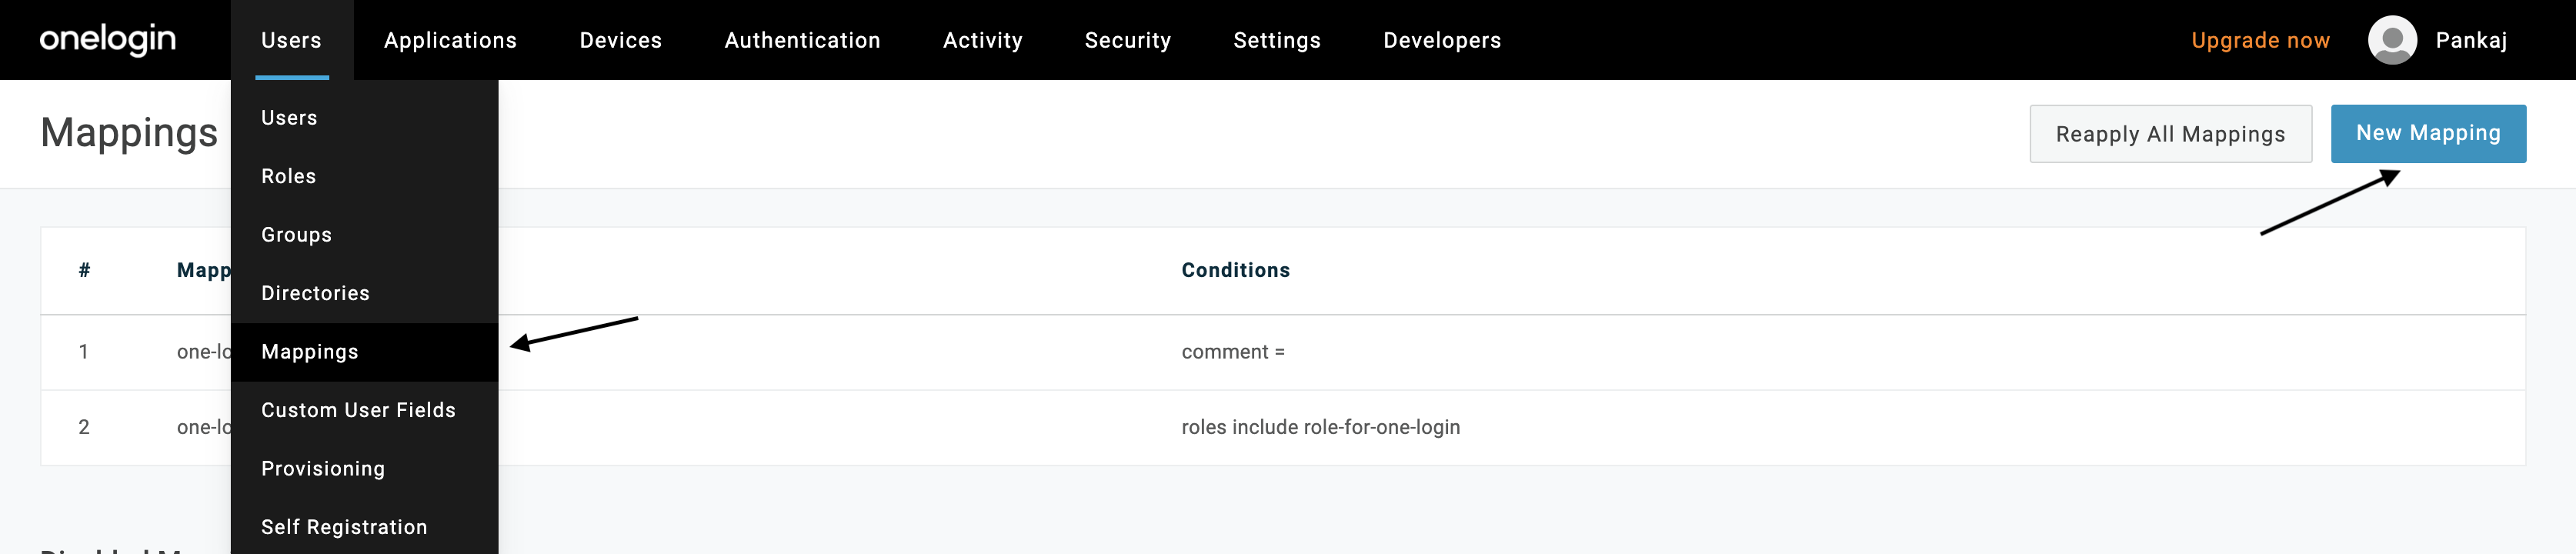
Select the Mappings option and click New Mapping.
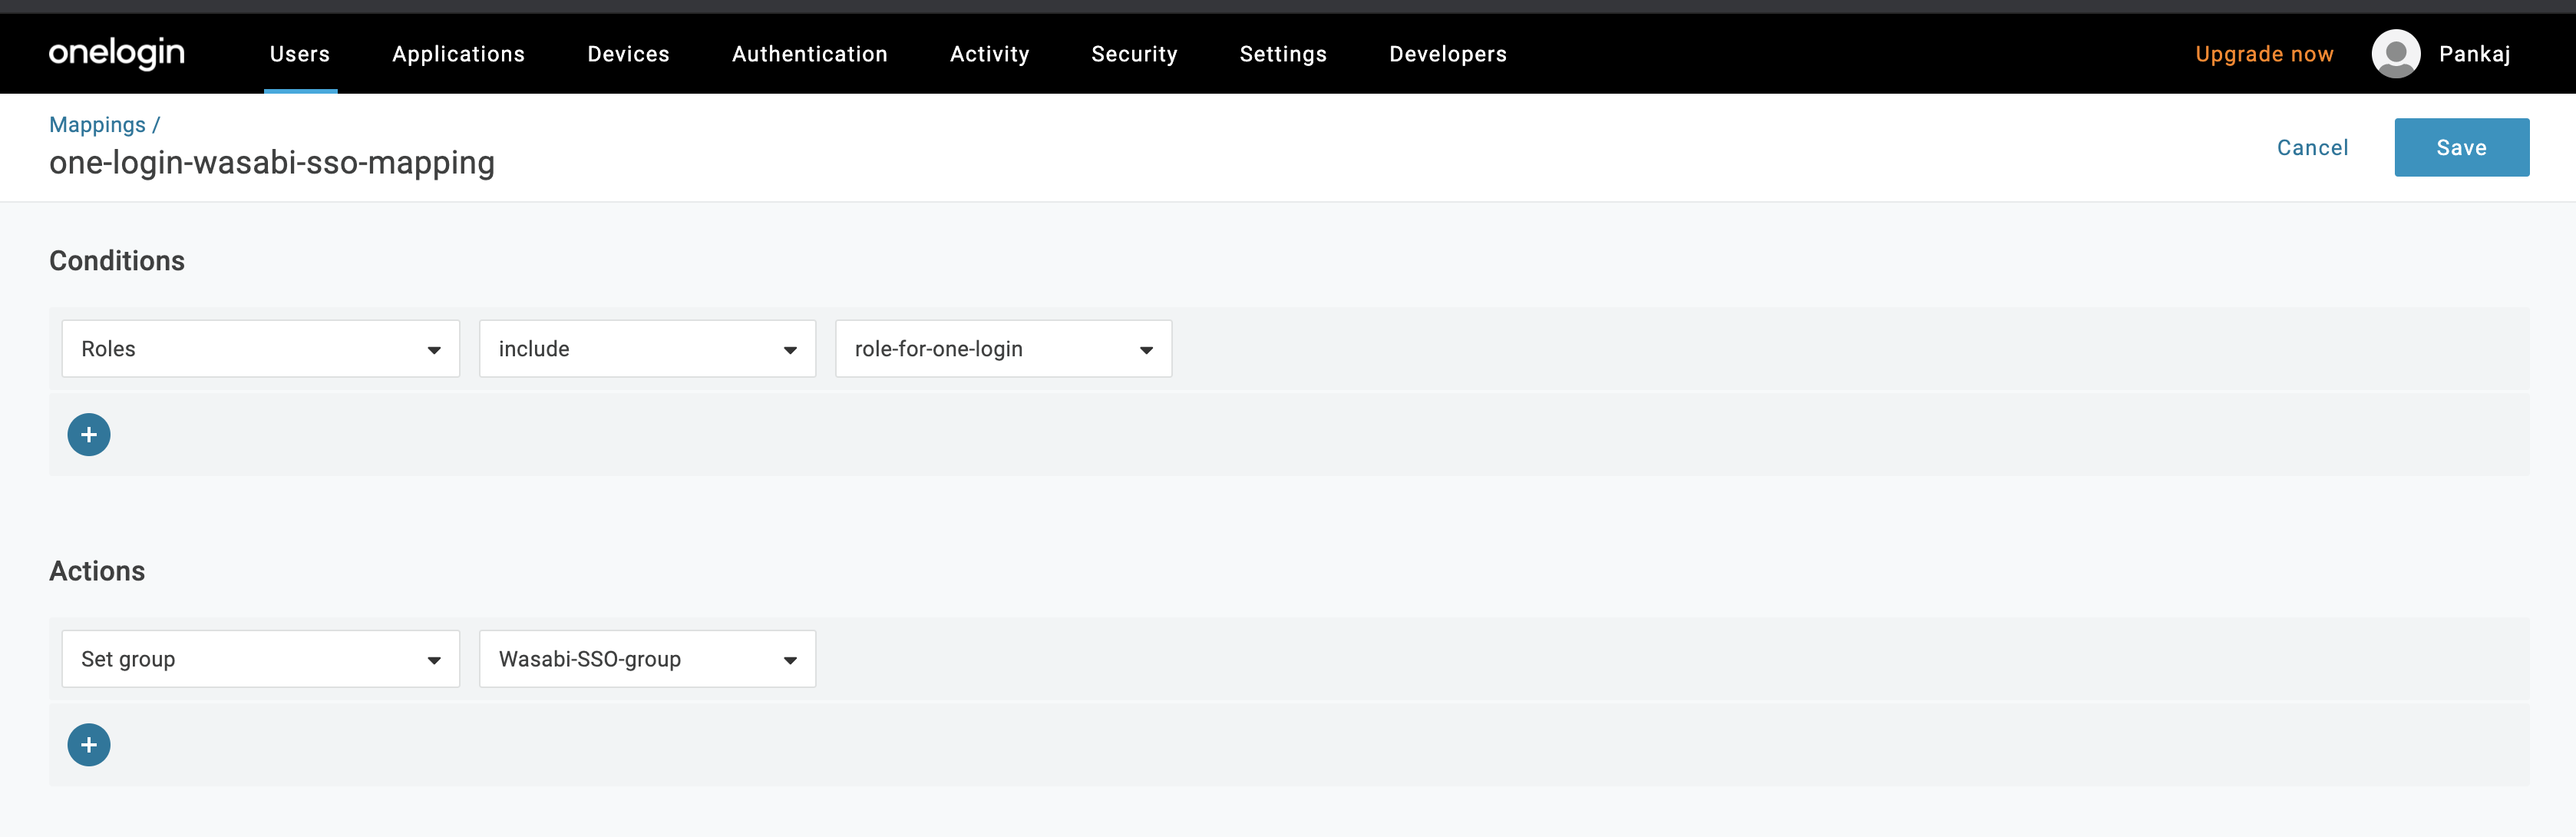
Enter a name for this mapping, such as “one-login-wasabi-sso-mapping,” and then set Conditions and Actions. Click Save.
Configuring OIDC Settings in Wasabi Console (SP / Client Side)
Sign in to the Wasabi Console (https://console.wasabisys.com/login) using a Root account email.
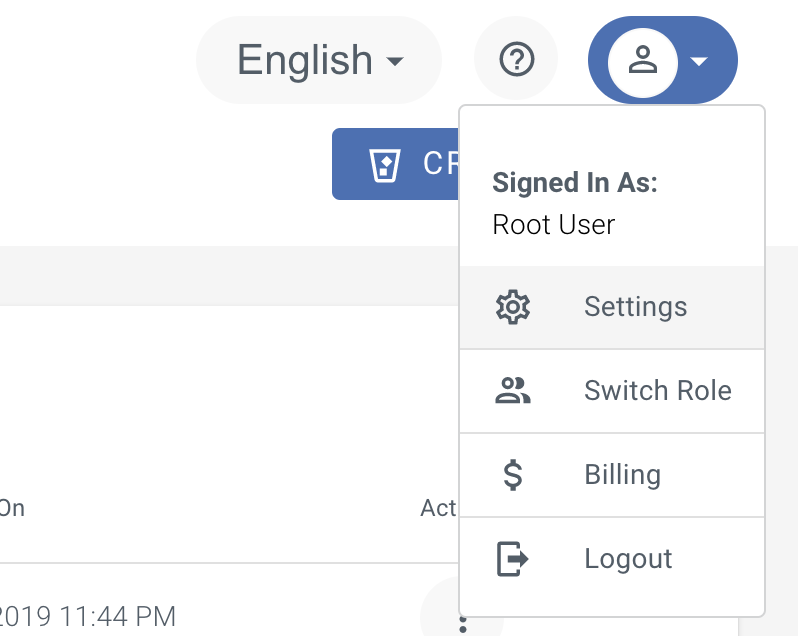
Navigate to your user profile and select Settings.
Scroll down to SSO (Single Sign-On) and click Configure SSO.

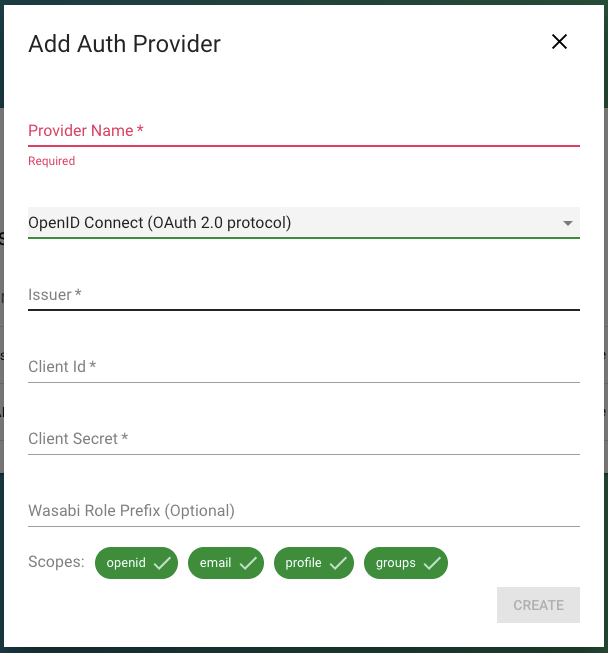
Click the "+" sign to initiate the provider configuration. The Add Auth Provider page is displayed.
Enter a provider name and then select OpenID Connect (OAuth 2.0 protocol) from the drop-down.
Enter the data from the previous section, Step 11, for Issuer, Client ID, and Client Secret.
In the Wasabi Role Prefix box, enter "role-for-one-login."
Click Create.
When you save the configuration, it will be assigned a new ProviderId, which is a random string. You should copy and store the new ProviderId for later reuse.
Click Back to Console.

From the Wasabi Console menu, select Roles. Roles created will be used for SSO user permissions/policies.
Select Create Role and enter the policy as shown below. The example in this step uses the WasabiAdministratorAccess policy. You can attach any Wasabi-managed policy/user-managed policy based on your requirements.
The example uses the same role name, "role-for-one-login," for both the IdP mapping and this role.
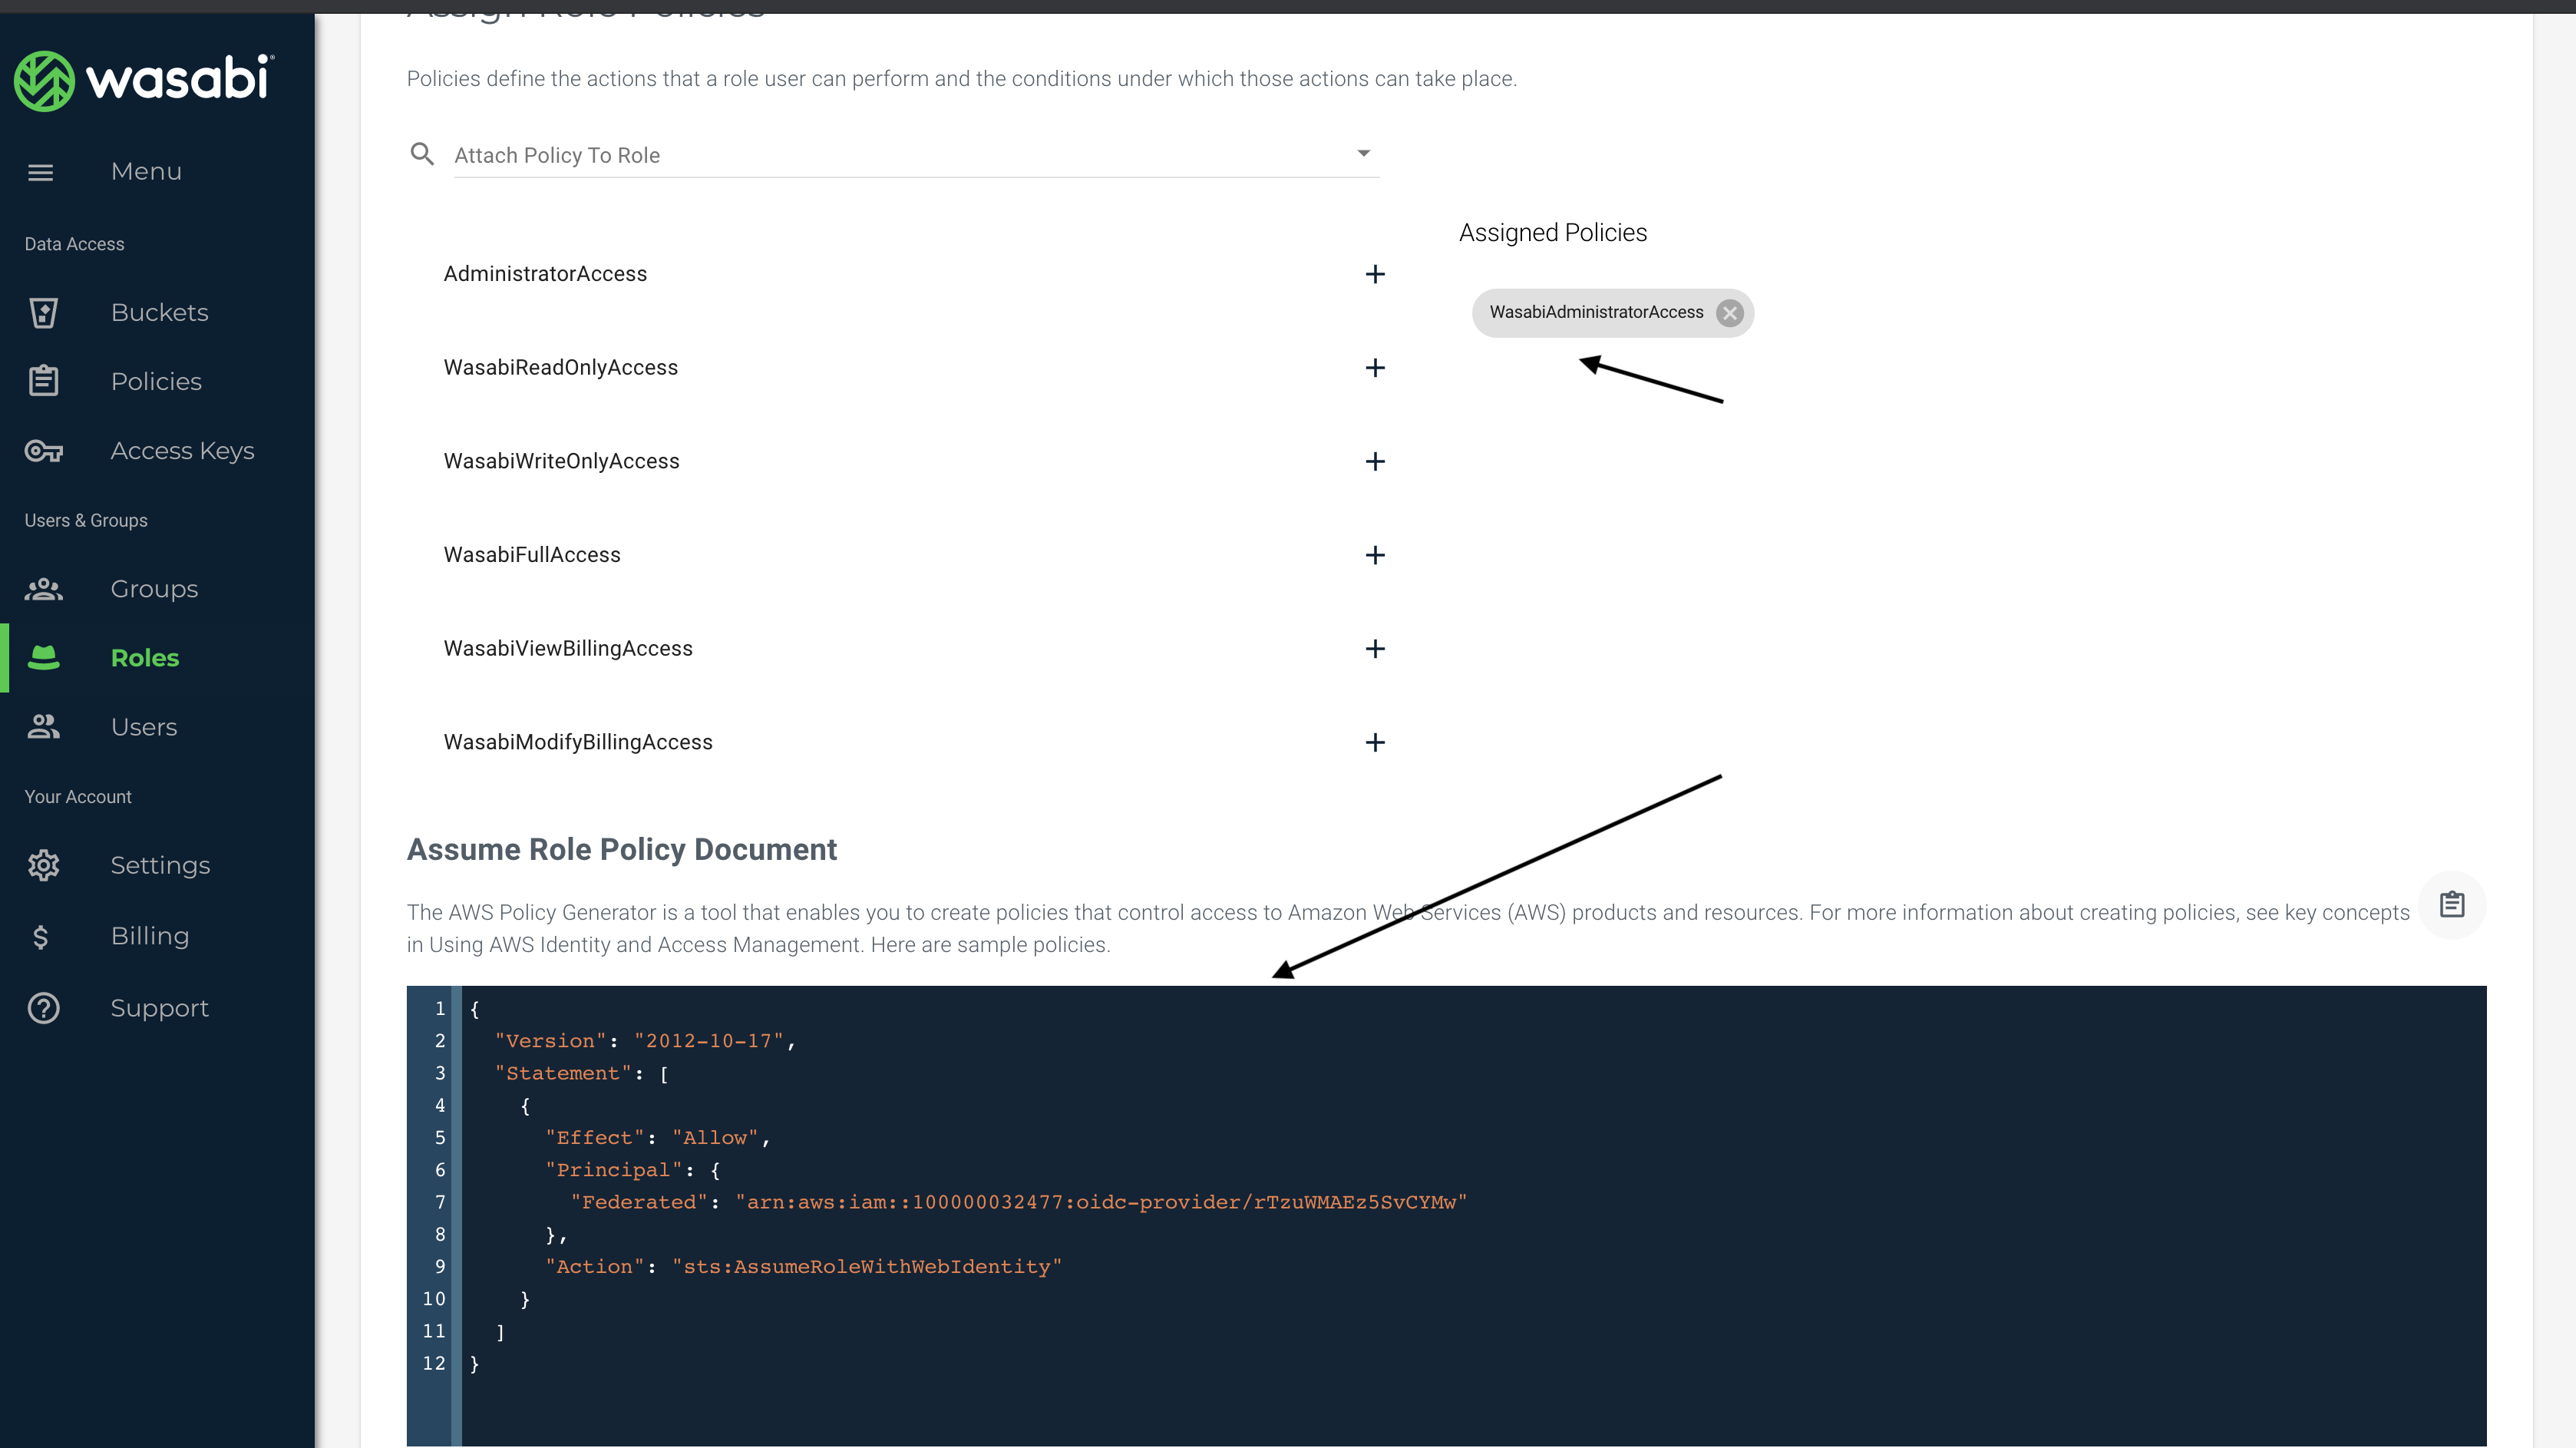
The actual policy is:
{
                    "Version": "2012-10-17",
                    "Statement": [
                    {
                    "Effect": "Allow",
                    "Principal": {
                    "Federated": "arn:aws:iam::100000032477:oidc-provider/rTzuWMAEx5SvCYMw"
                    },
                    "Action": "sts:AssumeRoleWithWebIdentity"
                    }
                    ]
                    }
Be sure to use your own Wasabi Console Account ID, where the example above specifies 100000032477, and replace “rTzuWMAEx5SvCYMw” with your ProviderId, from the section Creating an OIDC App for the Wasabi Catalog.
The role name configured in OneLogin must match the role name in the Wasabi Console.
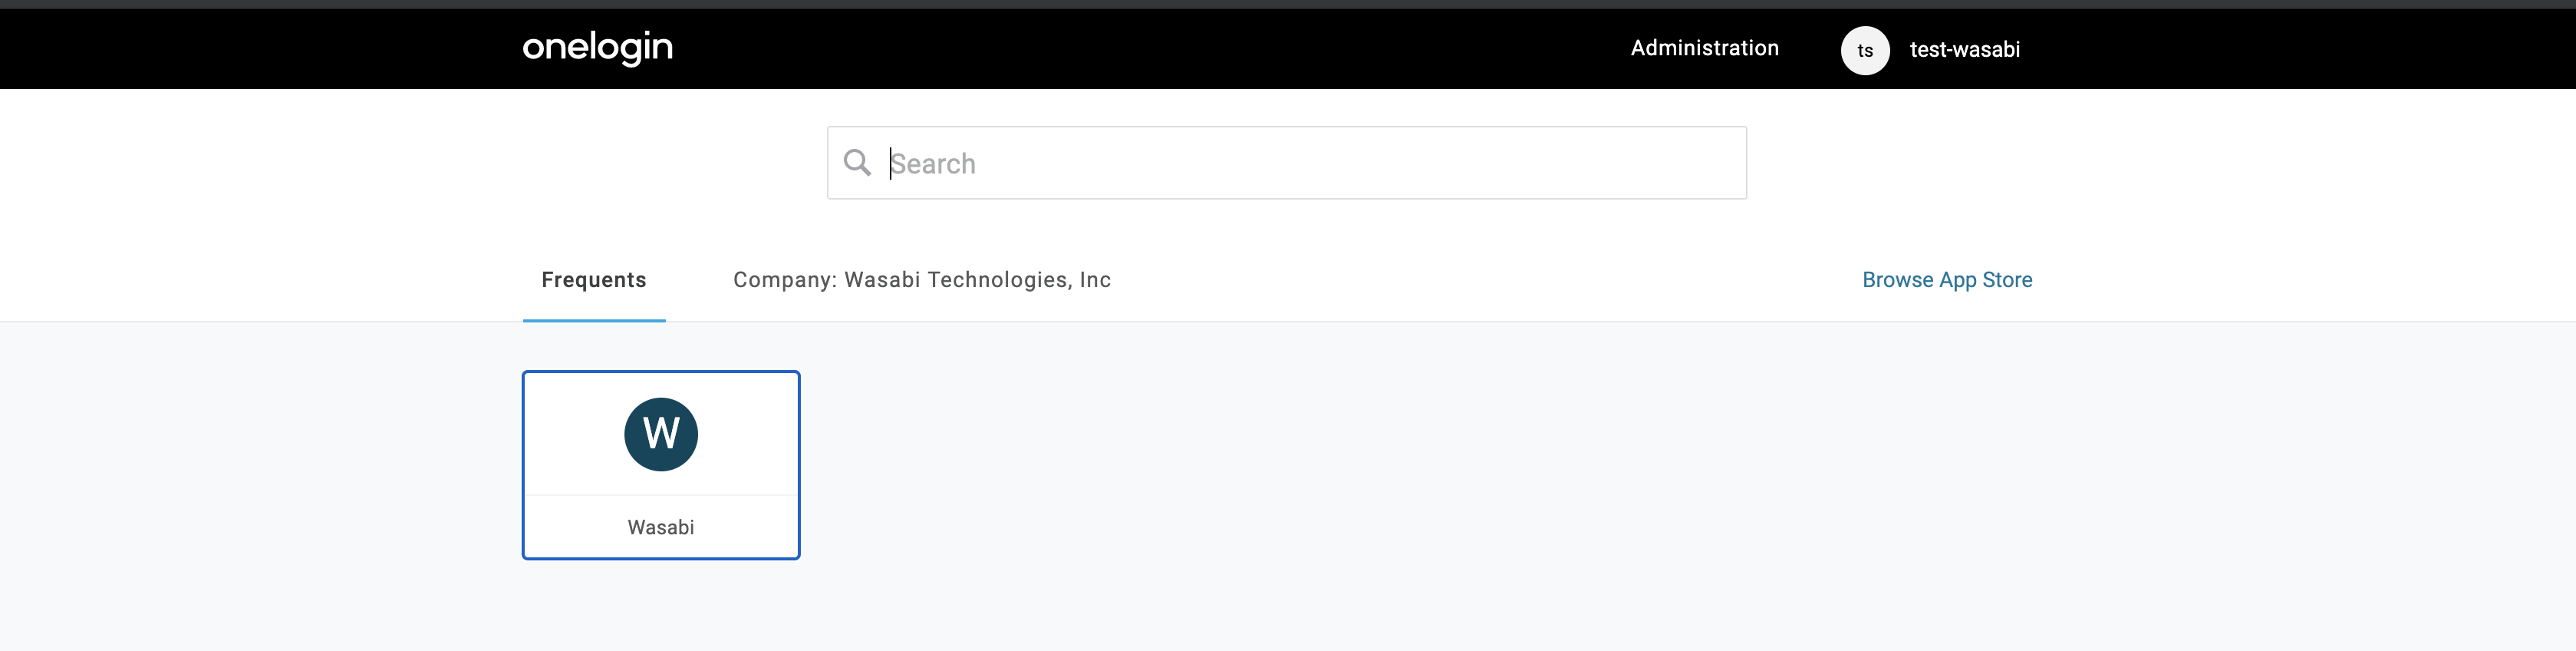
The Wasabi Console is now configured. You can log in with your OneLogin IdP credentials, view the Wasabi application, and then SSO into the Wasabi Console.
Testing the Integration
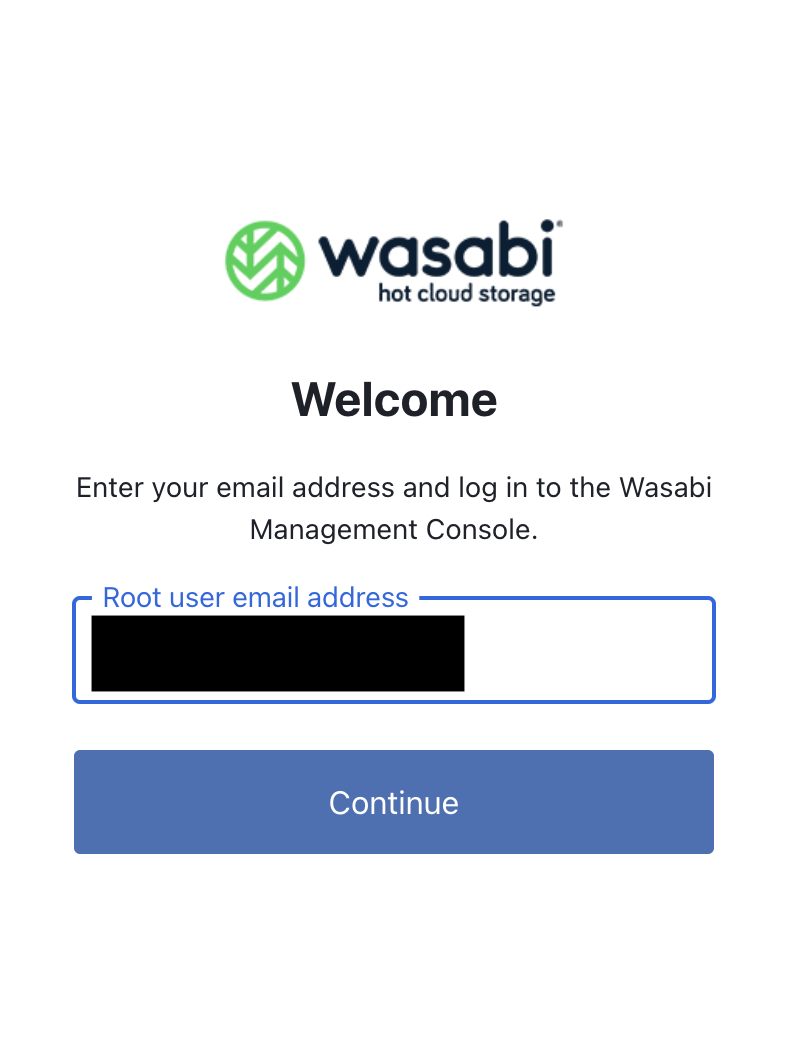
Sign in to the Wasabi Console (https://console.wasabisys.com) to test the SSO configuration.
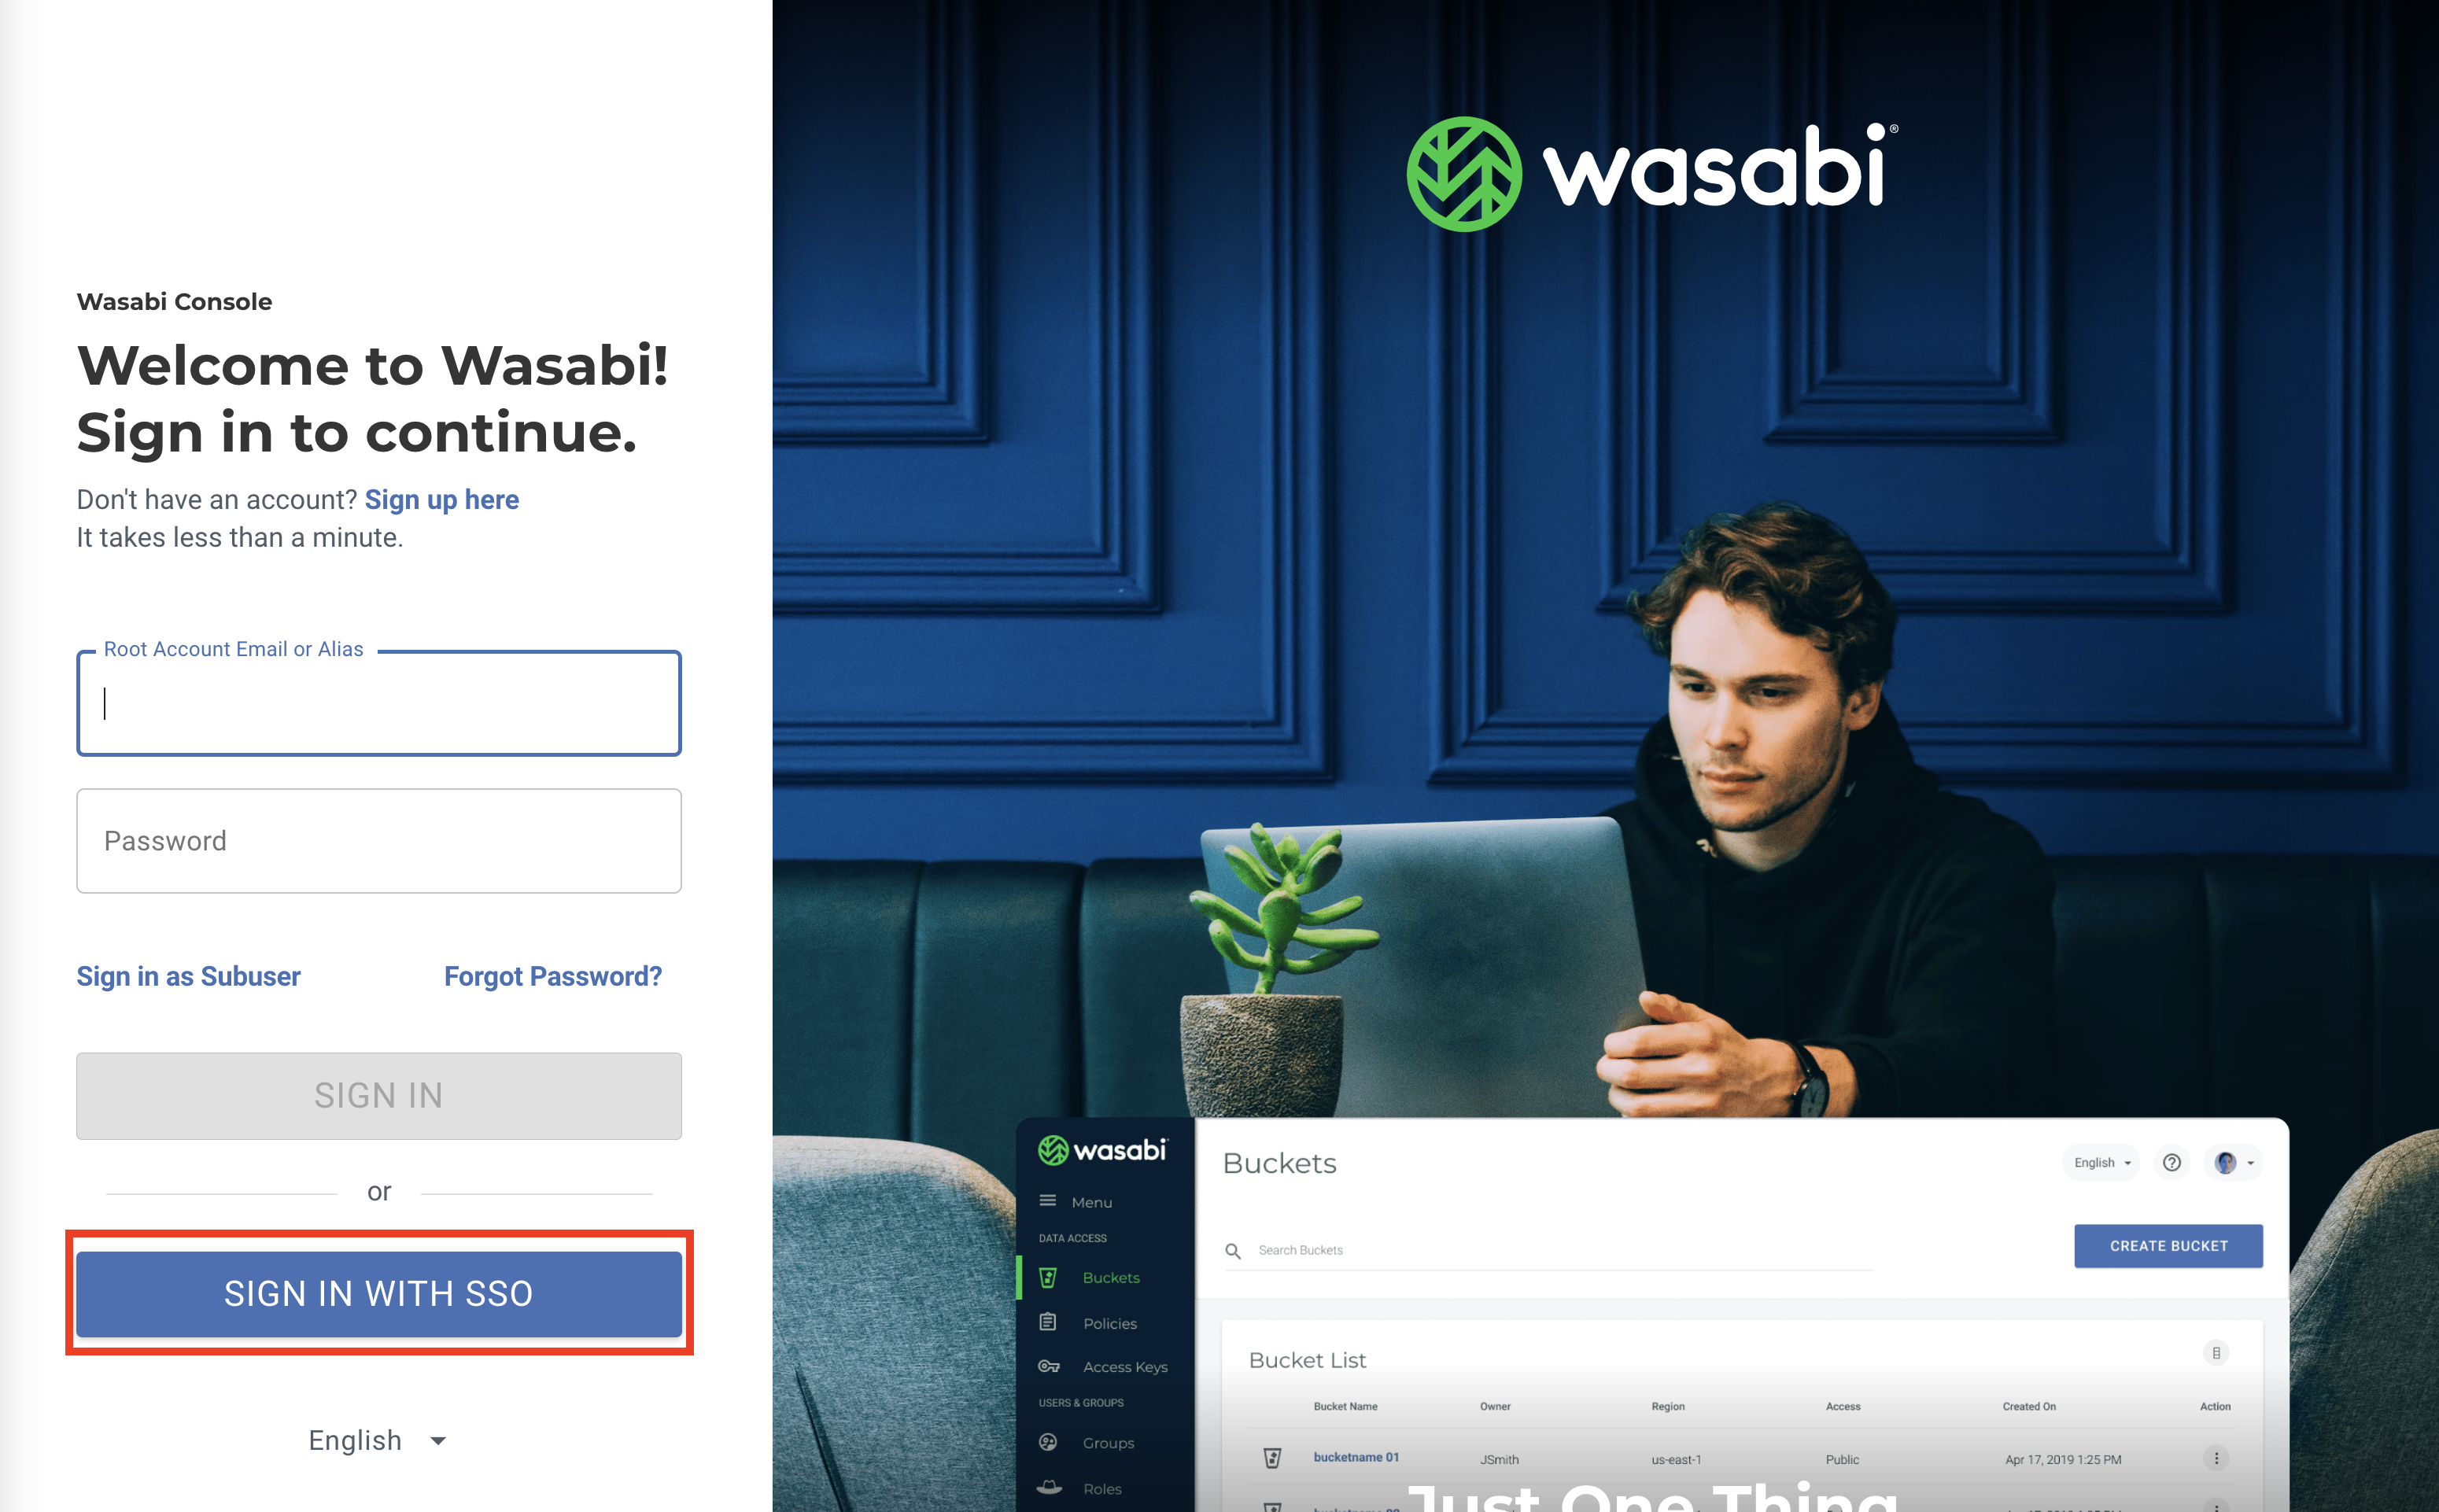
When prompted, enter your Wasabi Root user email address. Click Continue.
You will be redirected to your IdP’s OneLogin login page, where you will enter your IdP username/password.