Wasabi cloud storage has been validated with Storware Backup and Recovery. Storware Backup and Recovery is an enterprise-ready, agentless backup and snapshot-management solution for virtual environments, cloud (Microsoft 365), and macOS and Windows-based desktops and laptops. It allows you to reliably improve and automate backup performance, automate recovery tests, and significantly save resources, time, and money. To learn more about the Storware + Wasabi solution, please refer to our joint solution brief.
This article provides steps to use Storware with Wasabi's cloud storage. Please refer to Storware documentation for more information on configuring Storware Backup and Recovery.
1. Pre-requisites
Storware version 5.0
Active Wasabi account with access to the Wasabi console
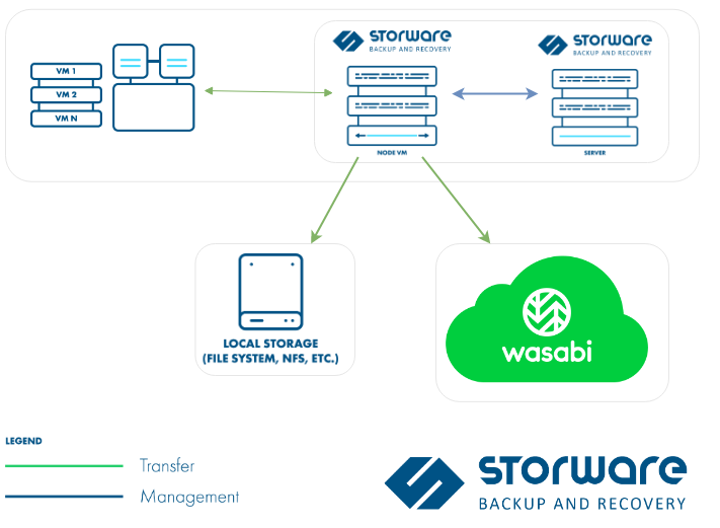
2. Reference Architecture Diagram
Below is a high-level architecture diagram depicting the solution.
3. Wasabi Configuration
3.1 Log in to the Wasabi console. Click Create Bucket to create a new standard bucket. Refer to Creating a Wasabi bucket for information on creating a bucket.
3.4 Create access keys by referring to create a sub-user with Console access and Access and Secret Keys. The user will need access to Programmatic as well as to the console.
4. Storware Backup and Recovery configuration
Follow the steps below to configure the Storware Backup and Recovery WebUI.
4.1 Log in to the Storware Backup and Recovery WebUI.
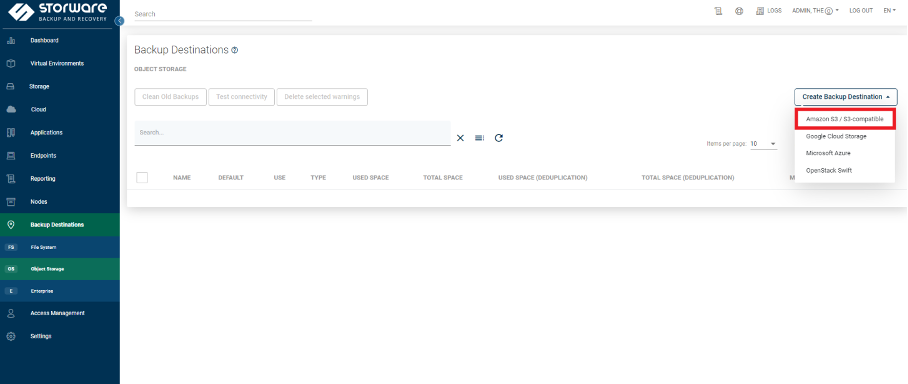
4.2 Navigate to Backup destination, click Object Storage. Click Create Backup Destination and select Amazon S3 / S3-compatible.
4.3 In the Create Backup Destination window, input the name for your backup destination and choose the node configurations as needed.

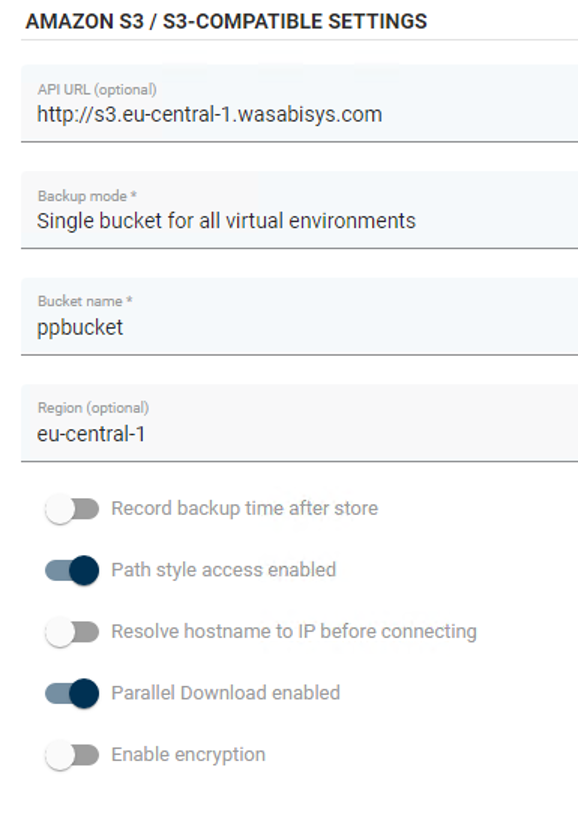
4.4 In AMAZON S3 / S3-COMPATIBLE SETTINGS, provide the information about your bucket
API url- This is the URL for the Wasabi region. Please refer to service URLs for various Wasabi regions
Backup mode
Bucket name- this is the bucket that was created in section 3 above
Region- Region for Wasabi bucket. Please refer to service URLs for various Wasabi regions
Make sure the flags Path style access enabled and Parallel Download enabled are enabled.
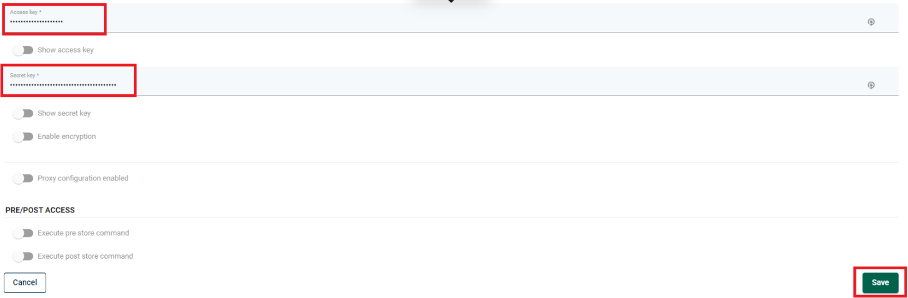
4.4 Input the Access key and Secret key. Click Save.
4.5 Test the connectivity by clicking Test connectivity.
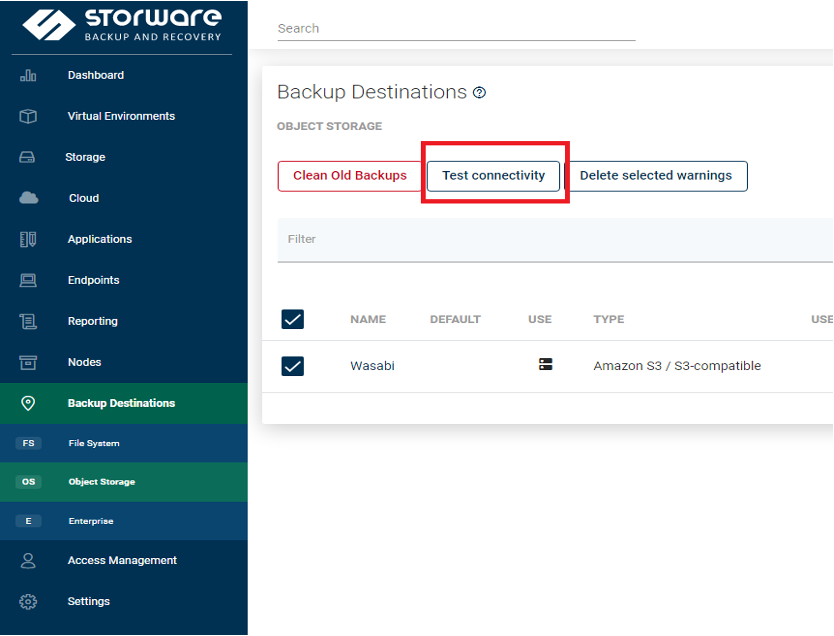
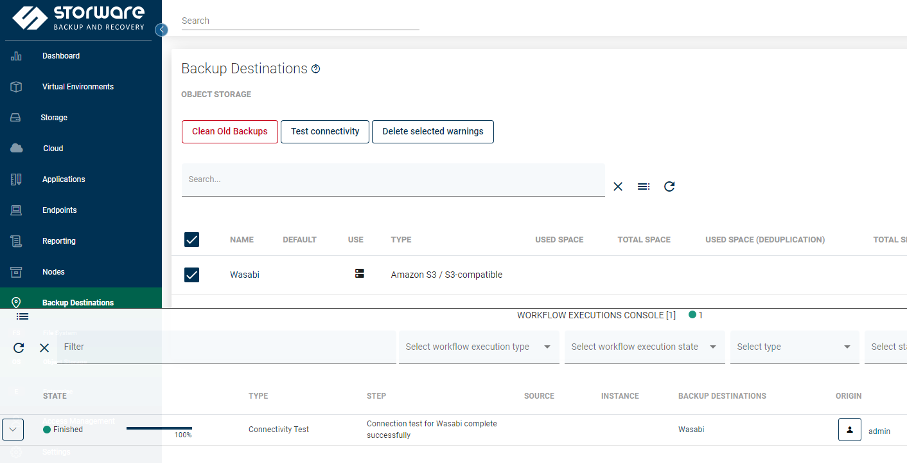
4.6 The results can be viewed in the gas console.
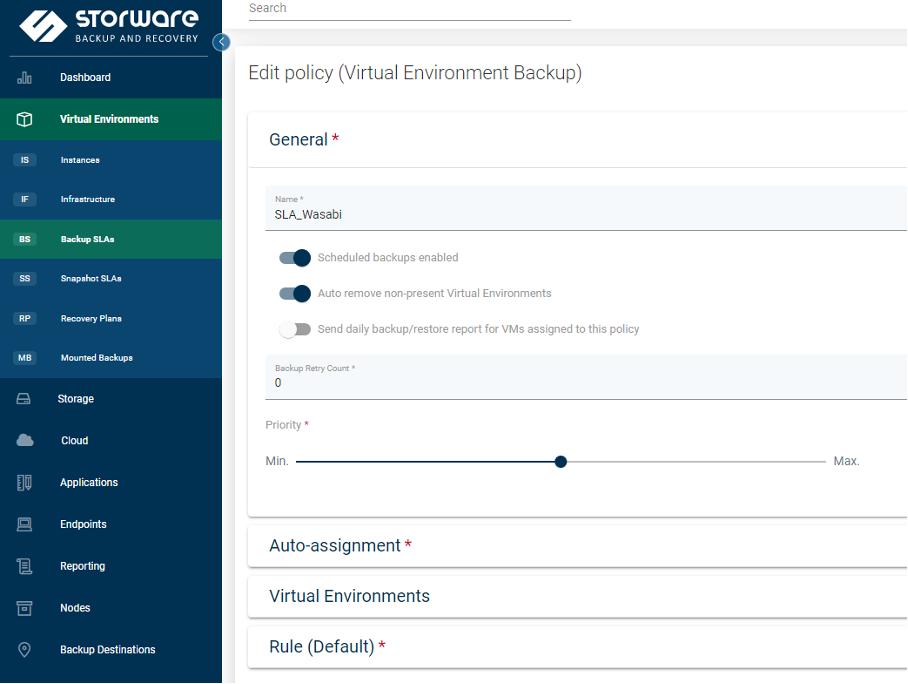
4.7 Click on Virtual Environments and then Backup SLAs to create a Backup SLA and protect your Virtual Environments, Containers, Microsoft 365, and Applications using Wasabi as a backup destination. Configure the settings under the General tab. Please review Backup SLA Policy for more information on configuring policy settings.
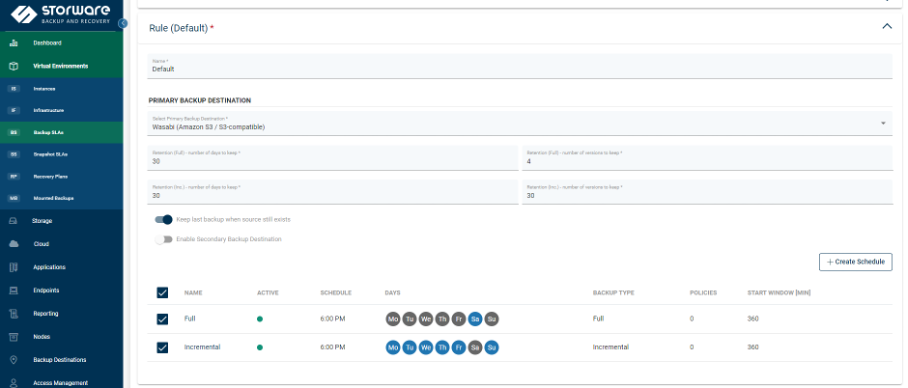
4.8 Configure settings under the Rule tab.
Review Backup SLA Schedule documentation to configure the Rule and schedule for Backup SLA.
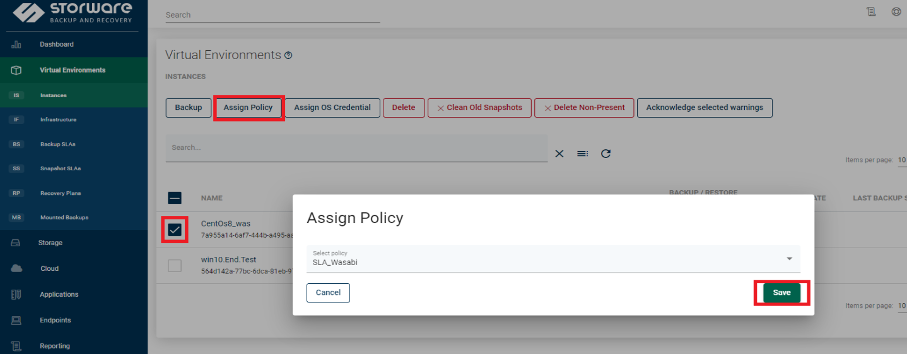
4.9 Assign the created policy to a virtual machine by clicking on Virtual Environments, then Instances. Select the instance, click Assign Policy, then select the policy created in step 4.7. Click Save.
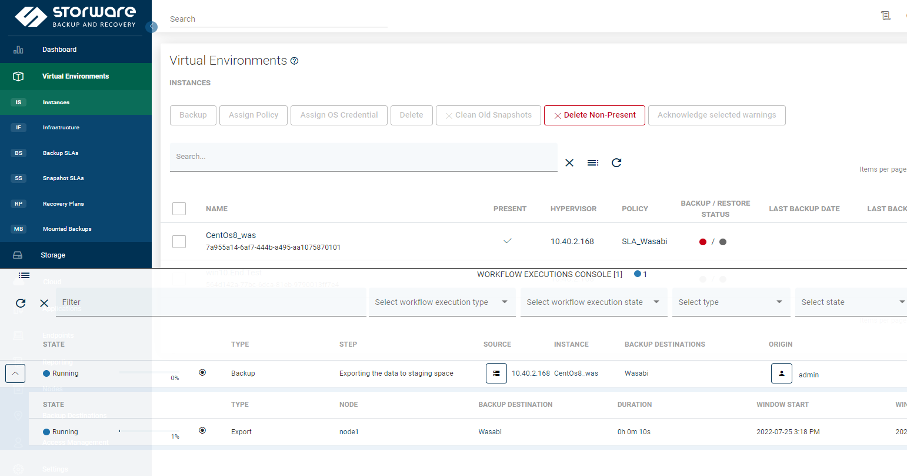
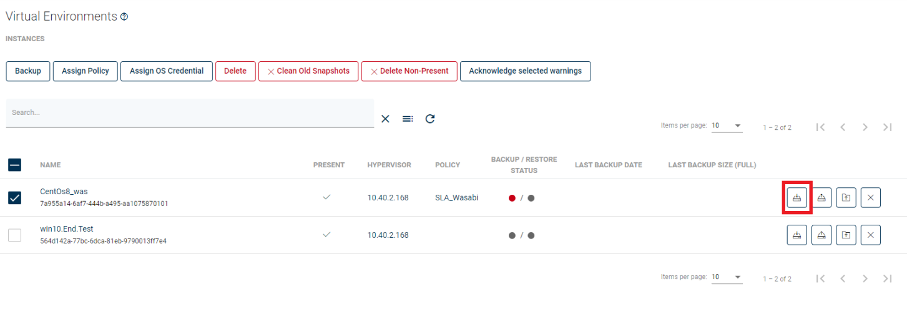
4.10 Start a Backup by selecting instance and clicking the Backup icon.
4.11 The progress of the backup can be viewed on the task console.