TrueNAS has been validated for use with Wasabi. TrueNAS is a free file server platform, which was previously known as FreeNAS.
For the purpose of this guide, we are using TrueNAS CORE 12.0-U2.
Configure Cloud Credentials
System, then Cloud Credentials, then Add.
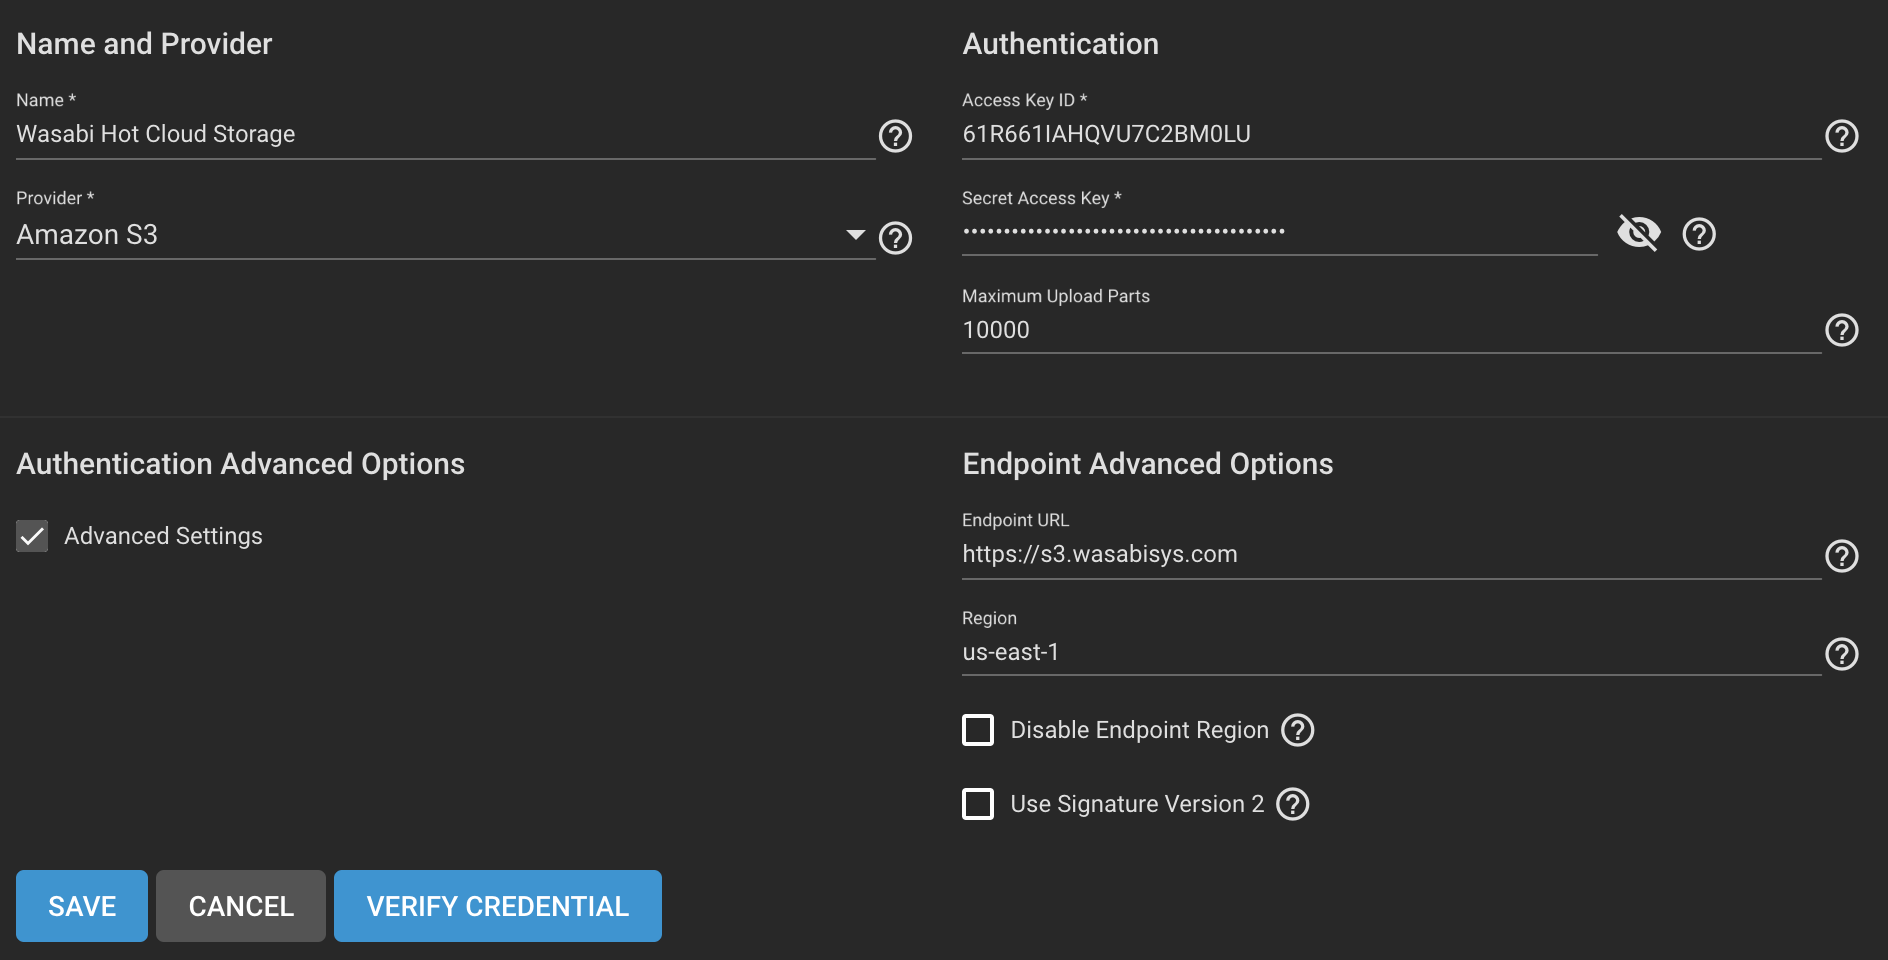
Select Provider dropdown Amazon S3.
Type in a name to reference these Cloud Credentials, in this case we are using "Wasabi Hot Cloud Storage".
Provide your Access Key, and Secret Key.
Check the Advanced Settings Checkbox.
Add in your endpoint URL.
Click Verify Credential, this step should come back with The Credential is valid.
Click Save.
NOTE: That this example discusses the use of Wasabi's us-east-1 storage region. To use other Wasabi storage regions, please use the appropriate Wasabi service URL as described in this article.
Setup CloudSync Task
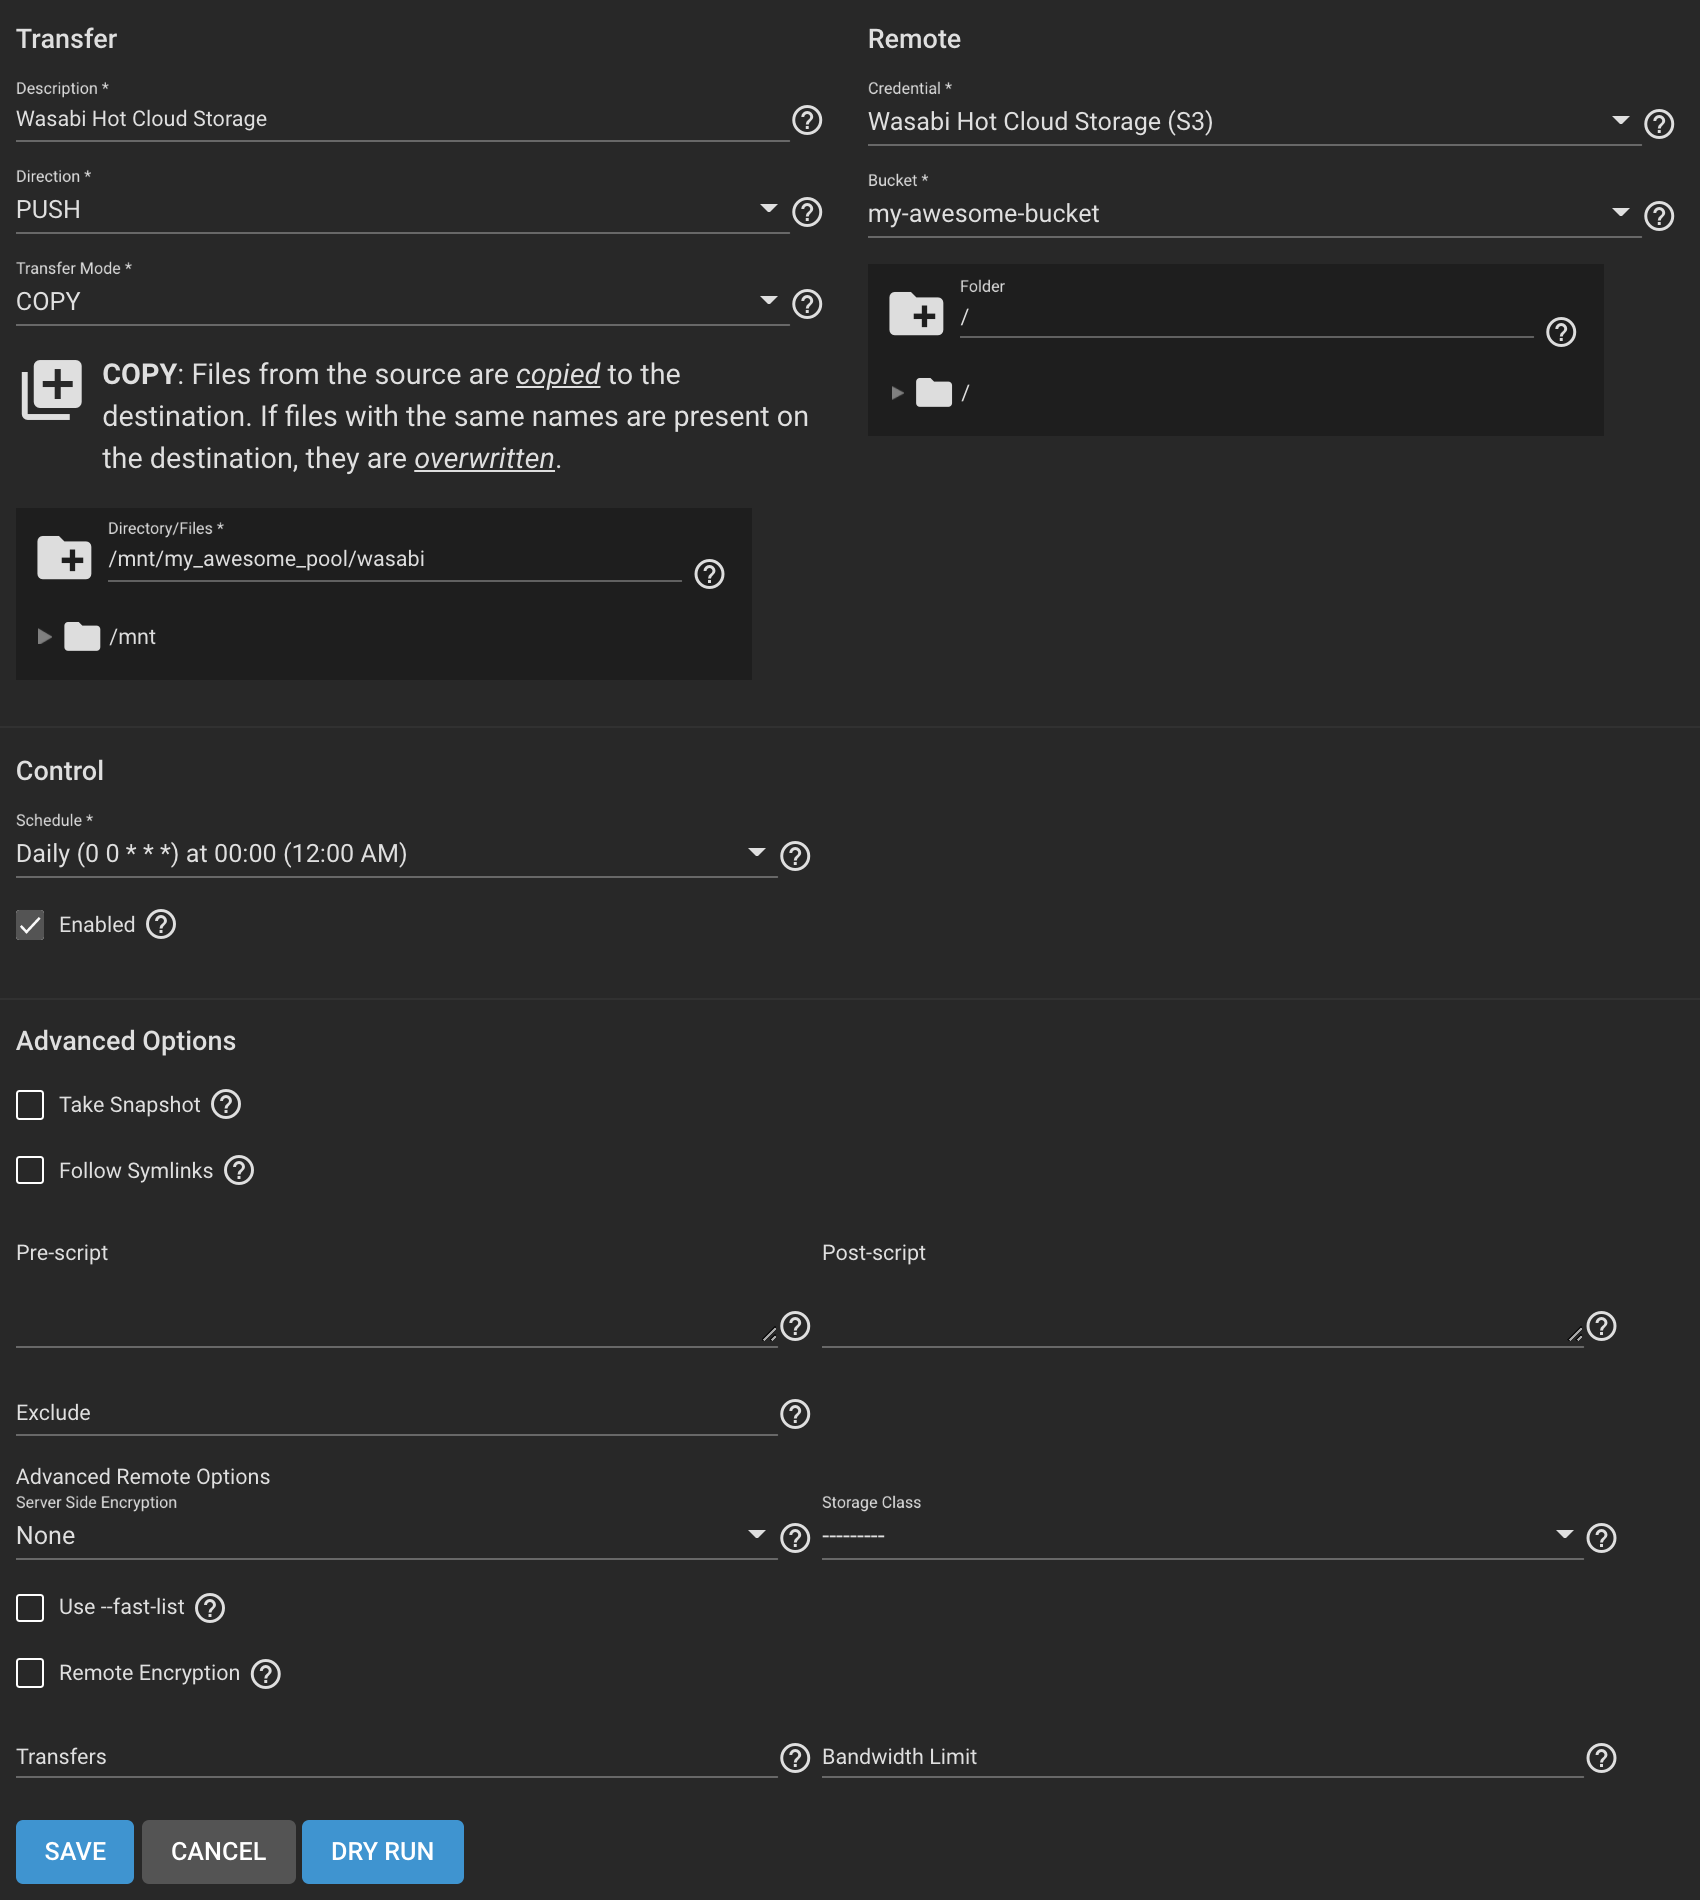
On the Right side under Remote, select your previously created Cloud Credentials.
Click the dropdown for Bucket, and choose your bucket.
On the Left side under Transfer, give a description of the task.
Select the direction you want to use with Wasabi. You can either PULL data from Wasabi to your TrueNAS device, or PUSH data from the TrueNAS device to Wasabi. In this example we are PUSHing data from TrueNAS into Wasabi.
Select Your Transfer Mode. The TrueNAS CloudSync options are SYNC, COPY, MOVE. In this example we are COPYing data from TrueNAS to Wasabi.
In the directory structure dropdown, still on the Transfer side, select the directory you want to sync with Wasabi.
Under the Control dropdown, select the Schedule which you wish the syncing to occur. Options are hourly, daily, weekly, monthly or custom. Custom will allow you to select your own syncing time-period based upon Cron scheduling.
All of the additional options are for advanced user customization at this point, and we are not using any of them in this guide.
Click Submit or Save.
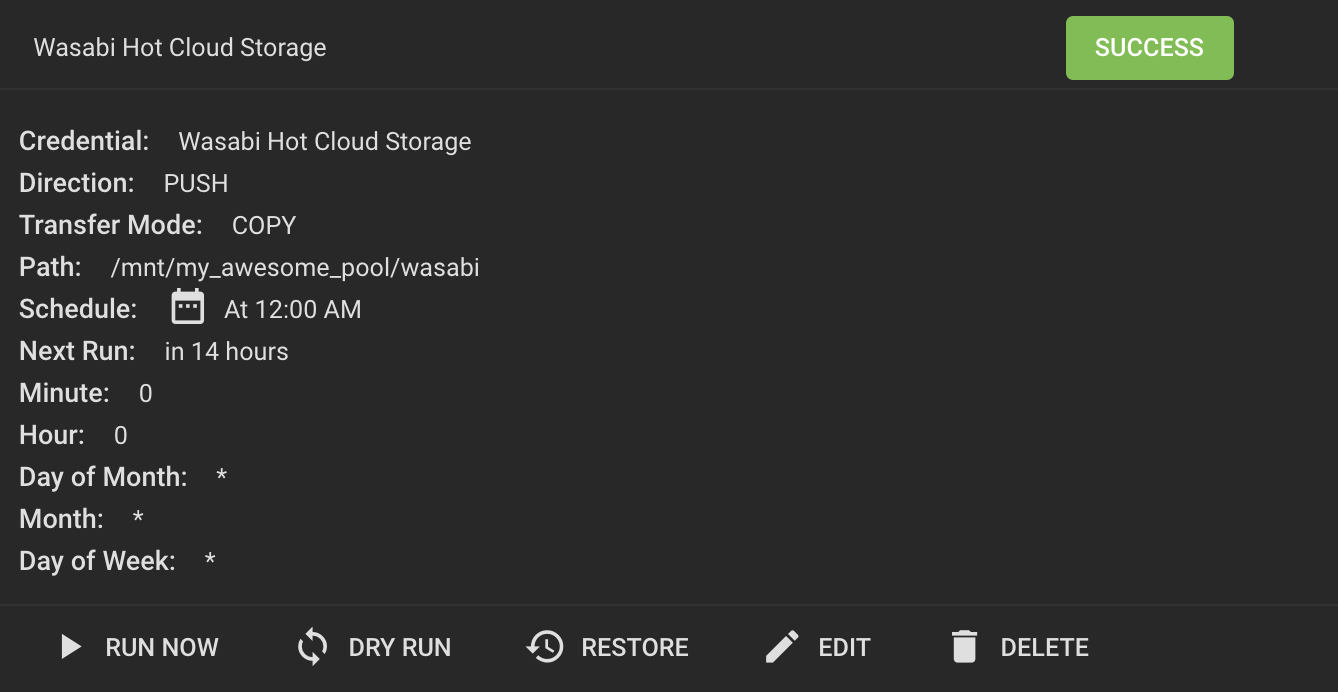
Run Your Sync Task
Now that your task has been setup, you can run the task for the first time.
Click Run Now, your CloudSync Task should run, and should show a success.