Many of our users are looking for a way to host a fileserver on Linux with Wasabi as their file server backend. uCloud, by mfscripts enables freelancers, small businesses (such as media agencies), and webmasters to easily share their files online. It’s been built to be extremely robust, secure, and very fast! To use this product with Wasabi, please follow the instructions below.
NOTE: ucloud does not natively support S3 Compatible services such as Wasabi yet. This document will assist you to modify the existing script to add an entry for Wasabi.

Prerequisites:
We recommend following this KB article from mfscripts: How to set up ucloud file server on ubuntu 20.04? to install this service on Linux. Please contact the mfscripts support team if you are facing any issues with the installation. In this document, we will be following this to set up the server and create an entry for Wasabi.
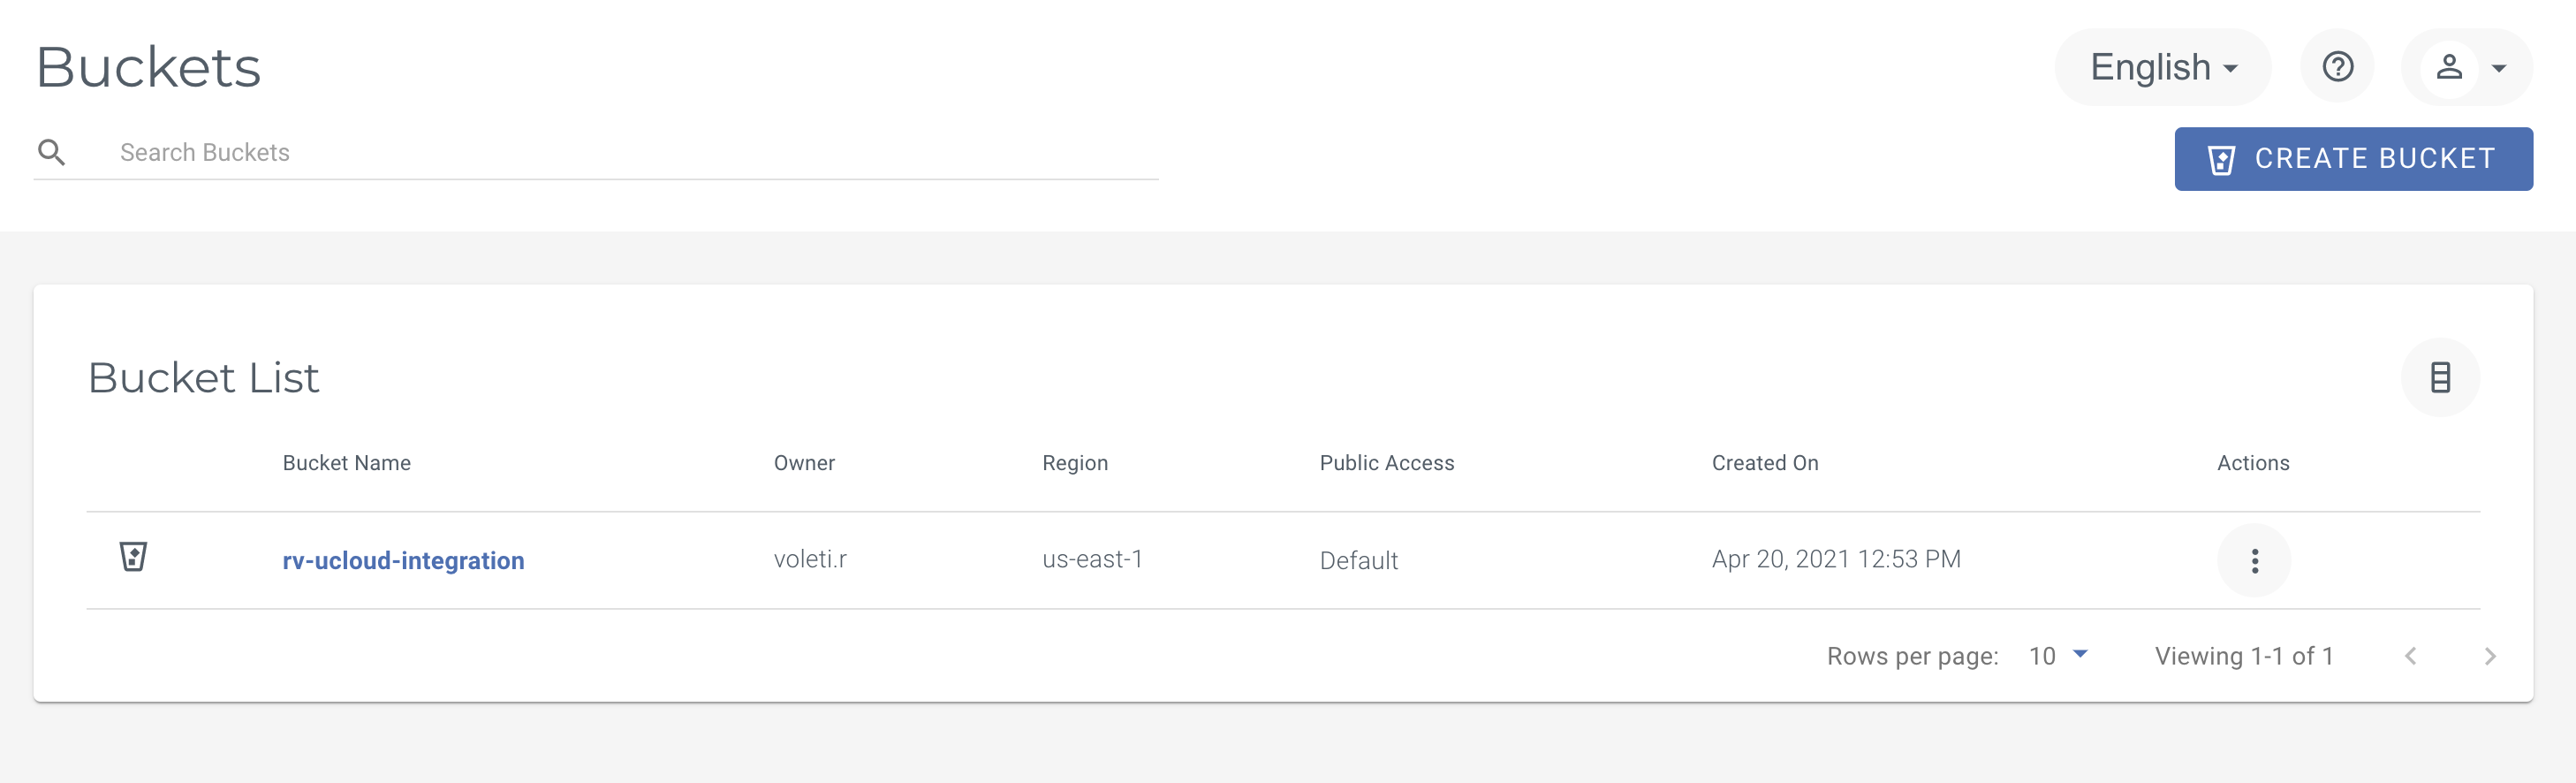
Create a bucket On Wasabi that will connect to ucloud. In our demonstration, we will be making the bucket rv-ucloud-integration on the us-east-1 region.
Installation:
A brief summary of what we will be accomplishing in the next few steps.
Edit the initFlysystemAws() file and add an entry to instantiate the Flysystem for Wasabi connectivity. This will allow us to create a connection to the Wasabi bucket as a File server.
Add the necessary DB insert statements which will populate the form in the Admin Area. This will allow us to select Wasabi servers directly via the GUI and not require direct changes to code in the future.
Create a connection to the Wasabi bucket in the Admin Area.
Test the server.
PART 1: adding an entry for Wasabi in the initFlysystemsAws() file
1. Once you have installed ucloud and you have verified that the server is working as intended by opening this link in a browser https://[your_ip_address]:8083,
Navigate to /app/helpers/FileServerContainerHelper.class.php open this file in an editor of your choice.
Notes:
You may need to specify sudo and provide root-level permissions to edit this file with Linux.
If you do not know your IP try this instead https://localhost:8083/
In my Ubuntu20.04 virtual box, FileServerContainerHelper.class.php was located at /home/admin/web/uclouddomain.com/public_html/app/helpers/FileServerContainerHelper.class.php
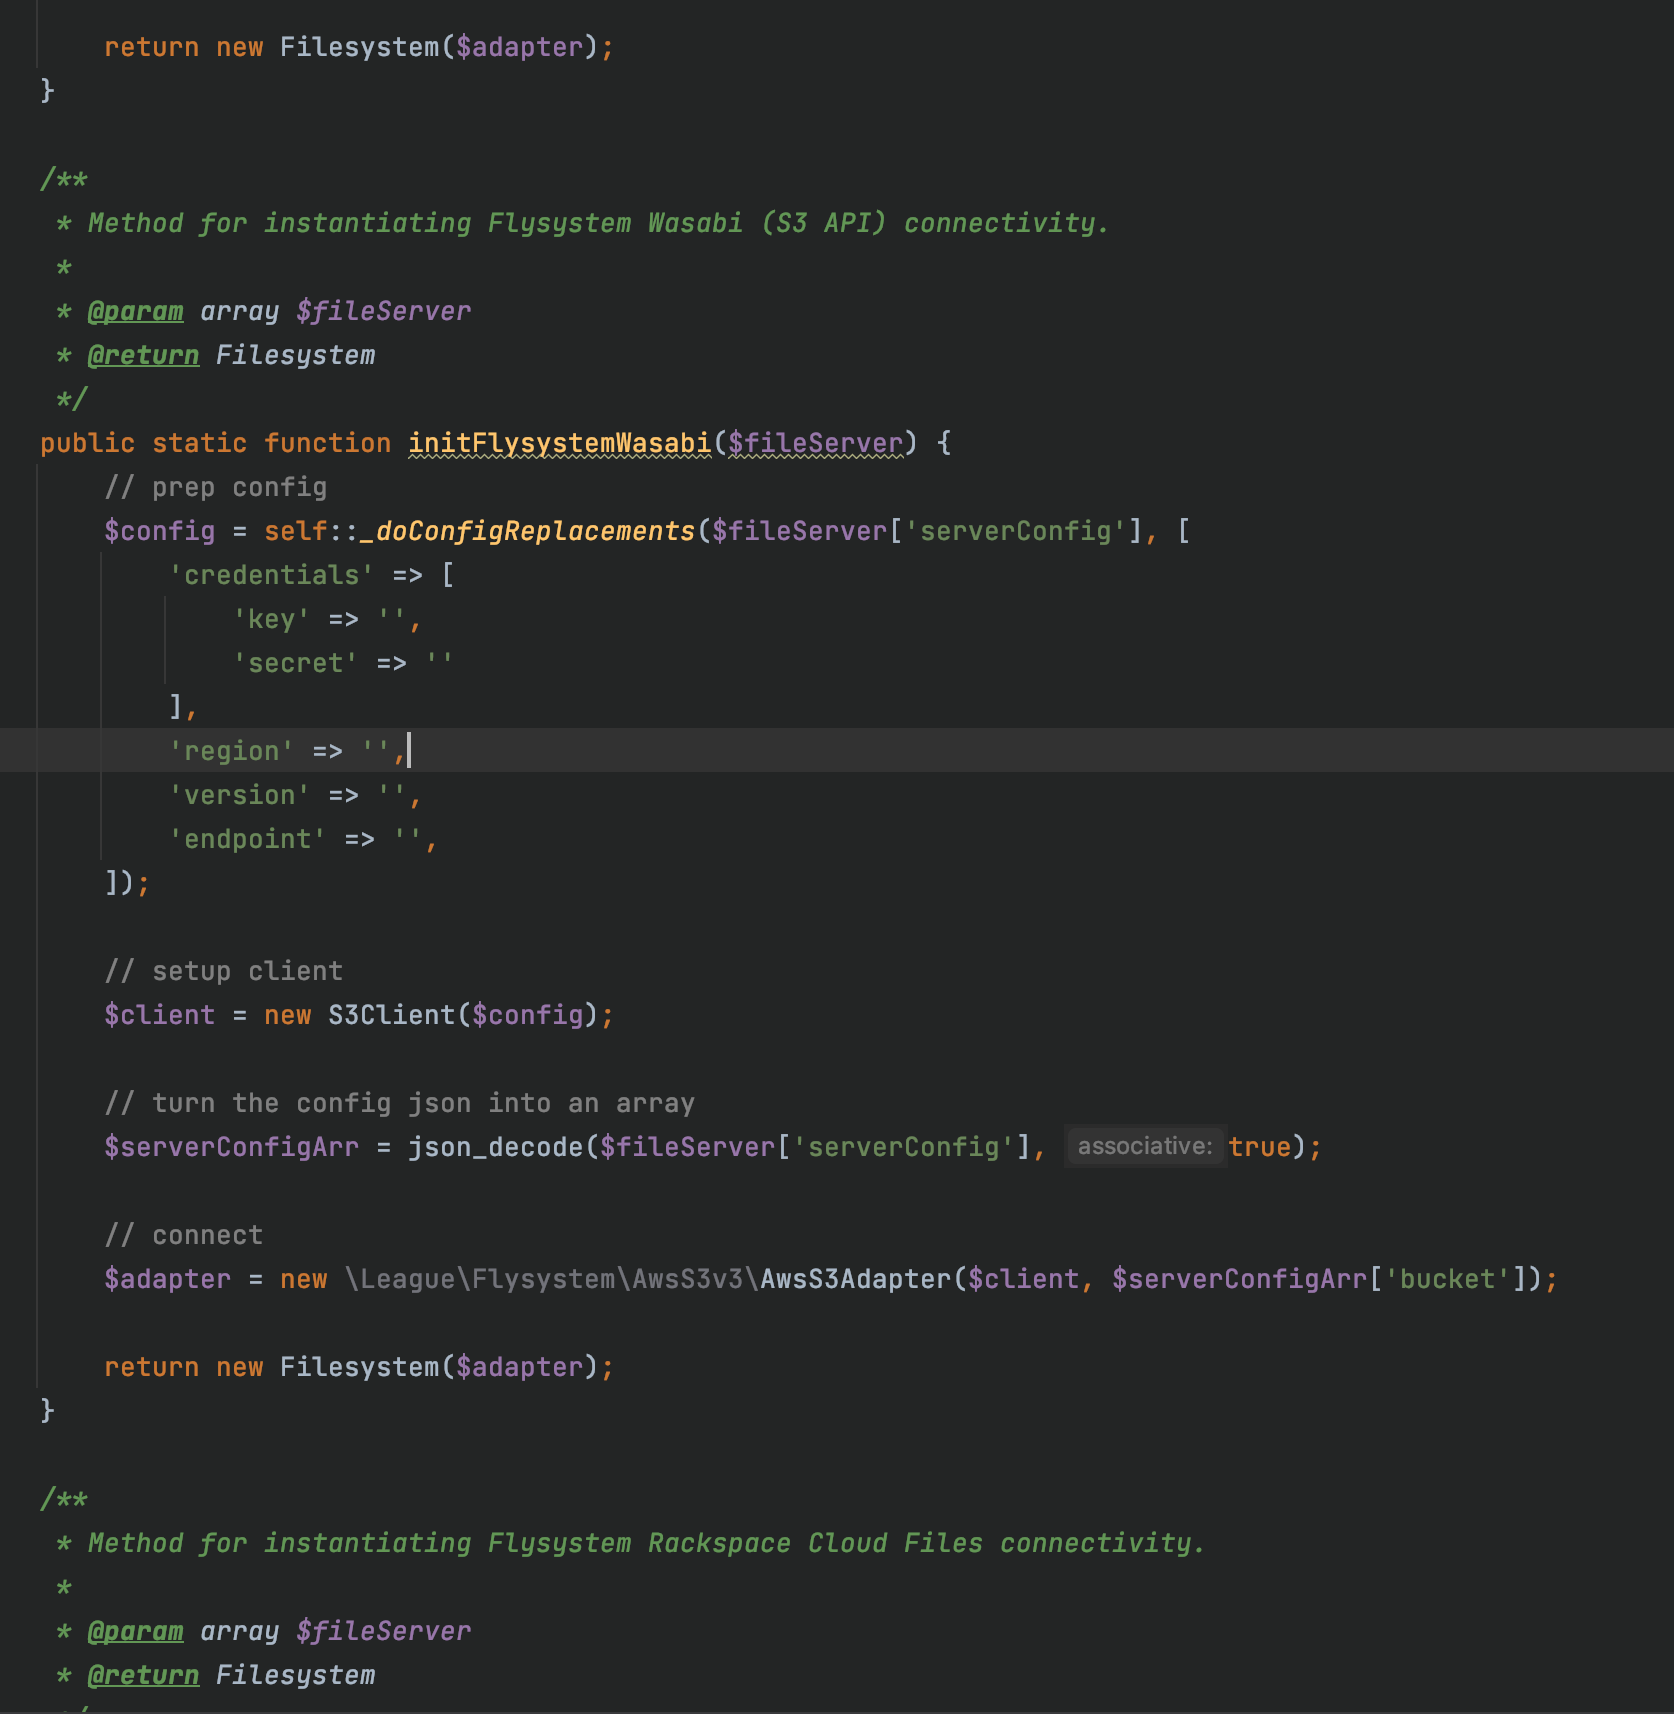
2. Within that folder you'll find initFlysystemAws() which then uses S3Client(). We will be adding an entry for Wasabi similar to the entry for AWS S3. Refer to the code segment below and add it to initFlysystemAws(). Add this within the class FileServerContainerHelper.
/**
 * Method for instantiating Flysystem Wasabi (S3 API) connectivity.
 *
 * @param array $fileServer
 * @return Filesystem
 */
public static function initFlysystemWasabi($fileServer) {
    // prep config
    $config = self::_doConfigReplacements($fileServer['serverConfig'], [
        'credentials' => [
            'key' => '',
            'secret' => ''
        ],
        'region' => '',
        'version' => '',
        'endpoint' => '',
    ]);

    // setup client
    $client = new S3Client($config);

    // turn the config json into an array
    $serverConfigArr = json_decode($fileServer['serverConfig'], true);

    // connect
    $adapter = new \League\Flysystem\AwsS3v3\AwsS3Adapter($client, $serverConfigArr['bucket']);

    return new Filesystem($adapter);
}
3. It should look something like this, we have added this method right after the AWS Flysystem method call.
4. Once you have made these changes, SAVE the file.
PART 2: Adding DB Statement
1. We installed the ucloud server via HestiaCP, by following this guide How to set up ucloud file server on ubuntu 20.04? if you are following this as well, open the browser and navigate to https://[your_ip_address]:8083 then click on the DB section on the top banner. Otherwise, you would need to open a connection to your local or remote DB and skip to step 3.
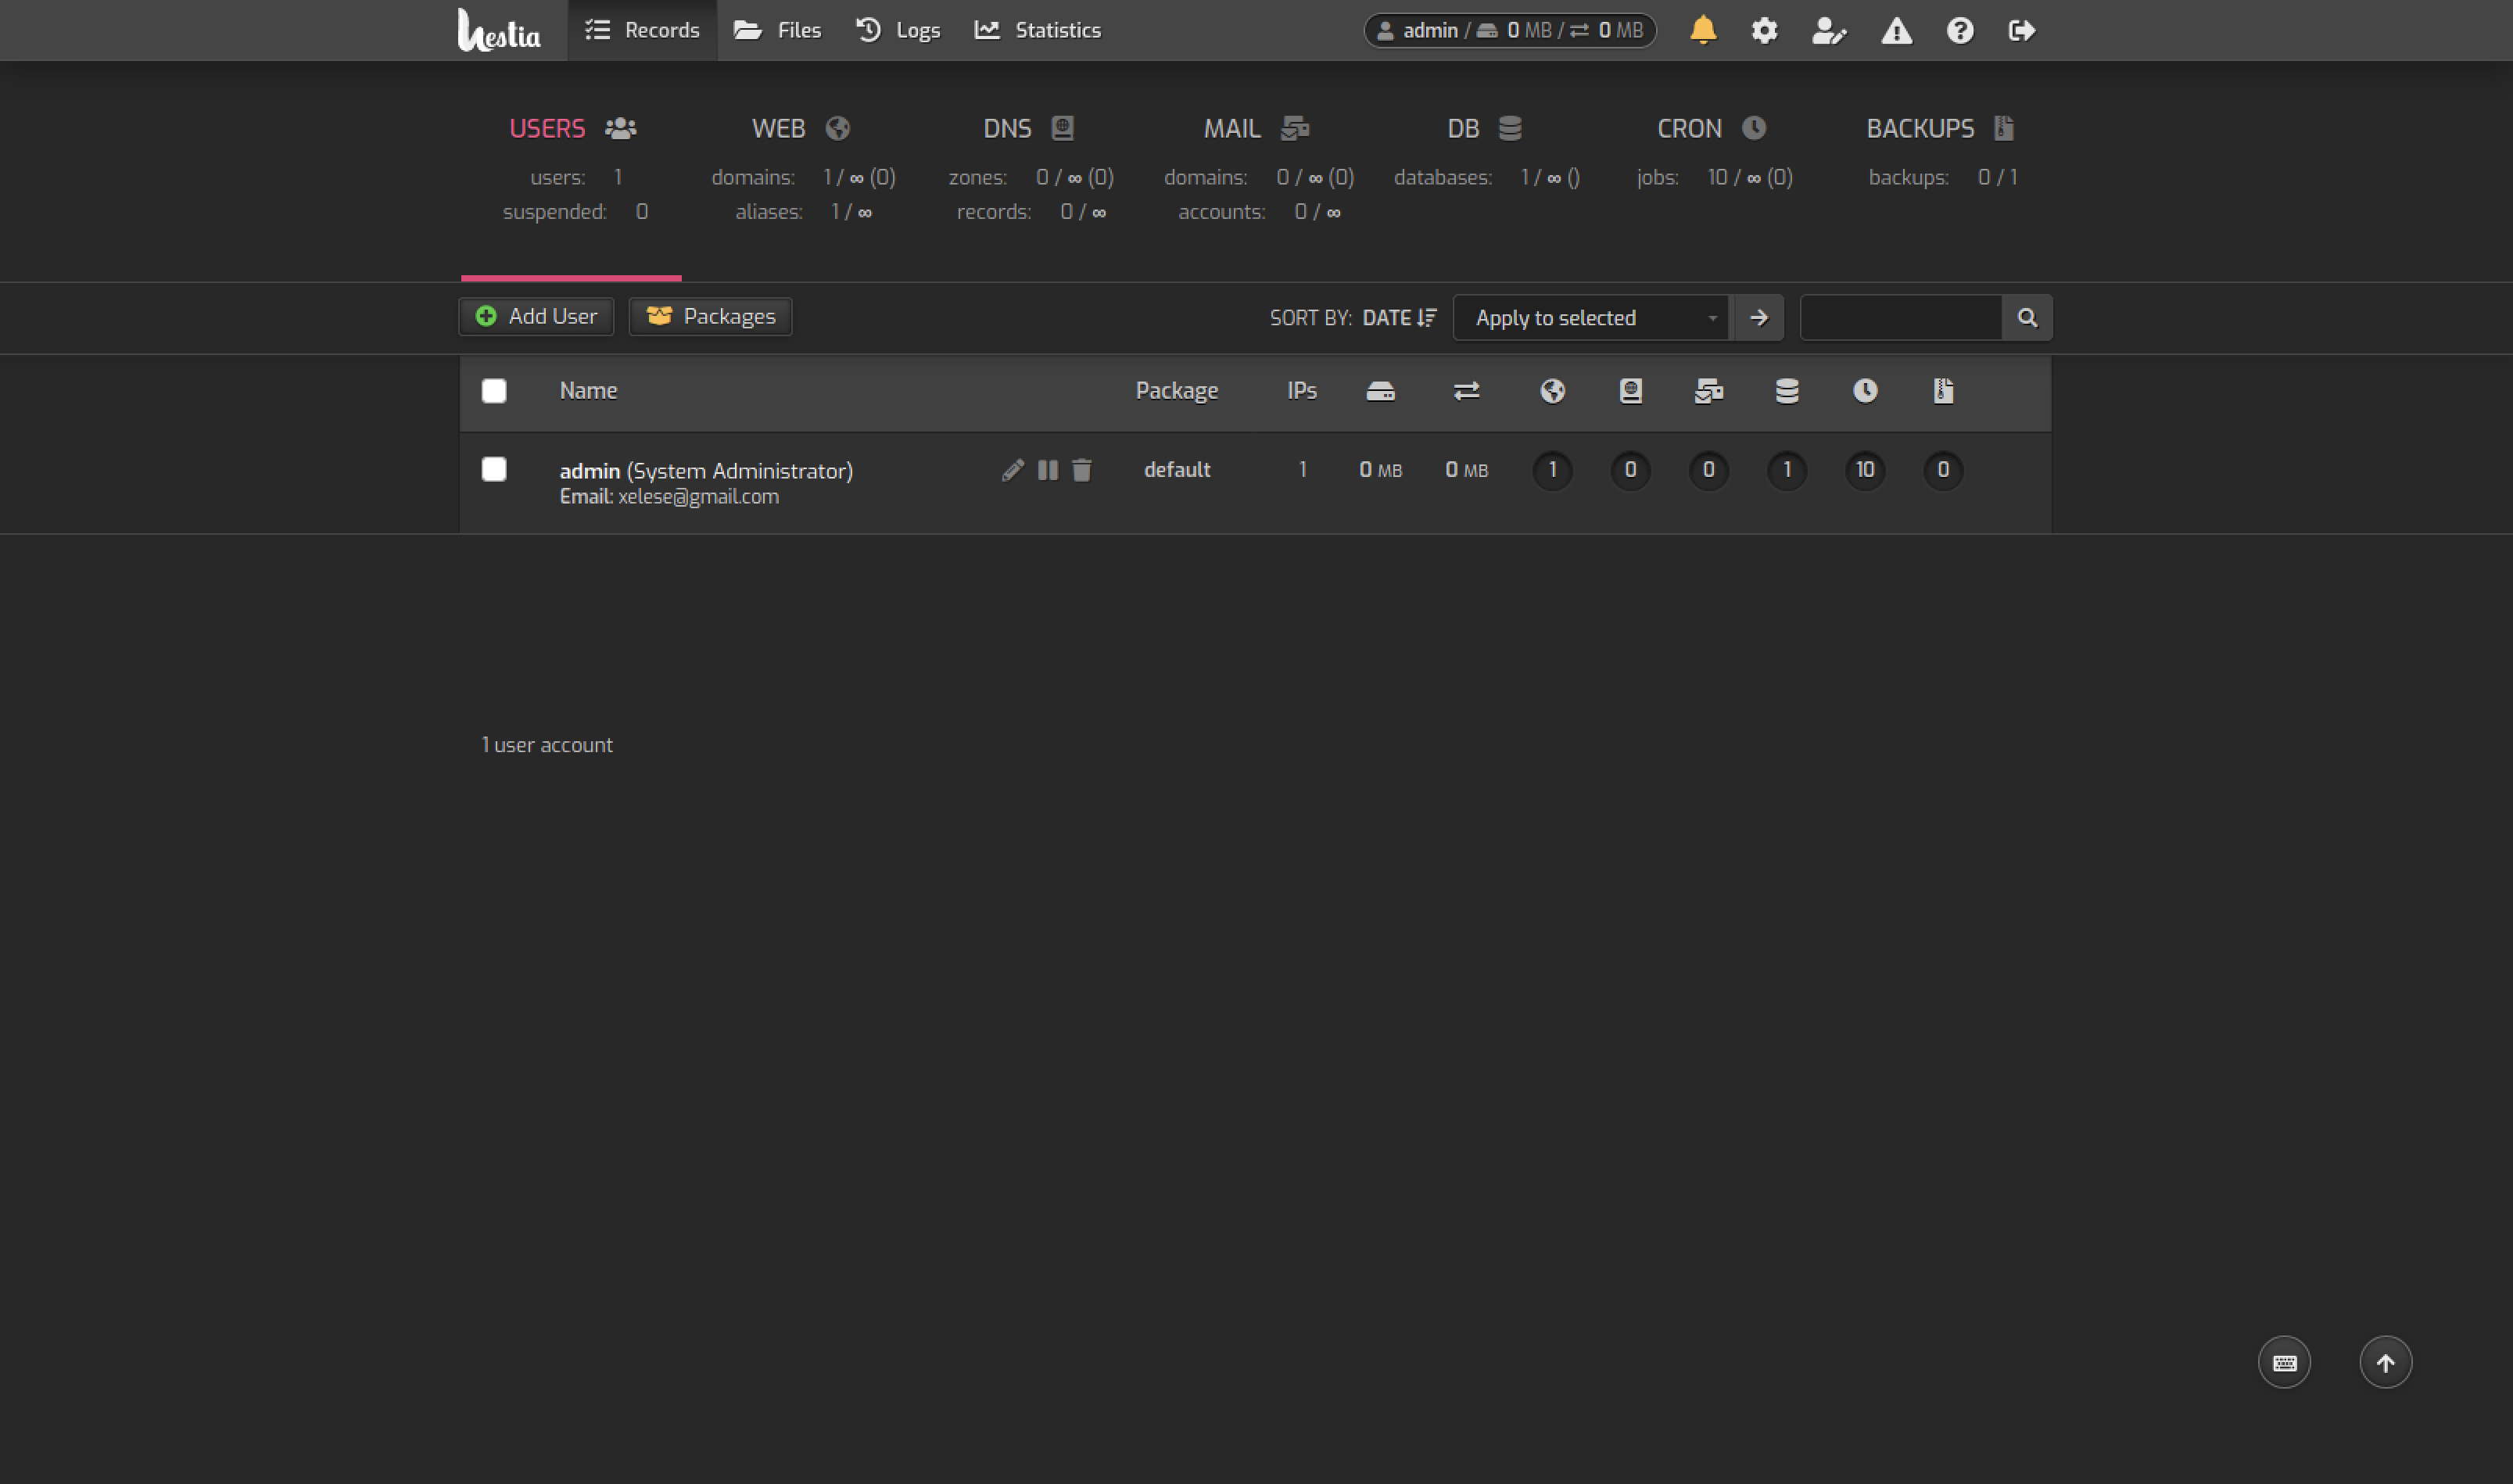
2. Click on phpMyAdmin.
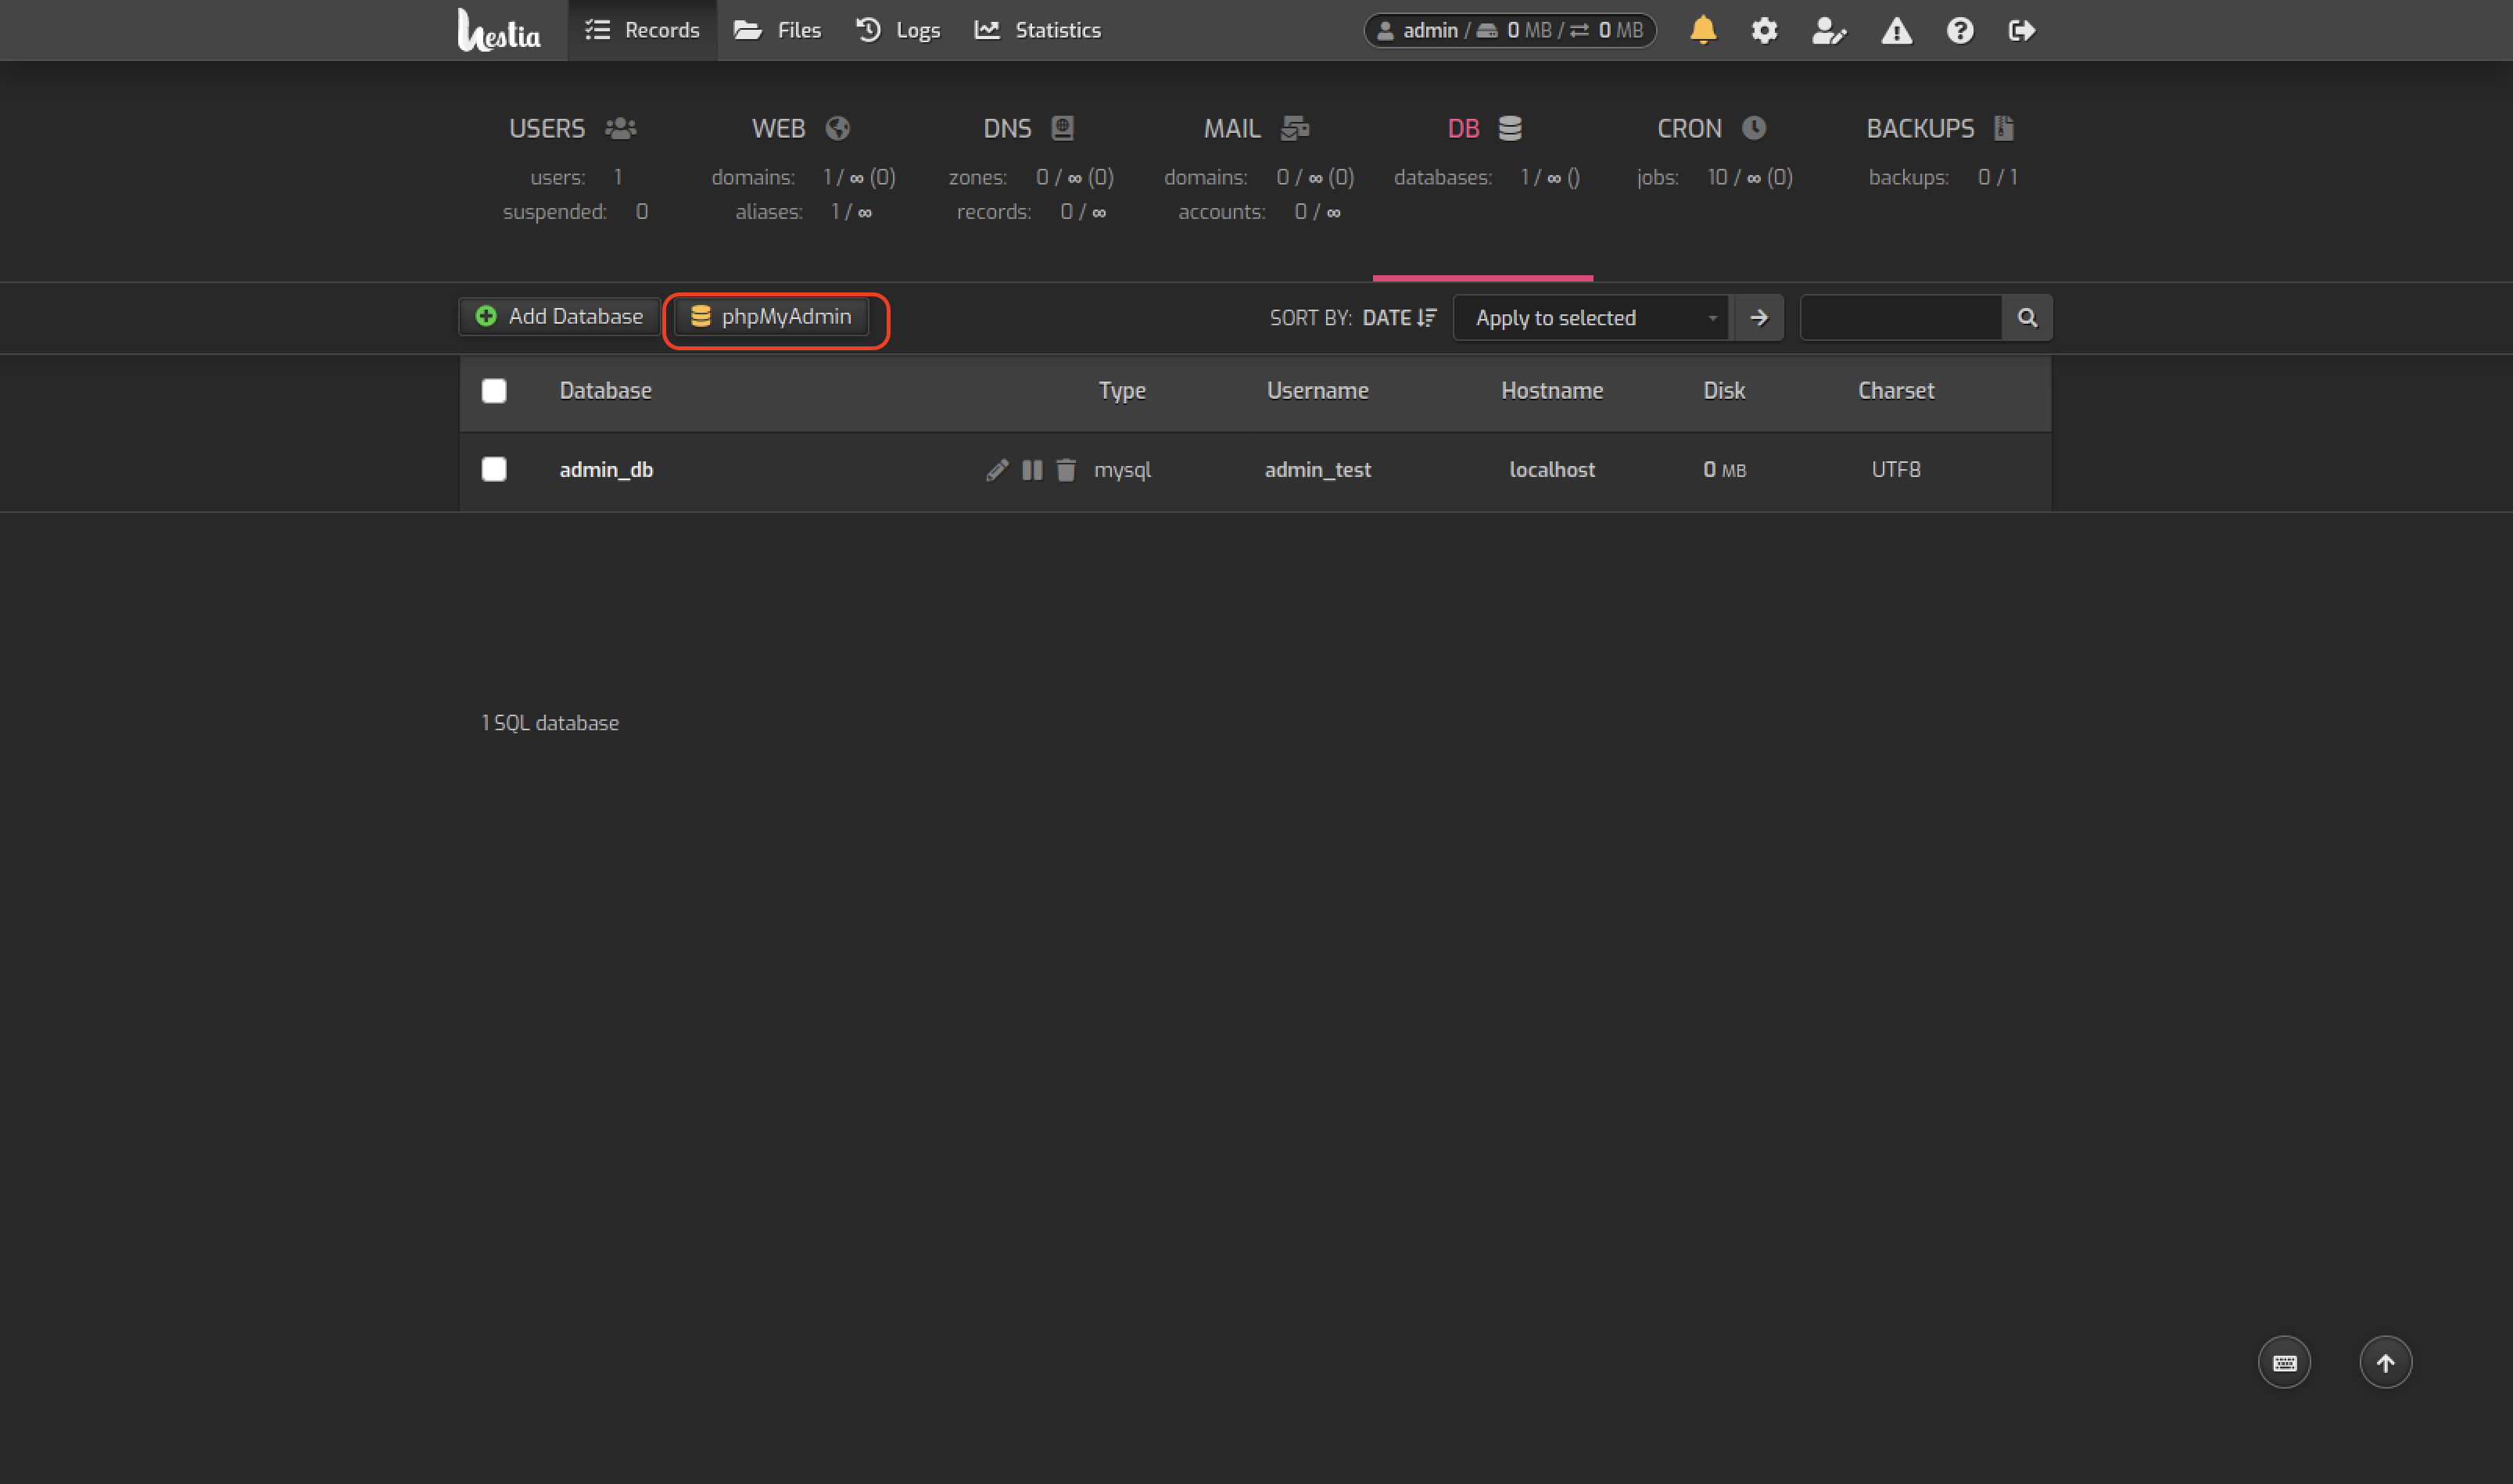
3. Log in to the server, navigate to the database that you configured for this and execute the following SQL script:
INSERT INTO `file_server_container` (`id`, `label`, `entrypoint`, `expected_config_json`, `is_enabled`)
VALUES (null, 'Wasabi', 'flysystem_wasabi','{\"key\":{\"label\":\"PublicKey\",\"type\":\"text\",\"default\":\"\"},\"secret\":{\"label\":\"SecretKey\",\"type\":\"text\",\"default\":\"\"},\"bucket\":{\"label\":\"S3Bucket\",\"type\":\"text\",\"default\":\"\"},\"region\":{\"label\":\"Your Bucket Region\",\"type\":\"select\",\"default\":\"us-east-1\",\"option_values\":{\"us-east-1\":\"us-east-1\",\"us-east-2\":\"us-east-2\",\"us-central-1\":\"us-central-1\",\"us-west-1\":\"us-west-1\",\"eu-central-1\":\"eu-central-1\"}},\"endpoint\":{\"label\":\"Your Endpoint Region\",\"type\":\"select\",\"default\":\"http://s3.wasabisys.com\",\"option_values\":{\"http://s3.wasabisys.com\":\"http://s3.wasabisys.com\",\"http://s3.us-east-2.wasabisys.com\":\"http://s3.us-east-2.wasabisys.com\",\"http://s3.us-central-1.wasabisys.com\":\"http://s3.us-central-1.wasabisys.com\",\"http://s3.us-west-1.wasabisys.com\":\"http://s3.us-west-1.wasabisys.com\",\"http://s3.eu-central-1.wasabisys.com\":\"http://s3.eu-central-1.wasabisys.com\"}},\"version\":{\"label\":\"Version(Don\'tChange)\",\"type\":\"string\",\"default\":\"latest\"}}',1);.png)
PART 3: Creating a connection
1. If you have followed this KB How to set up ucloud file server on ubuntu 20.04? HestiaCP would have configured a domain (in our case we have set this up as uclouddomain.com) on your Ubuntu system. Open this domain via a browser and log into your account and then to the Admin section by clicking on the top right Admin, then Admin Area as shown below.
.png)
2. Here select the File Servers Tab on the LEFT-hand side and select the Add File Server.
.png)
You will see that a new Server type Wasabi has been added on account of adding Wasabi FlySystem in initFlysystemAws() in PART 1 and inserting a row into the DB in PART 2.
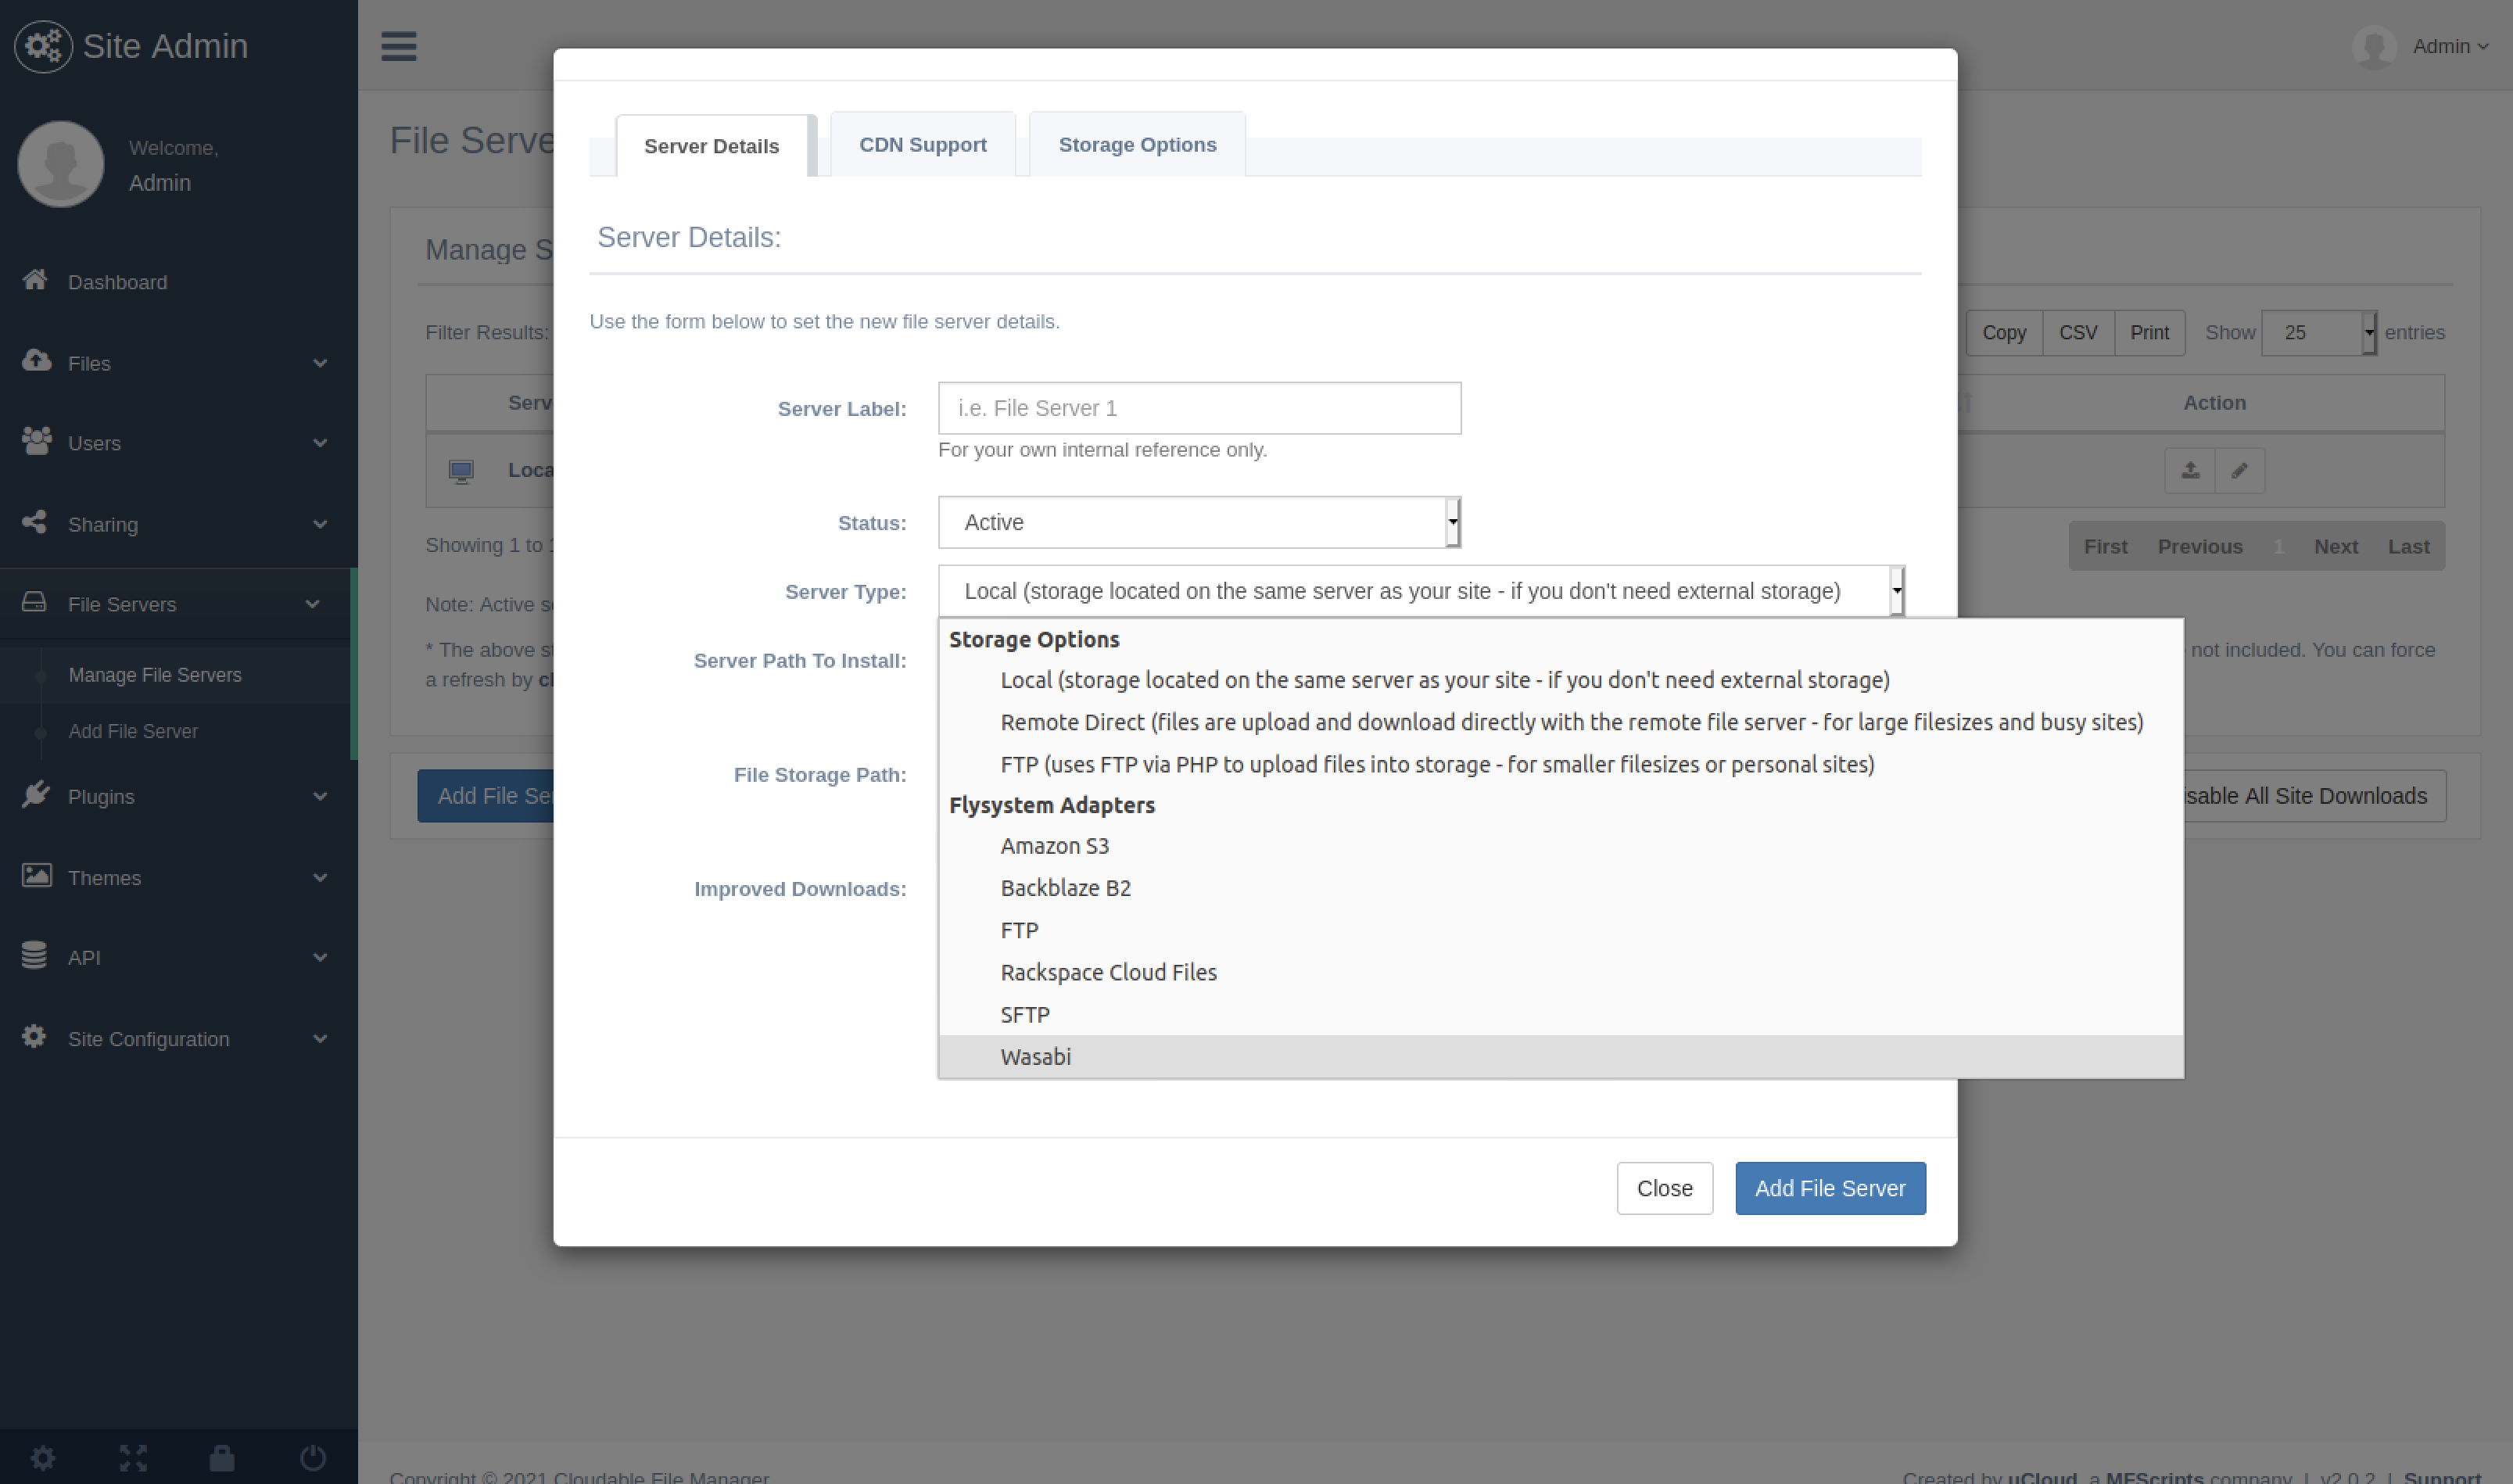
Select Wasabi and fill the form. We have attached our configuration as an example. When you are done add the File Server.
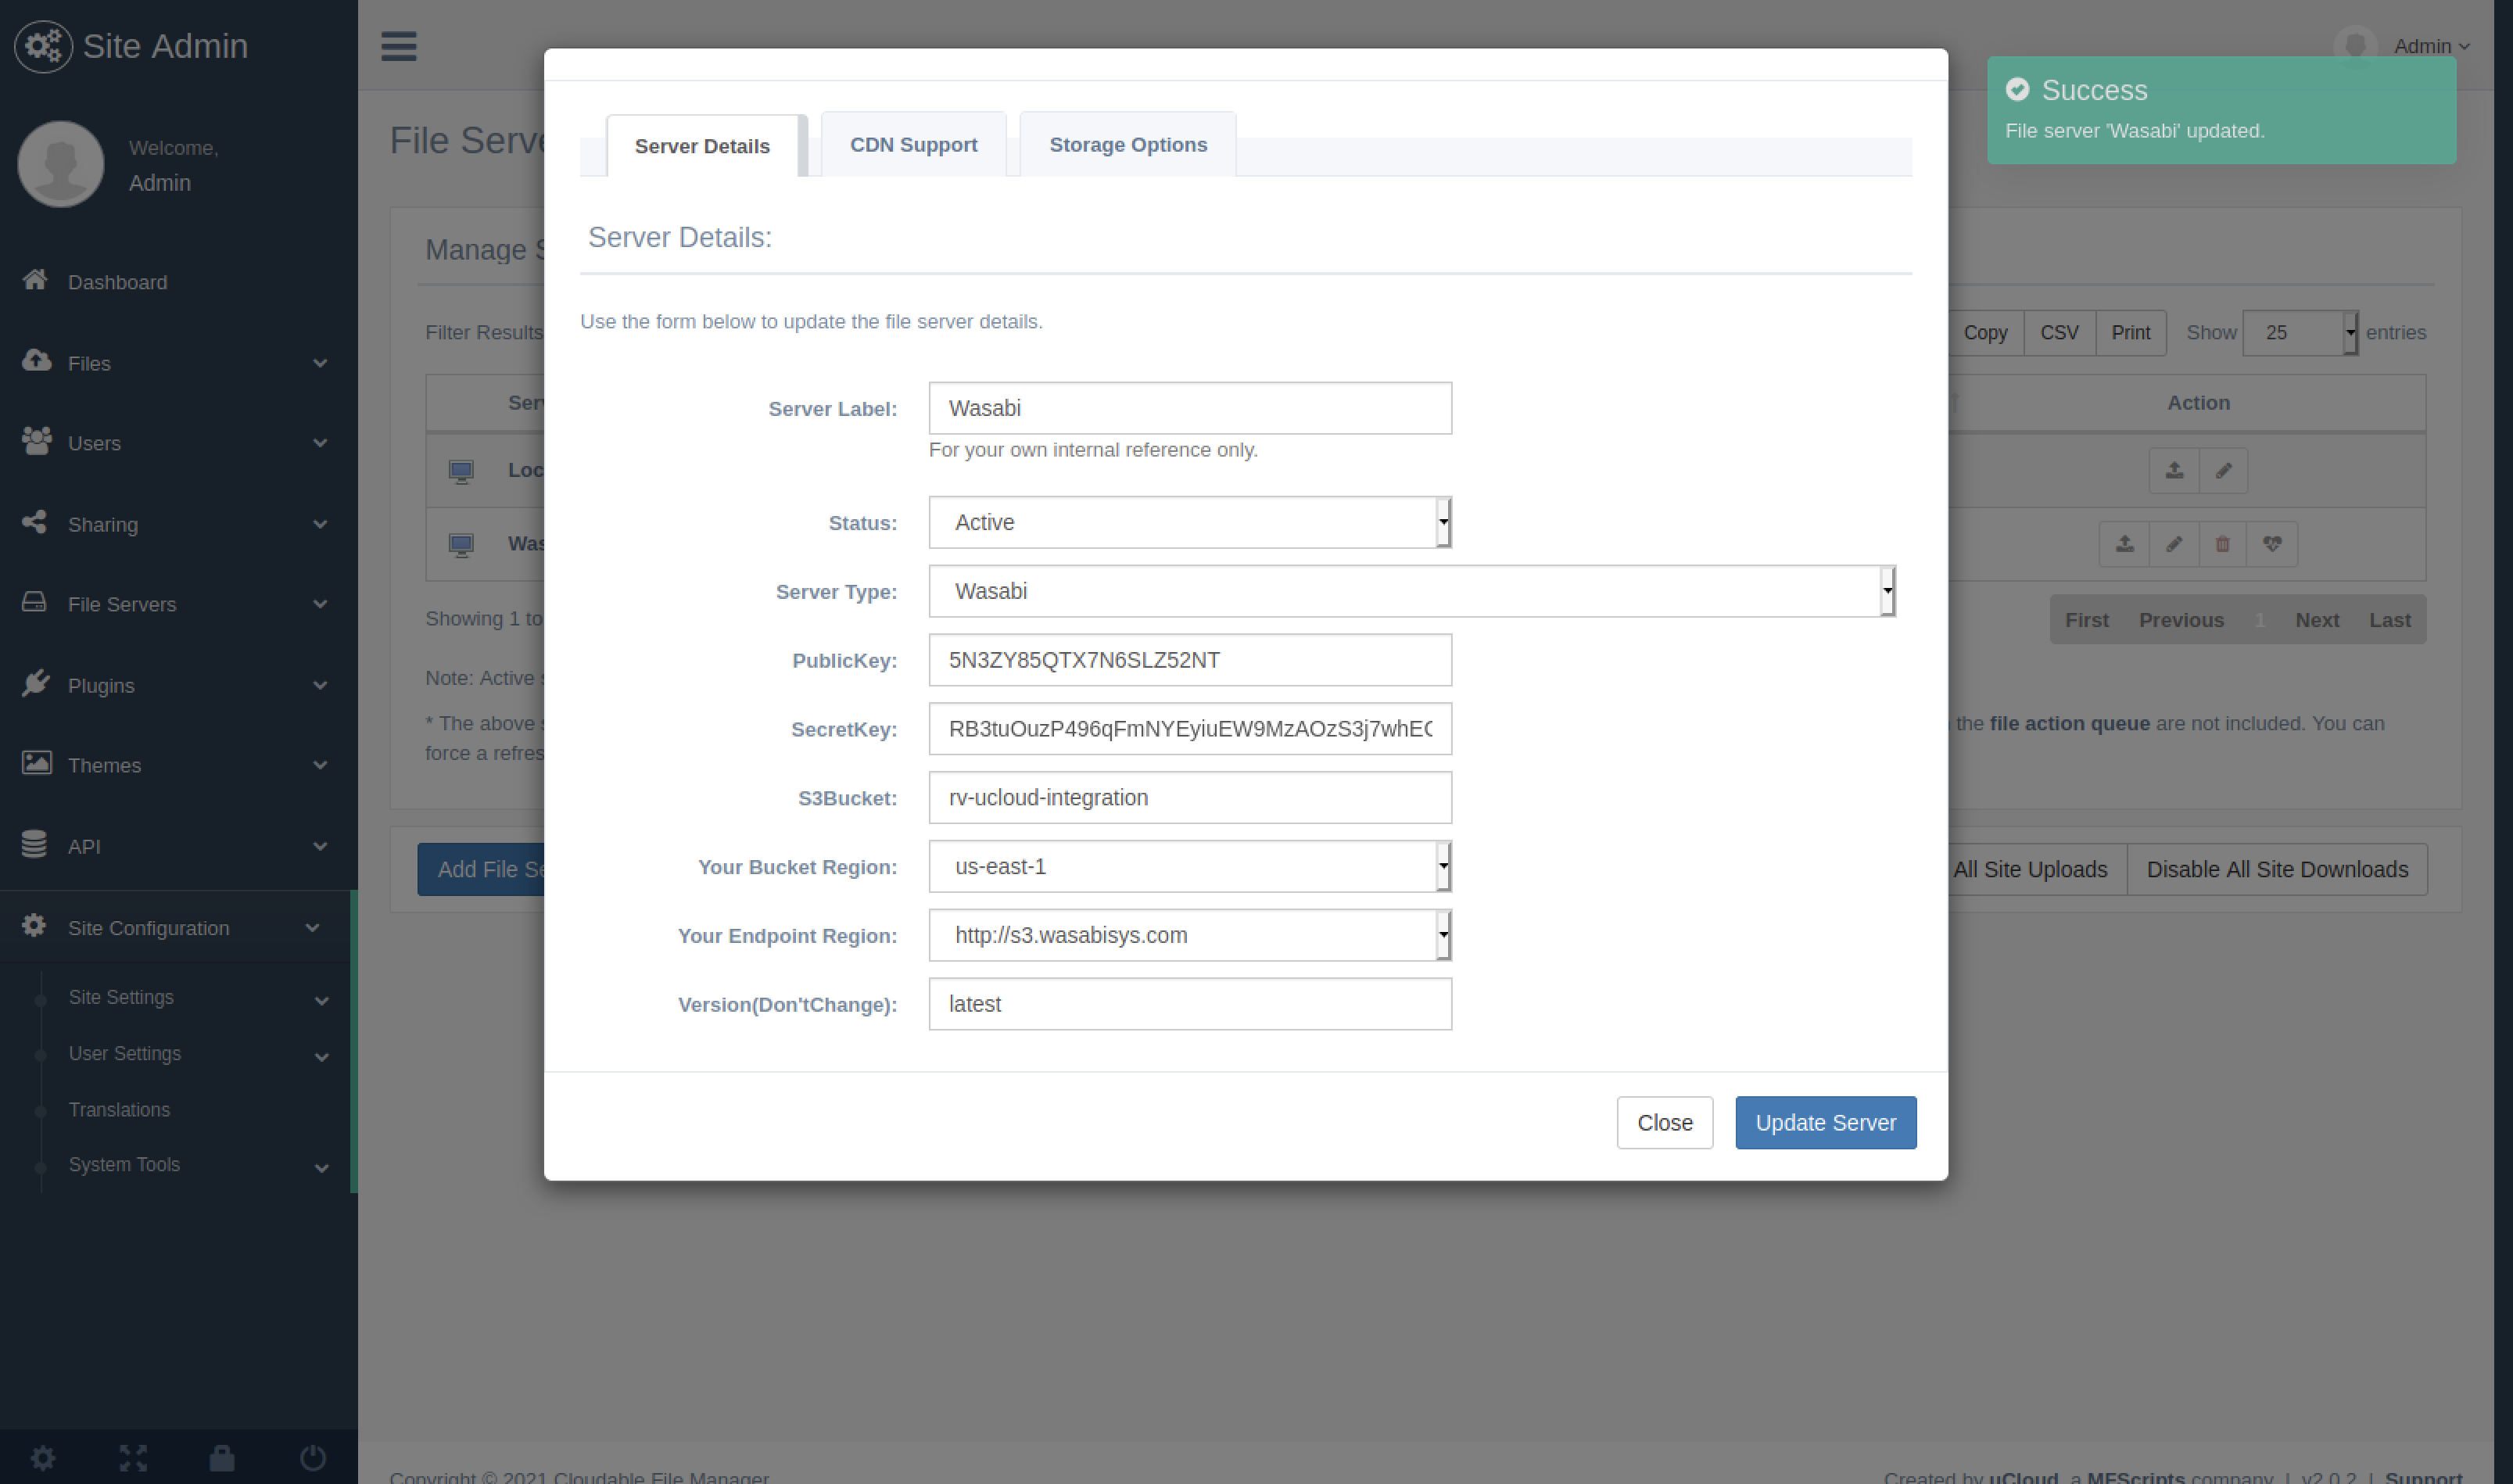
Note: This config example discusses the use of Wasabi's us-east-2 storage region.
DISCLAIMER: To use other Wasabi storage regions, please use the appropriate Wasabi service URL as described in this article: What are the service URLs for Wasabi's different storage regions?
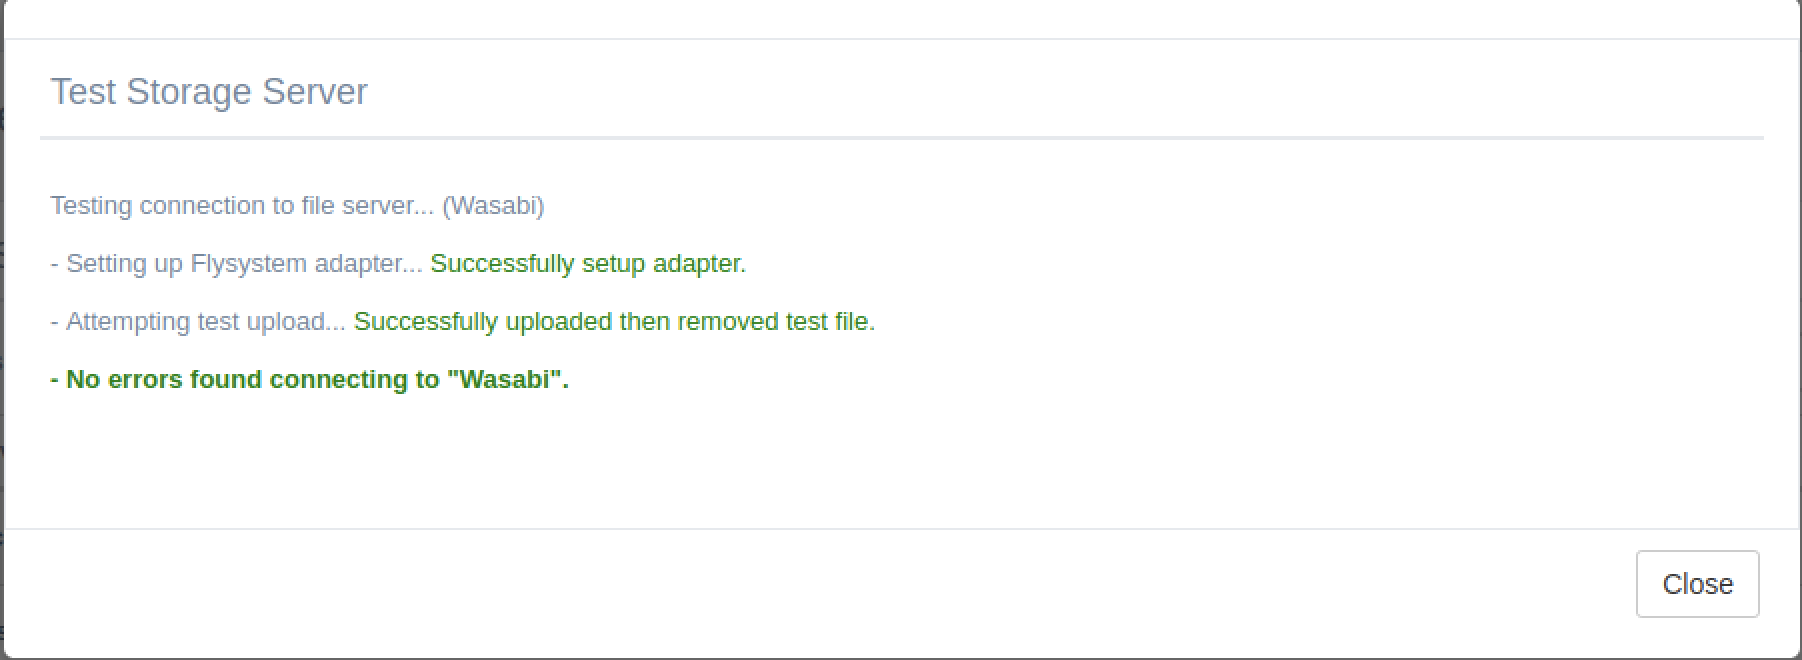
Click the heart-shaped icon to test the server.
.png)
Clicking on that icon should show a success screen like this.
Next Go back to the admin area and select the Site Configuration, then File Uploads and change the Default File Server to the newly created Wasabi connection.
.png)
PART 4: Testing
a. Uploading objects to Wasabi.
Navigate back to http://[your-domain.com]/account (in our case http://uclouddomain.com/account) and select the upload button on the top.
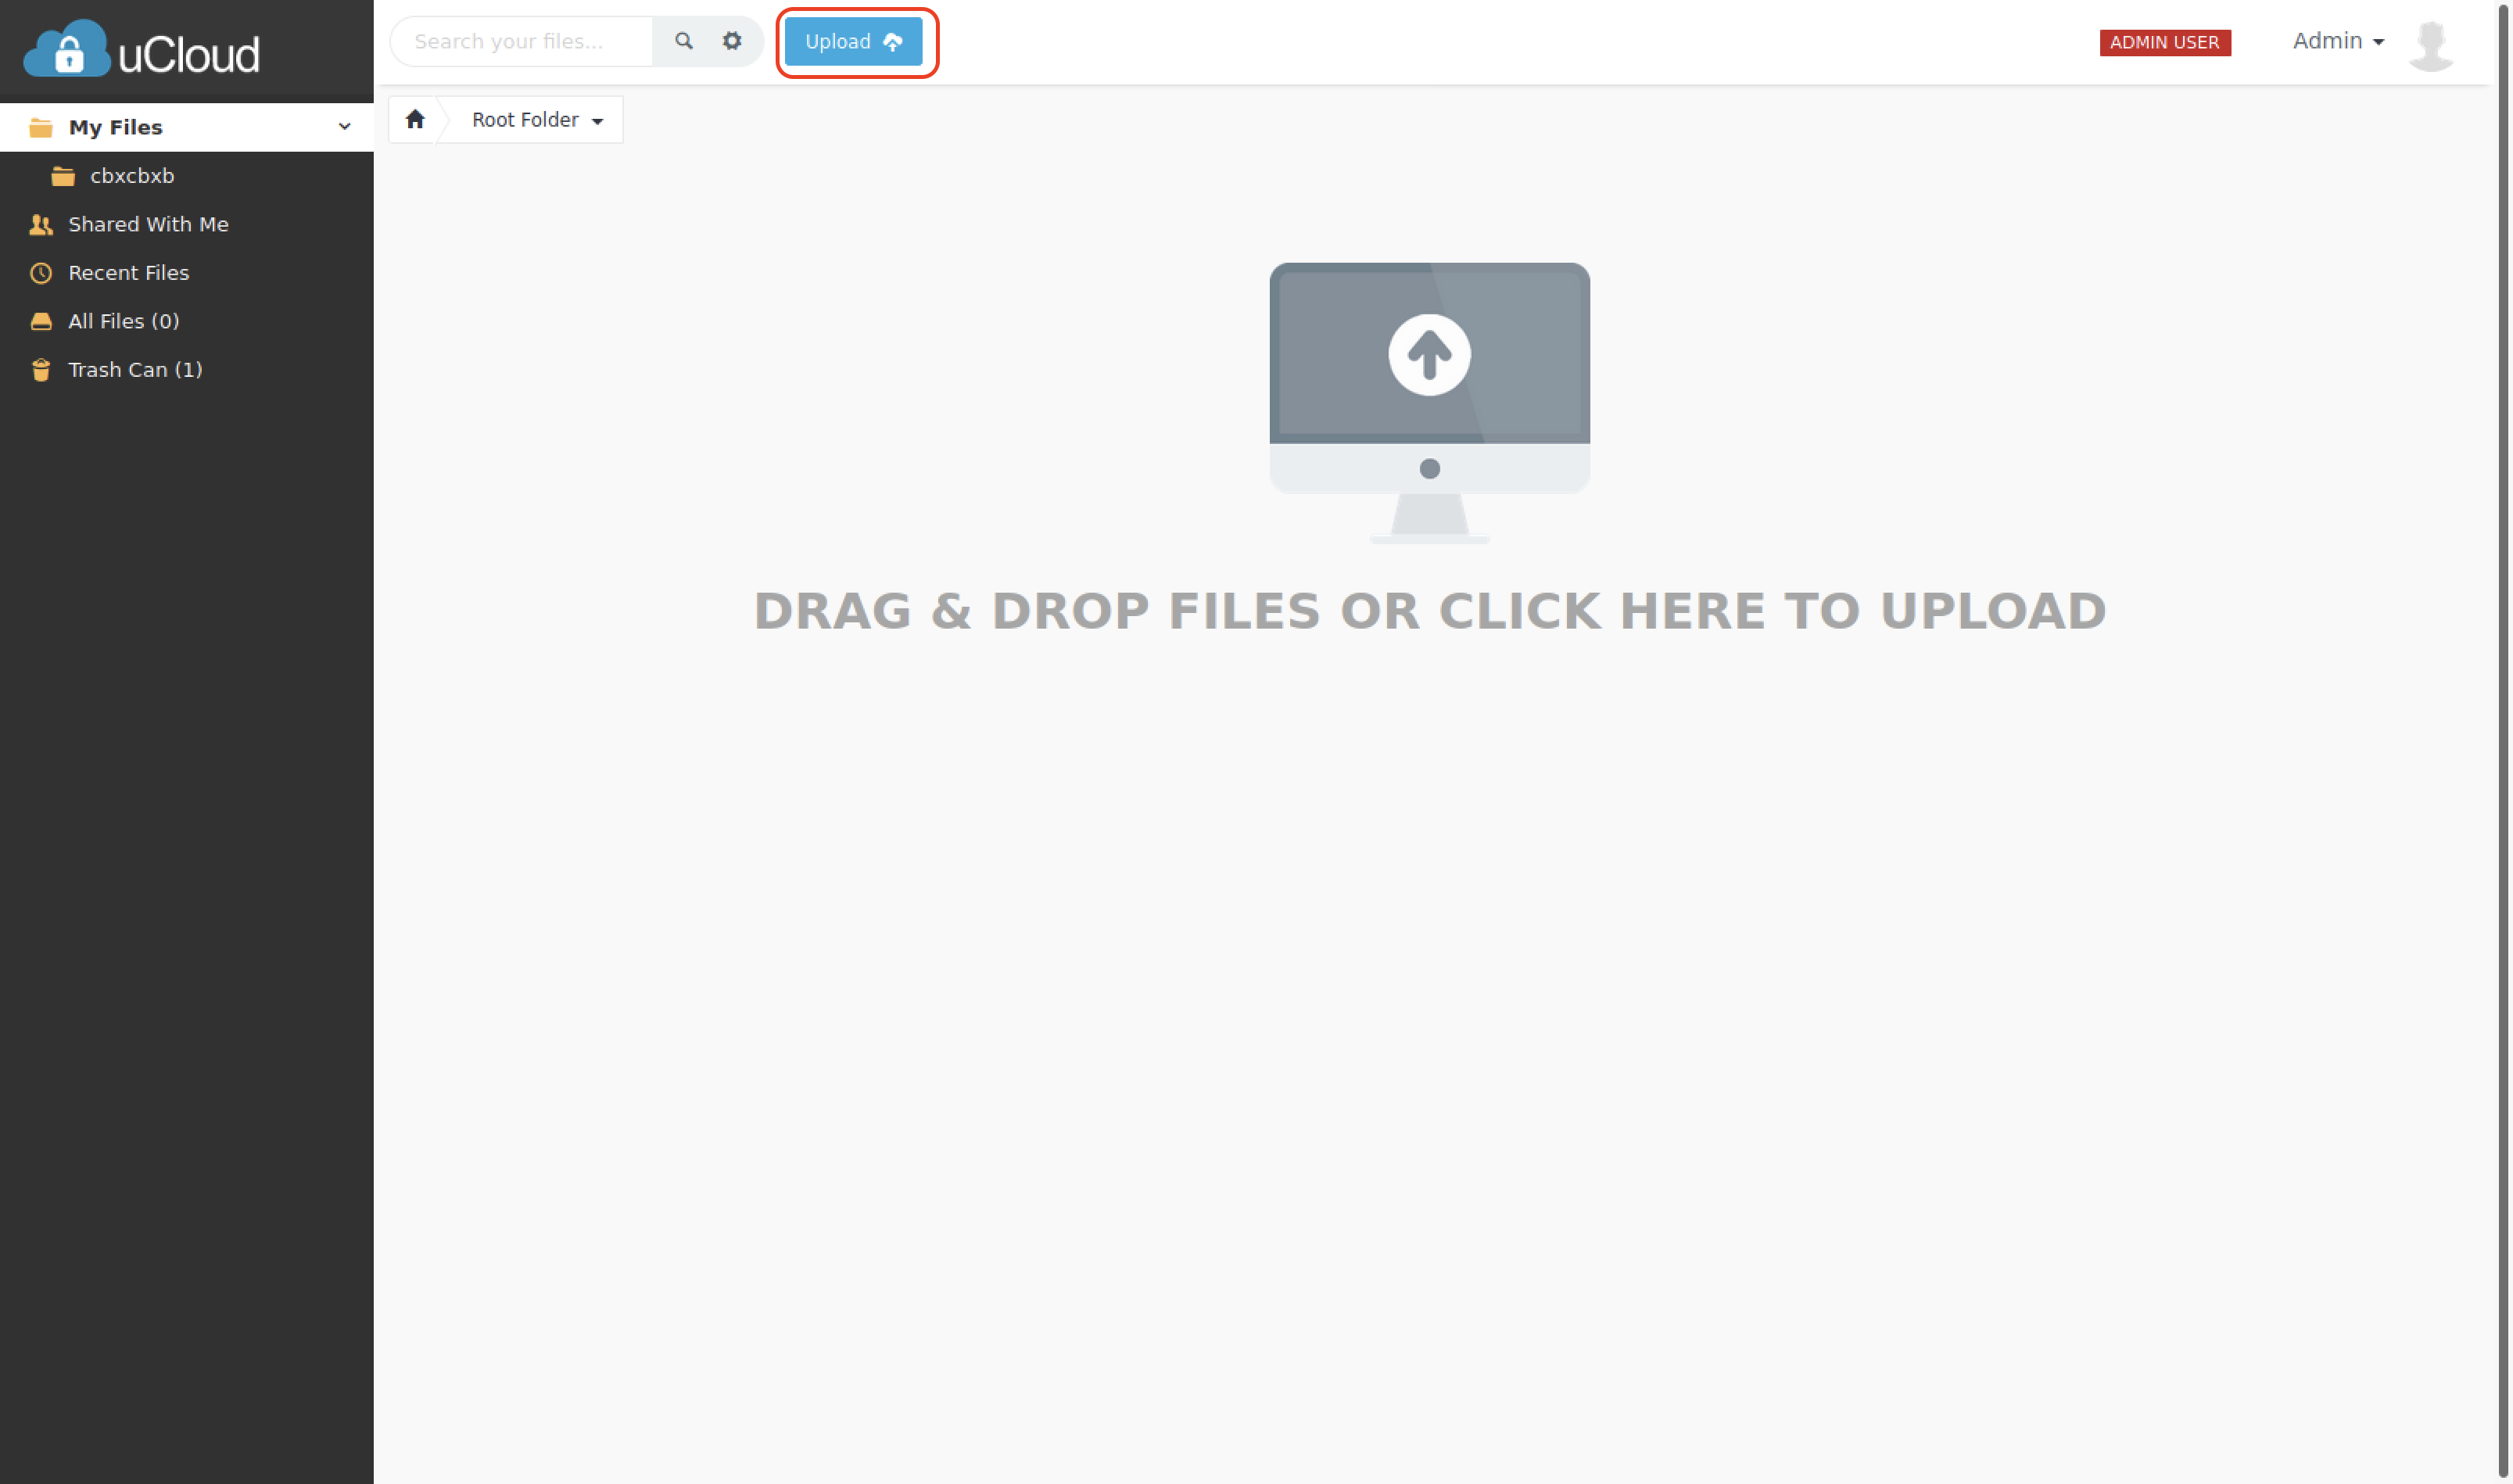
Upload a file to the system.
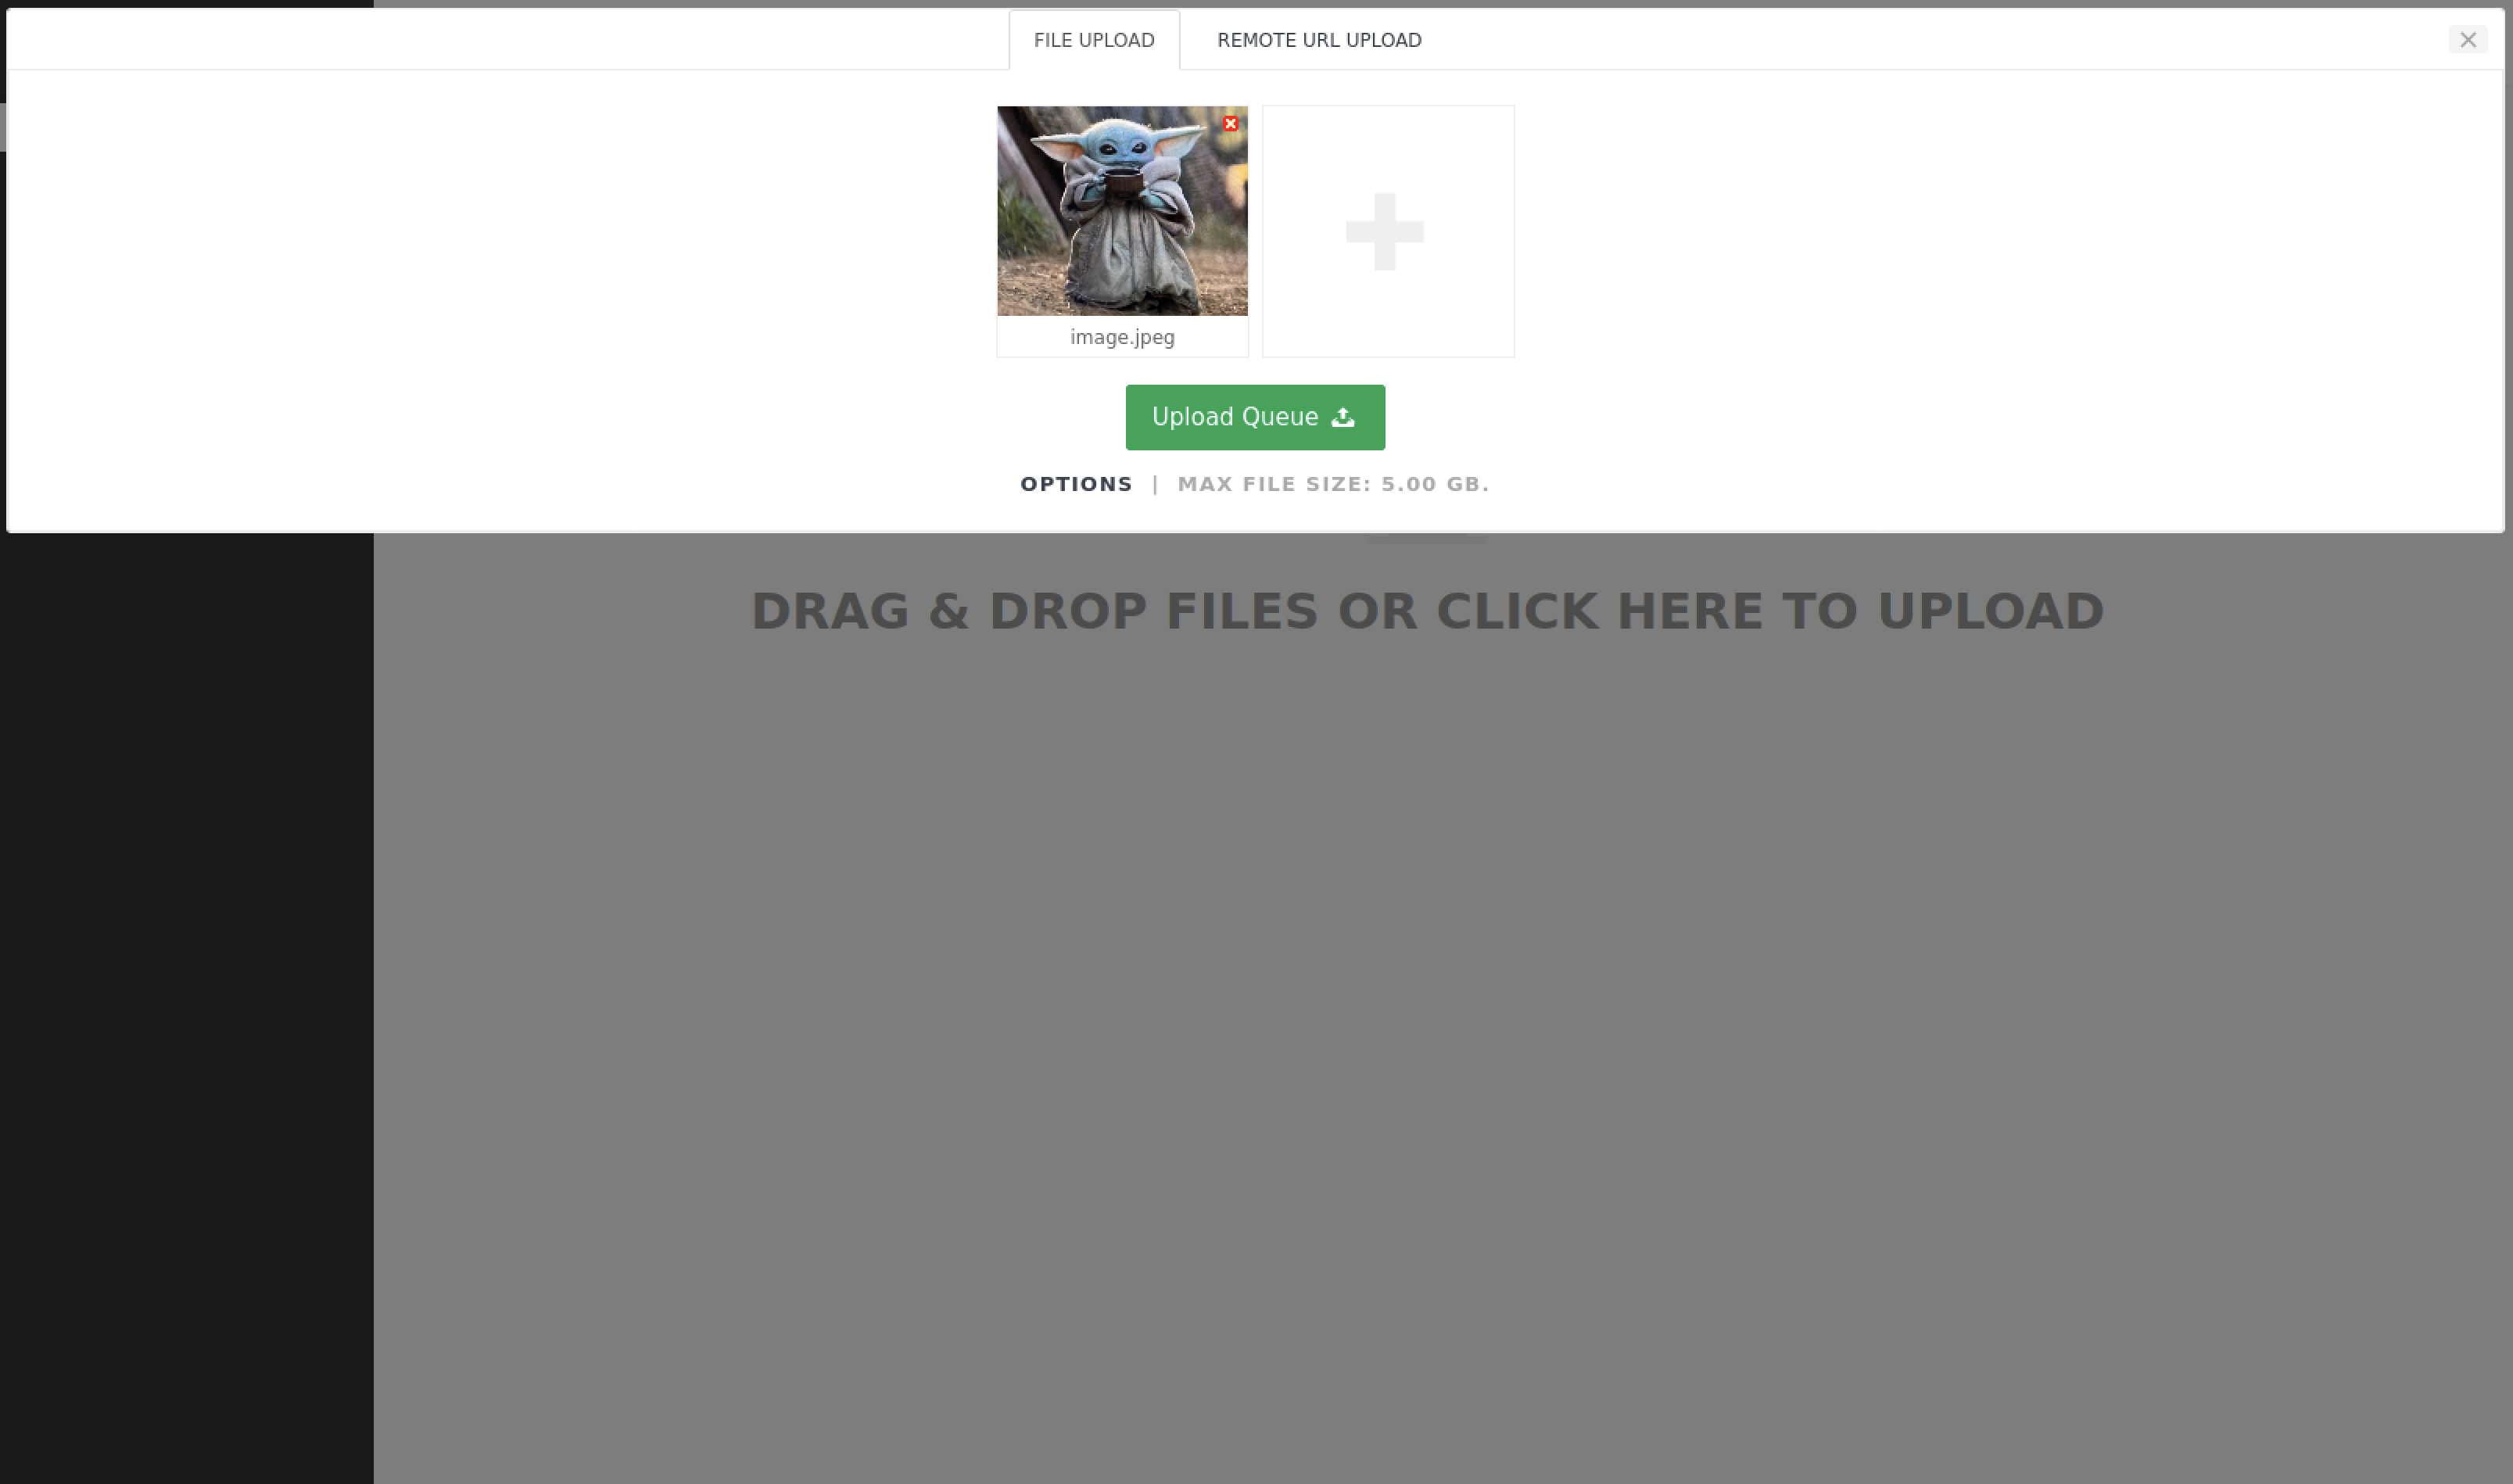
This is what it would look like on your screen.
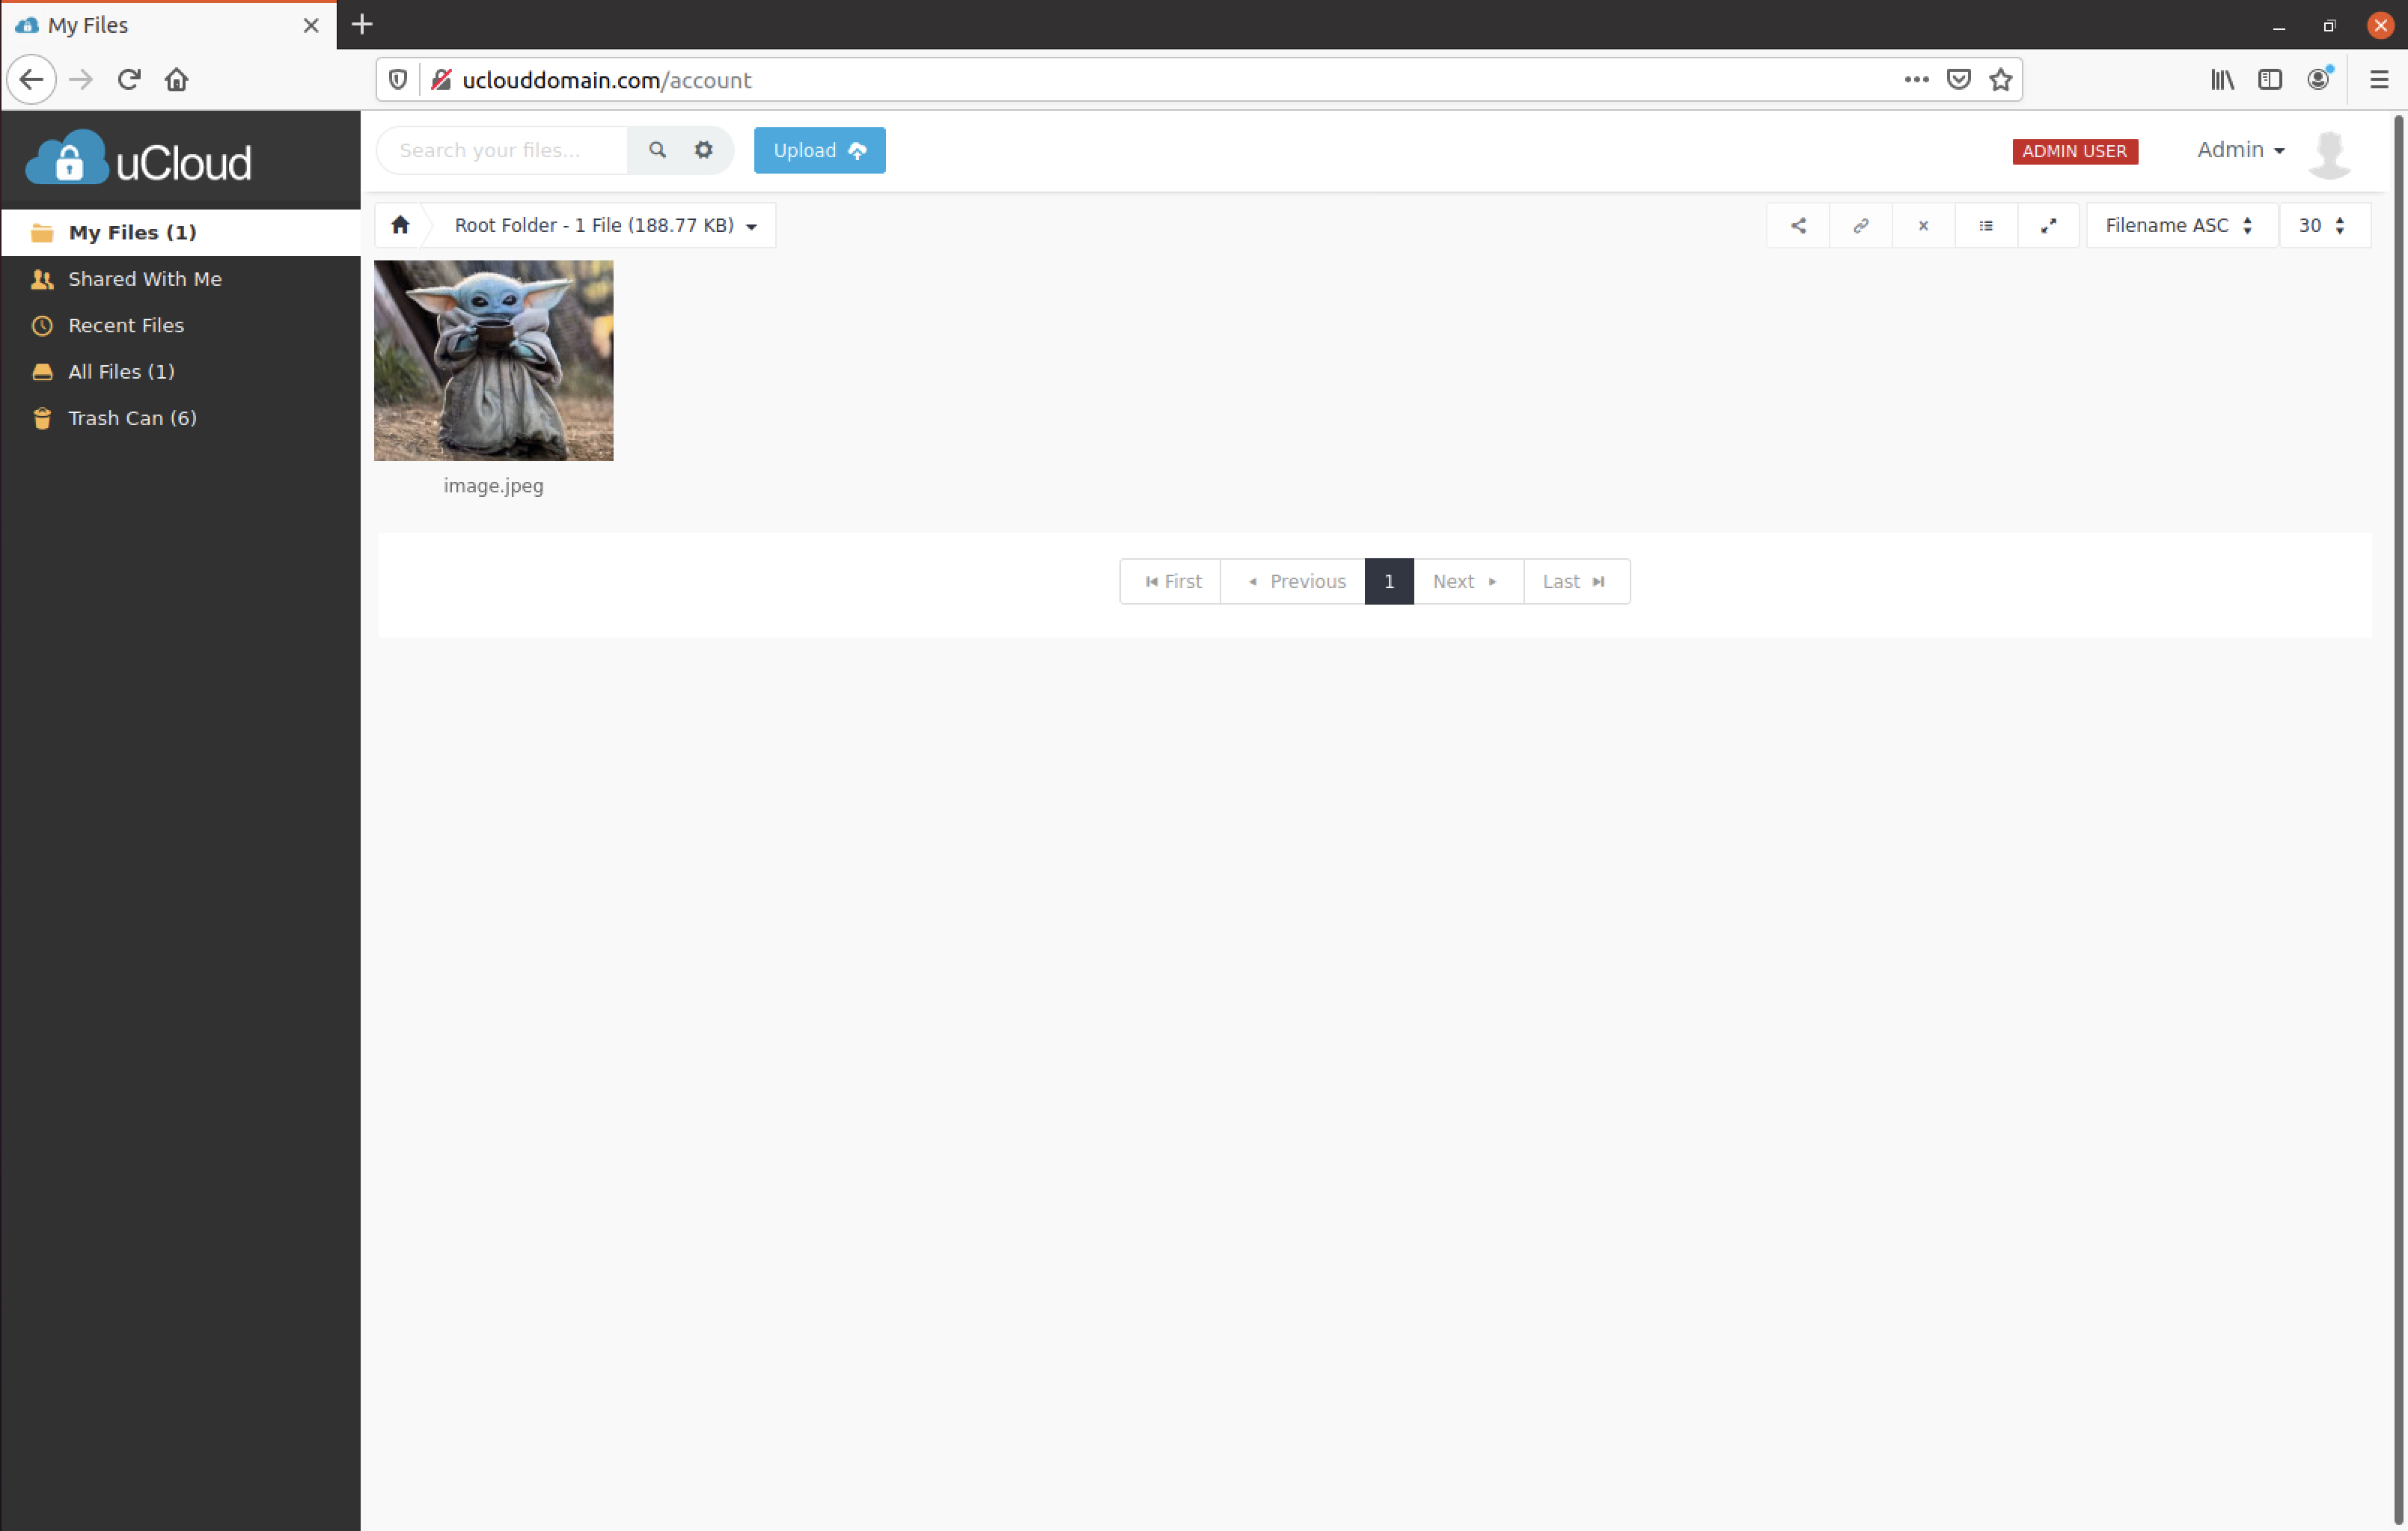
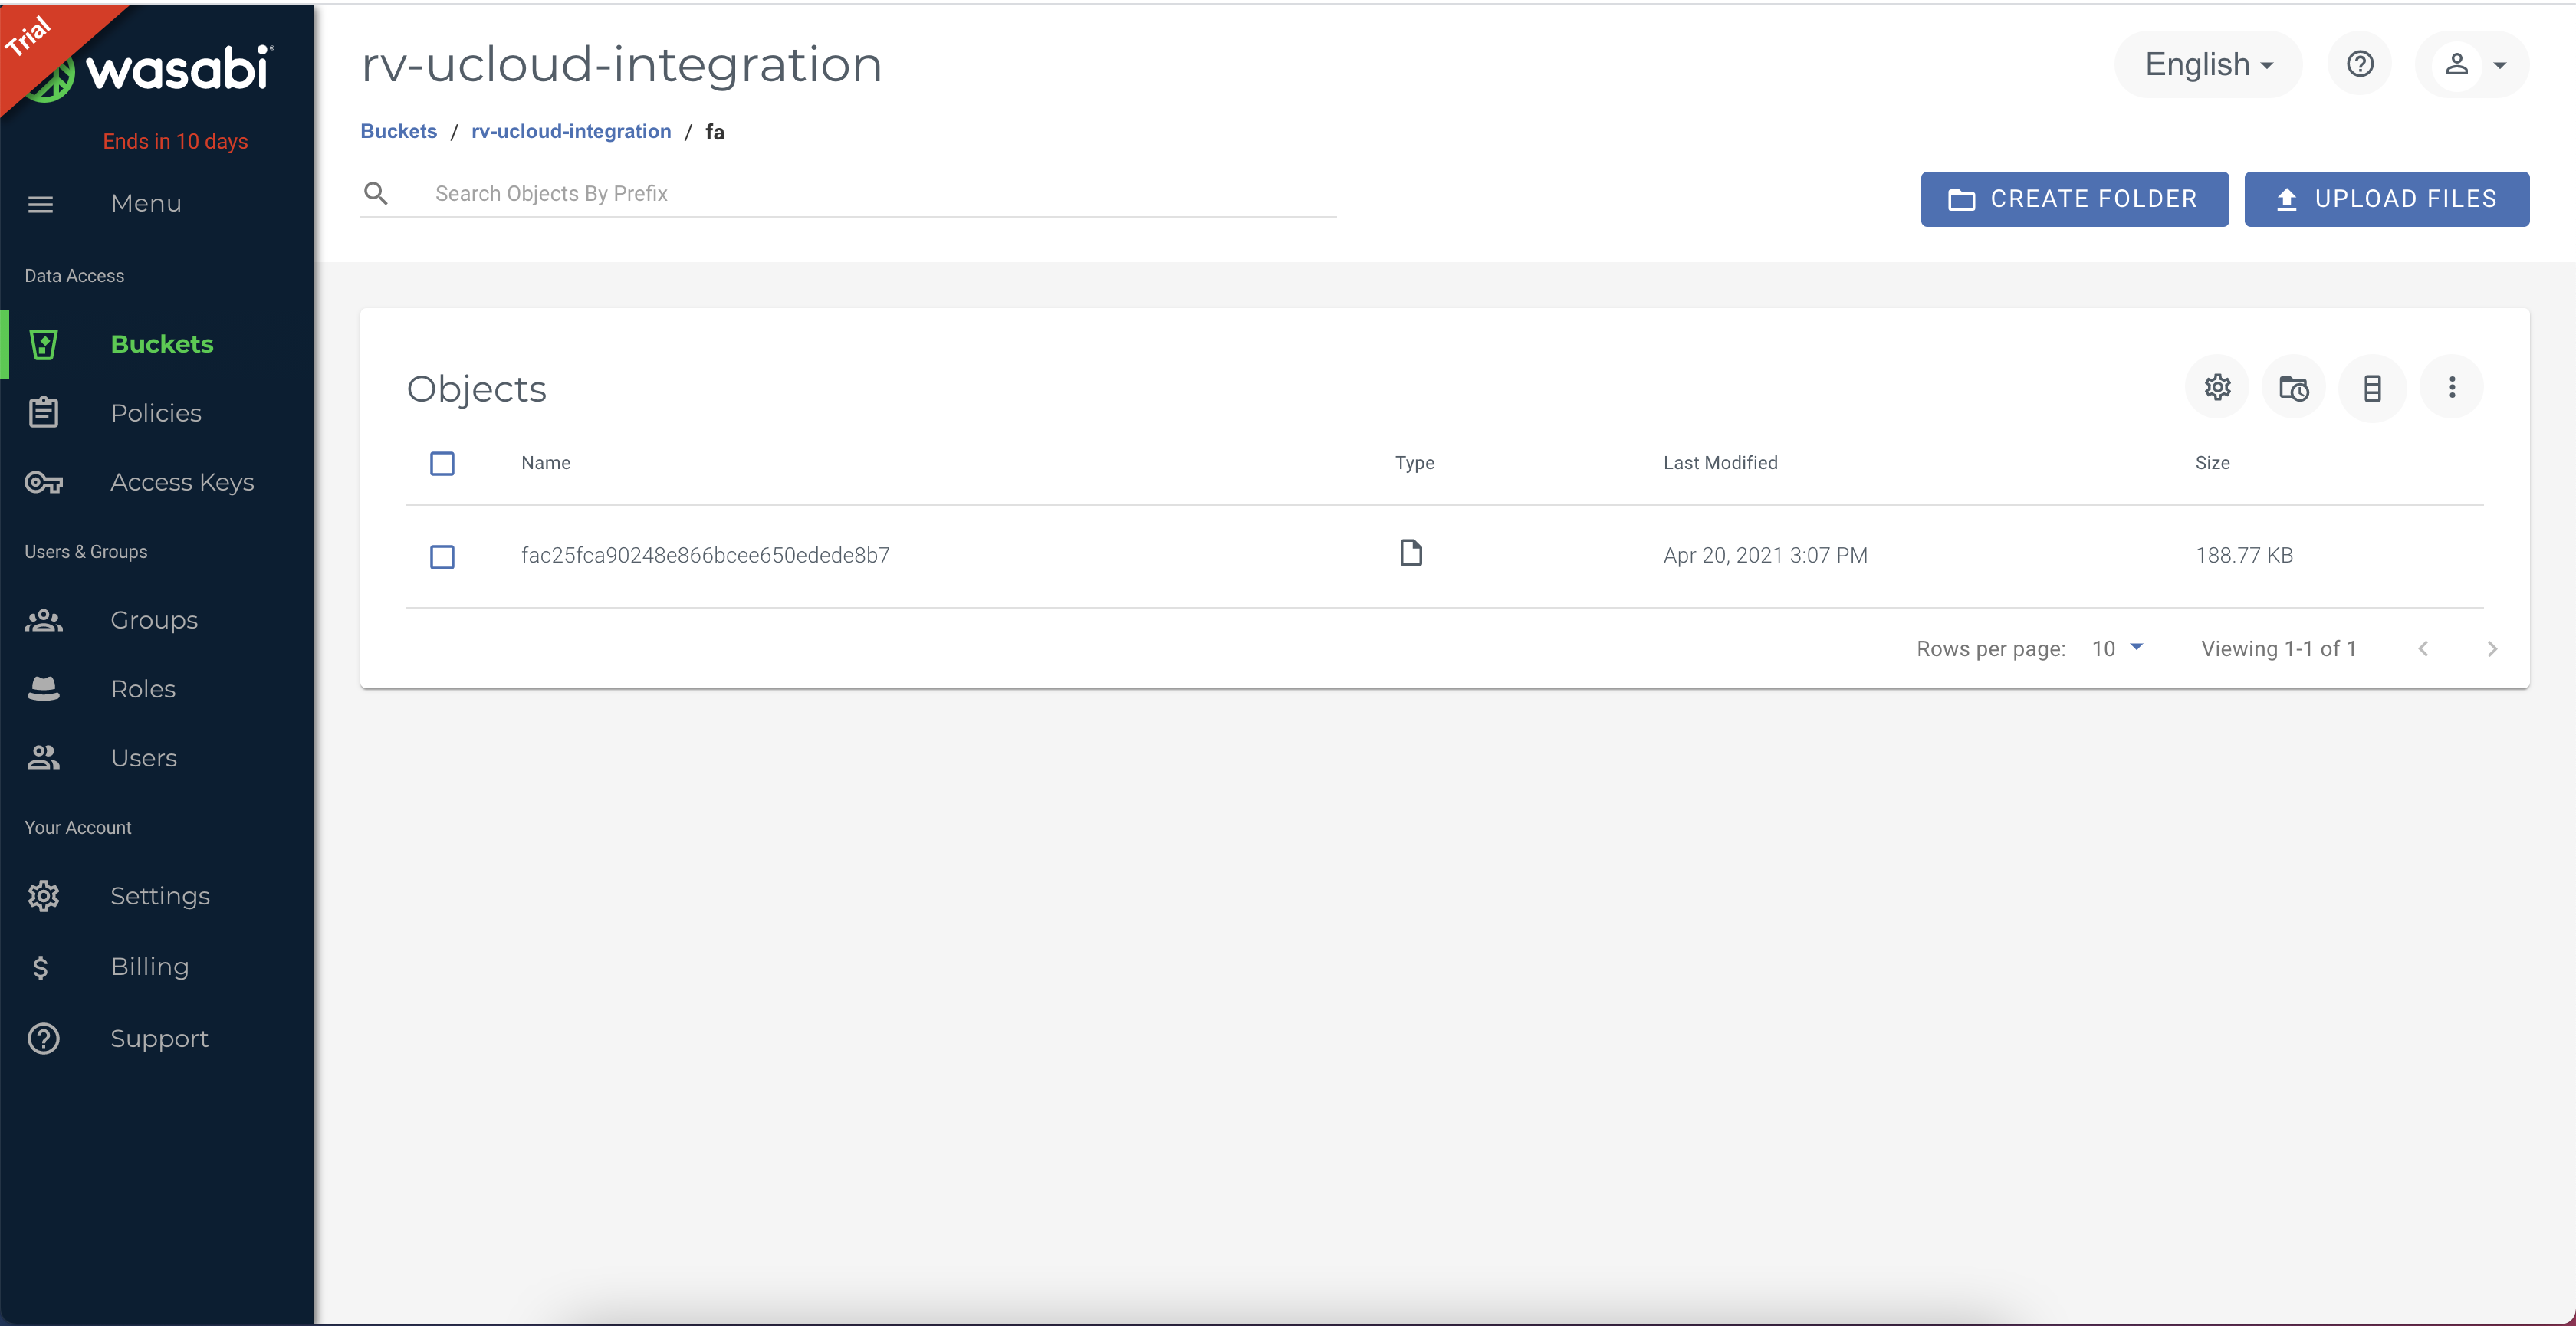
Navigating to Wasabi you will notice that the object has been uploaded to your bucket.
NOTE: uCloud has its own way to index the data, so the names of the files uploaded on Wasabi will not appear with the exact same name as on the ucloud server.
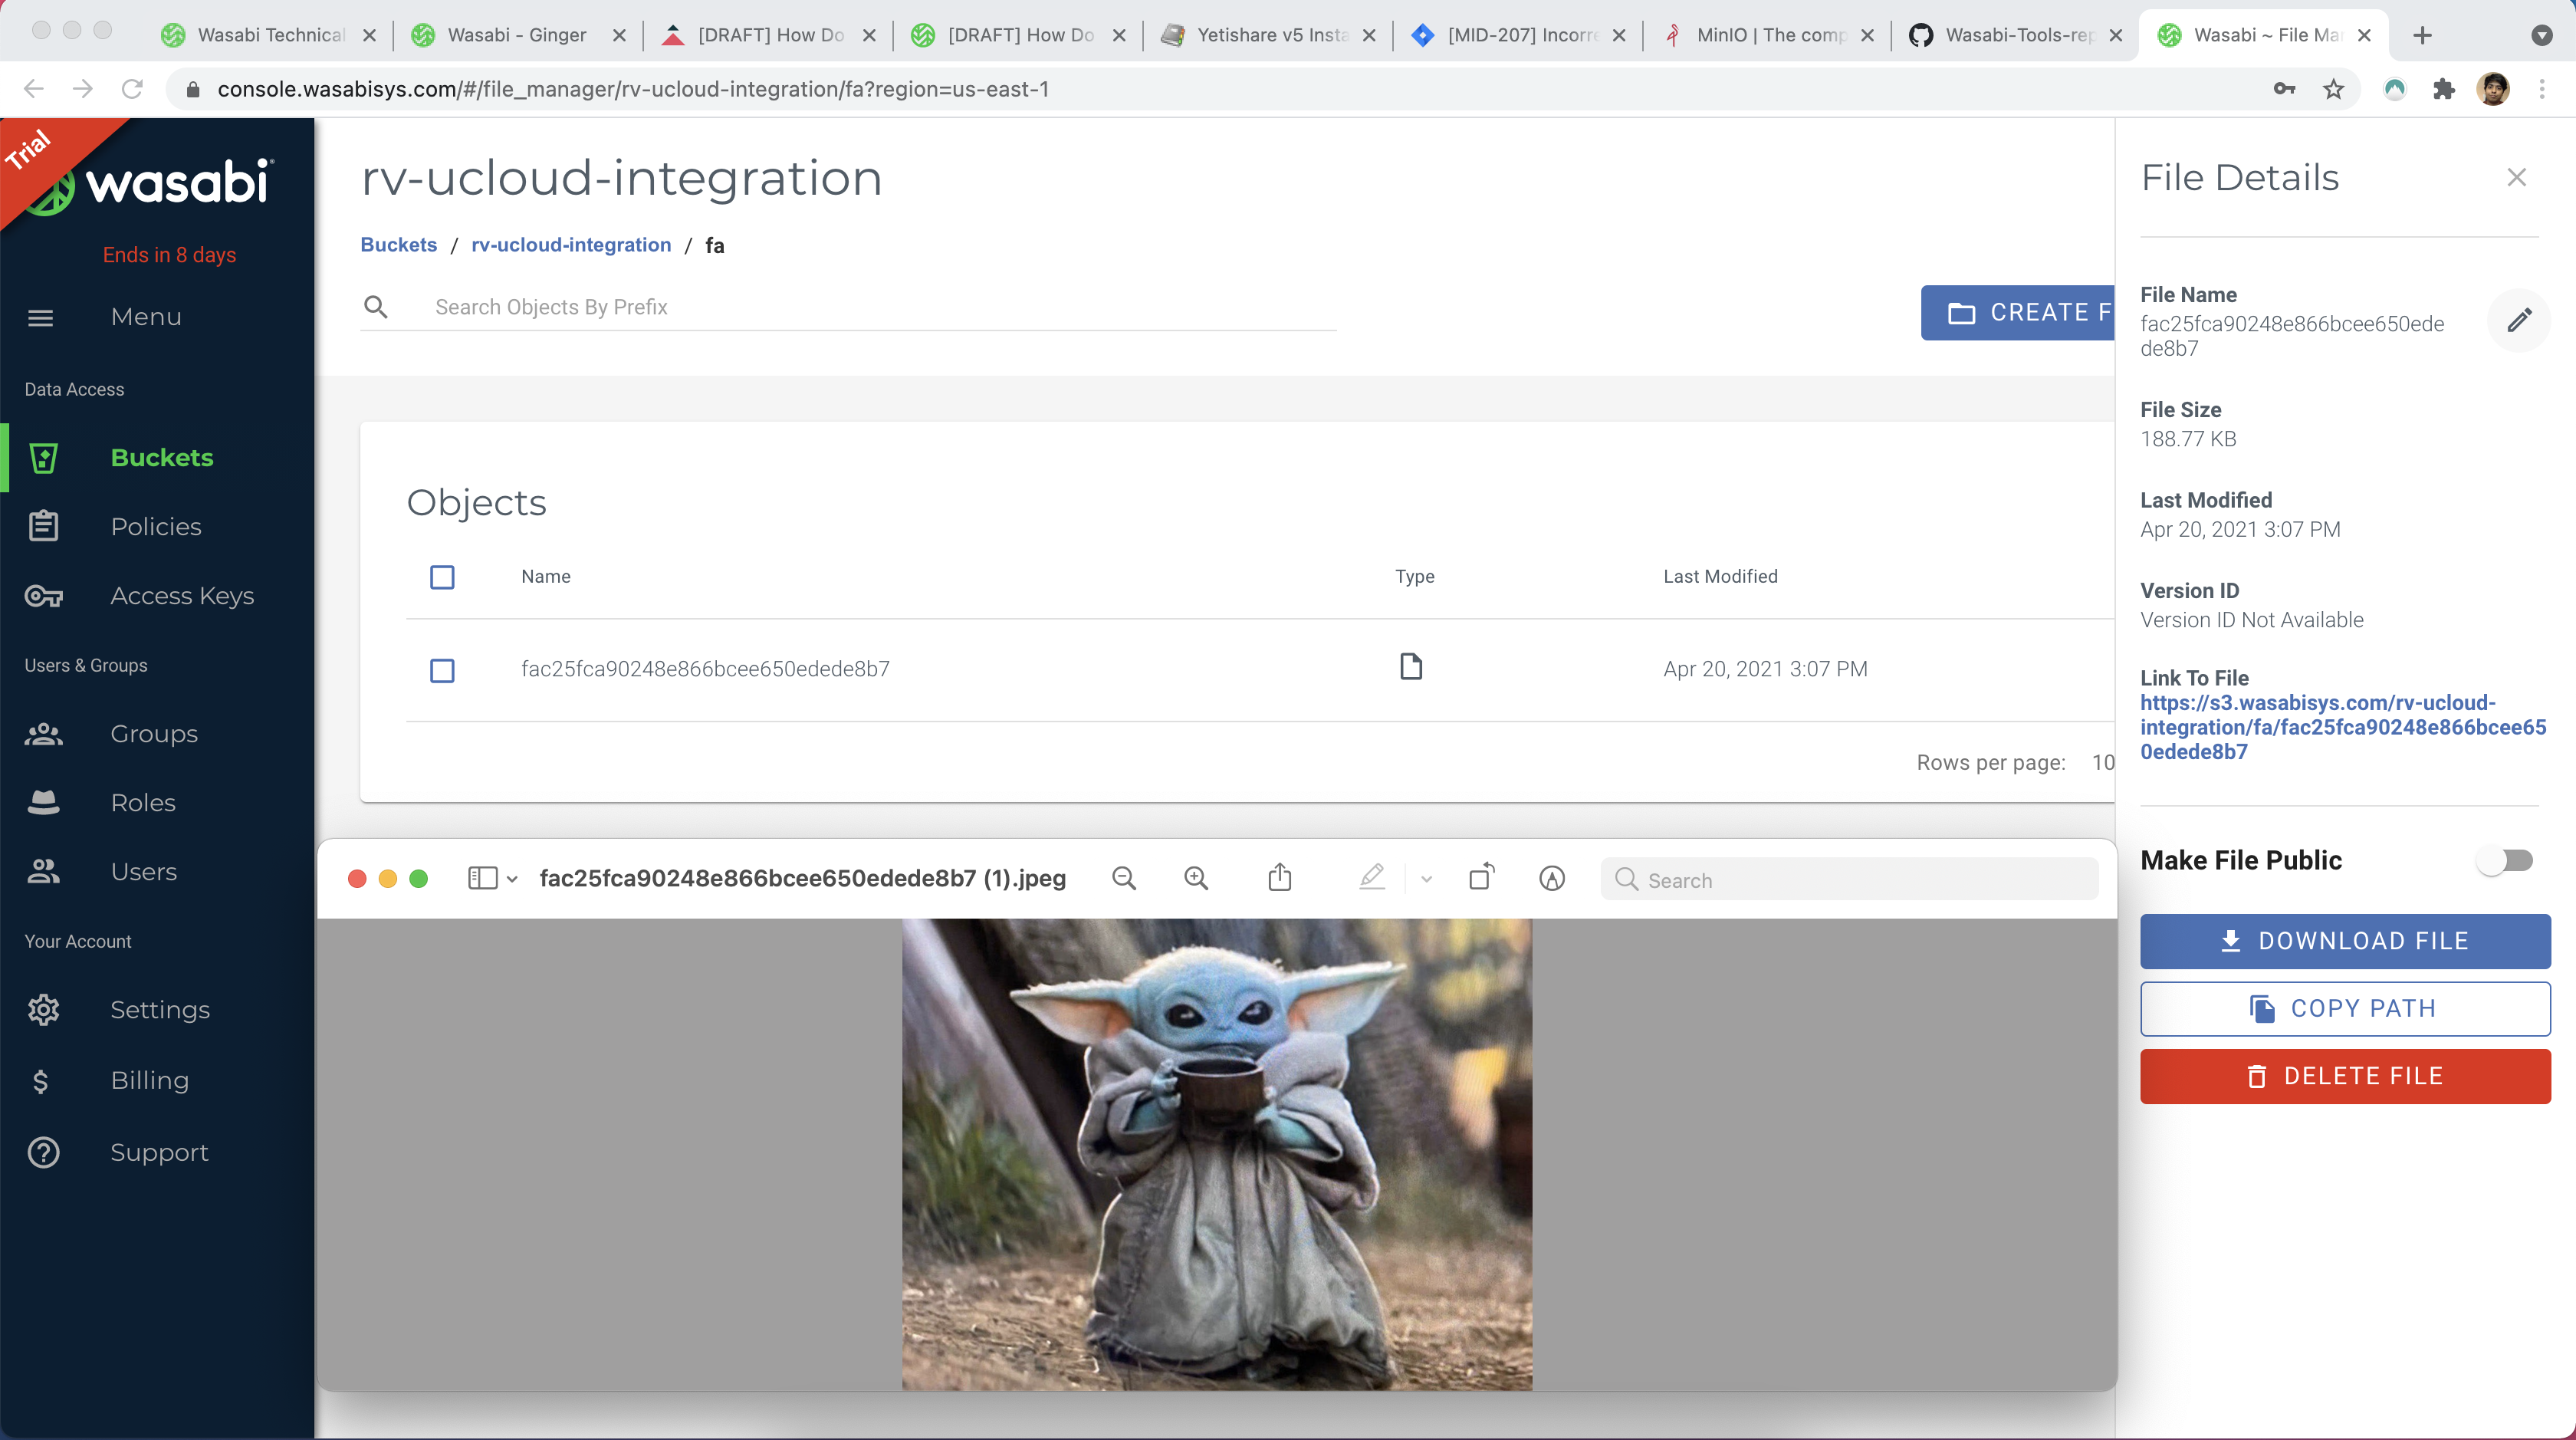
You can verify this by downloading this file and viewing it in your system.
b. Downloading Previously uploaded objects
From your accounts page, you have two ways to download the file from the server:
1. Hover over the image, and click the small triangle on the top right-hand.
.png)
This will open a small window. Here you can click on Download to download the file.
2. Alternatively, if you click on the image itself, the server will take you to a more informative page as shown below.
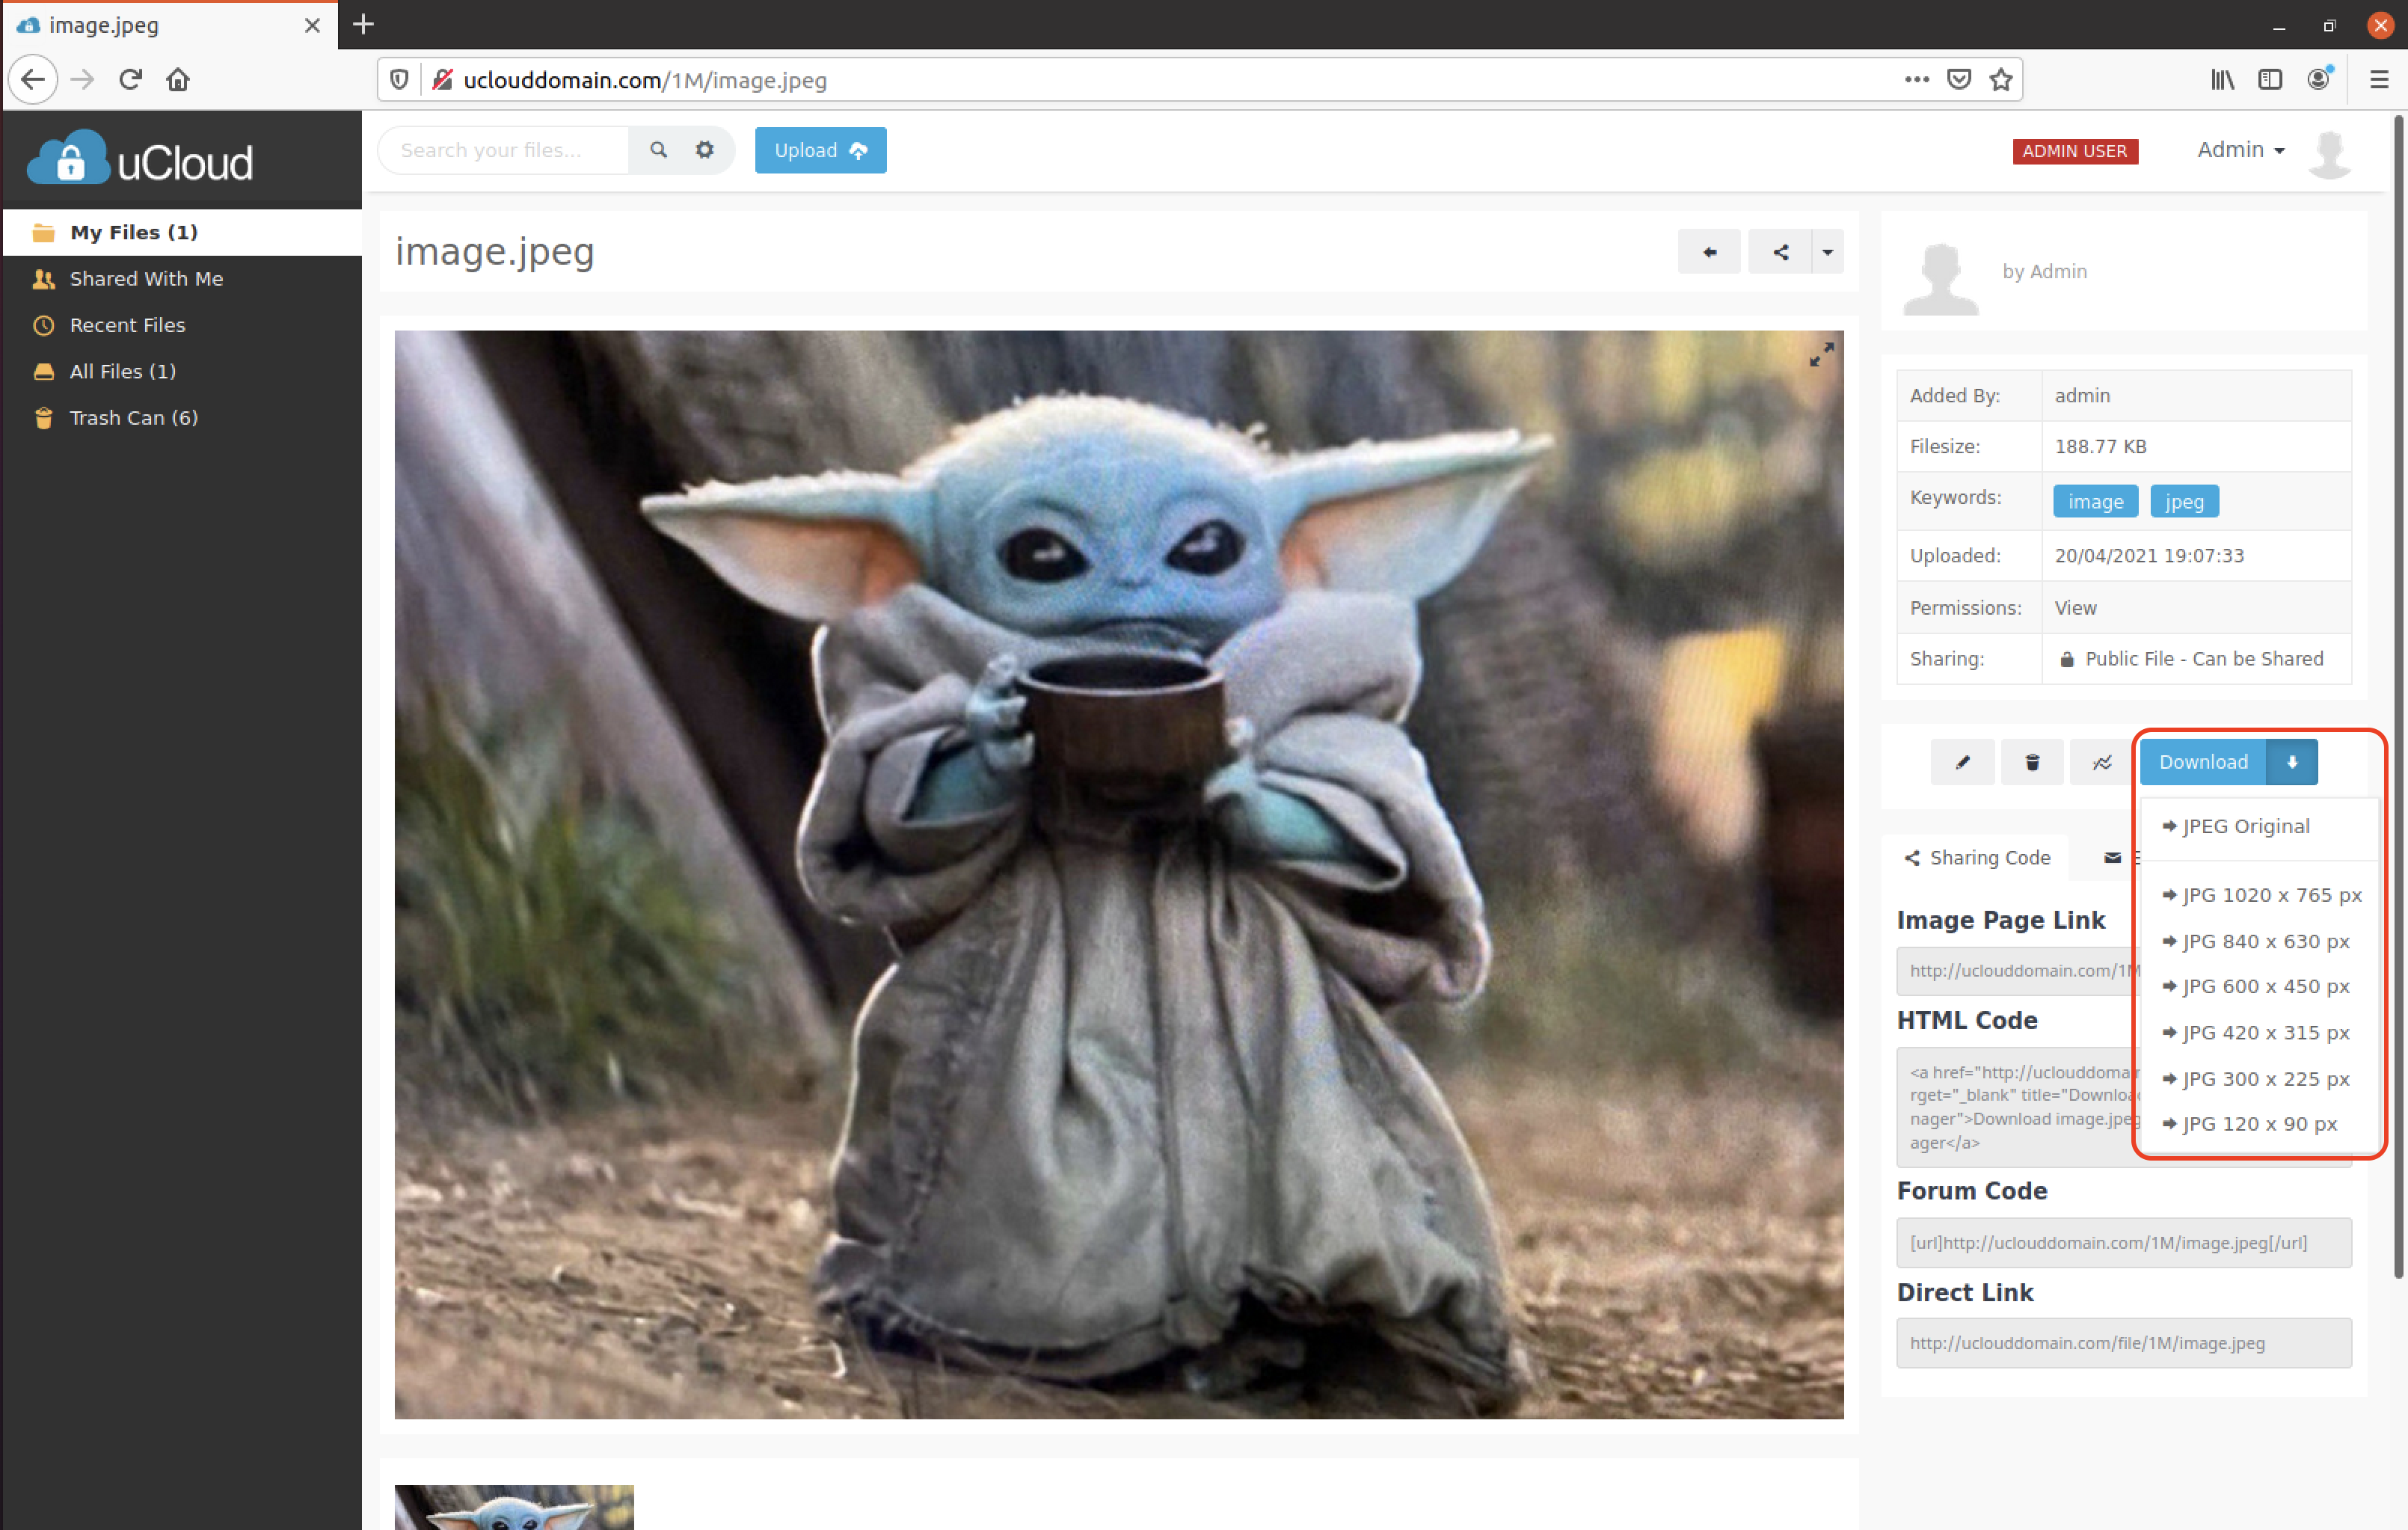
Download this image as indicated above from the right-hand side.
c. Deleting files
Deleting the files is similar to uploading previous files.
1. You may press the delete from the options menu or from the extended information page.
2. Files, which have been deleted are moved into the Trash can, which you can clear out by pressing the Empty trash button on the top right.

3. You can head over to the Admin are, then Files. Click Action Quue To view the state of the file.
NOTE: During the server setup, make sure that you have set up the CRON jobs so that the deletions are processed in the queue.
.png)
The files should be deleted from Wasabi after this.