Wasabi has been validated to work with VAST Data. To use this product with Wasabi, please follow the instructions below.
Reference Architecture
.png)
Prerequisites
VAST Data v3.4.0 and later
An active Wasabi account
Configuration
Create an S3 replication peer
1. Log in to the VAST data Web UI.
2. Navigate to Data Protection. Choose S3 Replication Peers.
.png)
3. Click + Create S3 Replication Peer.

4. In the Add S3 Replication Peer window, select Custom S3 as the Peer Type and provide the following details, and click Create.
Peer name - provide an appropriate name for the replication peer
Bucket name - name of the bucket
HTTP protocol - https
Custom Bucket URL - s3 endpoint URL of the bucket
Secret Key - Secret Key
Access Key - Access Key
Proxies - proxies through which replication traffic is routed, if any
.png)
Note: This config example discusses the use of Wasabi's us-east-1 storage region. To use other Wasabi storage regions, please use the appropriate Wasabi service URL as described in this article.
5. The replication peer is created and is displayed on the S3 Replication Peers page. When the cluster can successfully connect to the target, its status will display as Active.

Create a protection policy
6. Navigate to the Protection Policies tab and click + Create Protection Policy.
.png)
7. In the Add Protection Policy window, provide a Policy name and select the S3 replication peer created in Step 4 from the Peer drop-down menu.
.png)
8. Provide an appropriate snapshot prefix and configure the desired replication schedule, and click Create.
.png)
Create a Protected Path
9. In this example, we will be using an existing path in the Element store to create a protected path. To view your existing paths, navigate to Element Store, click Views.
.png)
10. All the existing paths are listed under Views. We will be using the path - /wasabi-export-test to create a protected path.
.png)
11. Navigate to Data Protection, then Protected Paths. Click on + Create Protected Path.
.png)
12. In the Add Protected Path window, provide the following details and click Create.
Path name - a name for the protected path
Choose a policy - select the policy created in Steps 6 - 8 (Wasabi Test in our example)
Path - path from the Element store
.png)
13. The newly created path is listed under the Protected Paths. It goes through Initializing, Initial Sync, and finally into Active state.
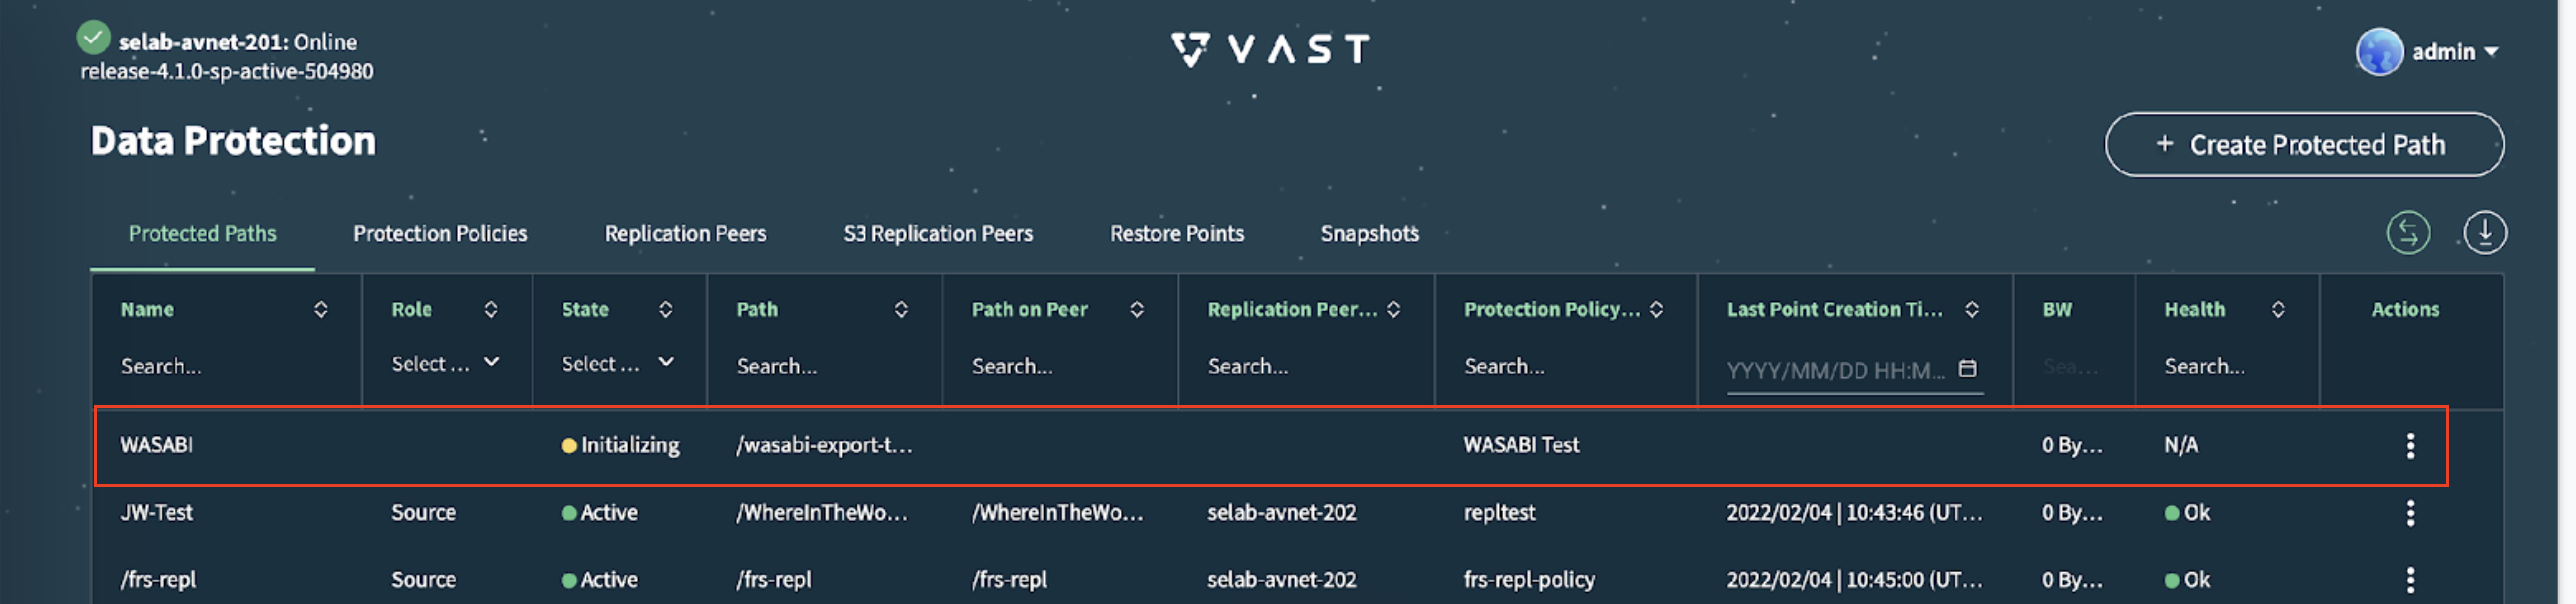
.png)
.png)
When a protected path is active, it performs an initial data sync to the replication peer or S3 replication peer (if applicable) immediately after being created. The initial sync creates the first restore point. Therefore, the restore point created on the start date configured in the Protection Policy is, in fact, the second restore point.