How do I use Veeam Standalone Agent for Linux (v6) with Wasabi?
Wasabi is a member of Veeam's cloud partner ecosystem. We have worked with Veeam closely to offer both a seamless implementation and a smooth transition to cloud storage. Veeam with Wasabi Solution Overview provides more information on the Wasabi-Veeam partnership and solutions.
Wasabi has been validated to work with Veeam Agent for Linux (6) in standalone mode to protect data on Linux computers and backup directly to Wasabi's Object storage. Veeam Agent for Linux version 6 introduces support for Backup directly to cloud object storage, as well as support for immutable backups.
The data restoration process is handled by your specific backup software application. As there are many, potential variables that will affect your unique environment, Wasabi strongly recommends that you seek the guidance of your backup software's technical support team in the event that you encounter difficulty or have application-specific inquiries.
To leverage immutable Veeam backups, follow the steps in Object Lock: Enabling. Enabling bucket versioning only is not a proper configuration for immutable Veeam backups and can cause problems. If you are simply going to use regular Veeam backups with Wasabi buckets, bucket versioning is not required.
Prerequisites
Active Wasabi Storage account.
Veeam Agent for Linux version 6 installed and licensed.
A valid Veeam license that supports capabilities for object storage.
Architecture Diagram

Creating a Backup Job
Veeam Backup Agent for Linux has a GUI-like user interface called Control Panel that enables users to easily perform main backup and restore tasks. These tasks (and some more advanced operations) can also be done by using the command line interface. Refer to Veeam Agent for Linux documentation for the command line interface with Veeam Agent for Linux control panel. You do not need to work with Linux shell and remember numerous commands.
The control panel can be navigated using the keys below.
Tab — To switch between controls and buttons in the Backup Job wizard.
Up and Down — To switch between items in a scrollable list.
Space — To select the necessary item in a list. The selected item's mark may vary in different steps of the wizard.
Enter — To proceed to the next step of a wizard or to view details of the backup job session selected in the list of sessions.
Backspace — To return to the previous step of a wizard (you cannot use this button to change wizard steps when a text field is selected).
Esc — To exit the wizard currently used or close the Veeam Agent for Linux control panel.
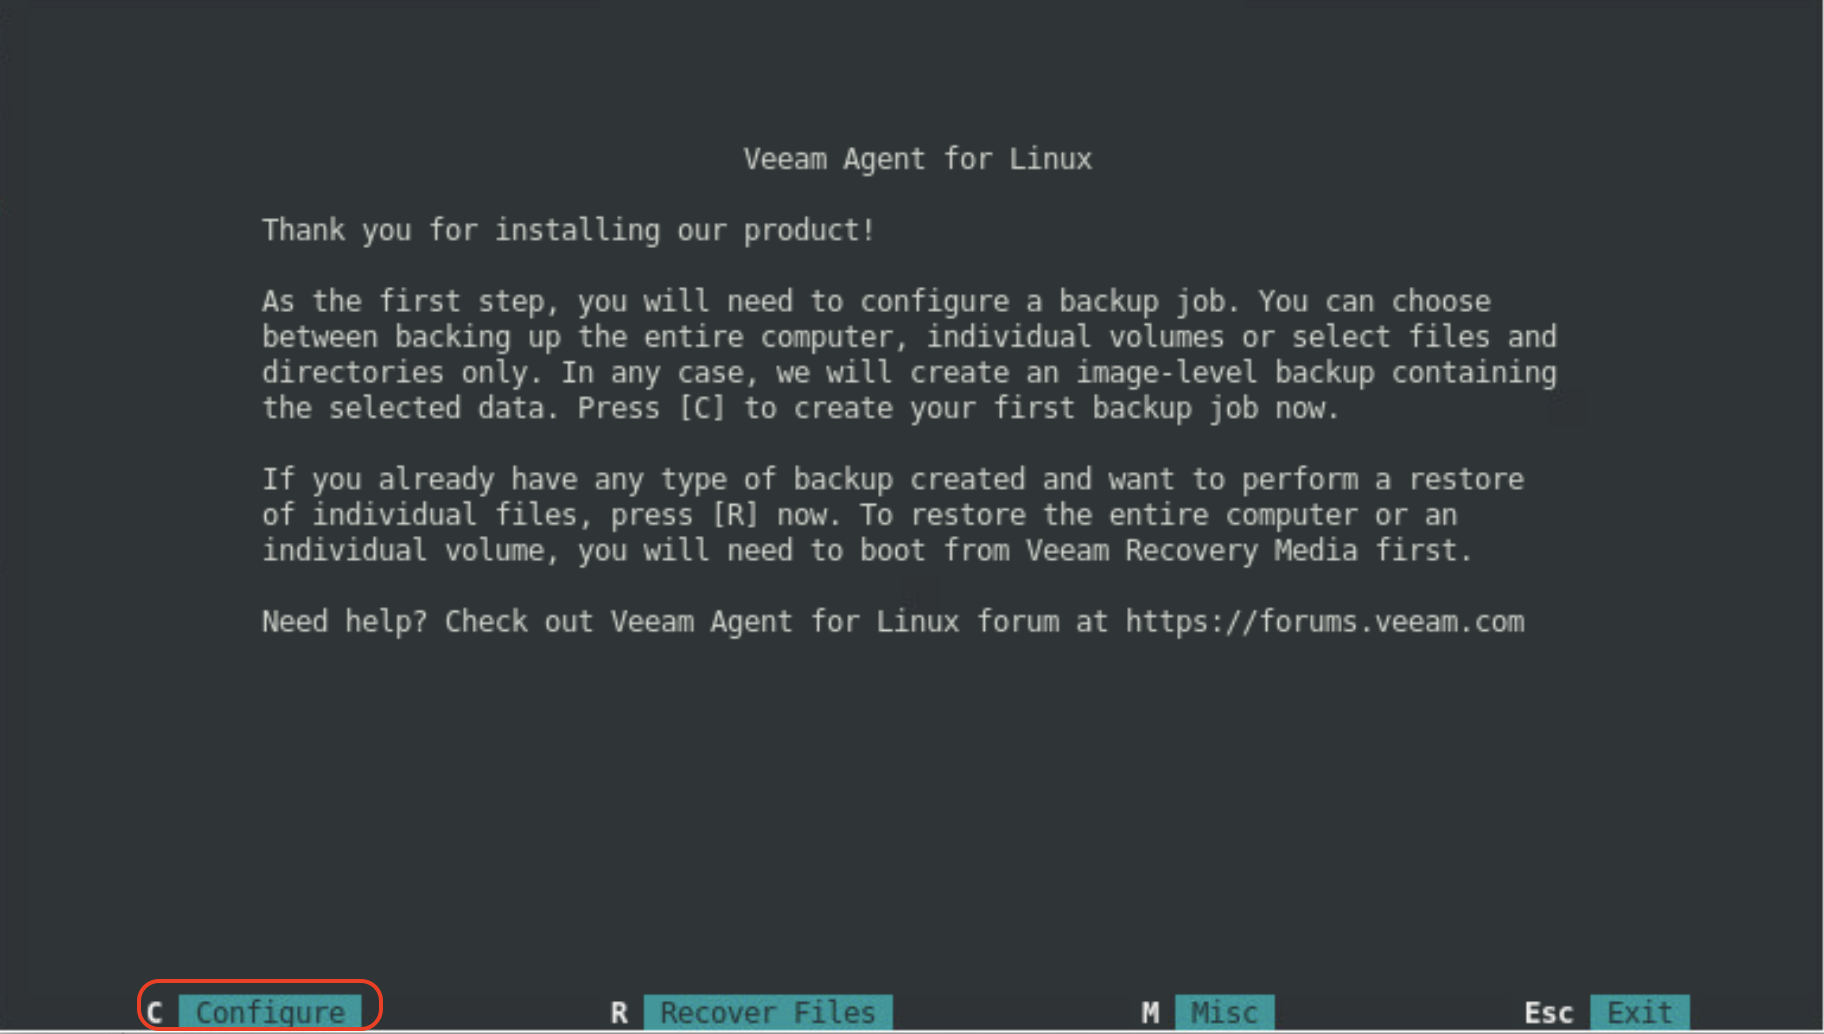
Open Veeam Agent for Linux by typing "Veeam" in the terminal. Press C to configure.
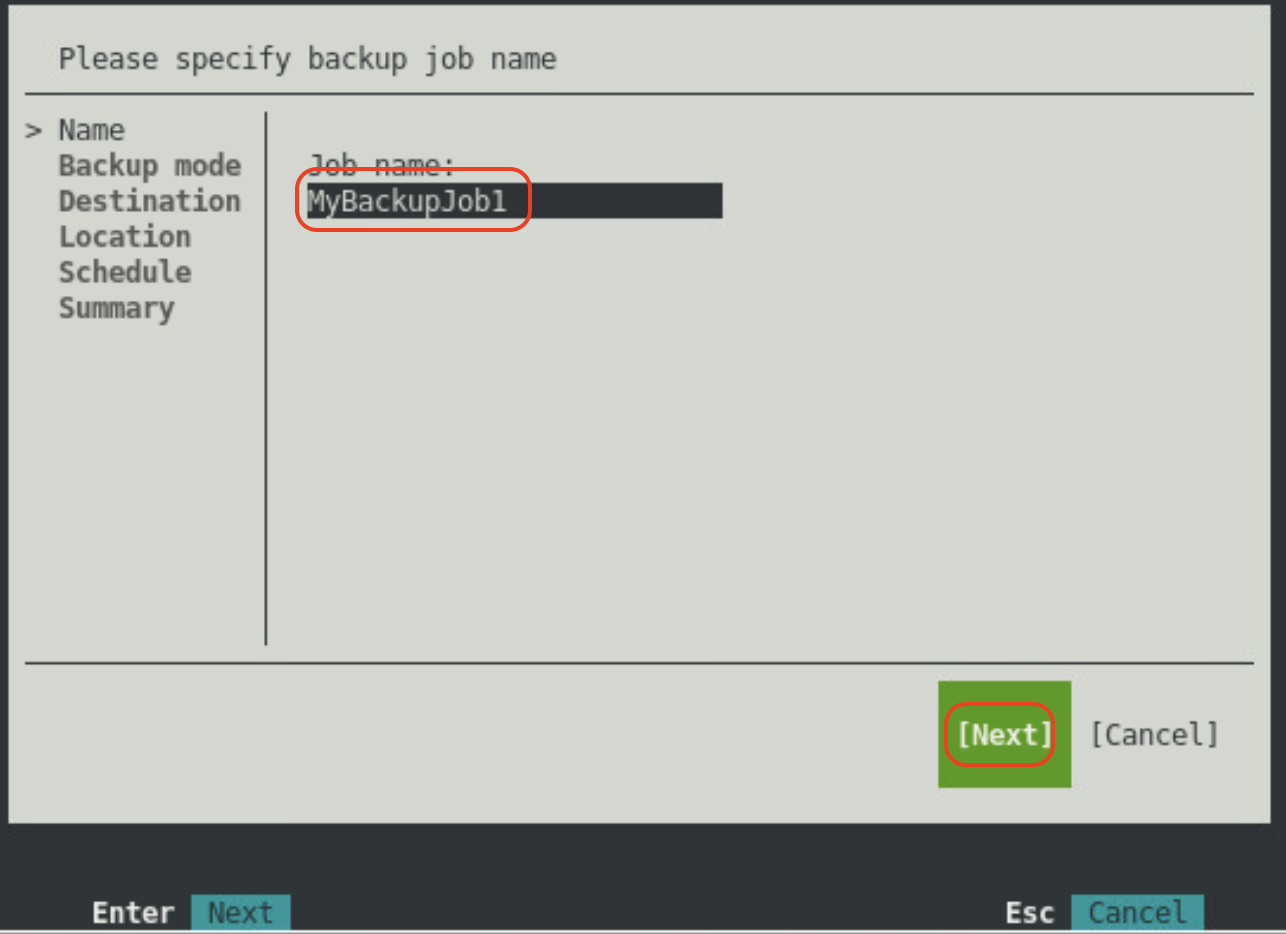
Input the Name for the backup job. Press the Return key.
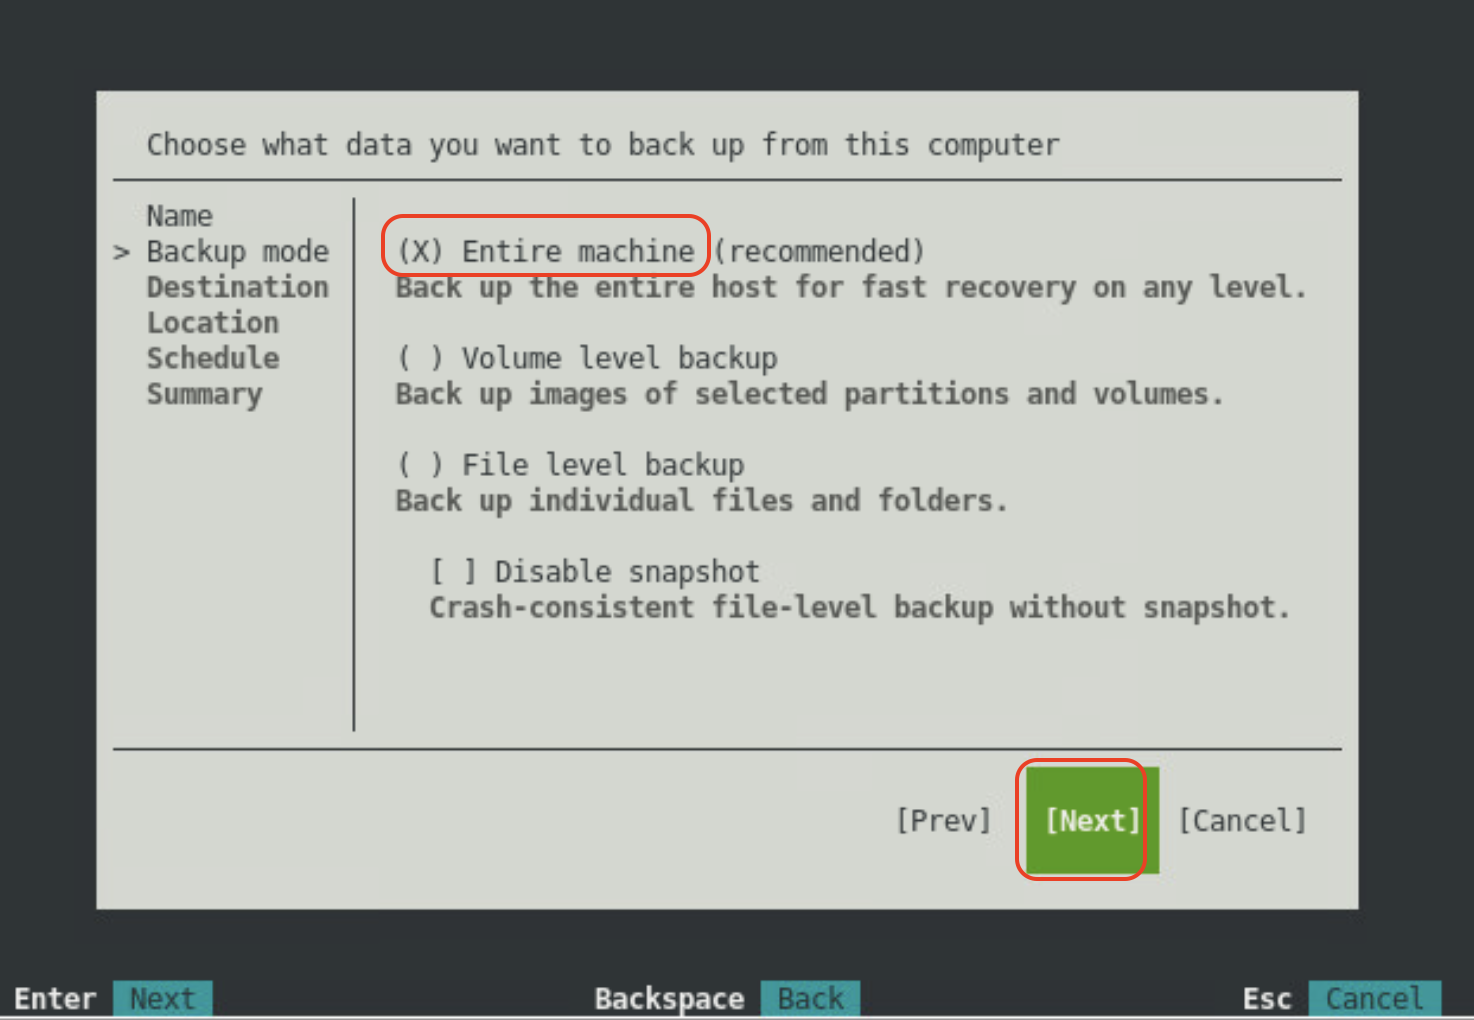
Select the desired backup mode and press the Return key. This example shows Entire machine, but Volume and File level backs can also be taken. For more detail, refer to Veeam Agent for linux documentation for Backup mode.
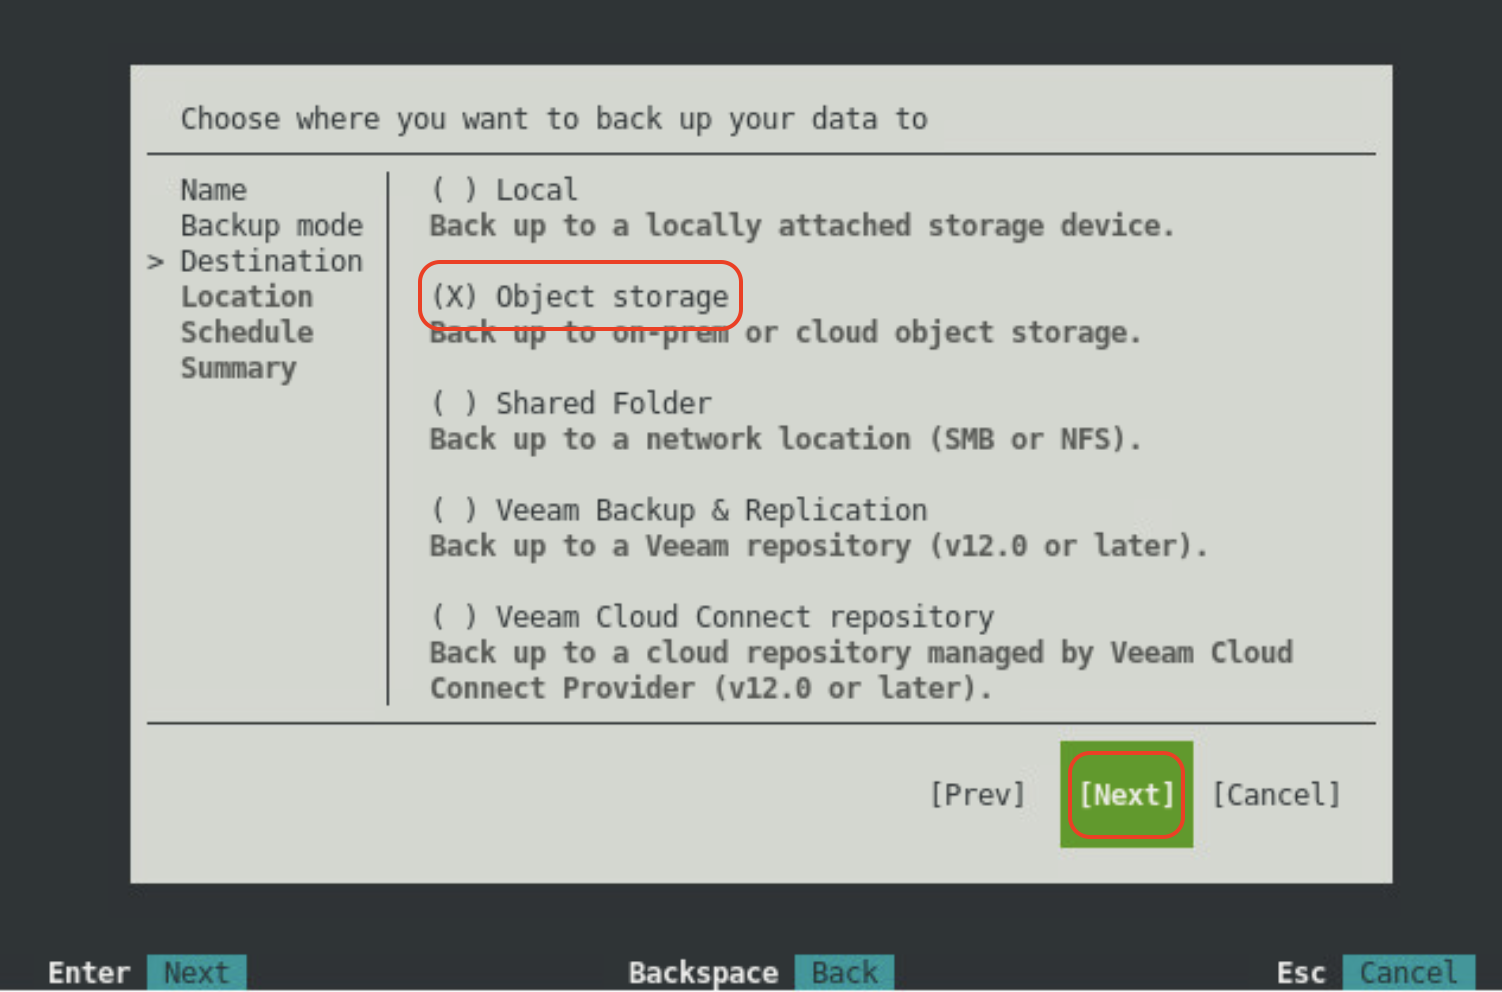
On the Destination page, select Object storage. Press the Return key.
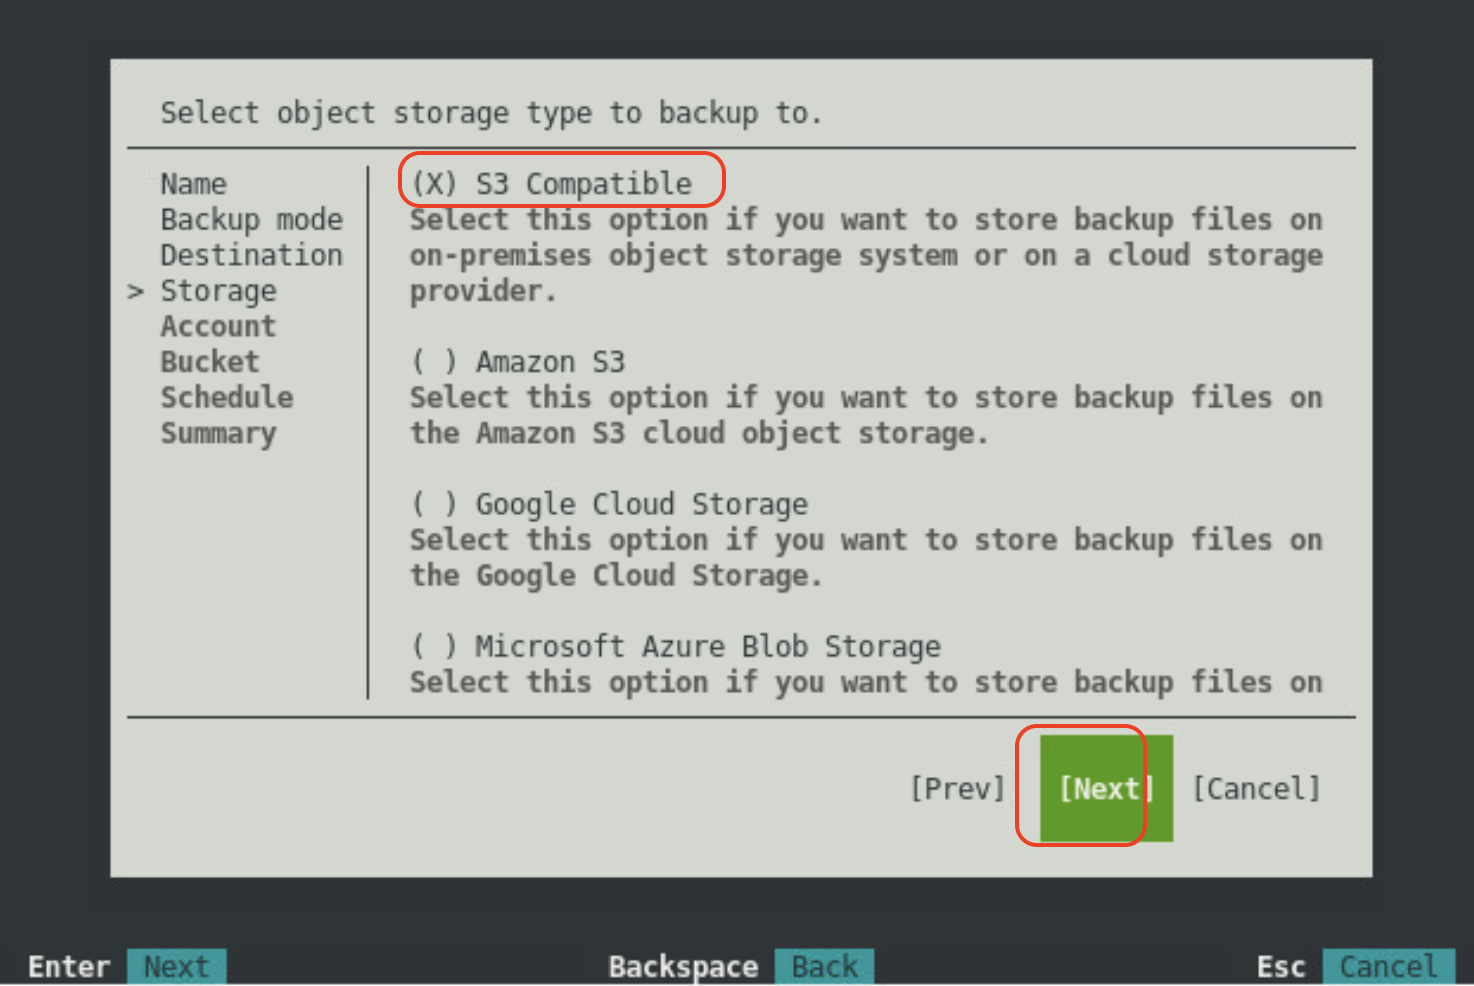
On the Object Storage page, select S3 Compatible. Press the Return key.
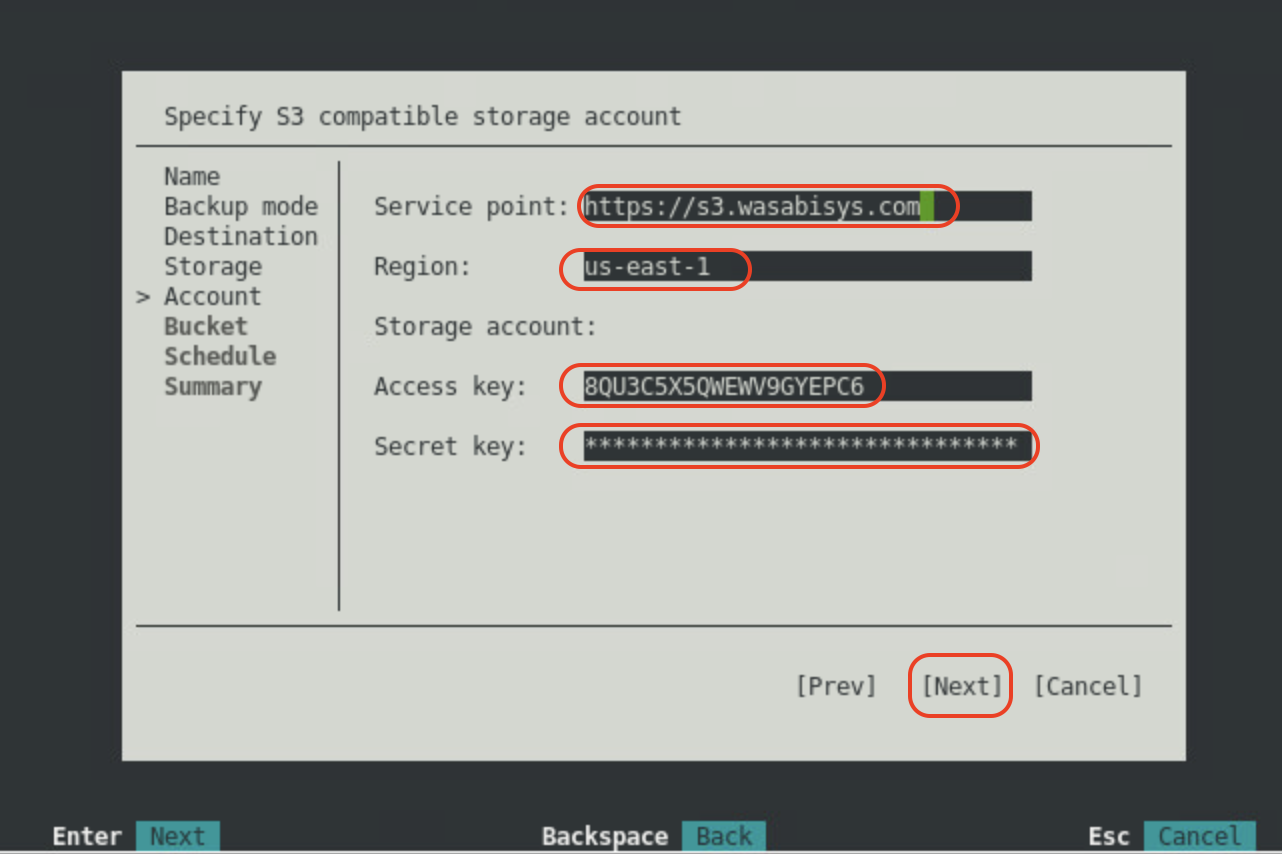
Input the following Wasabi account details and press the Return key.
Service point: Service URL for Wasabi.
Region: Wasabi region name.
Access key: Access key for the Wasabi bucket. For more information, refer to creating a sub-user and access and secret keys.
Secret key: Secret key for the Wasabi bucket. For more information, refer to creating a sub-user and access and secret keys.
In this example, we are using us-east-1 region. To get a list of Wasabi regions, refer to Service URLs for Wasabi's Storage Regions.
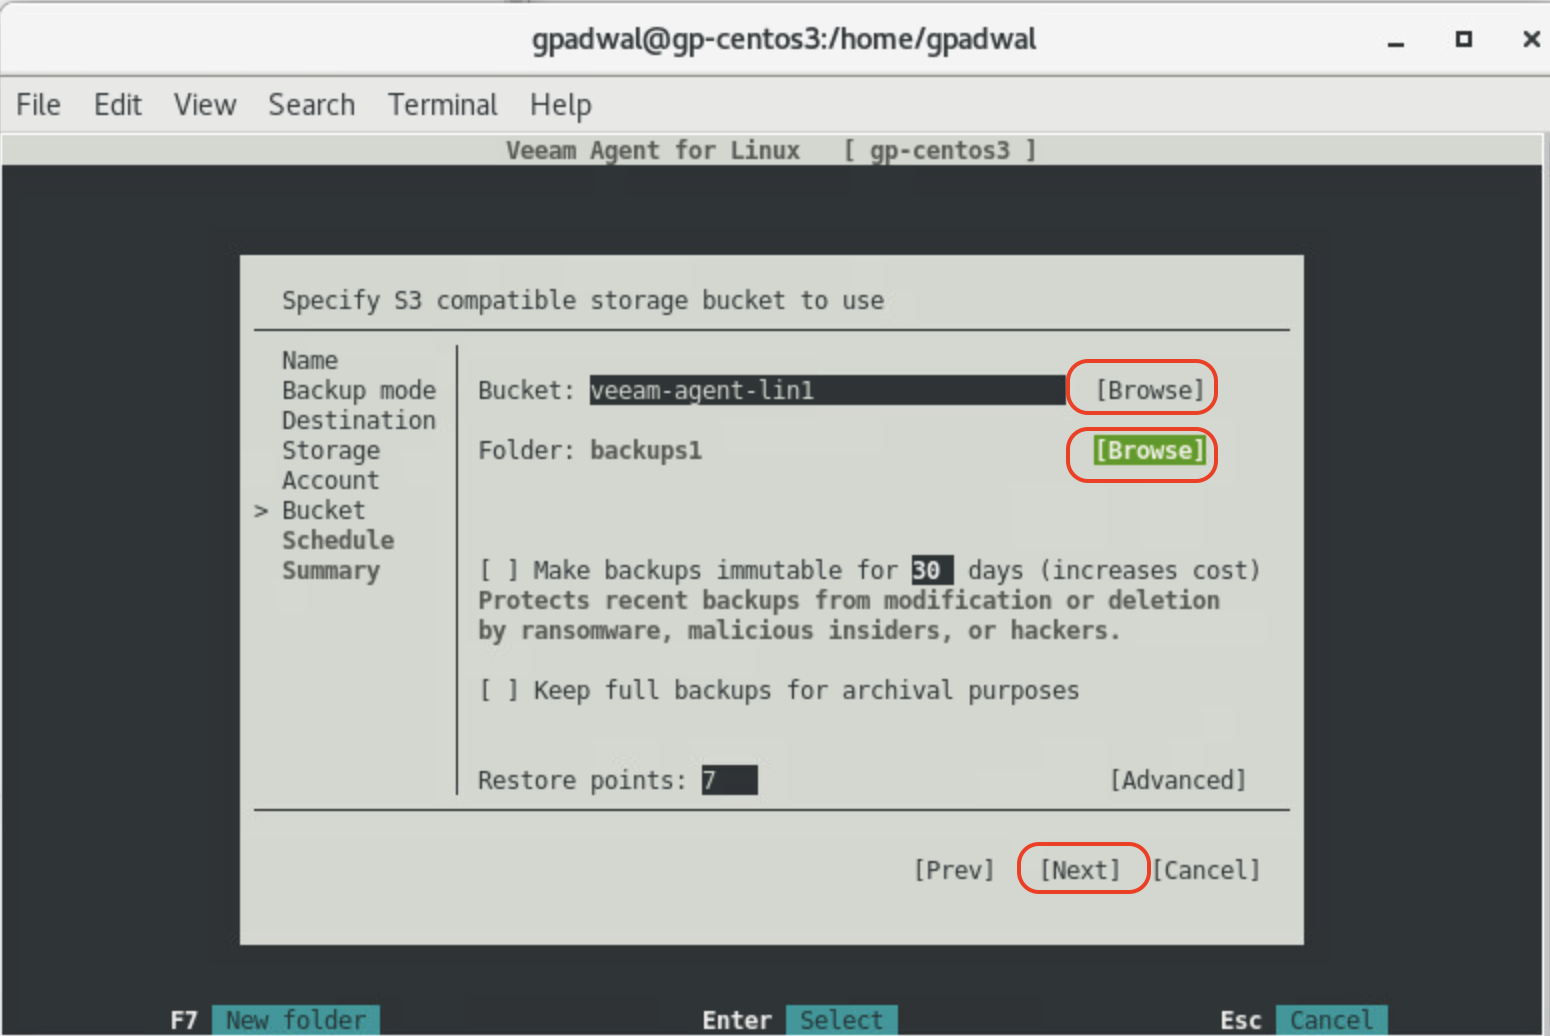
Press Return on Browse to choose the Wasabi bucket to be used. Under Folder, press return on Browse to select an existing folder in the bucket or create a new folder. Press Next.

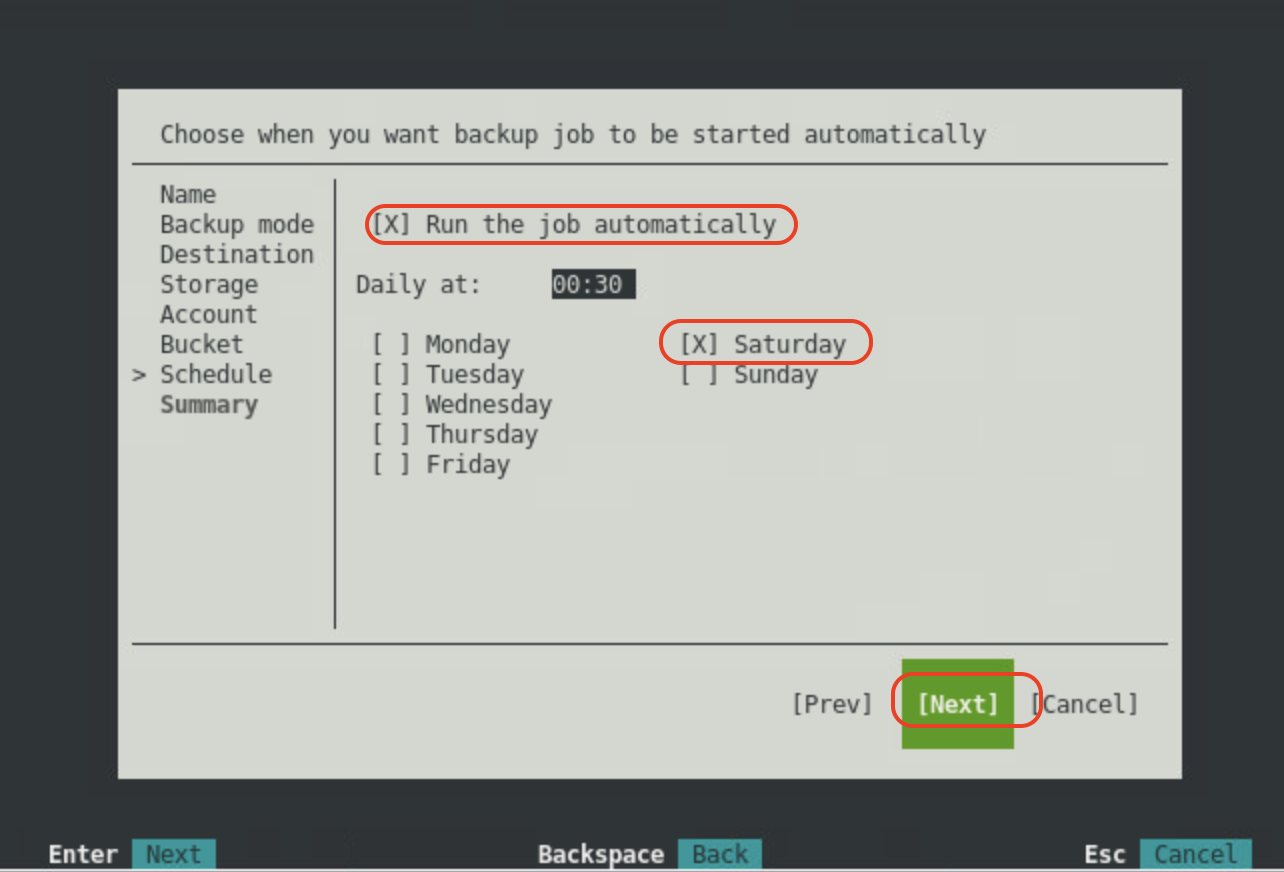
Optionally, on the Schedule page, check Run the job automatically and configure the schedule settings. Press the Return key to continue.
Review the Summary and check Run the job when I click Finish to run the backup job immediately. Press the Return key to finish creating the backup job.
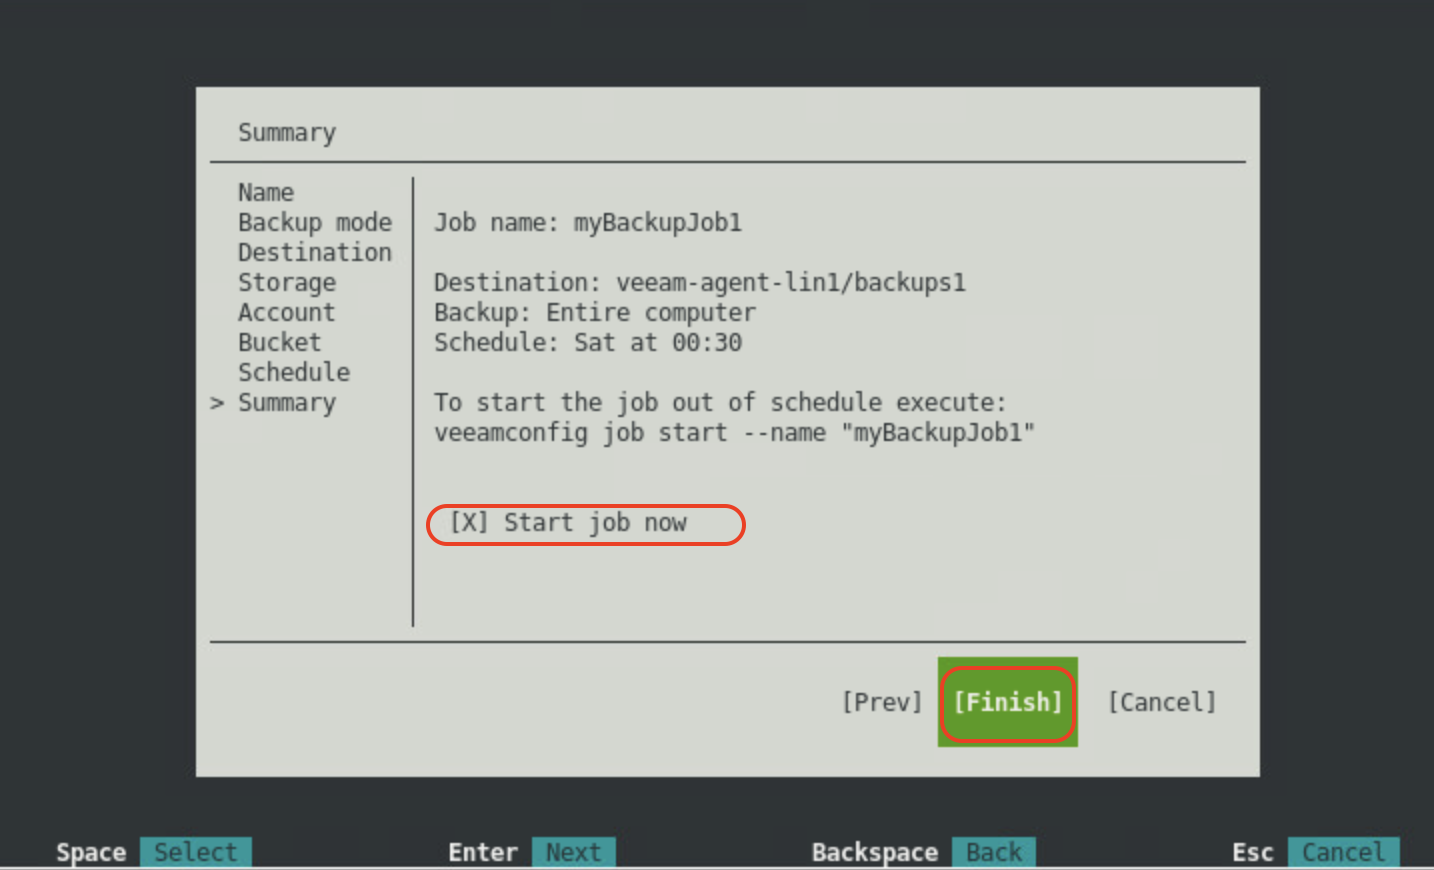
The Backup job is created and begins running. Press the return key on the Info box.
Manually Running the Backup Job
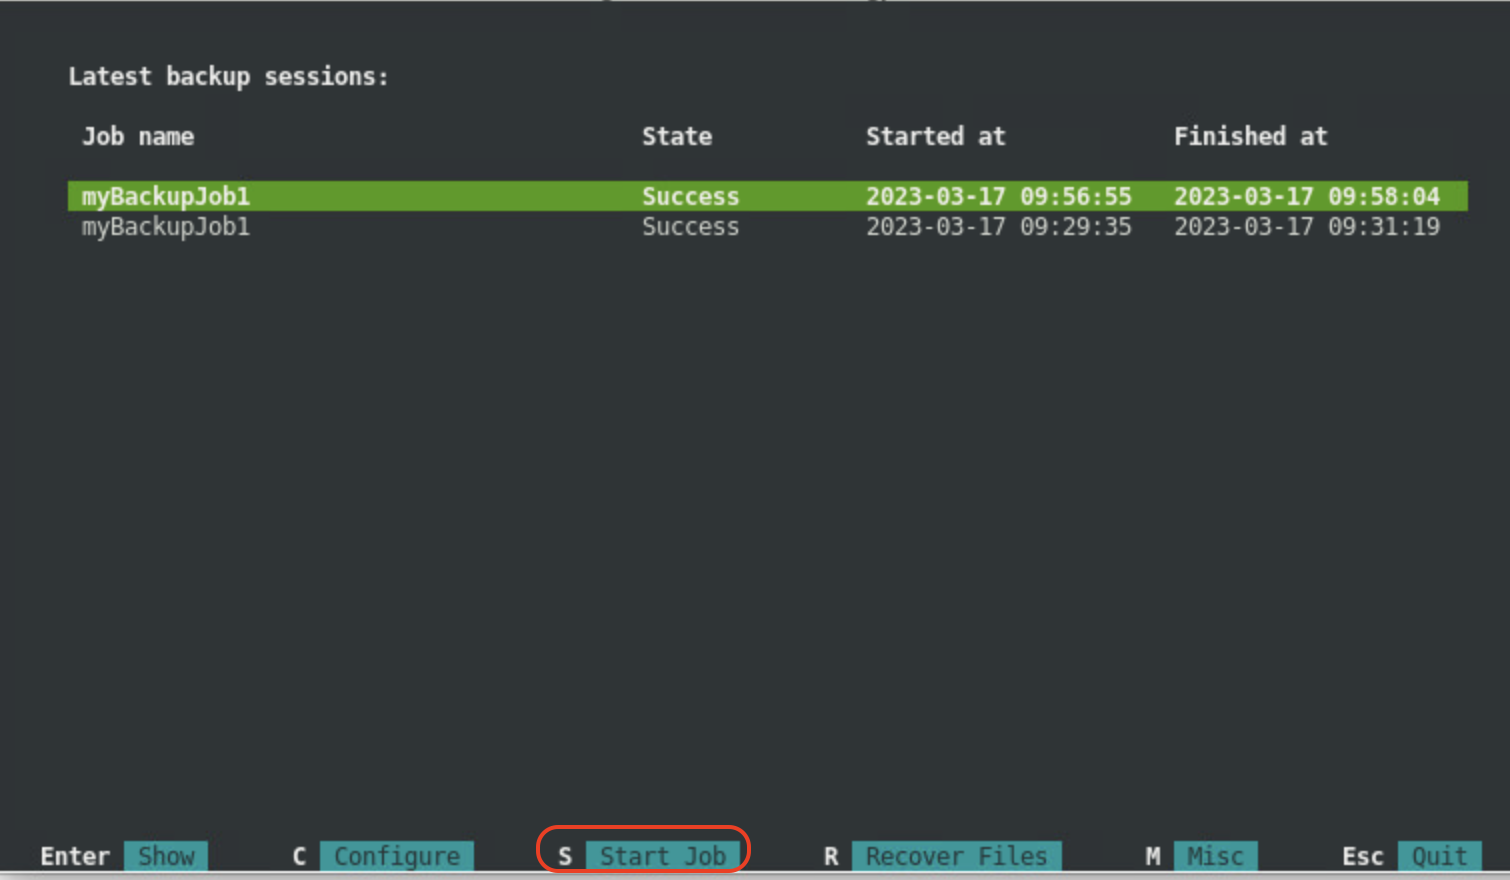
Open Veeam Agent for Linux. Press S to start a backup job.
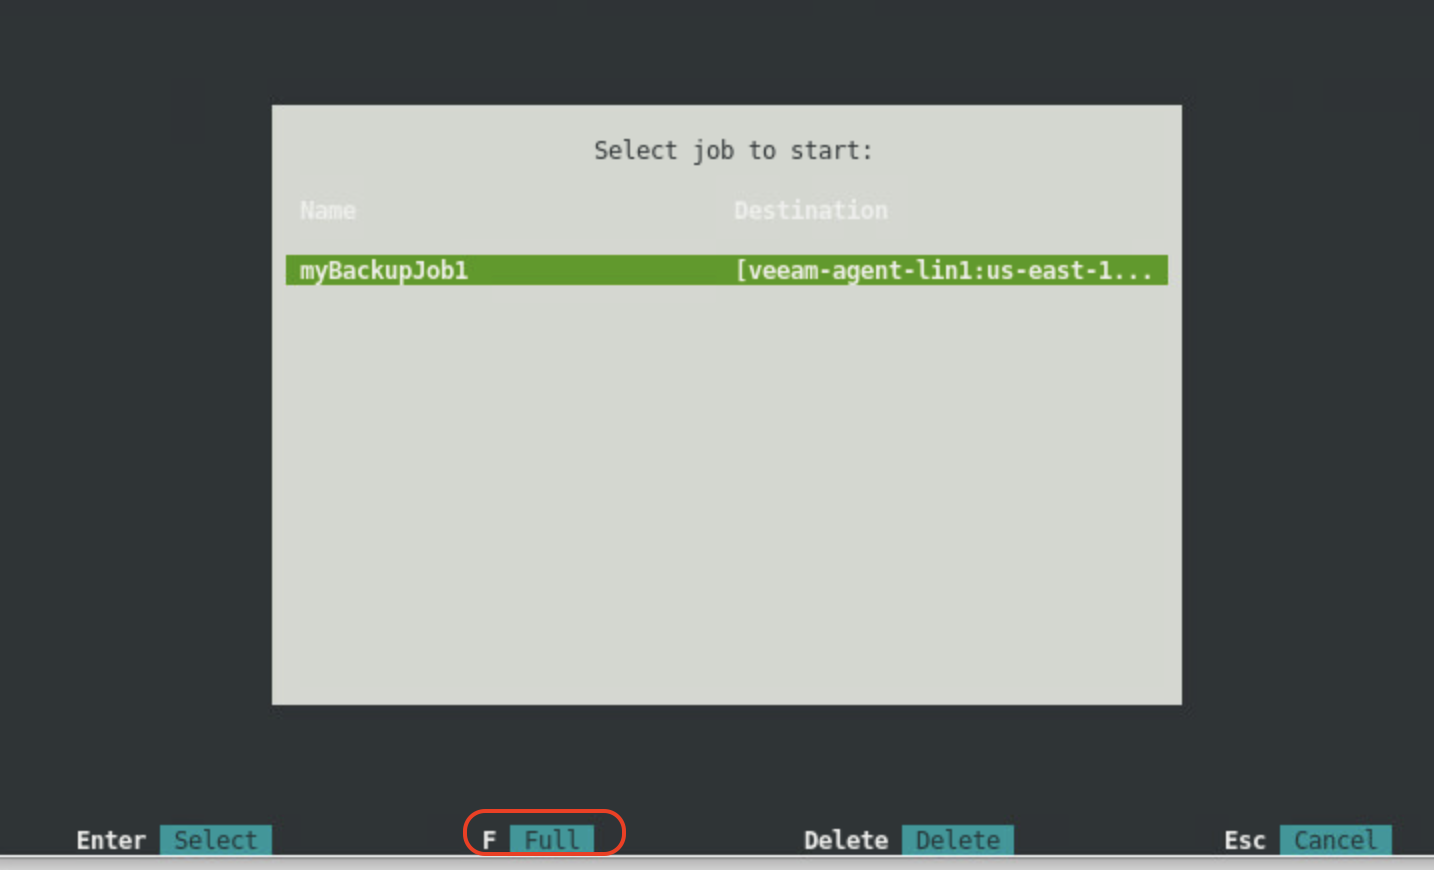
Select the backup job to run and press the Return key to run the job. Optionally, press F to run a full backup for the selected job.
The backup job is running. The control panel shows the status of the job.
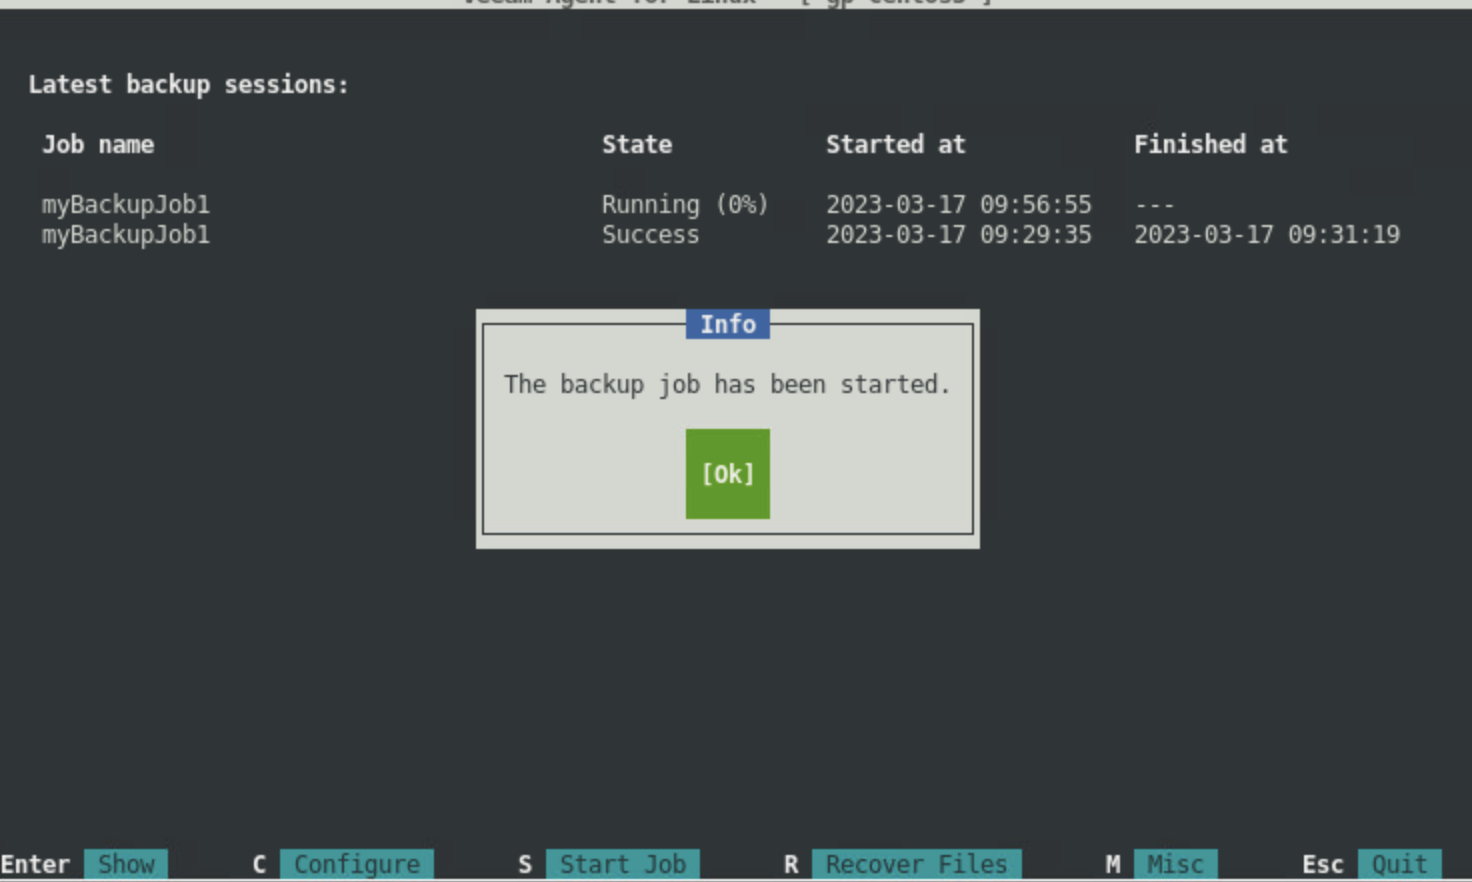
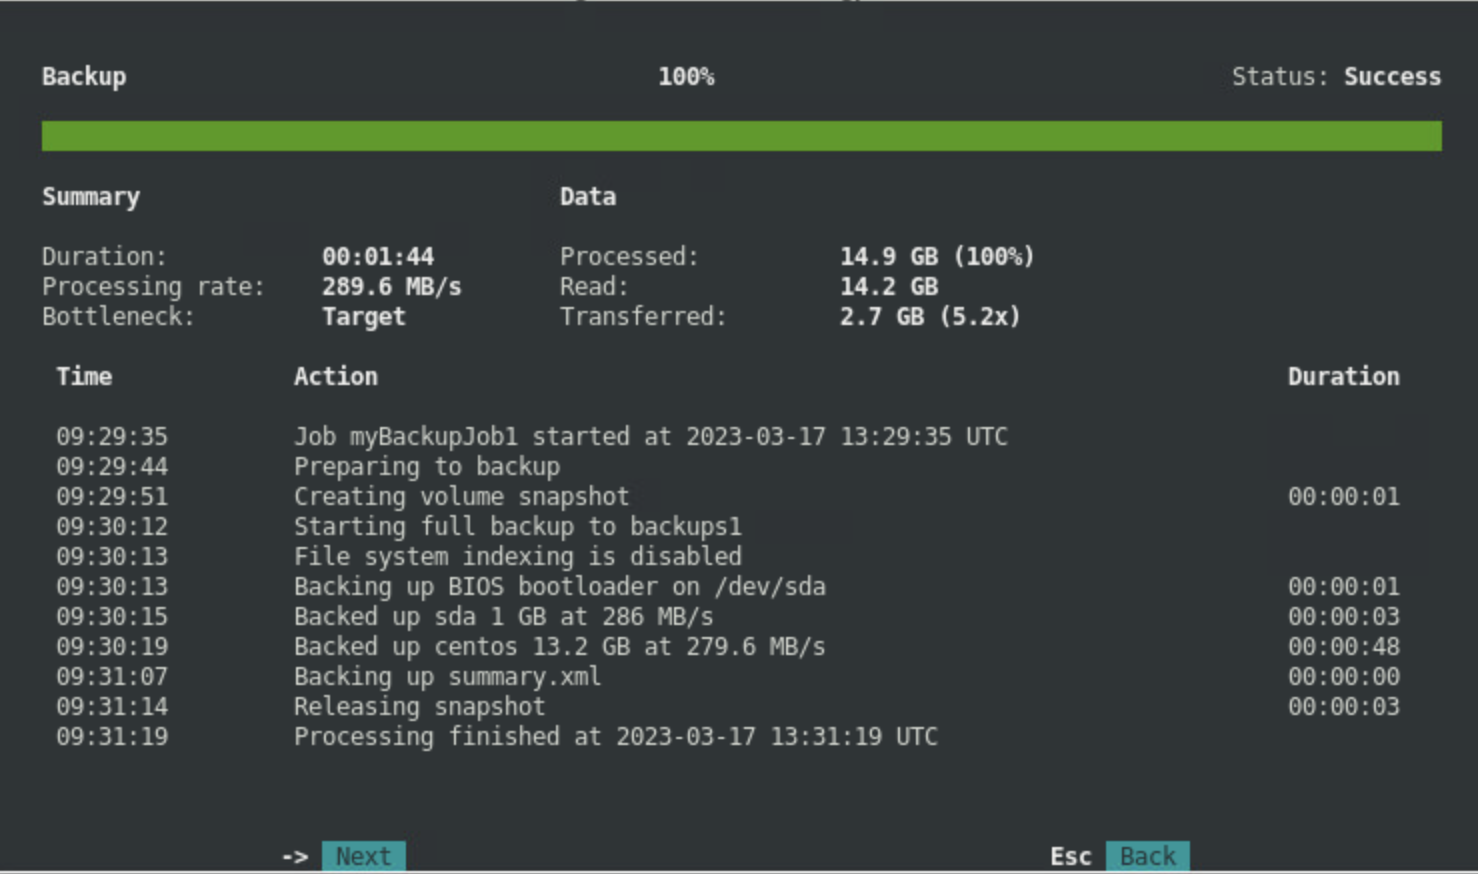
To view the statistics of a backup job, select the backup from the control panel and press the return key.
Restoring a Backup
Restoring Volumes using CLI
You can restore a specific computer volume or all volumes from a volume-level backup using the command line interface (CLI). This feature is not available on the control panel of Veeam Agent for Linux. When you restore a volume from the backup, Veeam Agent will automatically select the latest restore point in the backup. You can also select a specific restore point in the backup to recover data to a desired point in time. Use the commands below to perform a volume level restore. For more detail, refer to the Veeam Help Center article for restoring from backup.
If a volume is restored to the original location, Veeam will overwrite the files in that location.
Locate the backup. To view a list of backups created by Veeam Agent, use the command below.
veeamconfig backup list --allExplore the backup content. View detailed information about specific backup using the command below.
veeamconfig backup show --idwhere — ID of the backup for which you want to view detailed information.
To view information about restore points in the backup, use the following command.
veeamconfig point list --backupid— ID of the backup for which you want to view information on restore points
Start the restore process. To start the volume-level restore from a backup, use the following command.
veeamconfig backup restore --id --targetdev --backupdevTo start the volume-level restore from a specific restore point, use the following command.
veeamconfig point restore --id --targetdev --backupdev <>— ID of the backup.
— ID of the restore point.
— Path to a block device that represents a volume on your computer in which to recover. This parameter is optional.
— Path to a block device that represents a volume in the backup.
Monitor the restore process.
To view a Veeam Agent for Linux session log, use the following command.
veeamconfig session log --id— ID of the restore session
Restoring Files and Folders Using the Recovery Wizard
A file-level restore can be performed using the Veeam control panel recovery wizard. Follow the steps below to run the recovery wizard for restoring files and folders.
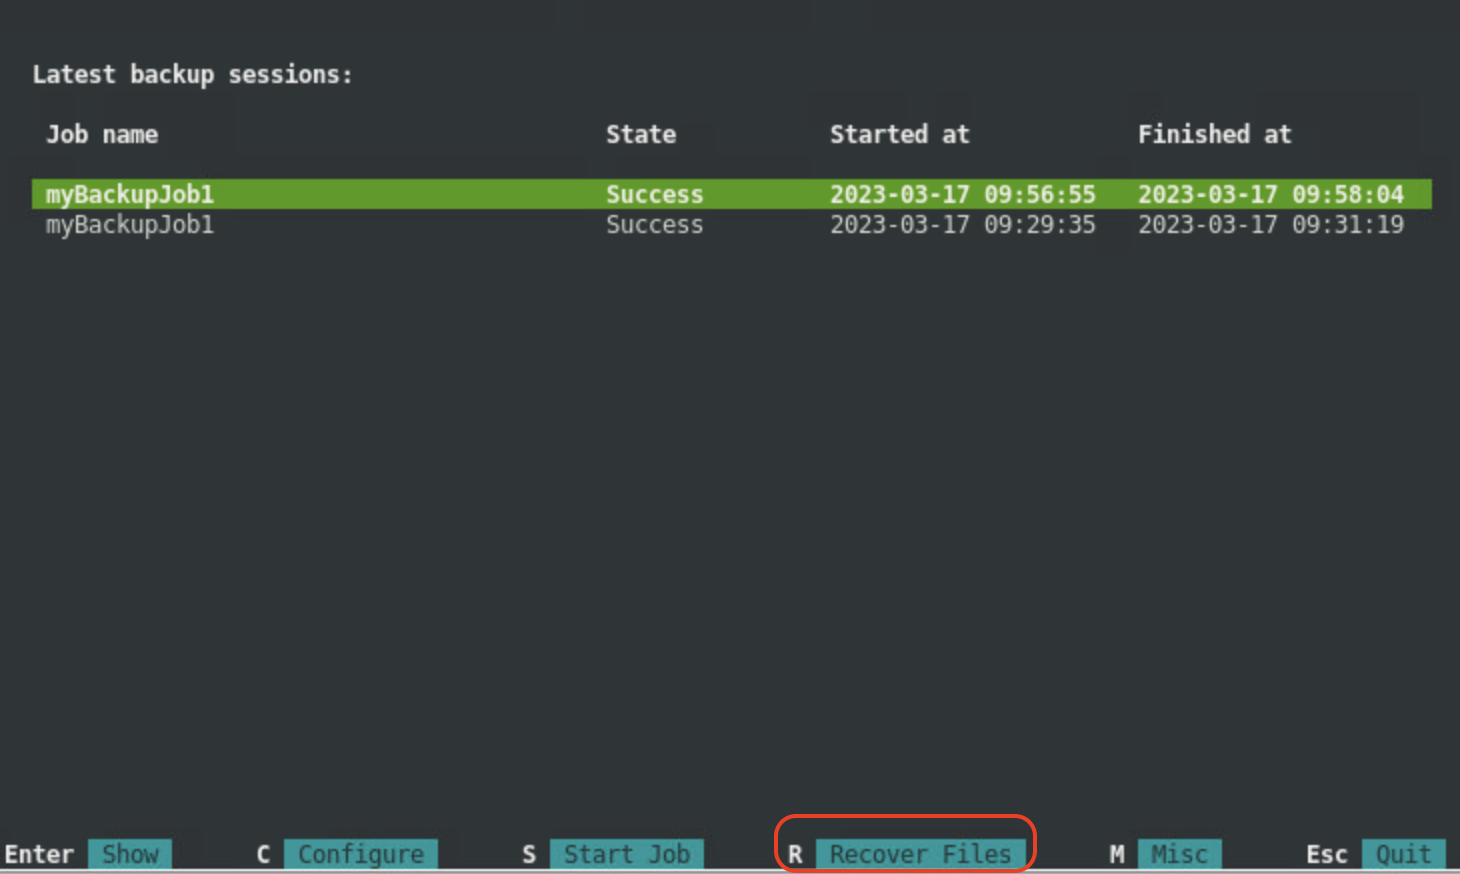
Launch the Veeam Agent control panel with the "veeam" or "veeamconfig ui" command. Press the R key to proceed to the File Level Restore wizard.
Select the Backup from which to restore. Press the return key.
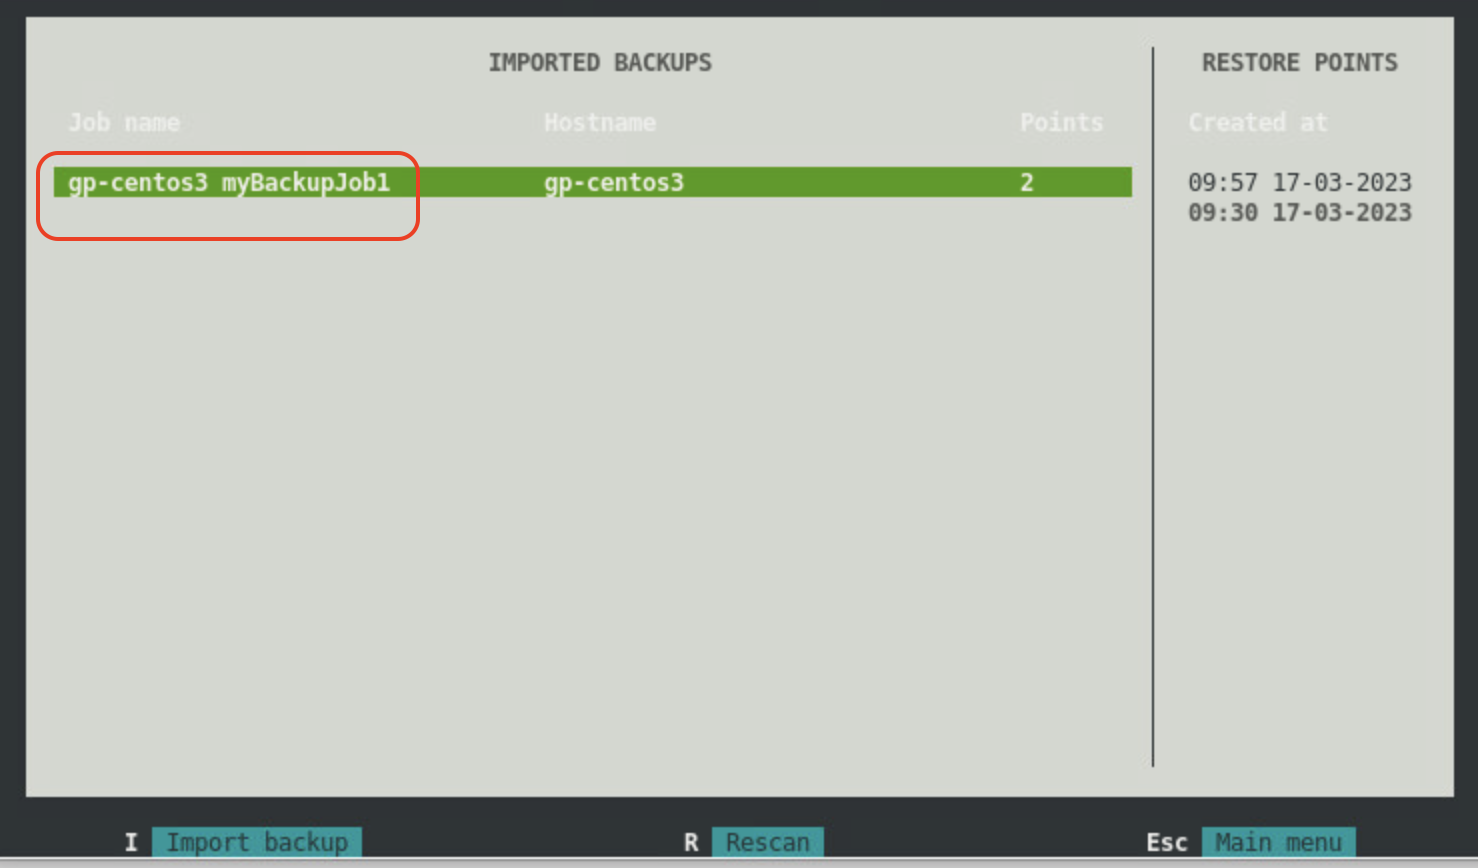
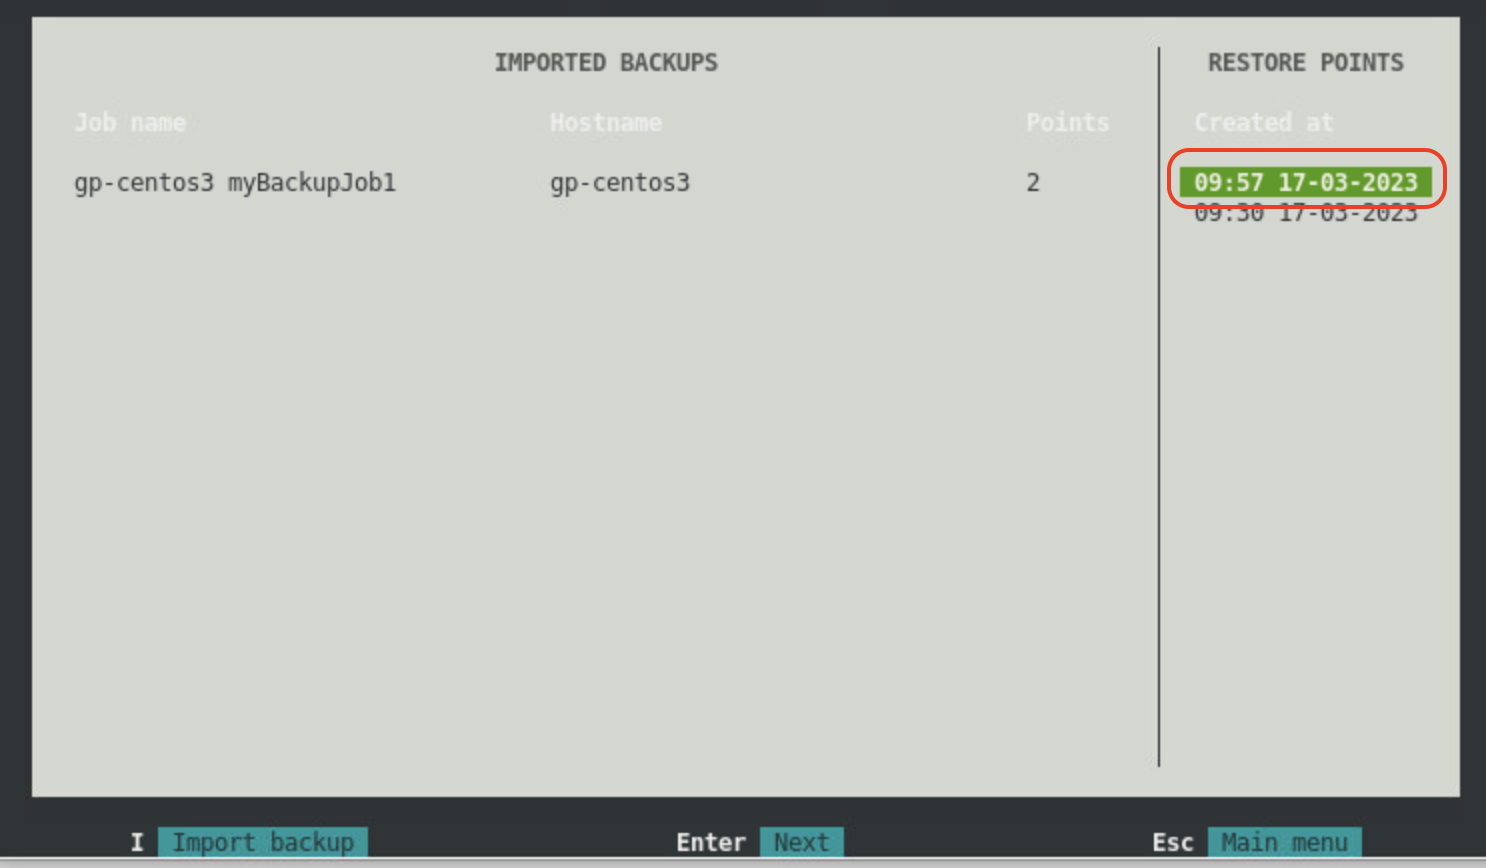
Select the restore point to use. Press the enter key.
The Veeam agent mounts the backup files to the "/mnt/backup" directory. Press the return key on “OK" to continue.
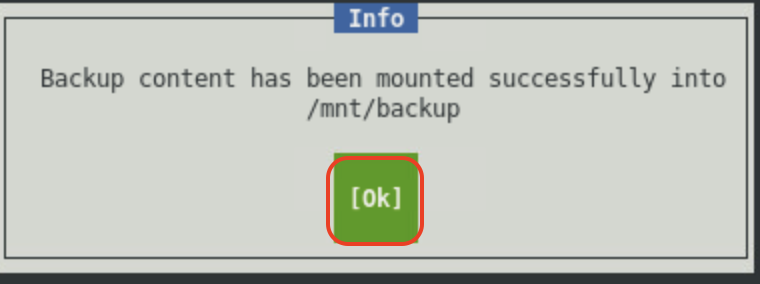
After the backup files are mounted to the /mnt/backup directory on the computer's file system, you can use Linux command line utilities or the preferred file browser to browse the files and directories in the mounted backup. Additionally, you can copy the files and directories that you want to restore to either their initial location or to a new location.
Enabling Immutability
In version 6 of Veeam Agent for Linux, Veeam introduced immutability support for backup jobs. When you store your backup data in Wasabi, Veeam Agent enables you to protect backup data from deletion or modification by making that data temporarily immutable using the Object Lock feature on a Wasabi bucket.
This section details the procedure to create immutable backups using a backup job for your Linux computer.
Create an Object Lock enabled bucket. For more detail, review Object Lock: Enabling.
Do not enable Bucket-Level Object Retention settings on the Object Lock tab for your bucket. The screenshot below illustrates the correct way to configure Object Lock.
Enable immutability while creating the backup job. Follow the steps in Section 4 to create a backup job. On the Bucket page, once you browse the bucket and create a new folder, enable immutability by checking Make backups immutable and specify the number of days to keep the backup immutable. Once you press return on Next, you will get a confirmation box regarding increase in costs due to immutability. Click OK to continue.
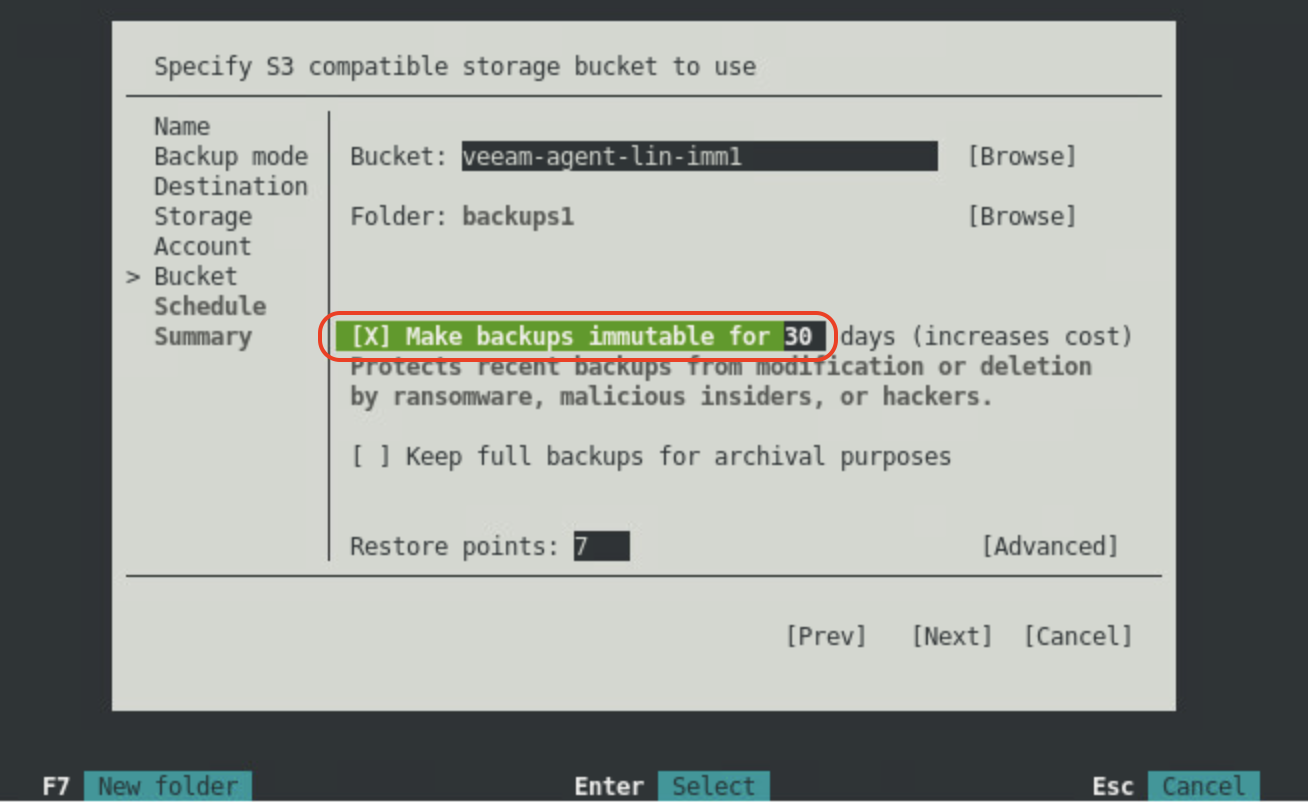
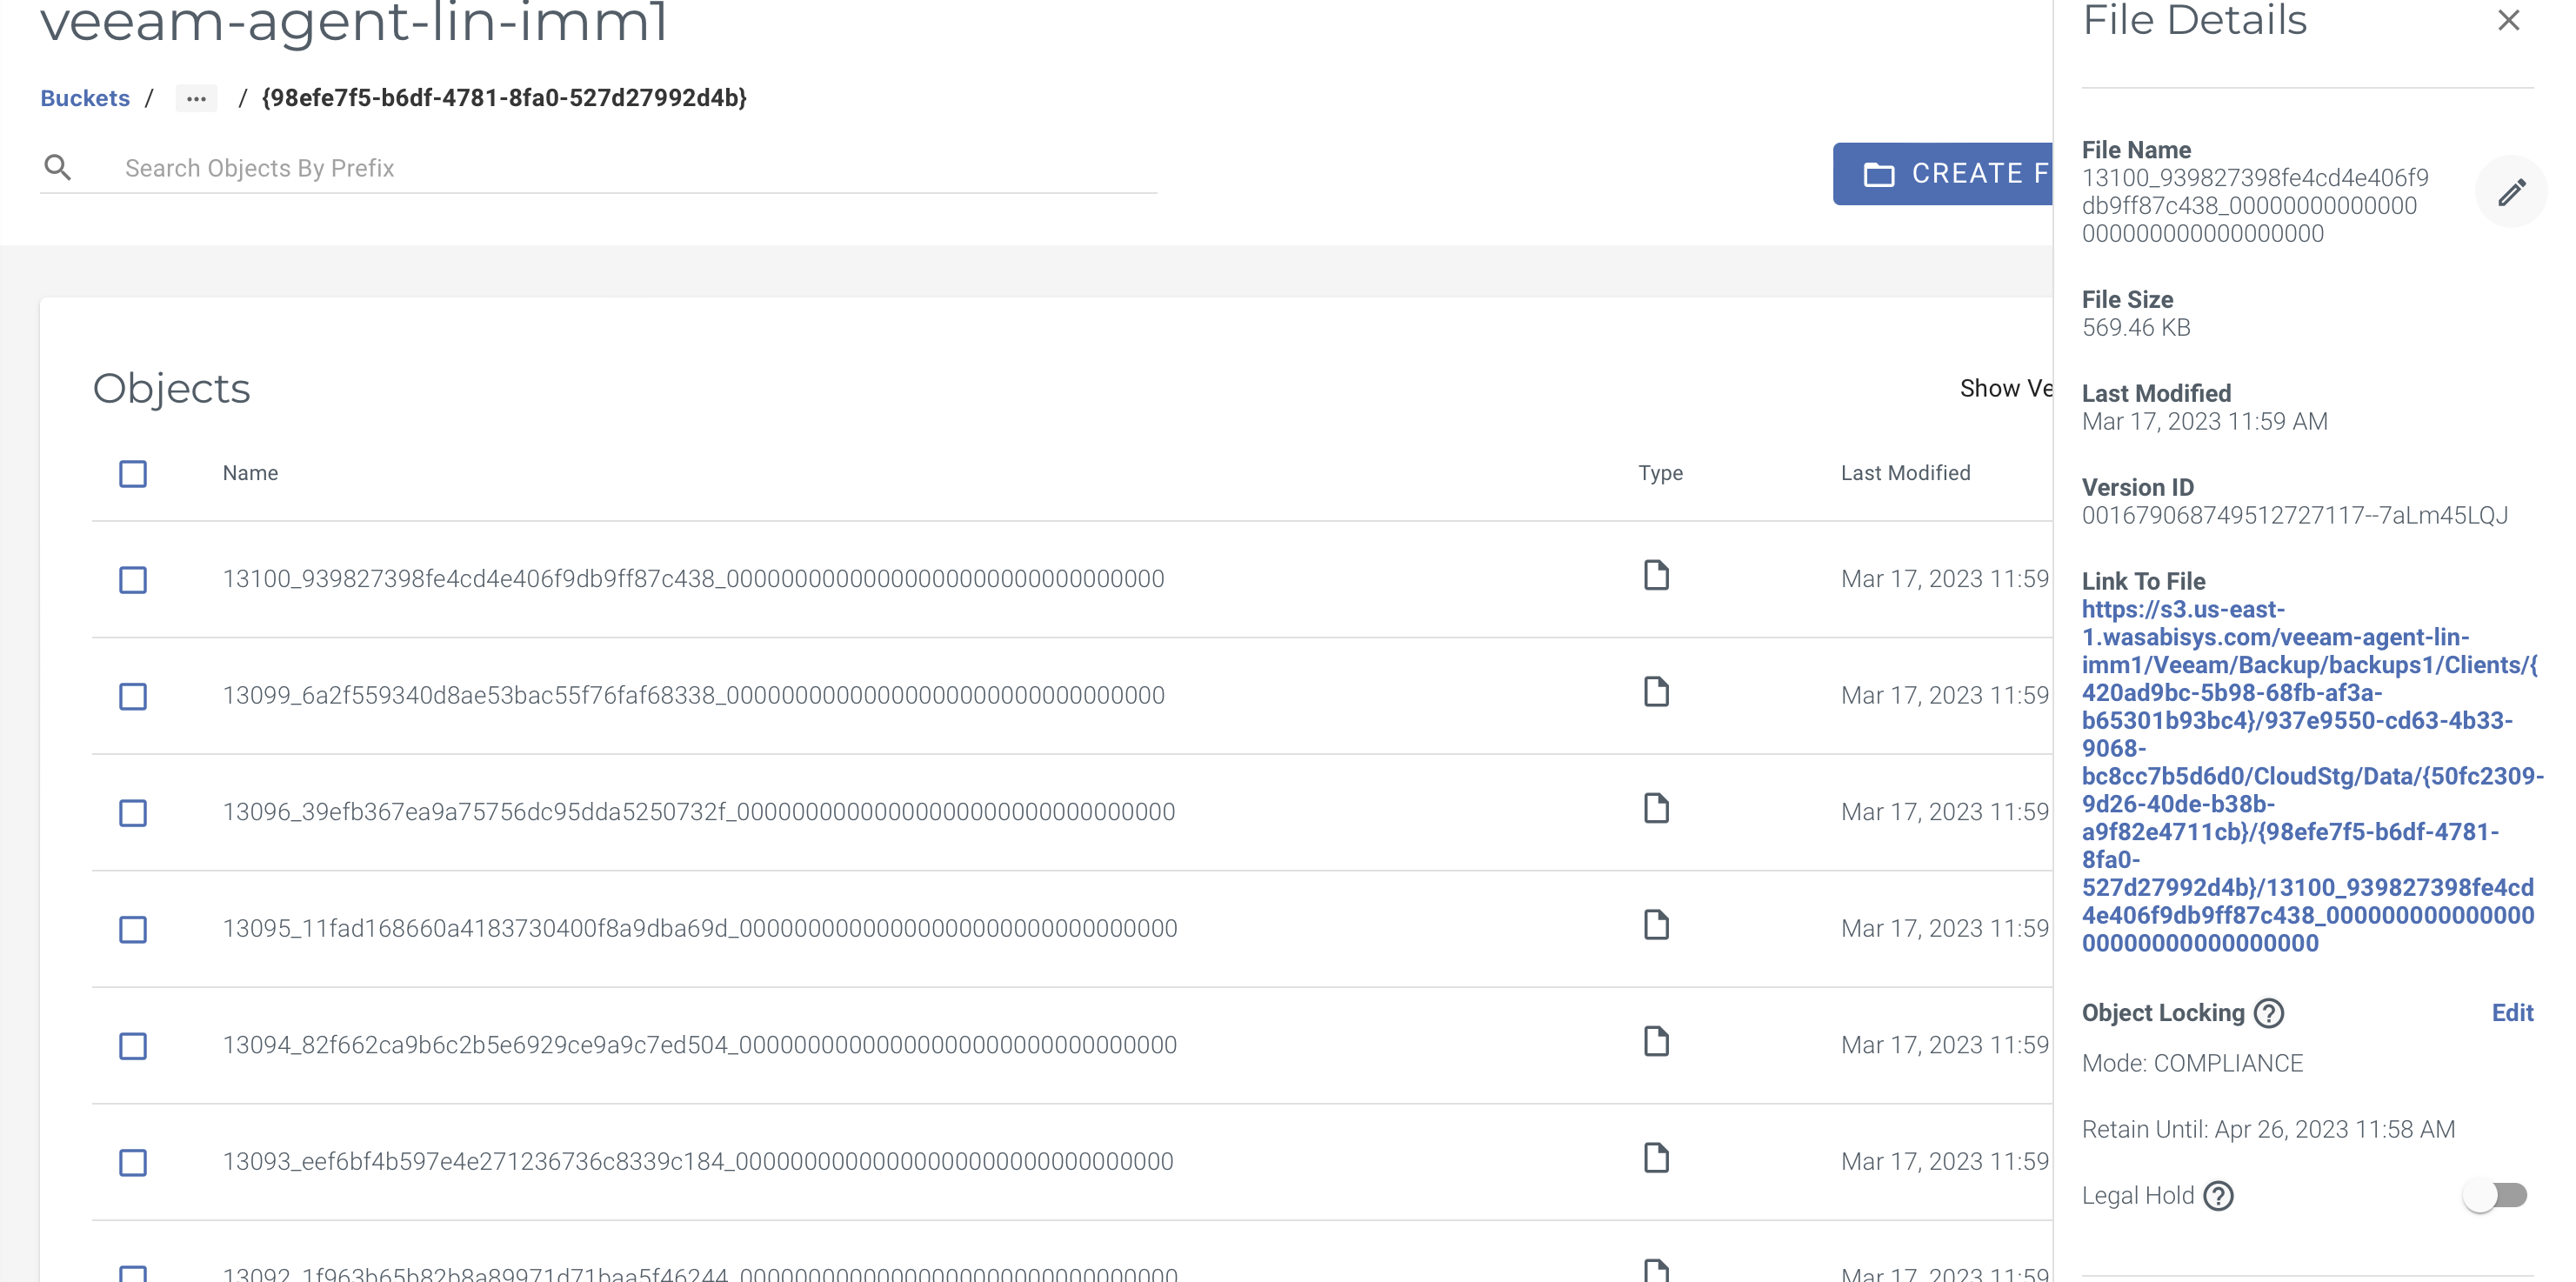
Complete the remaining steps to create the backup job. Once a successful backup is written to Wasabi, confirm that immutability is enabled by viewing the file properties on the Wasabi Console.
To view object lock properties of files on the Wasabi Console, check the checkbox beside Show versions.
