Wasabi is a member of Veeam's cloud partner ecosystem. We have worked with Veeam closely to offer both a seamless implementation and a smooth transition to cloud storage. For more information on how Veeam works with Wasabi, review Veeam with Wasabi Solution Overview.
The data restoration process is handled by your specific backup software application. As there are many, potential variables that will affect your unique environment, Wasabi strongly recommends that you seek the guidance of your backup software's technical support team in the event that you encounter difficulty or have application-specific inquiries.
Veeam version 12 introduces direct to object storage and immutability support for NAS backups. Now, customers can protect their NAS devices by creating immutable backups and storing directly to Wasabi's object storage repositories. This article details the procedure to backup NAS devices to Wasabi's object storage.
Immutable backups can be created by enabling immutability while creating the Wasabi object storage repository. For more detail, refer to Wasabi Veeam Object Lock Integration.
If you are going to leverage immutable Veeam backups, follow the steps in Object Lock: Enabling.
Enabling bucket versioning only is not a proper configuration for immutable Veeam backups and can cause problems.
If you are simply going to use regular Veeam backups with Wasabi buckets, bucket versioning is not required.
Requirements
Active Wasabi Storage account.
Veeam Backup and Recovery version 12 software installed and licensed. The steps outlined below require the Veeam v10 release. For other release versions, refer to Veeam With Wasabi.
A valid Veeam license that supports capabilities for object storage.
A NAS device deployed and configured.
A Wasabi object storage repository created. Refer to Section 3 of Create a Backup job in Veeam v12.
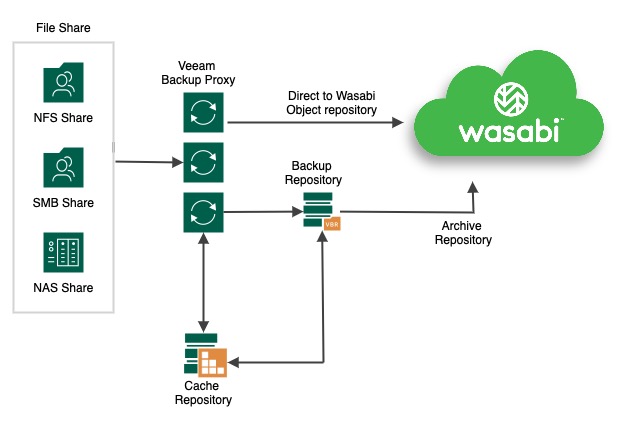
Architecture Diagram
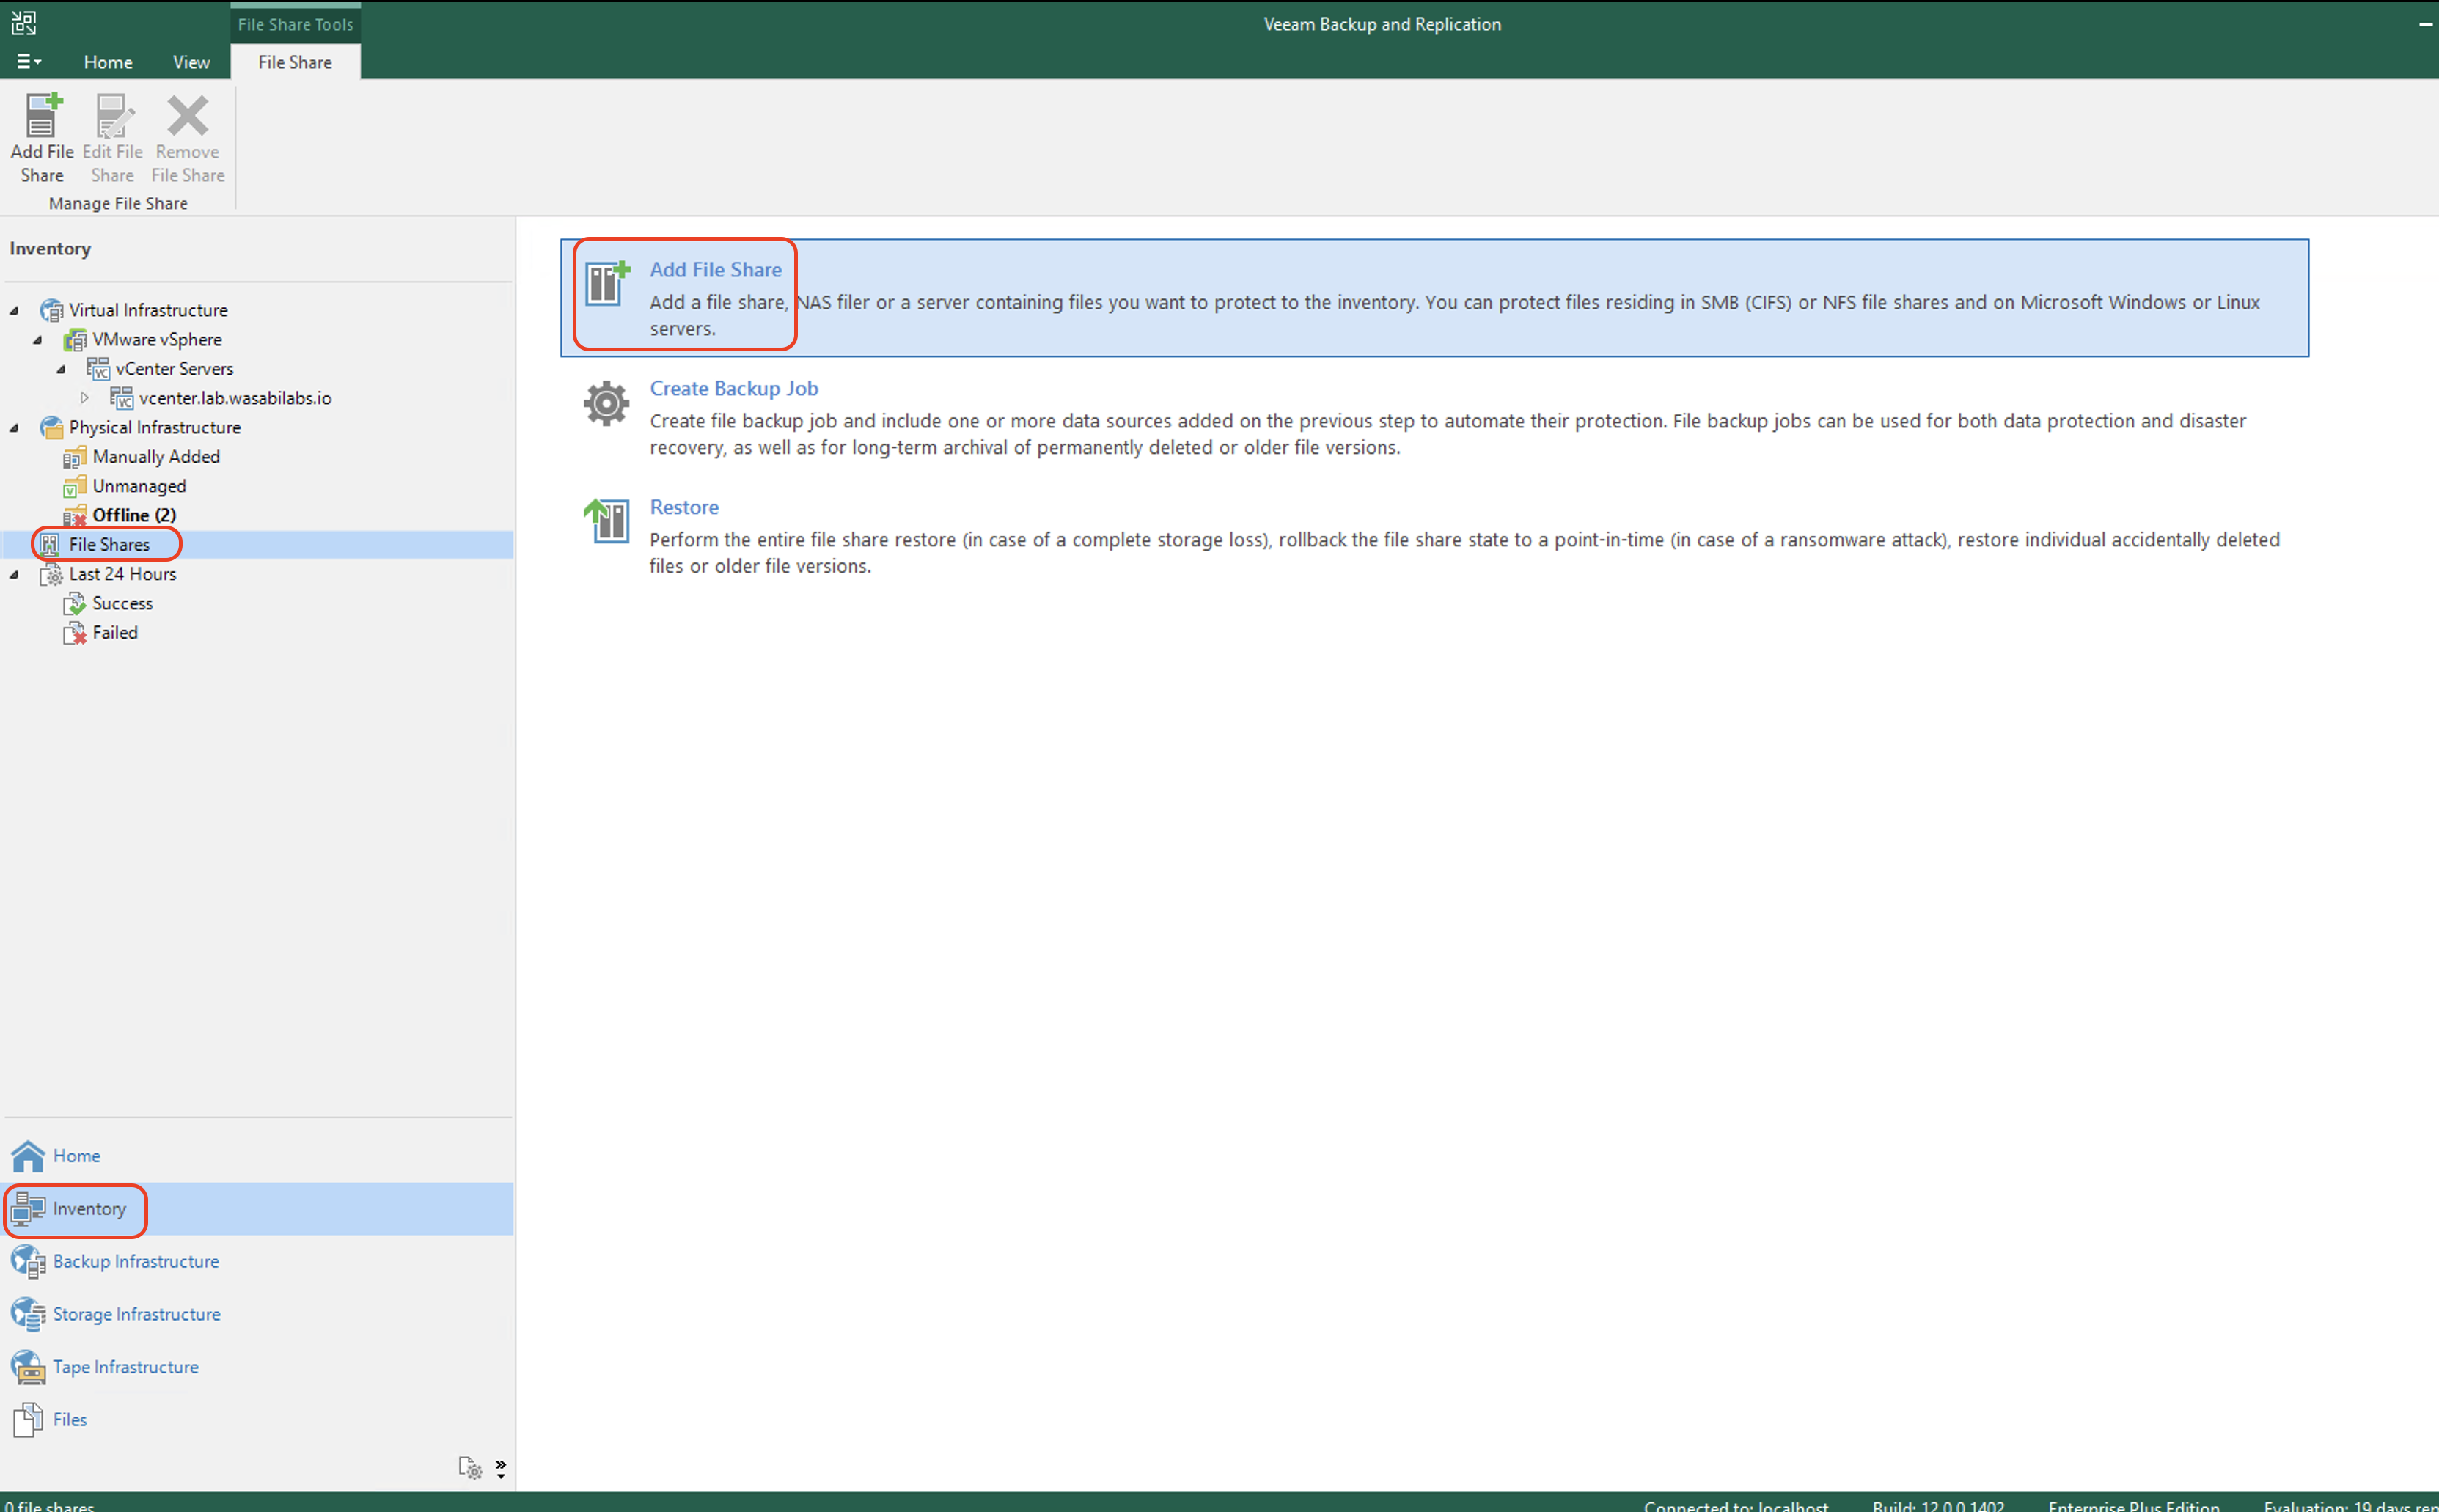
Adding an NFS Share
Navigate to Inventory. Click File Shares. Click Add File Shares.
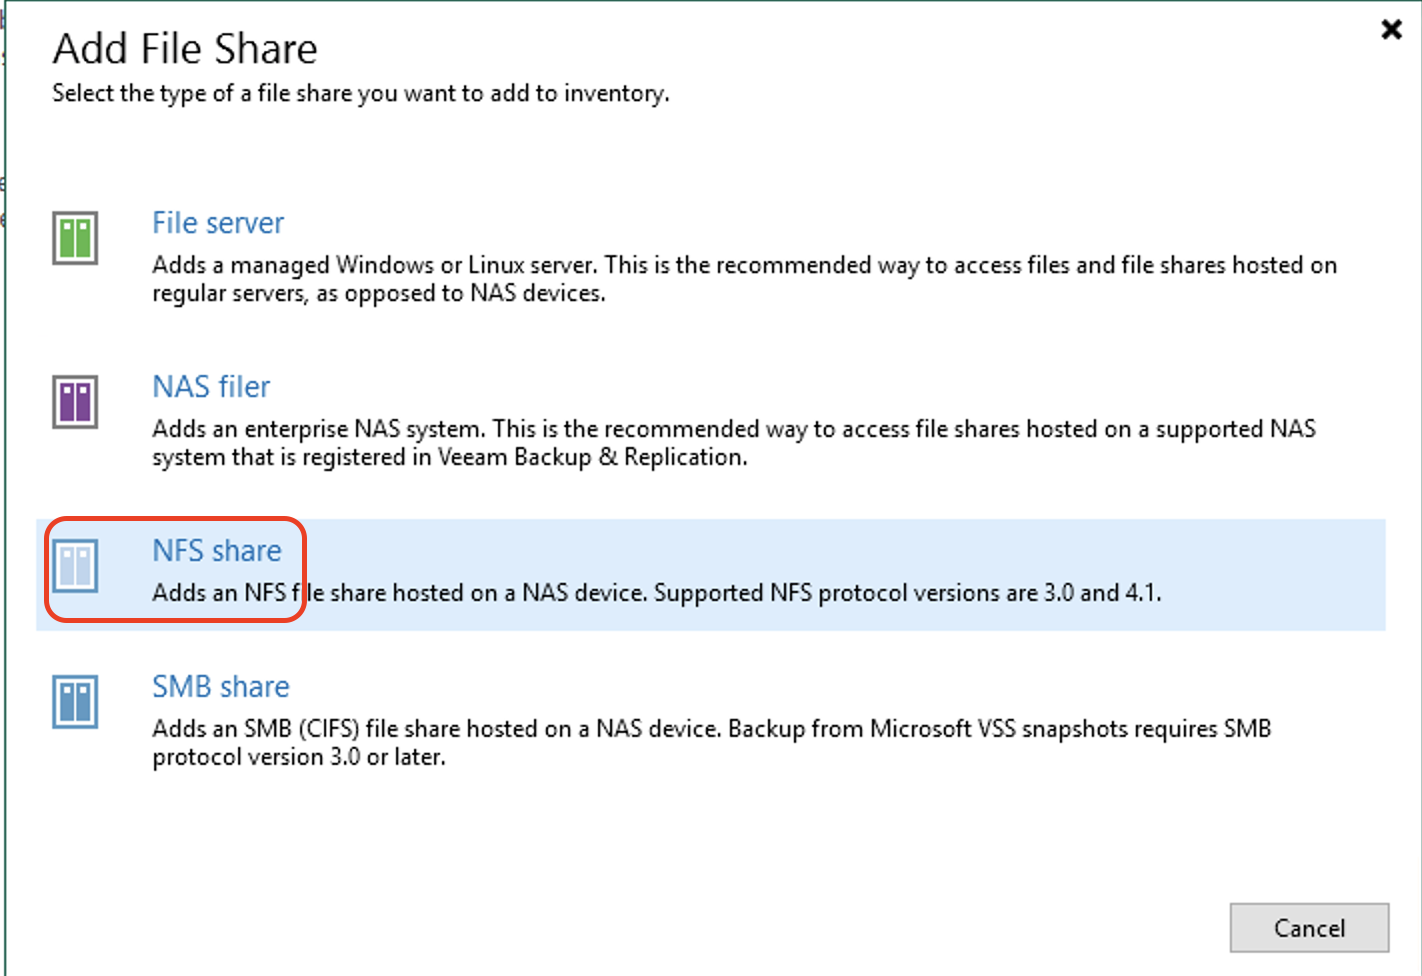
Click NFS share.
The following example walks through adding an NFS share. Contact Veeam if you have questions about your specific configuration.
Input the NFS path. Click Next.

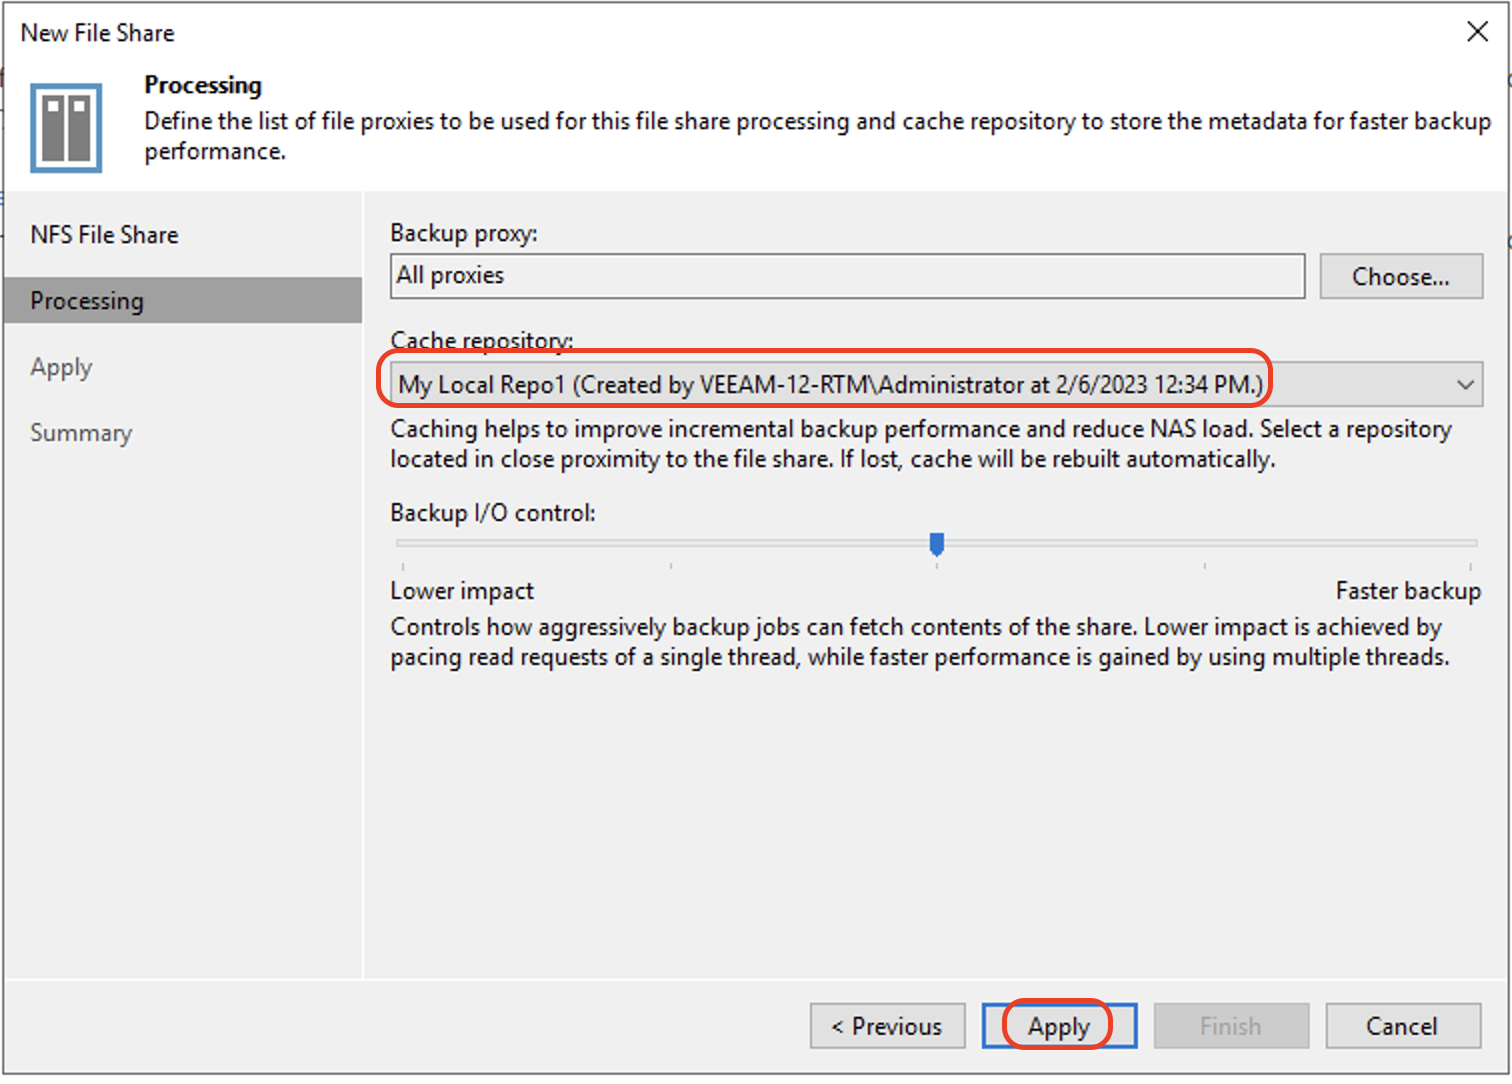
Select your local backup repository from the drop-down. Click Apply.
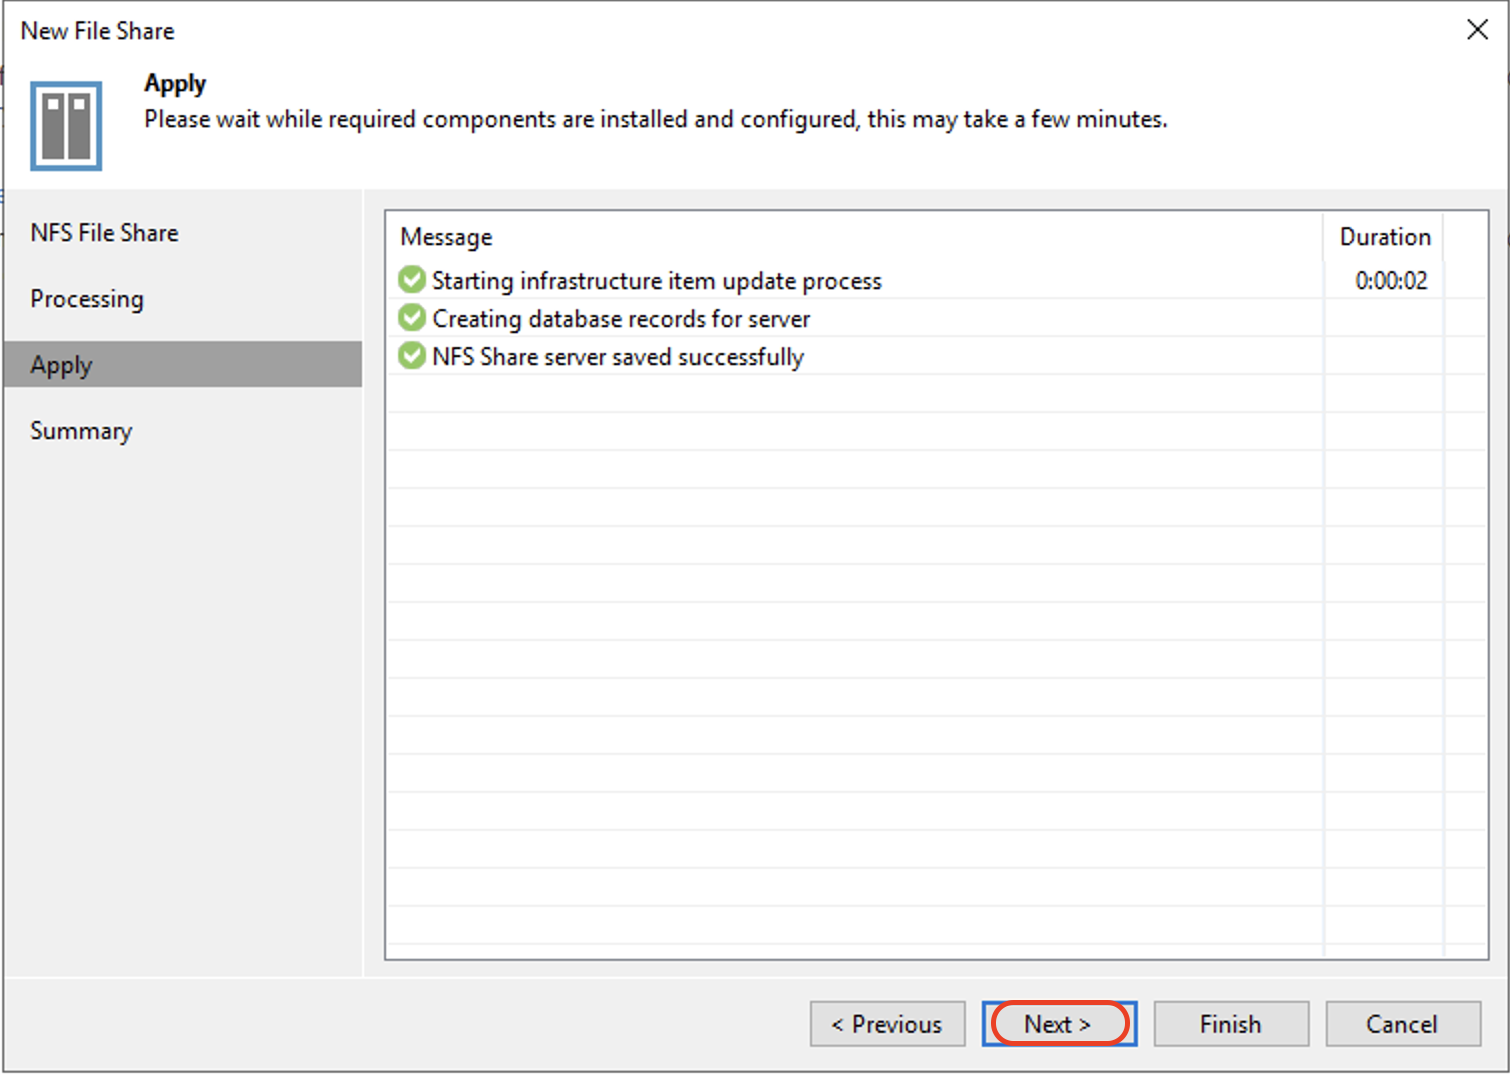
Review the Apply page. Click Next.
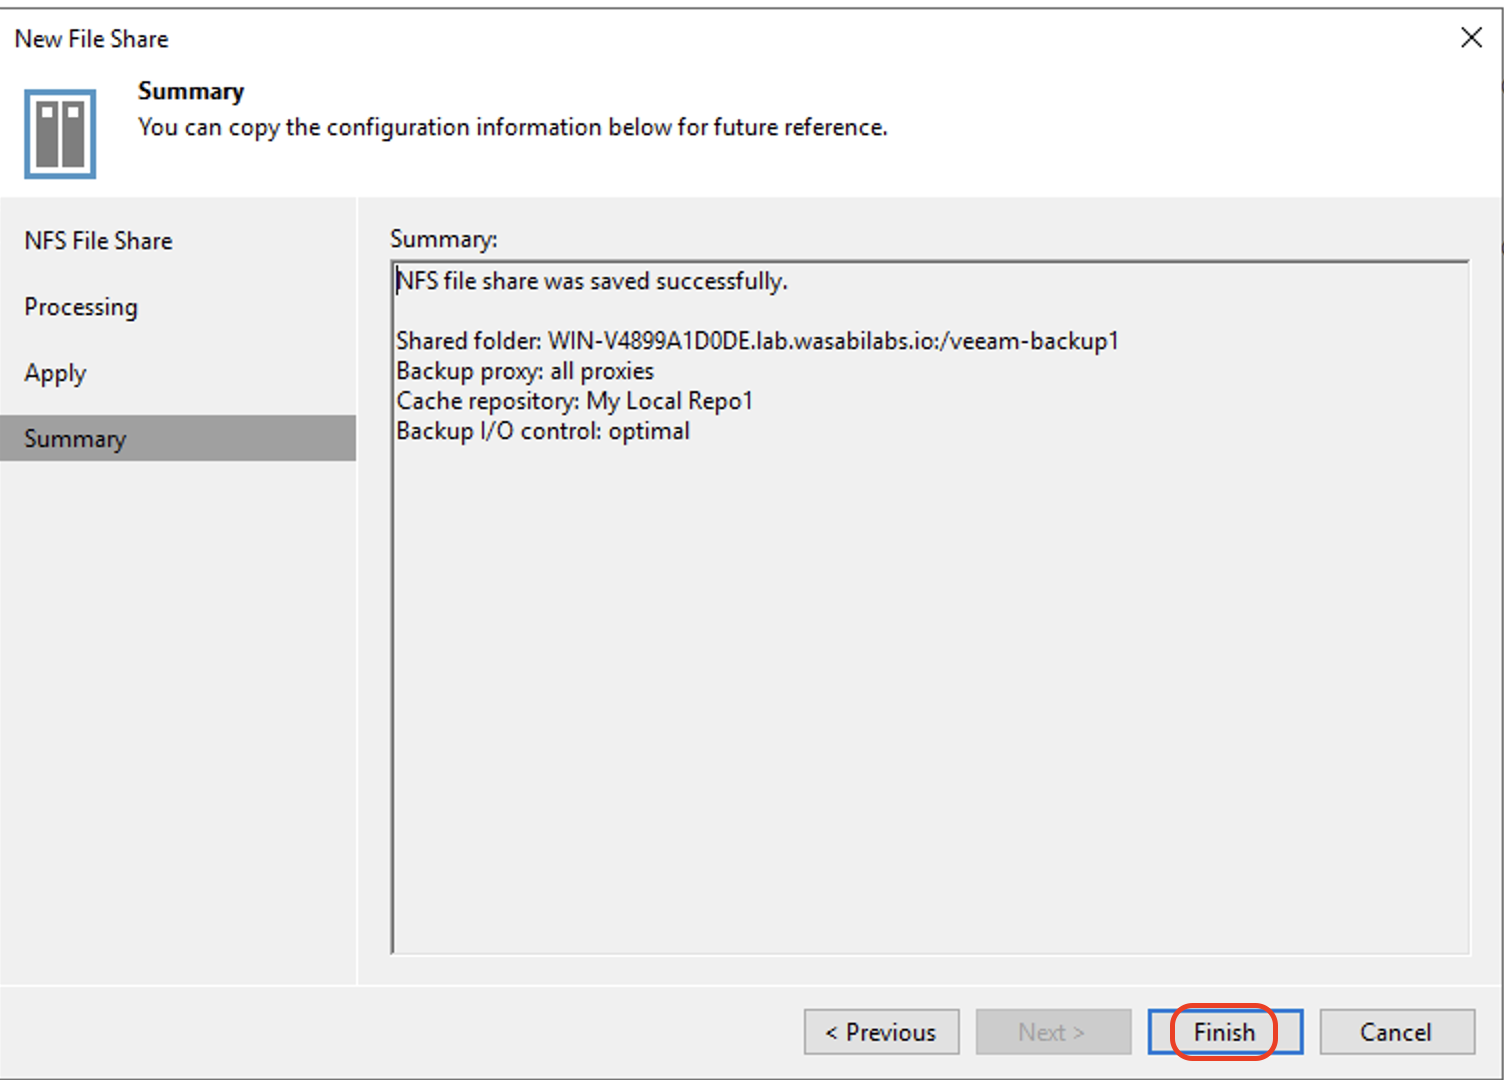
Review the Summary page. Click Finish.
Creating a Backup Job for the NAS Device
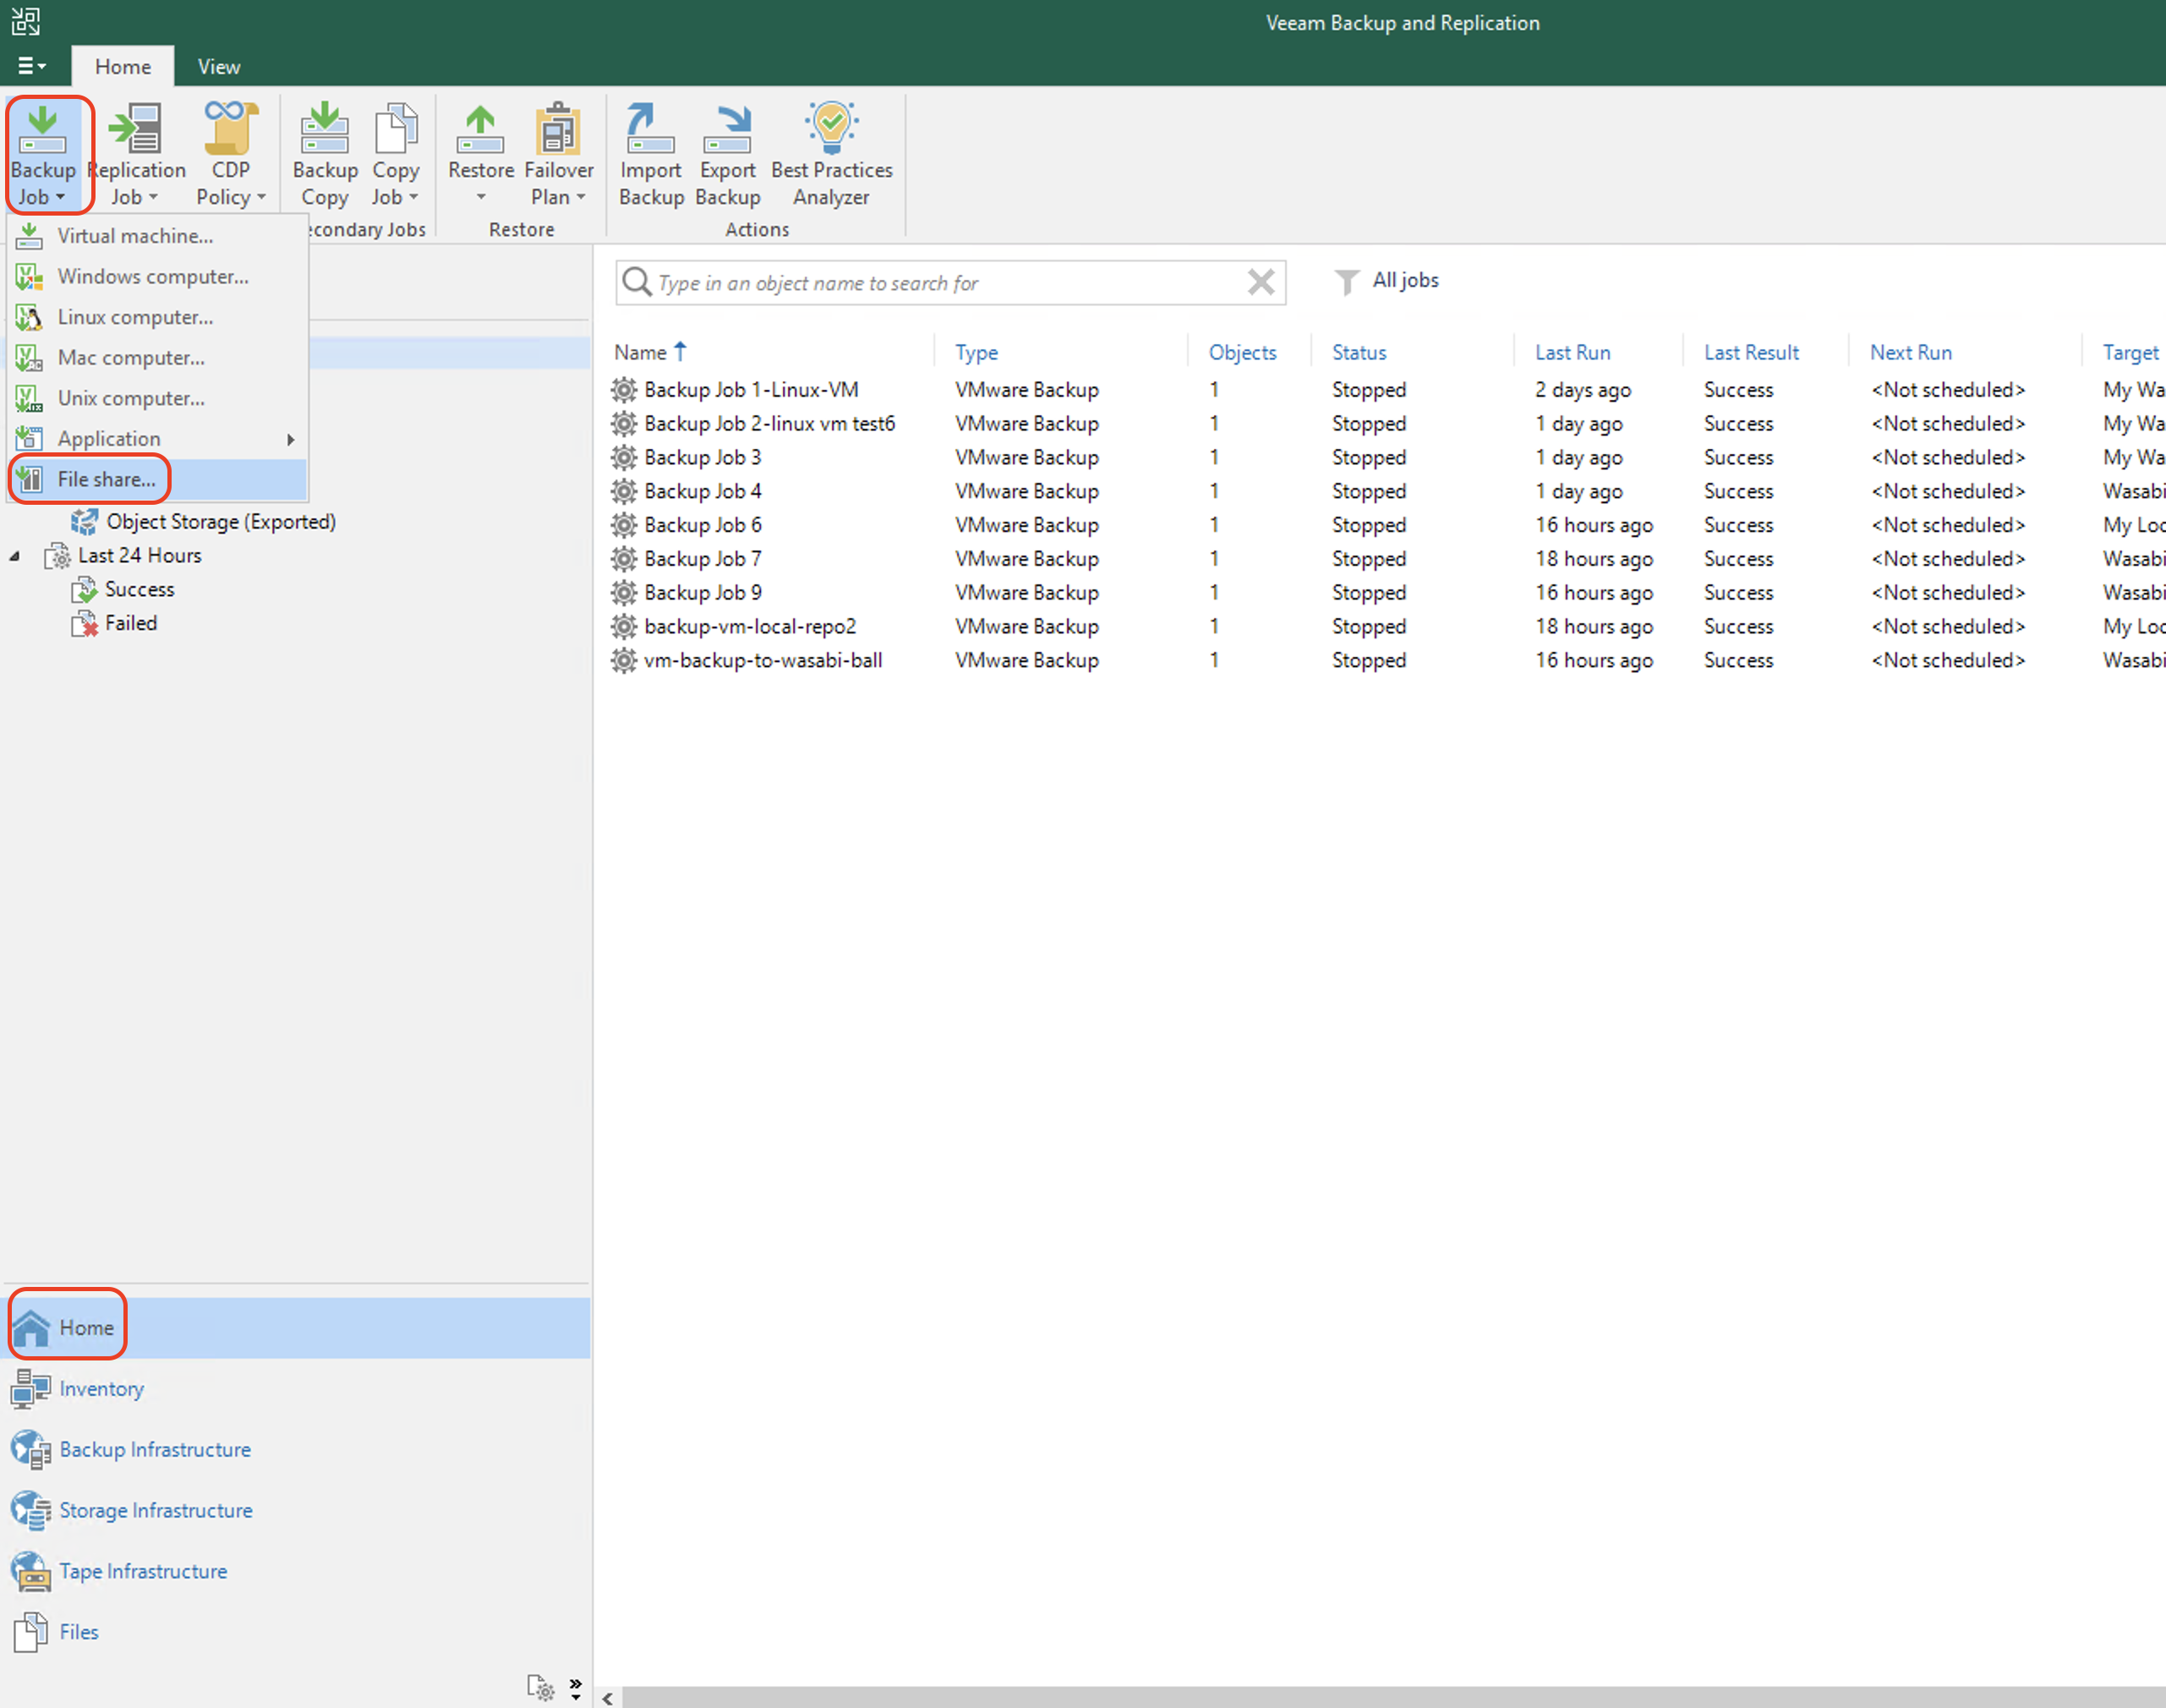
From the Home tab in VBR, click Jobs. Click Backup Job and then click File Share.
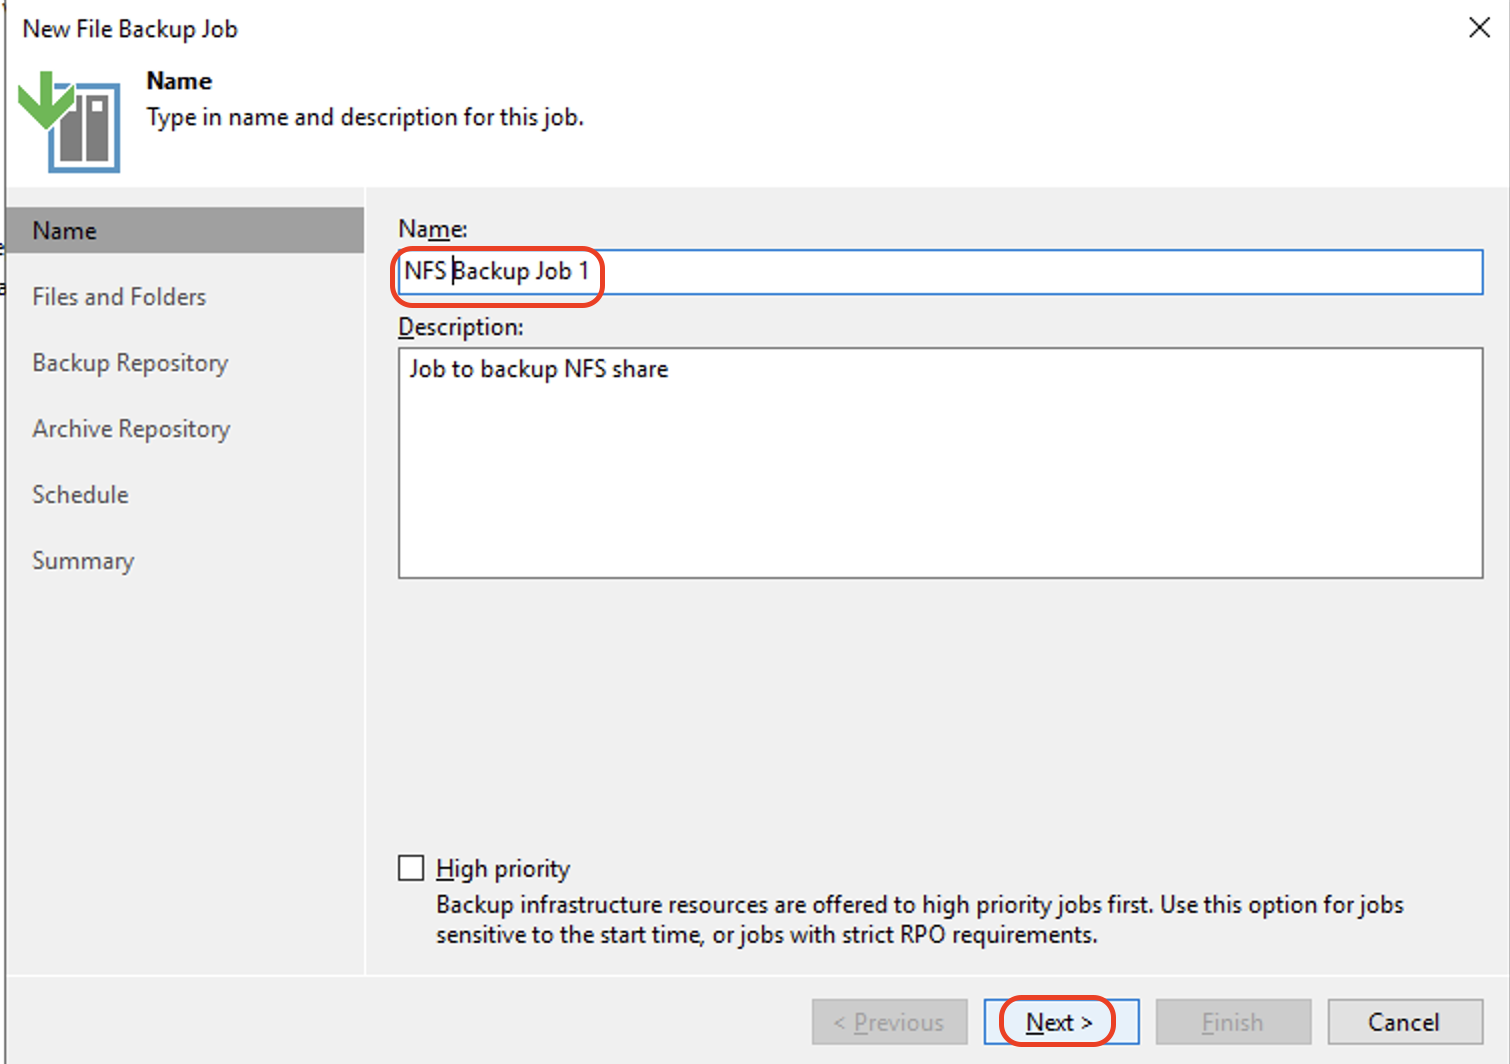
Input a Name and Description. Click Next.
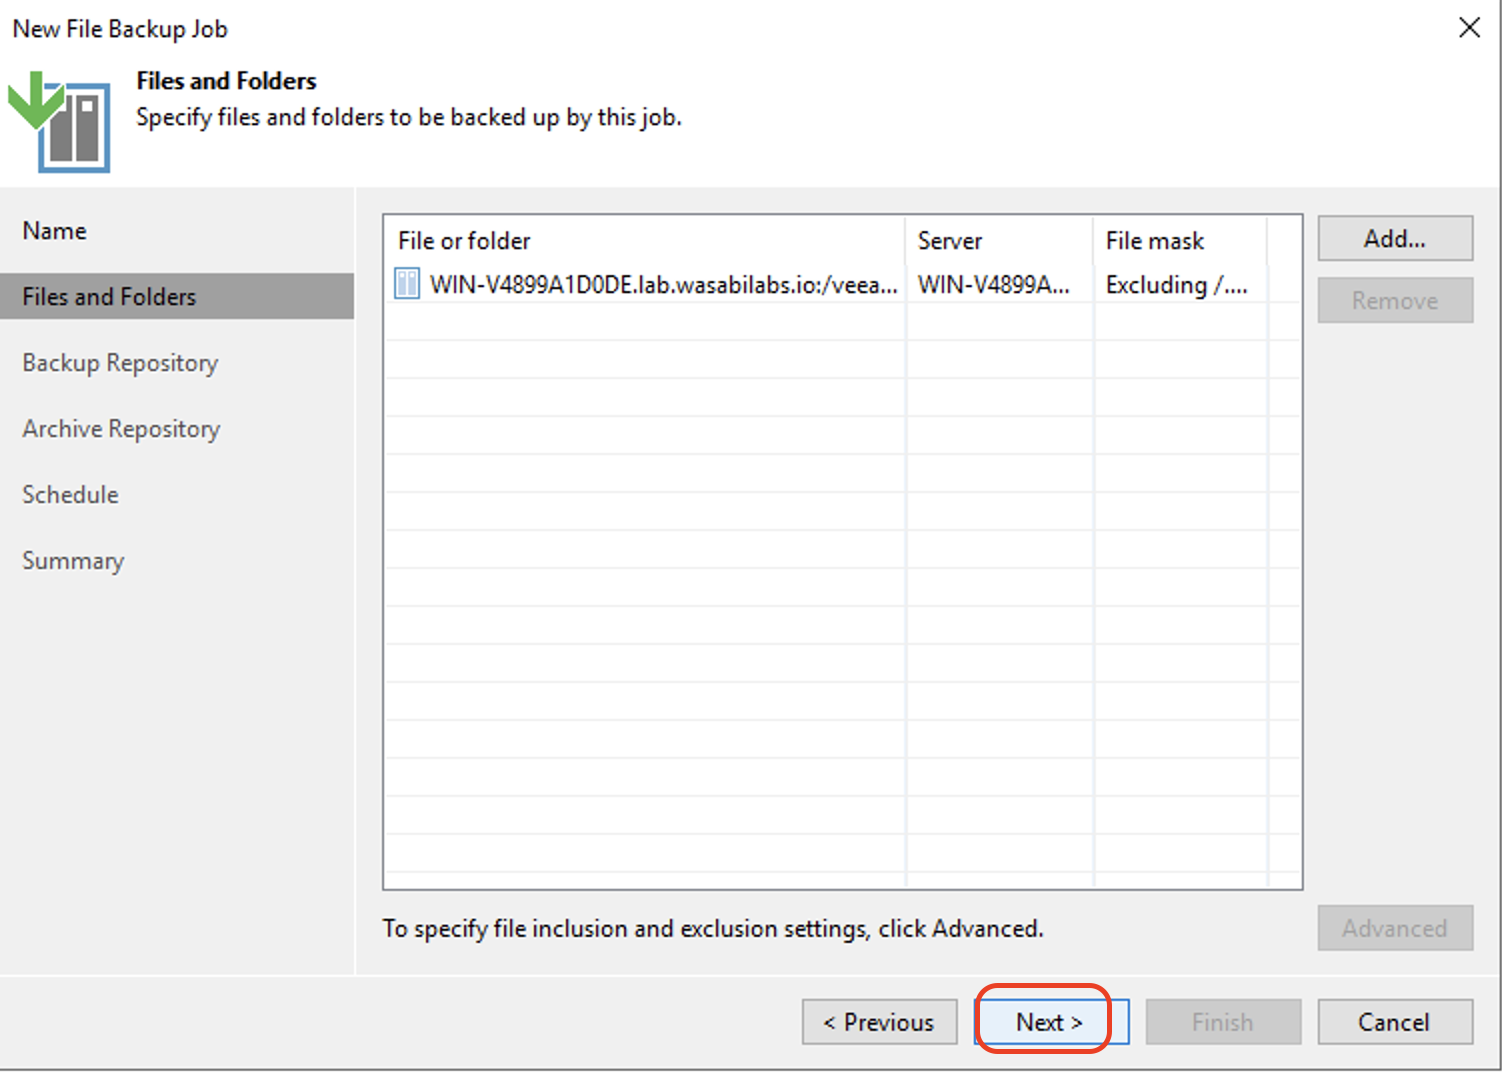
In the Files and Folder tab, click Add.

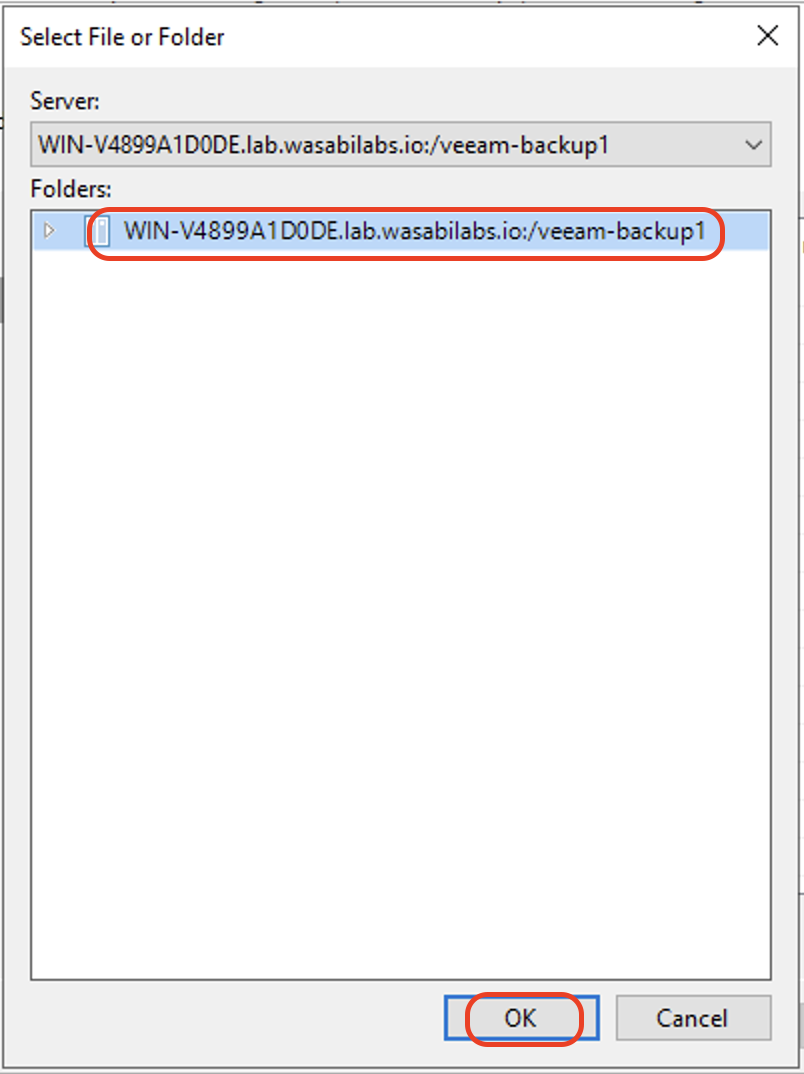
Select the Folders to be backed up. Click OK.
Click Next to continue.
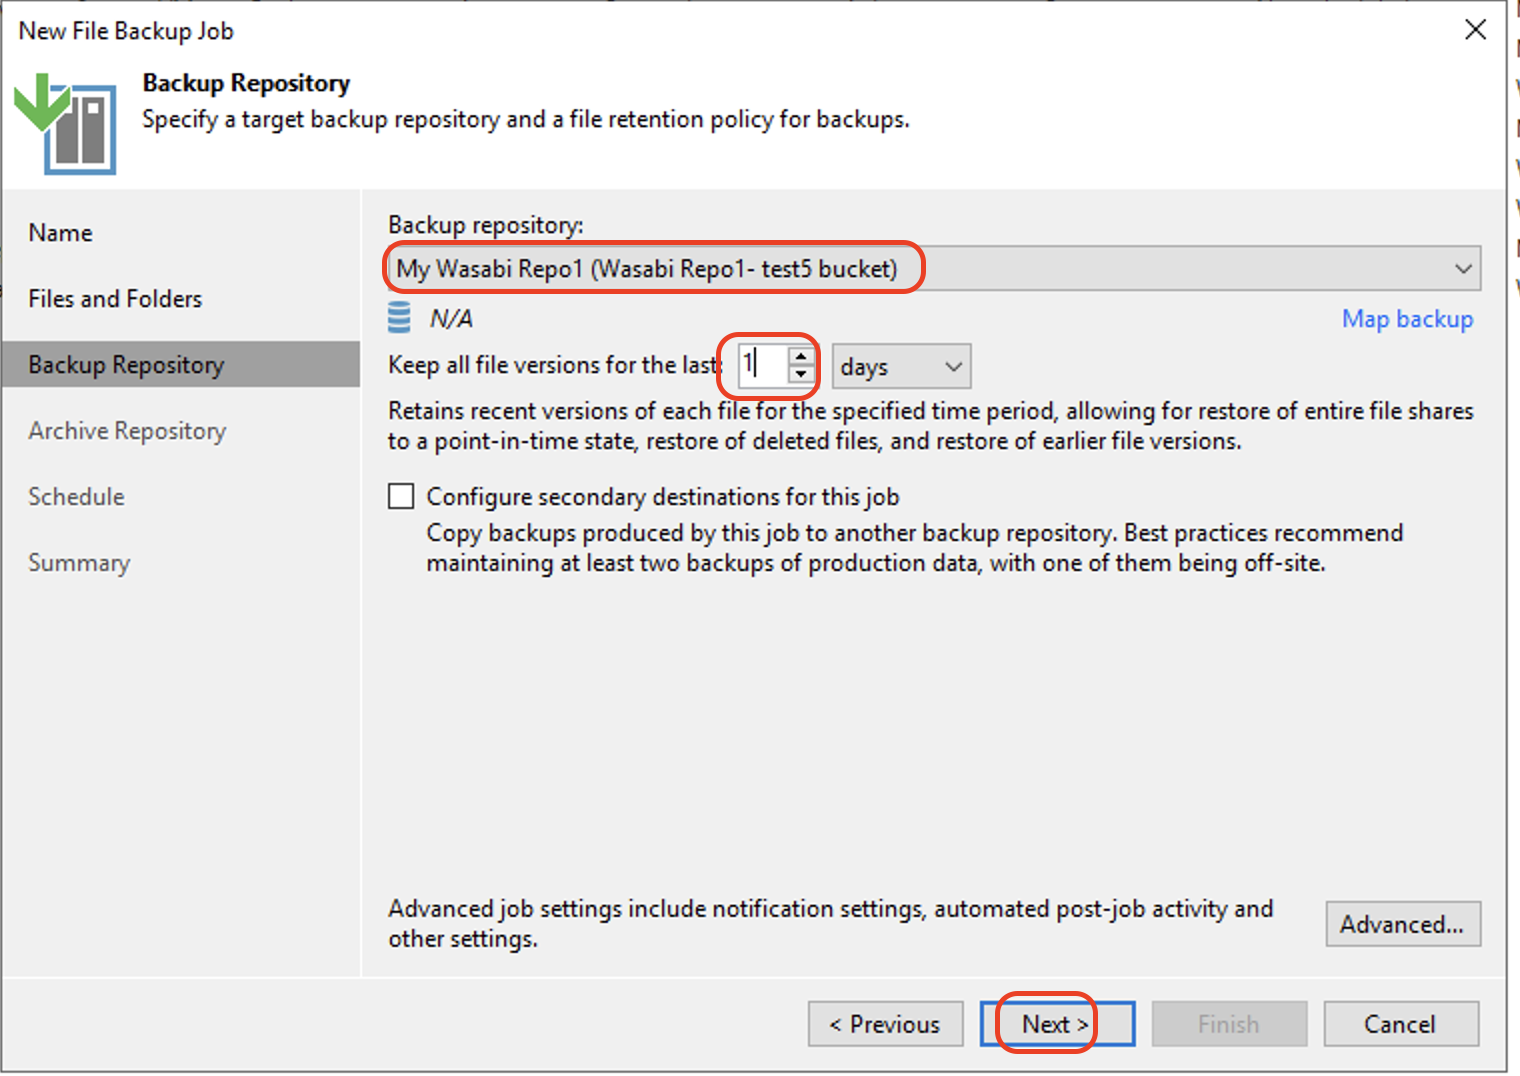
Select the Wasabi backup repository and set Keep all file versions for the last to 1 day. Click Next to continue.
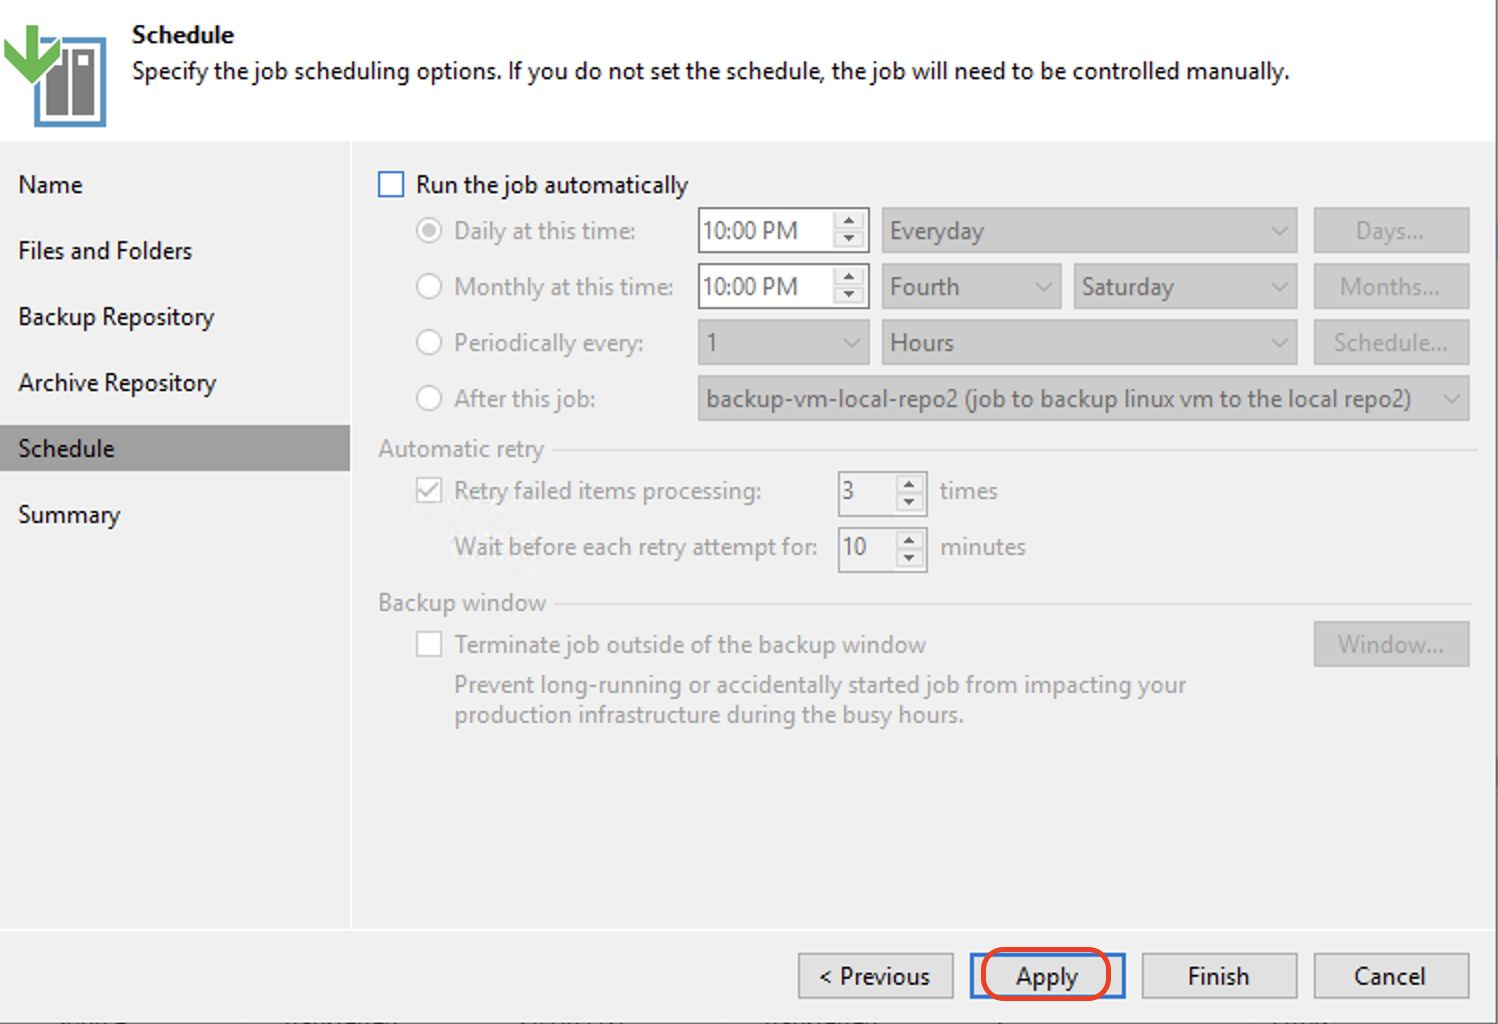
In the Archive Repository tab, configure the following and click Next.
Check the Archive file versions and select the Wasabi repository for archiving.
Check the Archive recent file versions to immediately copy all backed up file versions to archive repository.
Check Archive oldest file versions to an appropriate value.

Leave the default settings. Click Apply.
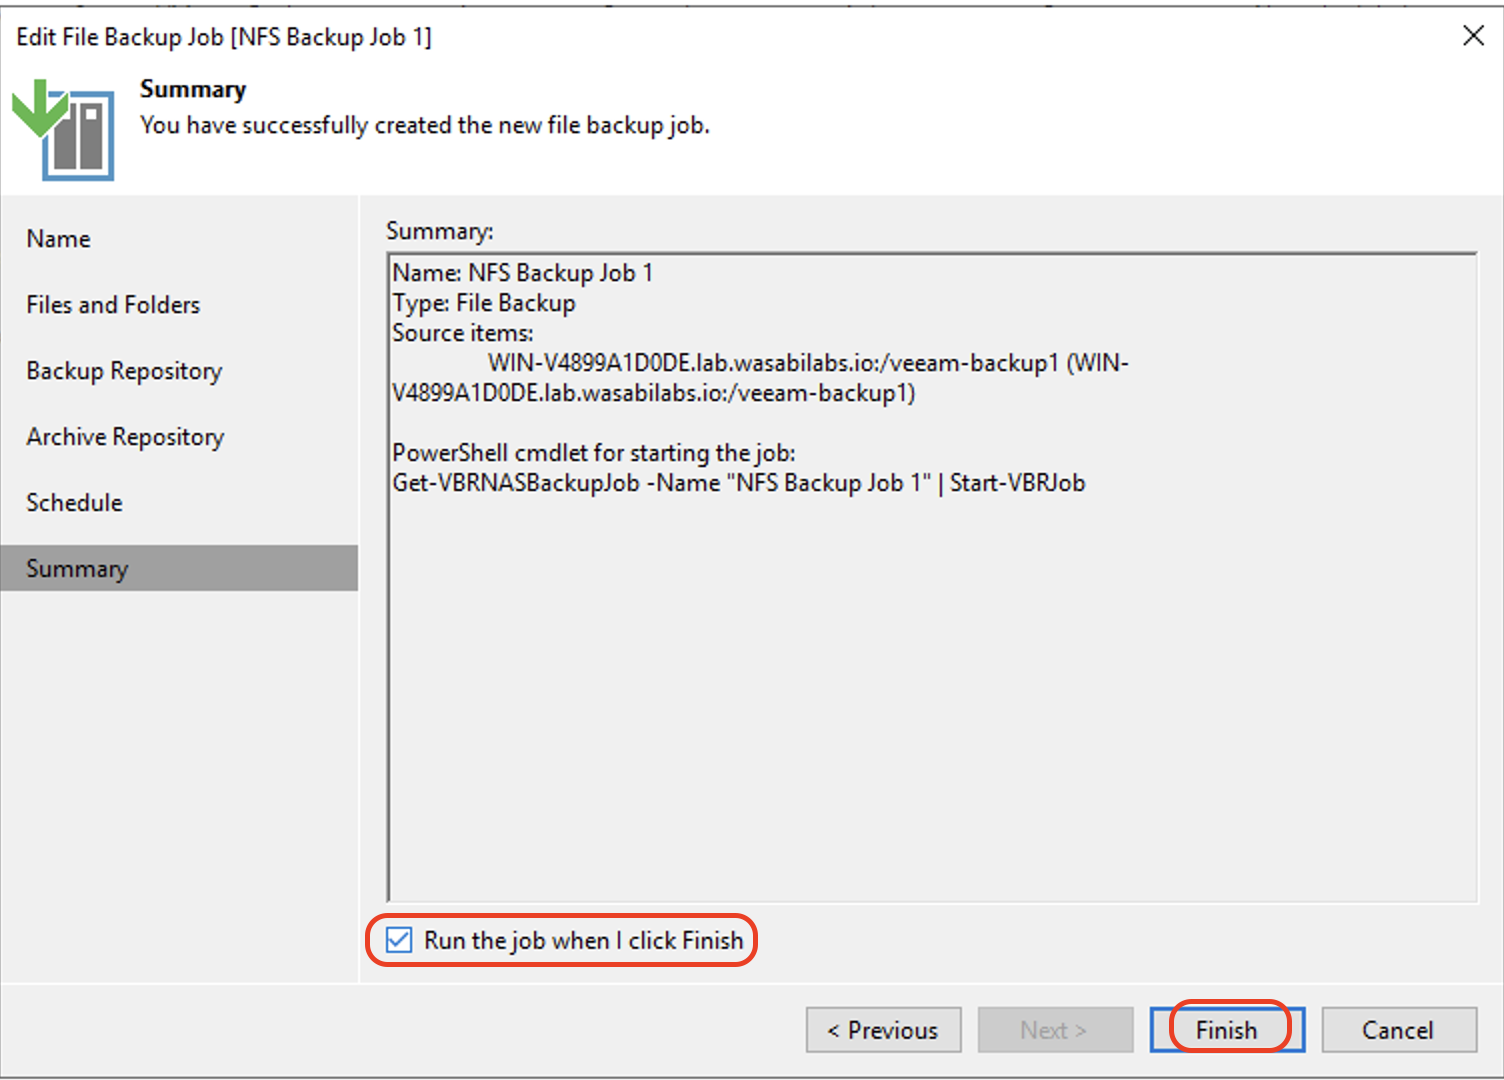
Check Run the job when I click Finish to start the job immediately. Click Finish to create the Backup job.
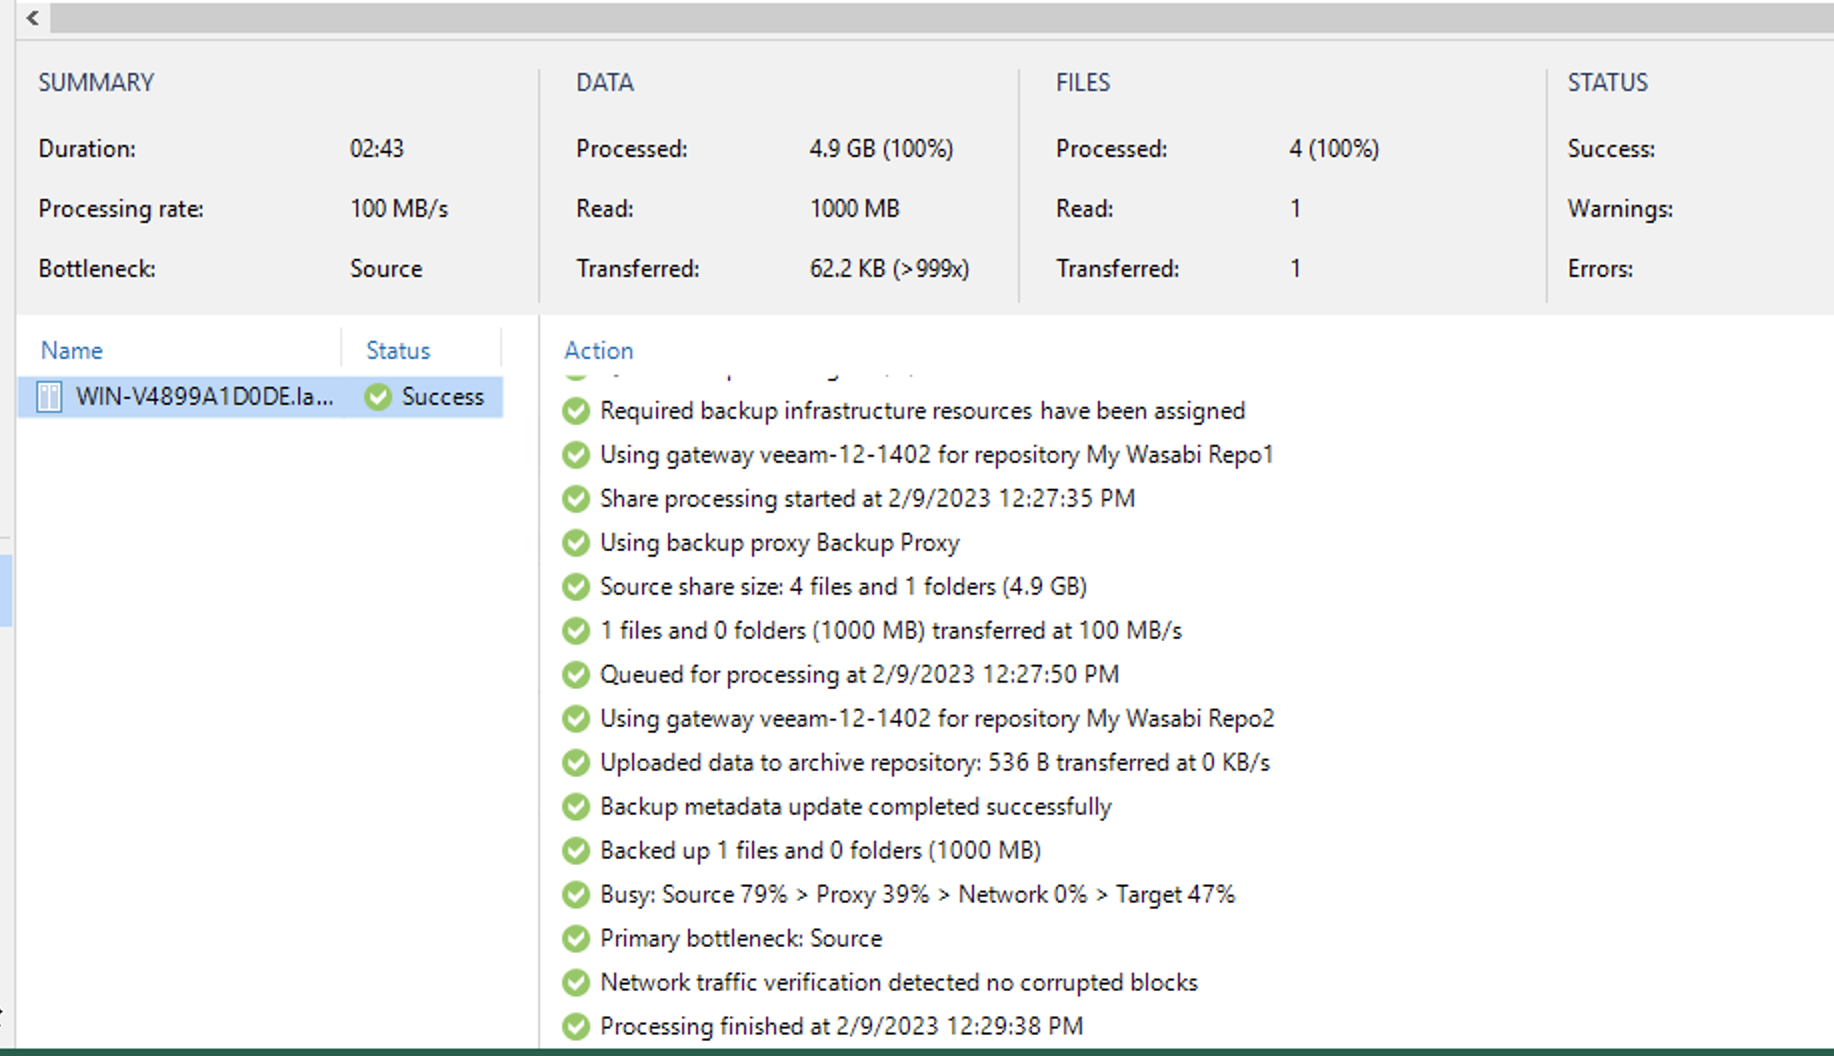
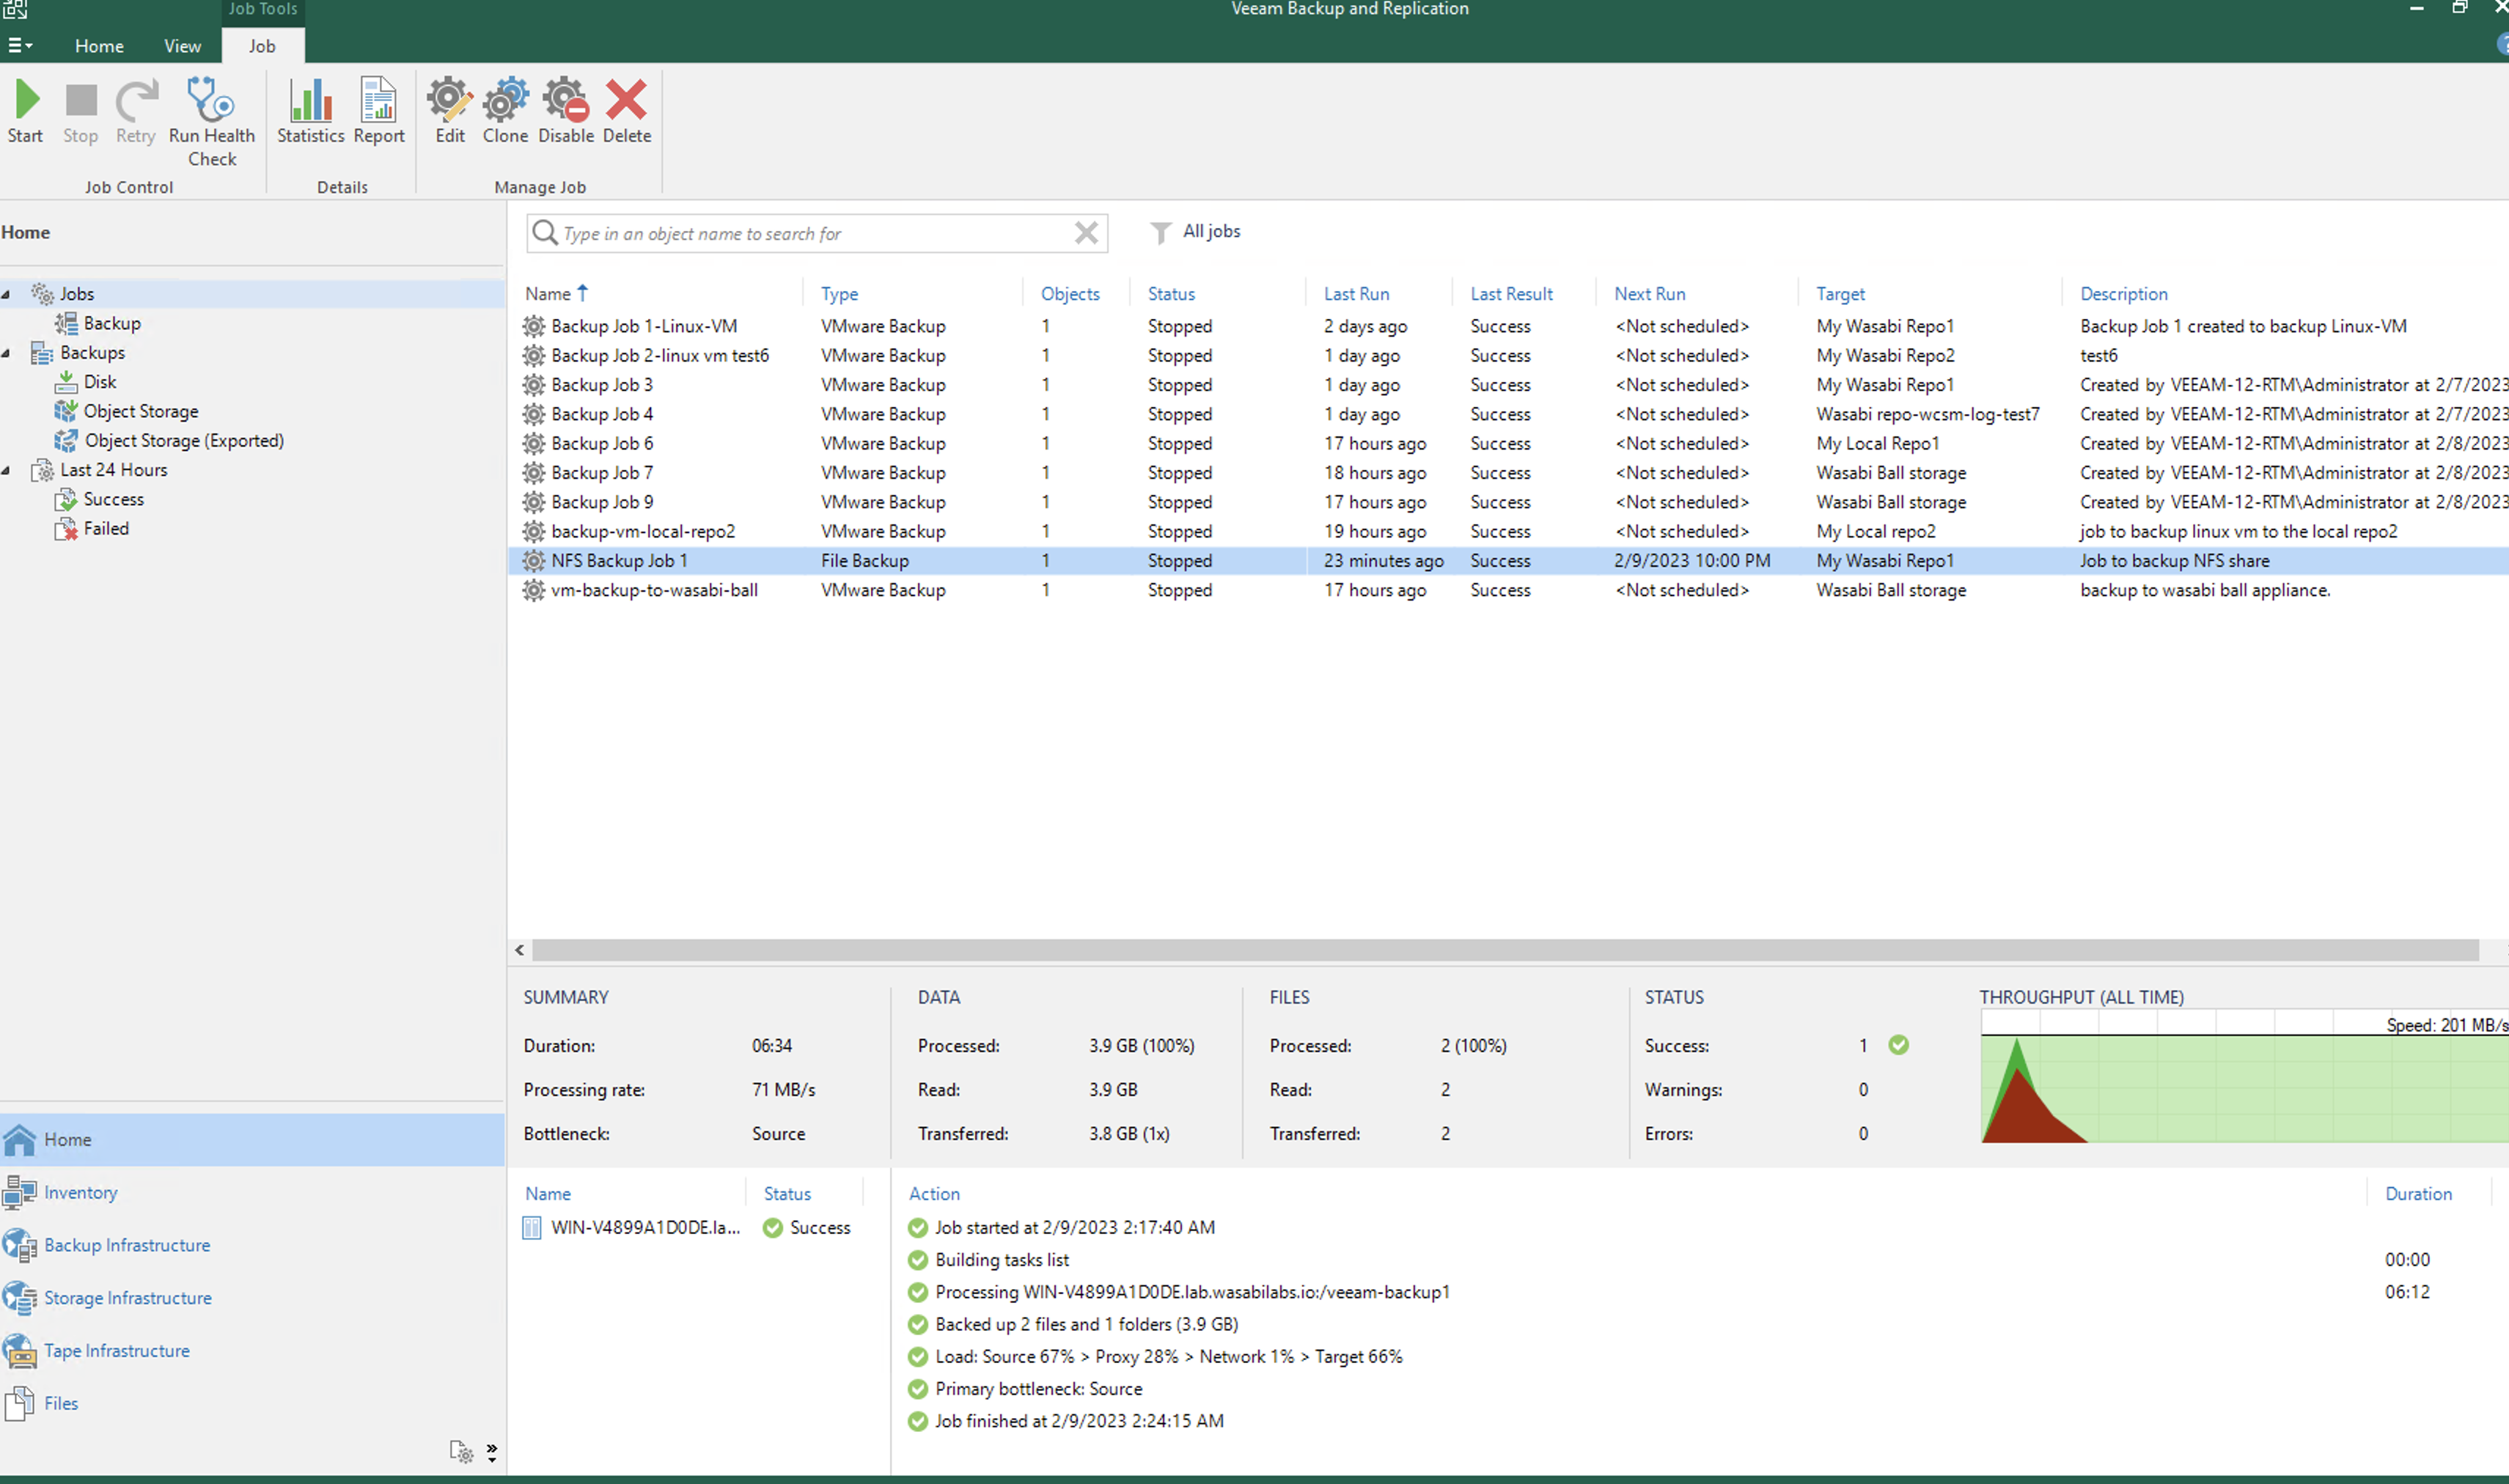
Navigate to Home. Under Jobs, select the job that was created above. Once the job completes, the following output is expected.
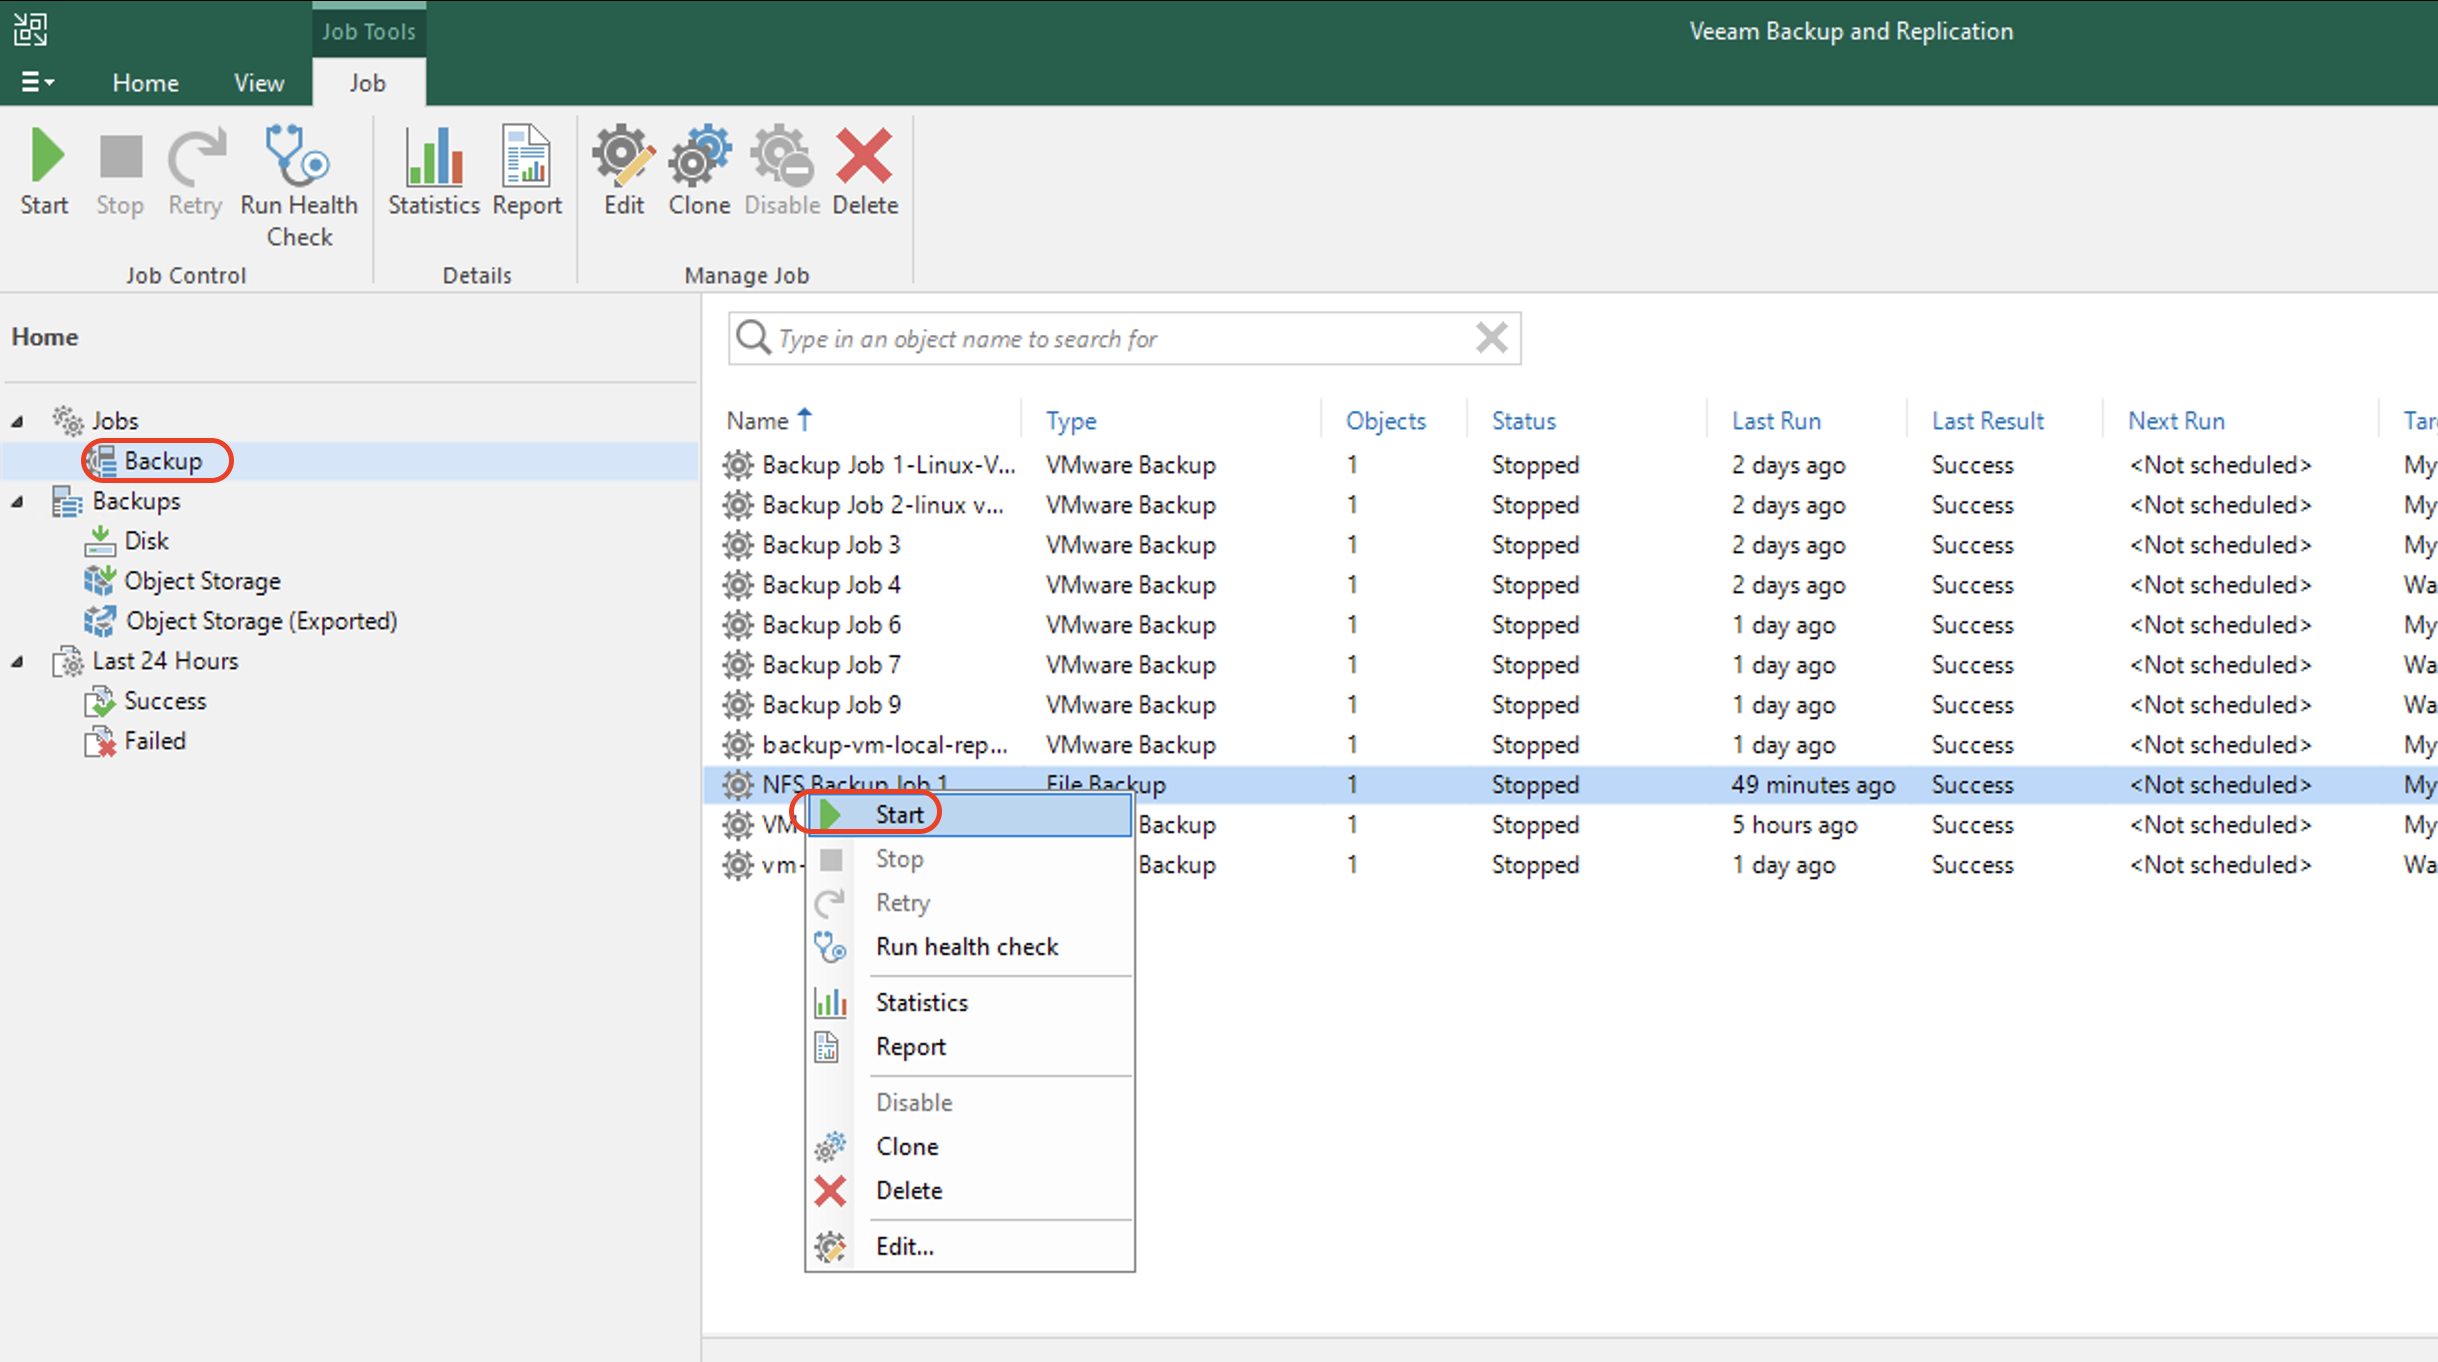
To manually invoke a backup offload, the data on the NAS requires a change. In this example, we have copied over an additional 1 GB data file. This change will invoke the offload logic within Veeam to begin to offload the first backup.
Once the data change is complete, navigate to Home, then Jobs. Click Backup. Right-click Backup Job for NFS. Click Start.
Once the job completes, data is uploaded to the archive repository.