Vinchin Backup & Recovery has been validated to work with Wasabi. Enterprise and SMB customers can get next-gen data protection from the software, and it can now archive backups to Wasabi's cloud storage.
1. Prerequisites
Active Wasabi cloud storage account
Vinchin Backup & Recovery v6.5 and above versions
Vinchin Backup & Recovery Enterprise Edition deployed and licensed
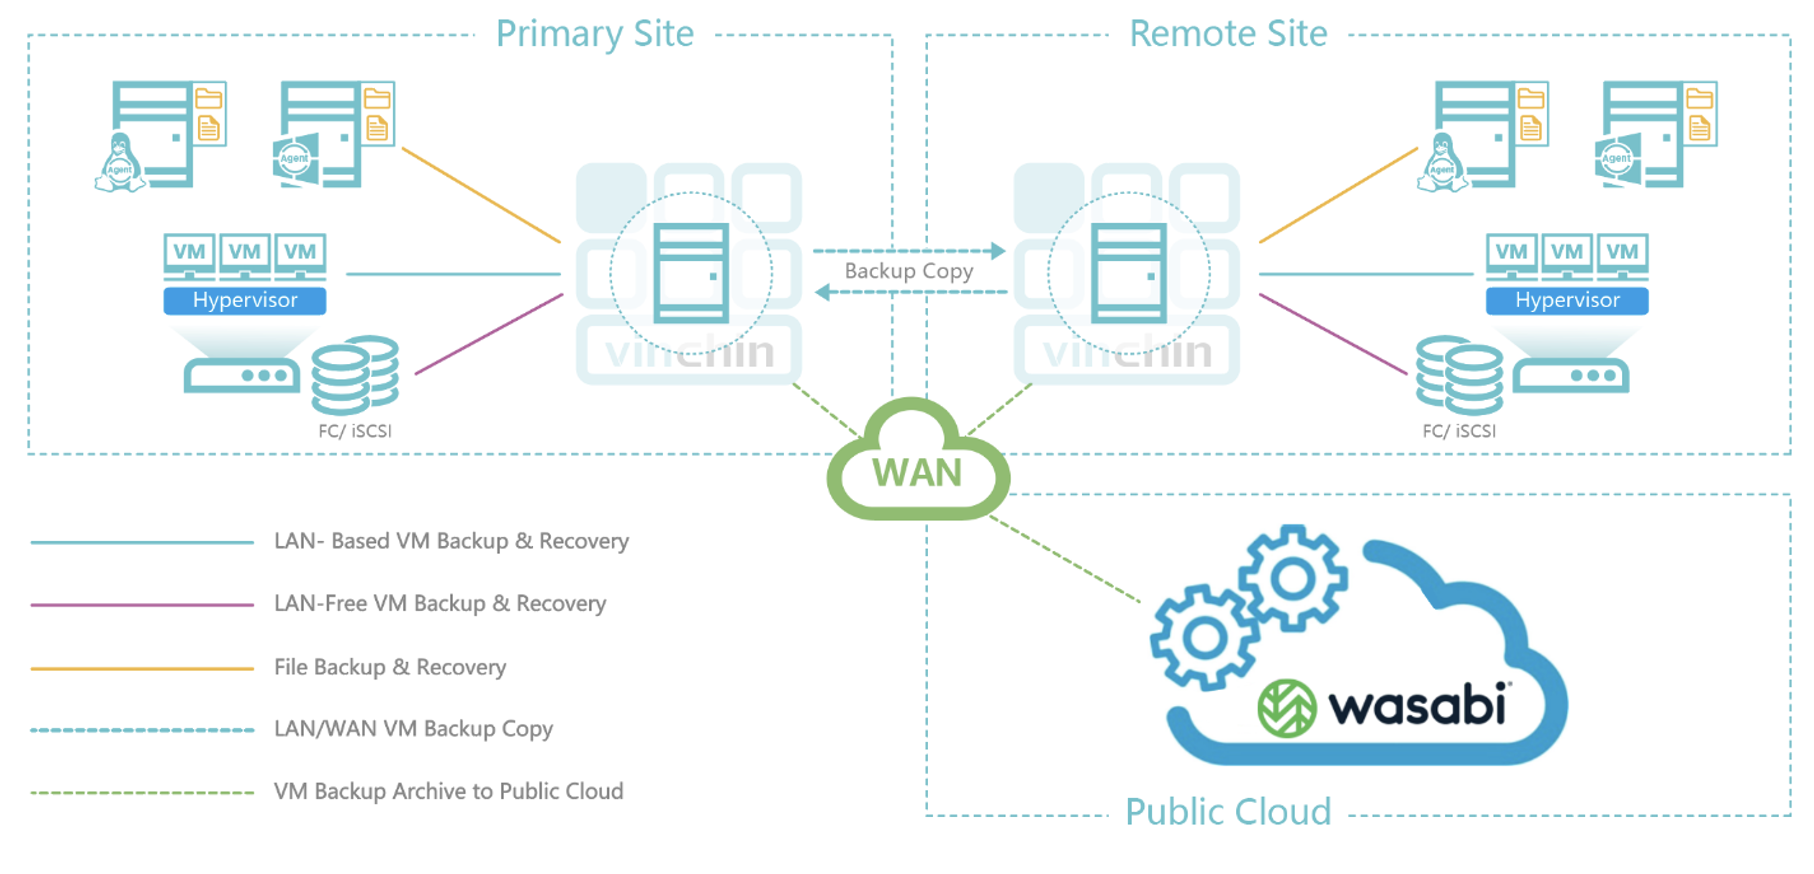
2. Architecture Diagram
3.Configure Wasabi as Archive Storage
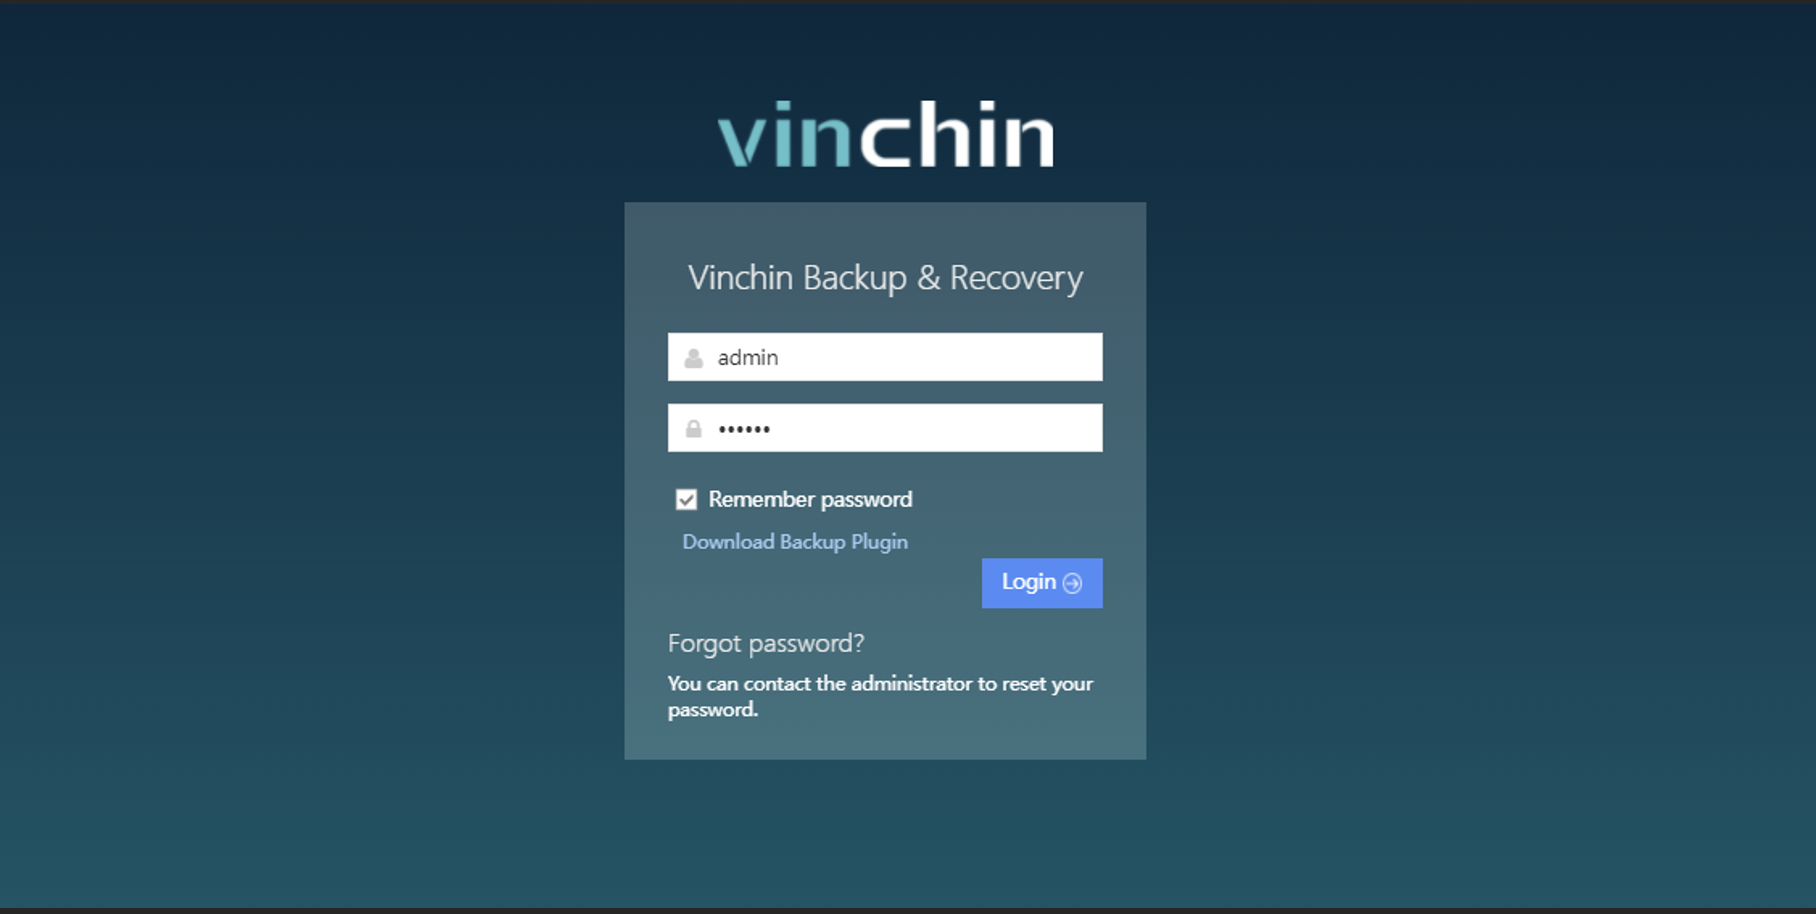
3.1 Log in Vinchin backup server web console.
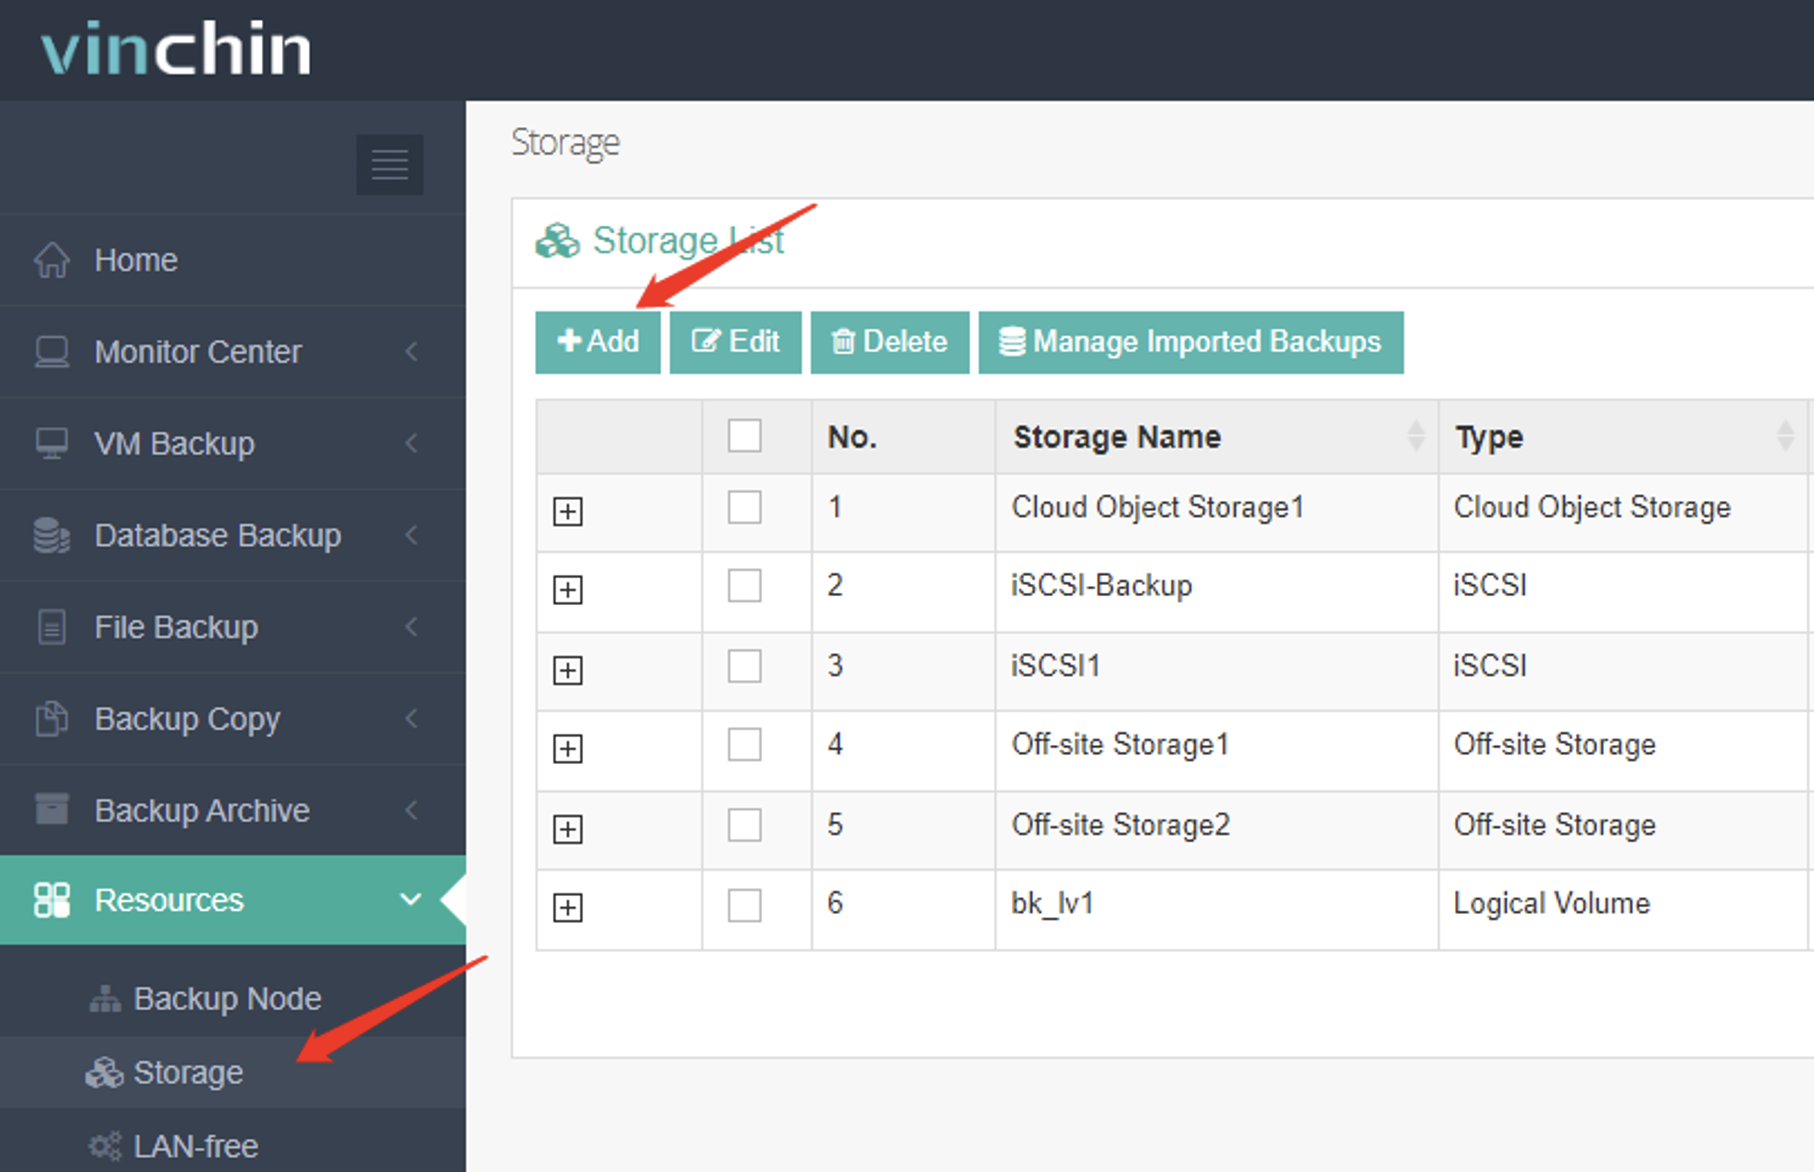
3.2 Navigate to Resources, then Storage. Click Add.
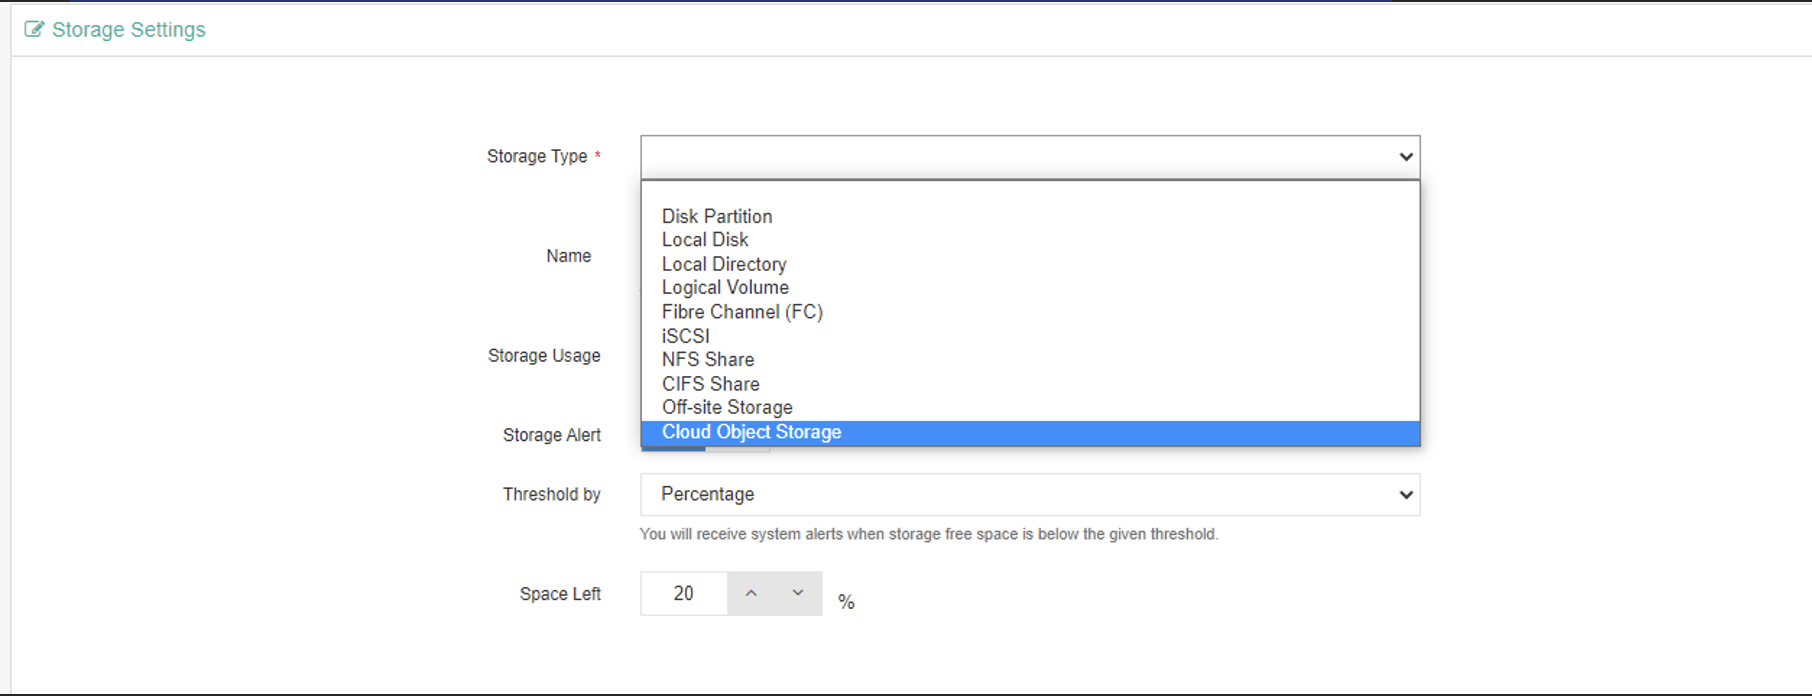
3.3 Choose Cloud Object Storage from the Storage Type .
3.4 Choose Wasabi from the Vendor.

3.5 Choose a location of the storage data center from the Region or manually enter an IP address.

Note: This configuration example discusses the use of Wasabi's us-east-1 storage region. To use other Wasabi storage regions, please use the appropriate Wasabi service URL as described in our Wasabi Service URLs article.
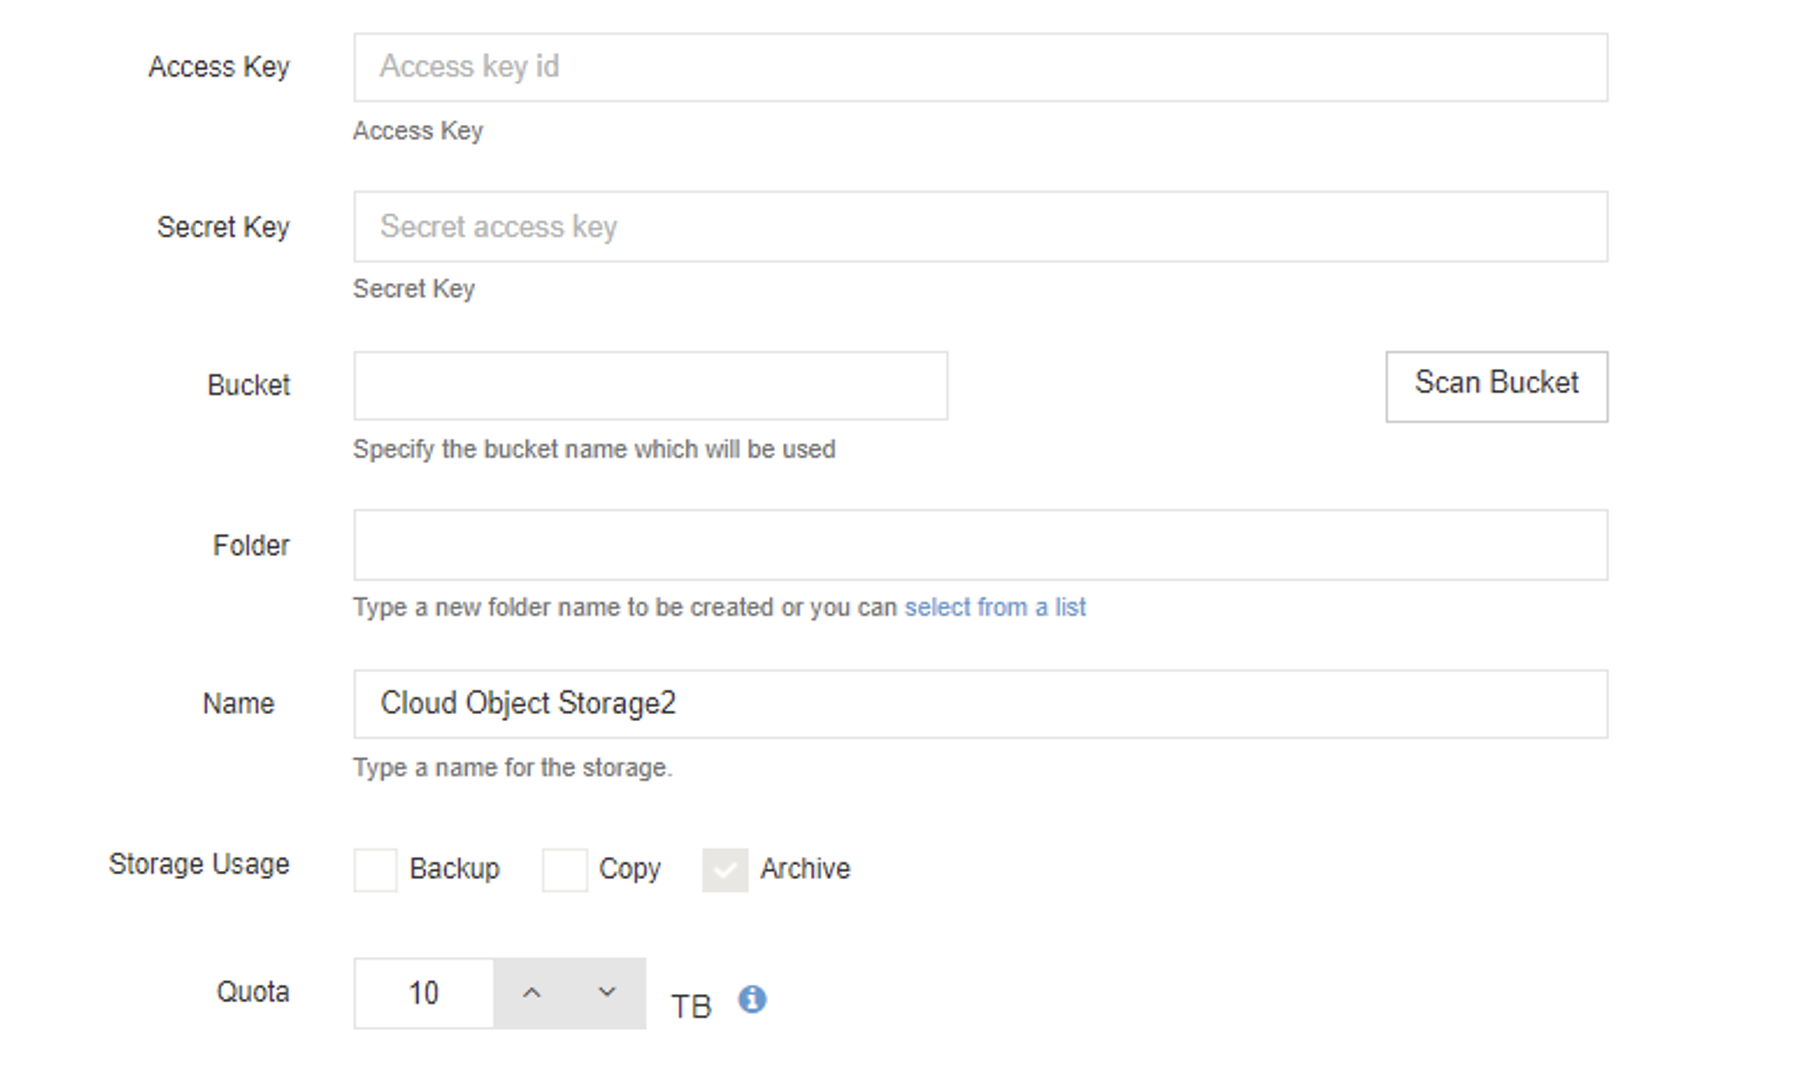
3.6 Provide the following:
Access Key- Provide the S3 Access Key. Refer to creating a sub-user, access, and secret keys.
Secret Key: Provide the S3 Secret Key. Refer to creating a sub-user, access, and secret keys.
Bucket- Provide the name of the Wasabi bucket to be used.
Folder- Provide the name of the folder to store the archive data
Name- Provide the name for the storage.
Quota- Maximum space usage allowed for cloud archive.
The Storage Usage field has been set to Archive by default, since cloud storage can now only be used as an archive destination.
3.7 Click OK.
Once you add the Wasabi Hot Cloud Storage into the Vinchin backup infrastructure successfully, you’ll be redirected to the Storage page again, and the added cloud storage can be seen in the list.
4. Create a Backup Archive job
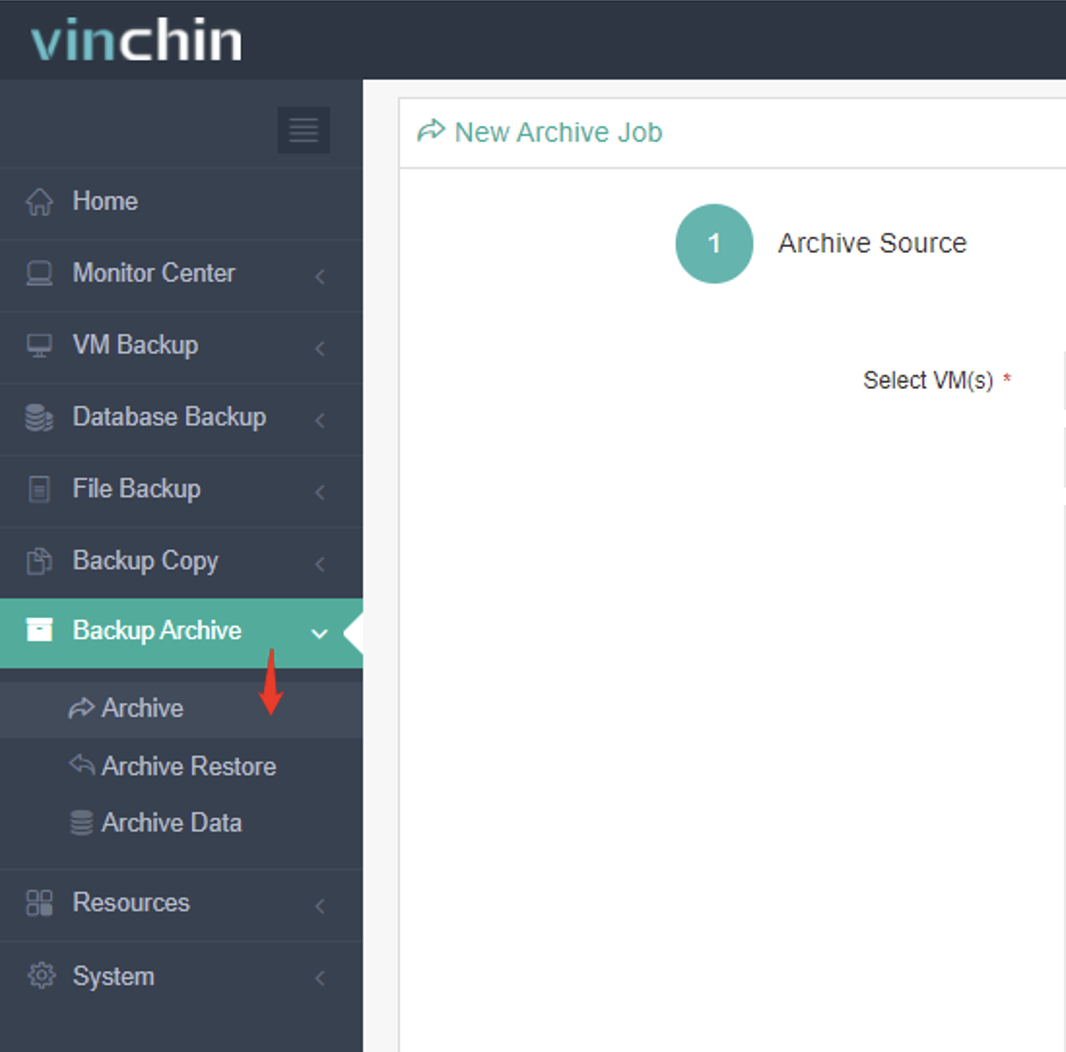
4.1 Navigate to Backup Archive, then Archive.
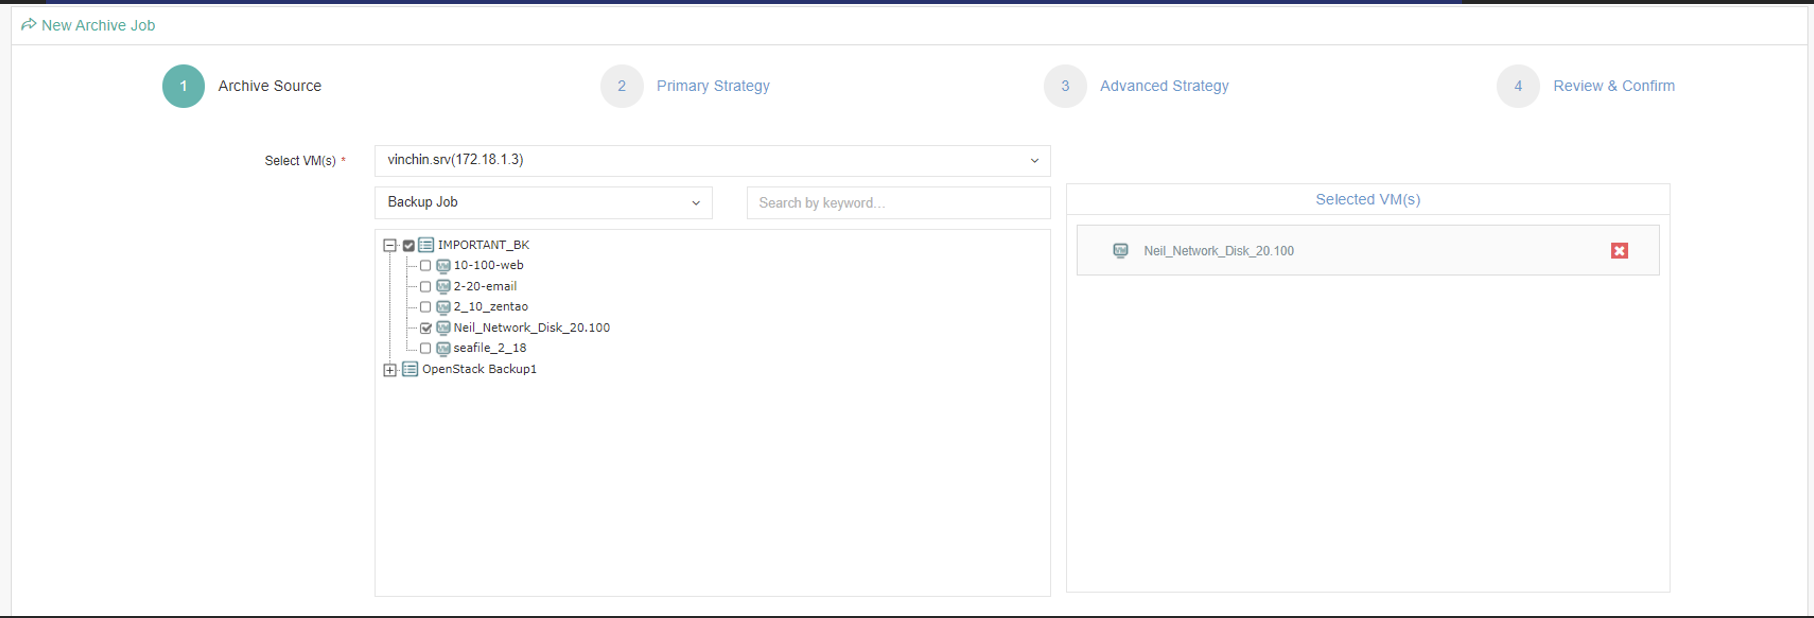
4.2 Choose an archive source from the available Restore point list. Click Next. Each Restore reflects a successful backup, either a full or an incremental.
4.3 Set up archive mode to be once-off or as scheduled.
Select Once-off Archive to run the job once. Define a start time from the calendar.
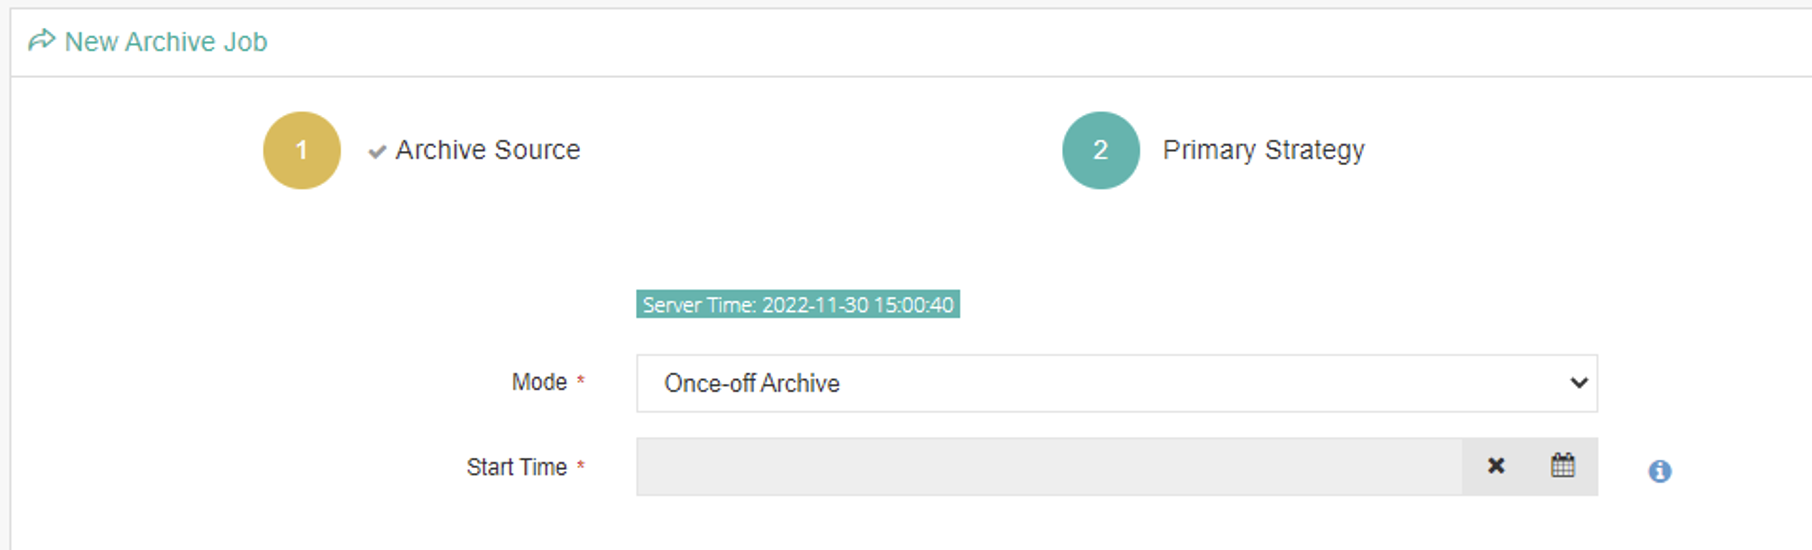
Select Archive as Scheduled to run the archive job automatically on a daily, weekly, or monthly schedule.
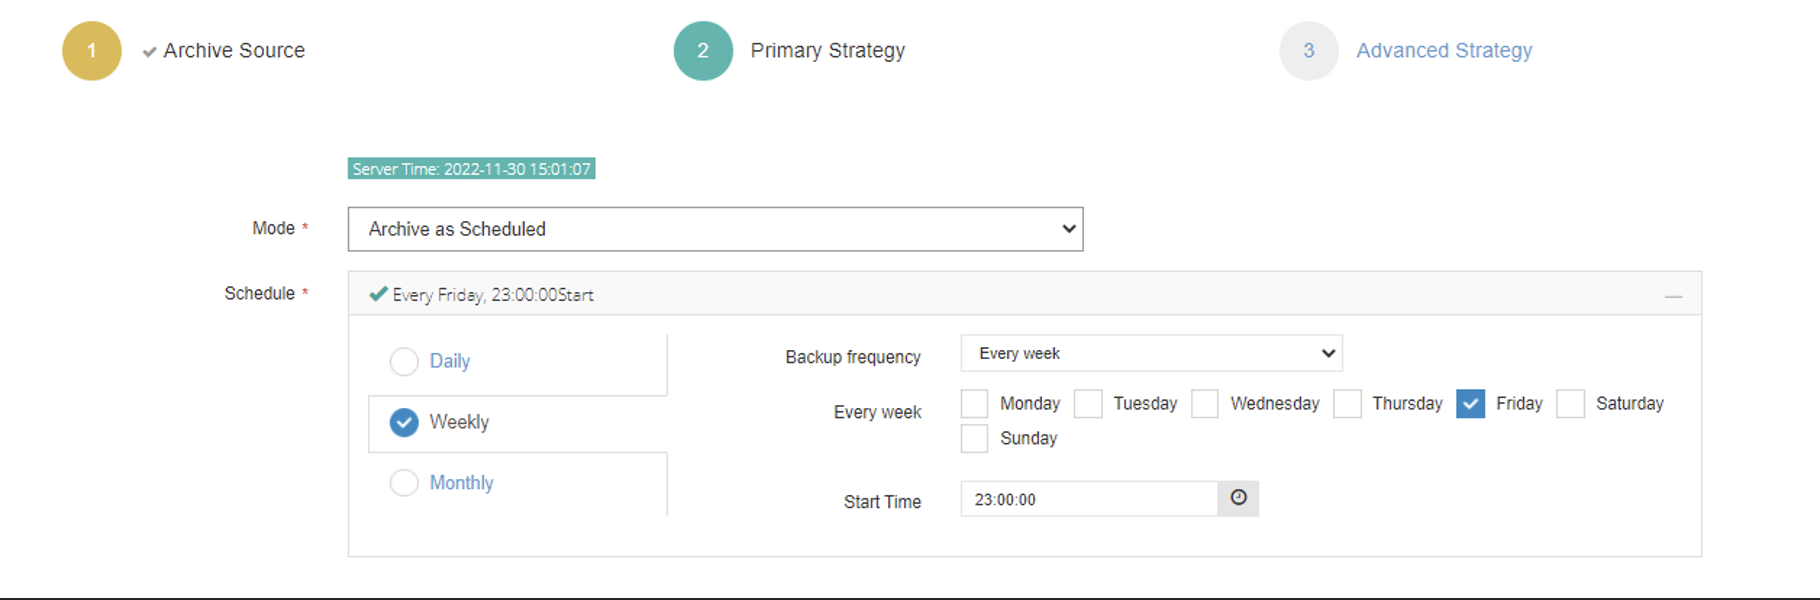
Click Next.
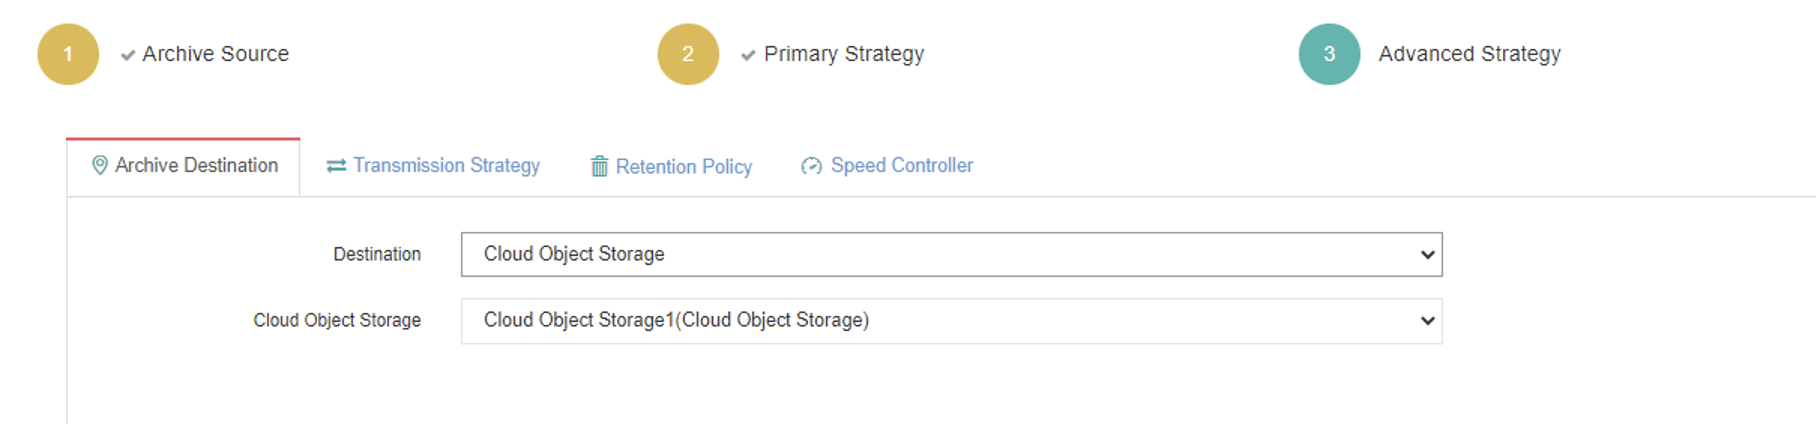
4.4 Choose Cloud Object Storage from Destination drop down list, and select the target Wasabi Hot Cloud Storage from the Cloud Object Storage.
4.5 Settings for Encrypted Transmission (ensure data security during data transfer), Retention Policy, and Speed Controller (optional) can be customized by clicking on the corresponding section.
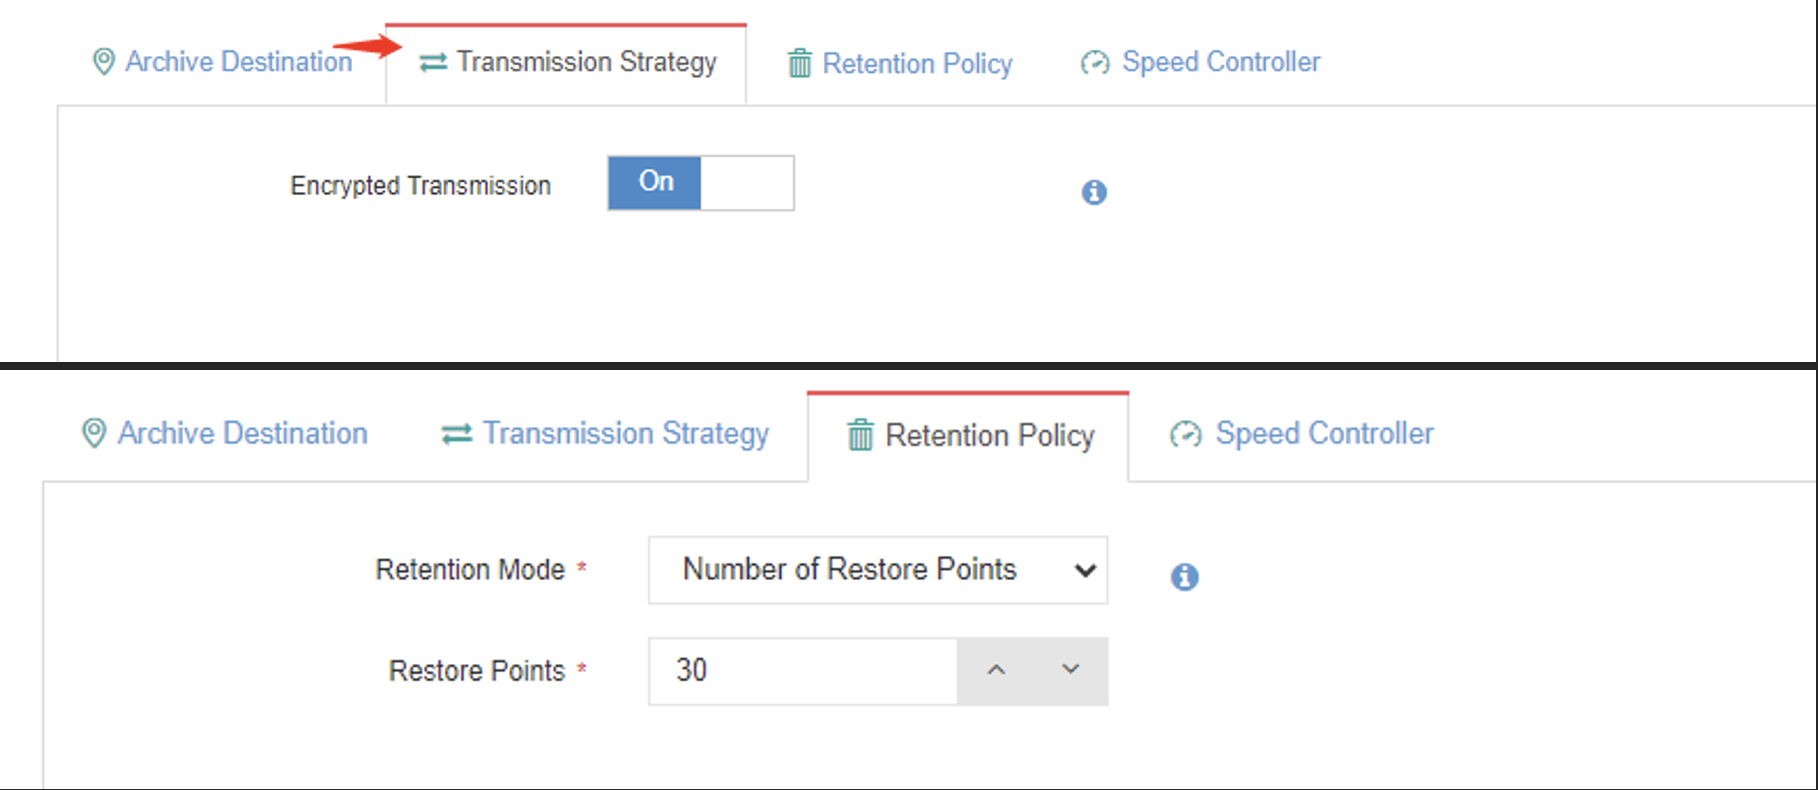
Click Next once the settings are configured.
4.6 Review and confirm the job configuration. Click Submit.
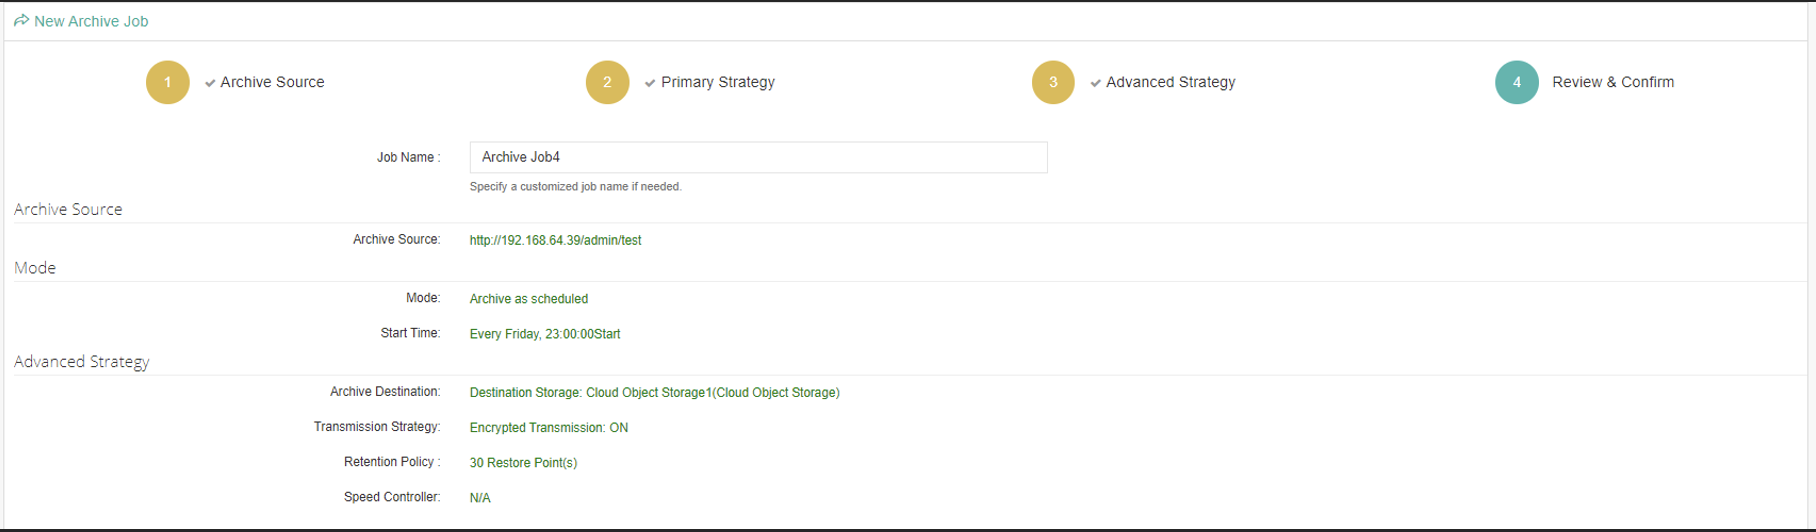
After the job is saved successfully, Vinchin Backup & Recovery will automatically archive data as schedule to Wasabi hot cloud storage.
5. Restore a Backup Archive
To restore backup archive data from Wasabi cloud storage, users should first create an archive restore job to restore the backup archive to an on-site storage. Then, users should create a restore job to restore the backup. The following steps describe how to restore a backup from a backup archive stored on Wasabi cloud storage.
5.1 Create an Archive Restore Job
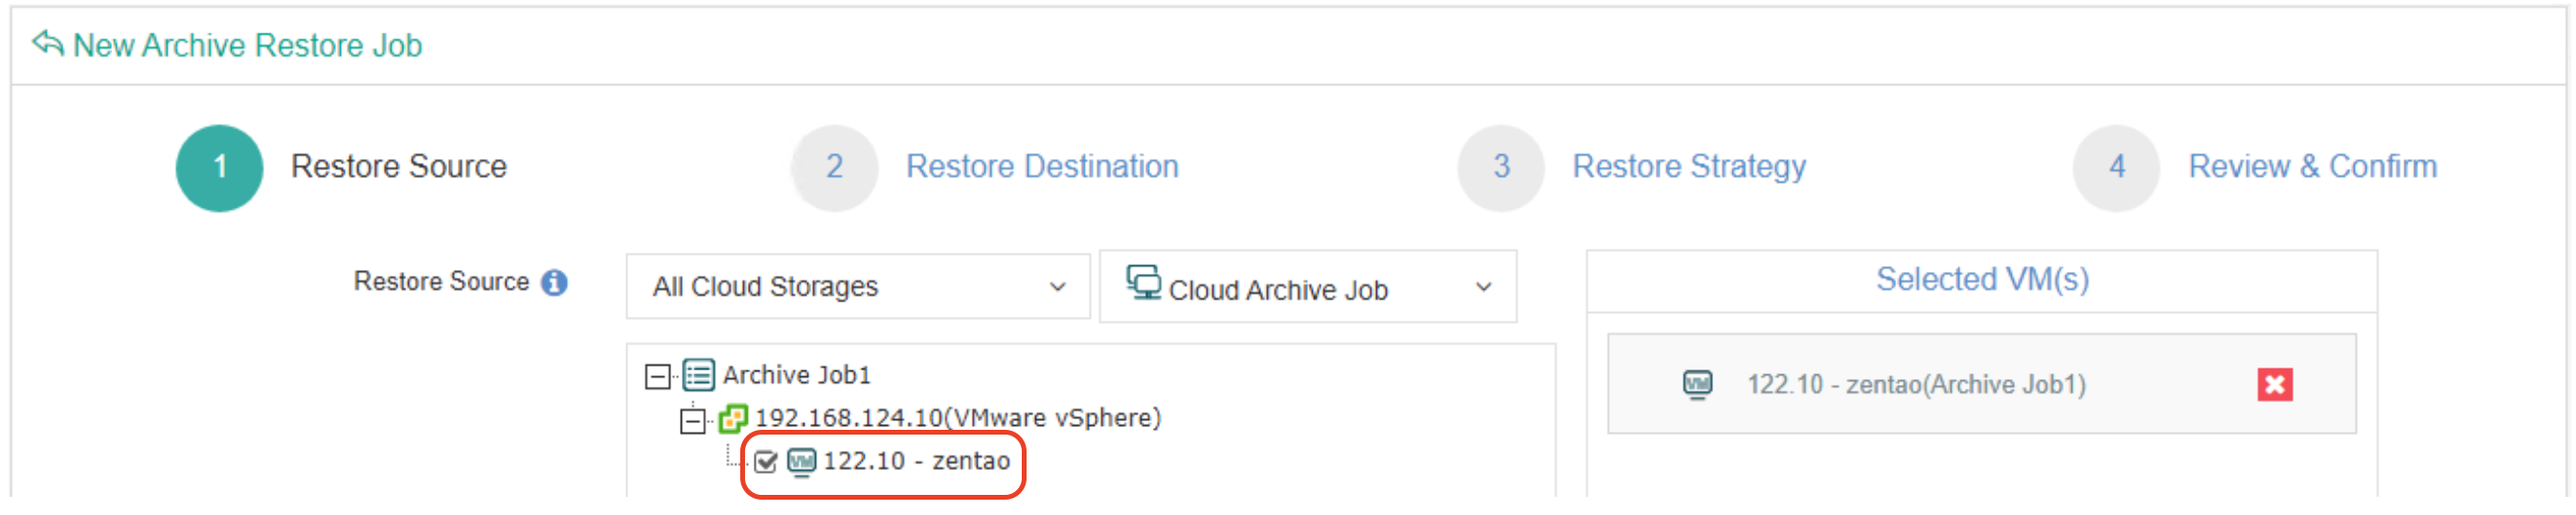
5.1.1 Create an Archive Restore job by navigating to Backup Archive, then Archive Restore. Select the Wasabi Cloud Storage and select the Restore point in the Restore Source tab. Click Next.
Select an on-site storage to save the restored archive data in the Restore Destination tab.
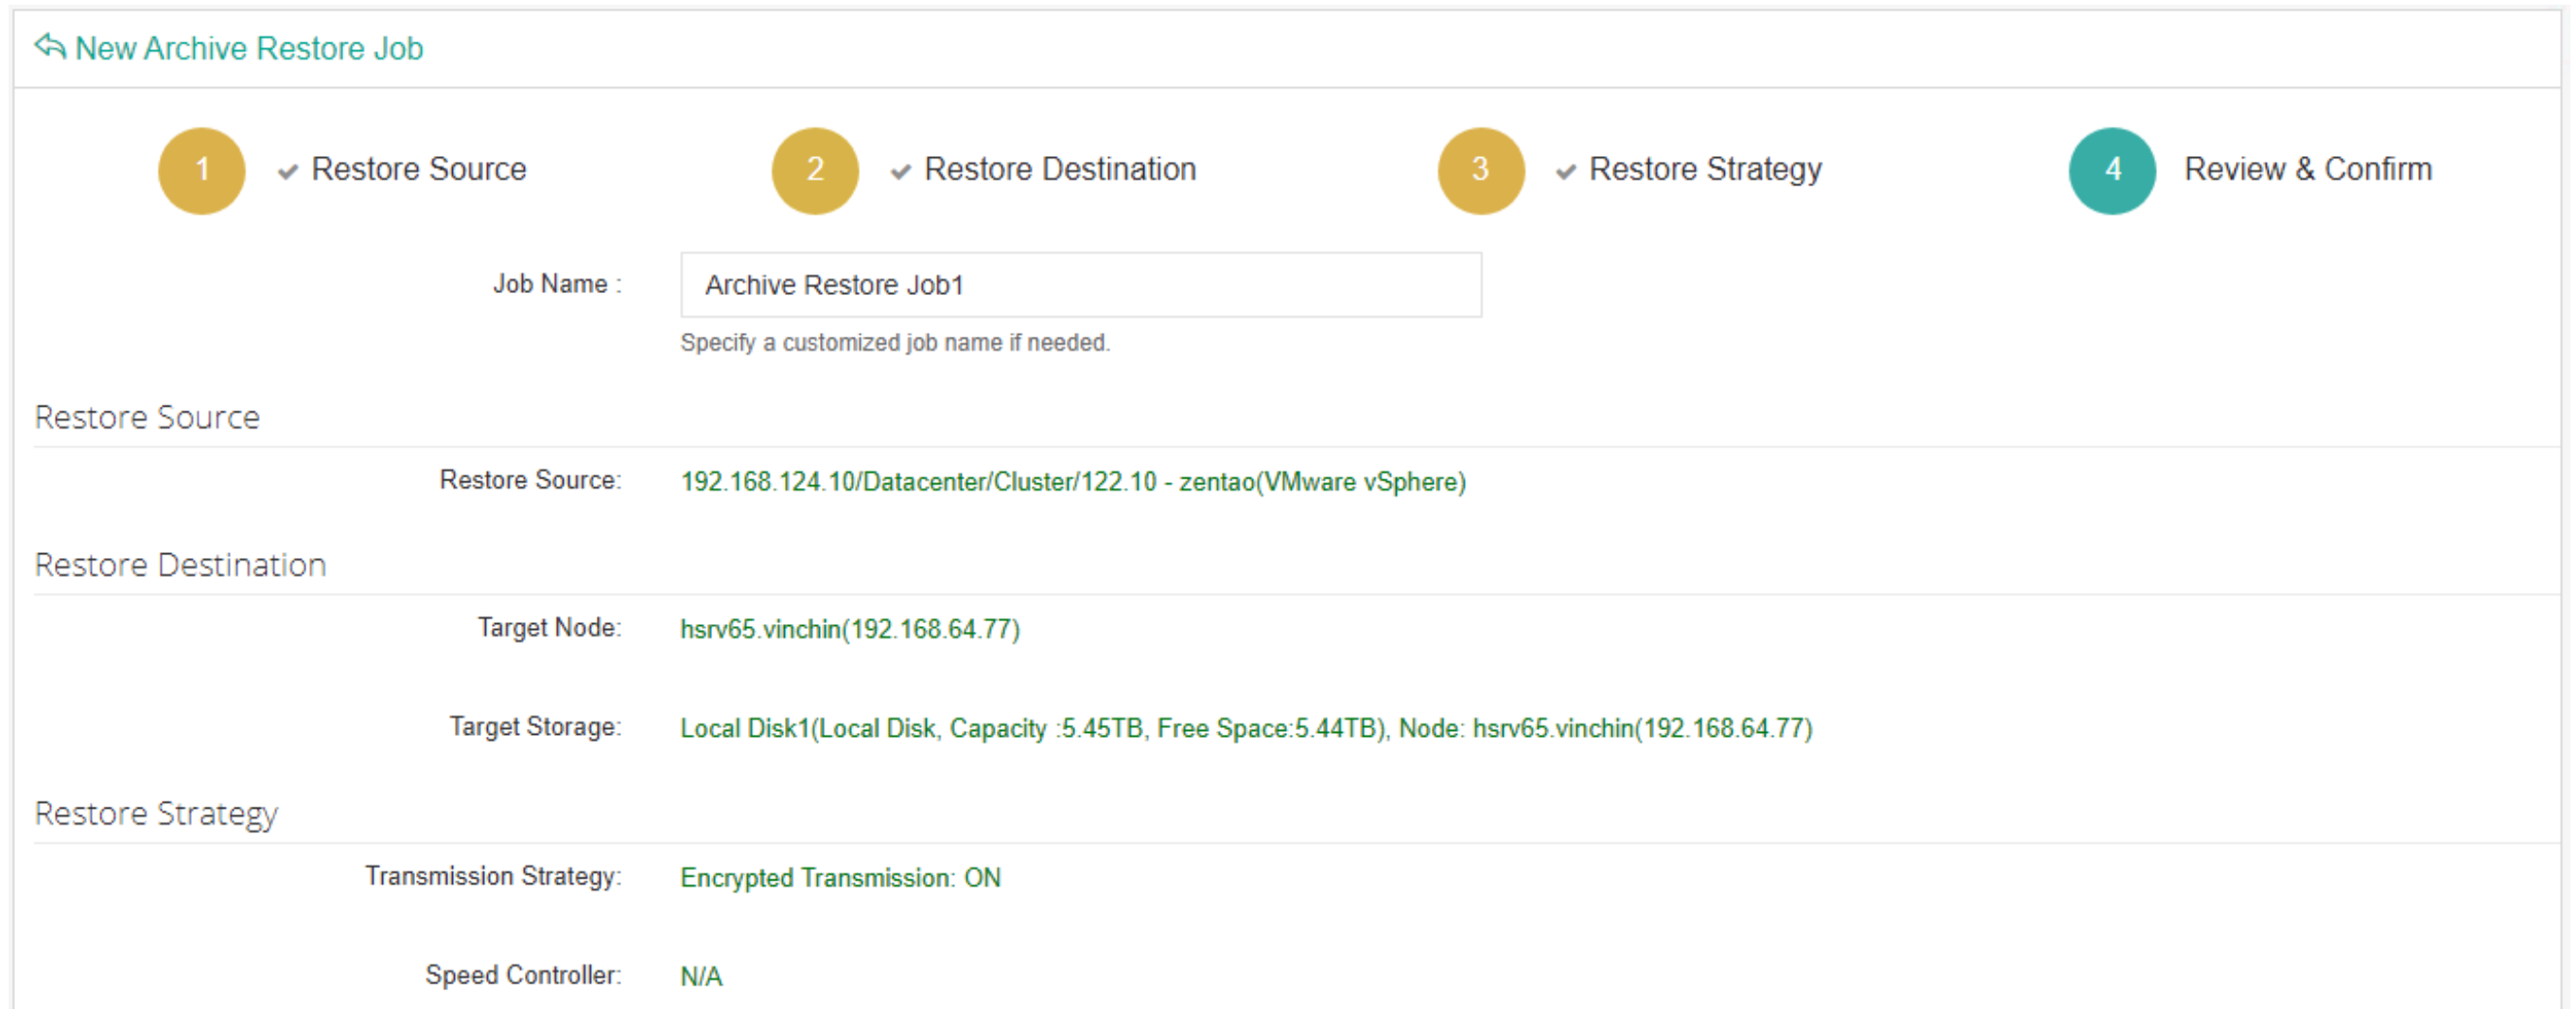
5.1.2 In the Restore Strategy tab, select encrypted transmission. Optionally select the Speed Controller tab to set the appropriate speed controller setting. This is needed only if the archive restore job will bring network or I/O overload to your production environment.

5.1.3 Review and confirm the settings and click Submit to create the archive restore job.
5.2 Create a Restore Job.
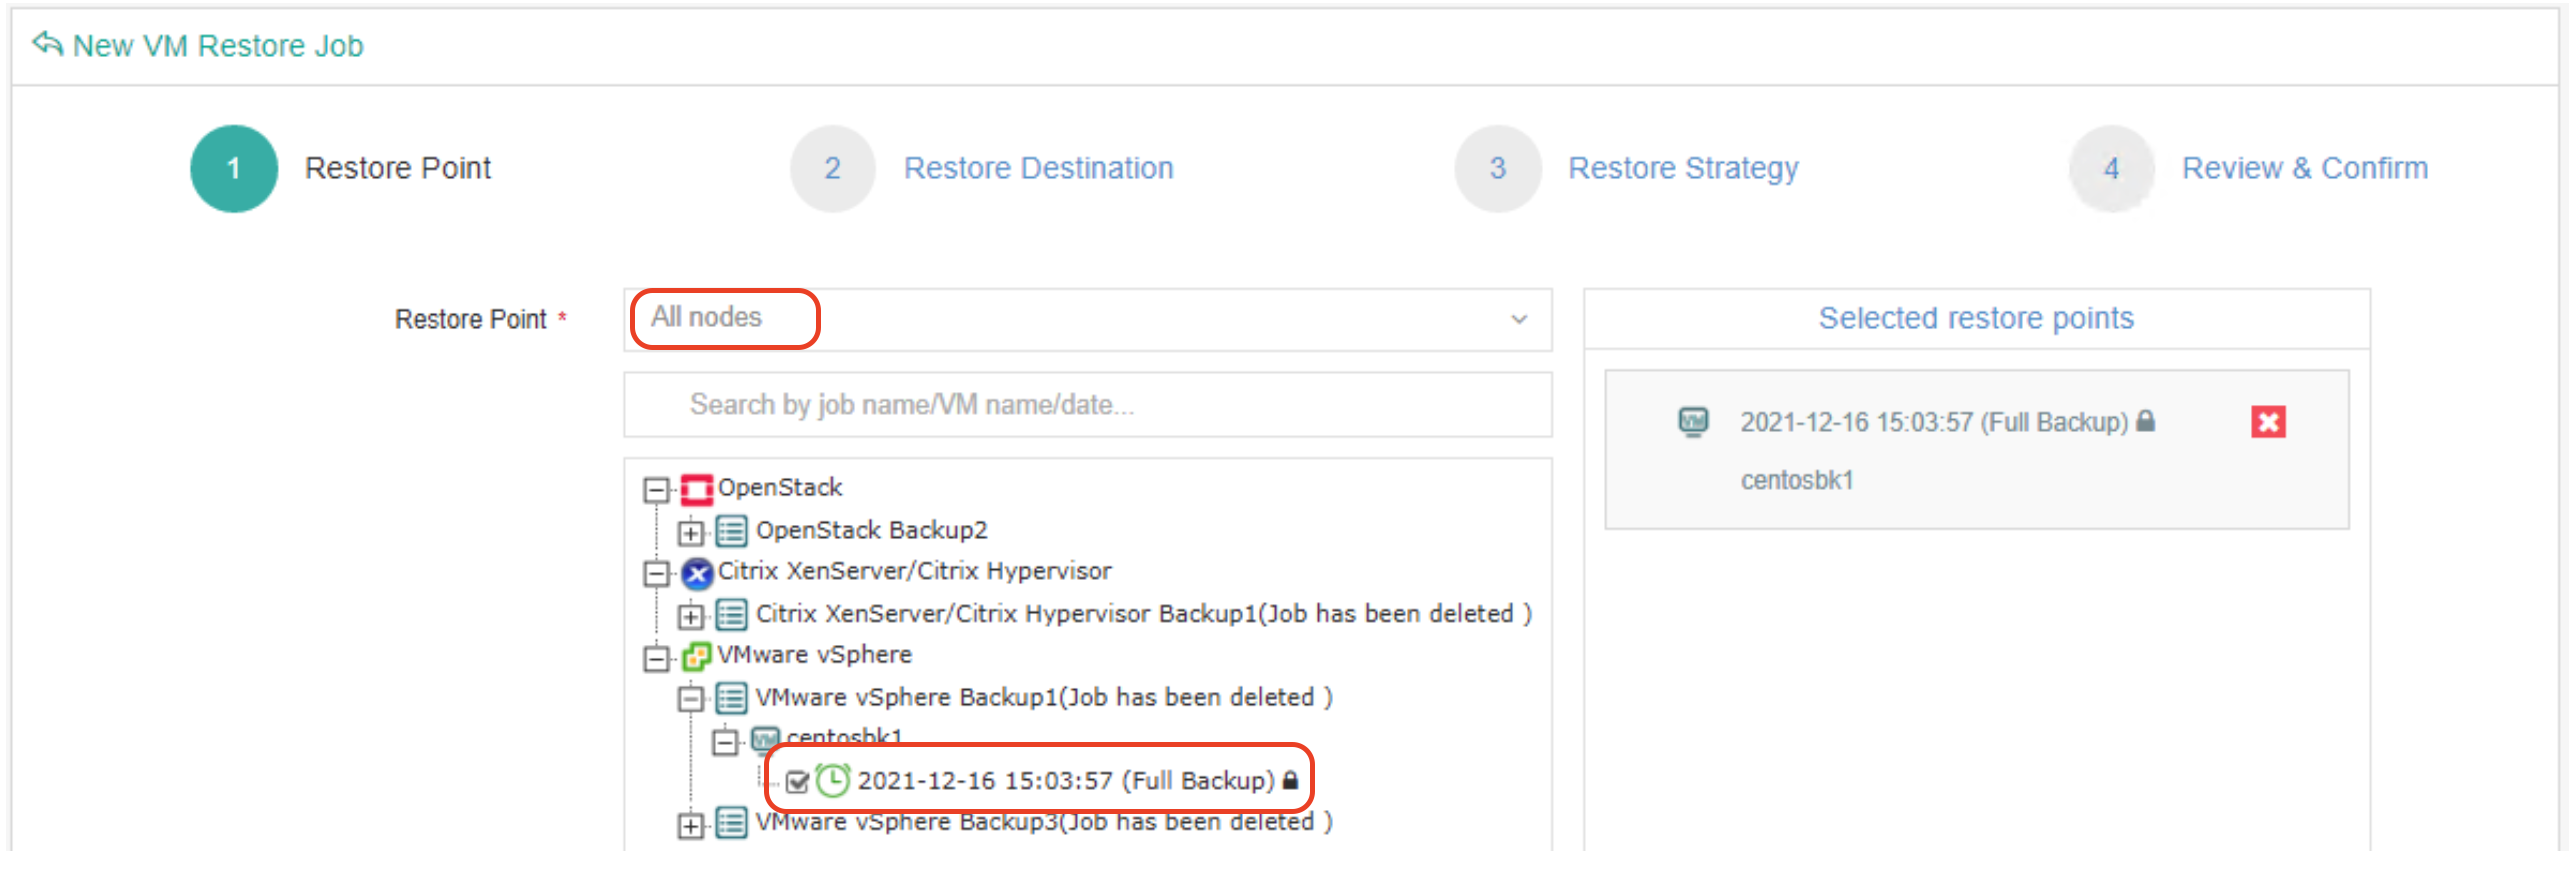
5.2.1 Navigate to VM Backup, then the Restore page, and create a VM restore job.
In the Restore Point dropdown list, select the backup node (refer to the target node in 5.1.2). Select the target VM restore point which you want to restore.
5.2.2 Select the restore destination by selecting the target host from the list where you want to run the restored VM. To restore a group of VMs, enable Unified Configuration function for setting the storage, and network, and choose whether to power ON the target VMs after restoring.

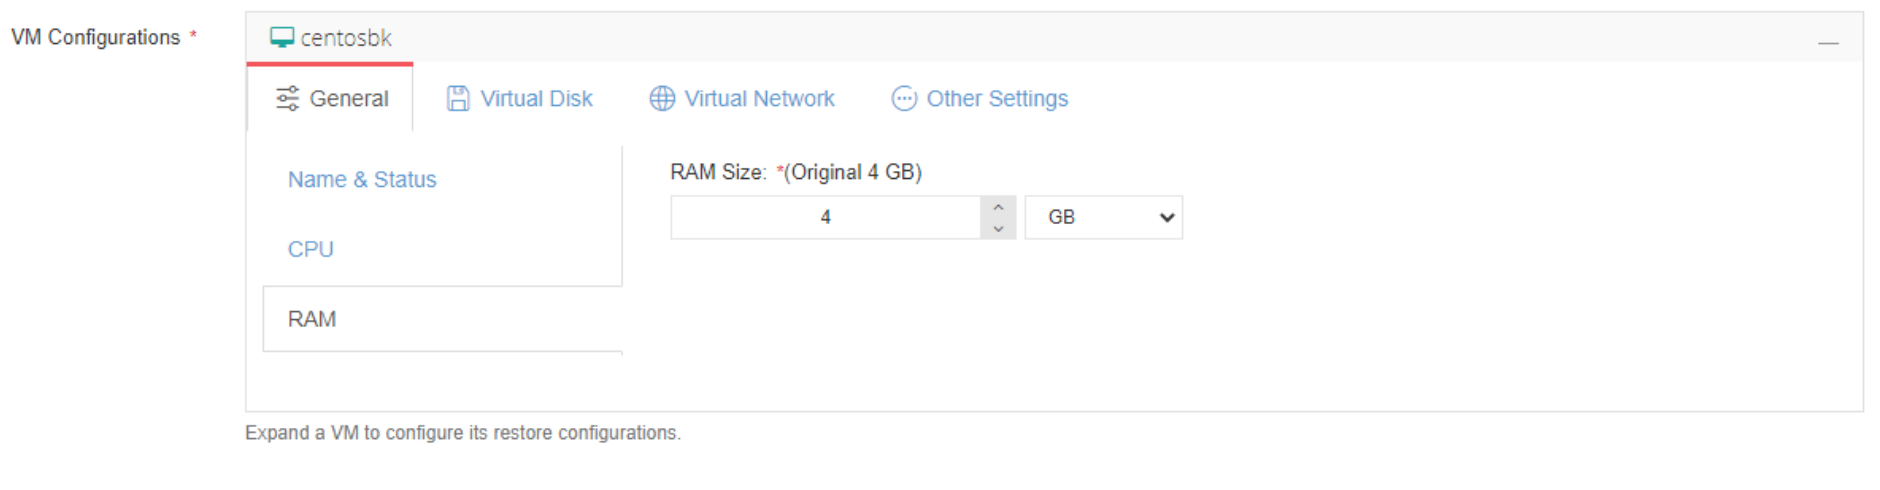
5.2.3 Set up the following advanced restore options in the VM Configurations window.
Choose Name & Status, then choose Name for the VM to be restored and its power status after restoring
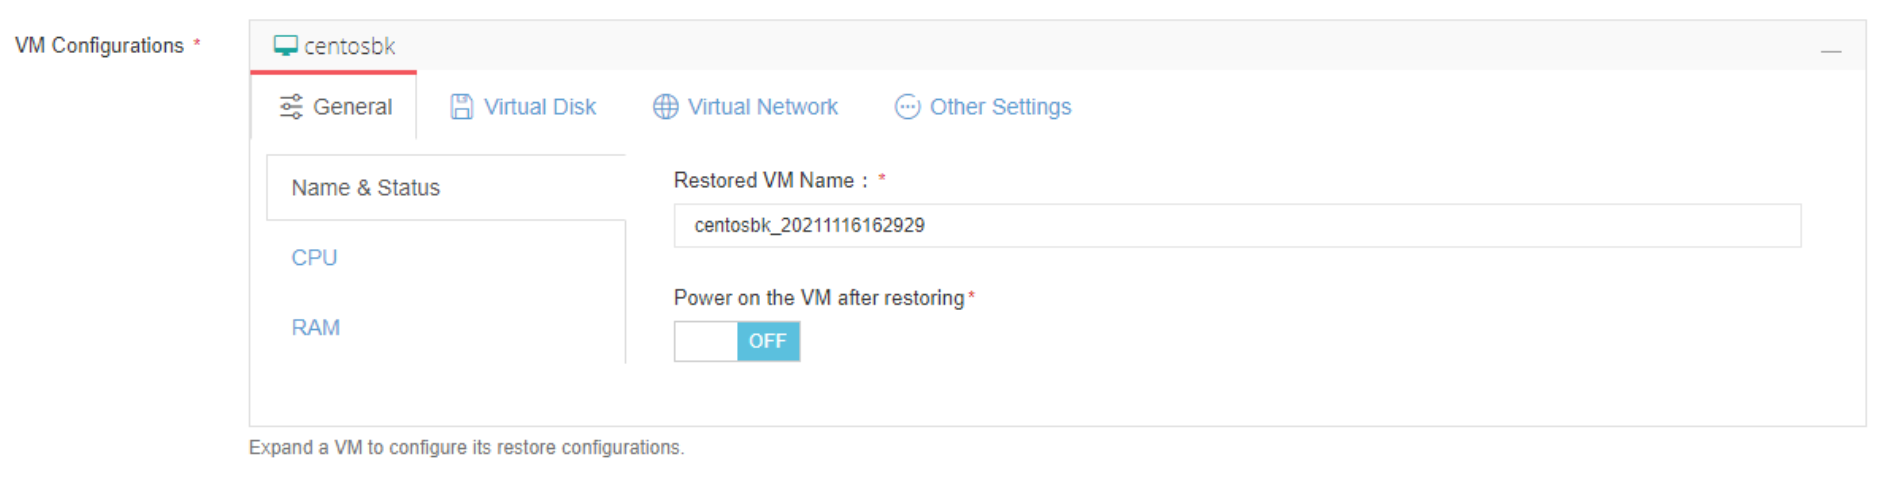
CPU- Change the number of CPUs or CPU cores
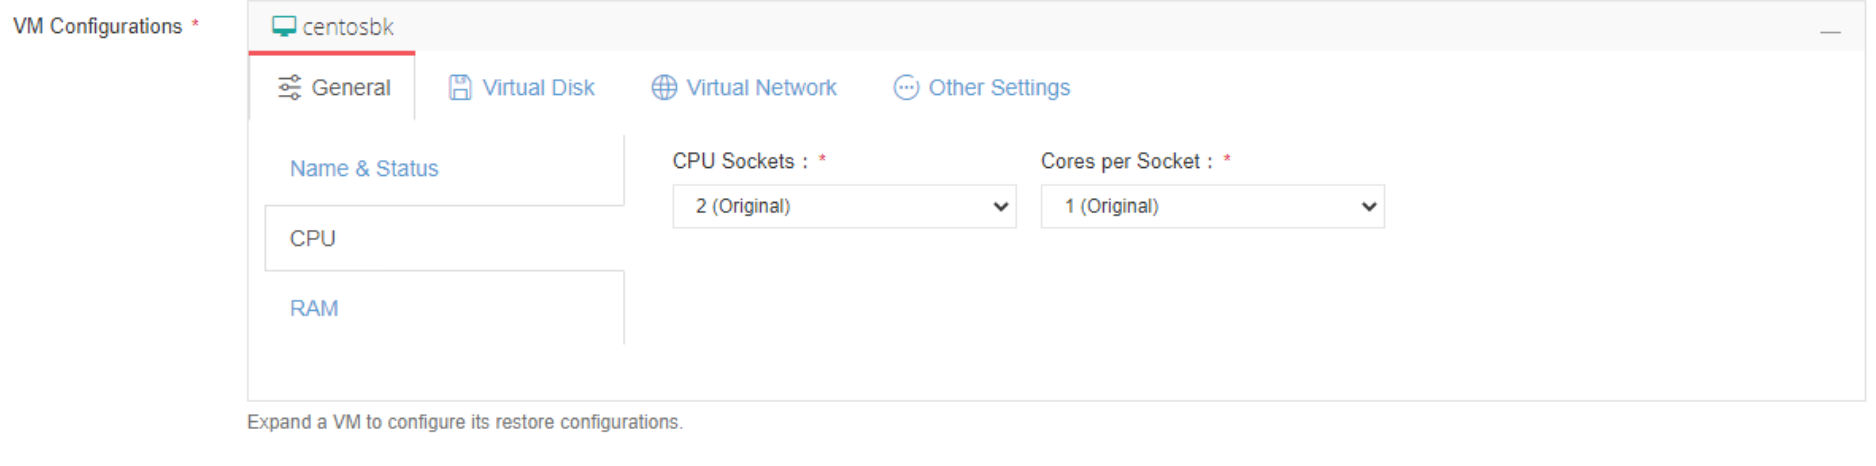
RAM- Change the RAM size
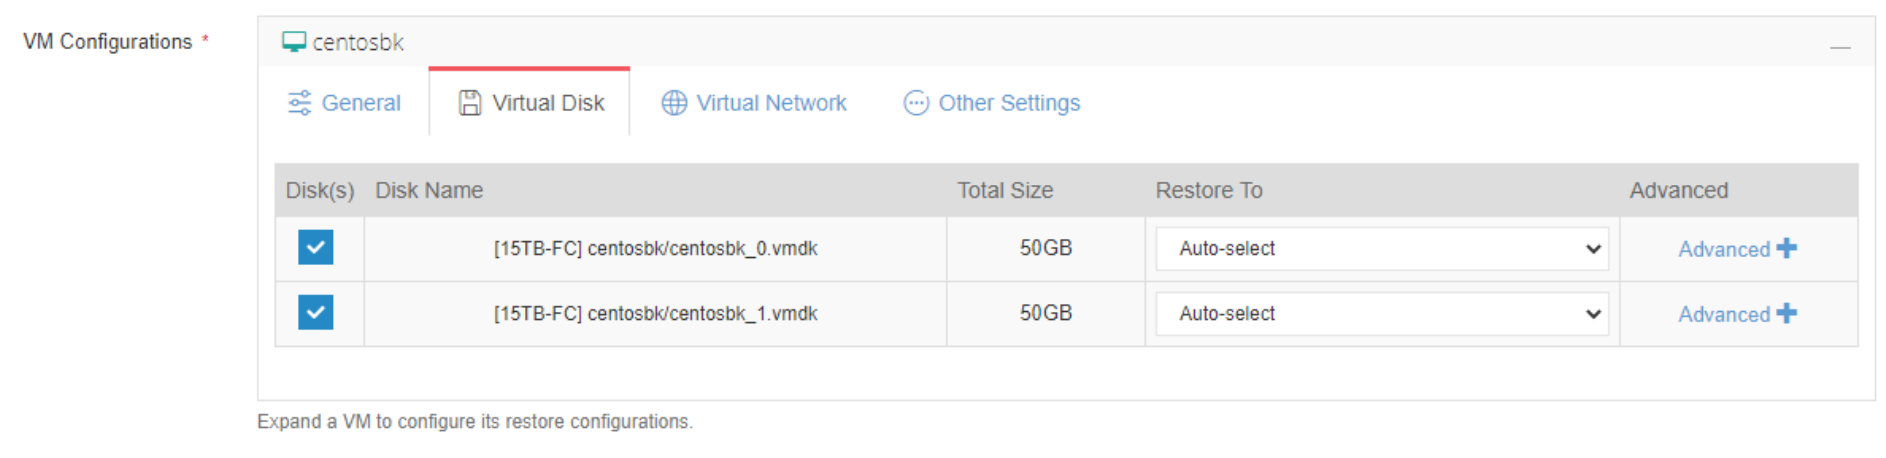
Virtual Disk- Optionally you can choose to restore specific disks without having to restore all disks of the VM. You can also select specific datastore to which the virtual disk will restore to and setup disk provisioning options by clicking Advanced.
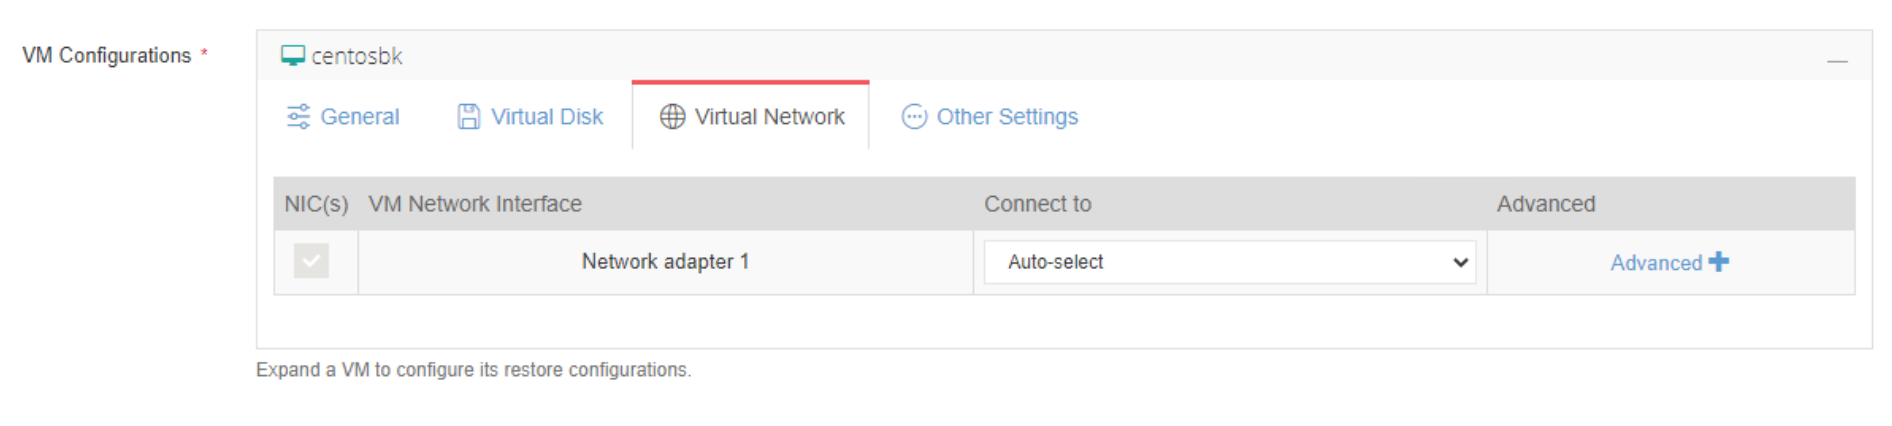
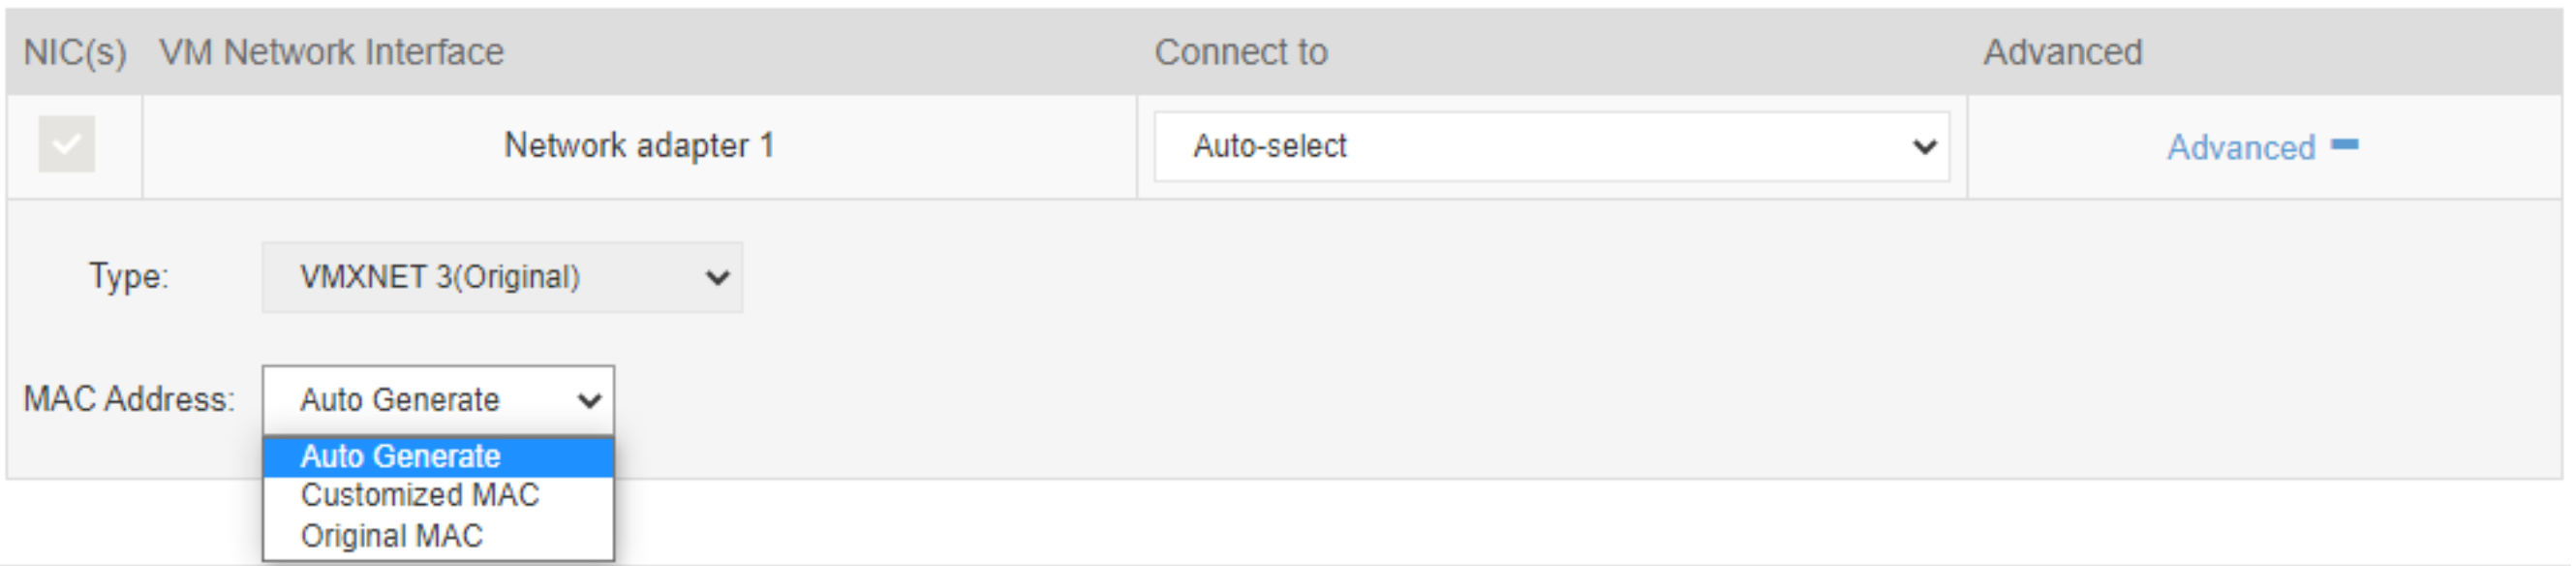
Virtual Network- Optionally, you can change the default Virtual network assigned to the VM. MAC address assignment can be set up by clicking on Advanced and selecting from the drop-down list.
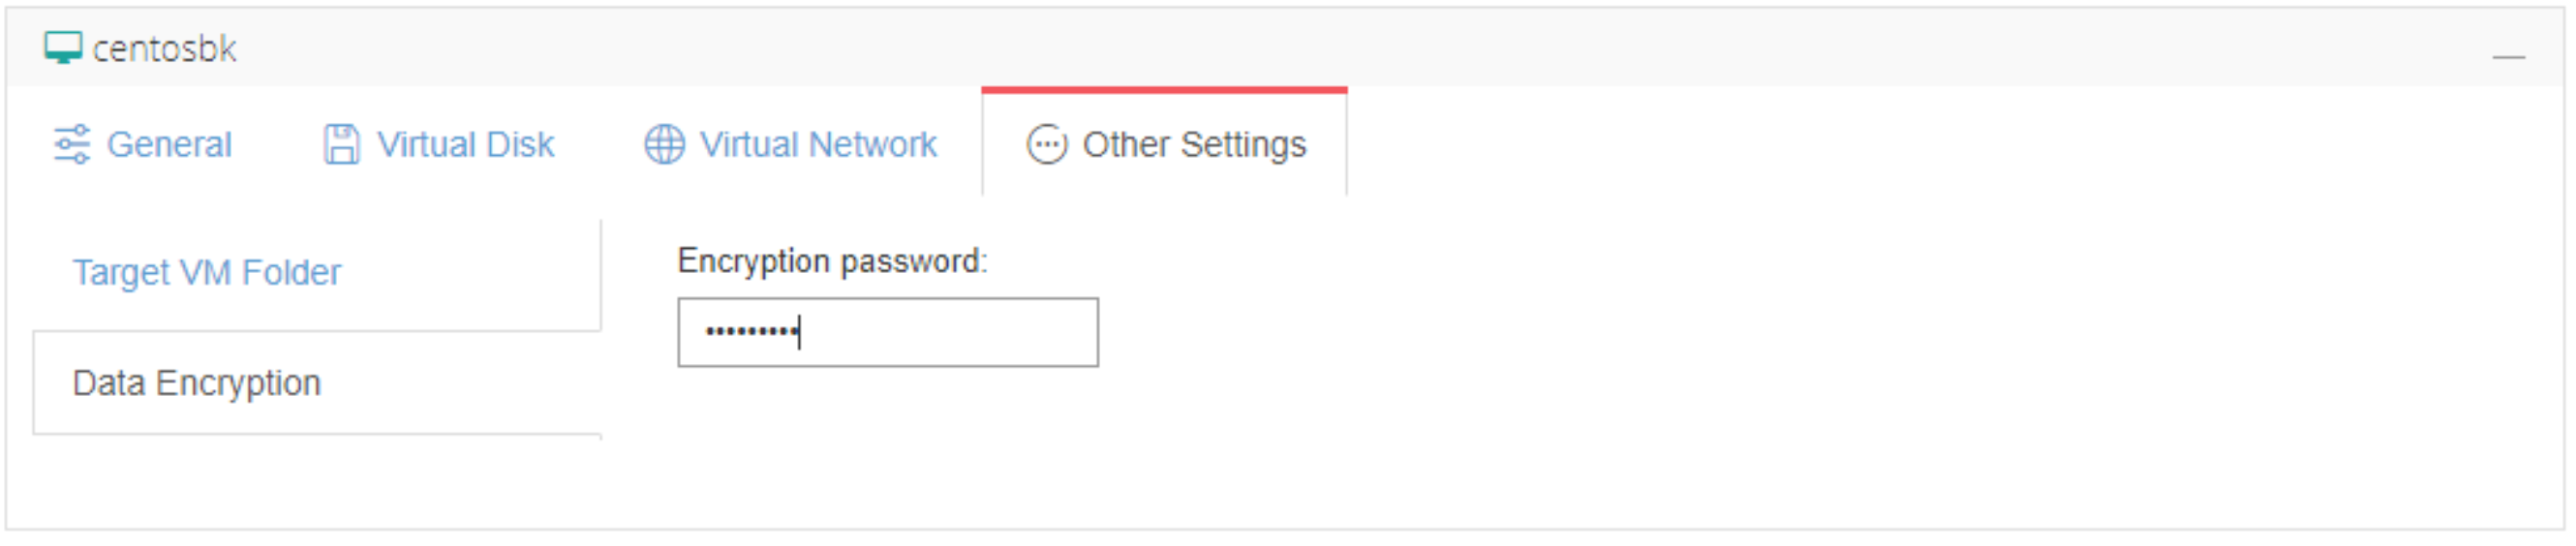
Other Settings- Provide the Encryption password if the VM backup data is encrypted.
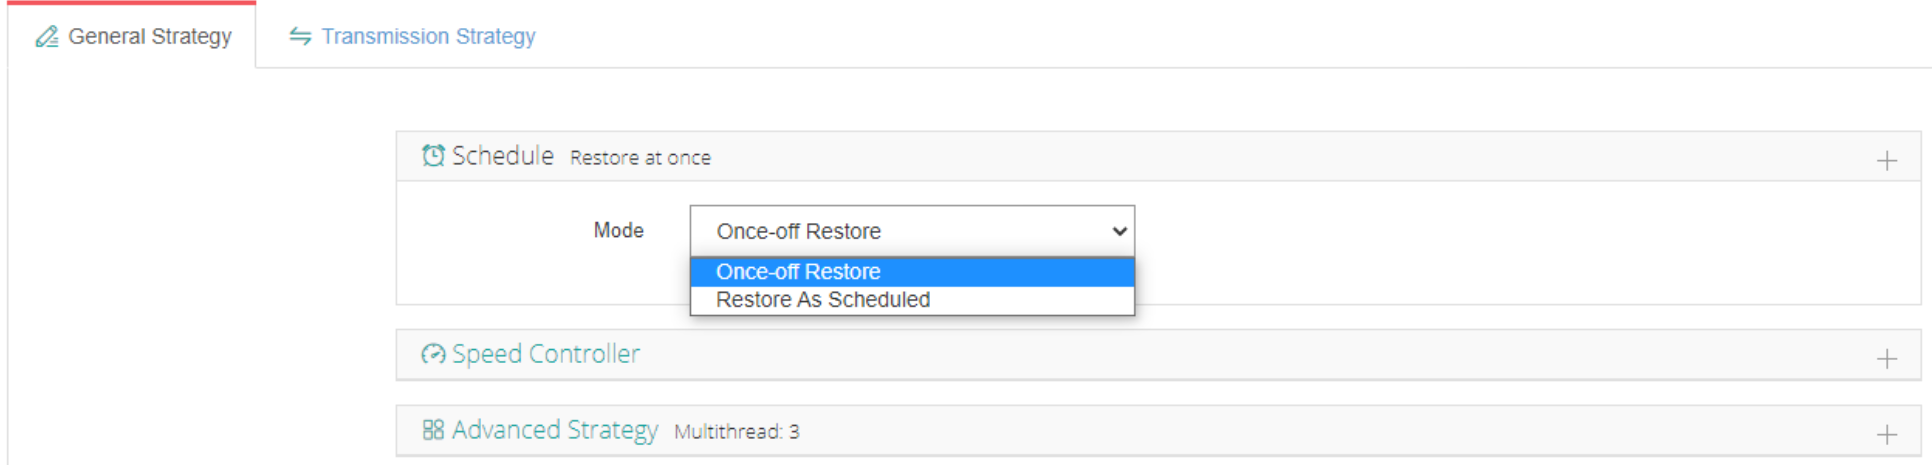
5.2.4 In the General Strategy window, configure the VM restore job as one-off or as scheduled. Optionally you can setup speed controller setting if there is a chance that the backup jobs will bring network or I/O overload to production environment.
5.2.5 Review and confirm the settings. Click Submit to create the restore job.

5.2.6 Once the job is created, the user is directed to Monitor Center, then Jobs to monitor the created restore job. If the job is a one-off, it runs immediately after being created.

The job details can be viewed by clicking the job while it is running. Run Log contains the logs of the currently running job.