Wasabi has been validated for use with Bubble.io using the Zeroqode plugin. Zeroqode's Wasabi cloud storage plugin allows you to interact with your Wasabi account and easily upload and manage files from Bubble.io based app.
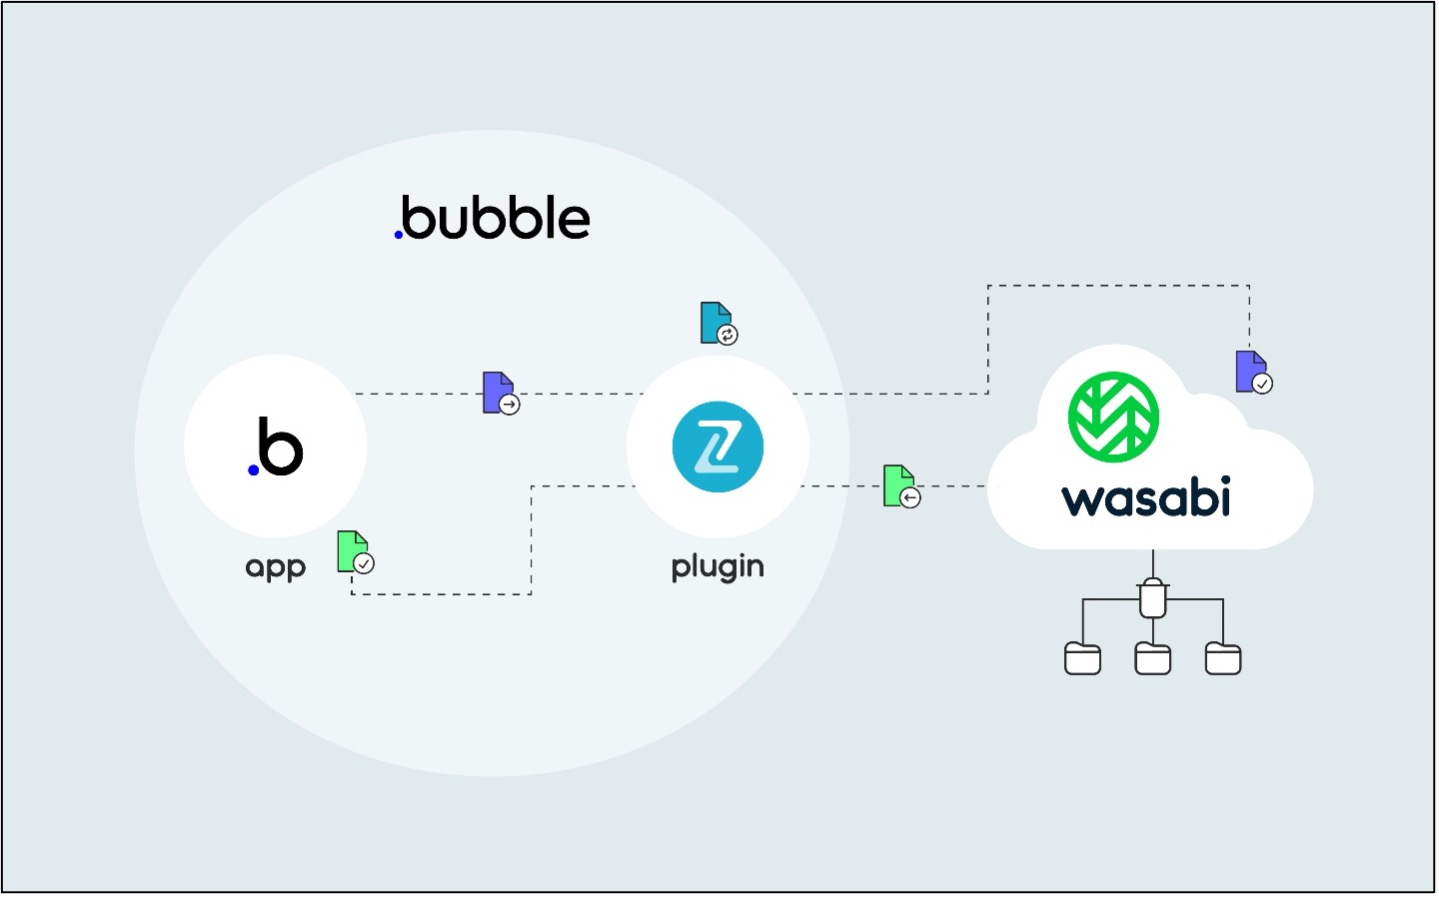
Reference Architecture
Prerequisites
An active Wasabi account
A bubble.io account
Zeroqode's Wasabi cloud storage plugin installed in the Bubble.io app. (You can either Buy or Subscribe to the plugin. The Subscribe option is available only on paid Bubble plans)
Installing the plugin
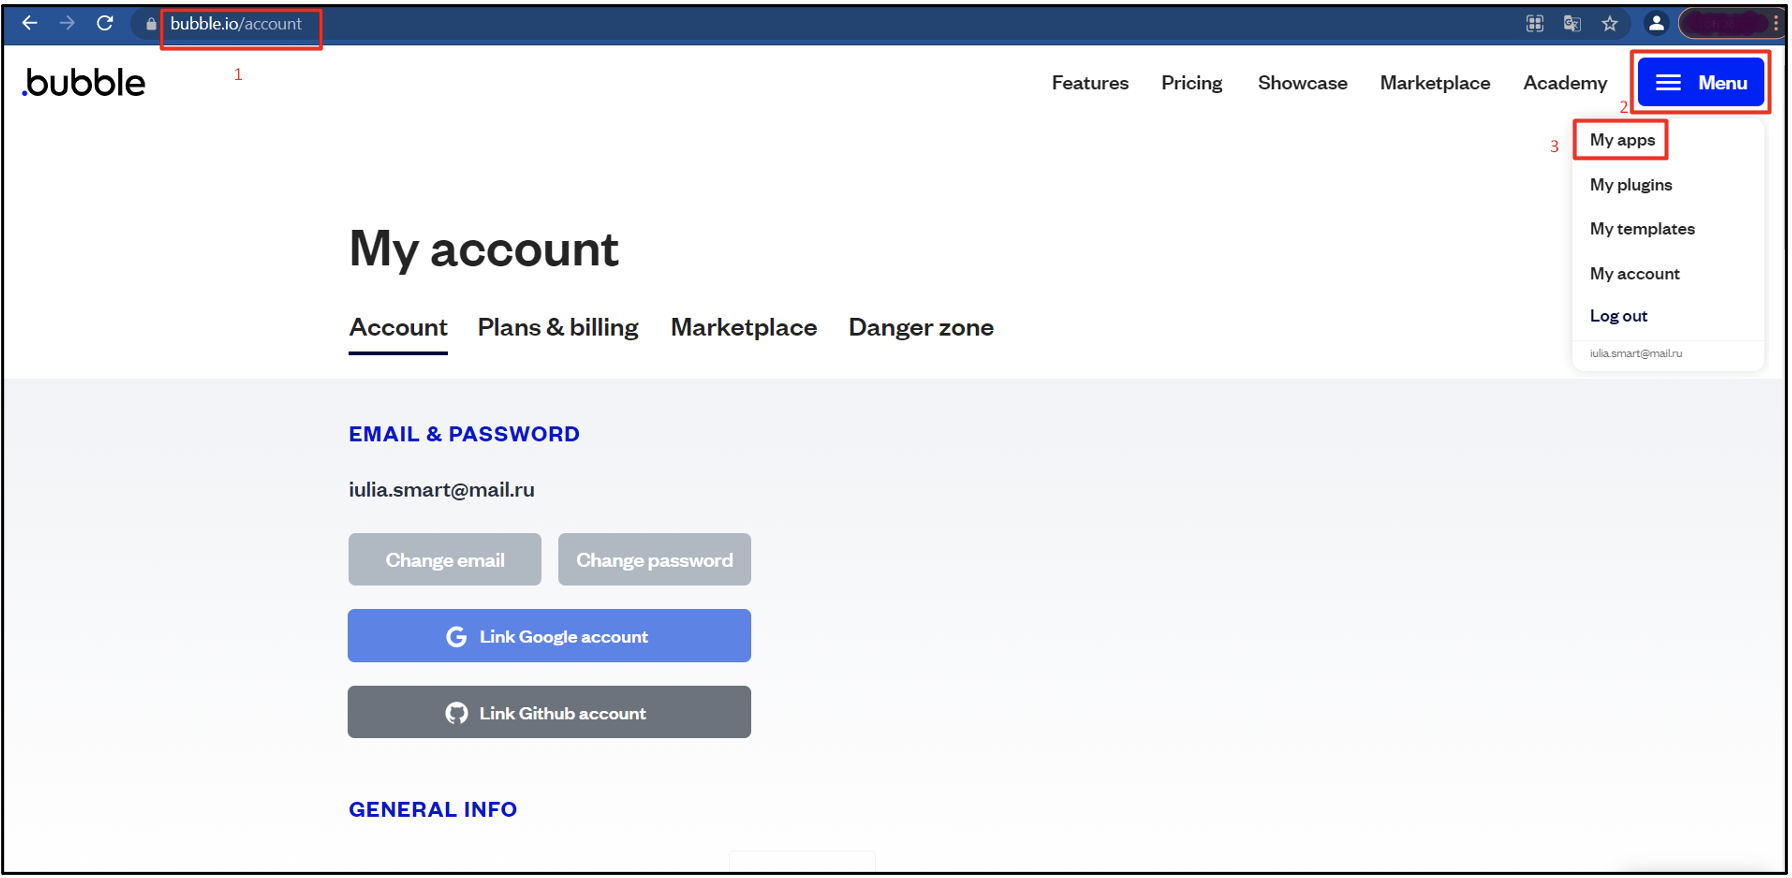
Login to the Bubble account and click Menu on the upper right corner and choose My App.
Select the App in which you want to install the plugin and press the pencil icon
.png)
In the Editor go to Plugin Tab and click Add plugins.
.png)
In the opened window, type the plugin name and click on Buy or Subscribe.
.png)
Note : The subscribe button is available on paid bubble plans. When subscribing to a plugin, you pay only for the days in use and not a penny more.
Configuring the plugin
Once you have installed the plugin, you need to add the Wasabi access keys in order to connect to the Wasabi account.
.png)
Now the plugin is ready for use.
How to use the plugin
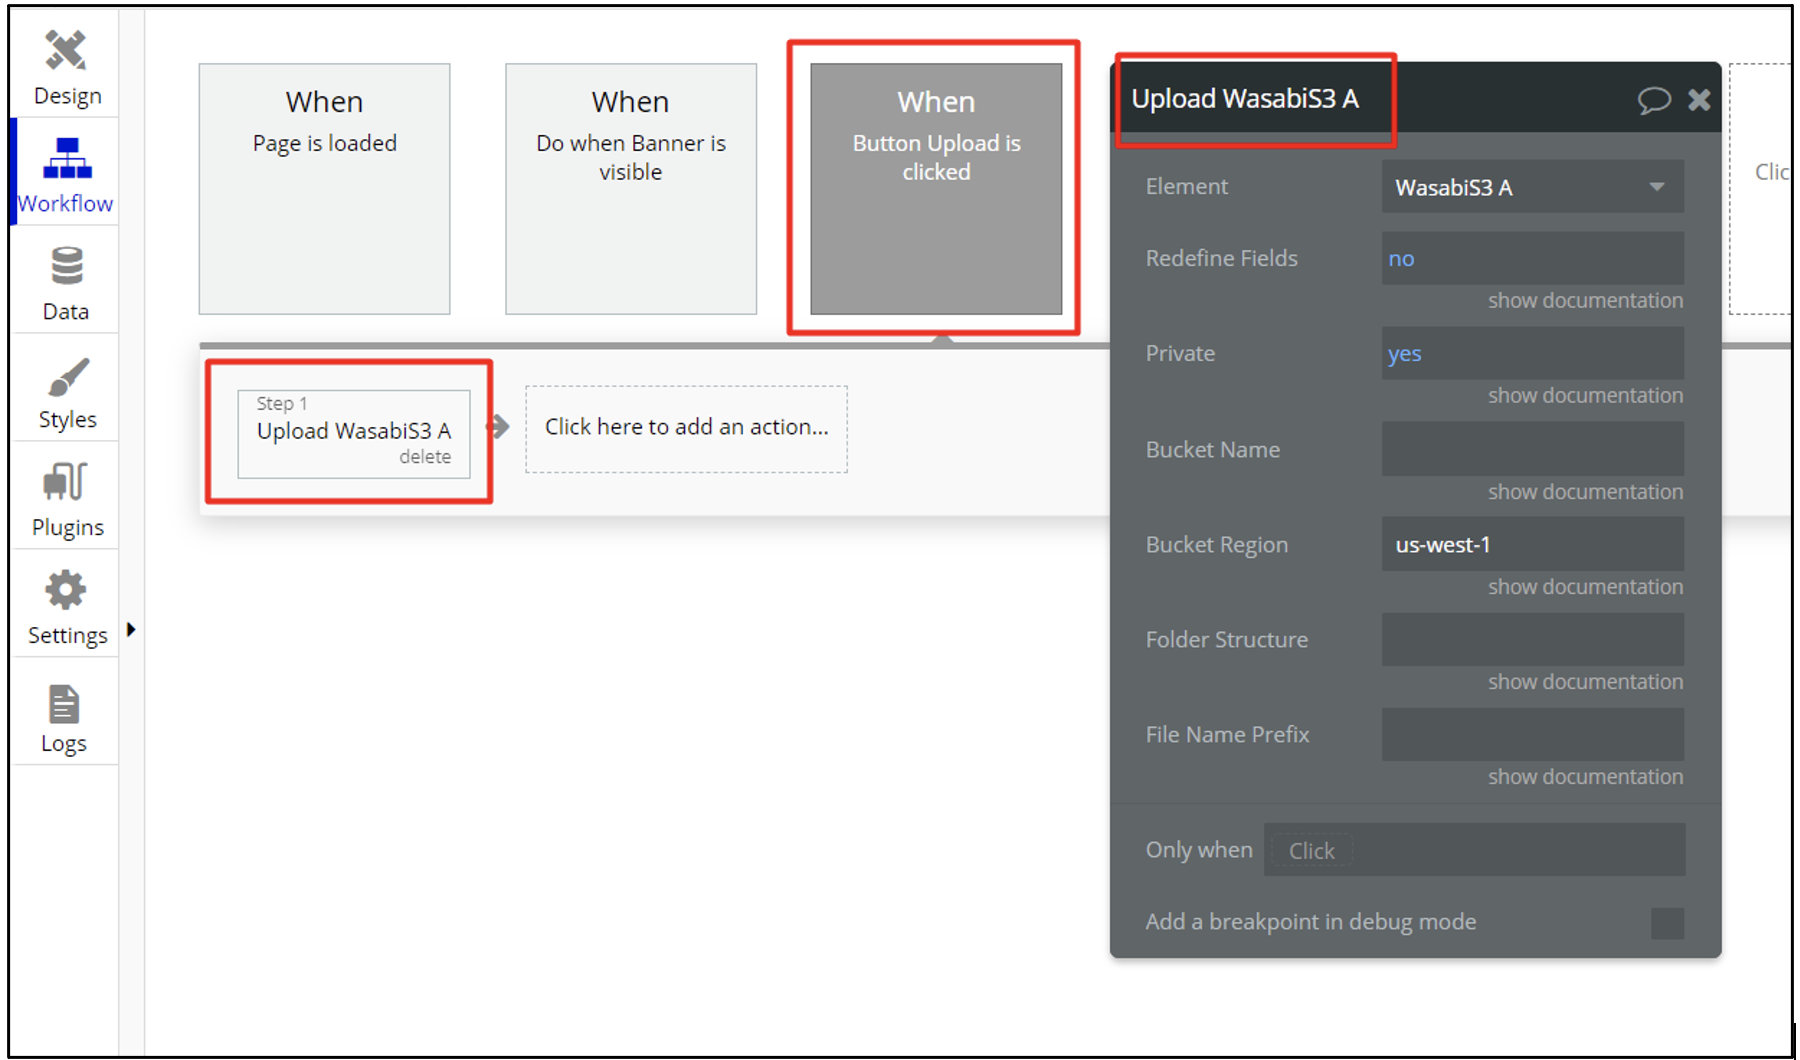
To interact with the plugin and be able to upload files through it into the Wasabi account, place the
Wasabi S3 element onto your page and configure any other preferences for uploading.
.png)
For more information on how to configure the plugin element and details about each field, please refer to the plugin documentation at https://docs.zeroqode.com/plugins/wasabi-cloud-storage#plugin-fields-events-actions-and-states.
Now you have an uploader on the page, which you can use to upload files into the plugin element. In this case the plugin element keeps your file. To be able to upload the file directly into Wasabi account (in your bucket-> folder) you need to trigger the plugin action – Upload WasabiS3 A. In order to do so, click on the Uploader, select the file from your PC through the opened window and then click on “Upload button” that triggers the plugin action.
All these actions will upload the file from bubble app into Wasabi account using the plugin.For example, if you click on Uploader, select the file from your PC through the opened window and then click on “Upload button” that triggers the plugin action. All these actions will upload the file from bubble app into Wasabi account using the plugin.
Please take a look at Bubble forum threads where is discussed use cases and user's questions regarding the plugin configuration:
https://forum.bubble.io/t/wasabi-cloud-storage-plugin/124862
https://forum.bubble.io/t/wasabi-s3-stopped-triggering-successful-upload-overnight/140351
Other helpful Zeroqode Forum threads:
https://forum.zeroqode.com/t/wasabi-cloud-hot-storage-api-connection/458
https://forum.zeroqode.com/t/wasabi-s3-is-possible-solution/5936
https://forum.zeroqode.com/t/wasabi-plugin-issue-with-download-preview/5340
https://forum.zeroqode.com/t/wasabi-retrieve-list-of-files/5459
https://forum.zeroqode.com/t/bug-in-wasabi-upload-file-to-wasabi-from-another-cloud/5814
The useful links about the plugin:
Plugin Docs: https://docs.zeroqode.com/wasabi-cloud-storage
Demo page: https://appkit.bubbleapps.io/wasabi
Editor: https://bubble.io/page?version=live&type=page&name=wasabi&id=appkit&tab=tabs-1
For any issues with plugin, please contact the Zeroqode support at support@zeroqode.com.
Chat: zeroqode.com
Zeroqode forum: https://forum.zeroqode.com/