How do I use Wasabi Object Replication with Veeam v12 Direct to Object Storage?
Wasabi is a member of Veeam's cloud partner ecosystem. We have worked with Veeam closely to offer both a seamless implementation and a smooth transition to cloud storage. For more information on how Veeam works with Wasabi, refer to Veeam and Wasabi Solution Brief.
This article describes the procedure to use Wasabi Object Replication to replicate objects from one region to another within the same continent. This can be used to recover from natural disasters or other events in a region.
This article covers only Direct to Object Storage. Reference the articles listed in the menu to the left for Scale-Out Backup Repositories (SOBRs) and Backup Copy Jobs.
Prerequisites
- Veeam Backup and Replication (VBR) v12 installed and licensed. This solution was tested with v12.3.
- Active Wasabi Cloud Storage account.
- Active Veeam repository pointing to a Wasabi bucket.
- Existing backups reside in a Wasabi Object Locked (immutable) or non-Object-Locked (non-immutable) "source" bucket.
High-Level Steps
Follow the high-level steps below to implement Object Replication from a source bucket to a destination bucket in another region with Veeam Backup & Replication. These are detailed further in the sections below.
- Sign up for notifications to be sent to your account email address.
- Create a Wasabi "destination" bucket where the source bucket will be replicated to.
- Configure an object replication job on the source bucket pointing to the destination bucket.
- In the case of a disaster, a Veeam repository pointing to the destination bucket may be created and the backup job(s) repointed to this new repository.
Sign Up for Object Replication Notifications
Signing up for notifications will allow you to receive information about any object replication failures.
- Login to the Wasabi Console.
- Navigate to Settings, then click on Notifications.

- Enable email notifications.

Create the Wasabi Destination Bucket
The "destination" bucket is the bucket that the "source" bucket will replicate to.
- Navigate to Buckets and click the name of the source bucket.

- Note the name and settings of the source bucket, including Object Lock settings. In this example we are using a source bucket in Wasabi's us-east-1 region with Object Lock (and Versioning) enabled.Enabling bucket versioning only is not a proper configuration for immutable Veeam backups and can cause problems. If you are simply using regular Veeam backups with Wasabi buckets, bucket versioning is not required.

- Choose the region within the same continent for the destination bucket.This configuration example discusses the use of Wasabi's us-east-1 storage region for the source and us-west-1 for the destination. For a list of regions, see Available Storage Regions.
- Navigate to Buckets, then click Create Bucket.

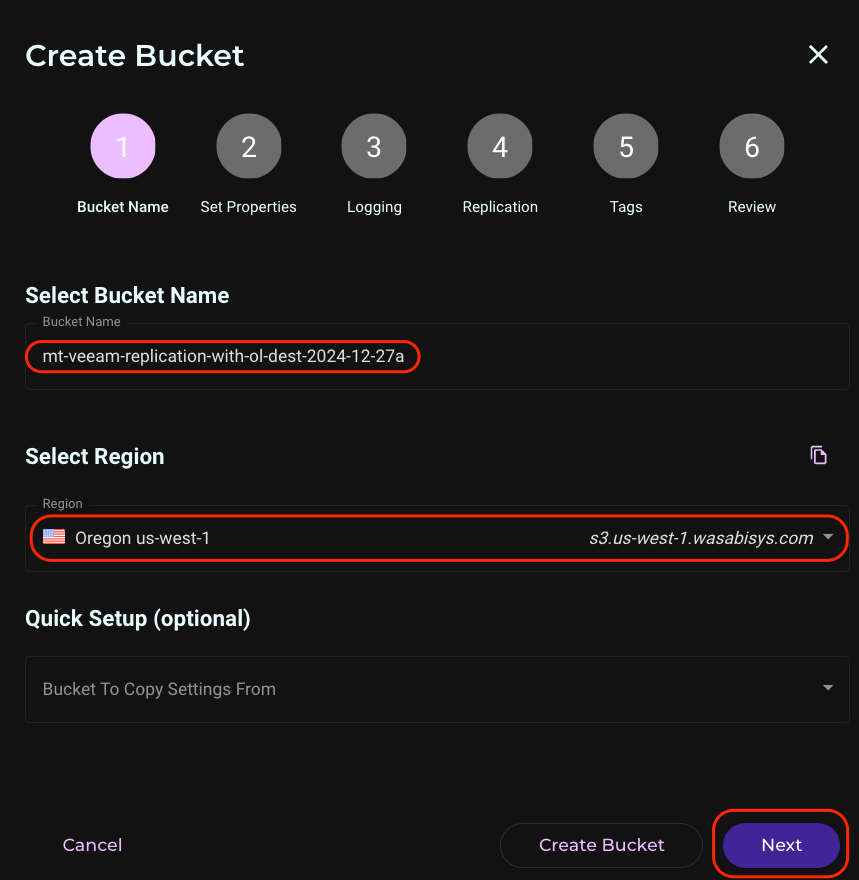
- Enter the destination bucket name, select the region for the bucket, and click Next.
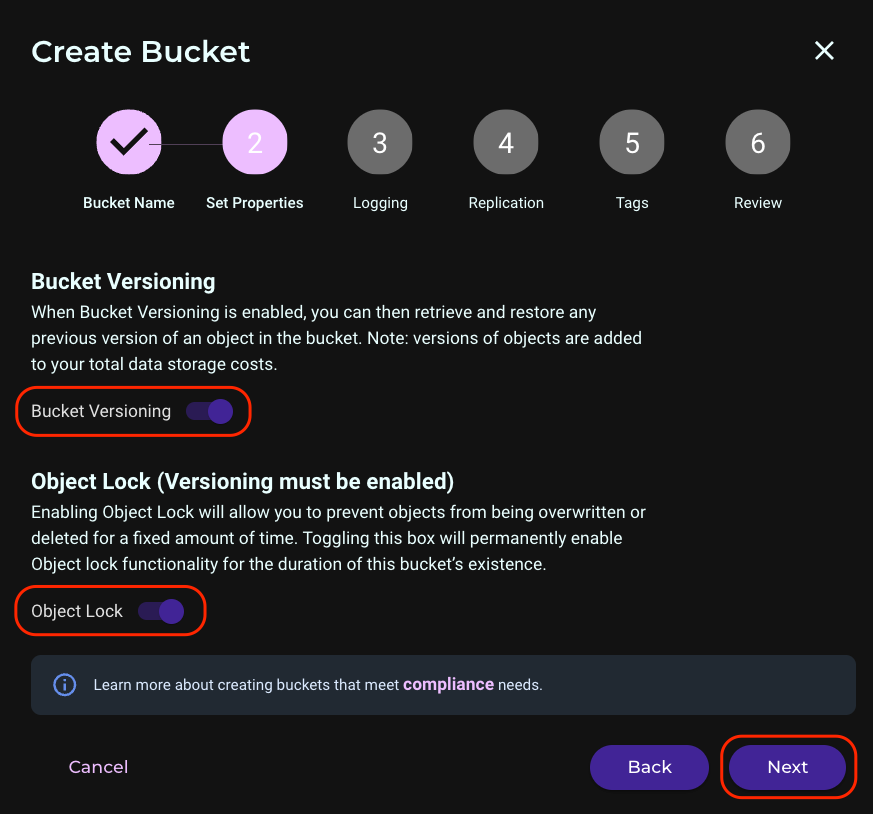
- Set Versioning and Object Lock to match the source bucket settings. These settings MUST match the source bucket. In this example we are enabling Versioning and Object Lock. Click Next.
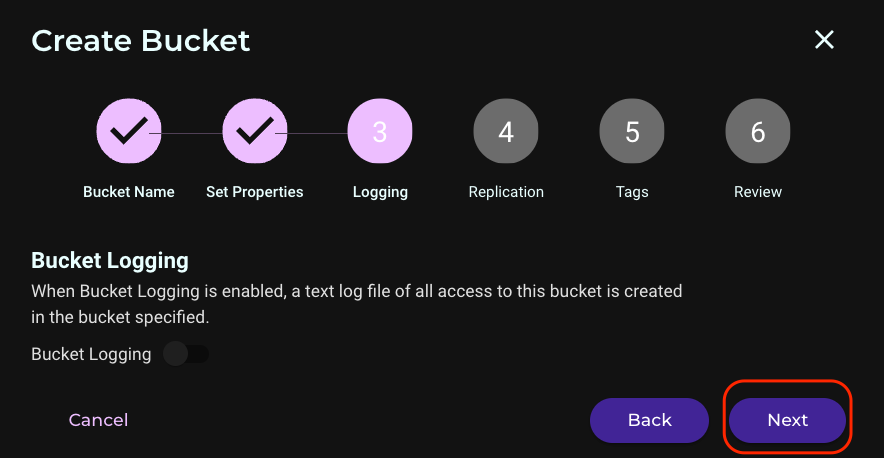
- Enable bucket logging if desired and click Next.
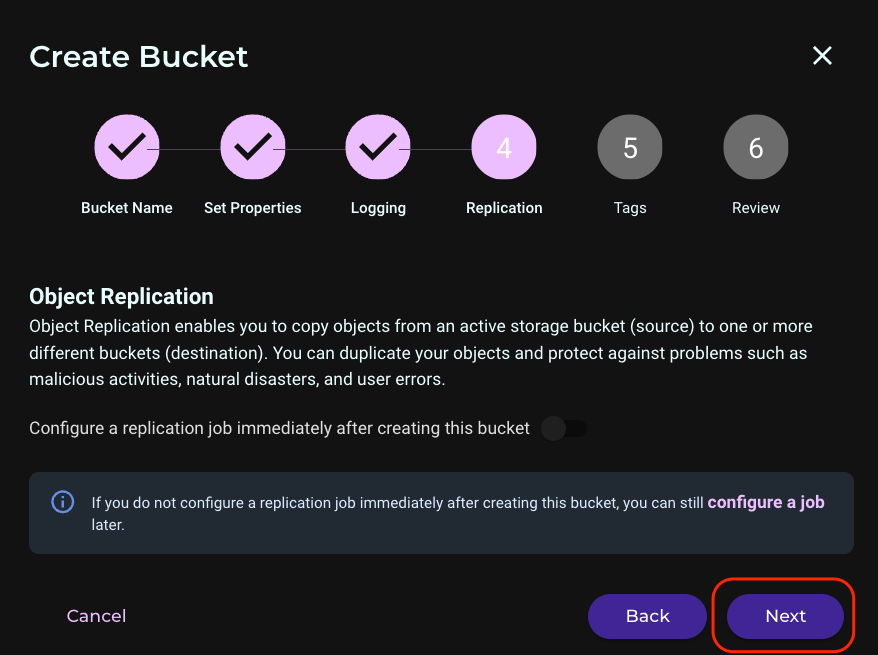
- Leave Object Replication disabled (default setting). The replication will be configured later on the source bucket. Click Next.
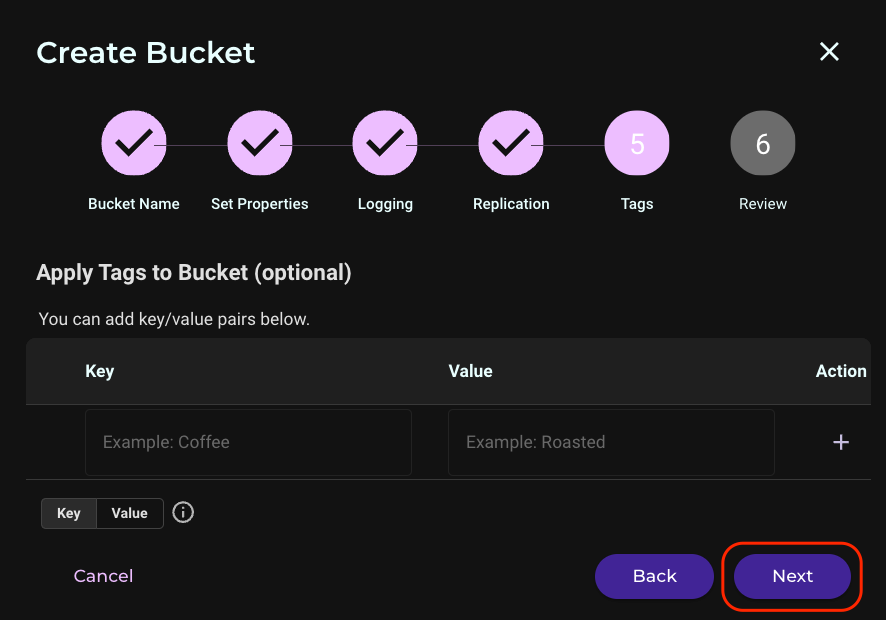
- Click Next on the Tags screen.
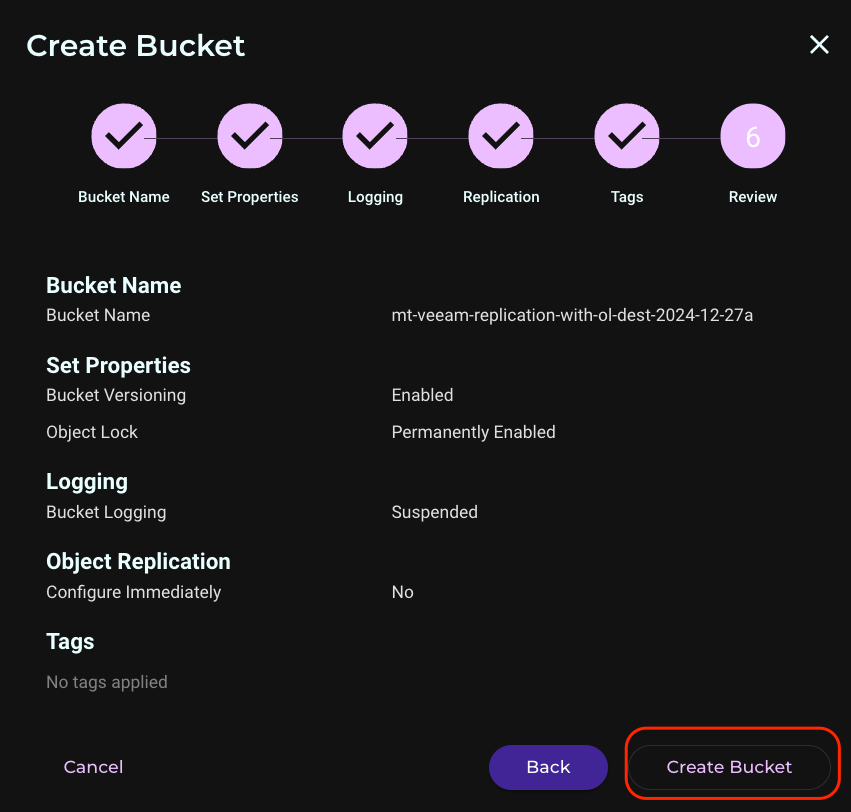
- Review the bucket's settings on the next screen and click Create Bucket.
Create an Object Replication Job
- Navigate to Buckets and click the name of the SOURCE bucket.

- Click the Settings gear wheel on the right side of the screen.

- Click the Object Replication tab, then click Create Replication Job.

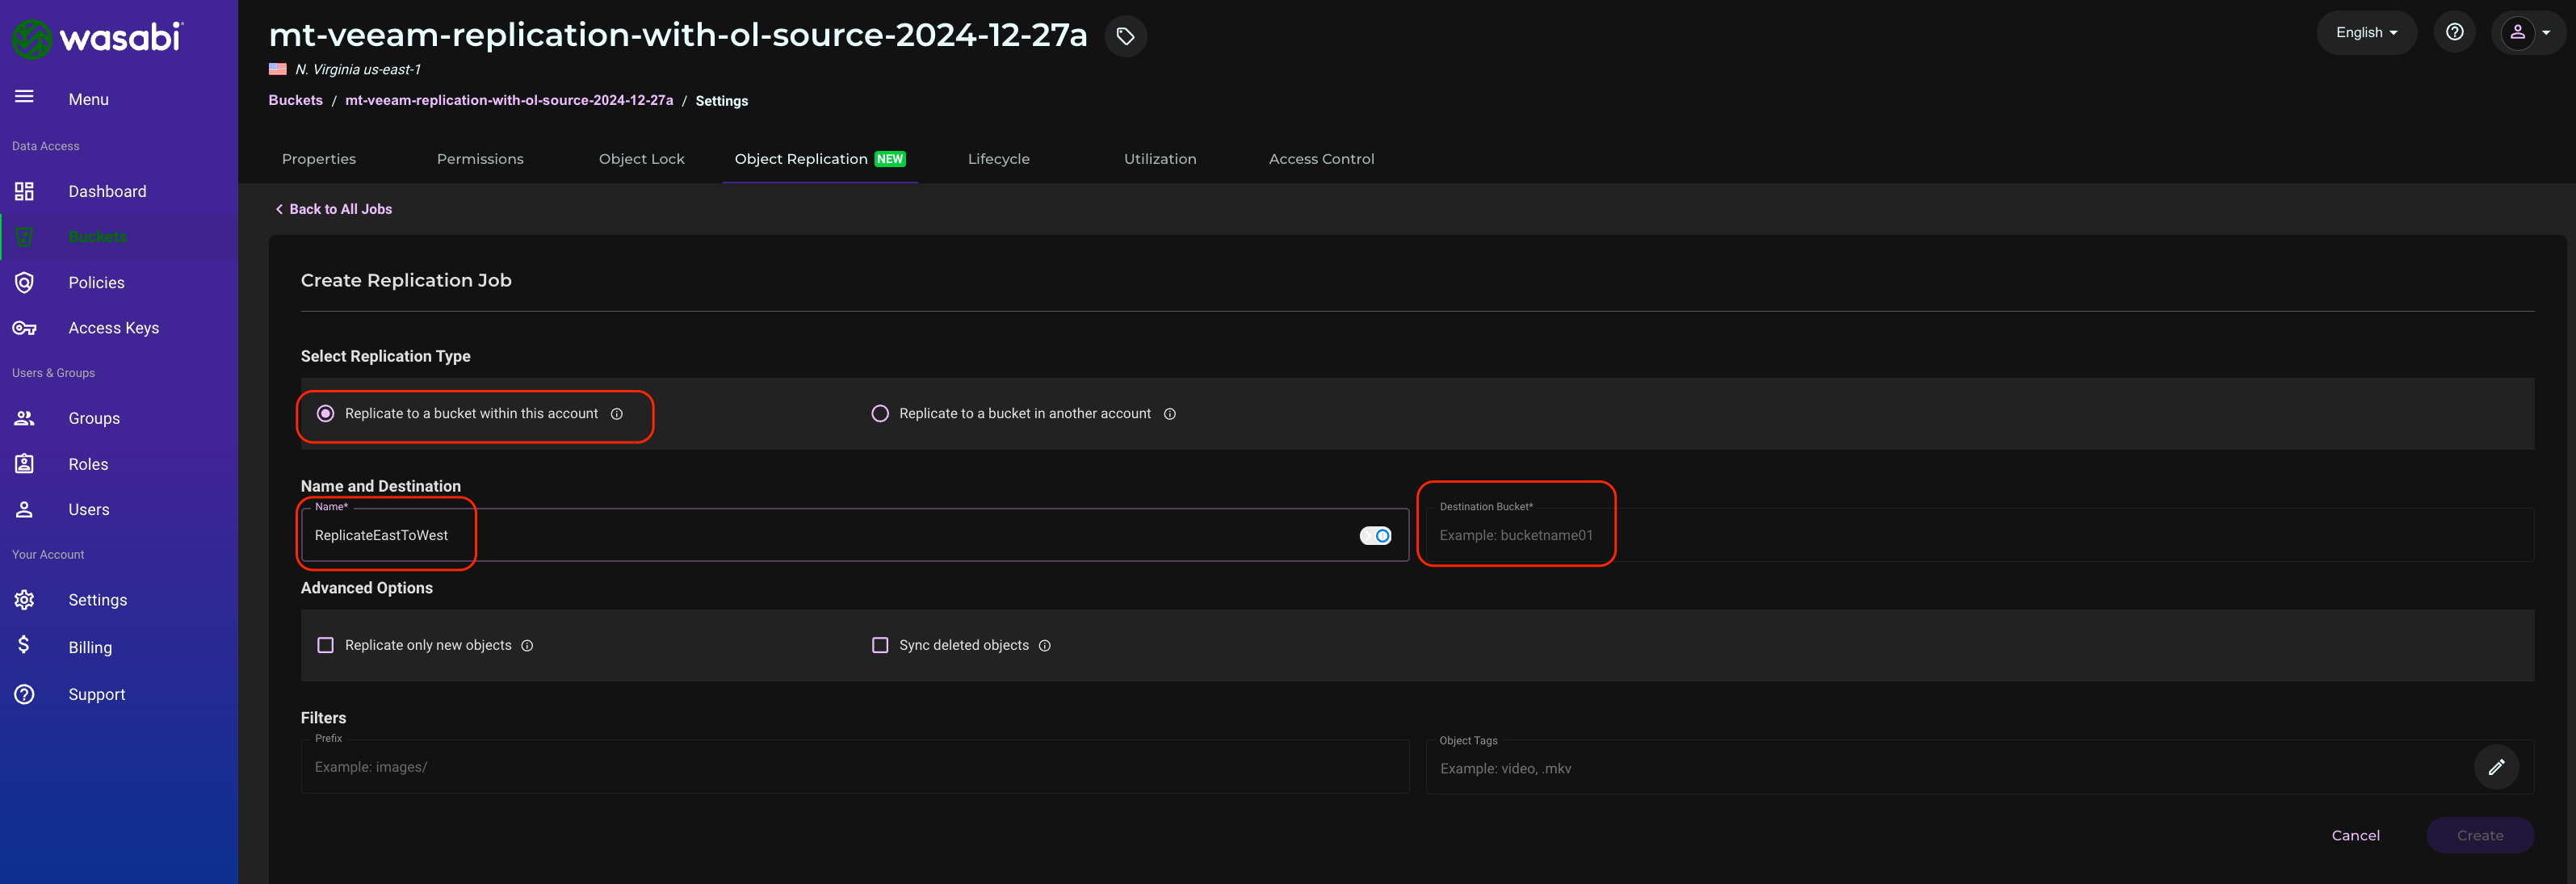
- Select the Replication Type. For this example we are selecting "Replicate to a bucket within this account." Give the job a name, and click in the Destination Bucket text field.
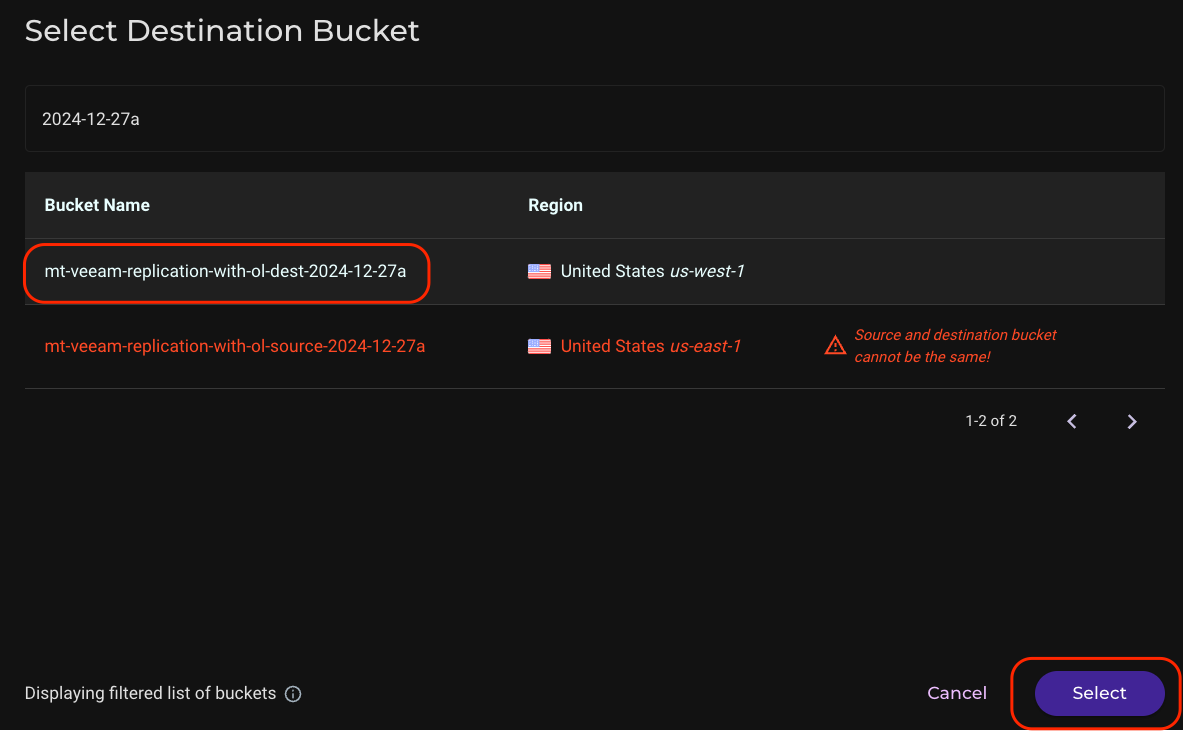
- Click on the name of the destination bucket from the list, then click Select.
- Click the checkbox next to "Sync Deleted Objects." This allows Veeam to control the backup lifecycle of the source bucket, and older backups that Veeam deletes from the source bucket will also be deleted from the destination bucket. Then click Create.
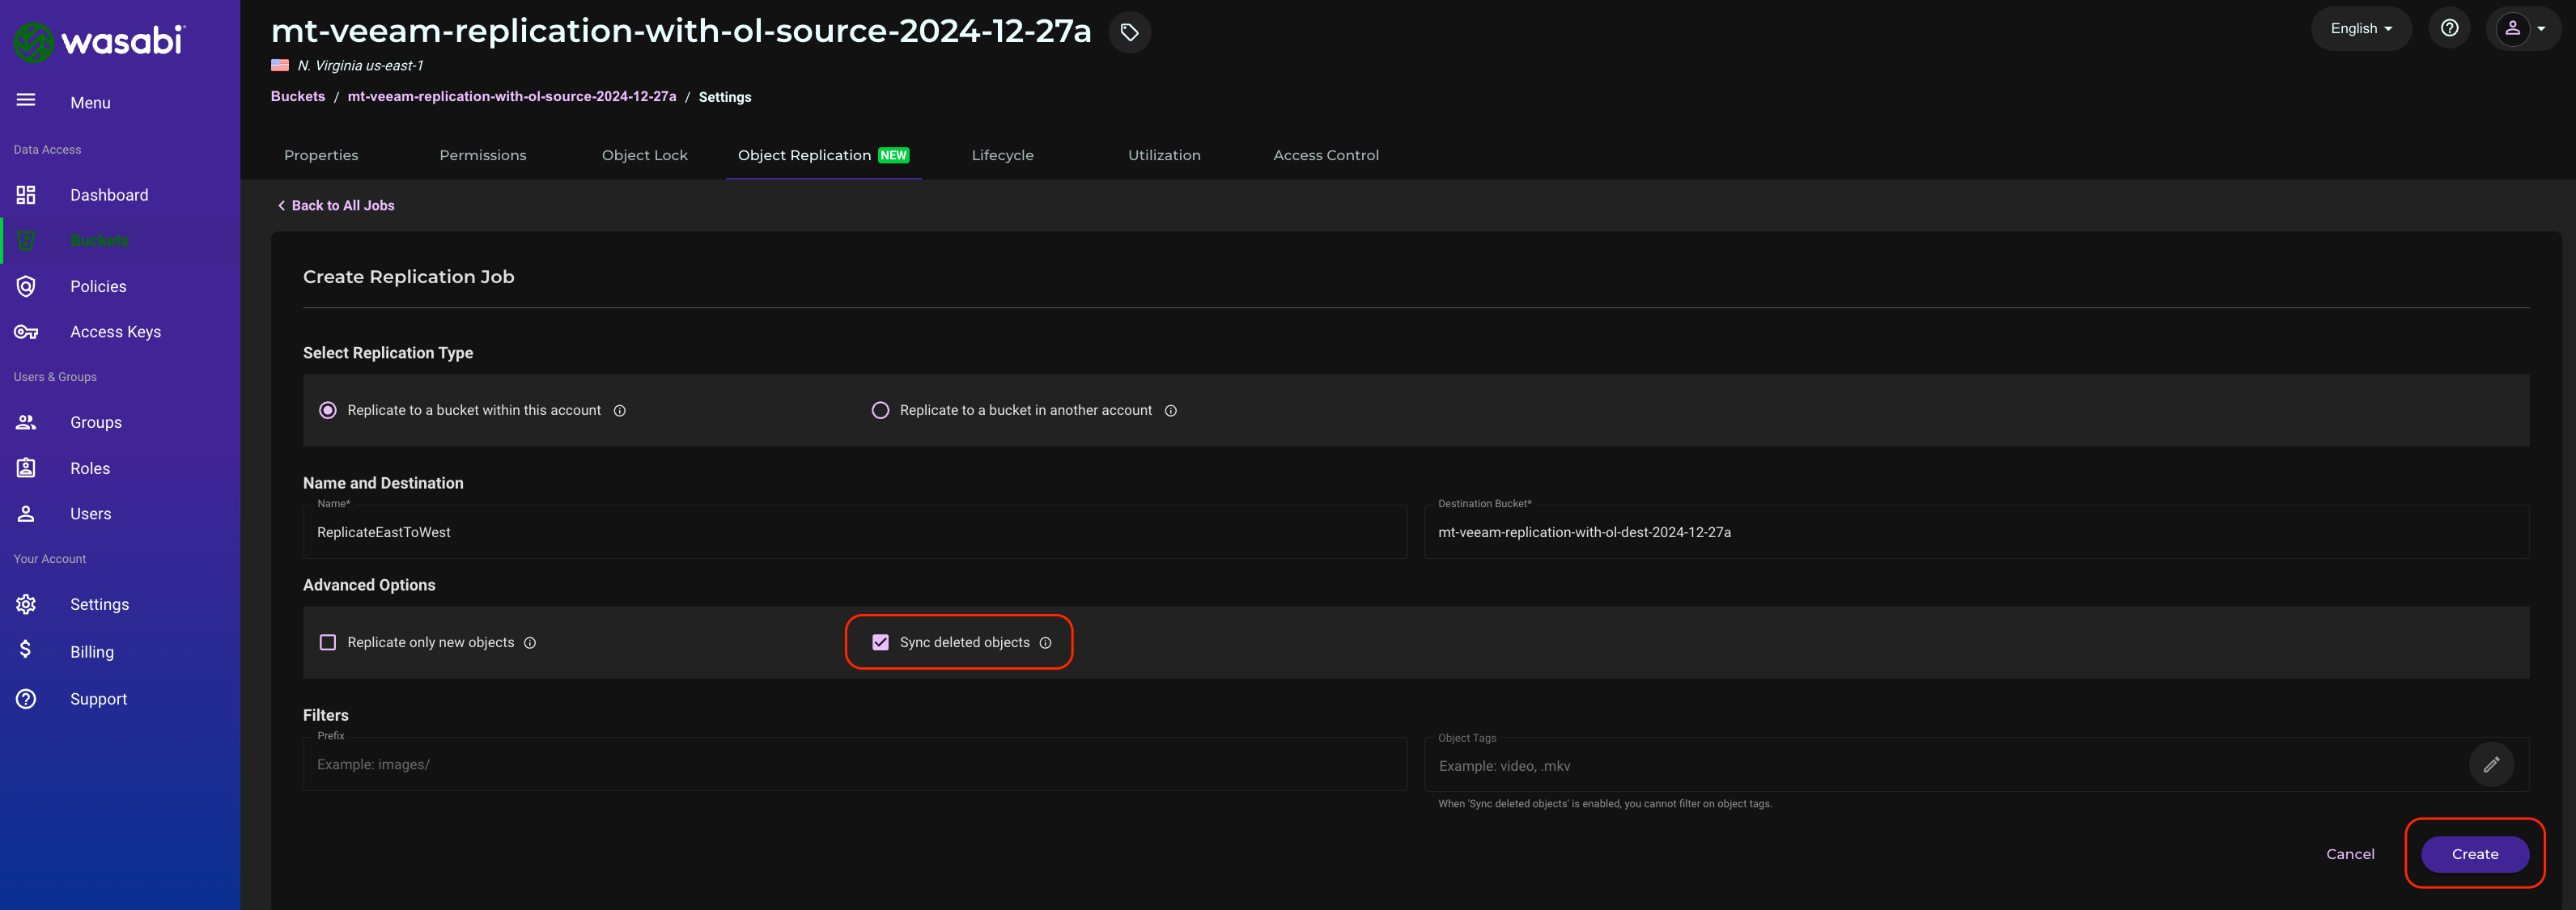
- The objects in the source bucket will now begin to replicate to the destination. There is no ETA for completion as this depends on many factors, such as the number of objects, frequency of backups, etc.
Appendix A - In case of a Disaster
In the case of a disaster that affects your source bucket, proceed with this section.
- Create a Veeam repository pointing to your destination bucket. Follow the steps outlined in Create a Backup Job in Veeam v12 to Backup to Wasabifor creating Wasabi as an object repository.
- On the Bucket screen, select the existing top-level folder in the bucket. Do NOT create a new folder. Use the same immutability settings as your source repository.
- On the Review screen, click the two checkboxes to search the repository for existing backups and import them automatically. Click Apply. Note that this will NOT download your previous backups to your local server.
- Navigate to Home, click Backup under Jobs, select the job currently pointed at the source bucket. Click Edit.
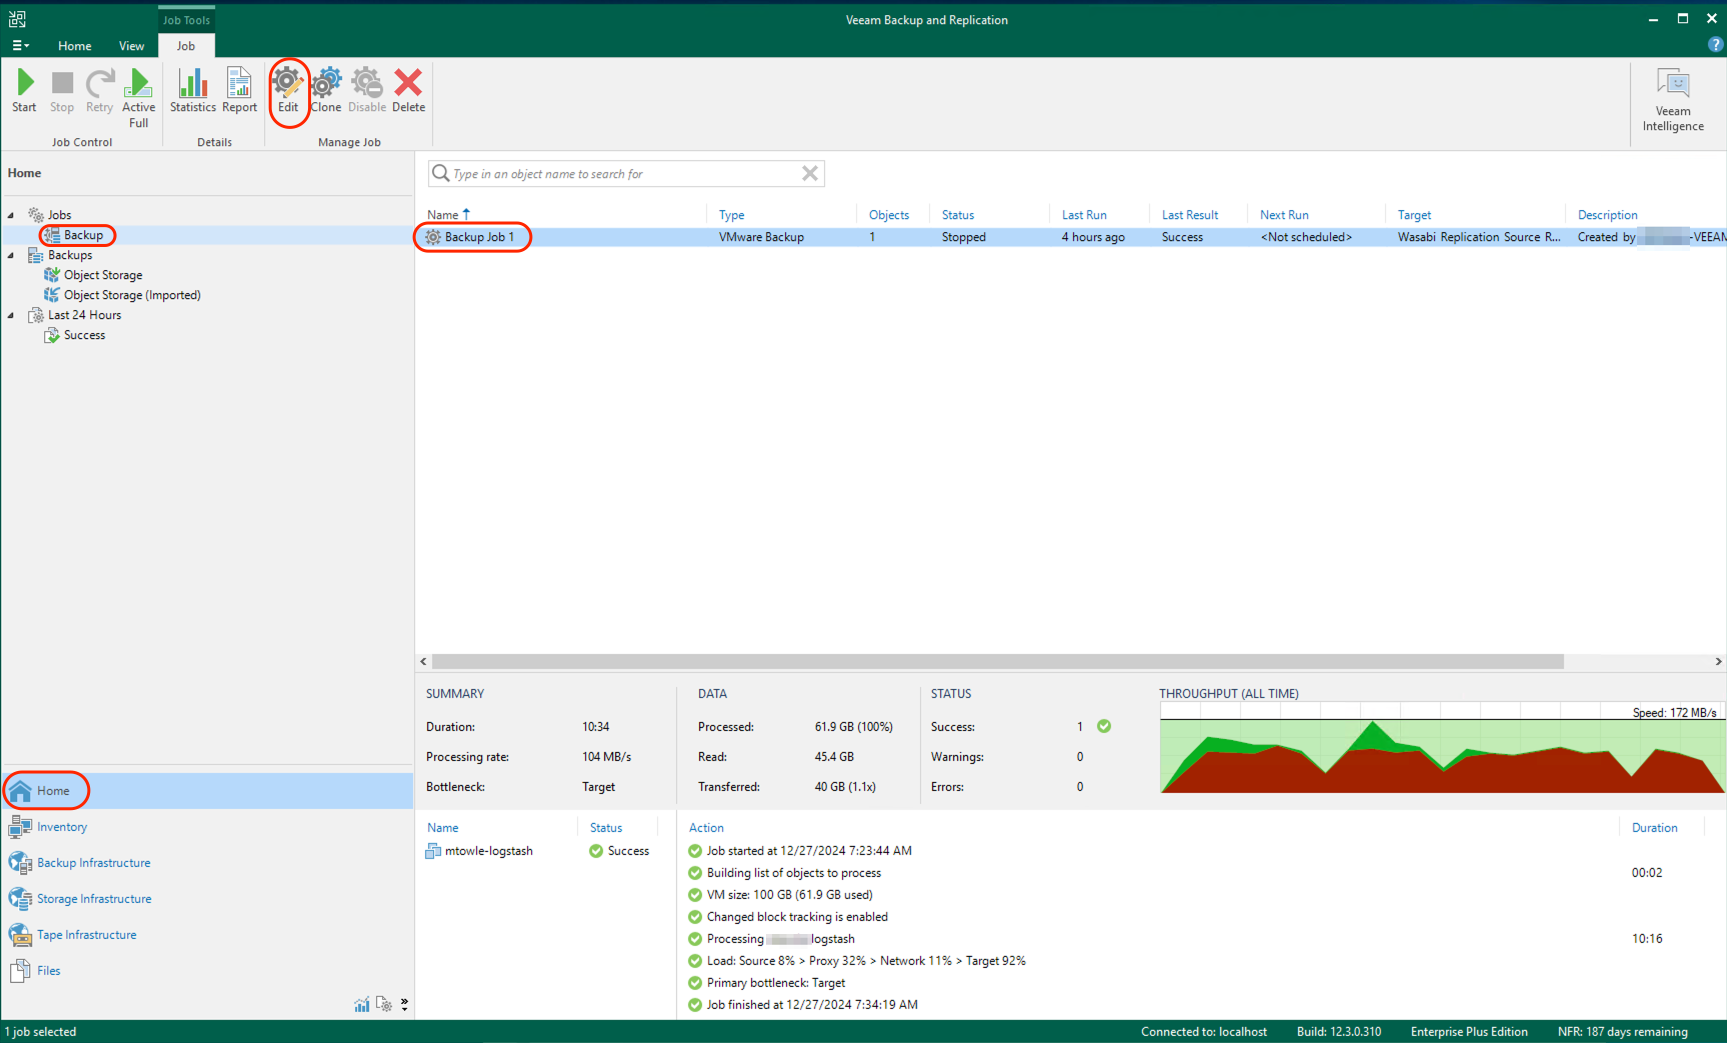
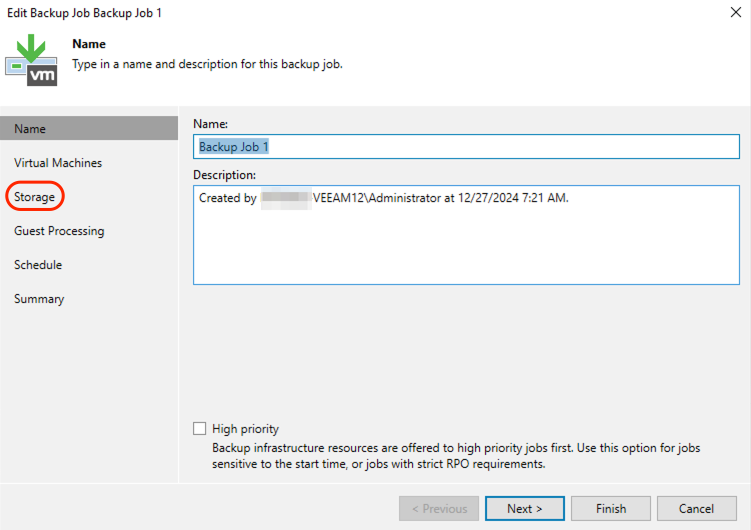
- Click Storage.
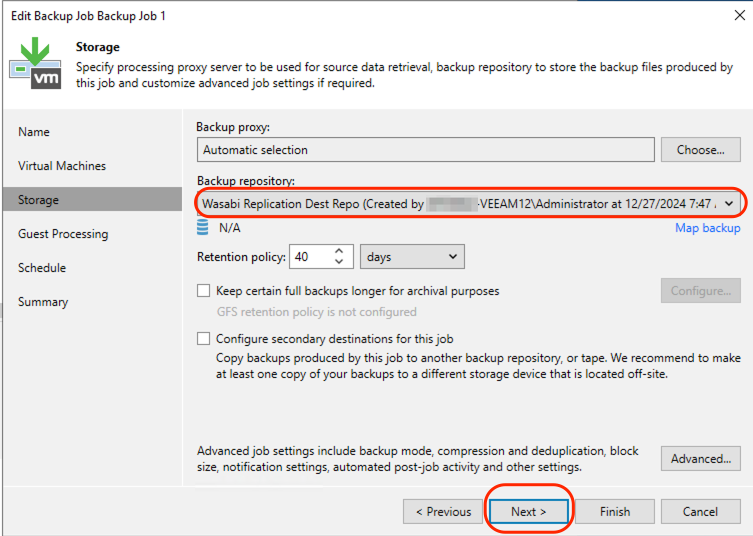
- Select the Wasabi destination repository.
- On the next screen, click Create New. Do NOT select Move Existing.

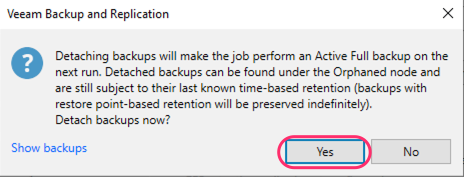
- Click Yes.
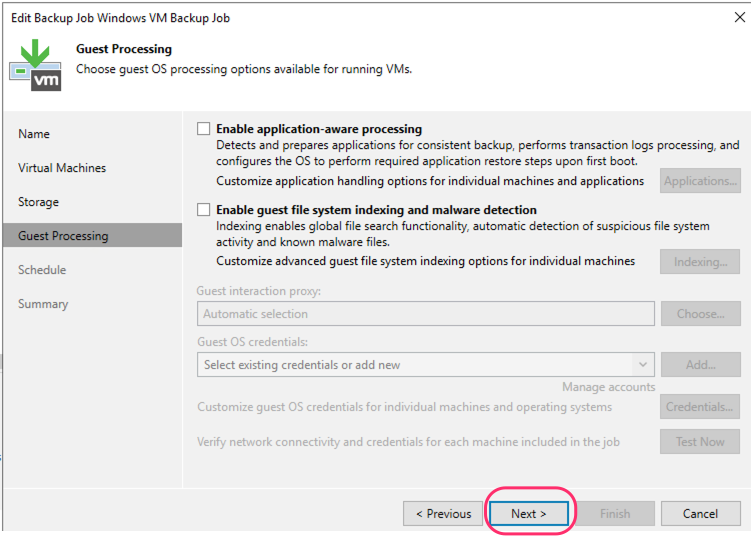
- On the following screen, click Next.
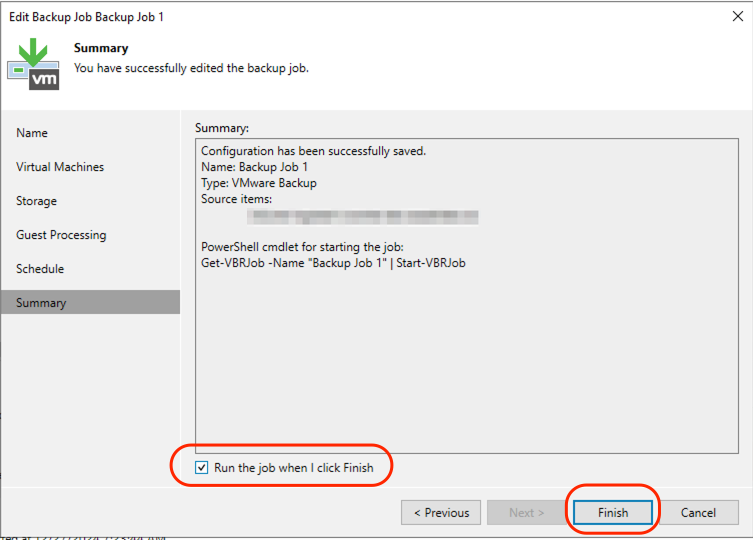
- Optionally, on the Summary screen, select Run the job when I click Finish. Click Finish.
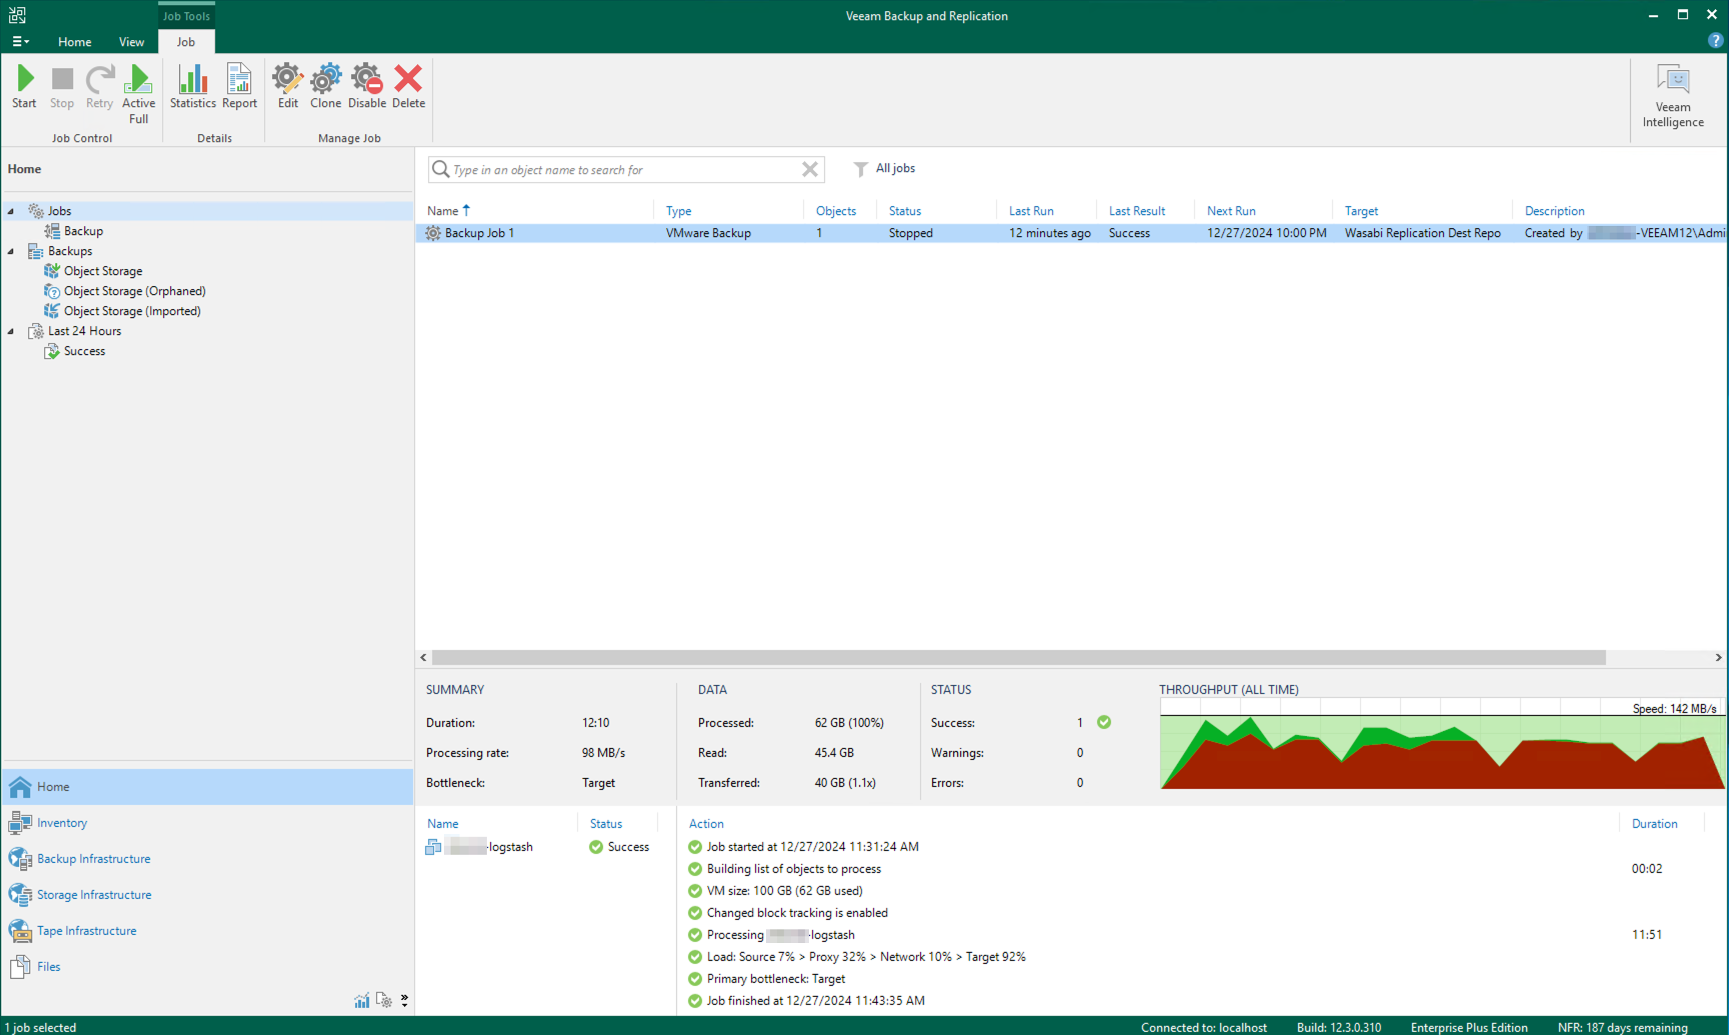
- Since "Run the job when I click Finish" was selected during our testing, the job will run and create a backup in the Wasabi destination repo. Here is what the successful backup looks like:
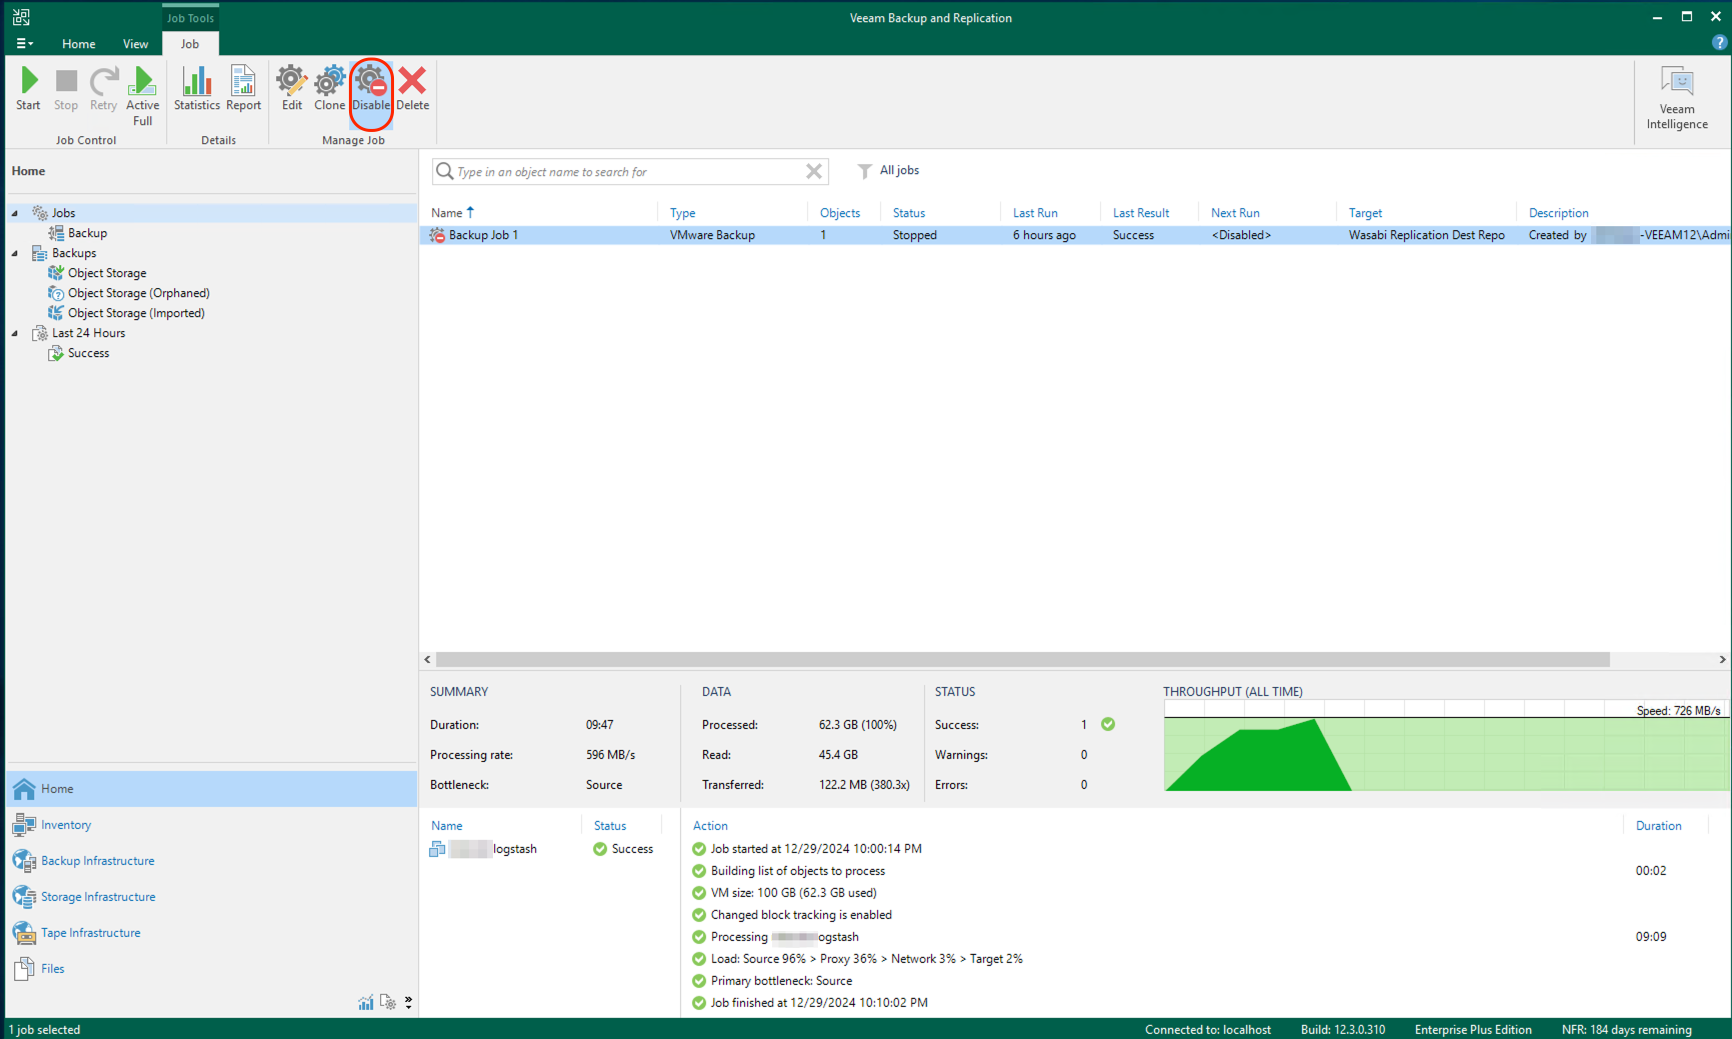
- If "Run this job when I click finish" was not selected, you must enable the job. Select the job and click "Disable" (there is no Enable button).
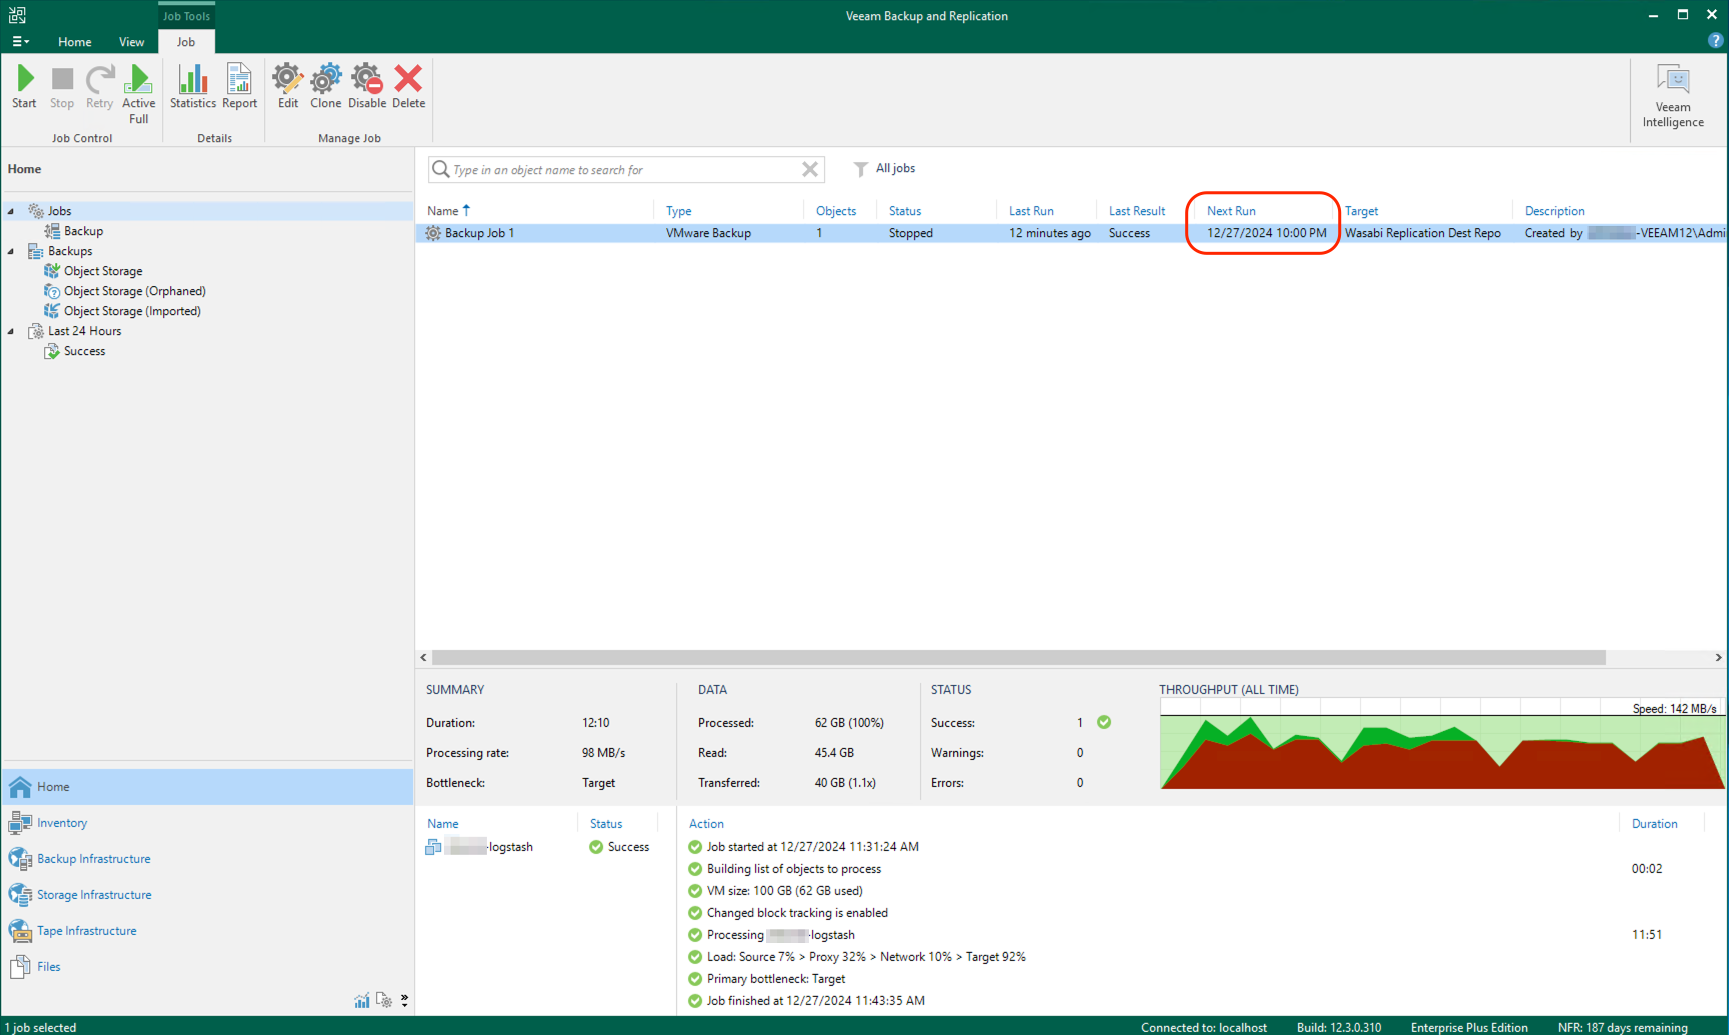
- The job will now show that it is enabled by displaying a "Next Run" date.
- New backups will appear under Object Storage, and replicated backups appear under Object Storage (Imported).