Wasabi has been validated for use with Xopero ONE. Xopero ONE Backup & Recovery is an all-in-ONE data protection solution for your physical, virtual, Microsoft 365, and DevOps environments. To use this product with Wasabi, follow the instructions below.
Reference Architecture
.png)
Requirements
Xopero ONE v. 1 and above
Xopero ONE license
An active Wasabi account
Configuration
Adding Wasabi as a New Backup Storage
Data storage is the location where the backups are stored. Xopero ONE allows users to define multiple datastores, which can be later assigned to any available backup plan.
Log in to your Xopero ONE administrator account. (If you do not have an account, download a trial version via Download free trial version.)
.png)
To add a new storage to Xopero ONE, select Storages.
Click Add storage.
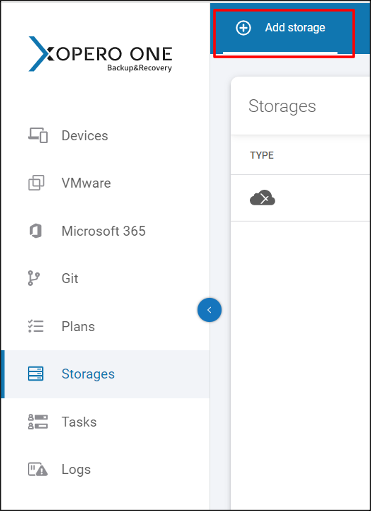
There are four types of storage that an administrator can add and use as a backup server: Local directory, Network Location - SMB share, Amazon Web Services storage, and S3-compatible storage. In this article, we will focus on the last one and set up Wasabi storage as our main backup server.
Regardless of the type of storage that you create, you are able to define the storage name and an optional Storage name and description. These two fields will help you identify the storage in the future.
.png)
Xopero ONE allows you to add any storage that uses S3 API and is S3 compatible certified (for example, Wasabi Hot Cloud Storage).
To add your Wasabi storage, select the Storage type drop-down.
Select S3 storage.
.png)
Fill out the login.
Assign a password using Password Manager.
.png)
Password Manager allows storing two sets of information: Login (your Wasabi’s Access Key) and a Password (the Secret Key). Those two parameters are used to sign the requests sent to Wasabi.
Provide the Service URL and Bucket name. The first parameter should also be provided by your provider, and the Bucket name is a unique name of the container that your objects are stored in.
.png)
For a list of service URLs for Wasabi's different storage regions, refer to this Service URLs for Wasabi's Storage Regions.
Select the Browsing machine (a device that will be later used to browse to reach and access the storage). Click Change to select one of the devices assigned to Xopero ONE that will connect the storage to the system.
Click Save.
Setting Up a New Backup Plan With Wasabi as a Backup Storage
To create a new backup plan, select the Plans tab.
Click Add Plan. The new panel will be displayed.
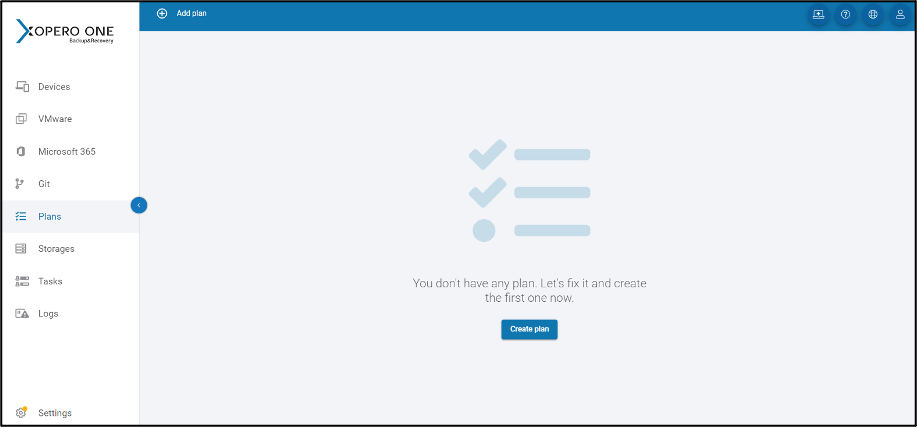
Provide a name for your new plan (for example, Plan#3). You can enter any name here, just keep in mind that you can use max. 100 characters.
.png)
To set a backup type, click How to protect? .
.png)
Click the Select backup type drop-down. You can choose between four types.
File-level—This backup type protects individual files or directories. Granular recovery of data protected with this type guarantees fast recovery across many scenarios.
Image-level—Creating an image of your devices enables you to protect the entire device quickly and easily. This type of backup is stored in the .RAW format and allows users to restore their systems (such as in the event of a drive failure).
Microsoft 365—This enabled you to protect Mailboxes, OneDrive, Contacts, and Calendars from your Microsoft 365 organization.
Git—This option enables you to protect your repositories from platforms such as GitHub, BitBucket, and GitLab.
.png)
In the Resources section, what is visible under this block depends heavily on the backup type you chose in the previous step. File-level and Image-level plans present Resources as Devices, and Microsoft 365 presents them as Users.
.png)
After clicking this section, a new aside shows. Select the checkbox next to the device that you want to include in the backup plan.
Selectthe Data to Protect section.
The data available for protection varies across File-level, Image-level, and Microsoft 365 backup types. While in the first and second ones, you can choose between using global rules and selecting directly from the device, Microsoft 365 has predefined resources (Messages, OneDrive, Contacts, Calendars) that can be protected.
After selecting this Image-level backup type, we can select one or more devices to which the plan will apply. To do so, select the Devices section and select the hosts to be assigned to the plan.
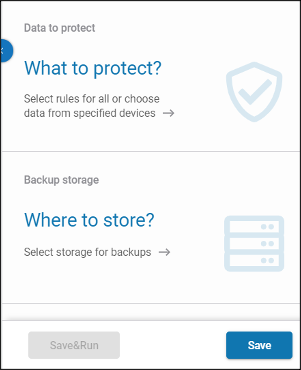
To apply your choice, click Save.
After adding devices, select the data to include in the backup plan. You can choose to assign data using global rules or select data directly from devices.
Global rules allow you to choose drives that will be protected. This method provides you with Xopero Variables, a predefined list of variables such as SYSTEM_DISK and ALL_DISKS. On the other hand, selecting from devices allows selecting disks individually for each device by connecting remotely to its file system.
.png)
After making your selections, click Save to apply your choices.
In the next step, we define our data storage. Since we have already added the Wasabi Storage, we will only select it from the list.
.png)
Select the Backup storage section. Choose the Wasabi Service.
In our final step, we are going to set a scheduler for our new backup plan. To pick a policy type, click the drop-down and select one of the available options:
Basic
GFS (Grandfather-Father-Son).
.png)
In this example, we selected Basic. This is the simplest type of schedule, offering a high number of versions relative to the storage space used.
It is using two backup cycles.
Full copy—Made every month by default
Incremental—Commonly made daily
.png)
After completing the Basic type settings, we will define the Backup Window. This is a time frame during which a specific backup plan can operate. If the policy exceeds the allowed time slot, it will automatically be terminated.
.png)
We can also define task-balancing settings (such as the Start delay), which specifies how long Xopero ONE must wait before starting the backup of the next device. Optionally, select Don’t suspend while performing a backup option, to prevent a device from going into suspended mode.
Set a Retention policy. Users can choose between three rules to decide how long they want to store backed-up data.
.png)
In this example, we chose By number of copies. Provide the total number of versions to store.
.png)
We will also set up our cleanup to run After the backup.
To finish setting the new backup plan, click Save. Your new plan is ready.
Advanced Backup Settings: Encryption, Compression, and Error Handling
To get access to Advanced backup settings, click the Configuration icon visible in the New backup plan section.
.png)
Enabling encryption will encode your data. It is recommended for use when working with sensitive data.
.png)
Available encryption levels.
Low (AES CBC 128)—AES algorithm operating in CBC (Cipher-Block Chaining) mode with the encryption key of 128 bits.
Medium (AES CBC 192)—Operates with the same mode as in the Low setting, but with a longer encryption key - 192 bits.
High (AES CBC 256)—With this option selected, the AES algorithm will work in CBC (Cipher-Block Chaining) mode with the encryption key of 256 bits.
Be sure to note that the chosen level will affect end-device resource usage and backup length.
Set a password to generate an encryption key.
.png)
Click Set or generate to create a new or existing password.
To add a new key, click Add password. After filling in the form, click Save password to proceed. The last step is to select a newly generated password from the list.
Using compression will make your backup files smaller than the source files. Using this option can save disk space on your storage and keep more data on it.
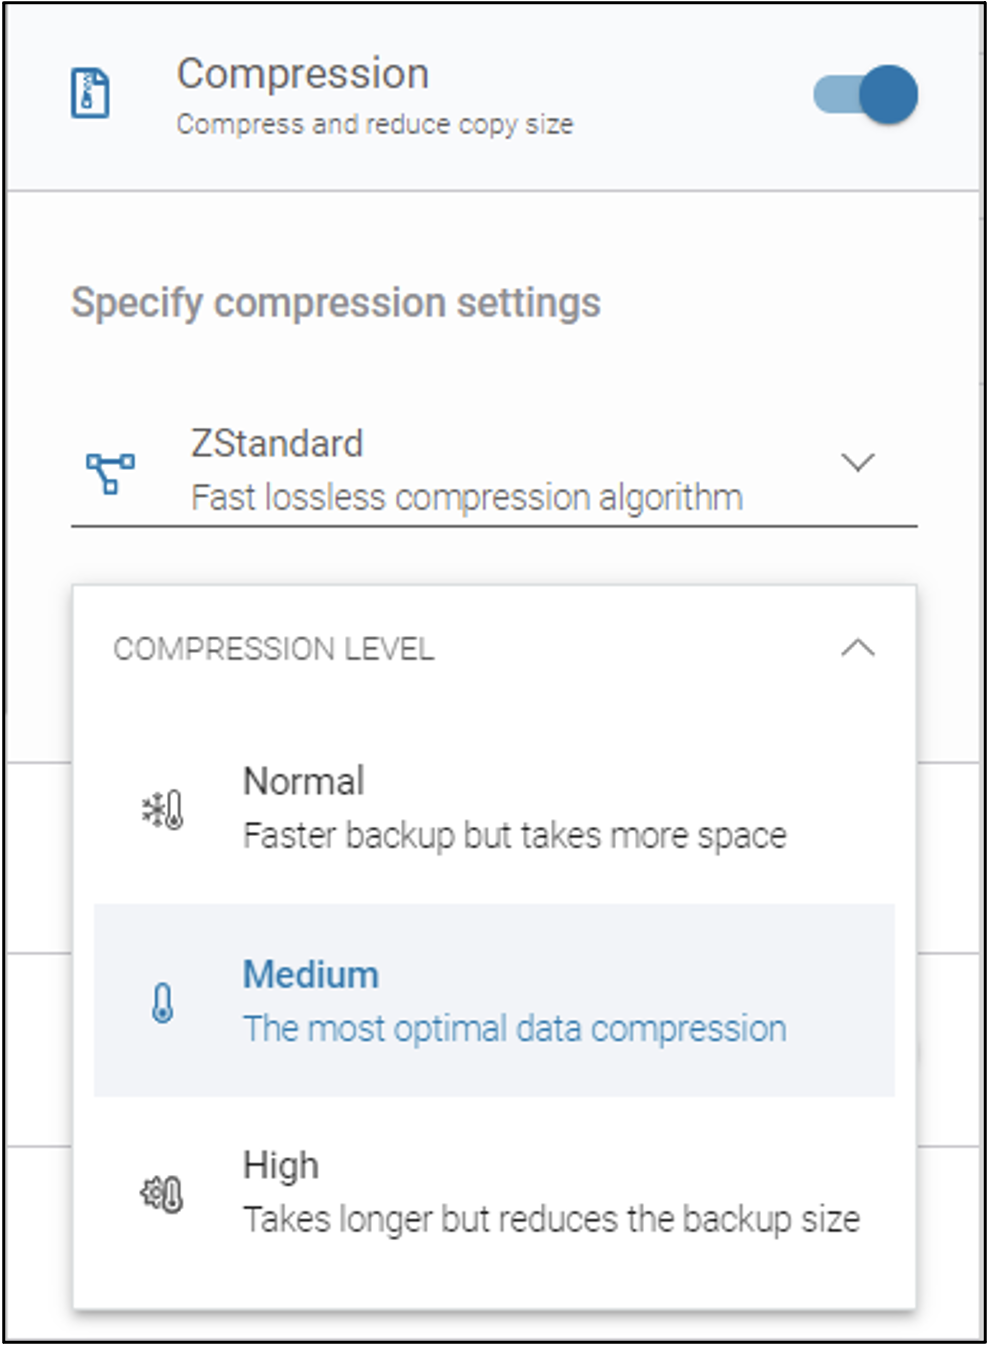
There are two available compression algorithms in Xopero ONE.
LZ4—lossless streaming compression algorithm is characterized by high compression speed and even faster decompression.
ZStandard—Fast lossless compression algorithm targeting real-time, wide range compression.
You can also choose between three compression levels.
Normal—Using this parameter will compress the data that is being protected very quickly.
Medium—Choosing this parameter is the most optimal solution - a compromise between the time of the compression process and the size of the data that will be saved in the storage.
High—As a result of this option, the maximum potential of the algorithm will be used in the process, taking much longer to complete, but resulting in the smallest possible amount of space taken up by the data sent.
Using advanced backup settings allows you to define how errors are handled during the backup process. This section consists of three options.
Run overdue backup tasks—If, for example, your device was turned off at the time that the backup task should start, enabling this feature will run these tasks despite them being late according to the schedule.
Repeat backup on fail—This option will come in handy if you know that sometimes something may interfere with the backup. You can specify the number of attempts that the program will make and a time interval between them.
Ignore bad sectors —While this option is enabled, backup will ignore bad sectors on disk.
.png)
Volume Shadow Copy Service (VSS) is responsible for maintaining data consistency and also allows you to back up open files. In Advanced Settings, you can decide whether to use VSS or not simply by turning the switch on/off.
.png)
To finish adding Advanced Setting, click Save.