How do I use ZebClient with Wasabi?
Zebware's ZebClient is a cloud data memory bridge delivering cloud data access at memory speed to local data-centric applications for high performance compute operations over S3 or filesystem interface. ZebClient has been validated for use with Wasabi. To use this product with Wasabi, please follow the instructions below.
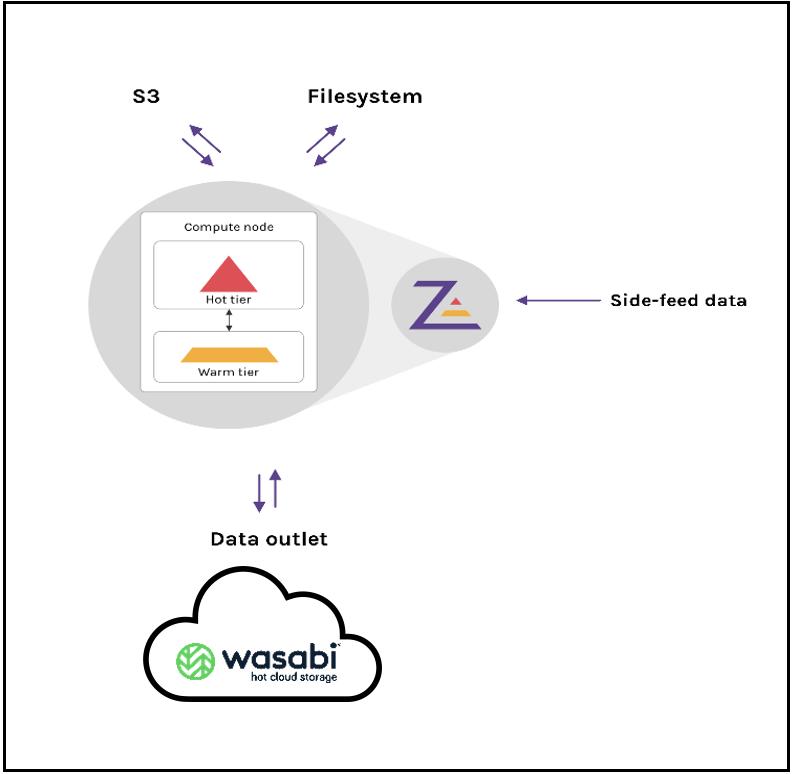
Reference Architecture

Prerequisites
ZebClient v 1.1
A standard deployment of ZebClient is required. Please refer to their documentation for instructions
An active Wasabi account
Configuration
ZebClient Agent Configuration
With the configuration files below you can start a 2-node ZebClient cluster (1 Agents and 2 Shared-services / Servers running on each of the 2 nodes)
ZebClient Agent configuration files need to be defined and running on each node in the cluster
The configuration file below is an example with Wasabi as an outlet.
cache:
  km: 2+4
  loglevel: warn
  telemetry:
    prometheus:
      addr: "0.0.0.0:9999"

license: #Update your path to the license file
  path: "path/to/license.json"


frontends:
- s3: #If needed, update your s3 frontend to ZebClient and possibly path to certs
    endpoint: 0.0.0.0:24101
    region: us-east-1
    accesskey: access
    secretkey: secret
    cacert:
    cert:
    certkey:
- fuse: #Update path to fuse mounted folder and tmp dir. Both folders need to be created and tmp dir located on fast disk.
      mountpoint: /path/to/fuse
      namespace: s3/buckets/
      tempdirs:
        - /path/to/tmp

tierings:
- tiering:
  - backend:
      fs: #Create path to folder for shards, NOTE: Shards should be placed on different disks.
        path: /path/to/shard/storage1/
    size: 200Gib
    threshold: 50%
    metadatapersistense:
        metadatadirectory: /path/to/metadata/storage/1
- tiering:
  - backend:
      fs:
        path: /path/to/shard/storage2/
    size: 200Gib
    threshold: 50%
    metadatapersistense: #Use fast disk for metadata directory
        metadatadirectory: /path/to/metadata/storage2/
- tiering:
  - backend:
      grpc: #Instead of NODE1 use ip address of the NODE1 where ZebClient server is running.
        endpoint: "NODE1:17101"
    cacert:
    cert:
    certkey:
    size: 200Gib
    threshold: 50%
    metadatapersistense:
      metadatadirectory: /path/to/metadata/storage3/
- tiering:
  - backend:
      grpc:
        endpoint: "NODE1:17102"
        cacert:
    cert:
    certkey:
    size: 200Gib
    threshold: 50%
    metadatapersistense:
      metadatadirectory: /path/to/metadata/storage4/
- tiering:
  - backend:
      grpc: #Instead of NODE2 use ip address of the NODE2 where ZebClient server is running.
        endpoint: "NODE2:17101"
    cacert:
    cert:
    certkey:
    size: 200Gib
    threshold: 50%
    metadatapersistense:
      metadatadirectory: /path/to/metadata/storage5/
- tiering:
  - backend:
      grpc:
        endpoint: "NODE2:17101"
    cacert:
    cert:
    certkey:
    size: 200Gib
    threshold: 50%
    metadatapersistense:
      metadatadirectory: /path/to/metadata/storage6/
outlets:
- s3: #Configure your own s3 provider to use outlet
    endpoint: https://s3.eu-central-1.wasabisys.com
    region: eu-central-1
    accesskey:
    secretkey:
    bucket: bucket_name
Note: This config example discusses the use of Wasabi's eu-central-1 storage region. To use other Wasabi storage regions, please use the appropriate Wasabi service URL as described in this article.
ZebClient Server Configuration
Configuration files for the ZebClient Servers (4 in total) need to be defined and available on the 2 nodes running the Server processes. Each node will run 2 Servers
The configuration file of Server 1 is shown below
cache:
  km: "2+4"

frontend: #If needed, update your s3 frontend to ZebClient and possibly path to certs
  endpoint: "0.0.0.0:17101"
  cacert:
  cert:
  certkey:

backend:
  fs: #Create path to folder for shards
    path: path/to/shard/grpc-storage/
The configuration file of Server 2 is shown below
cache:
  km: "2+4"

frontend: #If needed, update your s3 frontend to ZebClient and possibly path to certs
  endpoint: "0.0.0.0:17102"
  cacert:
  cert:
  certkey:

backend:
  fs: #Create path to folder for shards
    path: path/to/shard/grpc-storage2/
Copy configuration files to the selected folder (eg. /usr/local/etc/) on each cluster.
$ cp cluster-server1-1.conf /usr/local/etc/
$ cp cluster-server1-2.conf /usr/local/etc/
$ cp cluster-agent1.conf /usr/local/etc/
Bring up the 4 servers by executing the commands below on the 2 nodes.
Note: ZebClient should run as a user that has access to the filesystems that are being served. Furthermore, the Servers need to be launched prior to starting the Agents.
On node 1:
$ zebclient server run /usr/local/etc/cluster-server1-1.conf
$ zebclient server run /usr/local/etc/cluster-server1-2.conf
On node 2:
$ zebclient server run /usr/local/etc/cluster-server2-1.conf
$ zebclient server run /usr/local/etc/cluster-server2-2.conf
Once the ZebClient Servers are running, bring up the ZebClient Agents.
On node 1:
$ zebclient agent run /usr/local/etc/cluster-agent1.confOn node 2:
$ zebclient agent run /usr/local/etc/cluster-agent2.conf