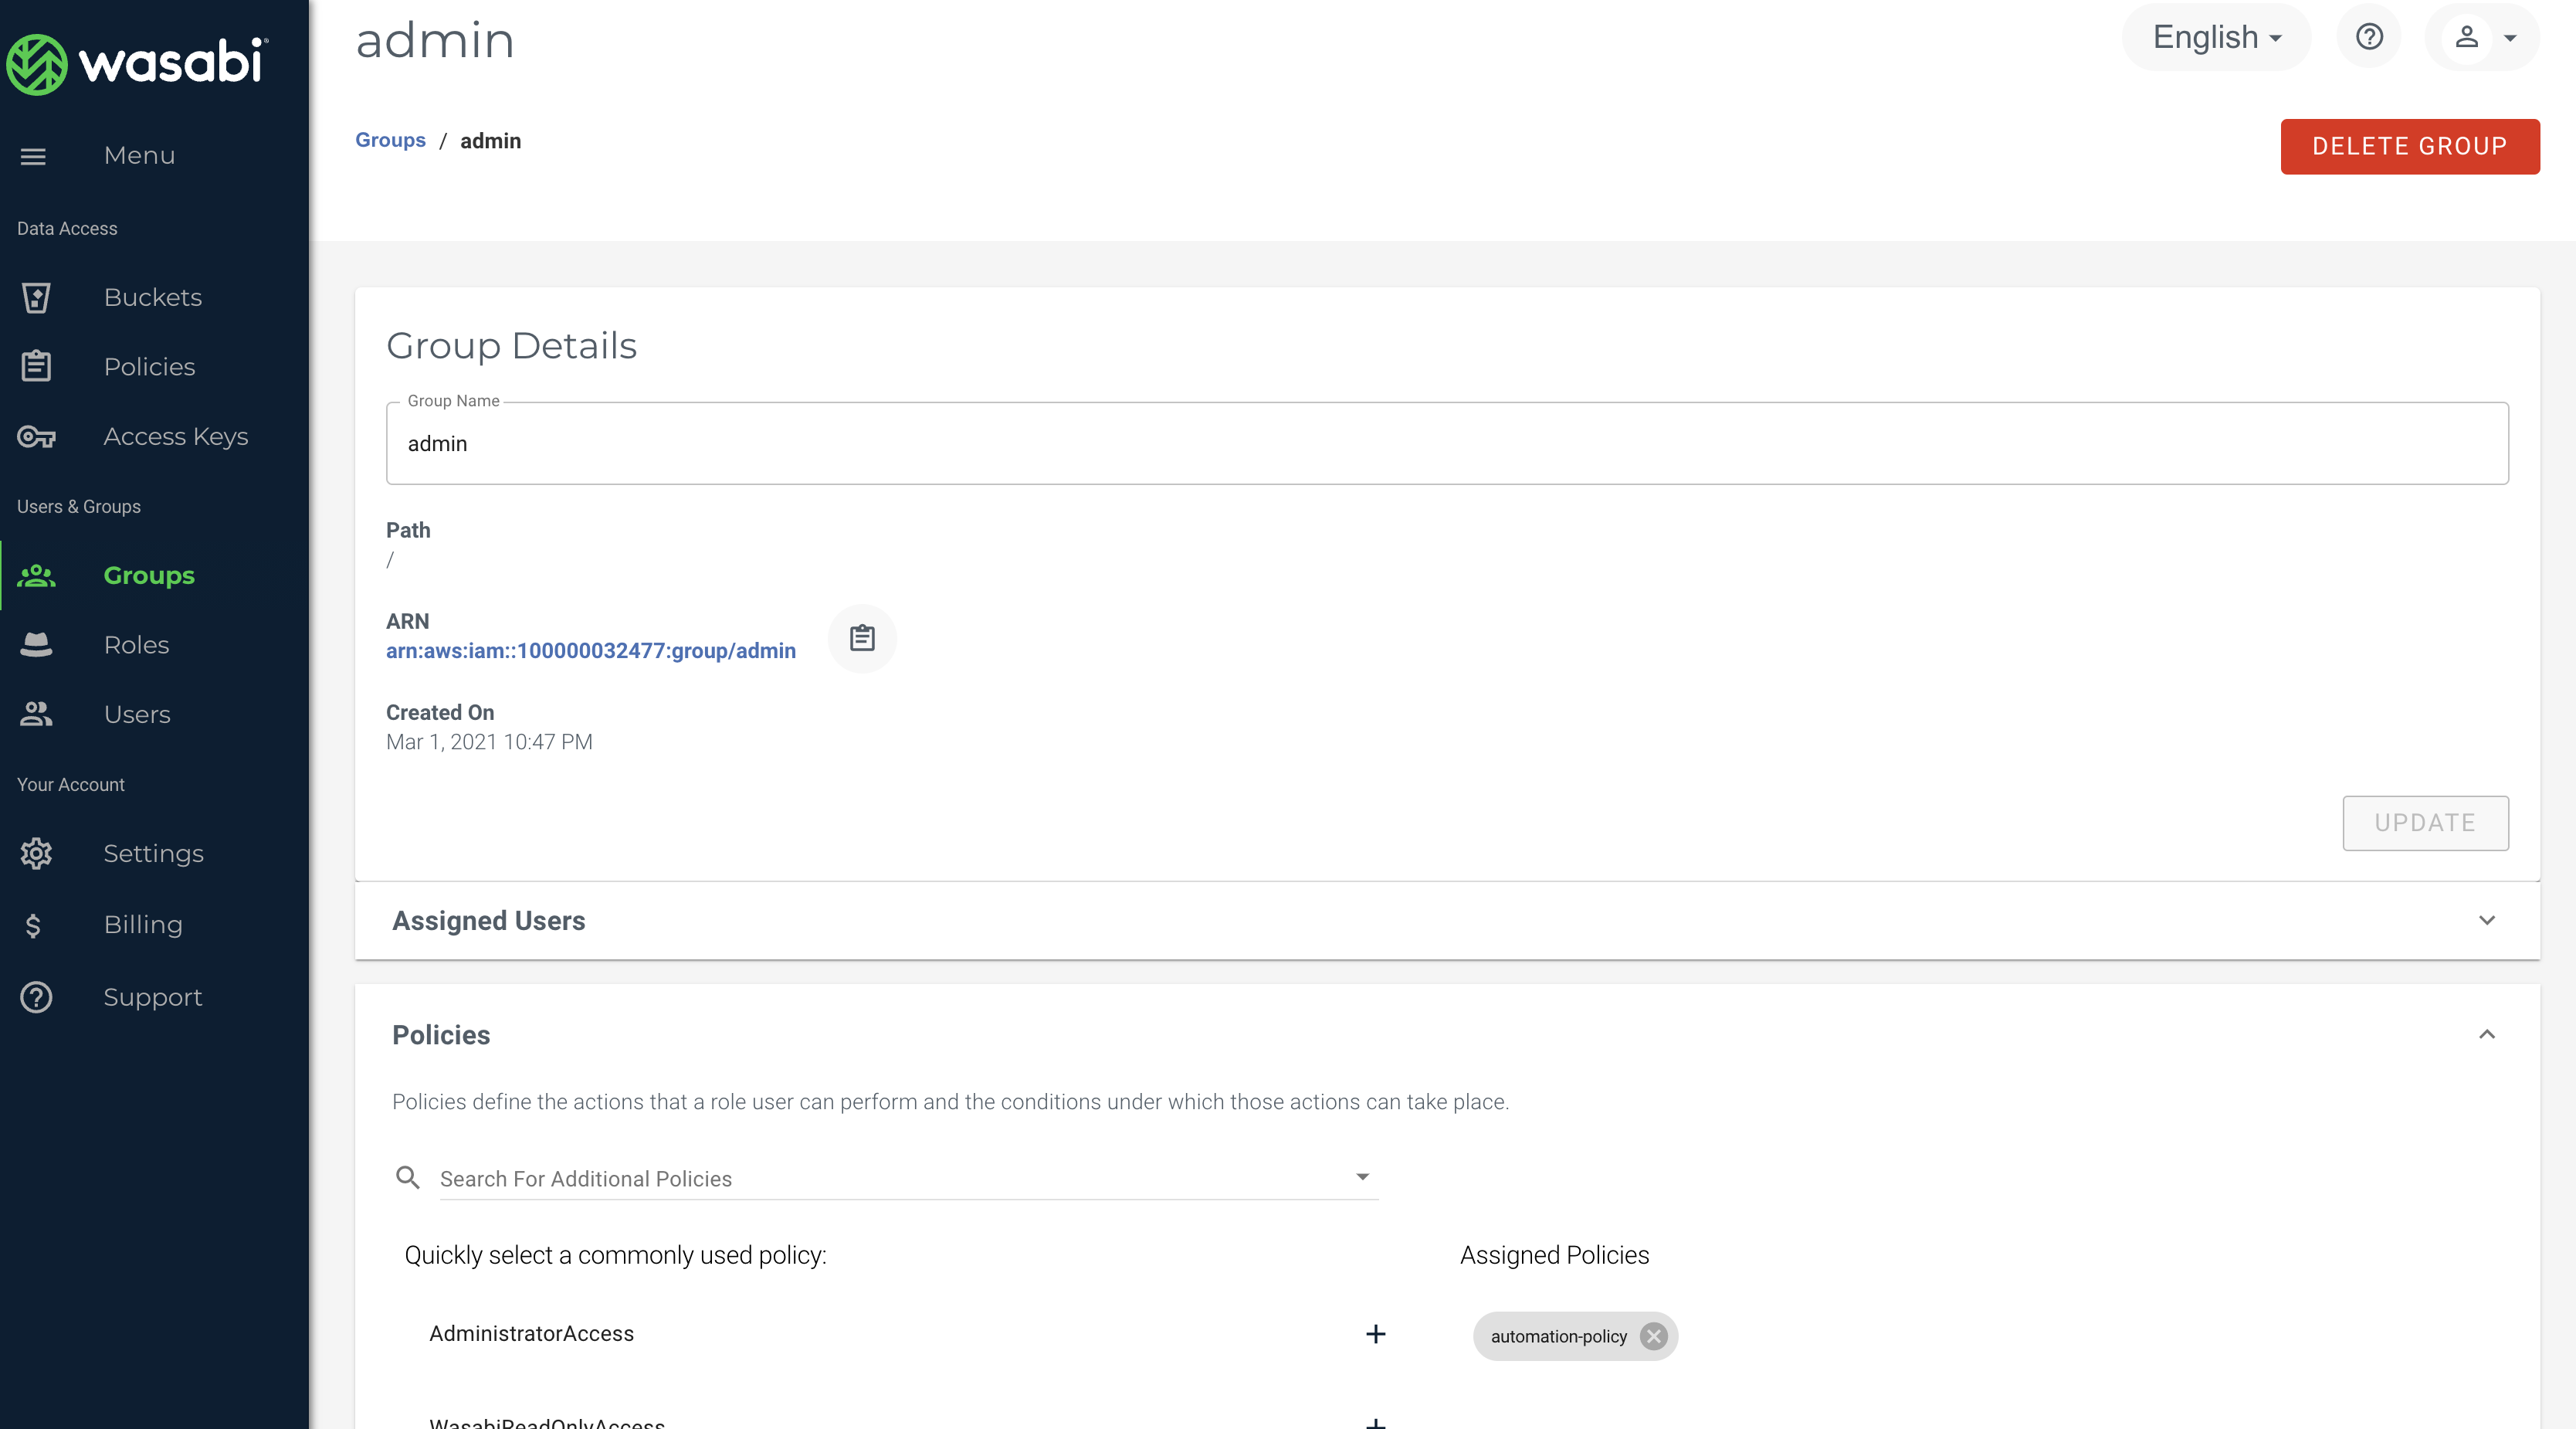
Medium and Large size organizations often require automated procedures to design cloud infrastructure and on-board hundreds, thousands, or even more employees as users on the company cloud account. Administrators of such organizations would need to create a user account for each employee and delegate them necessary infrastructure access based on company requirements. This document gives you an overview and code example of how you can automate the entire process of creating users, buckets, policies, groups and delegate access to those users in a most efficient way.
Blueprint components:
User: As a company may require to on-board many employees as users on a cloud account, the best approach is to create users wherein the username is some sort of unique UUID so there are no clashes between any two users
API Keys for the User: This automated script will create Access Key & Secret Access Key and store them in a secure file location on your local machine which you will share with your respective employees so they can access their own buckets
Bucket: Each user will be allowed to have one bucket of their own which they will use to contribute to their work. Users will be able to access ONLY their own bucket. Bucket creation will be automated in such a way that a company decides the prefix (say company name) will be used and appended by "username". This model will take care of unique global bucket name requirements as well as the buckets can be uniquely identifiable and paired with a particular user
Group: This script will create a group and drop users inside this group automatically
Policy: The code project allows you to create and attach any policy you want to your group. We are making use of the Dynamic policy shown later in the document which allows users access to ONLY their own buckets
Executions and Details of the automation (output & screenshots attached):
NOTE: This particular script is written in Python using Boto3 SDK. We have attached an executable file so you may directly execute this code if you have python installed on your system. We have also attached the entire code project so you can modify it as per your company requirements.
1. Before running the script
Create the dynamic policy in the code project under a file that is named "policy.json". This particular policy allows users to access their own bucket ONLY.
Please take note of the resource section that highlights how prefixes and policy variables are used. You may decide the prefix here to be your own company name and similarly make a change to the script to use that prefix. This prefix will also be used for the automatic creation of your bucket(s)
 def create_bucket(self, user: str):
prefix = "wasabi-technologies-"
bucket_name = prefix + user
The policy variable here determines the username and appropriately delegate access control to buckets based on usernames
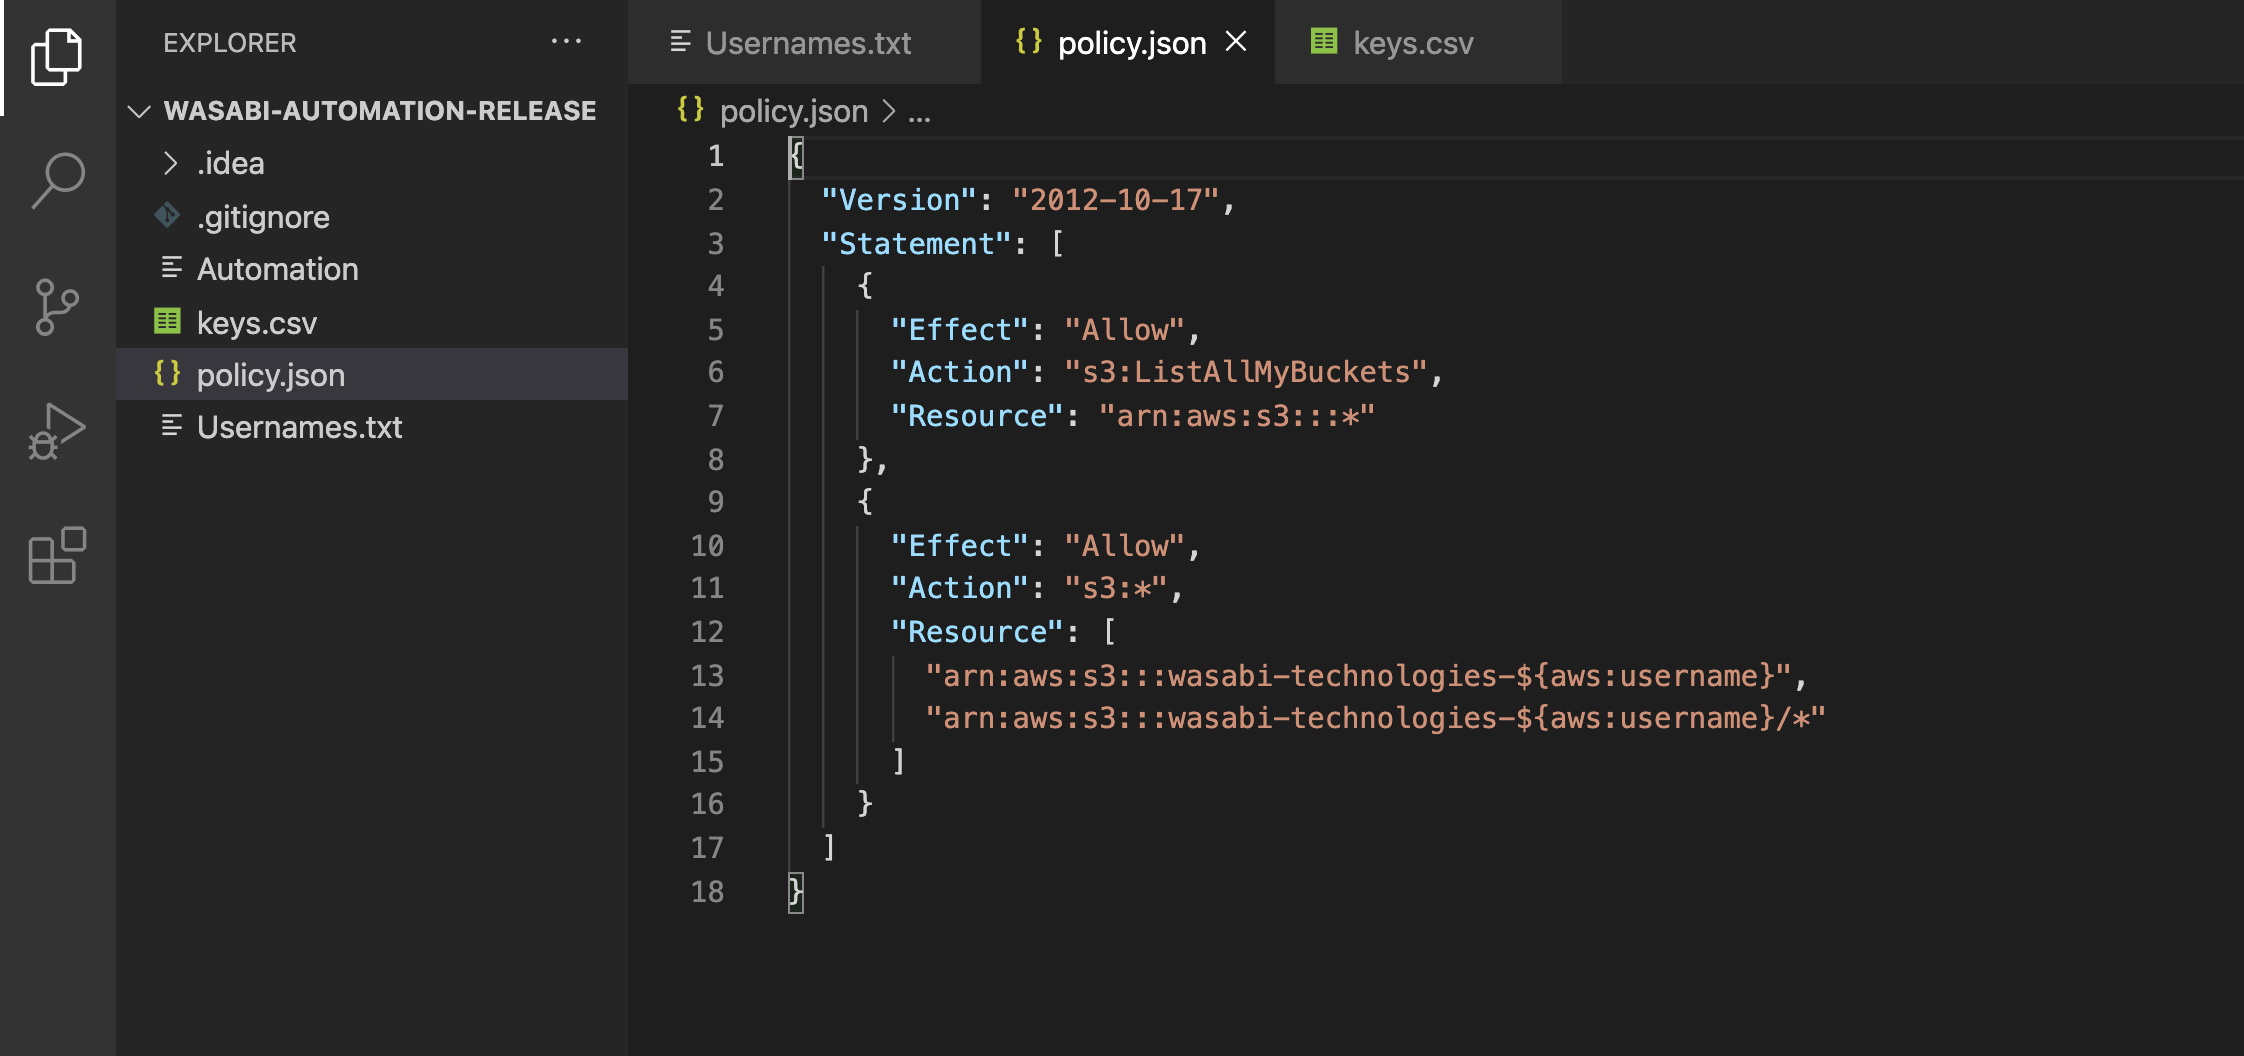
Actual Policy doc:
{
"Version": "2012-10-17",
"Statement": [
{
"Effect": "Allow",
"Action": "s3:ListAllMyBuckets",
"Resource": "arn:aws:s3:::*"
},
{
"Effect": "Allow",
"Action": "s3:*",
"Resource": [
"arn:aws:s3:::wasabi-technologies-${aws:username}",
"arn:aws:s3:::wasabi-technologies-${aws:username}/*"
]
}
]
}NOTE: due to the dynamic nature of this policy model, you do not need to create separate policies for each user individual users and this design will keep your policy count to absolute minimal.
2. Run the executable script
You will see a welcome message and it will prompt you to select the profile or enter the API keys of the admin who is executing this script
(i) If you already have a profile configured on your CLI, you may Press 1
you may configure the AWS CLI profile for the Wasabi account using the Wasabi keys ahead of time
NOTE that it is optional for you to use credential files to run your code but it is always a best practice to use such implementation wherein your credential keys are in a file stored on your local machine rather than being part of your actual code or entering Keys at runtime prompt
In this example, we have set the profile name as "username" in the "~/.aws/credentials" file.
(ii) If you do not wish to use the existing profile, you may press 2 and enter your API Keys.
3. Select region for bucket creation
The script will prompt you to select the region where you need the buckets to be created as shown in the screenshot later. You may select the corresponding number for appropriate region selection
4. Provide username(s)
You may either enter usernames here or allow reading from the Usernames.txt file
(i) Press 1 to manually enter Usernames on CLI (space separated only)
(ii) If you have a large number (hundreds, thousands) of users, add ALL the usernames in the "Usernames.txt" file as shown here.
Press 2 to use this file
For this example purpose, we are showing a demo of 10 users who are dumped into the "Usernames.txt" file
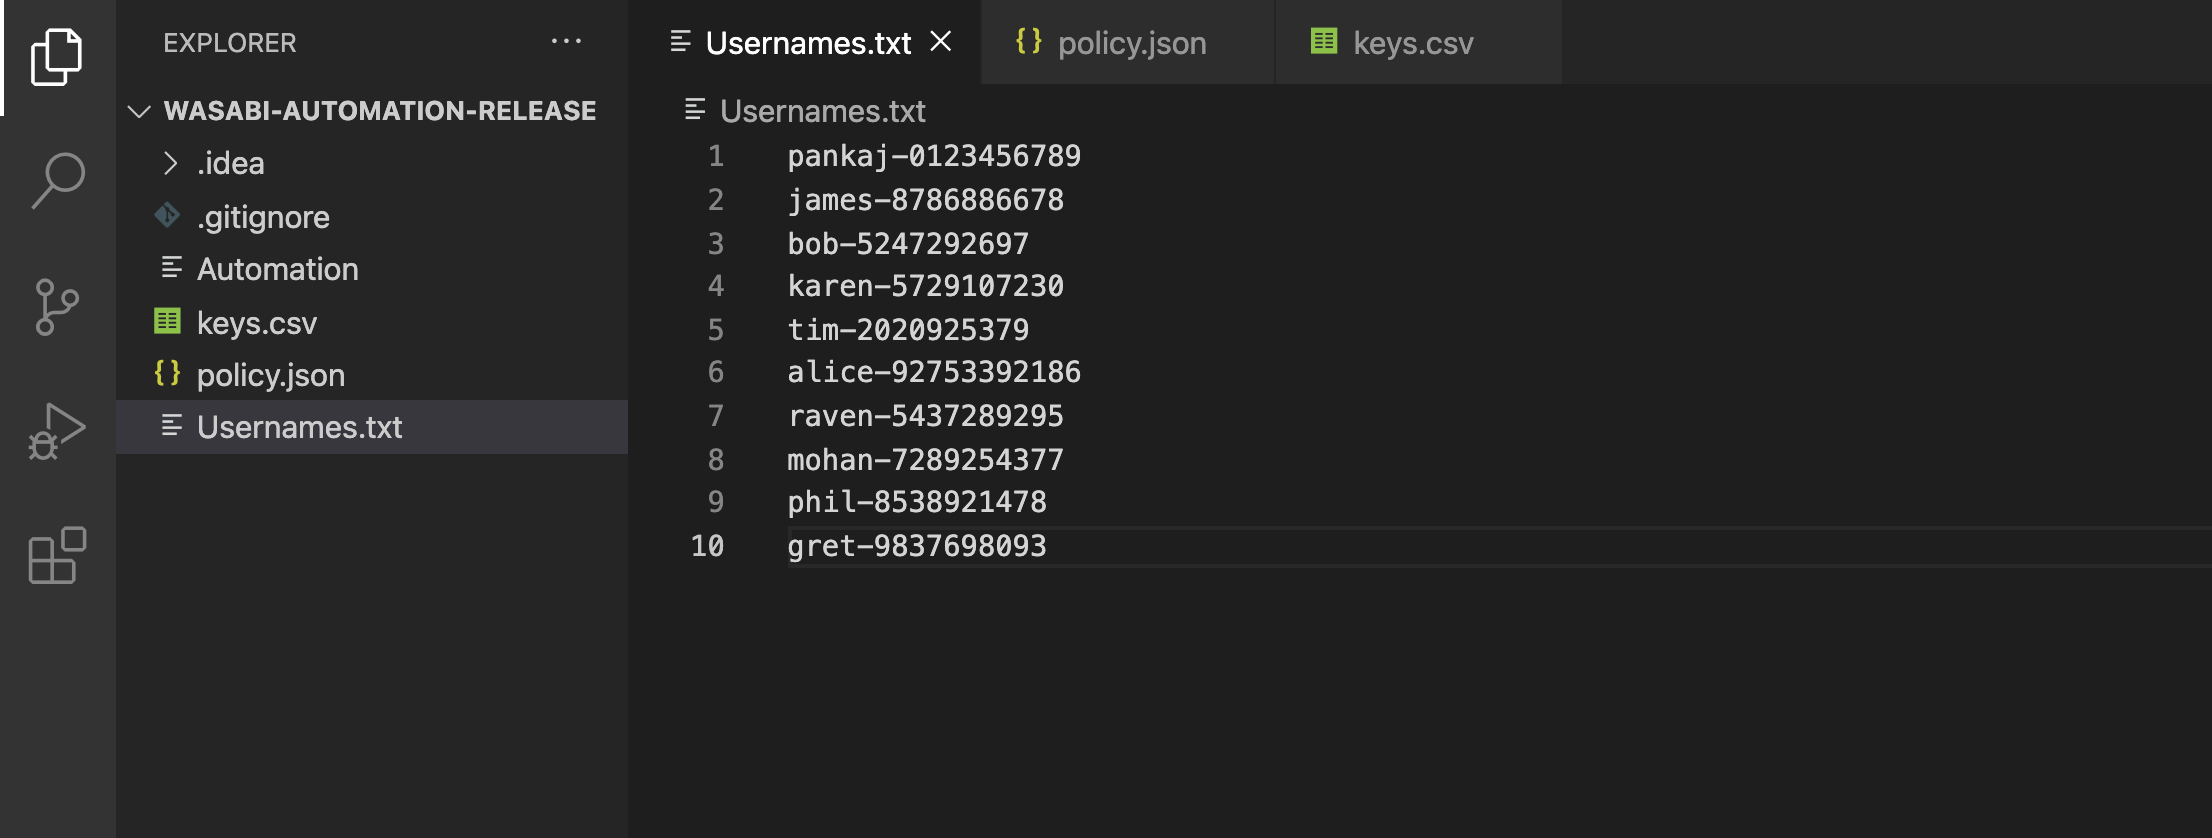
NOTE: few things to note here
Username + prefix will not be created if the user already with that name exists in the account.
The usernames will be forced to lowercase and will be verified so that they maintain the AWS naming convention. Usernames that fail the verification process will be printed in the terminal and that user will not be created.
Once you have selected the usernames, the script will automatically create a group in your account. If you have already run this code before, it will skip the creation of a group as it already exists
The script will automatically create the IAM policy based on your "policy.json" file and this policy will be attached to the group. This process will be skipped if the said policy is already attached to the group
Before creating users and their respective buckets, the scripts check the total number of existing buckets in your account. If you have say 100 already existing buckets while you have added 1000 usernames in your Usernames.txt file, the script will prompt you that it will create the first 900 possible users (if the username does not exist) from the list (as wasabi has a soft limit of 1000 max buckets). You may select Yes to proceed and it will create 900 users and corresponding 900 new buckets making your total tally of buckets to be 1000.
If you need more than 1000 buckets for your use case, please reach out to support@wasabi.com and request a limit increase. Also, note that Wasabi has a hard limit of 4999 sub-users in a single stand-alone account. If you need to create more than 4999 sub-users, refer to this document.
OUTPUT:
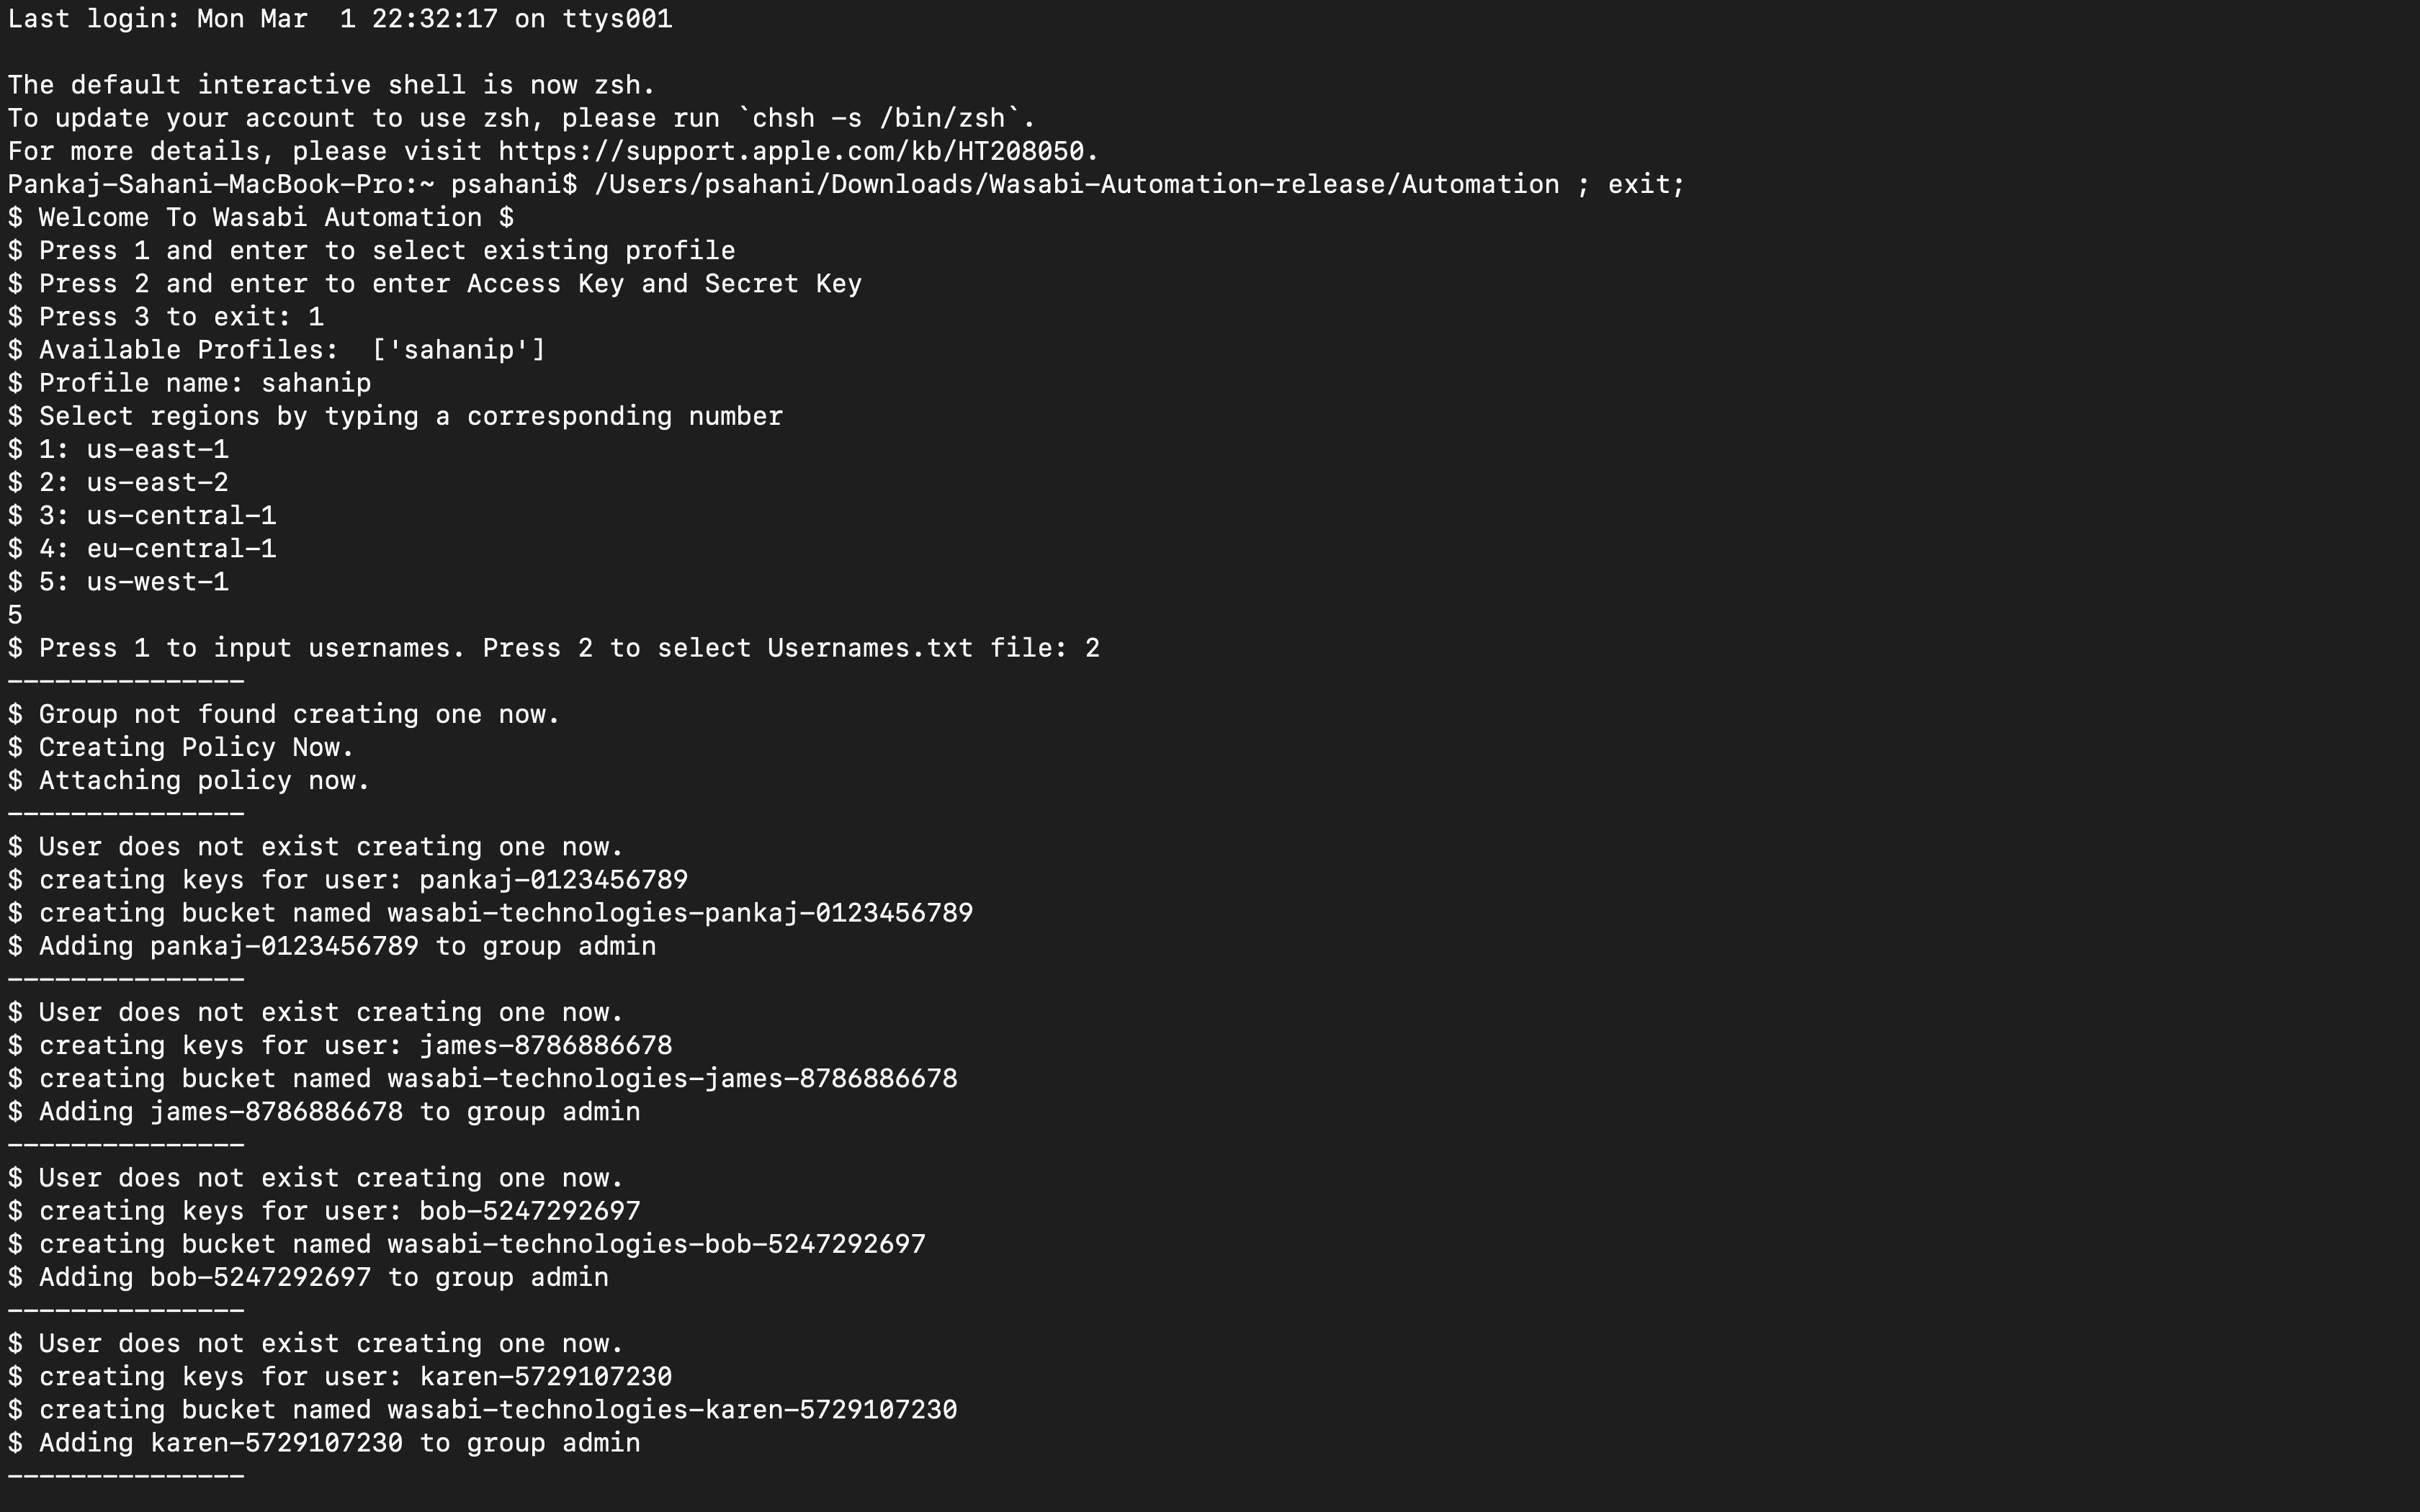
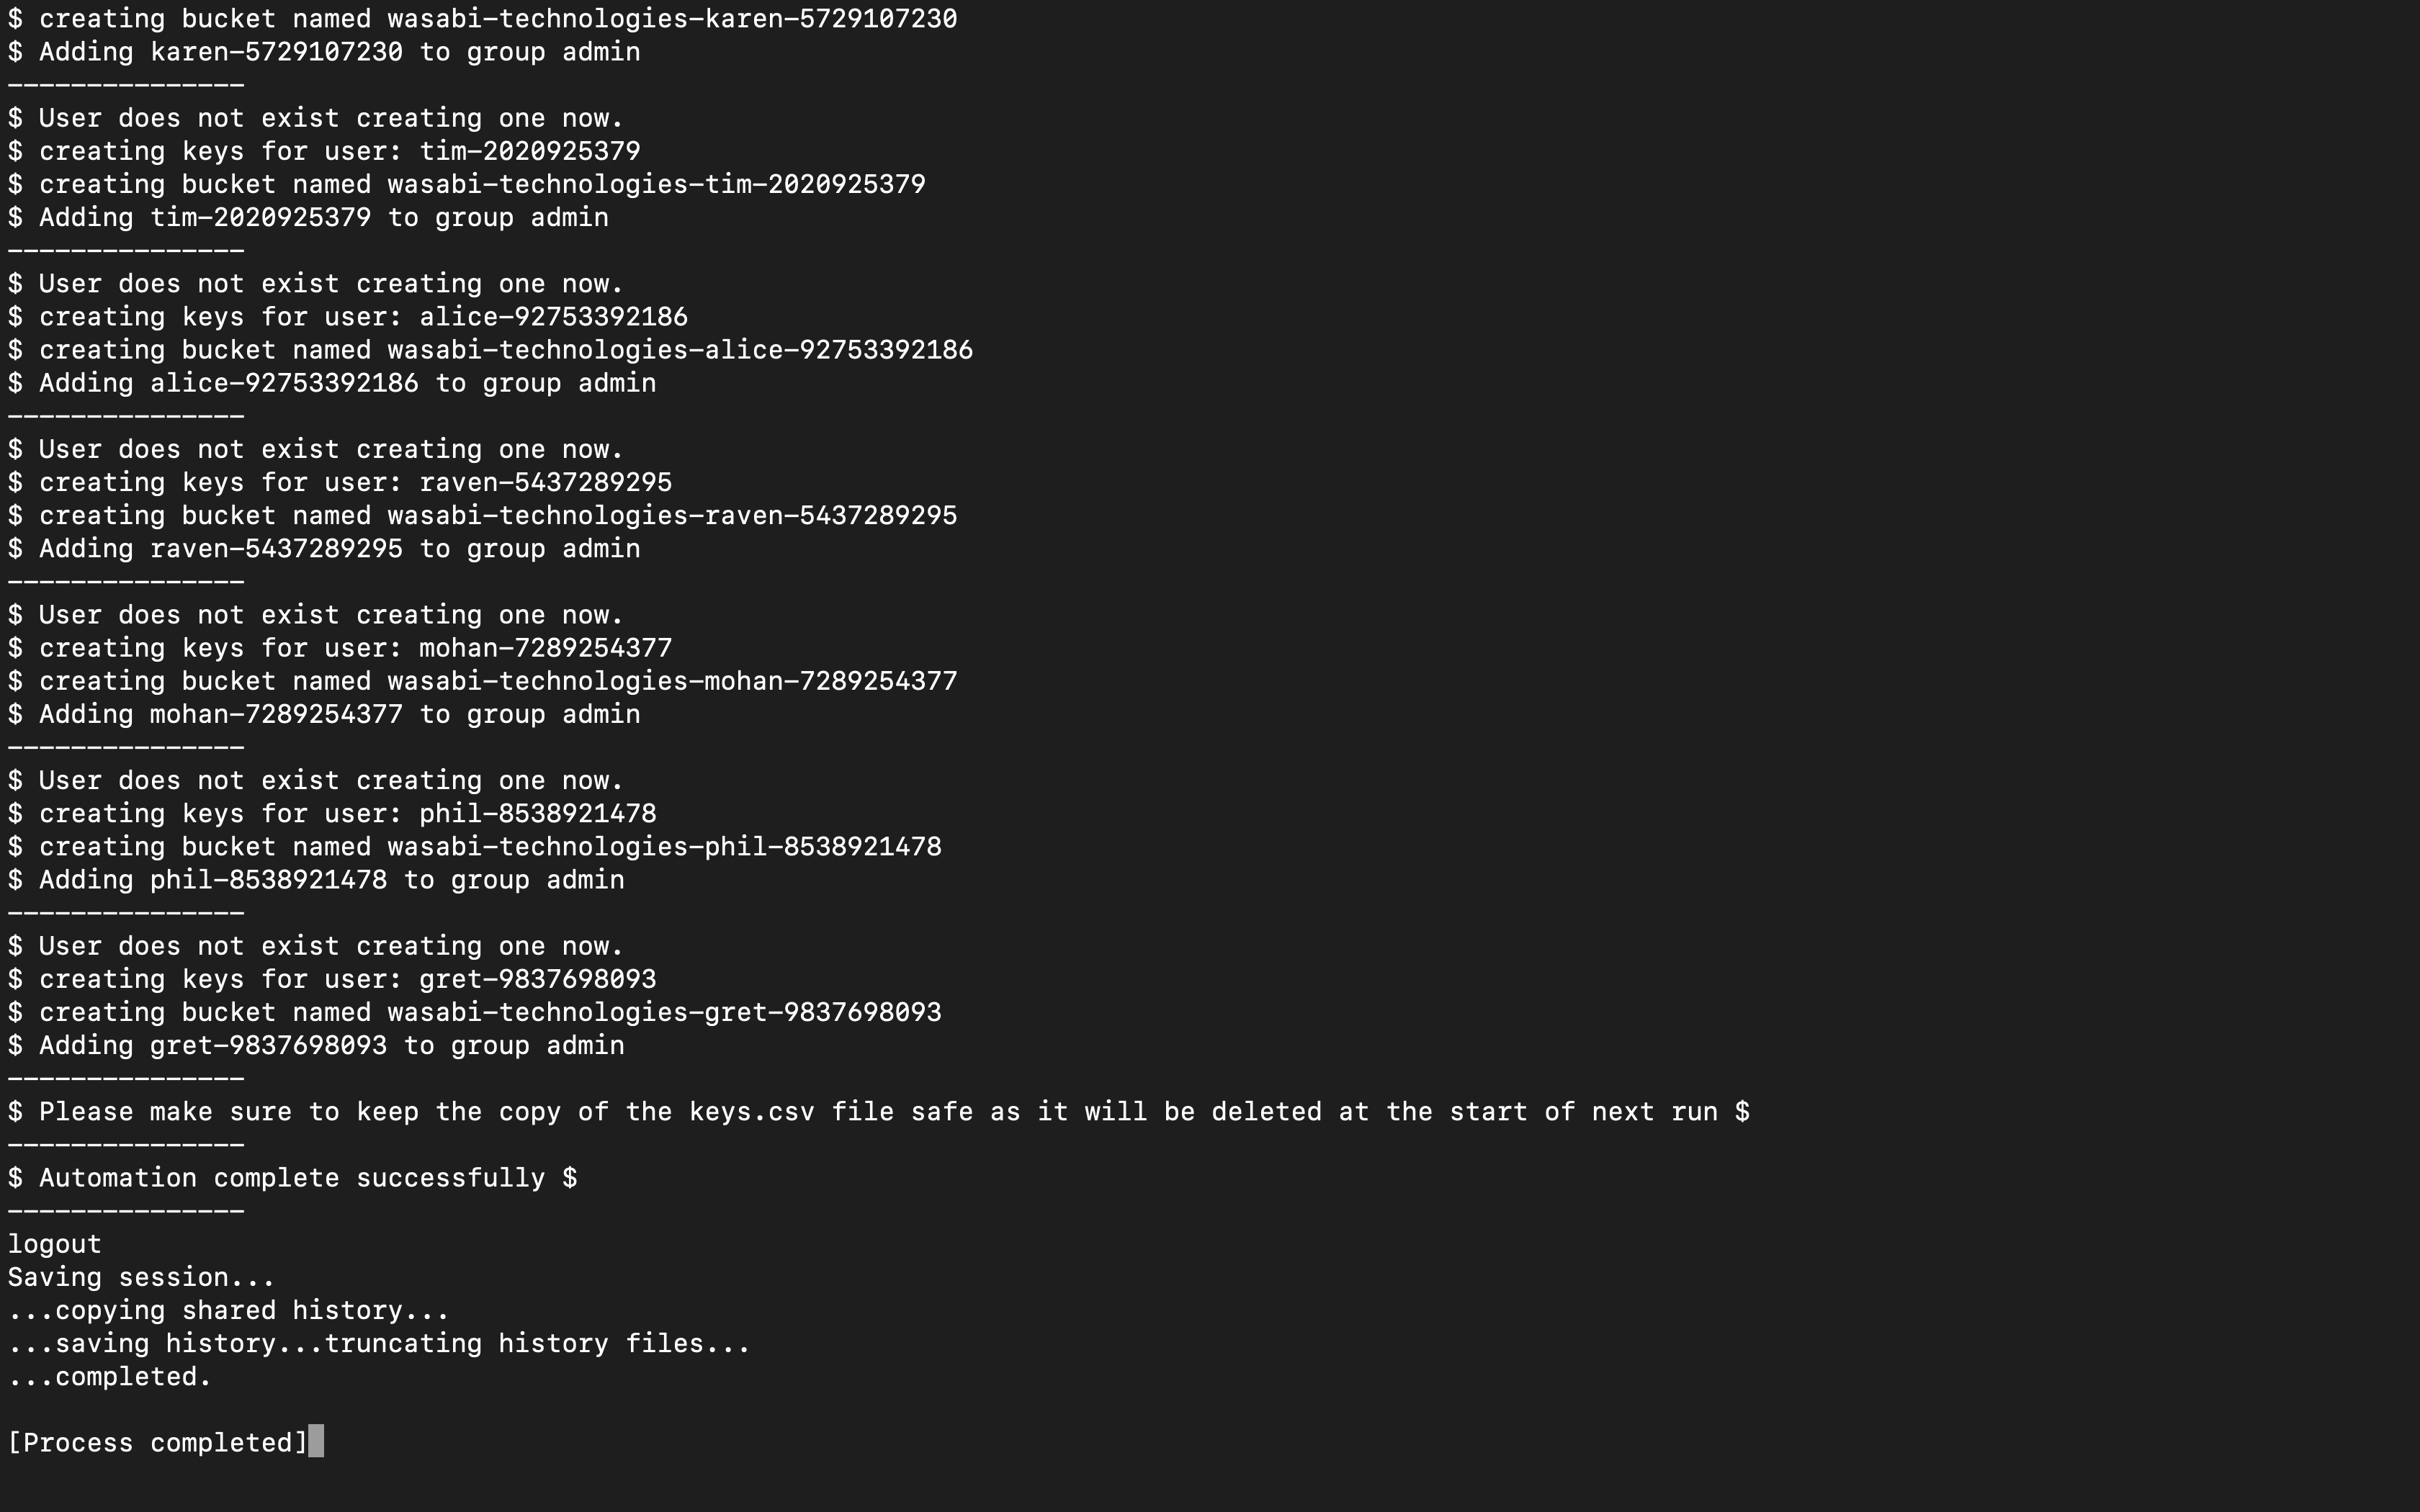
Username-MacBook-Pro:~ username$ /Users/username/Downloads/Wasabi-Automation-release/Automation ; exit;
$ Welcome To Wasabi Automation $
$ Press 1 and enter to select existing profile
$ Press 2 and enter to enter Access Key and Secret Key
$ Press 3 to exit: 1
$ Available Profiles: ['username']
$ Profile name: username
$ Select regions by typing a corresponding number
$ 1: us-east-1
$ 2: us-east-2
$ 3: us-central-1
$ 4: eu-central-1
$ 5: us-west-1
5
$ Press 1 to input usernames. Press 2 to select Usernames.txt file: 2
---------------
$ Group not found creating one now.
$ Creating Policy Now.
$ Attaching policy now.
---------------
$ User does not exist creating one now.
$ creating keys for user: username-0123456789
$ creating bucket named wasabi-technologies-username-0123456789
$ Adding username-0123456789 to group admin
---------------
$ User does not exist creating one now.
$ creating keys for user: james-8786886678
$ creating bucket named wasabi-technologies-james-8786886678
$ Adding james-8786886678 to group admin
---------------
$ User does not exist creating one now.
$ creating keys for user: bob-5247292697
$ creating bucket named wasabi-technologies-bob-5247292697
$ Adding bob-5247292697 to group admin
---------------
$ User does not exist creating one now.
$ creating keys for user: karen-5729107230
$ creating bucket named wasabi-technologies-karen-5729107230
$ Adding karen-5729107230 to group admin
---------------
$ User does not exist creating one now.
$ creating keys for user: tim-2020925379
$ creating bucket named wasabi-technologies-tim-2020925379
$ Adding tim-2020925379 to group admin
---------------
$ User does not exist creating one now.
$ creating keys for user: alice-92753392186
$ creating bucket named wasabi-technologies-alice-92753392186
$ Adding alice-92753392186 to group admin
---------------
$ User does not exist creating one now.
$ creating keys for user: raven-5437289295
$ creating bucket named wasabi-technologies-raven-5437289295
$ Adding raven-5437289295 to group admin
---------------
$ User does not exist creating one now.
$ creating keys for user: mohan-7289254377
$ creating bucket named wasabi-technologies-mohan-7289254377
$ Adding mohan-7289254377 to group admin
---------------
$ User does not exist creating one now.
$ creating keys for user: phil-8538921478
$ creating bucket named wasabi-technologies-phil-8538921478
$ Adding phil-8538921478 to group admin
---------------
$ User does not exist creating one now.
$ creating keys for user: gret-9837698093
$ creating bucket named wasabi-technologies-gret-9837698093
$ Adding gret-9837698093 to group admin
---------------
$ Please make sure to keep the copy of the keys.csv file safe as it will be deleted at the start of next run $
---------------
$ Automation complete successfully $
---------------
Once the automation is successfully completed. The API keys will be created for ALL the users and stored inside the "keys.csv" file as shown below. Note that all the keys shown in this screenshot are inactive

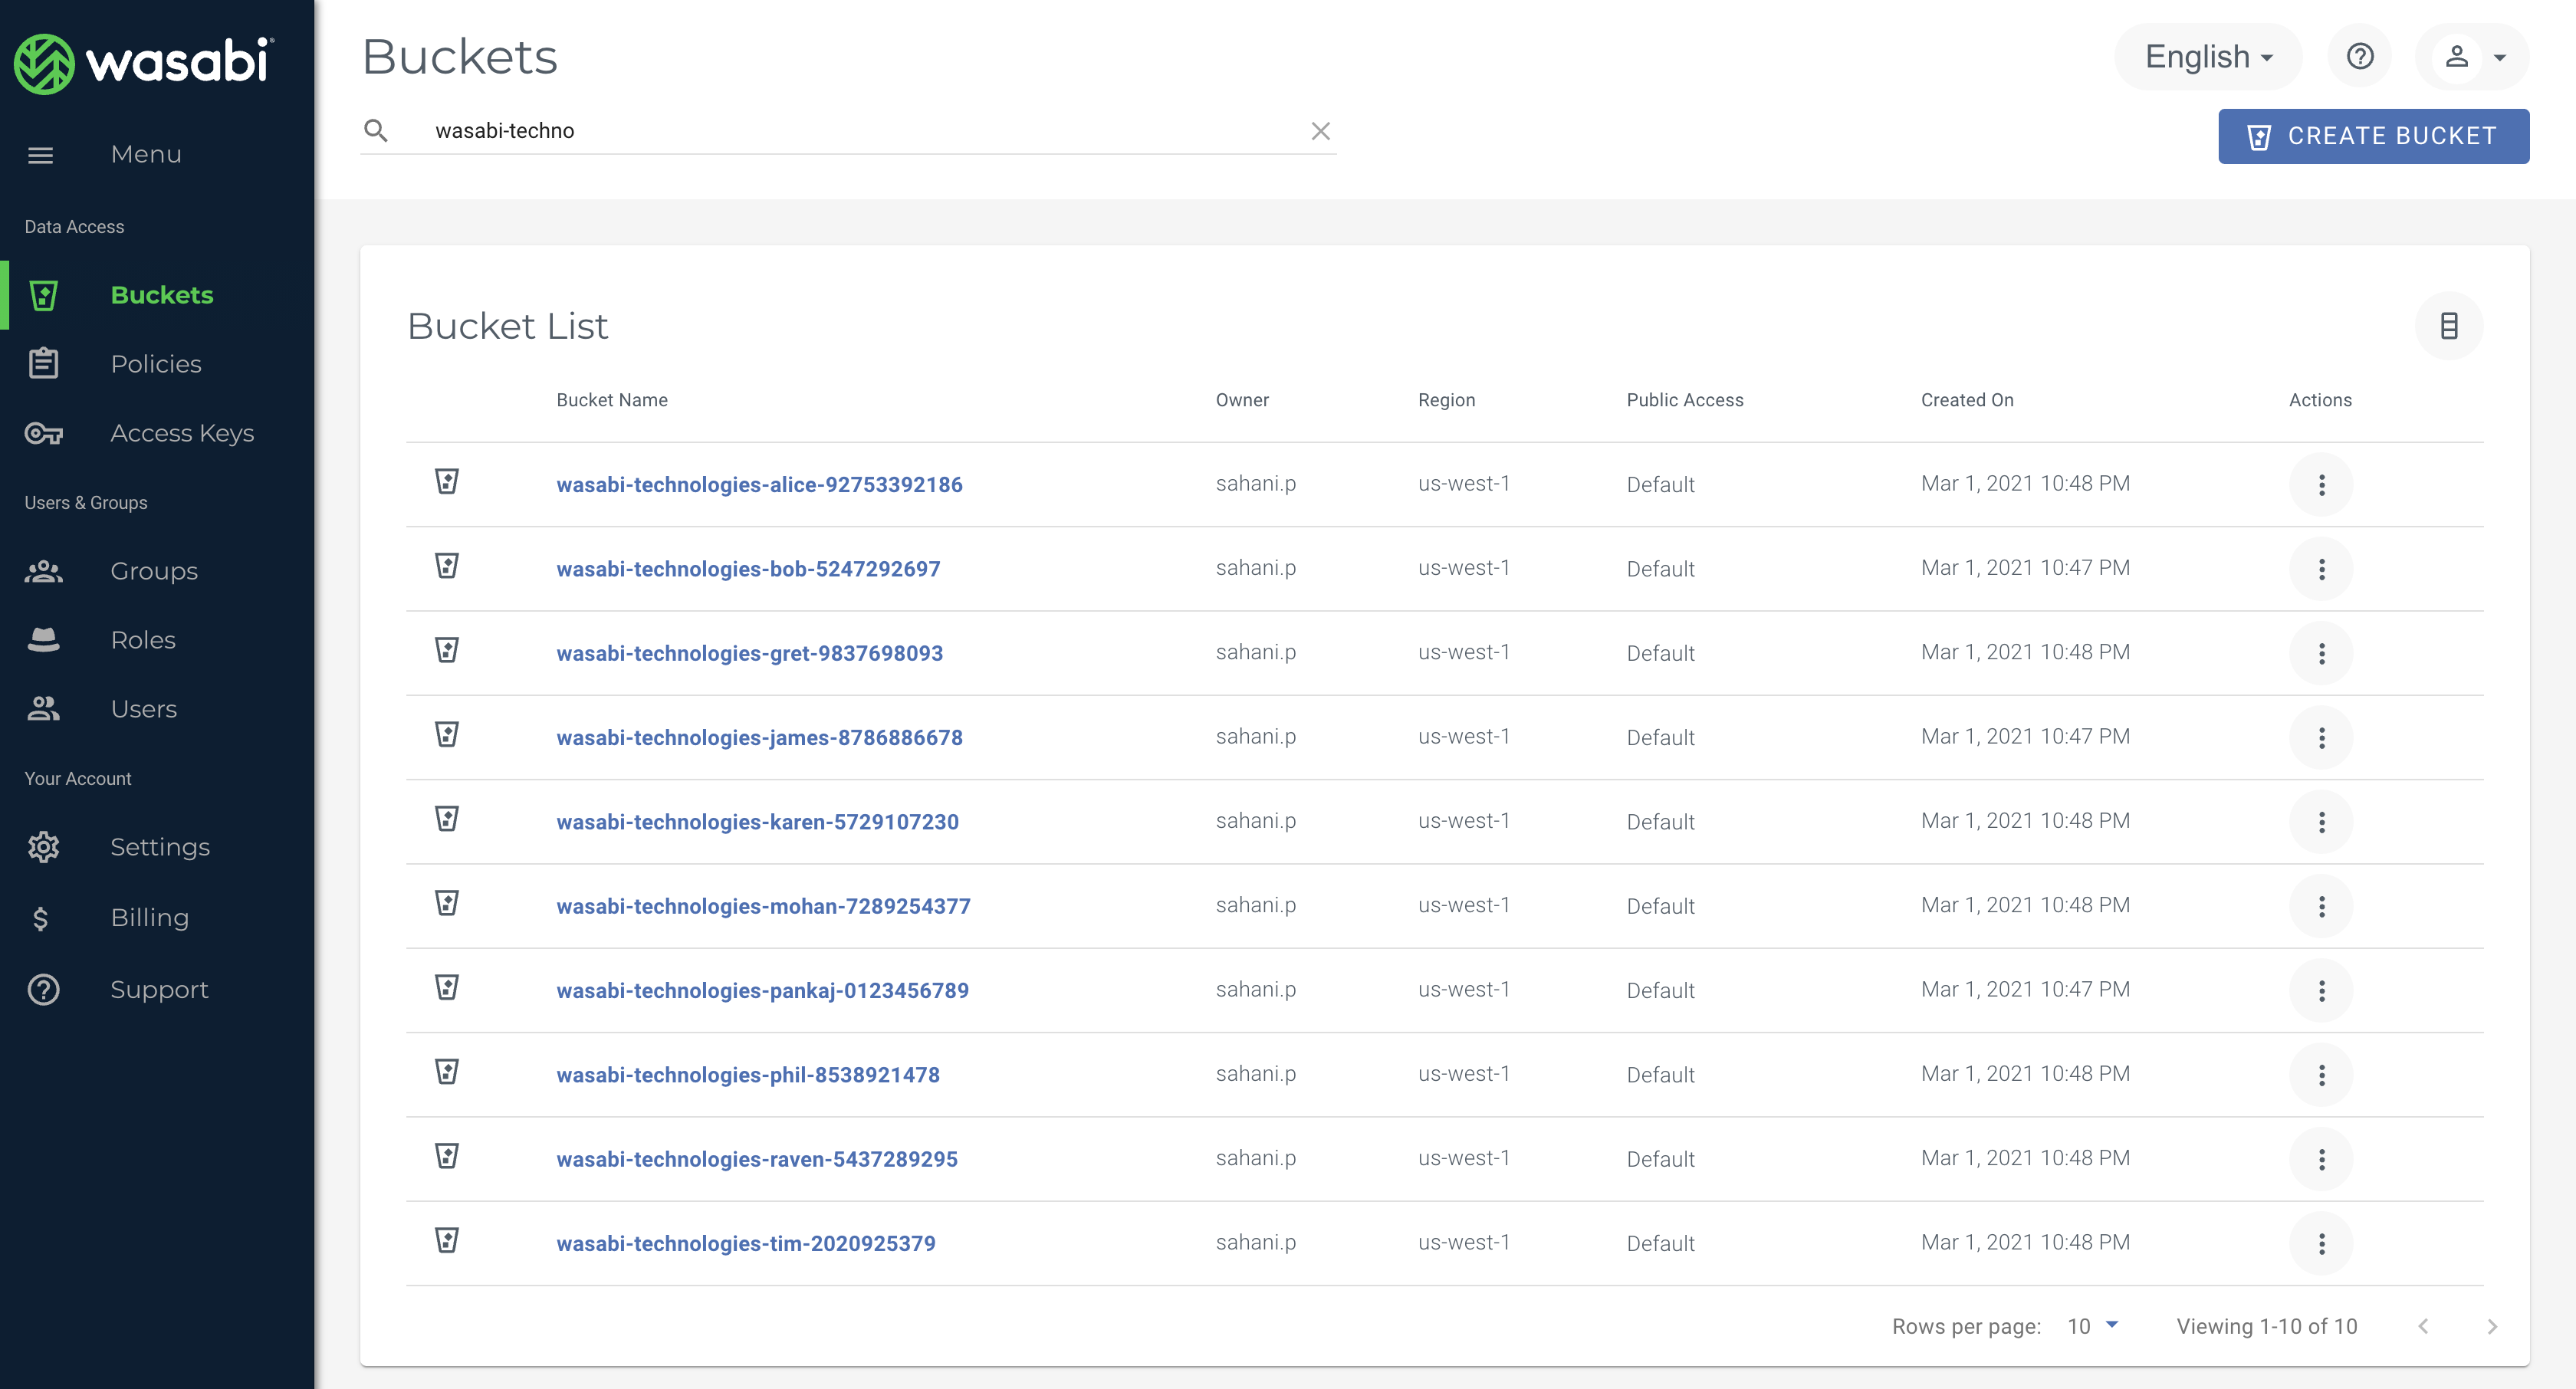
You can see the buckets created and test the API keys to verify access separation
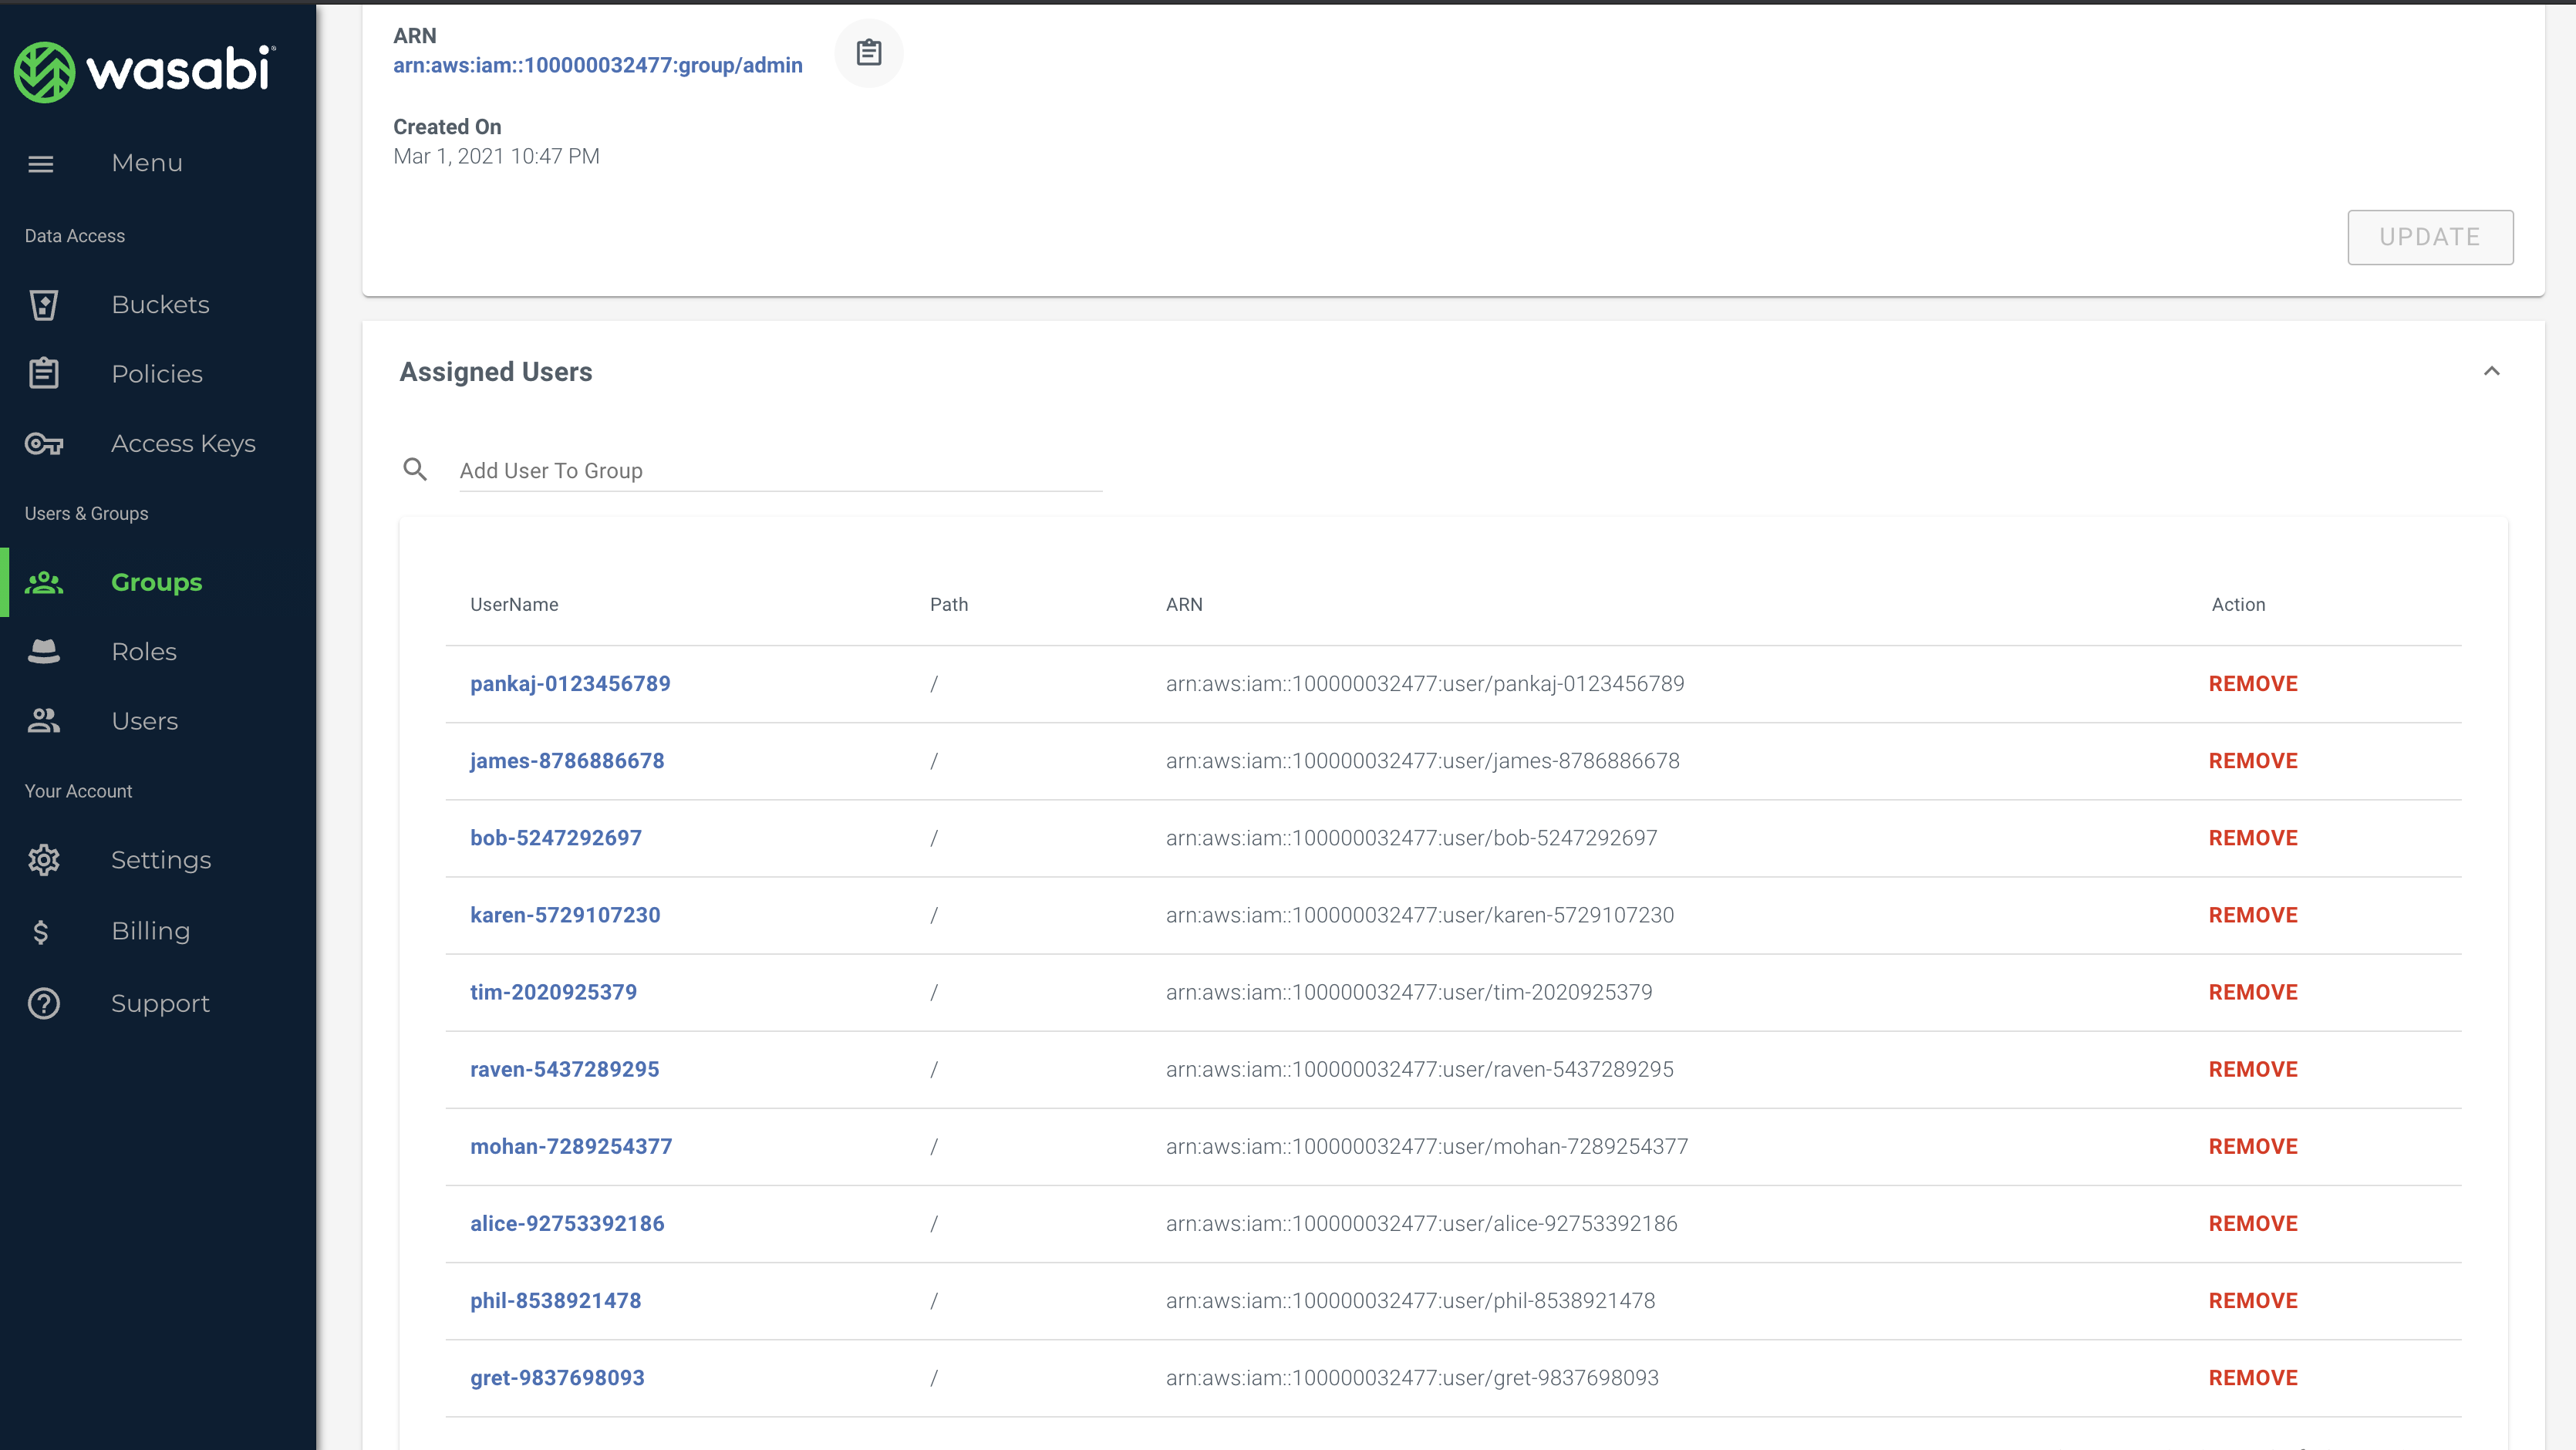
Group and users dropped inside them
Dynamic Policy
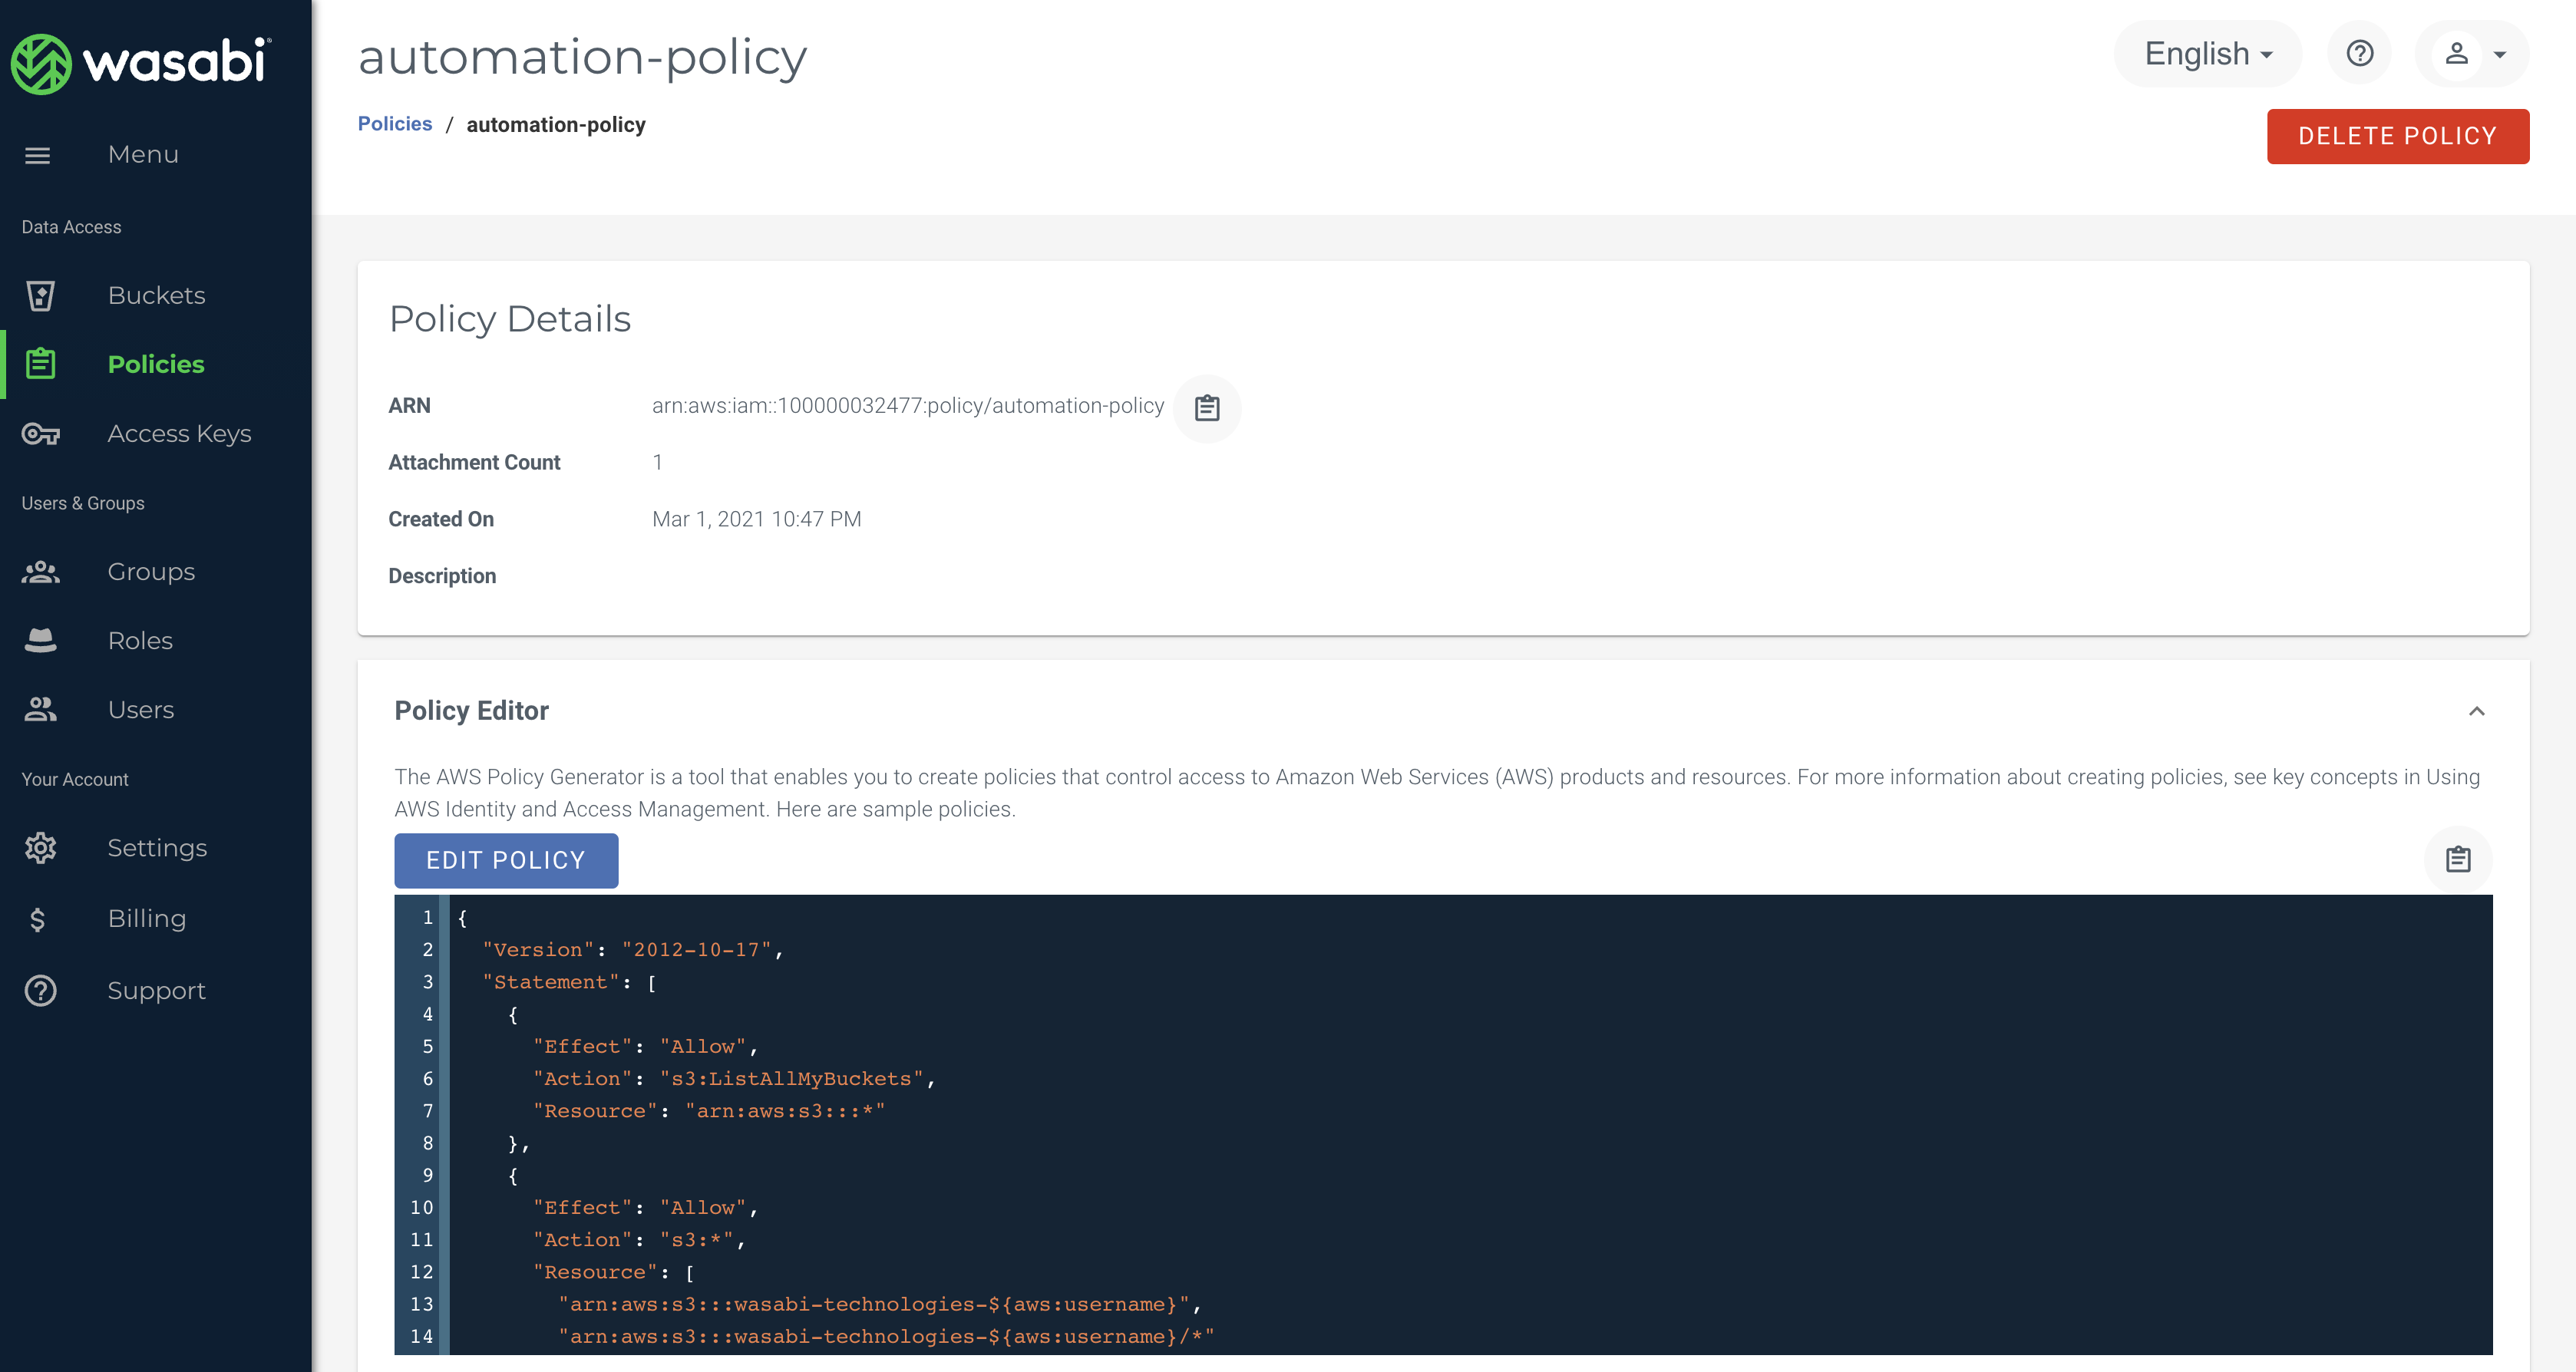
Policy attached to the group
