Dell Technologies NetWorker has been validated to be used with Wasabi cloud storage. As part of Dell's Data Protection Suite, NetWorker offers comprehensive data protection software applications and tools for enterprises.
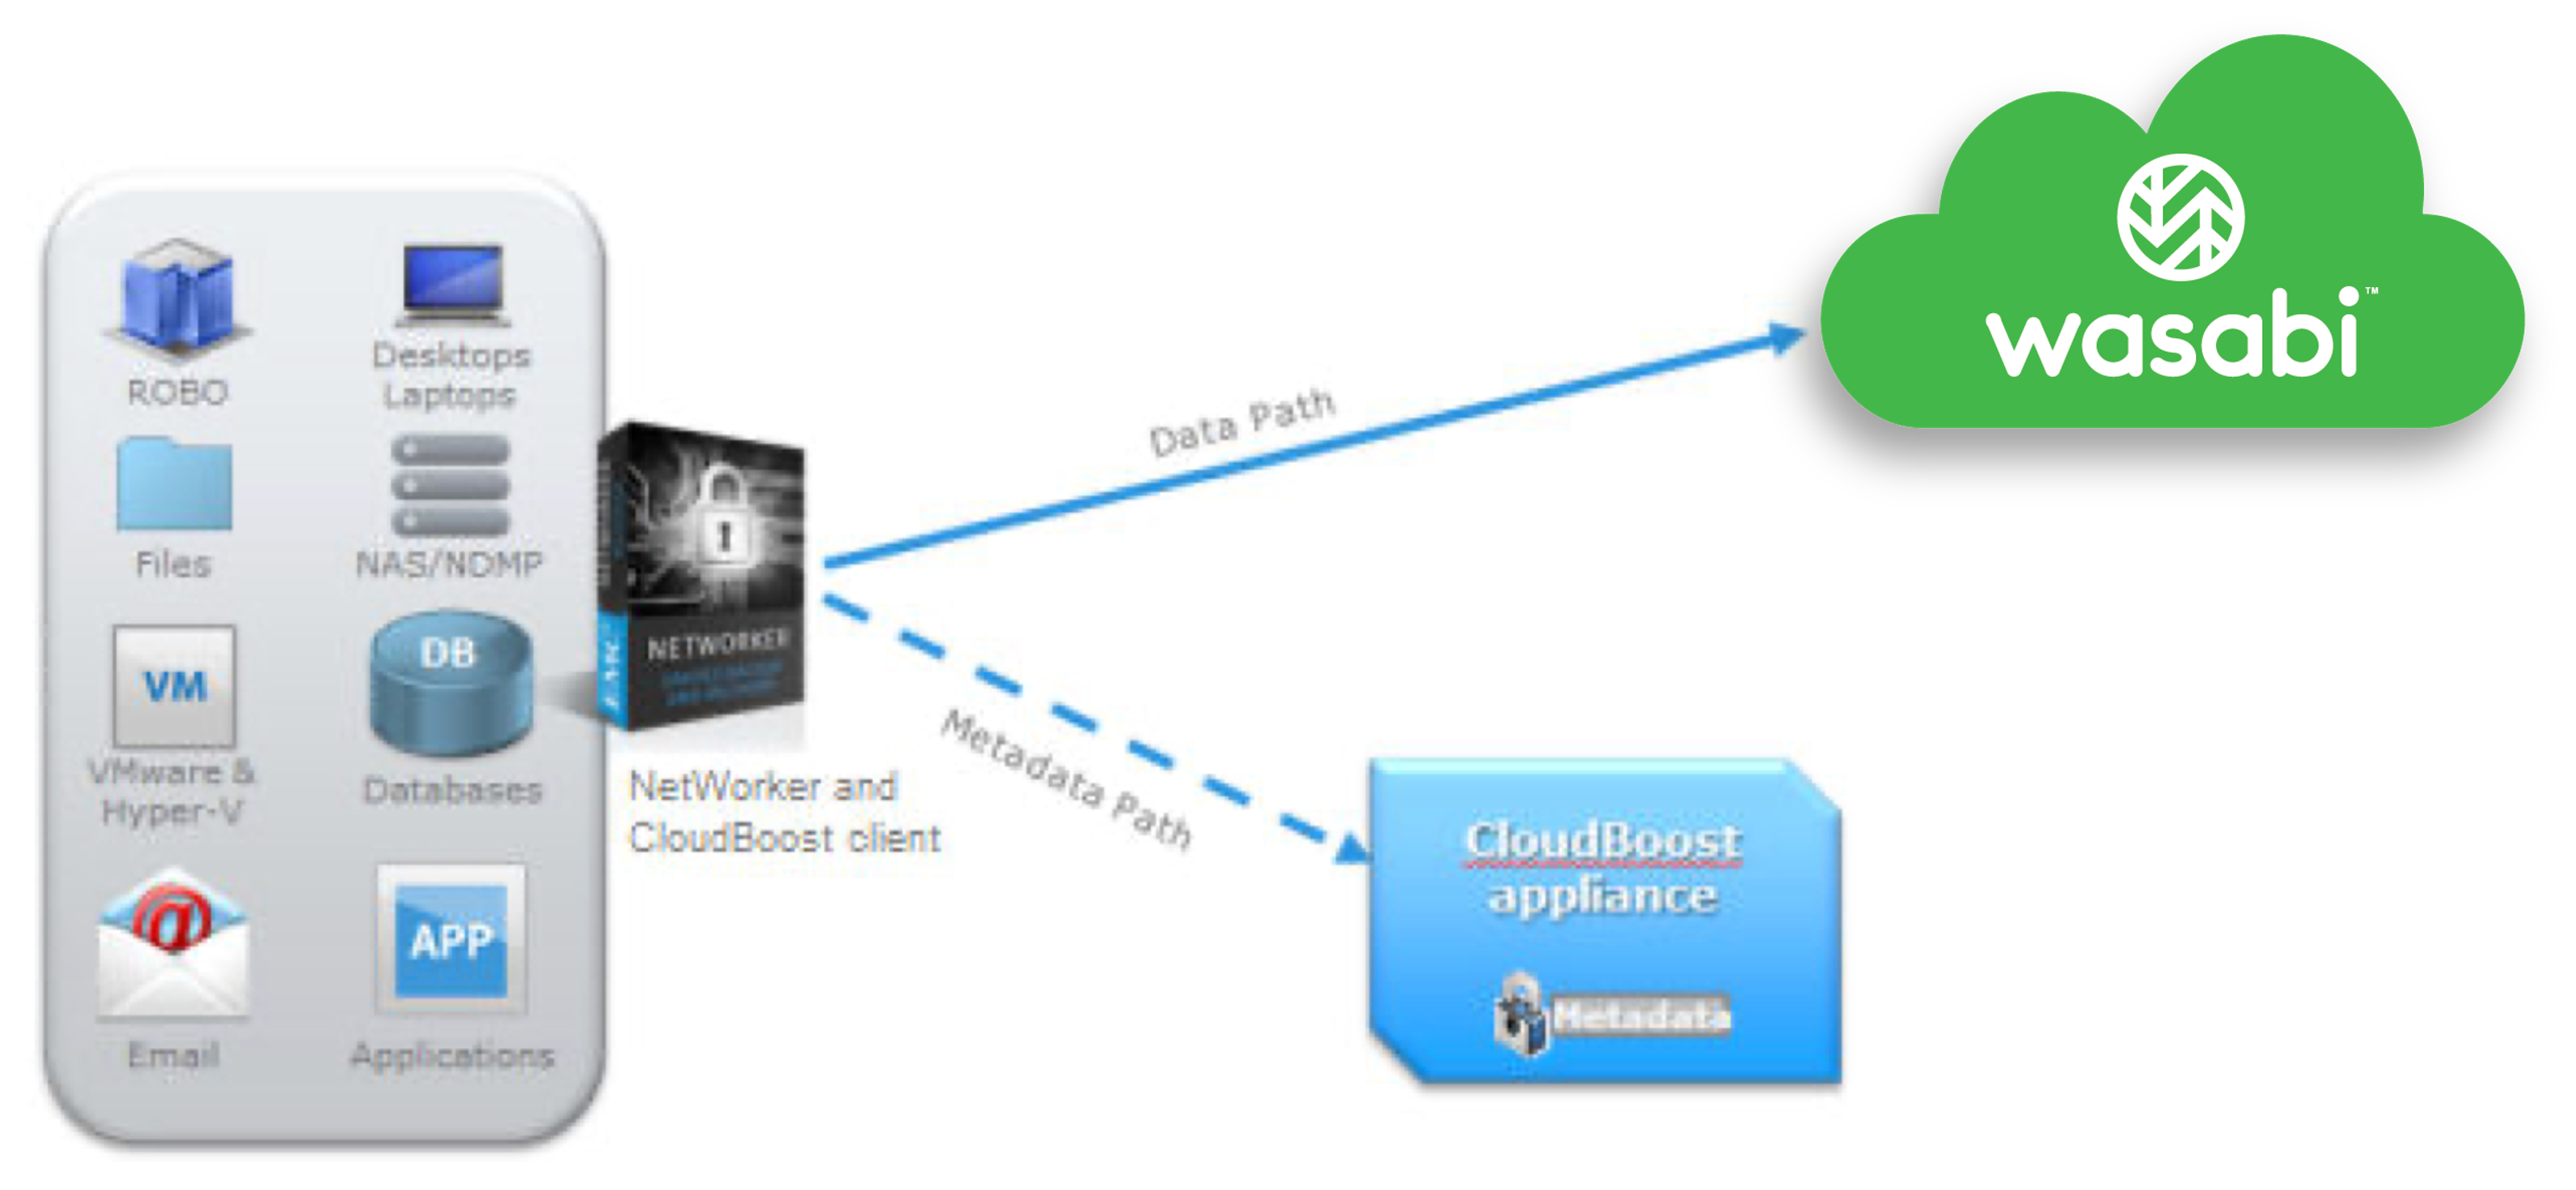
A NetWorker with CloudBoost environment can extend onsite data protection to Wasabi's cloud storage. This solution allows clients to send backups directly to Wasabi's object storage with only the metadata being stored in the CloudBoost appliance.
Requirements
An active Wasabi account.
NetWorker software deployed and licensed.
CloudBoost appliance deployed and configured to transfer data to Wasabi. For more information on configuring CloudBoost, review Using Dell CloudBoost with Wasabi.
CloudBoost and NetWorker FQDNs are resolvable through DNS.
Architecture Diagram
Configuring on CloudBoost Appliance
On the CloudBoost appliance, enable remote client mounts. Remote control mounts are required to integrate NetWorker with CloudBoost. Follow the steps below to do so:
Open a CLI window for the appliance.
Log in with the administrator username and password.
Type the following command:
remote-mount-password enable <password>
where <password> is the new password for the remotebackup user.
Adding the CloudBoost Device on NetWorker
To receive backup or clone data, configure a CloudBoost device on NetWorker. Below are the steps to do so:
Log in to the NetWorker UI. Click Devices.

Right click on Devices.
Click New Device Wizard.

In the New Device Wizard, select CloudBoost.
Click Next.

Review the check list and click Next.

Select Create New CloudBoost Appliance in the CloudBoost configuration options window and enter the following details:
— Appliance Name
— FQDN for the appliance
— CloudBoost credentials - username and password
Click Next to continue creating a CloudBoost device.

Click New Folder. This will create a new folder at the specified path in the CloudBoost file system.
Select the folder and click Next.

Select the Pool Type as Backup. Click Create and use a new Pool.
Enter a name for the new pool. Click Next.

Review the device configuration settings. Click Configure to create the device.
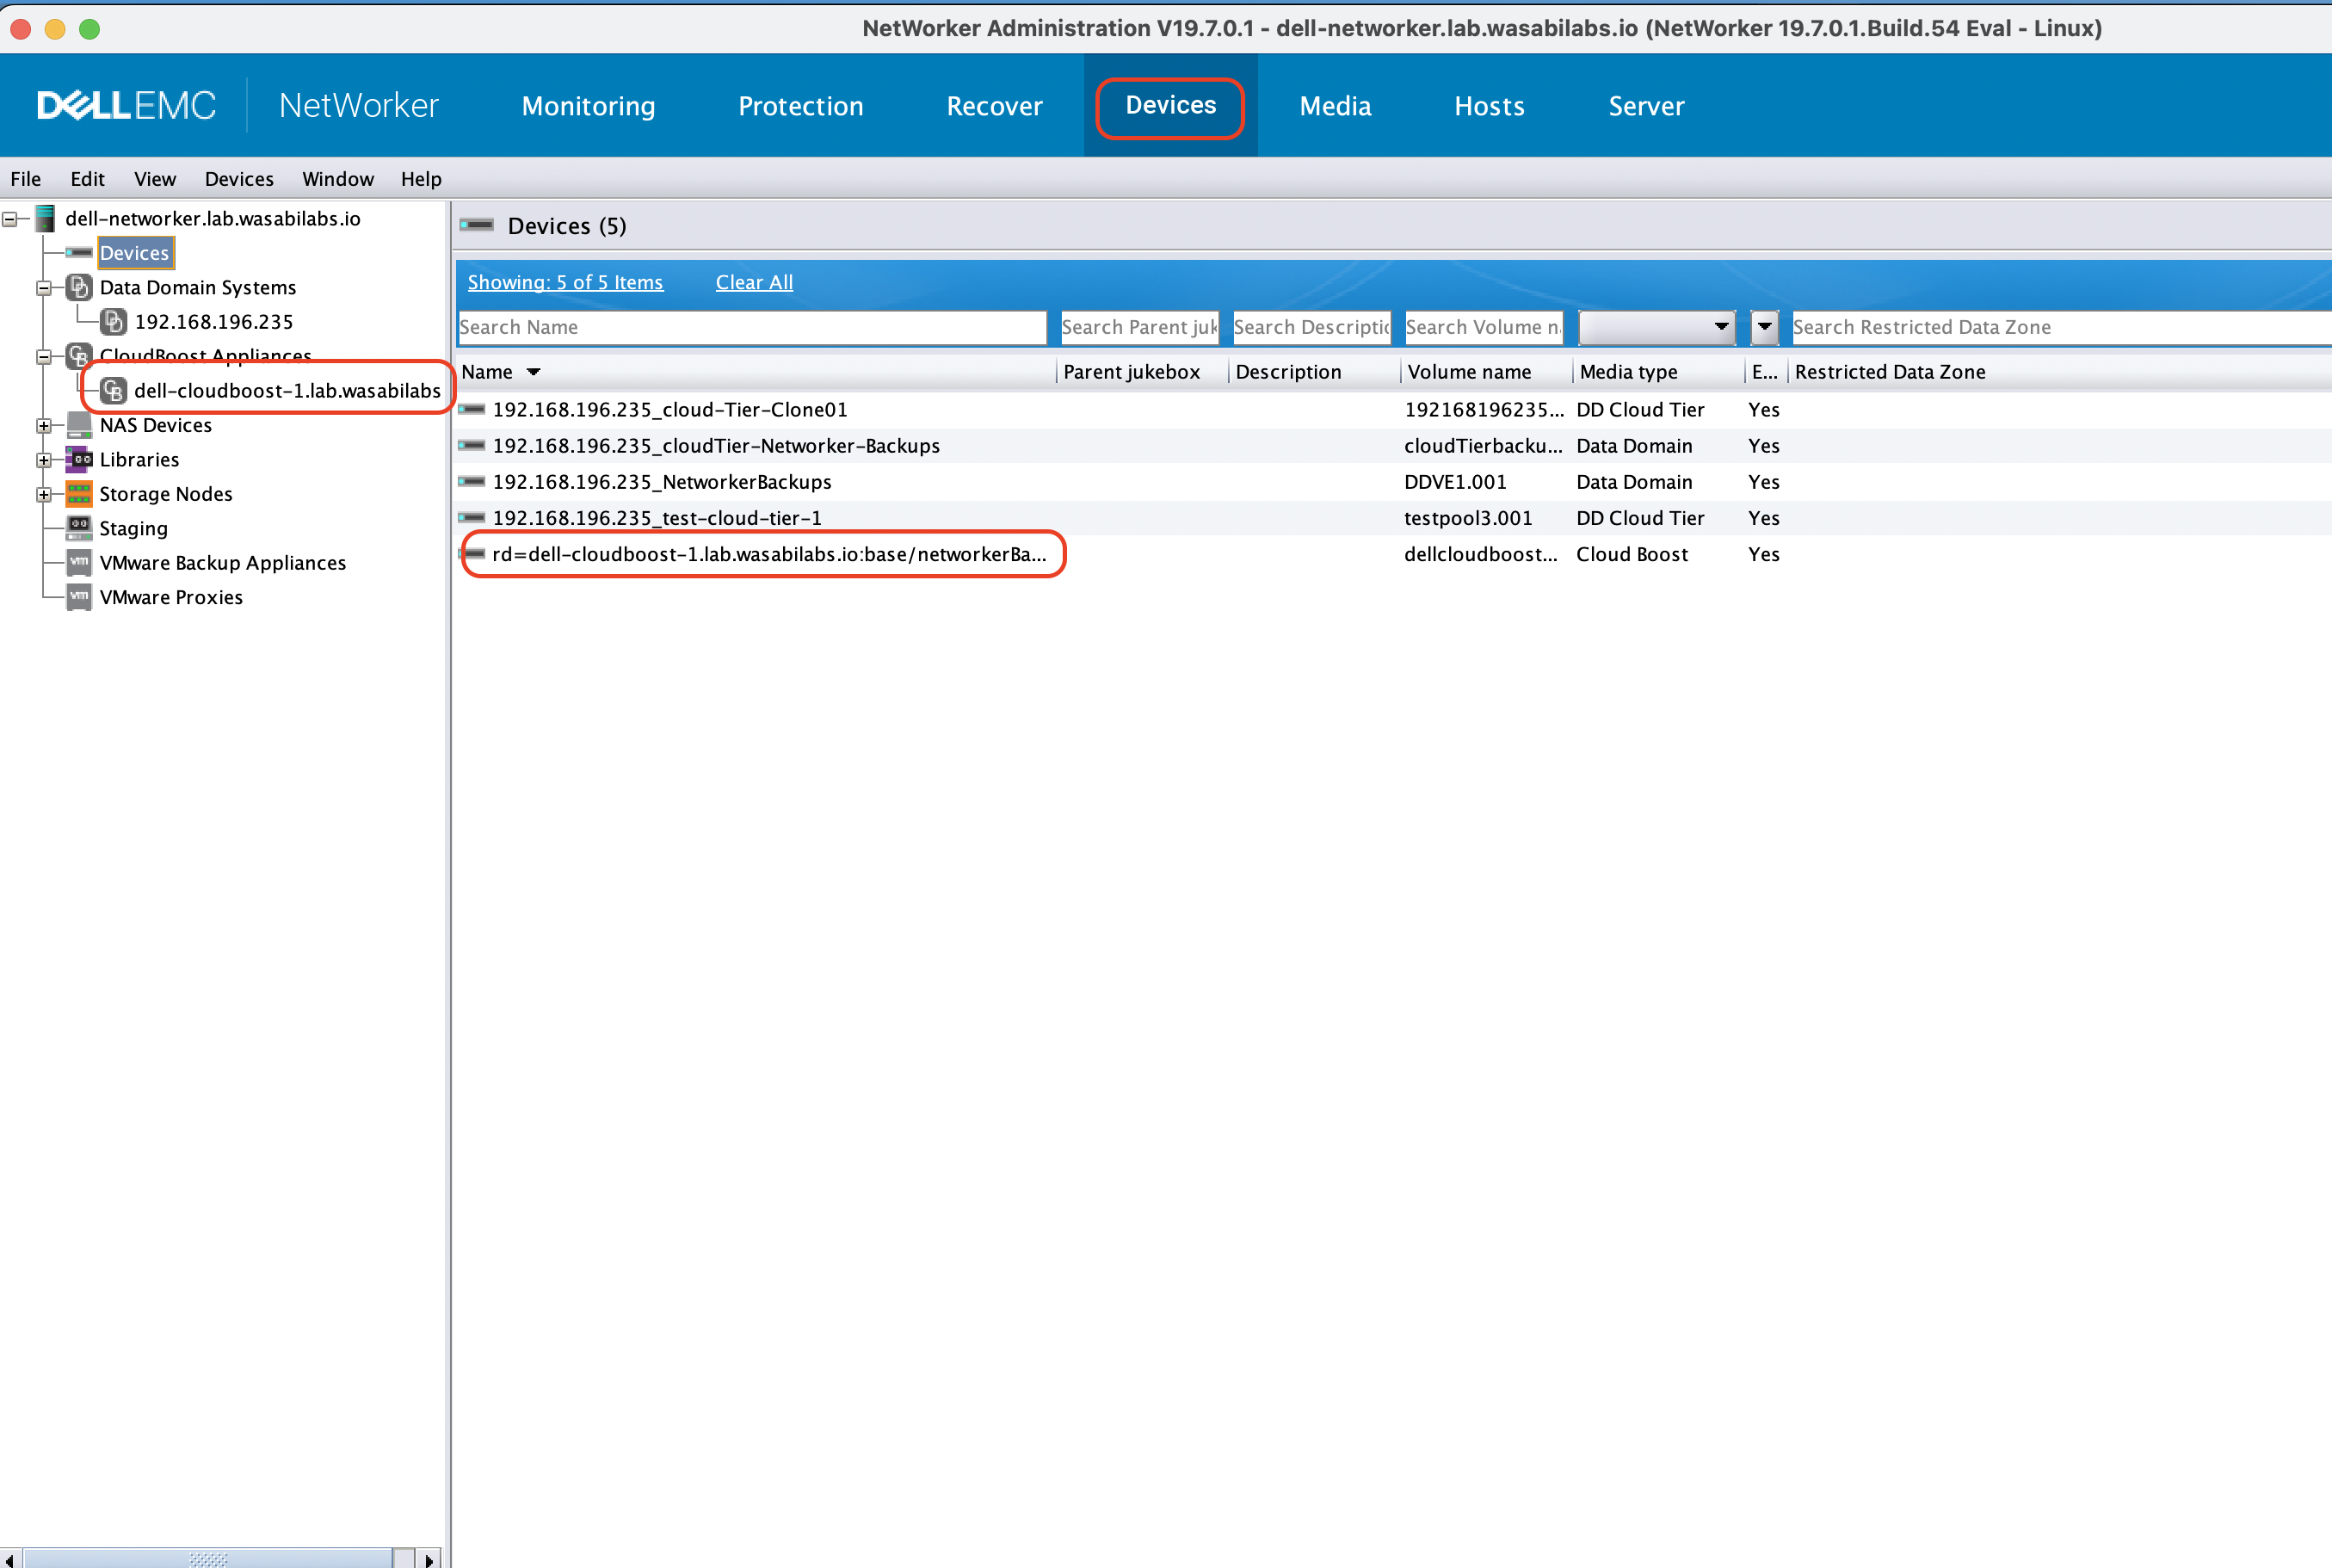
The CloudBoost device is now listed under the devices section.
Click the Devices tab. On the left panel, click Devices to list all devices added to NetWorker.
Creating Backups on NetWorker
The following steps describe how to create a policy and workflow for backing up data to be stored on Wasabi. The following steps use the CloudBoost device configured on NetWorker, as described above.
Log in to the NetWorker Administration GUI.
Click Protection.

Right click on Policies.
Click New.

In the Create Policy window, enter the Name. Click OK to create a new policy.

To create a new Workflow, click Create a new Workflow.

In the New Workflow window, enter the Name for the workflow.
Add the group that you want the workflow to run on by clicking the +.
Click Add to create and add a new Action.

The Policy Action Wizard opens. Enter the Name for the Action and select Action Type as Backup. Optionally, select the Period and days of the week to schedule backups.
Click Next to specify Backup Options.

In the Specify the Backup Options window, click the pencil icon next to the Destination Storage Node list.

In the Specify the Backup Options window, ensure that the CloudBoost server is selected as a Destination Storage Node. Select the CloudBoost system as the Destination Pool. Click Next.

Optionally, in the Advanced Options window, set the advanced options. Click Next.

Review the configuration for the new Action. Click on Configure.

Click OK to complete creating the new Workflow.

Running Backups to Store Data on Wasabi
Once you have created the policy and workflow for creating backups, backups will run as per the schedule in the protection policy. Manual backups can be initiated from the Monitoring tab in NetWorker. The following steps detail how to initiate manual backups and see the logs:
Click the Monitoring tab on the NetWorker GUI.
Expand the policy that you want to run by clicking the + (plus sign) beside the policy name.
Right click on the workflow that you want to initiate and click Start. This will run the protection workflow.

Once the backup workflow has started, you can view the details by expanding the actions and clicking on each action.

To view log messages, hover over the Messages column on the right for each of the actions.

Recovering from Backups
Click the Recover tab.
Click New Recover in the menu bar under Recover.

Select the Recover Type and click Next.

Select the name of the host that needs to be recovered.
Click Next.
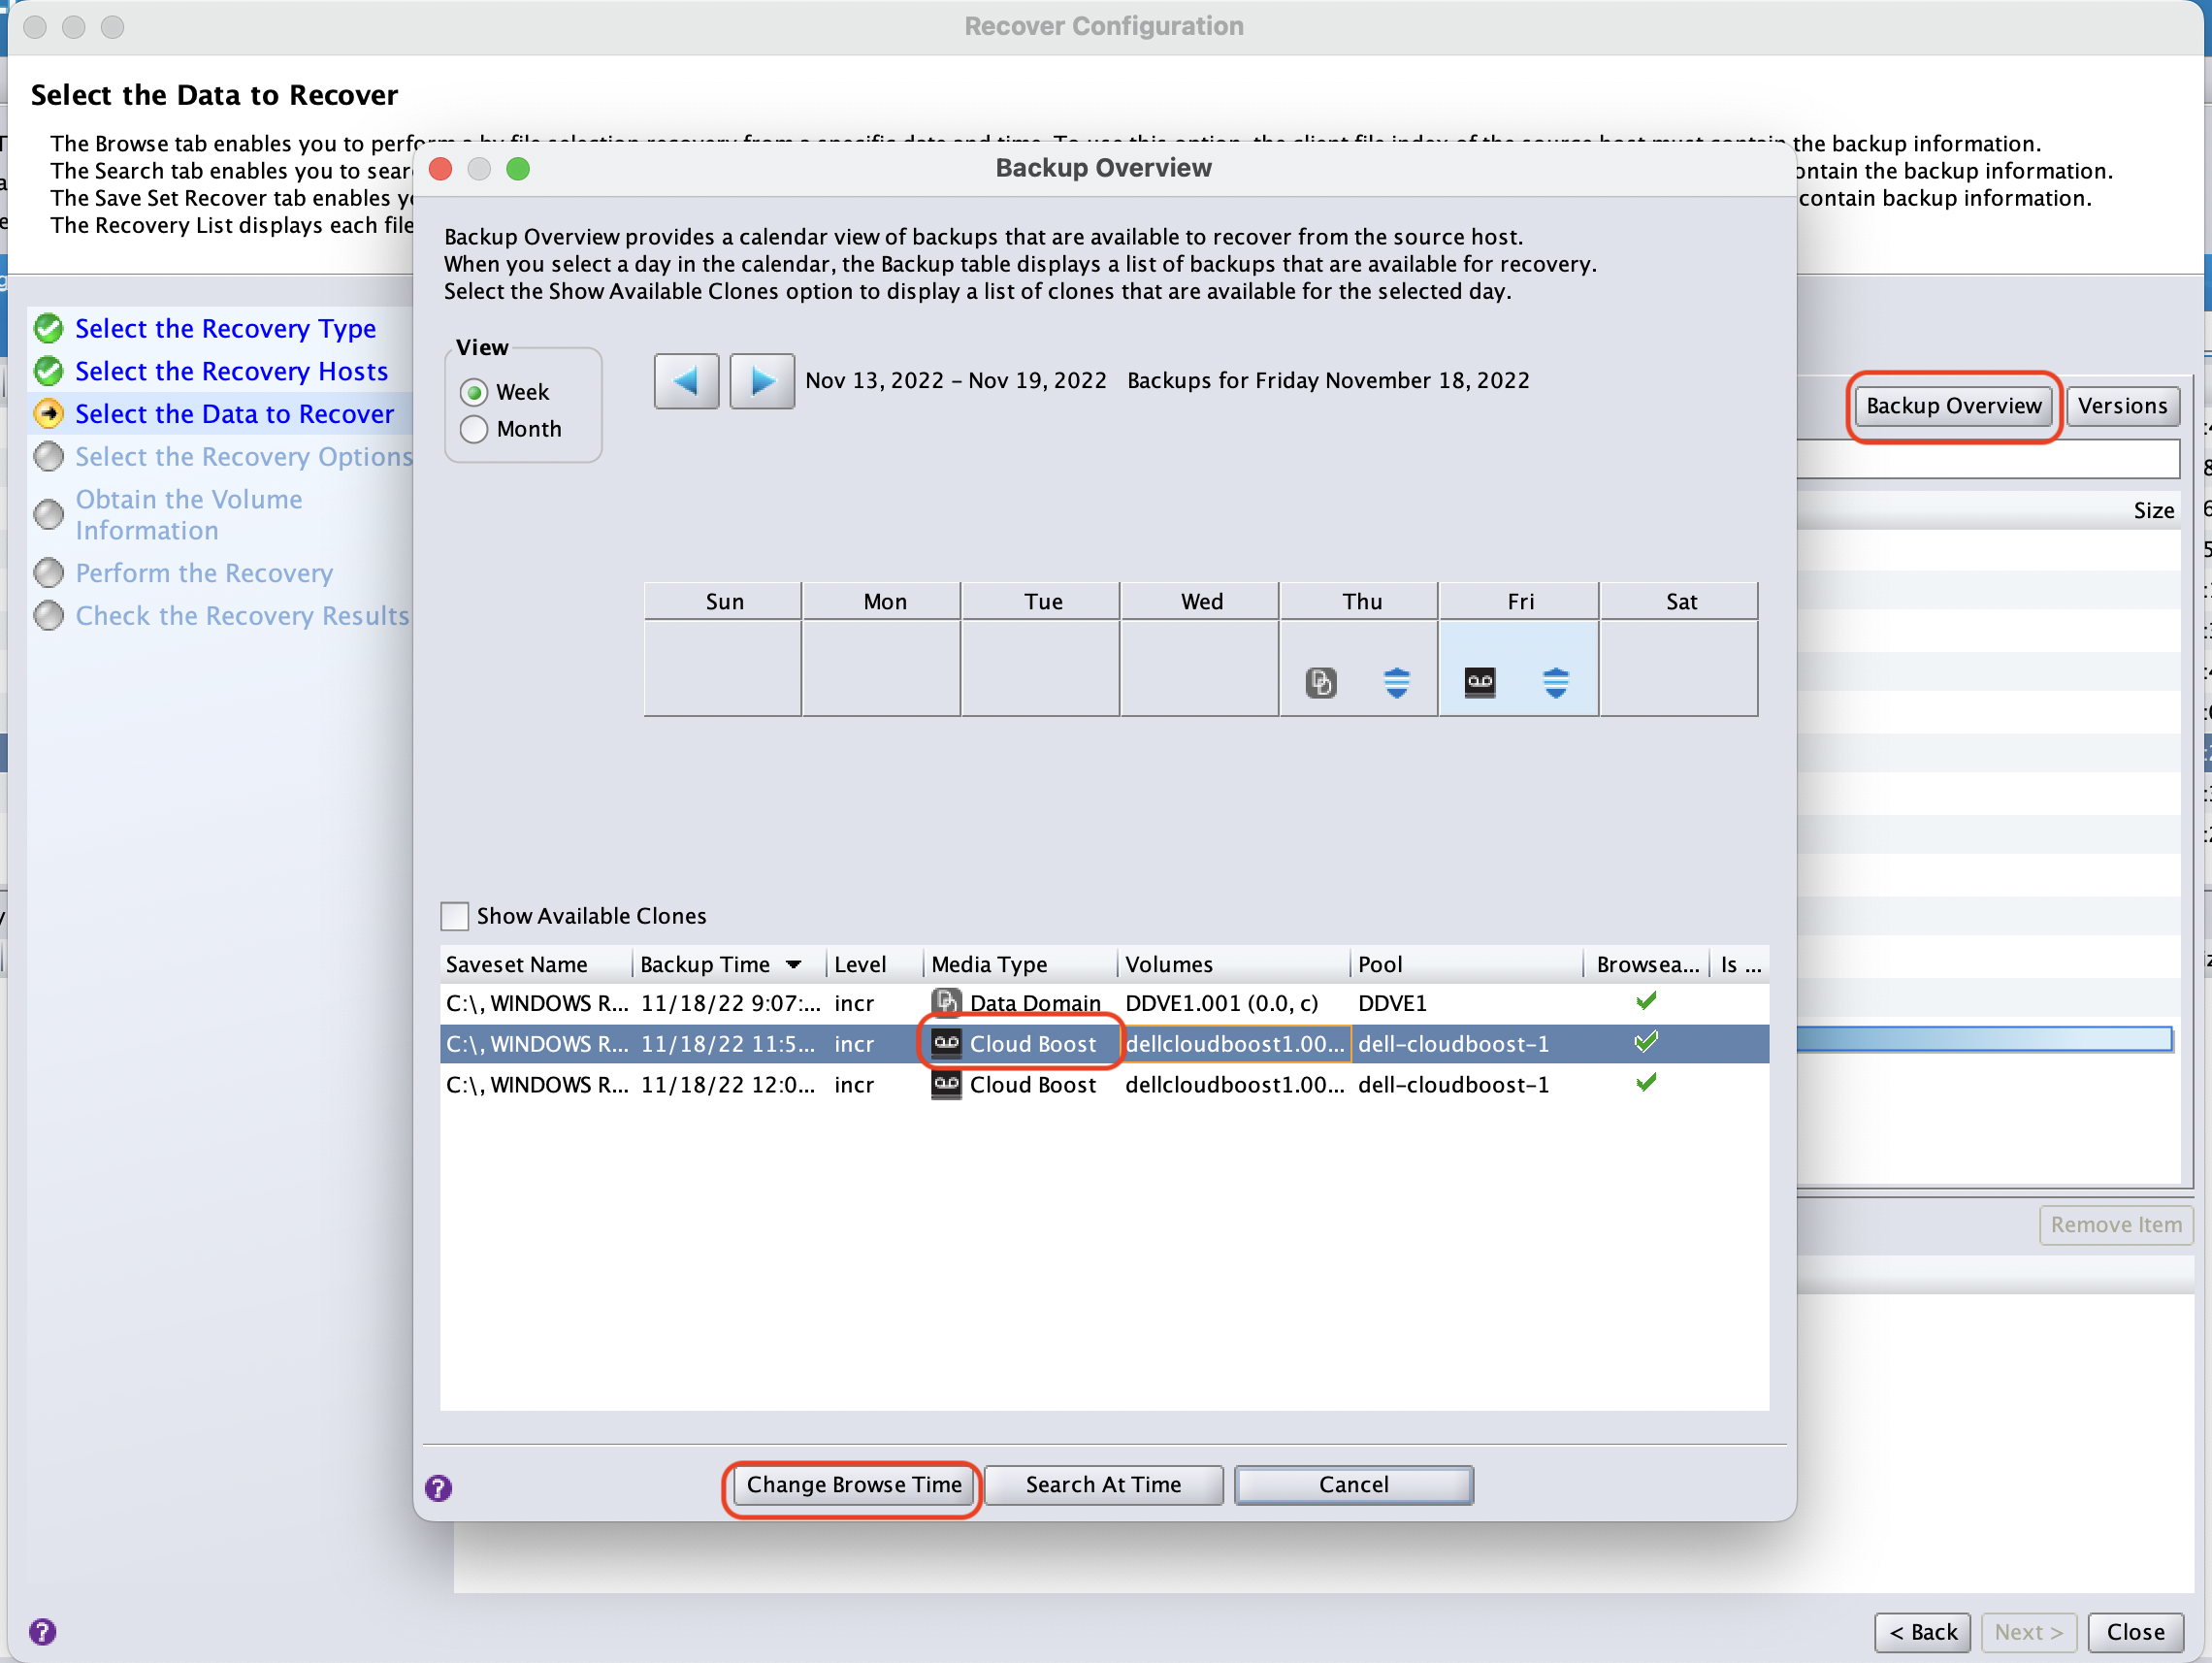
Select the backup set to be recovered. There are three ways to select a backup set:
Browse tab
— On this tab, click Backup Overview to get a calendar view per week or month.
— Select a day to list backups performed on that day.
— Select a backup set from the list and click Change Browse Time to go back to the data to recover window.
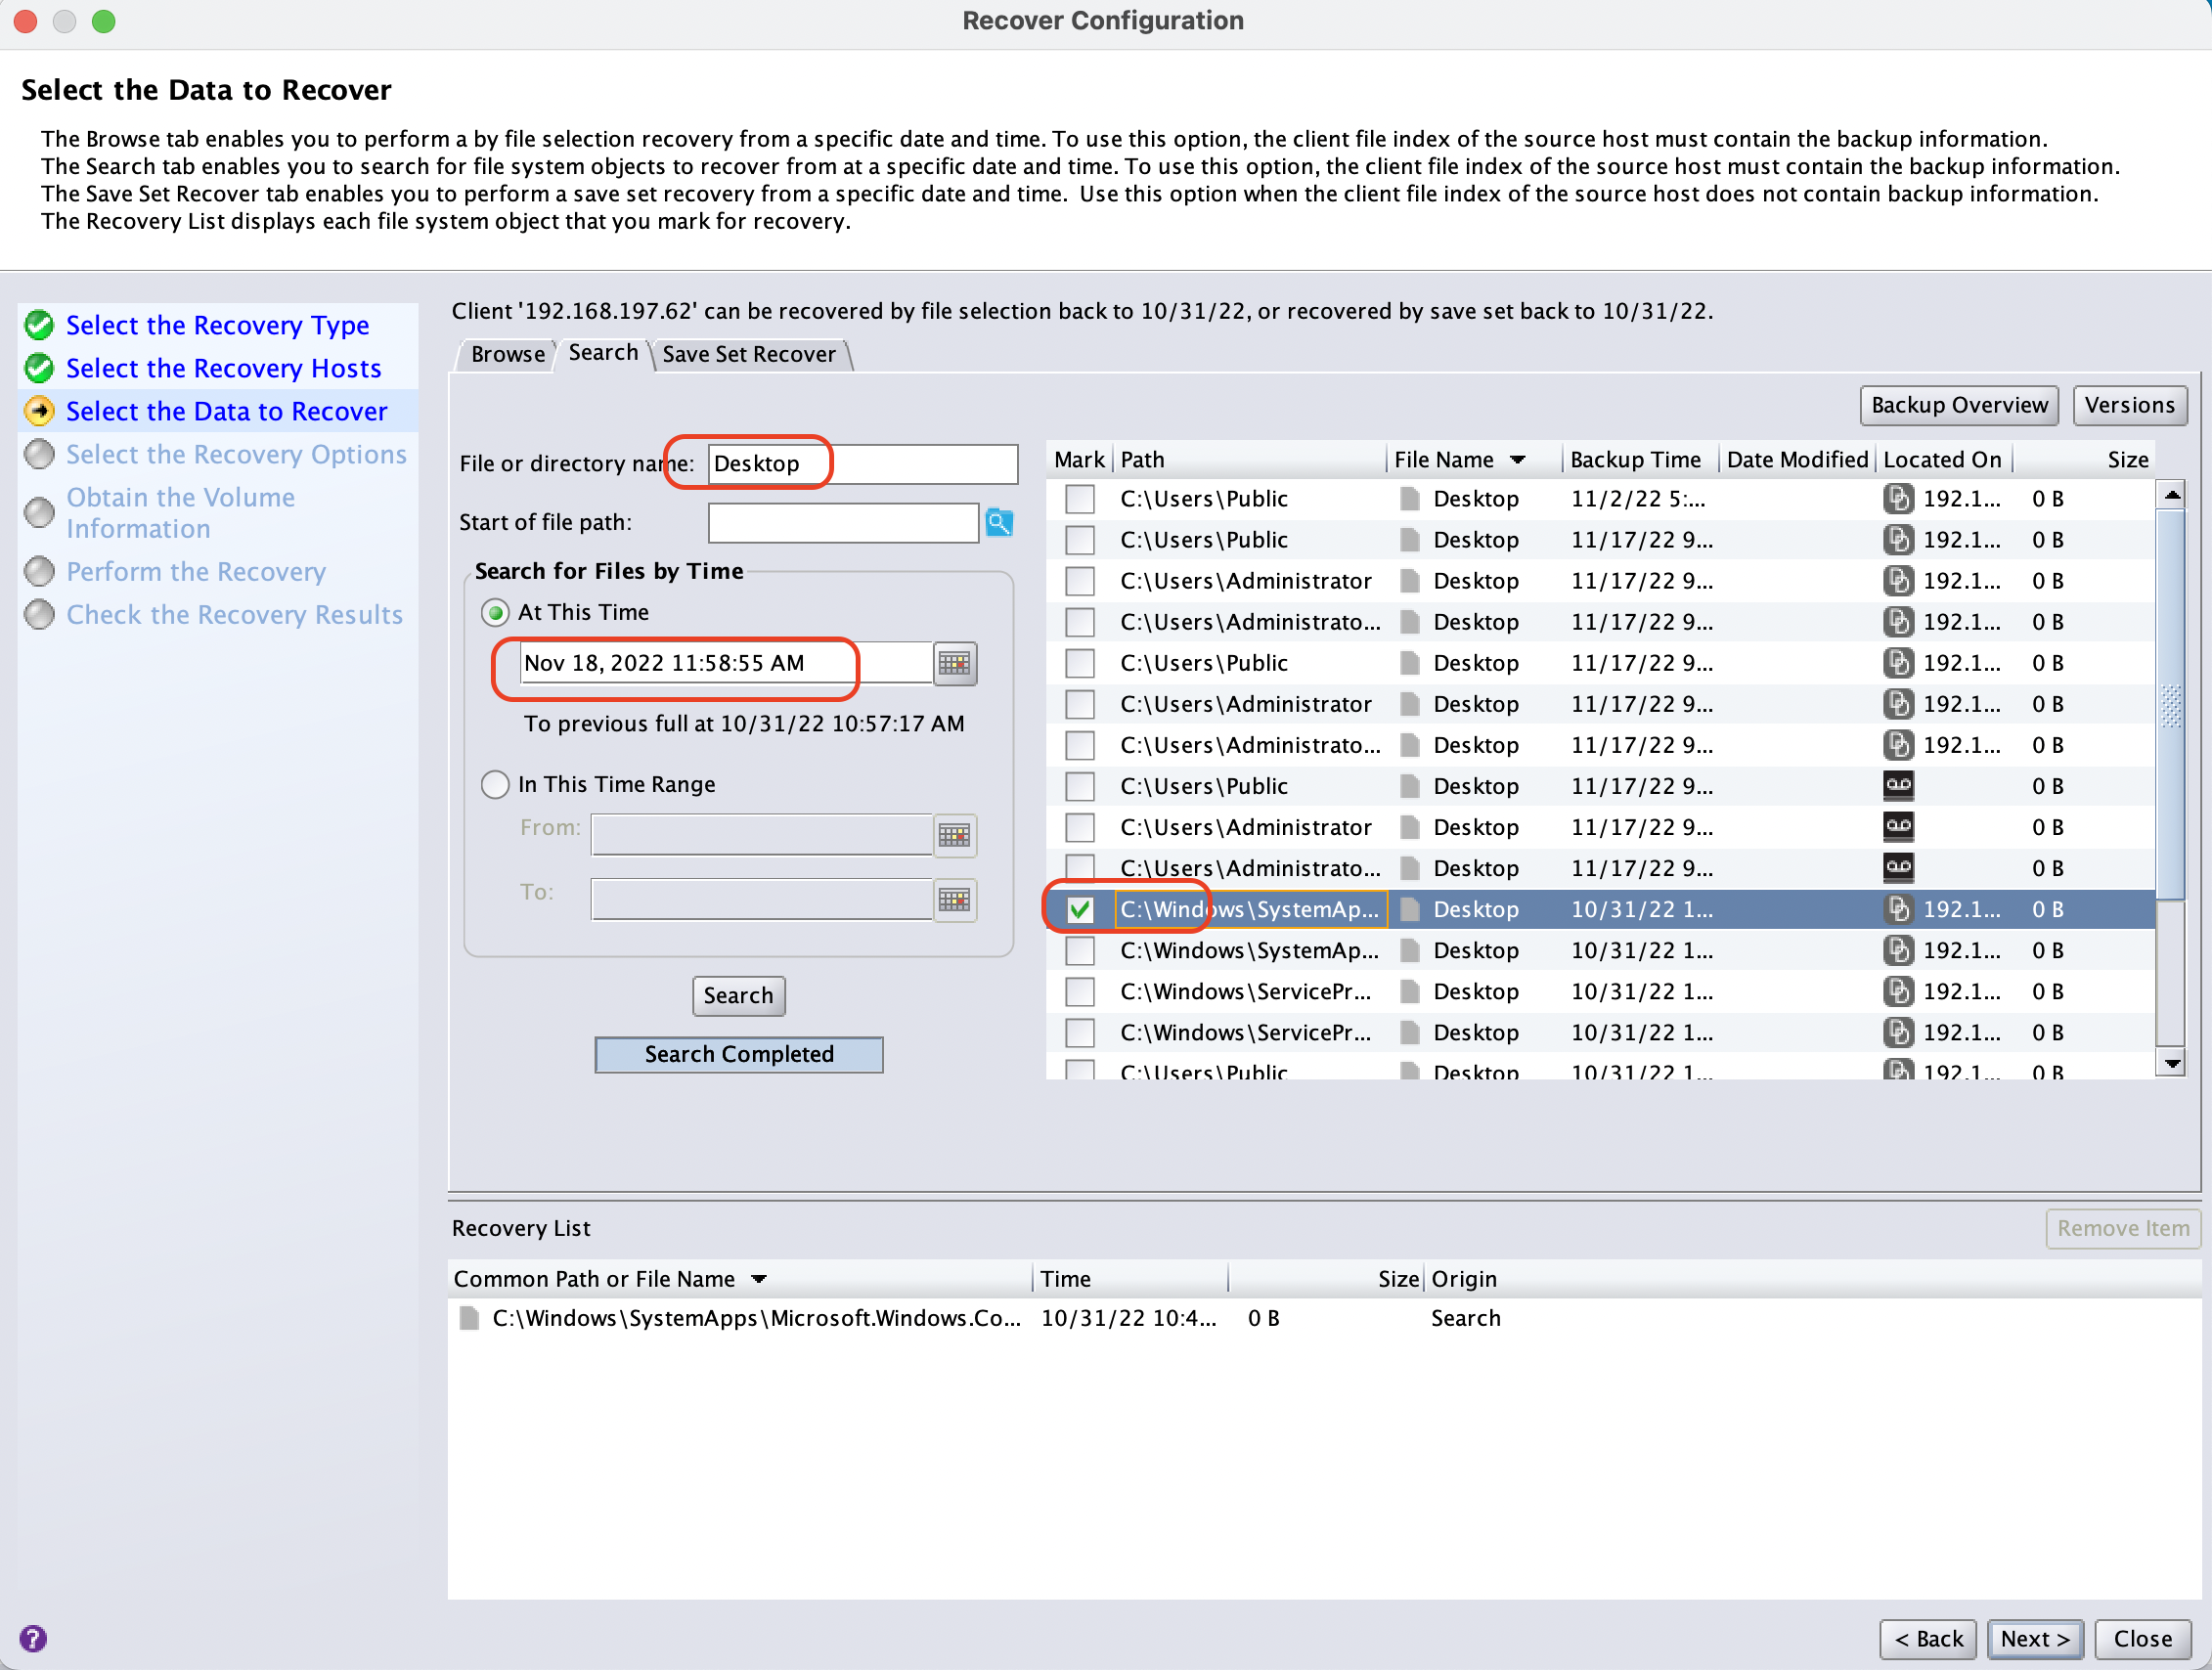
Search tab - You can search for and select backup sets by file or directory name, file path, or backup time.
Save Set Recover
Query the list of backup sets based on time of backup and select the backup you want to recover.
Click Next.

Select a path in the recovery options window. If New destination path is selected, click the folder icon on the right to select a patch.

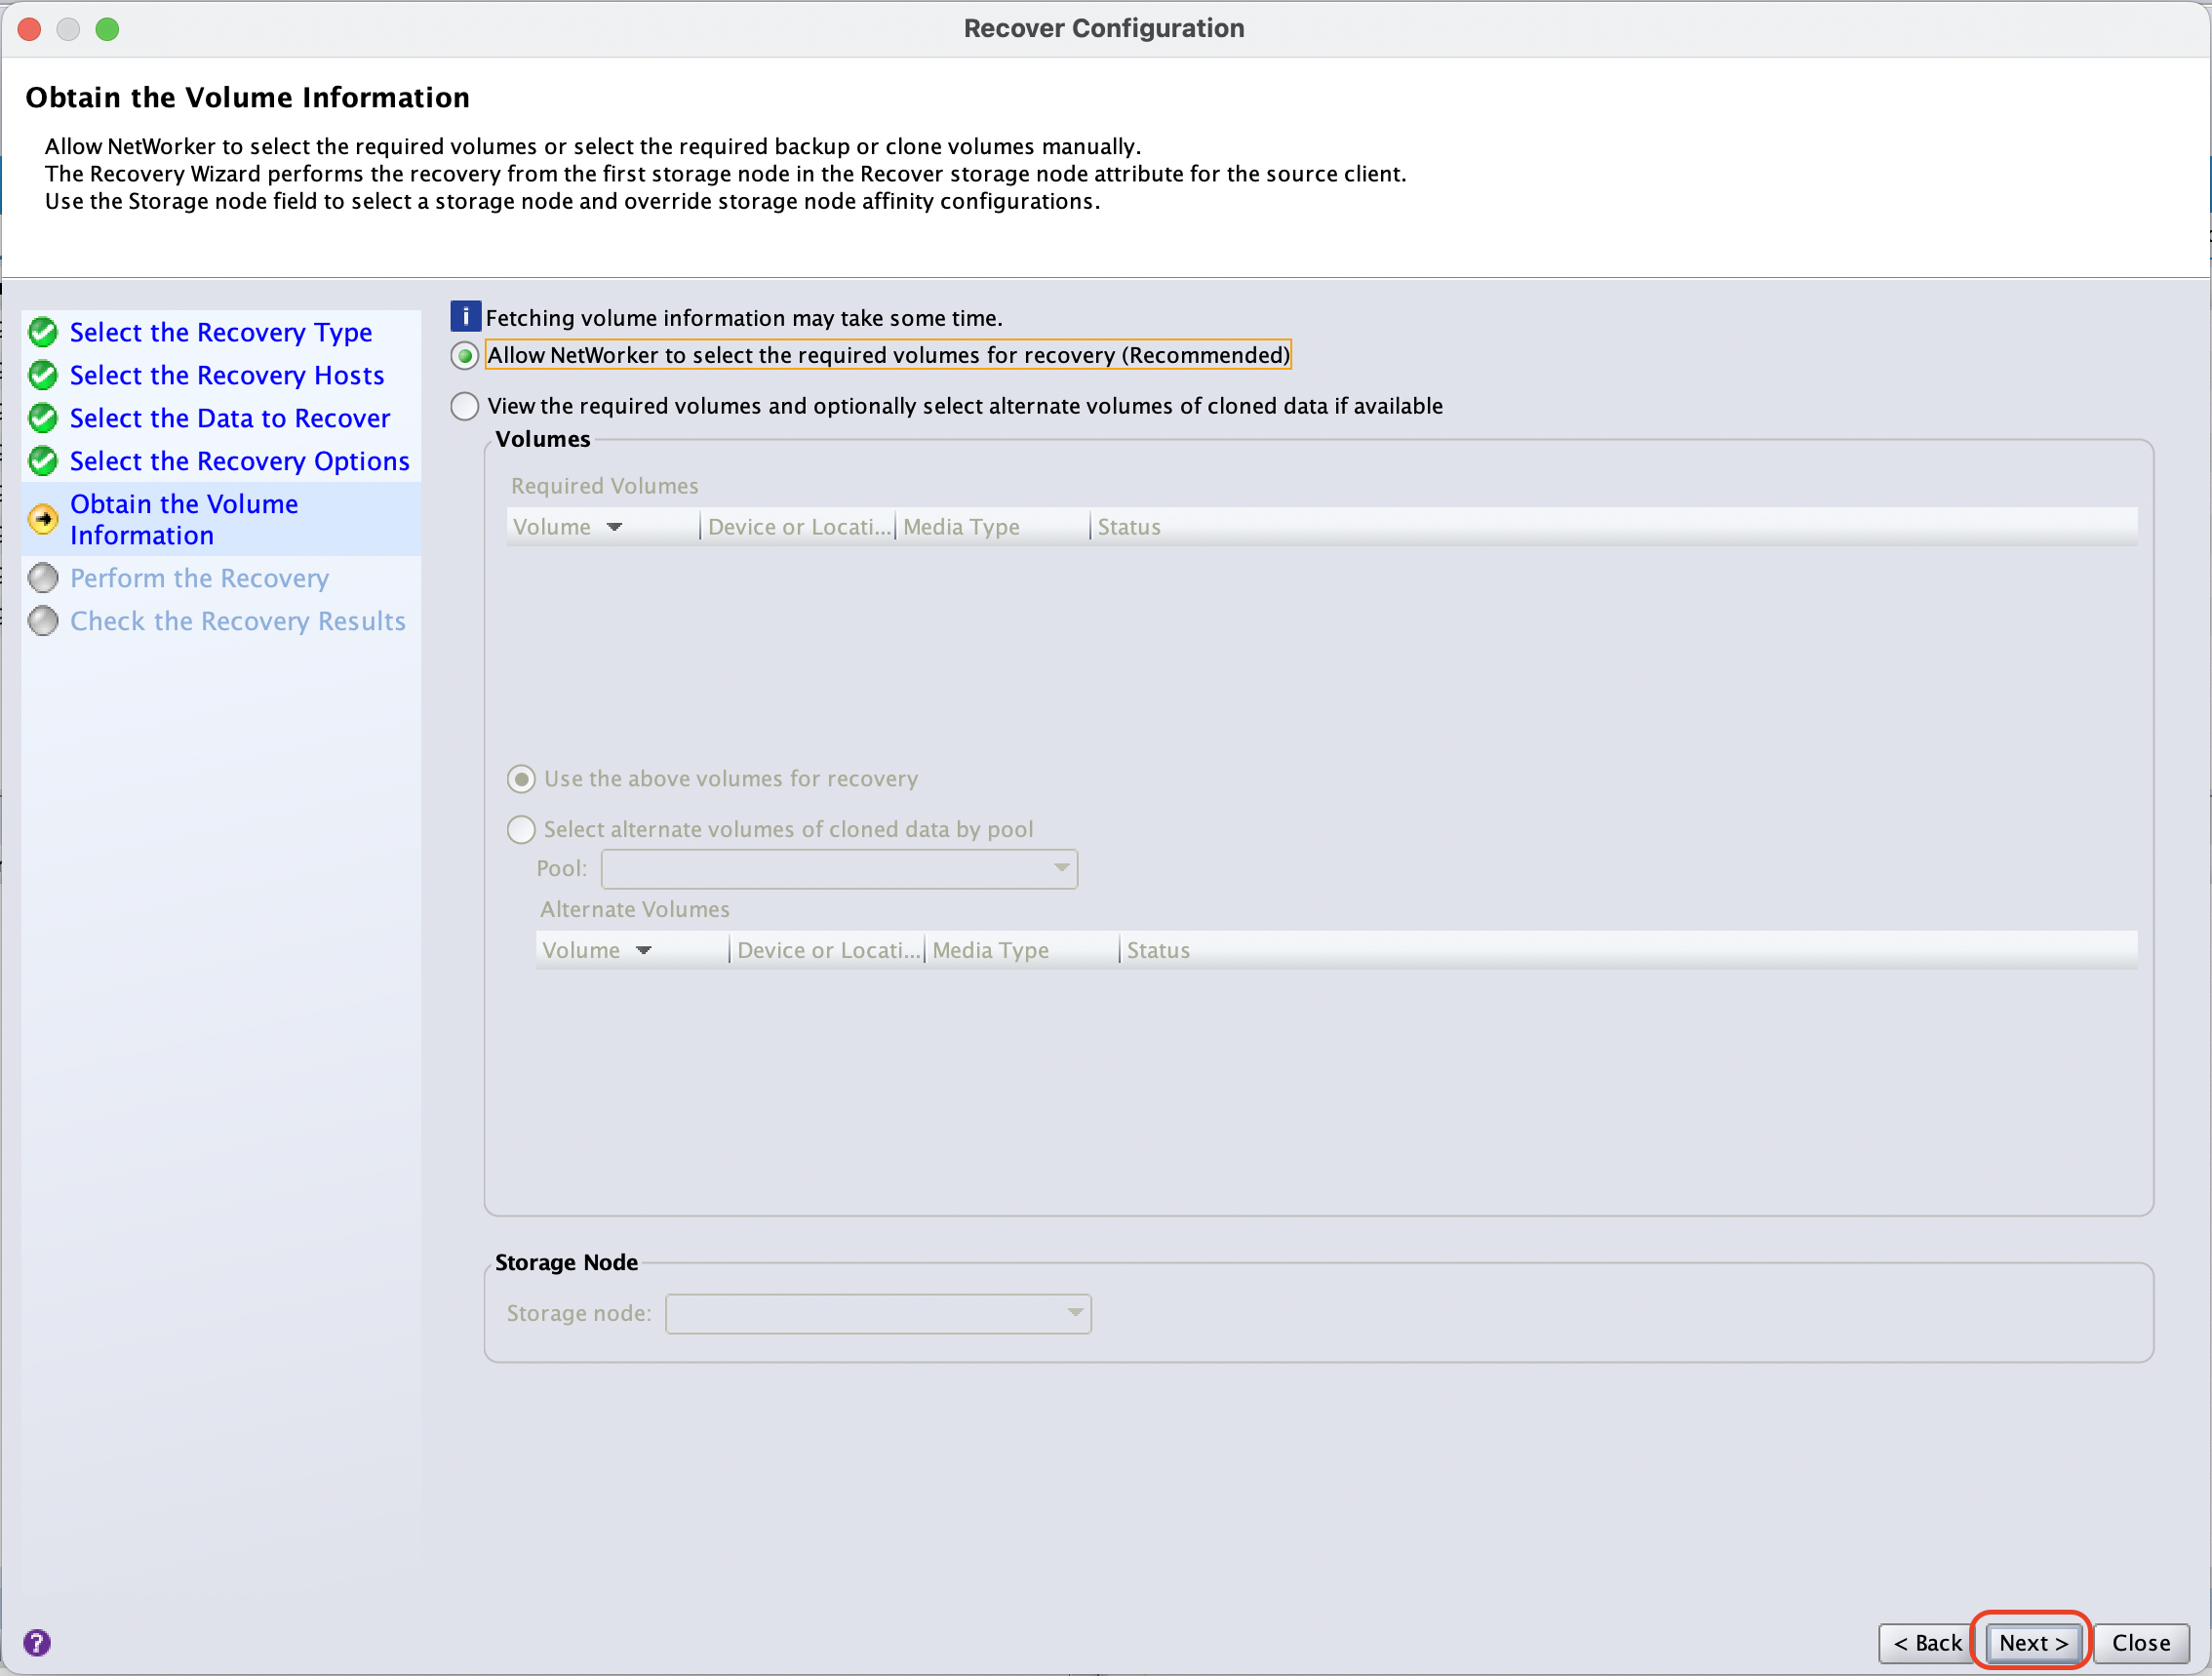
Leave the recommended option in the Volume information window. Click Next.
Enter the name for the recovery and select the Recovery Start time, as needed. Click Run Recovery to start recovery.

In the Recovery results window, the progress of the recovery and log can be viewed. Click Finish to exit.

Storing on Wasabi
You can confirm the integration by checking the Wasabi account. CloudBoost will create buckets with the naming convention mag-XXXXXXXX.
.png "Buckets-Screenshot_2024-02-26_at_4_41_09%E2%80%AFPM(2).png")
The configuration steps provided in this document are an example. For more detail on NetWorker and CloudBoost integration, review the following Dell documentation Dell CloudBoost 19.10 Integration Guide and