How to use ShardSecure Platform with Wasabi?
ShardSecure Platform has been validated for use with Wasabi. The ShardSecure platform ensures the security, privacy, and resilience of unstructured data on-premises, in the cloud, and in multi- and hybrid-cloud environments, keeping it safe from unauthorized access.
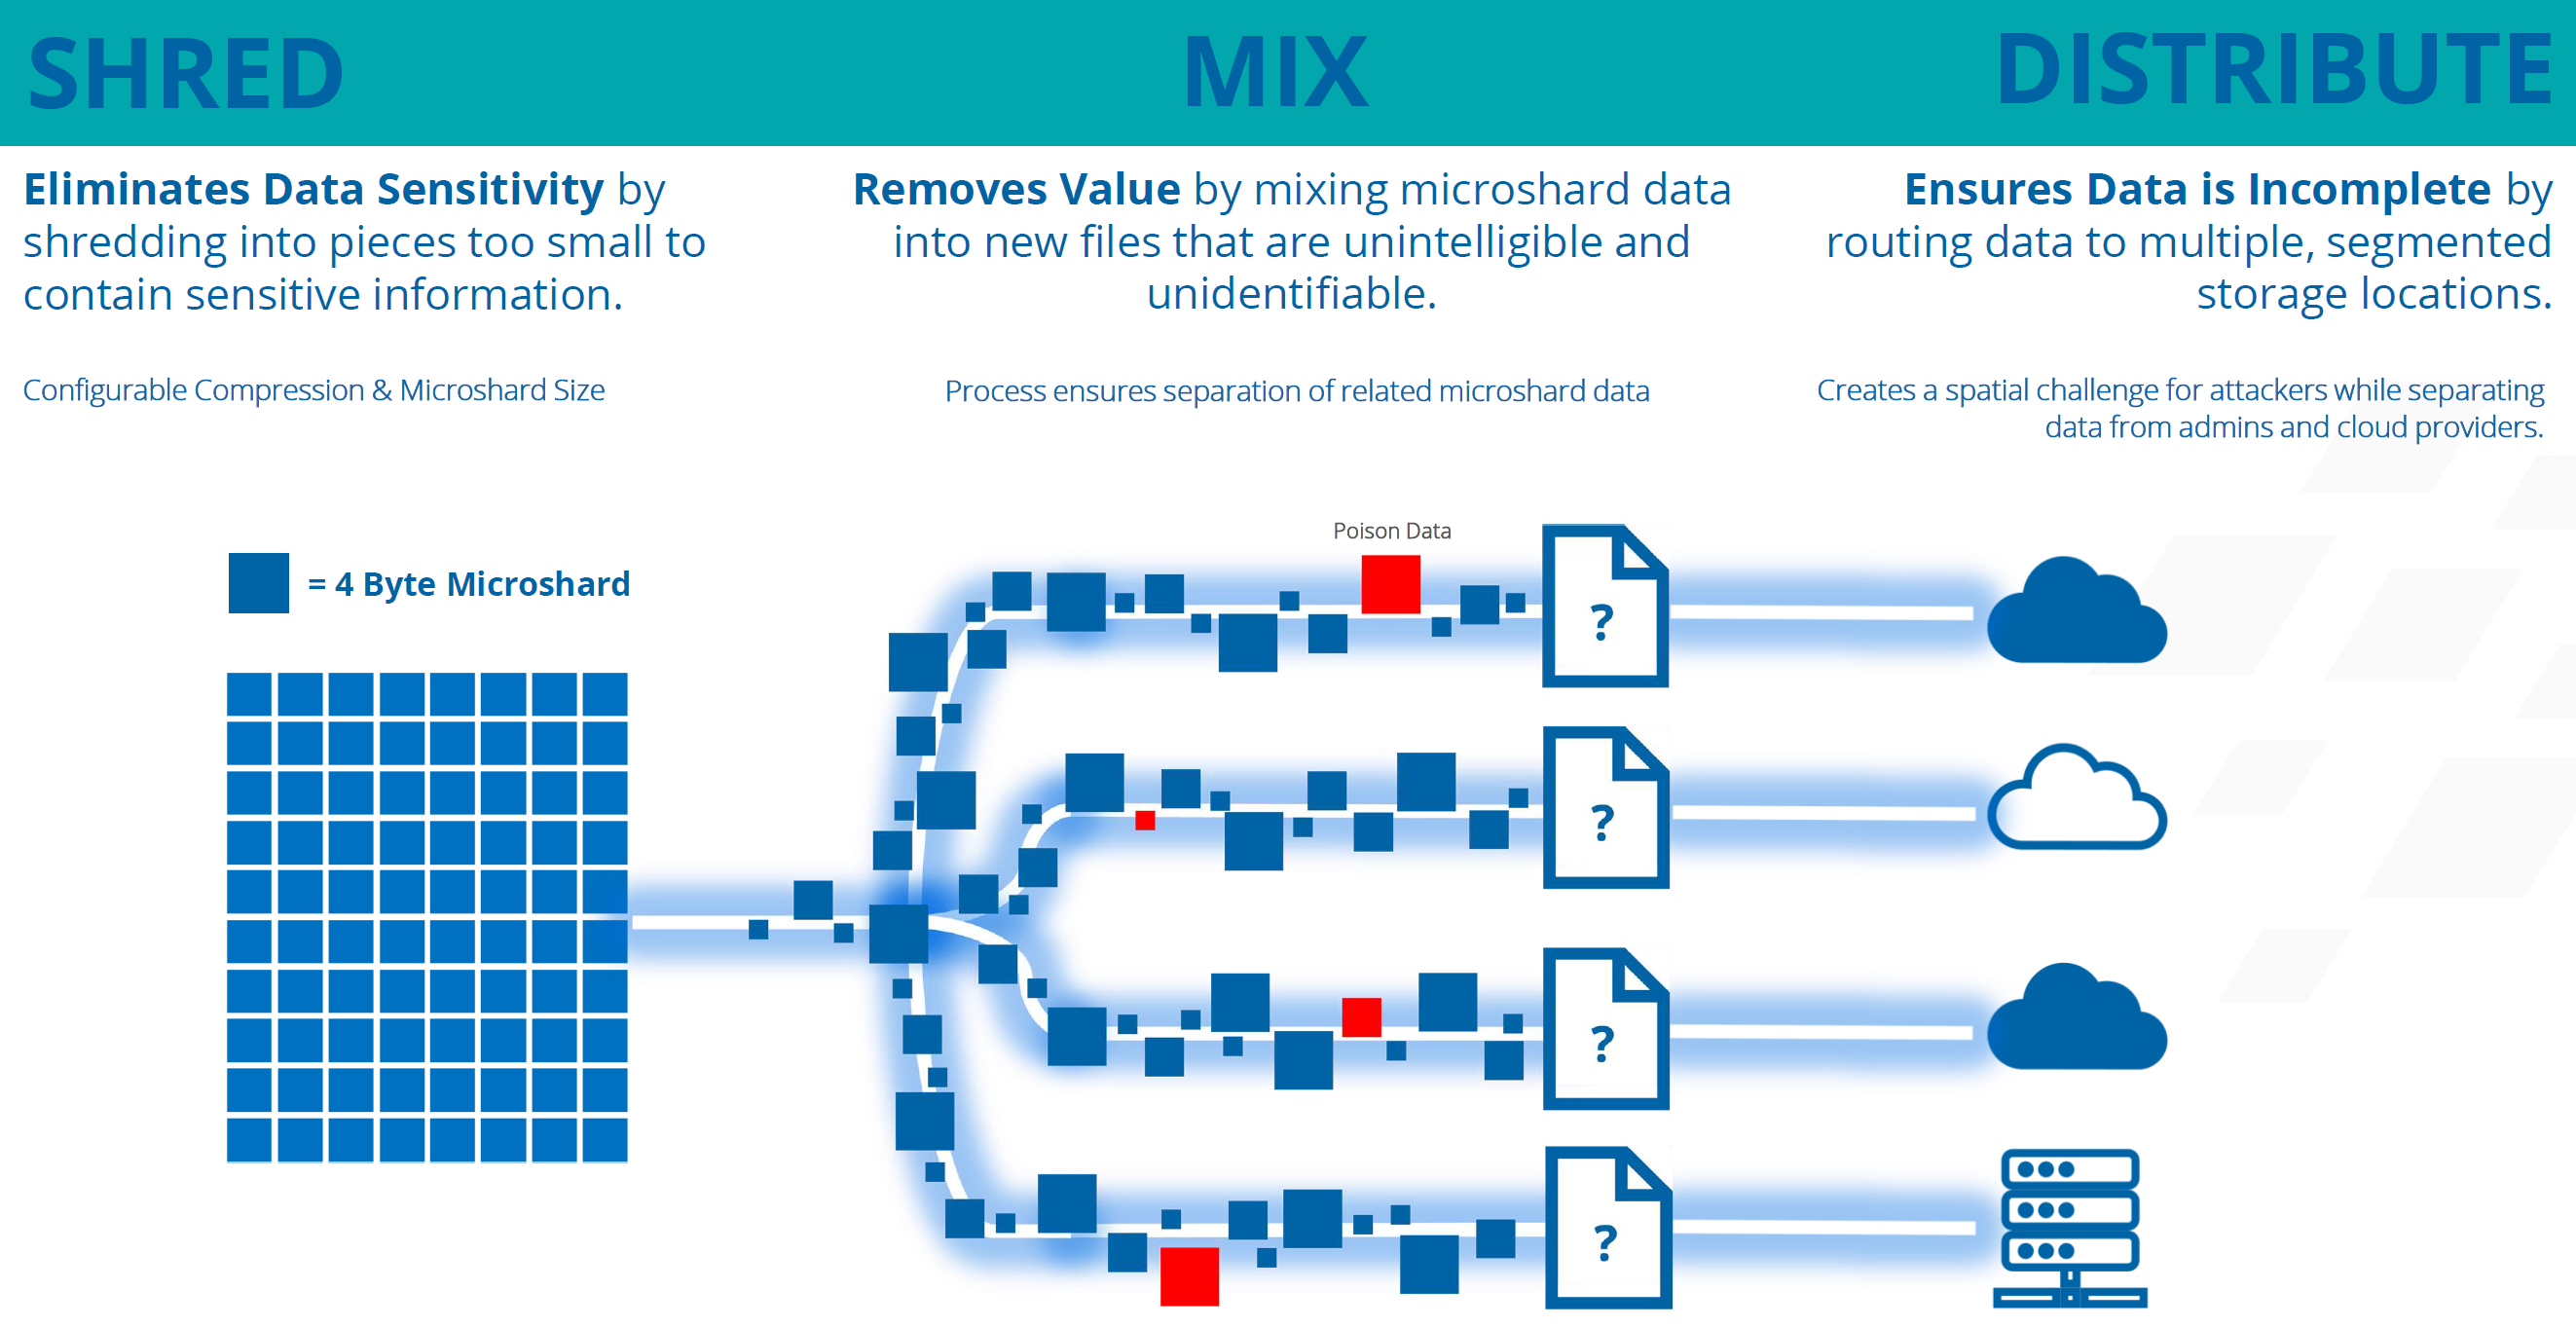
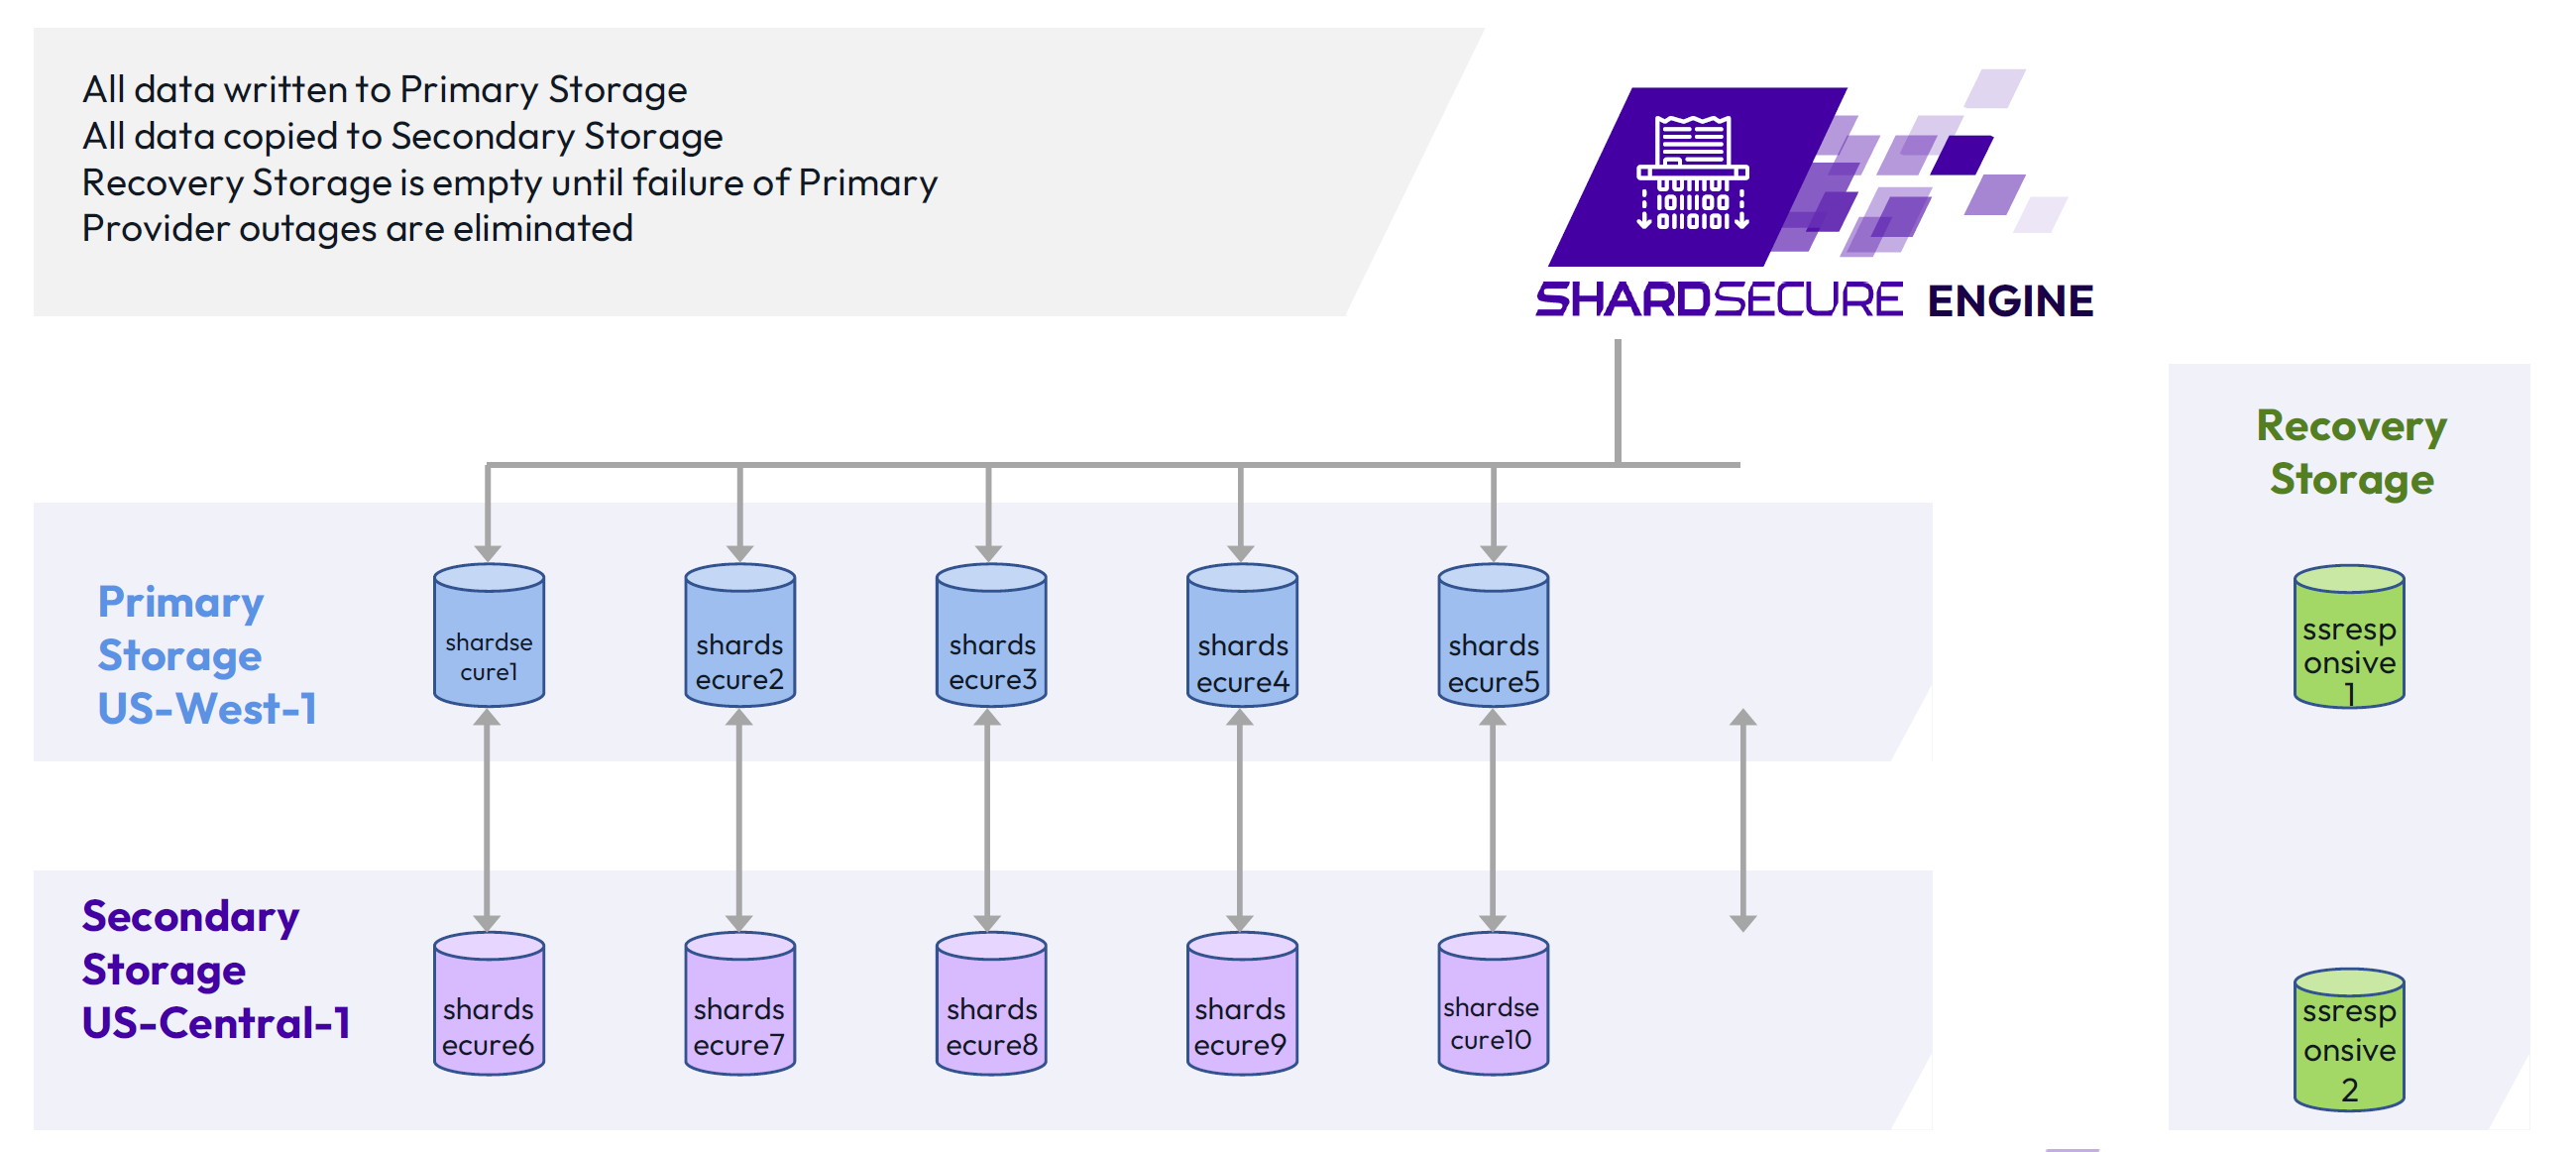
ShardSecure utilizes Microsharding and a three-step process referred to as Shred, Mix, and Distribute to ensure your data is secure and available even during an outage.
1. Prerequisites
Active Wasabi Cloud Storage Account
ShardSecure v2.1.0
2. Reference Architecture
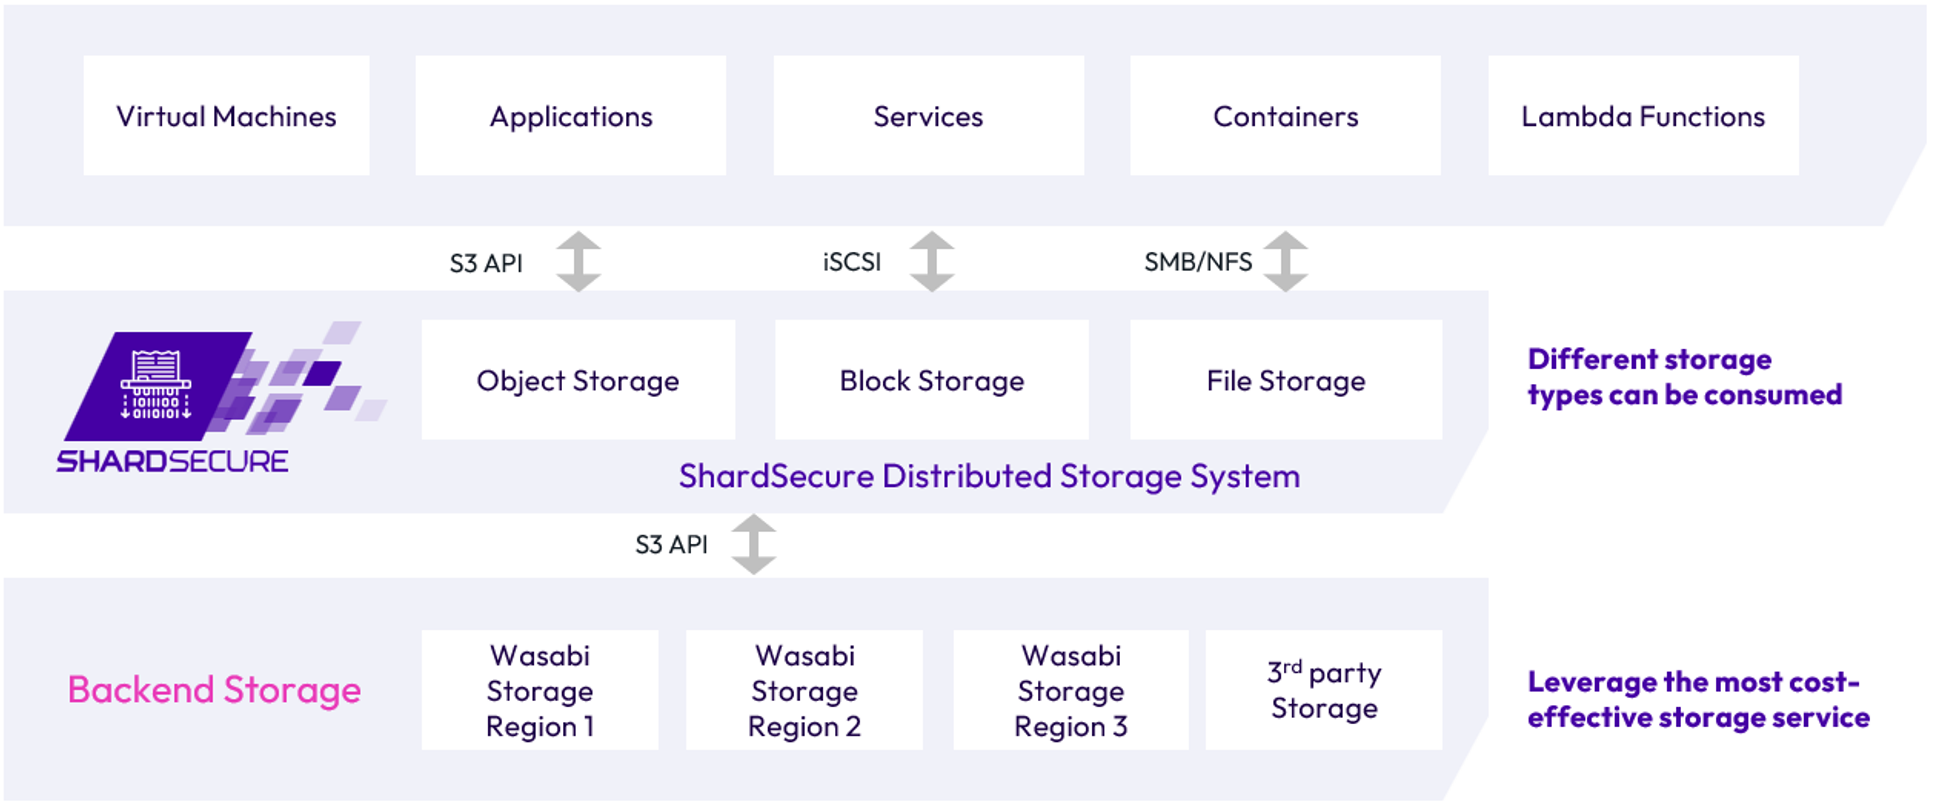
ShardSecure Engine
3. Configuration of ShardSecure Wasabi Buckets
3.1 Log in to your Wasabi Console.
3.2 Click on "Create Bucket"

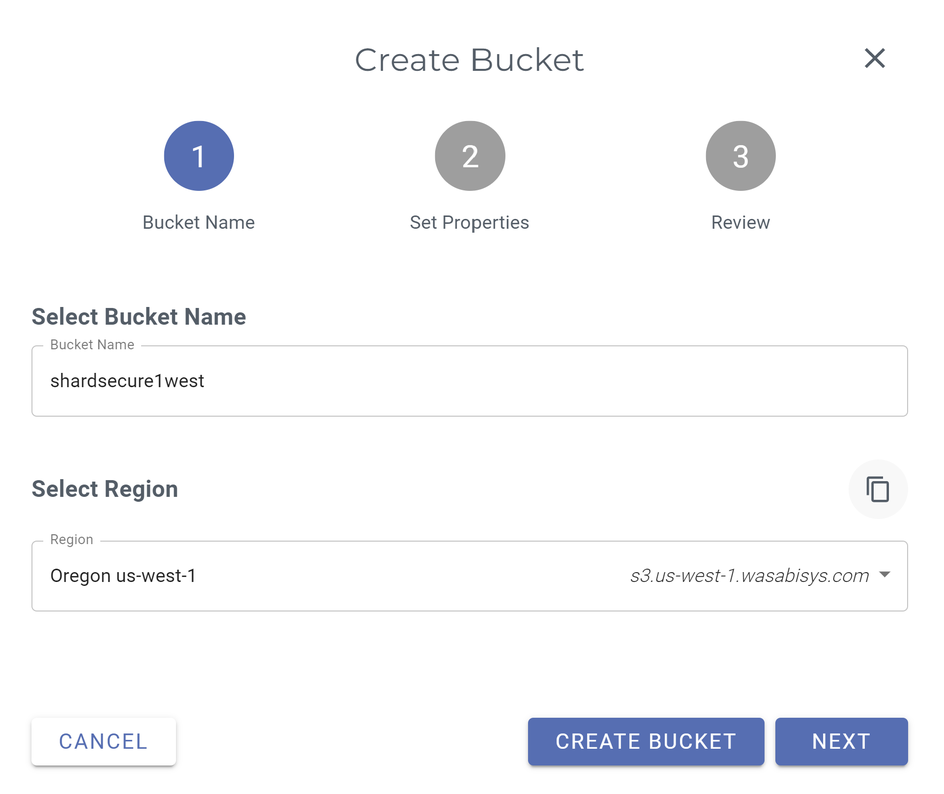
3.3 Name the bucket with a scheme that reflects ShardSecure and select your region. Click on "Create Bucket".
3.4 Repeat Steps 3.2 - 3.3 until you have a minimum of 3 buckets created. Your buckets should resemble the following image:
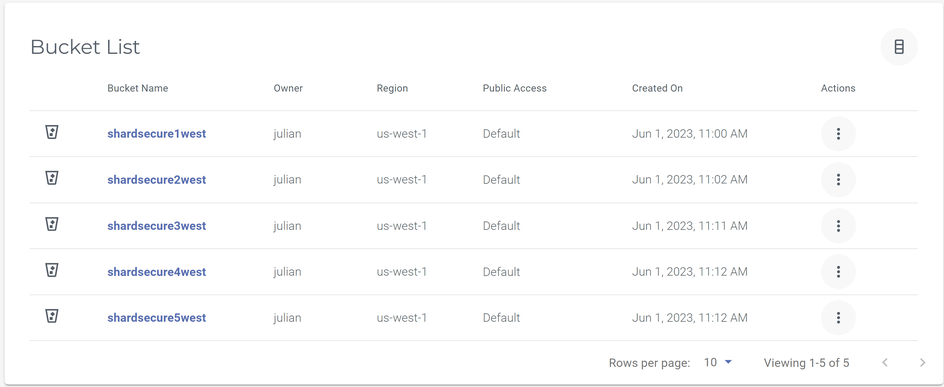
Note - Buckets are not required to be located in the same region.
3.5 Next if not already completed we will create an Access Key to be used for the ShardSecure buckets.
Click on "Access Keys" in the left-hand pane and then click on "Create New Access Key".

3.6 ShardSecure can leverage Root and Sub Users as long as the credentials have read/write access to the buckets. Select one and click "Create".
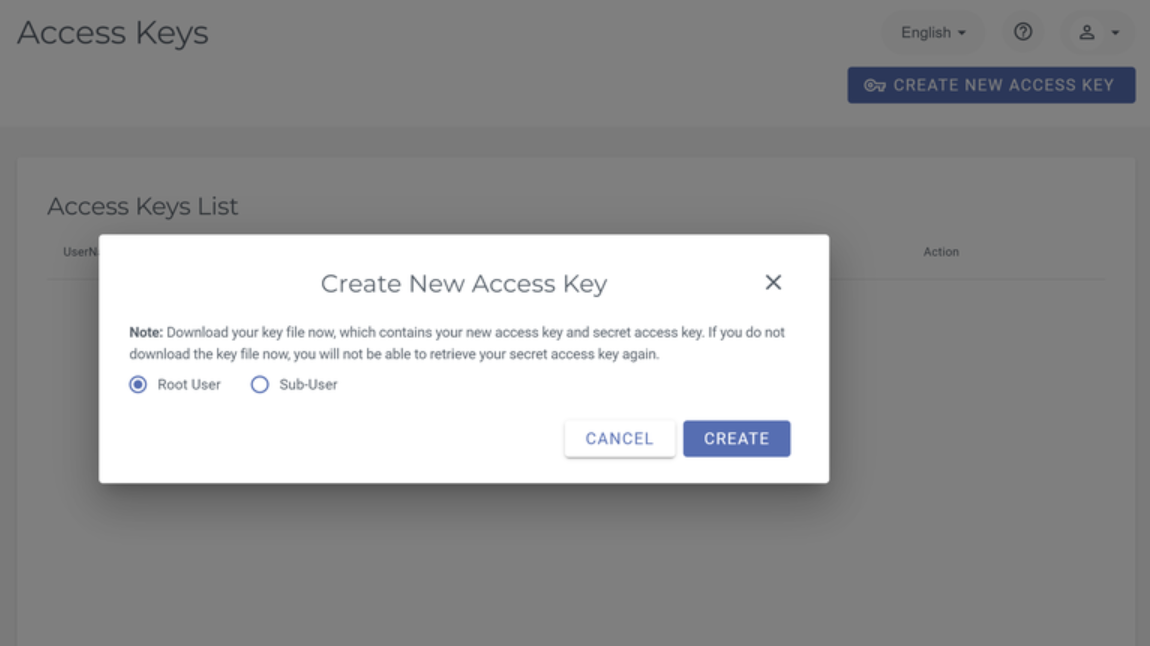
3.7 Make sure to Download or Copy the Keys to the Clipboard for use inside of ShardSecure.
4. Configuration of ShardSecure
4.1 Log into your ShardSecure configuration portal.

4.2 Click on "Config" in the upper right hand corner.

4.3. A separate window will now open to take you to the Configuration home screen.
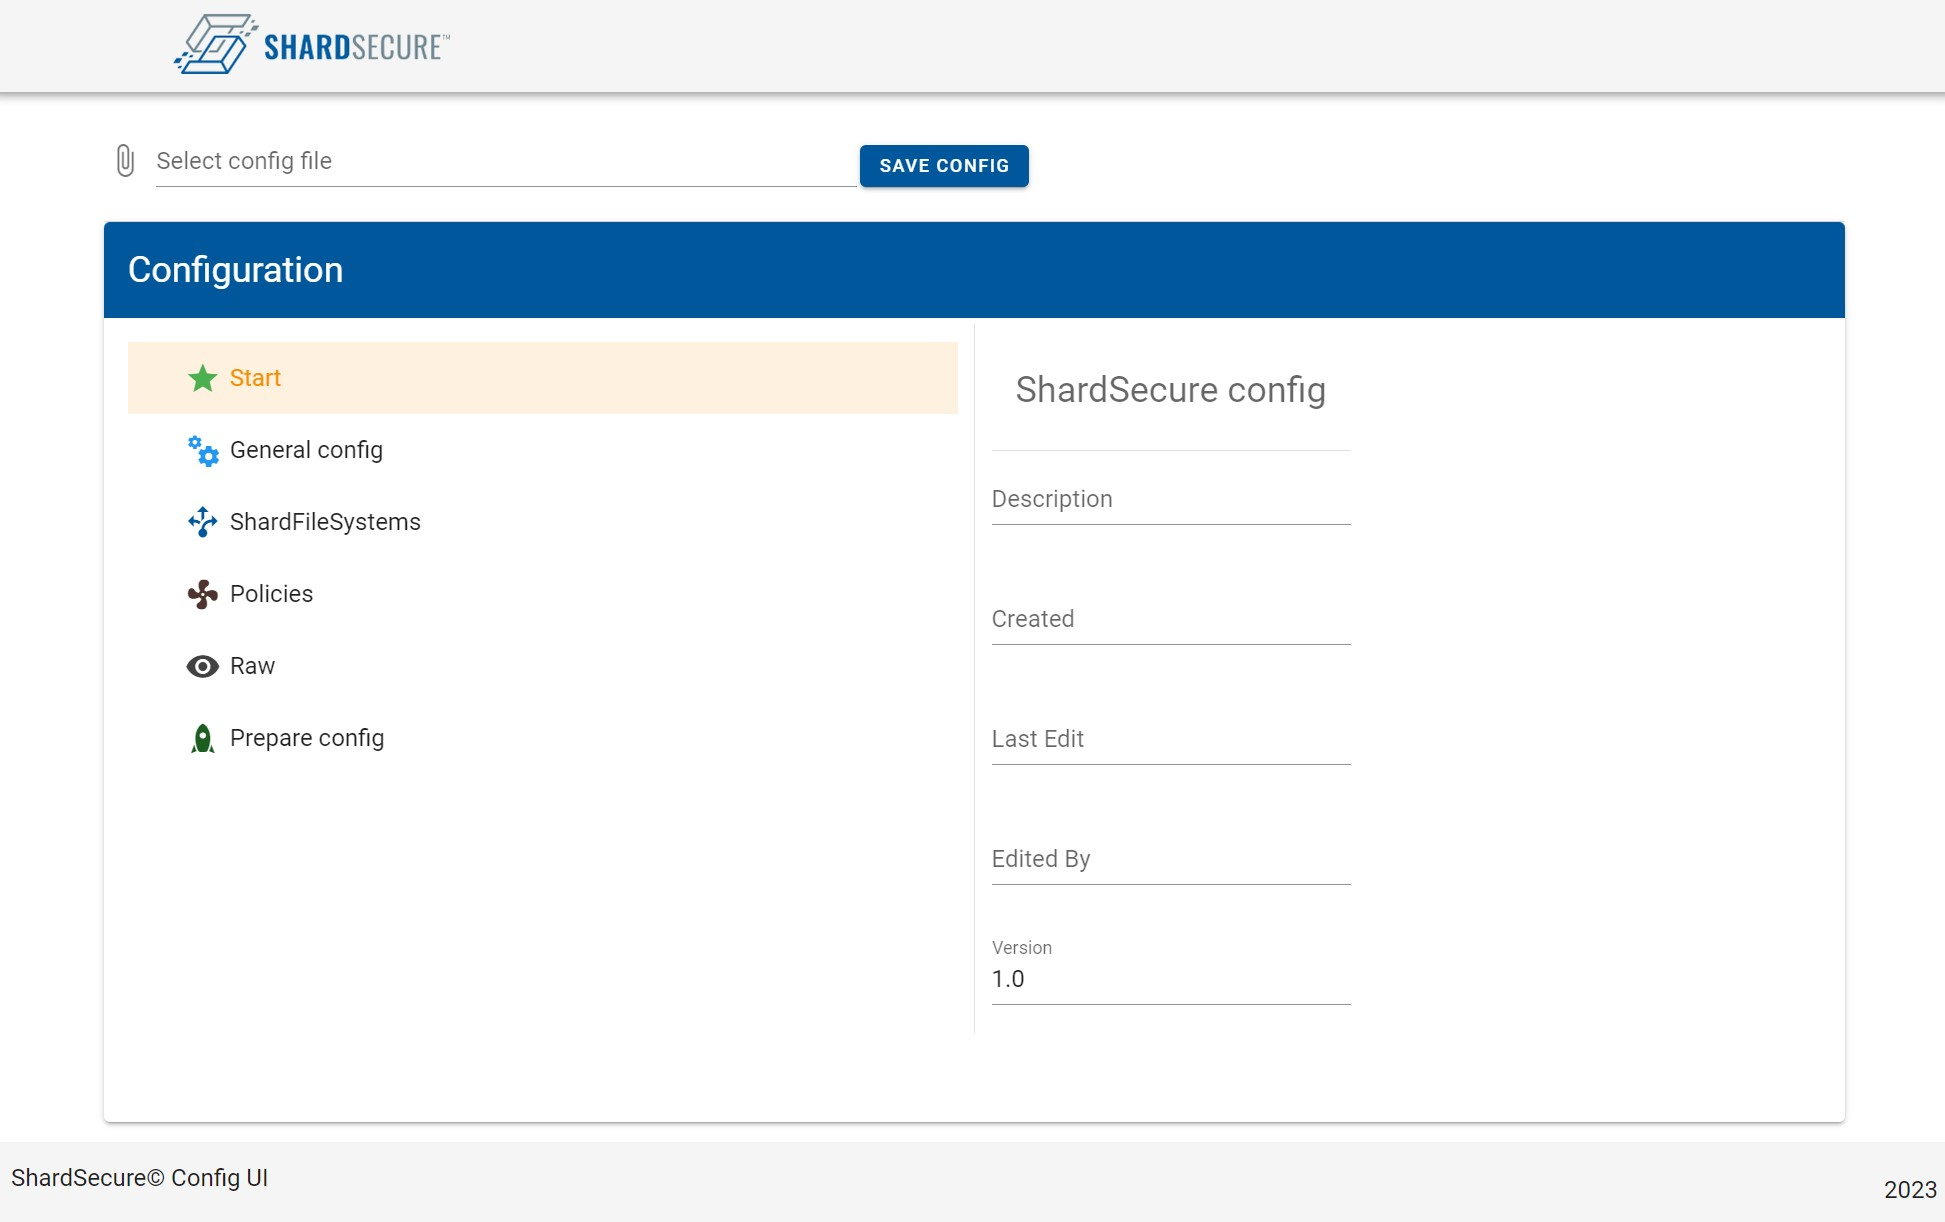
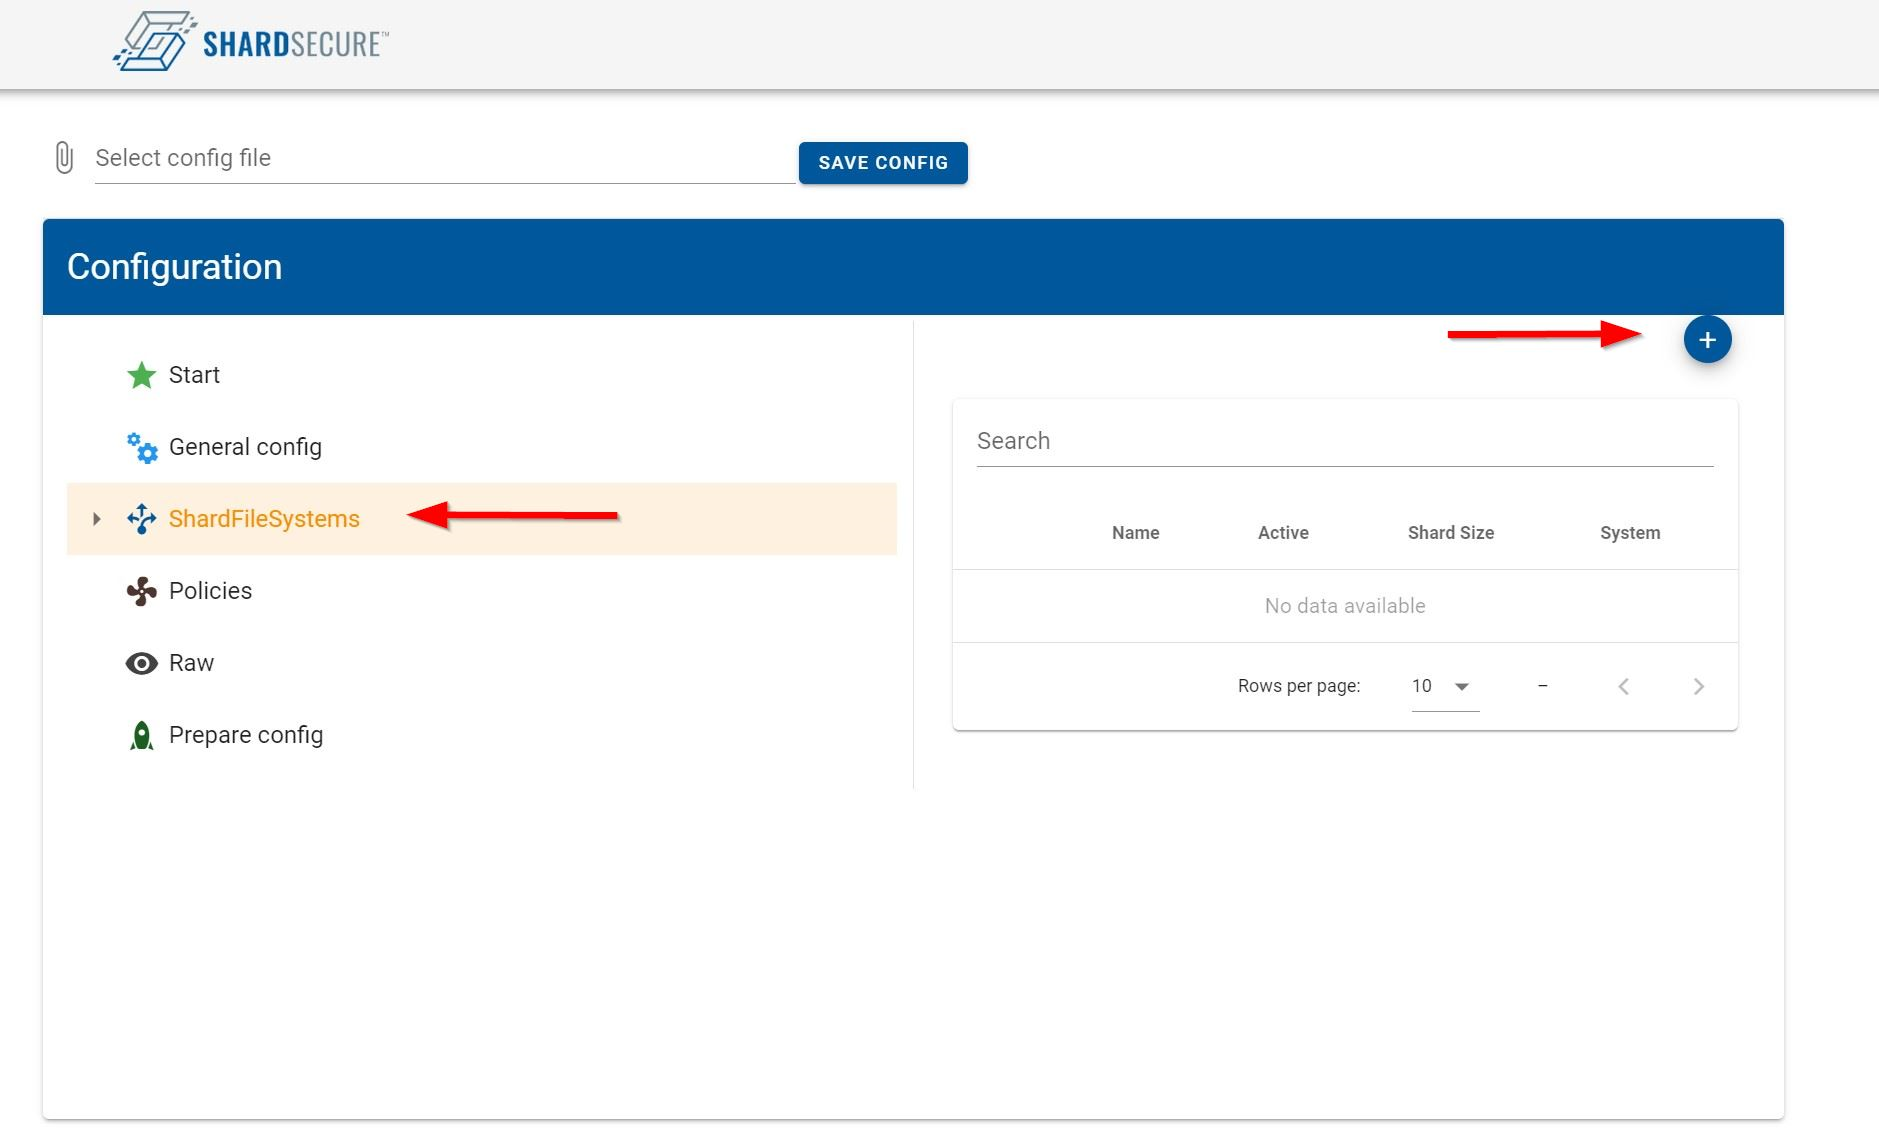
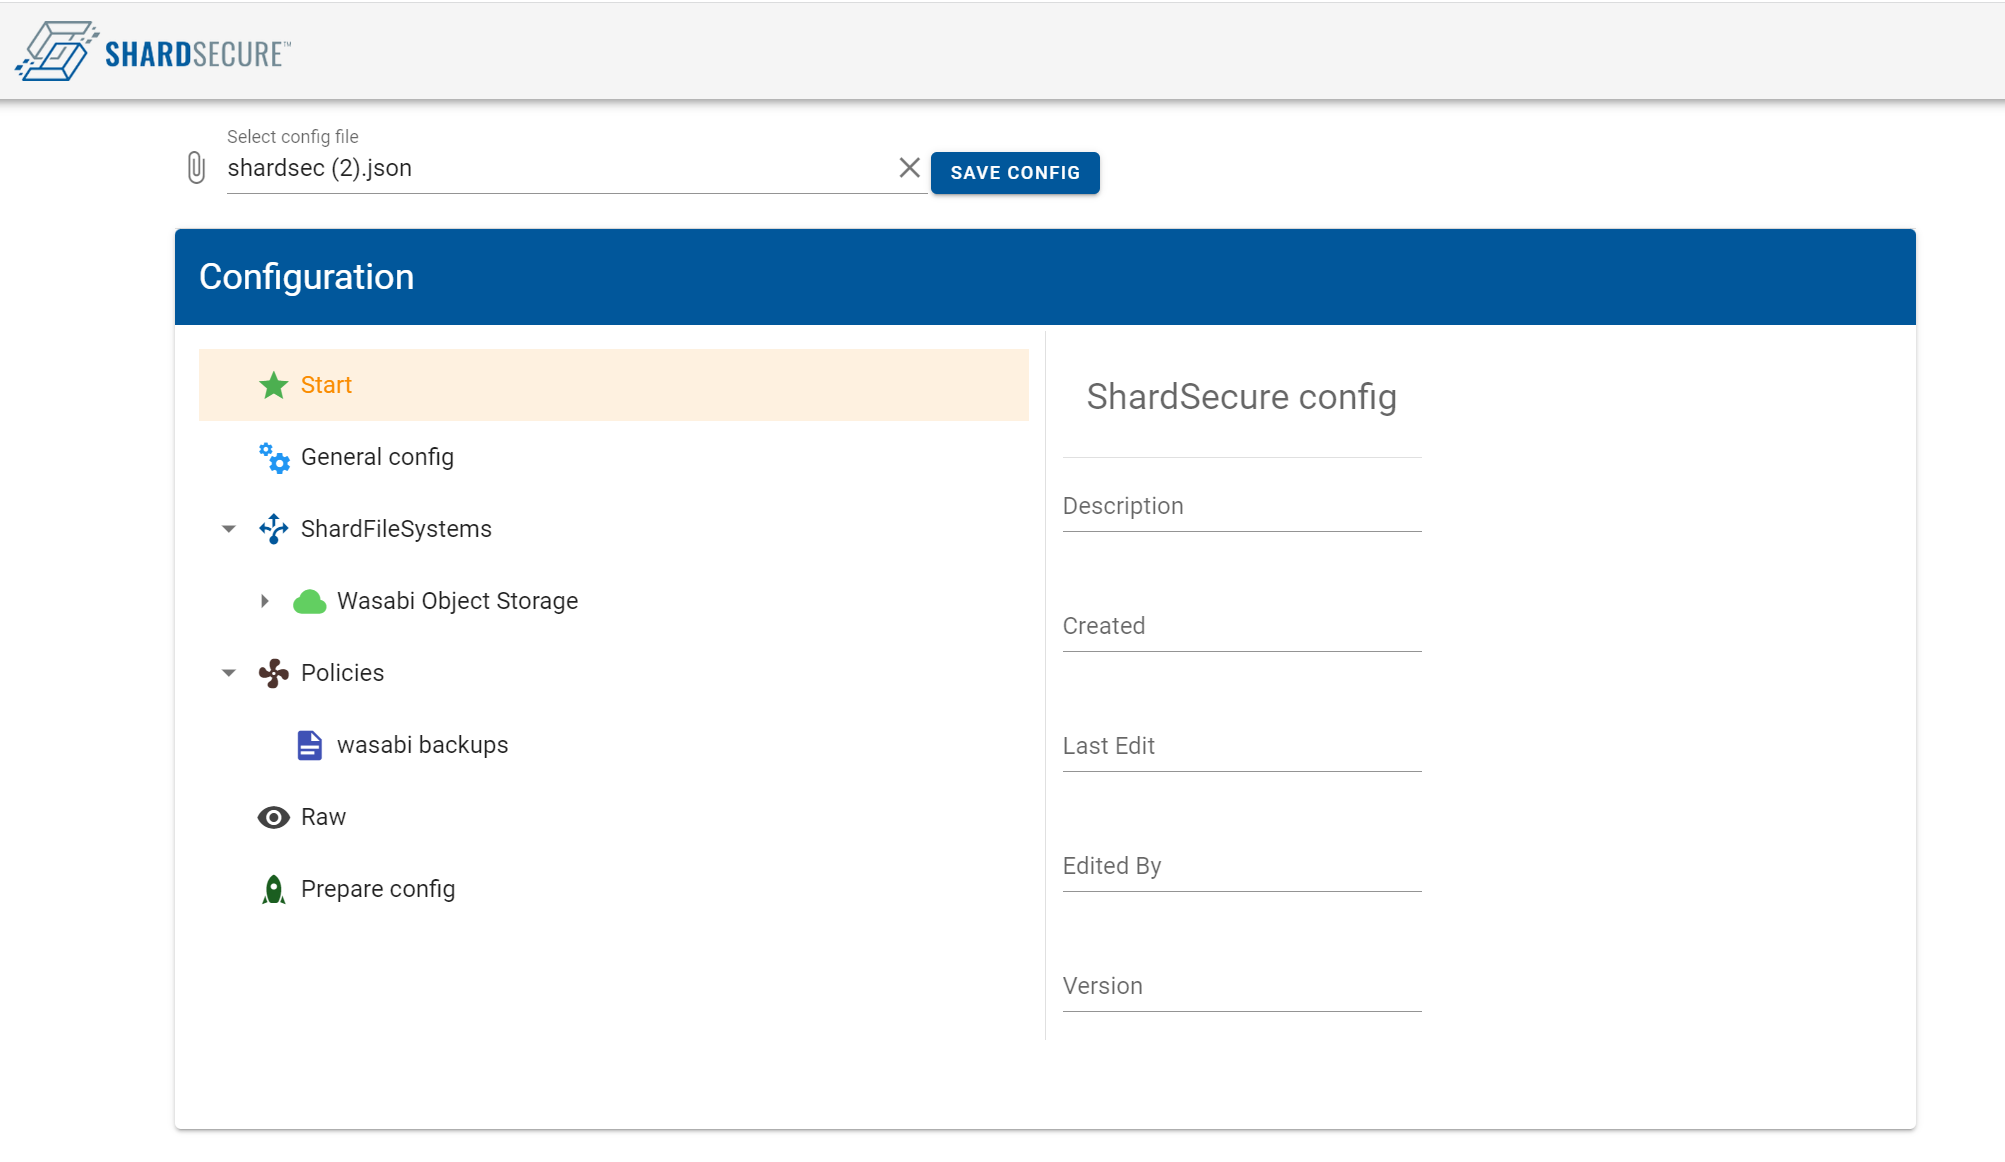
4.4 To add a new storage location go to "ShardFileSystems" and click on the "+" to add Wasabi as a file system.
4.5 In the drop down menu click on "Wasabi" and then for the name enter "Wasabi Object Storage". Click on "Add".

4.6 Next you will need to enter the following information:
Wasabi Key ID - Enter your Access Key
Wasabi Key Secret - Enter your Secret Key
Region - Select the region where you created your buckets
Endpoint - Specify the region URL where your buckets are created
Click on "Add SCF".
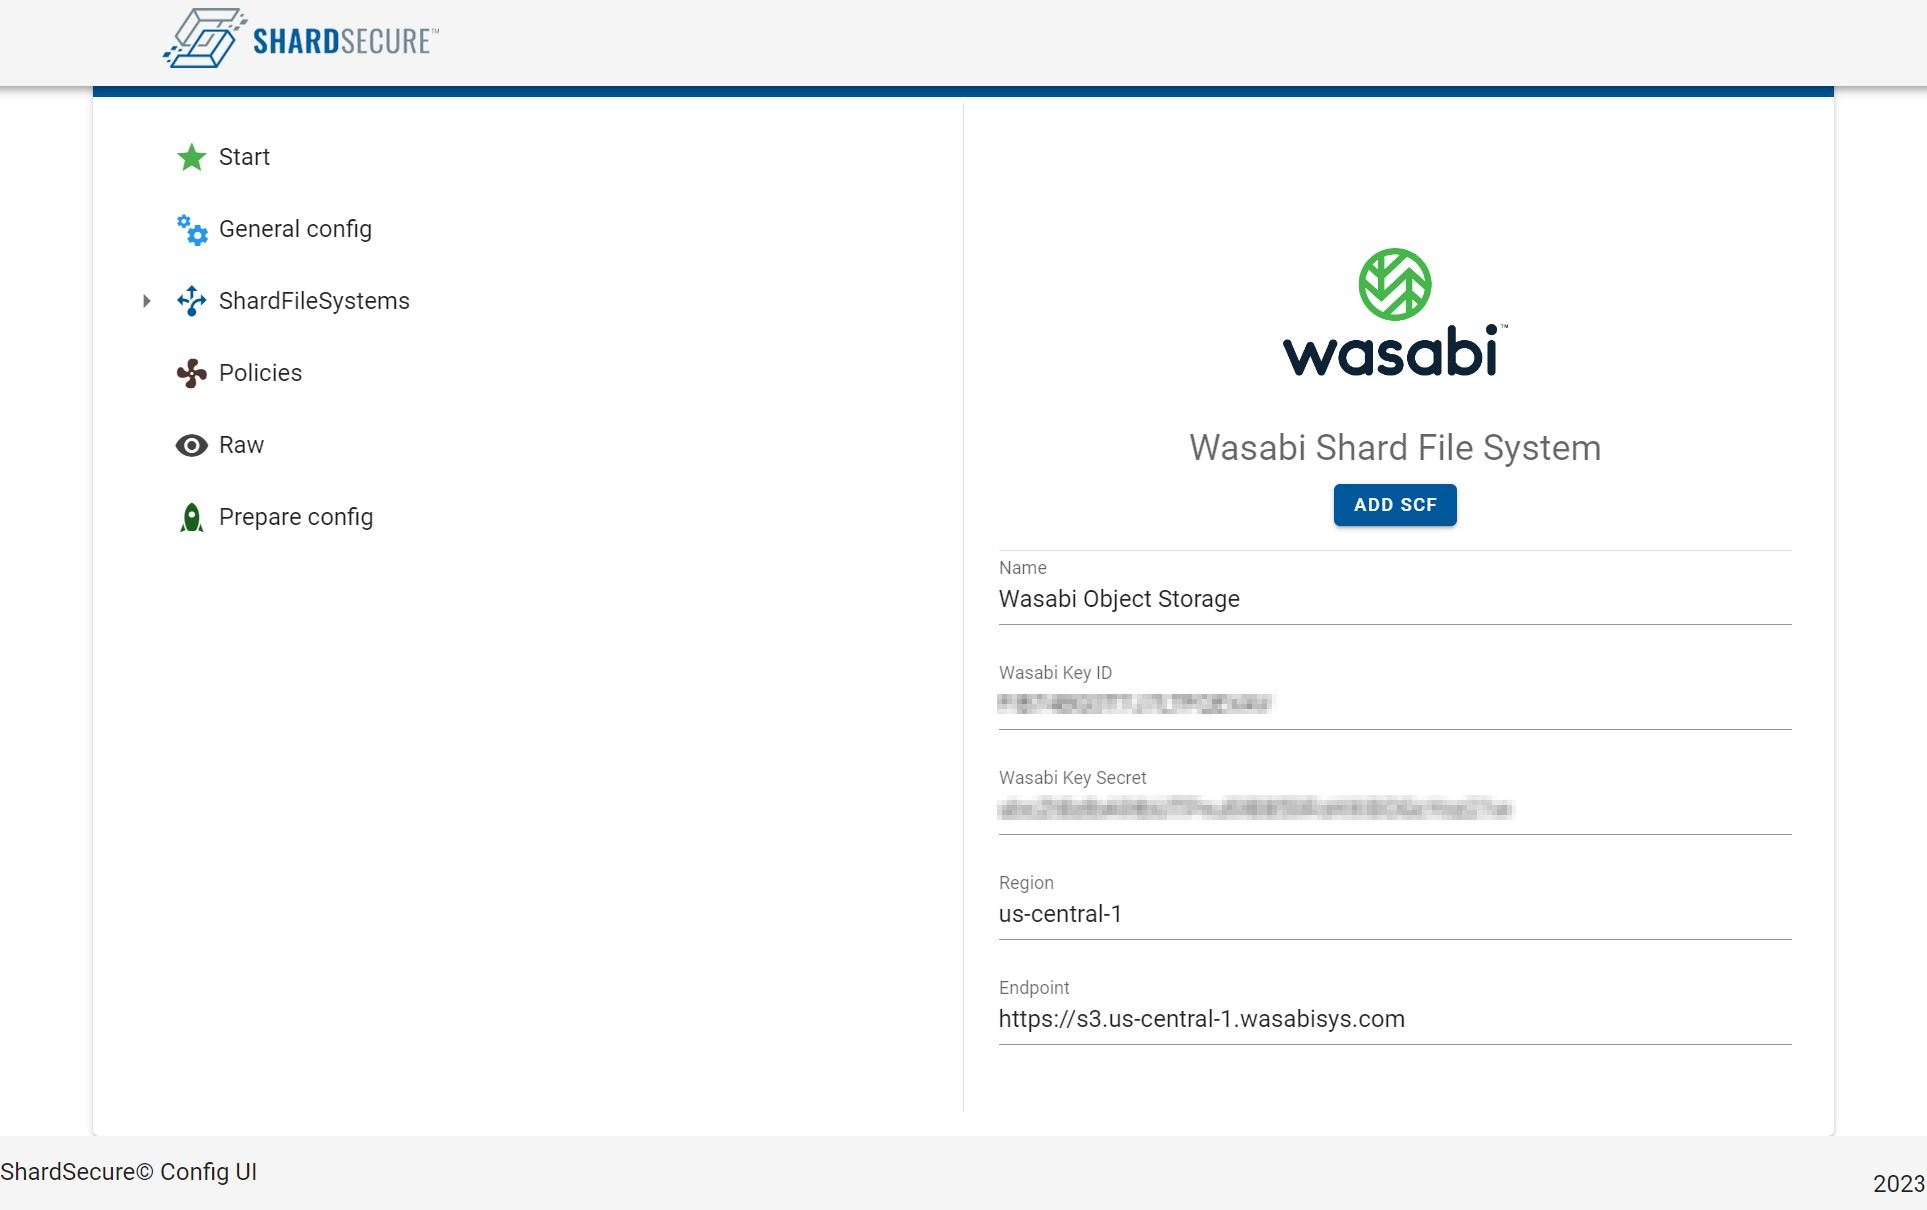
Note: This configuration example discusses the use of Wasabi's us-west-1 storage region. To use other Wasabi storage regions, use the appropriate Wasabi service URL as described in our Wasabi Service URLs.
4.7 Next enter a name for the bucket in ShardSecure and then enter the name of the Wasabi bucket you created for ShardSecure in your Wasabi Console from Section 3.
Click "Add SCF".
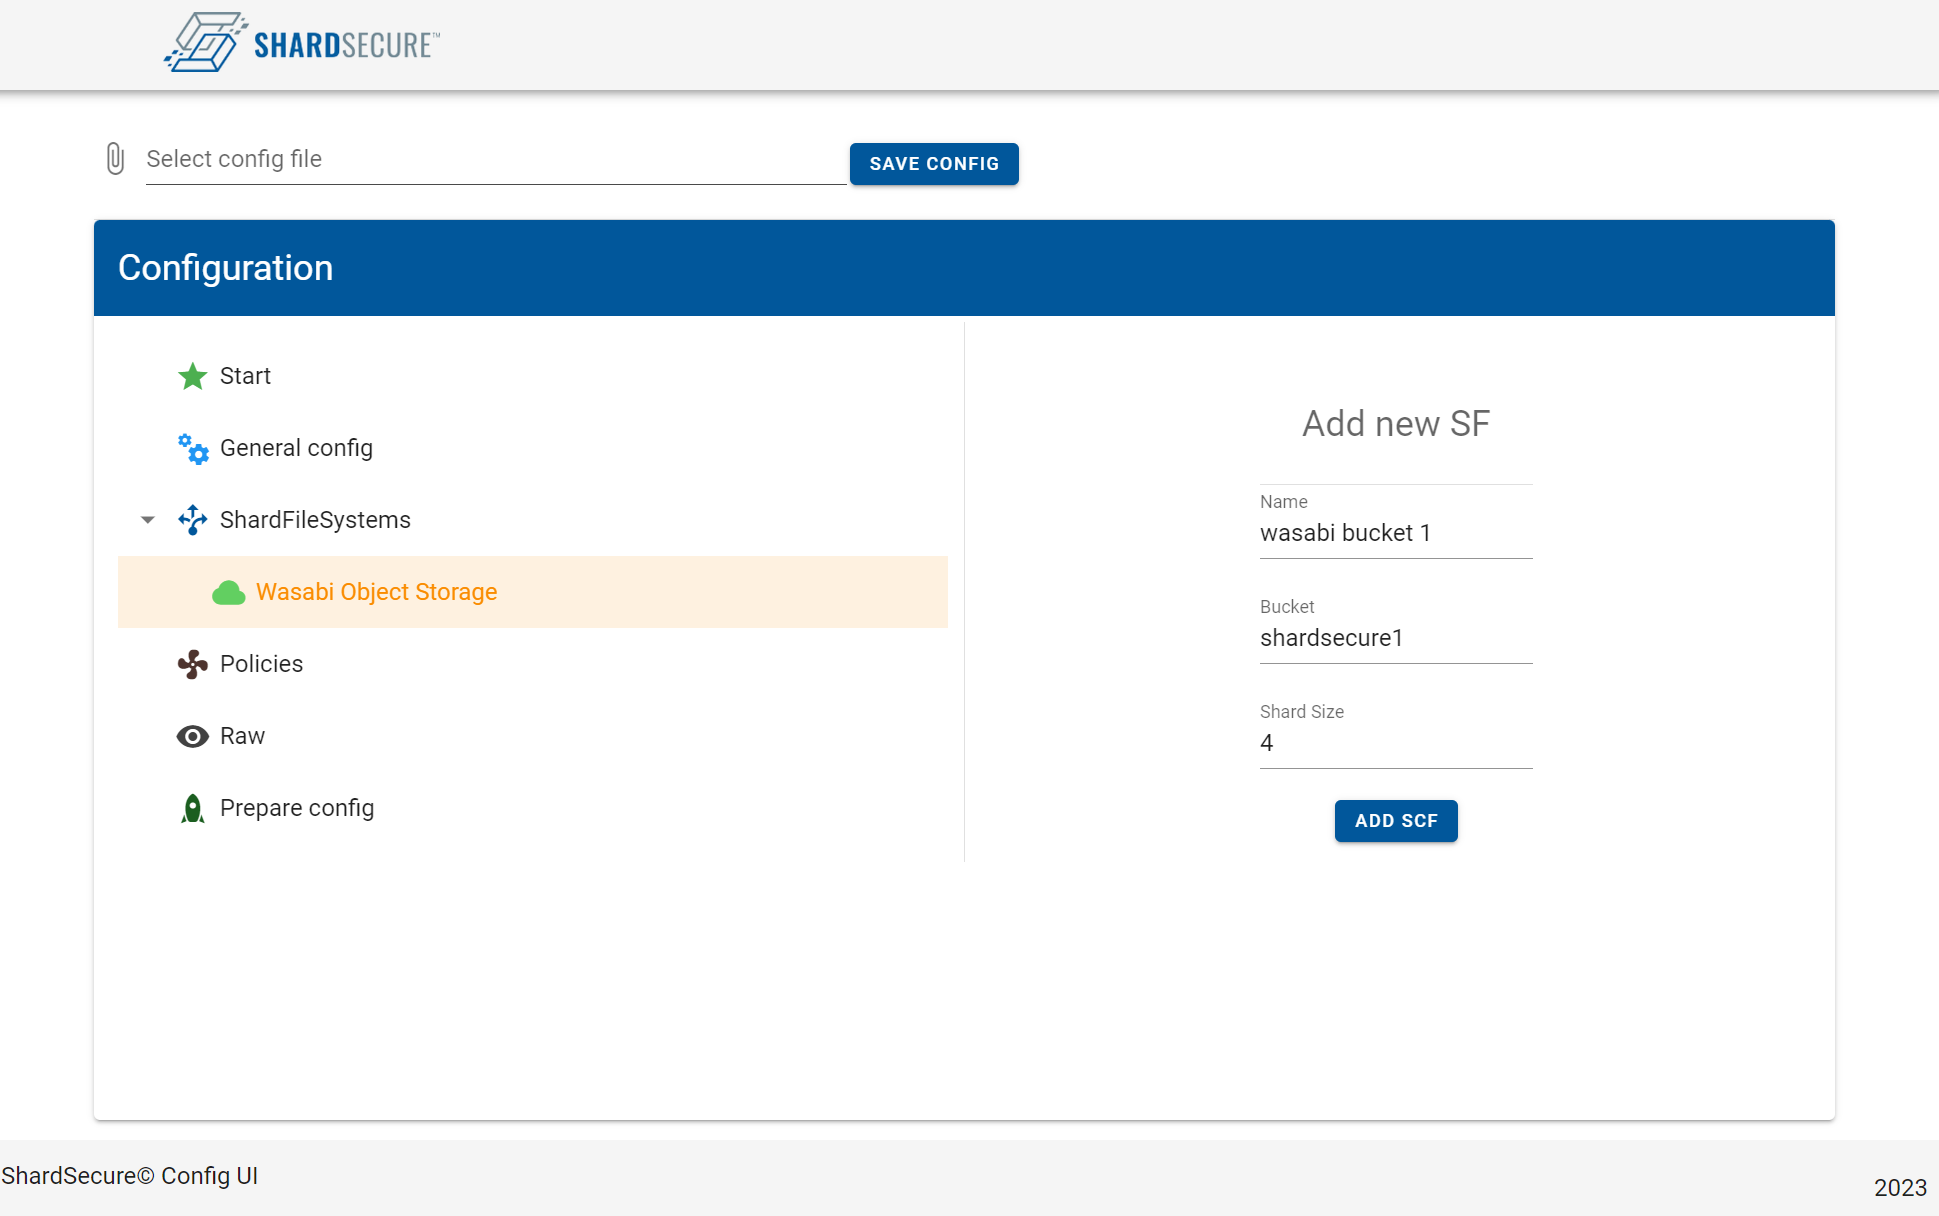
Note - The Shard Size should be 4 unless otherwise recommended by your ShardSecure consultant.
4.8 Repeat the steps until all buckets are created that were created in your Wasabi Console. When complete you should seem them all listed under your Shared Files Systems.
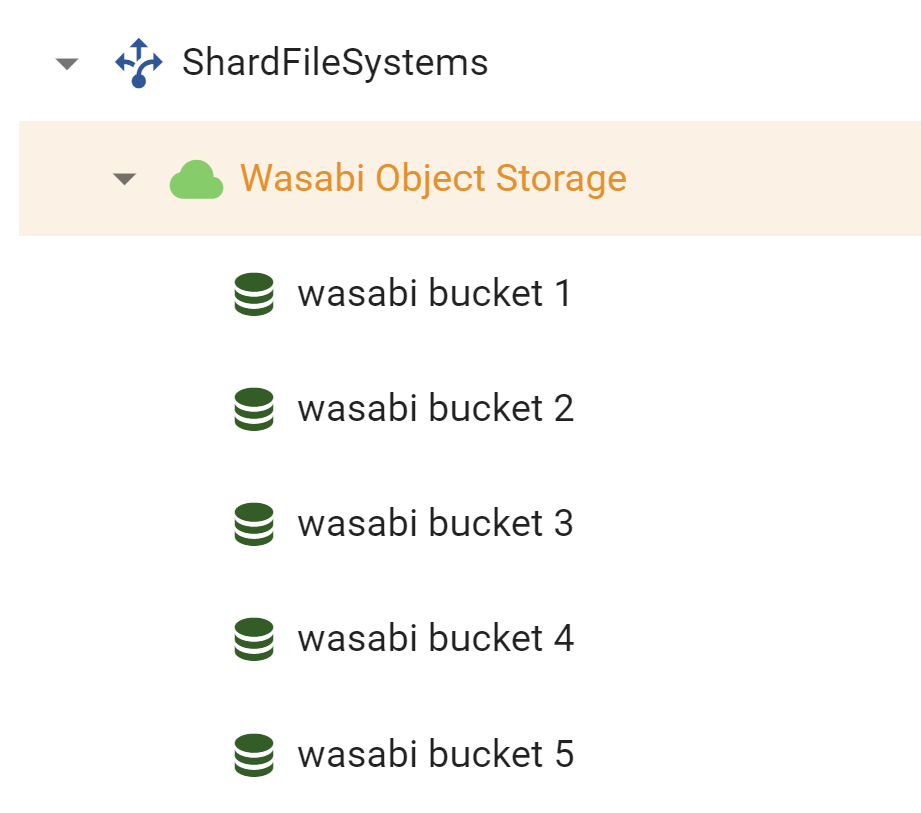
4.9 Go to Policies and click "+" to add a policy for Wasabi.
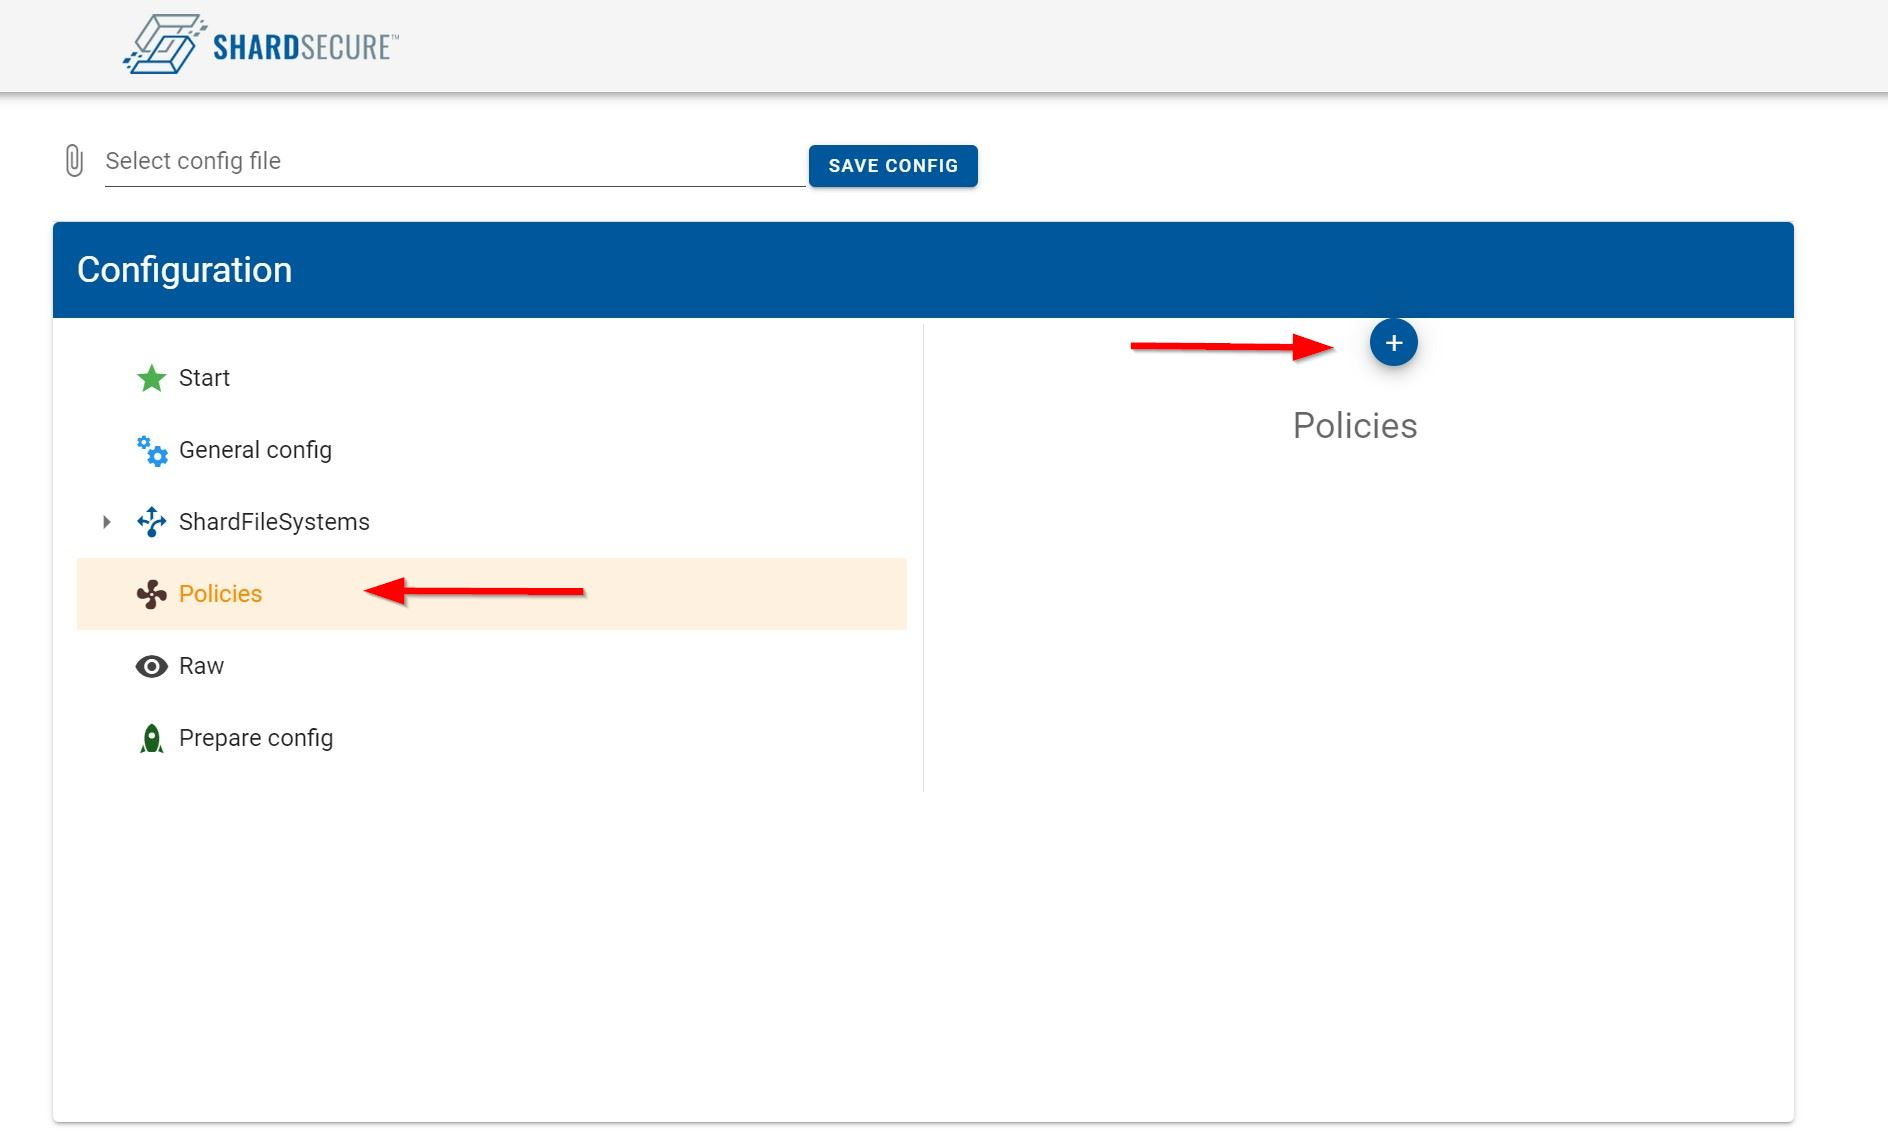
4.10 Enter a corresponding name to Wasabi and then click "Add".
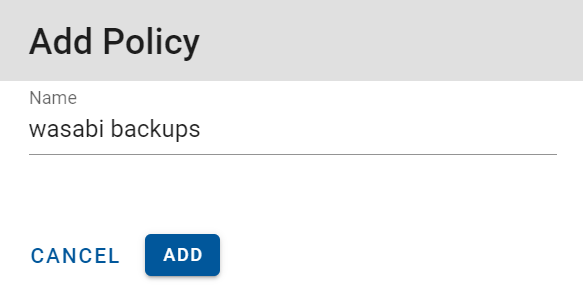
4.11 Give the policy a description if you wish.
4.12 Next you will give the policy an order number. Depending on if other policies exist set the order of the policy, if the policy has the same order as an existing policy, a message will show. The tree view reflects the order by sorting the policies from low to high.

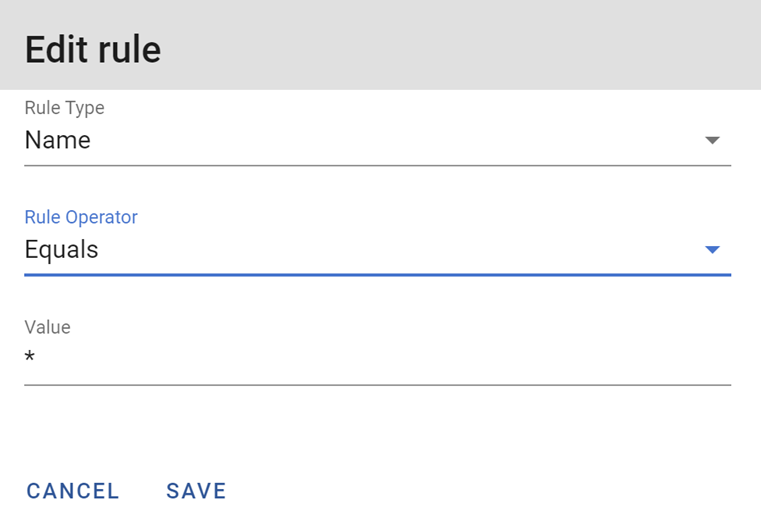
4.13 To edit the "Rule" for the policy click on the edit button
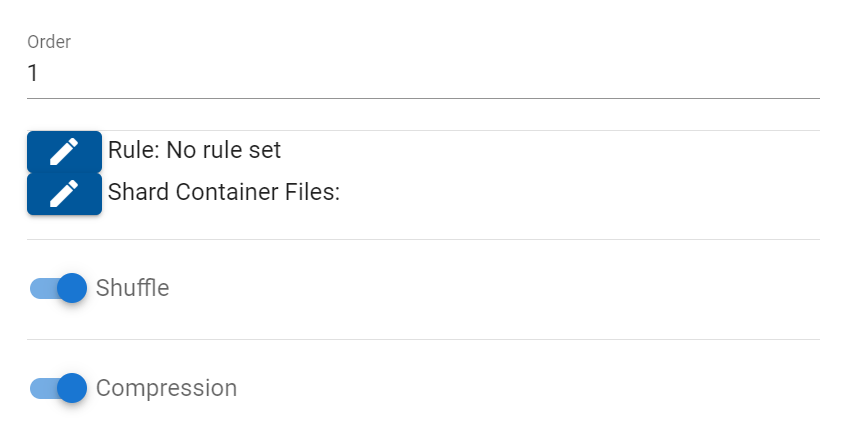
4.14 Use the below settings to establish a default rule and then click "Save".
4.15 Next click on the edit button for "Shard Container Files"
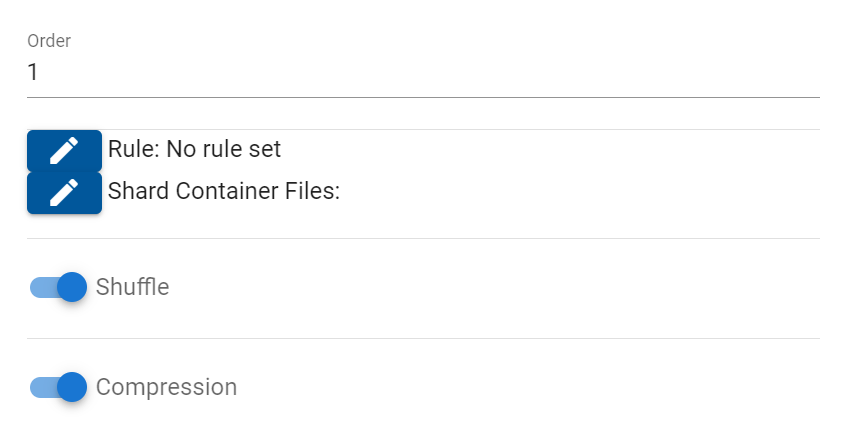
4.16 Select your Wasabi specific storage buckets and click on the "+" next to each bucket to add them.

4.17 All Wasabi buckets should now be listed under "Configured Shard Container Files". Click on "Close" to exit out of the setup dialog box.
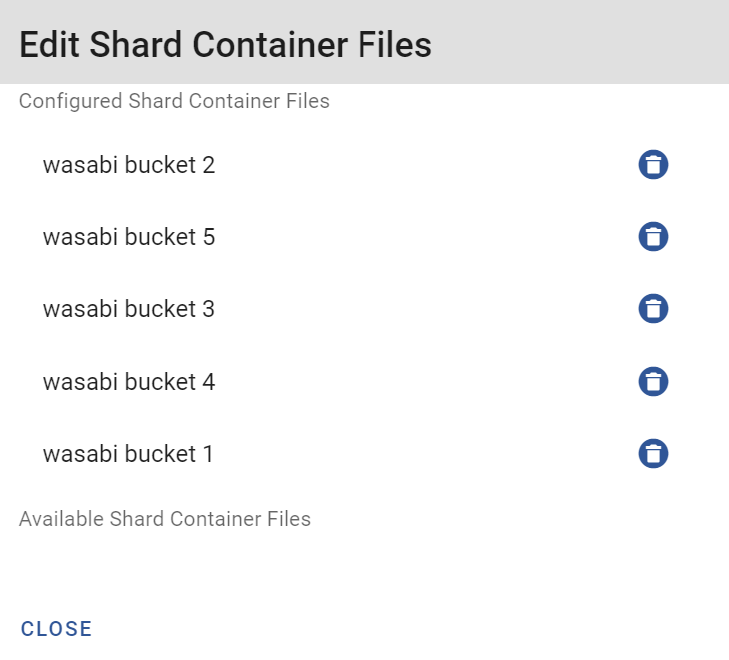
4.18 For the rest of the configuration options perform the following:
Shuffle - turn on or off if desired
Compression - Selected by default. Turn off if data is already compressed or highly random in nature
Compression Algorithm - LZ4 (fast compression) is selected by default. GZIP (DEFLATE) can be chosen which, while slower, provides better compression in many cases.
Digest - turn on or off if desired
Poison Percentage - Recommended percentage is roughly 0.5-1%. This will add garbage data at random intervals within the sharded data.
Poison Mix - There are 4 types of poison:
Text data: This will create text garbage data
Binary data: This will create binary garbage data
Autodetect: The system will generate random garbage data based on either text or binary by inspecting the data from the previous shards
Customer data: This will take existing data and scramble it before inserting it as poison data

4.19 Once your policy is created you will want to save it. Click on "Save Config" at the top of the page.
5. Upload Configuration to Cluster
5.1 On the ShardSecure Server Management click on "Admin" and then click on "Cluster Config"

5.2 Click on "Generate Key"
A file with the name ‘config-data.key’ has been generated on the server under

5.3 Open the file and copy the text content
5.4 Go back to the Config Management Page
5.5 Make sure your Config is Saved
5.6 Select Prepare Config
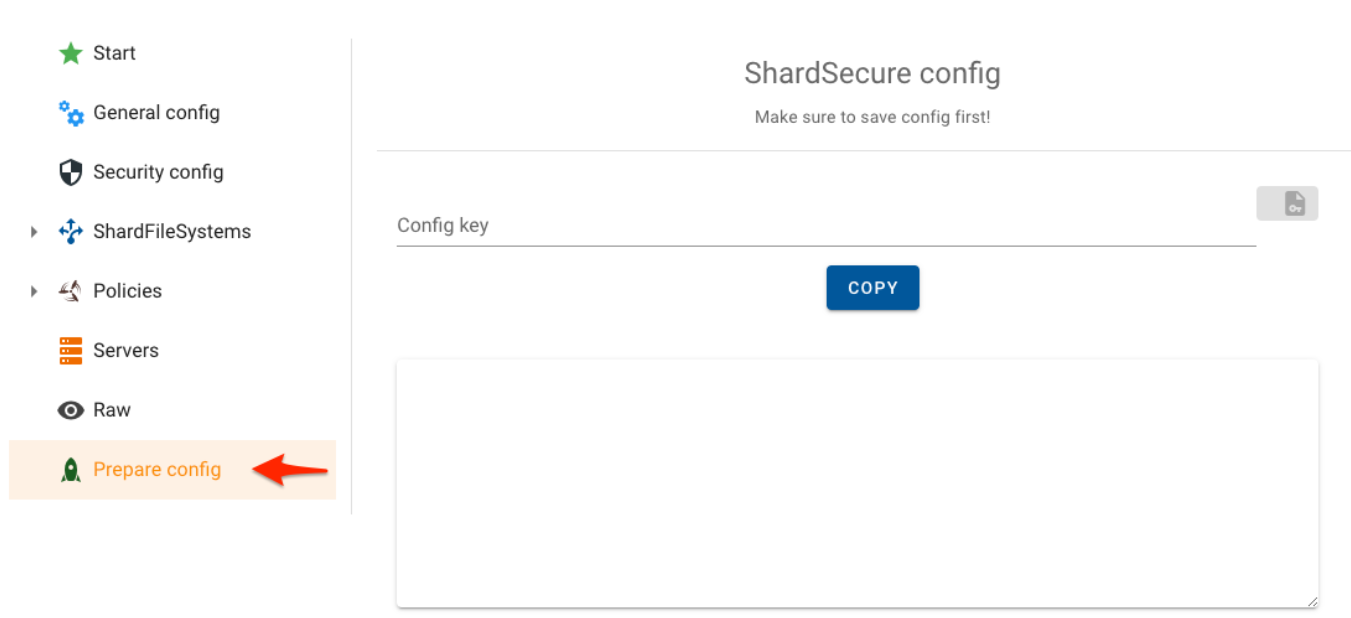
5.7 Paste the text content to "Config Key"

5.8 Press the Generate Config button and then click on "Copy" once the config info is displayed

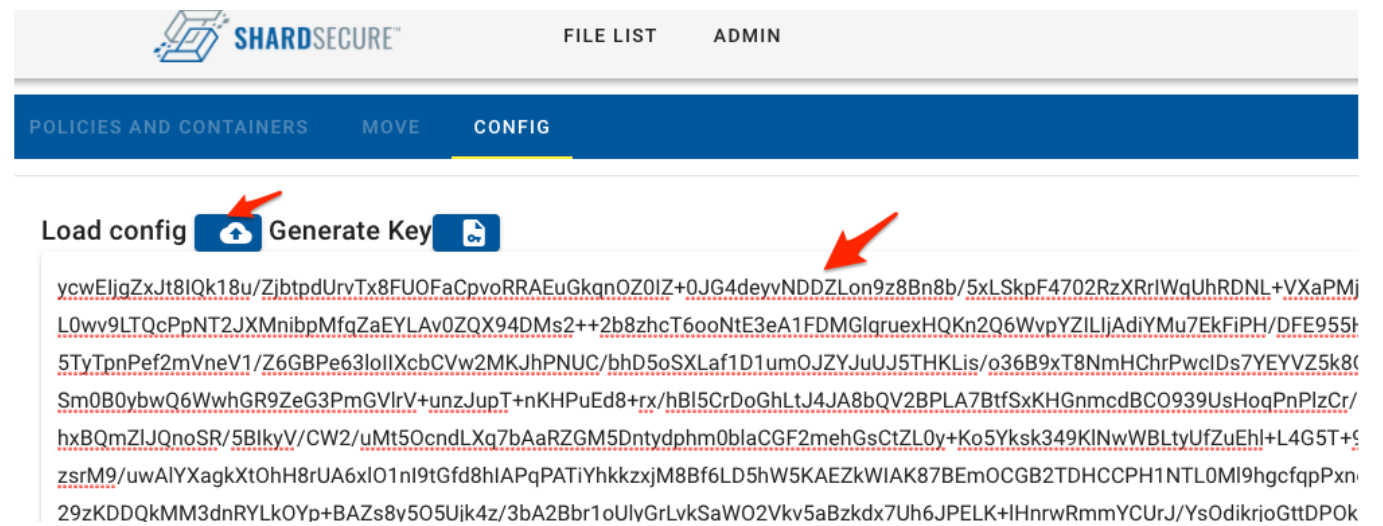
5.9 Go back to the Shardsecure Server Management page and click on "Admin" and then "Cluster Config"
5.10 Paste the data to the text area and click on "Load Config"
6. Create an Upload Bucket
After uploading the configuration to your ShardSecure Cluster you can now create a bucket within ShardSecure and upload data via the S3 compatible API. ShardSecure will introduce data confidentiality, integrity and availability before the data is stored on Wasabi.
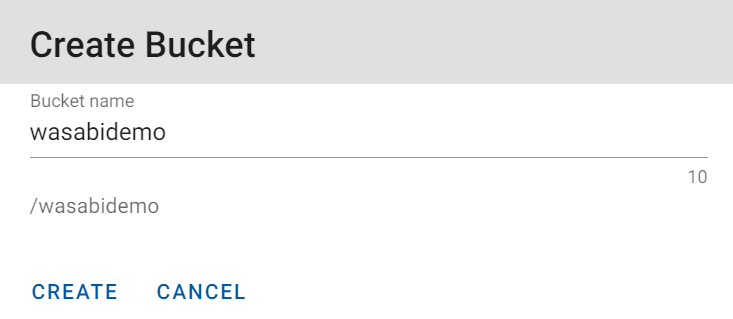
6.1 On the ShardSecure portal click on the "+" to create an upload bucket.

6.2 Specify a name for the bucket and click on "Create"
6.3 You will now see your bucket appear in the list. Click on your bucket and it will display the bucket properties and files.
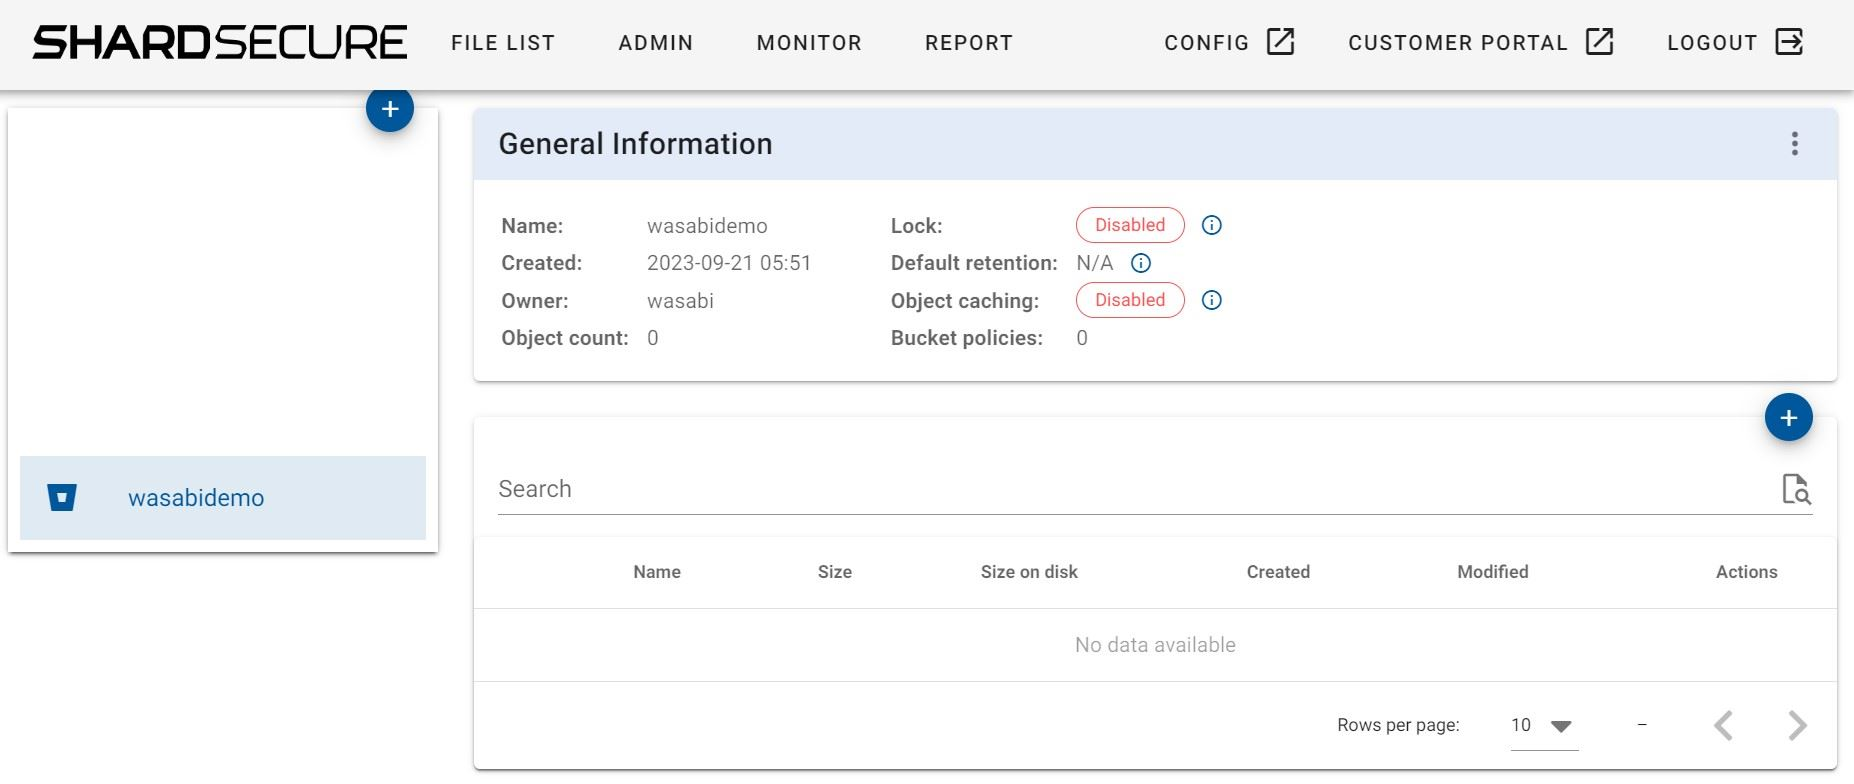
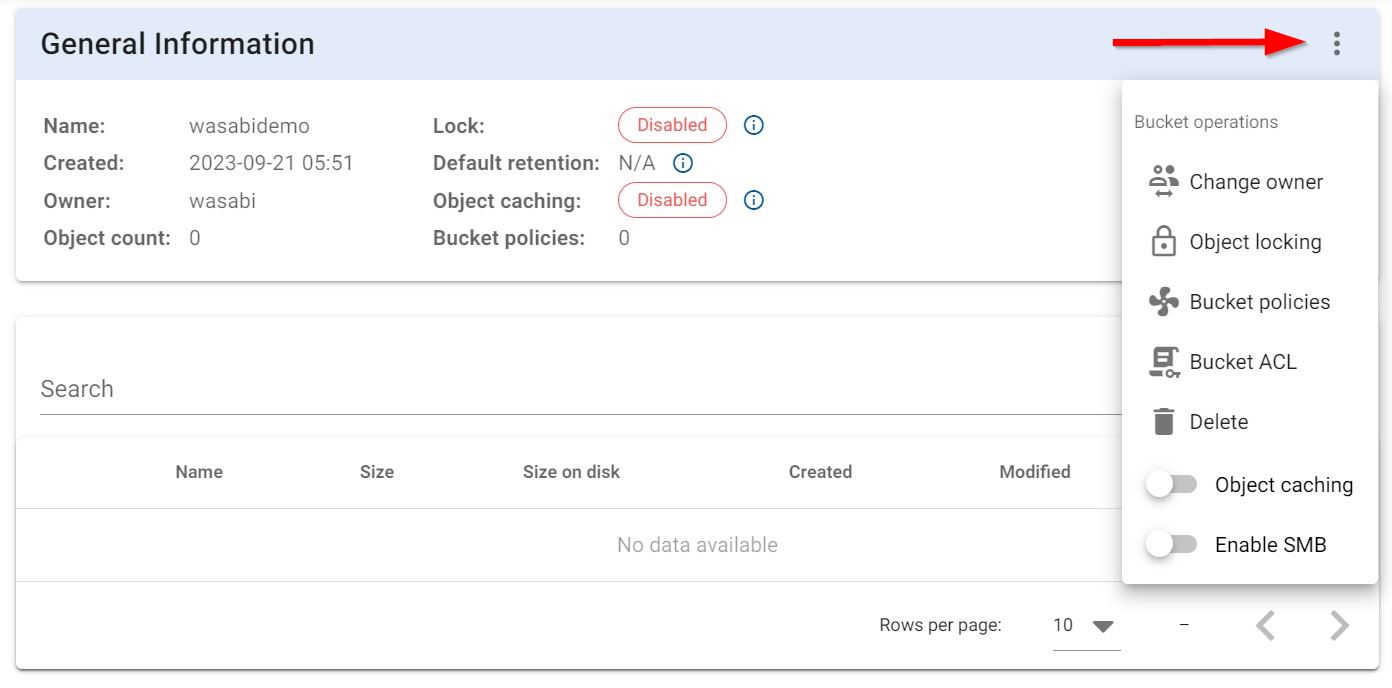
6.4 Click on the three dots on the left hand side to expand the Bucket Operations options. Click on "Bucket policies" to assign the bucket the policy you created earlier in Config.
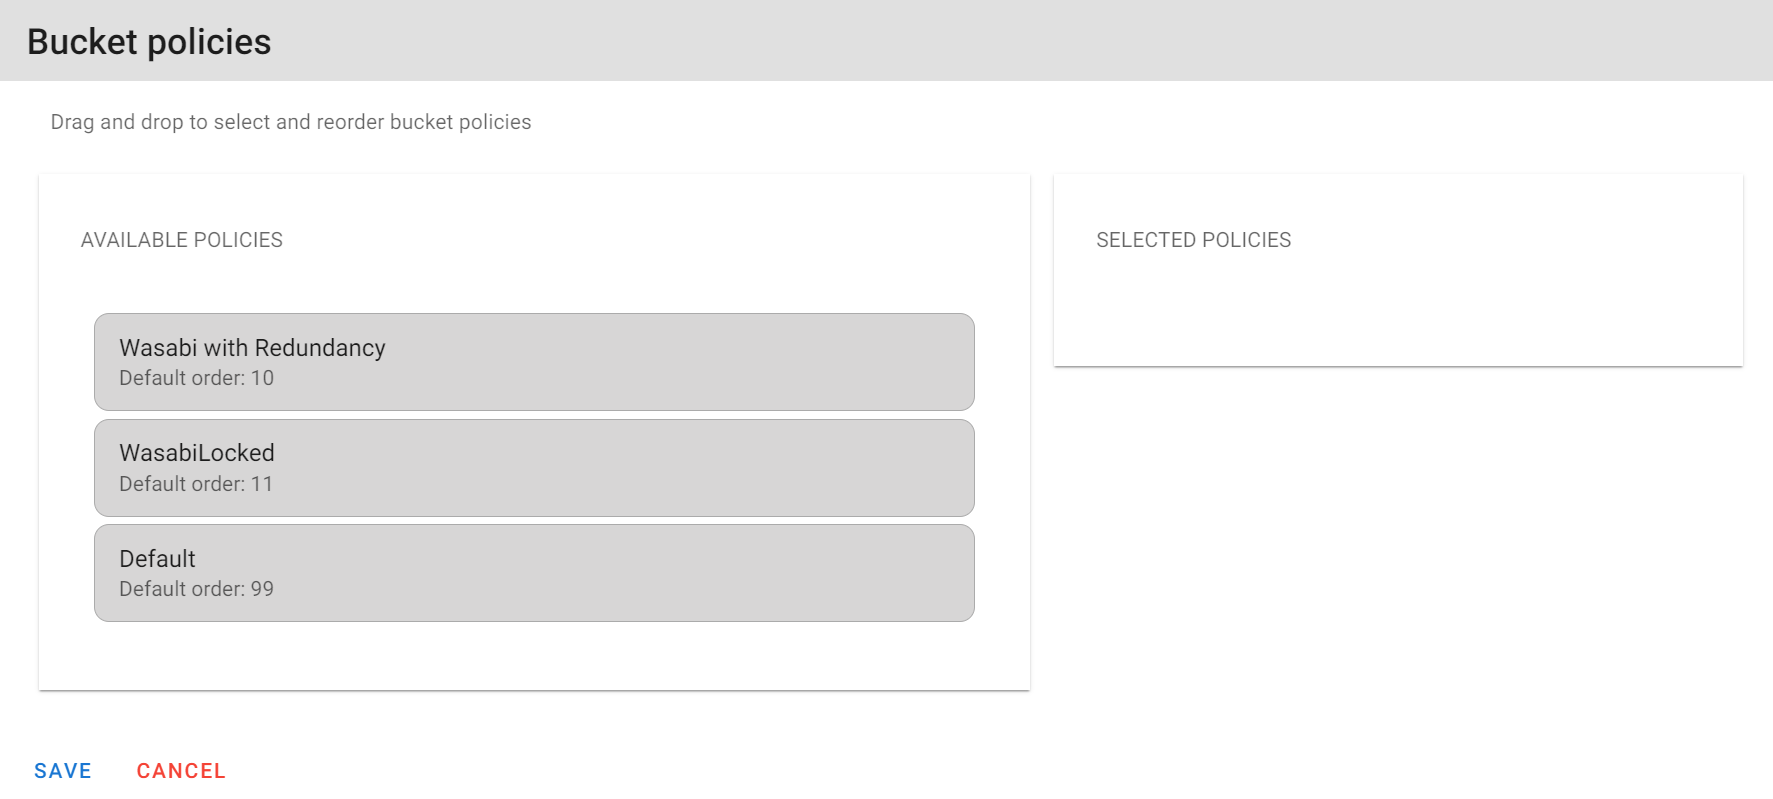
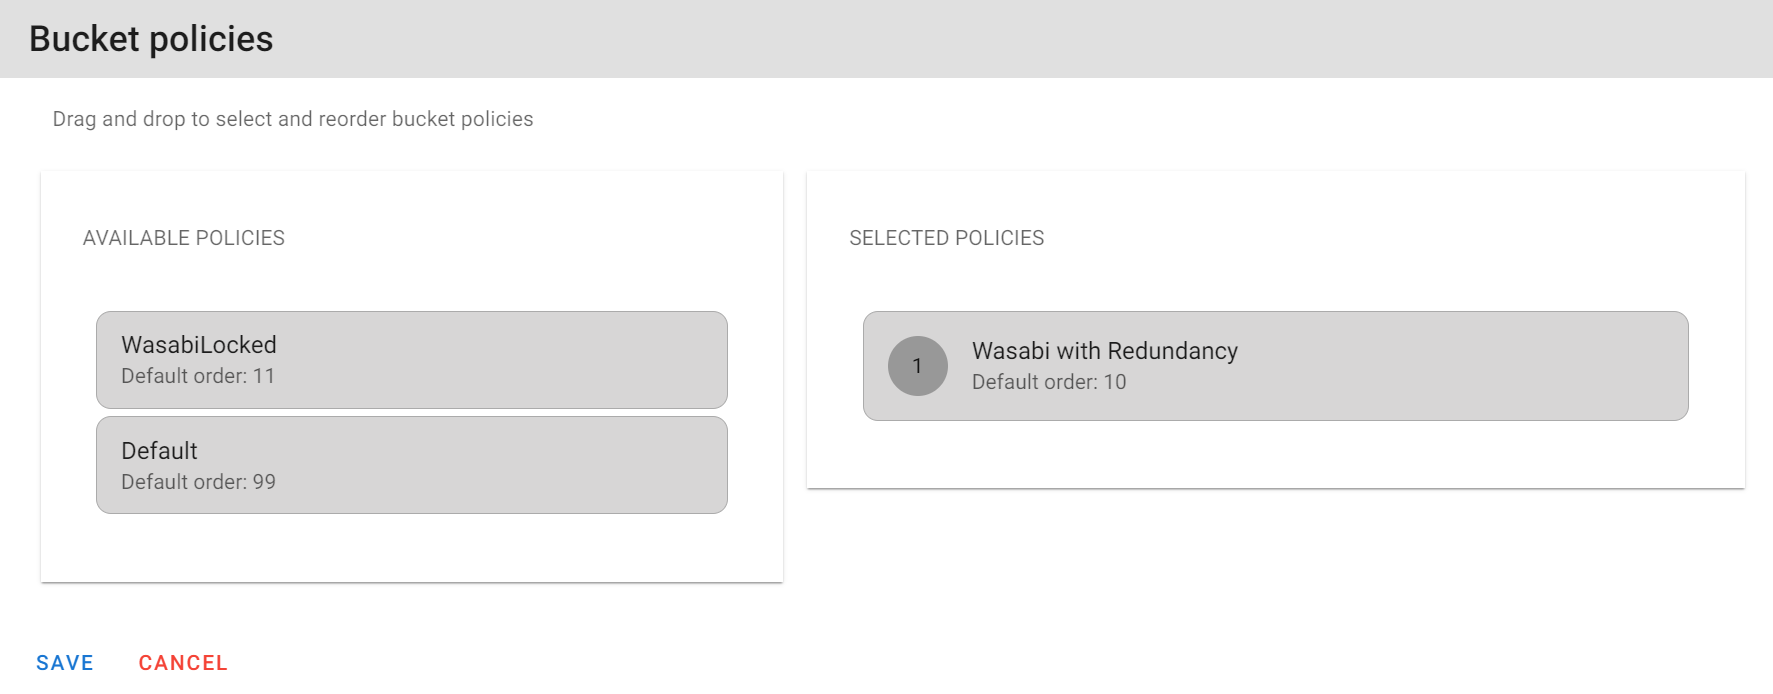
6.5 Click on and drag the policy that you wish to use over to the Selected Policies and click on Save.
6.6 Now you can click on the "+" to select a file to upload to the bucket.
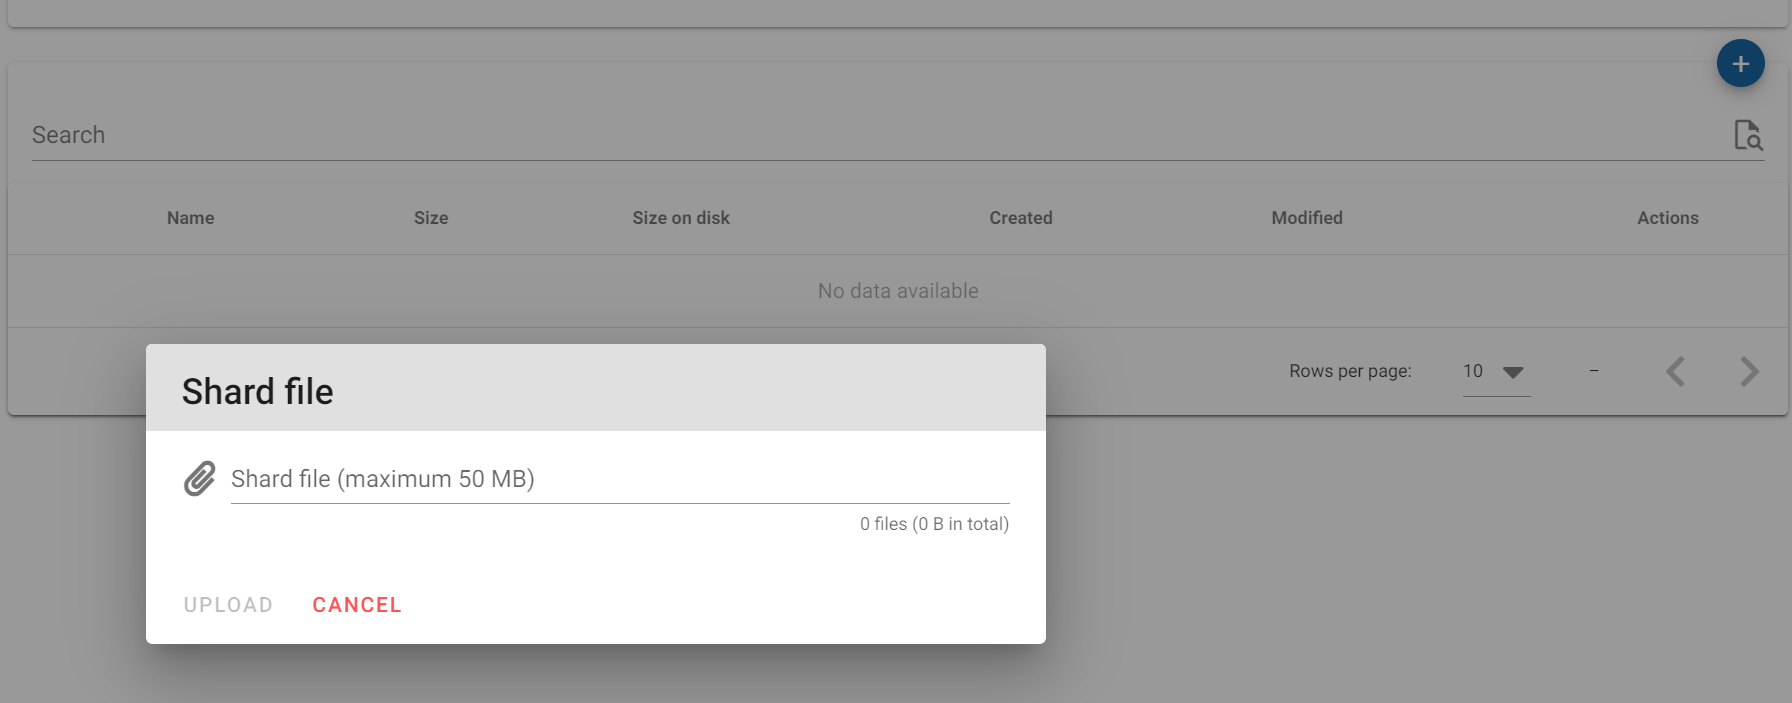
6.7 Once you have selected your file click on "Upload"
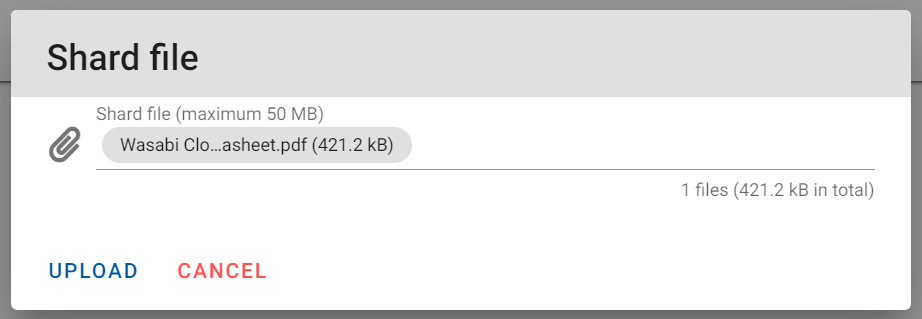
6.8 You will now see your file listed inside the bucket.

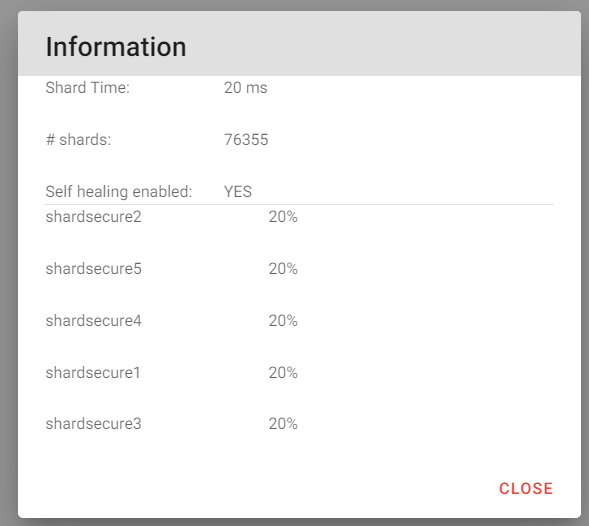
6.9 Click on the three dots under action and then click on "Information

6.10 You will now see to which buckets your file has been distributed across.
7. Immutability/Object Locking
"Object Lock" is a feature of the ShardSecure application that allows you to prevent the deletion or modification of files for a set amount of time. Files that you mark as locked can still be downloaded and accessed by authorized end users, just not overwritten, or deleted. This refers to Write-Once-Read-Many (WORM) functionalities to protect documents from modification and deletion for a certain time when enabled.
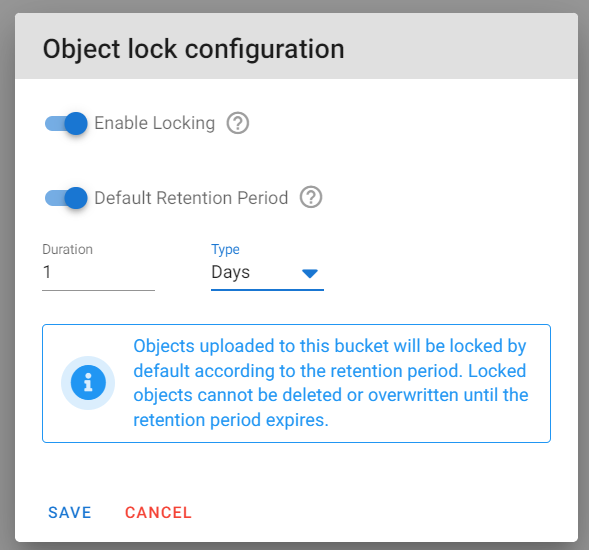
7.1 Click on the bucket in which you would like to enable Object Locking. Click on the three dots to reveal the "Bucket Operations" menu and select "Object Locking".

7.2 Click on the toggle for "Enable Locking"
7.3 Click on the toggle for "Default Retention Period"
7.4 Specify the Duration and Type "Days or Years"
7.5 Click on "Save"
Note: You can further utilize Object Locking by using Wasabi's Immutability feature by creating Object Lock enabled buckets in the Wasabi Console when creating your initial configuration.
Log in to your Wasabi Cloud Console and create your Object Lock Enabled Bucket following the steps in Object Lock Enabled Bucket article.
8. Replication of Data
ShardSecure’s automatic data migration feature allows companies to configure Tier 2 storage locations. If a specified number of data integrity checks fail, all the data in the Tier 1 storage location can be automatically migrated — in the background, with no downtime — to the secure Tier 2 location.
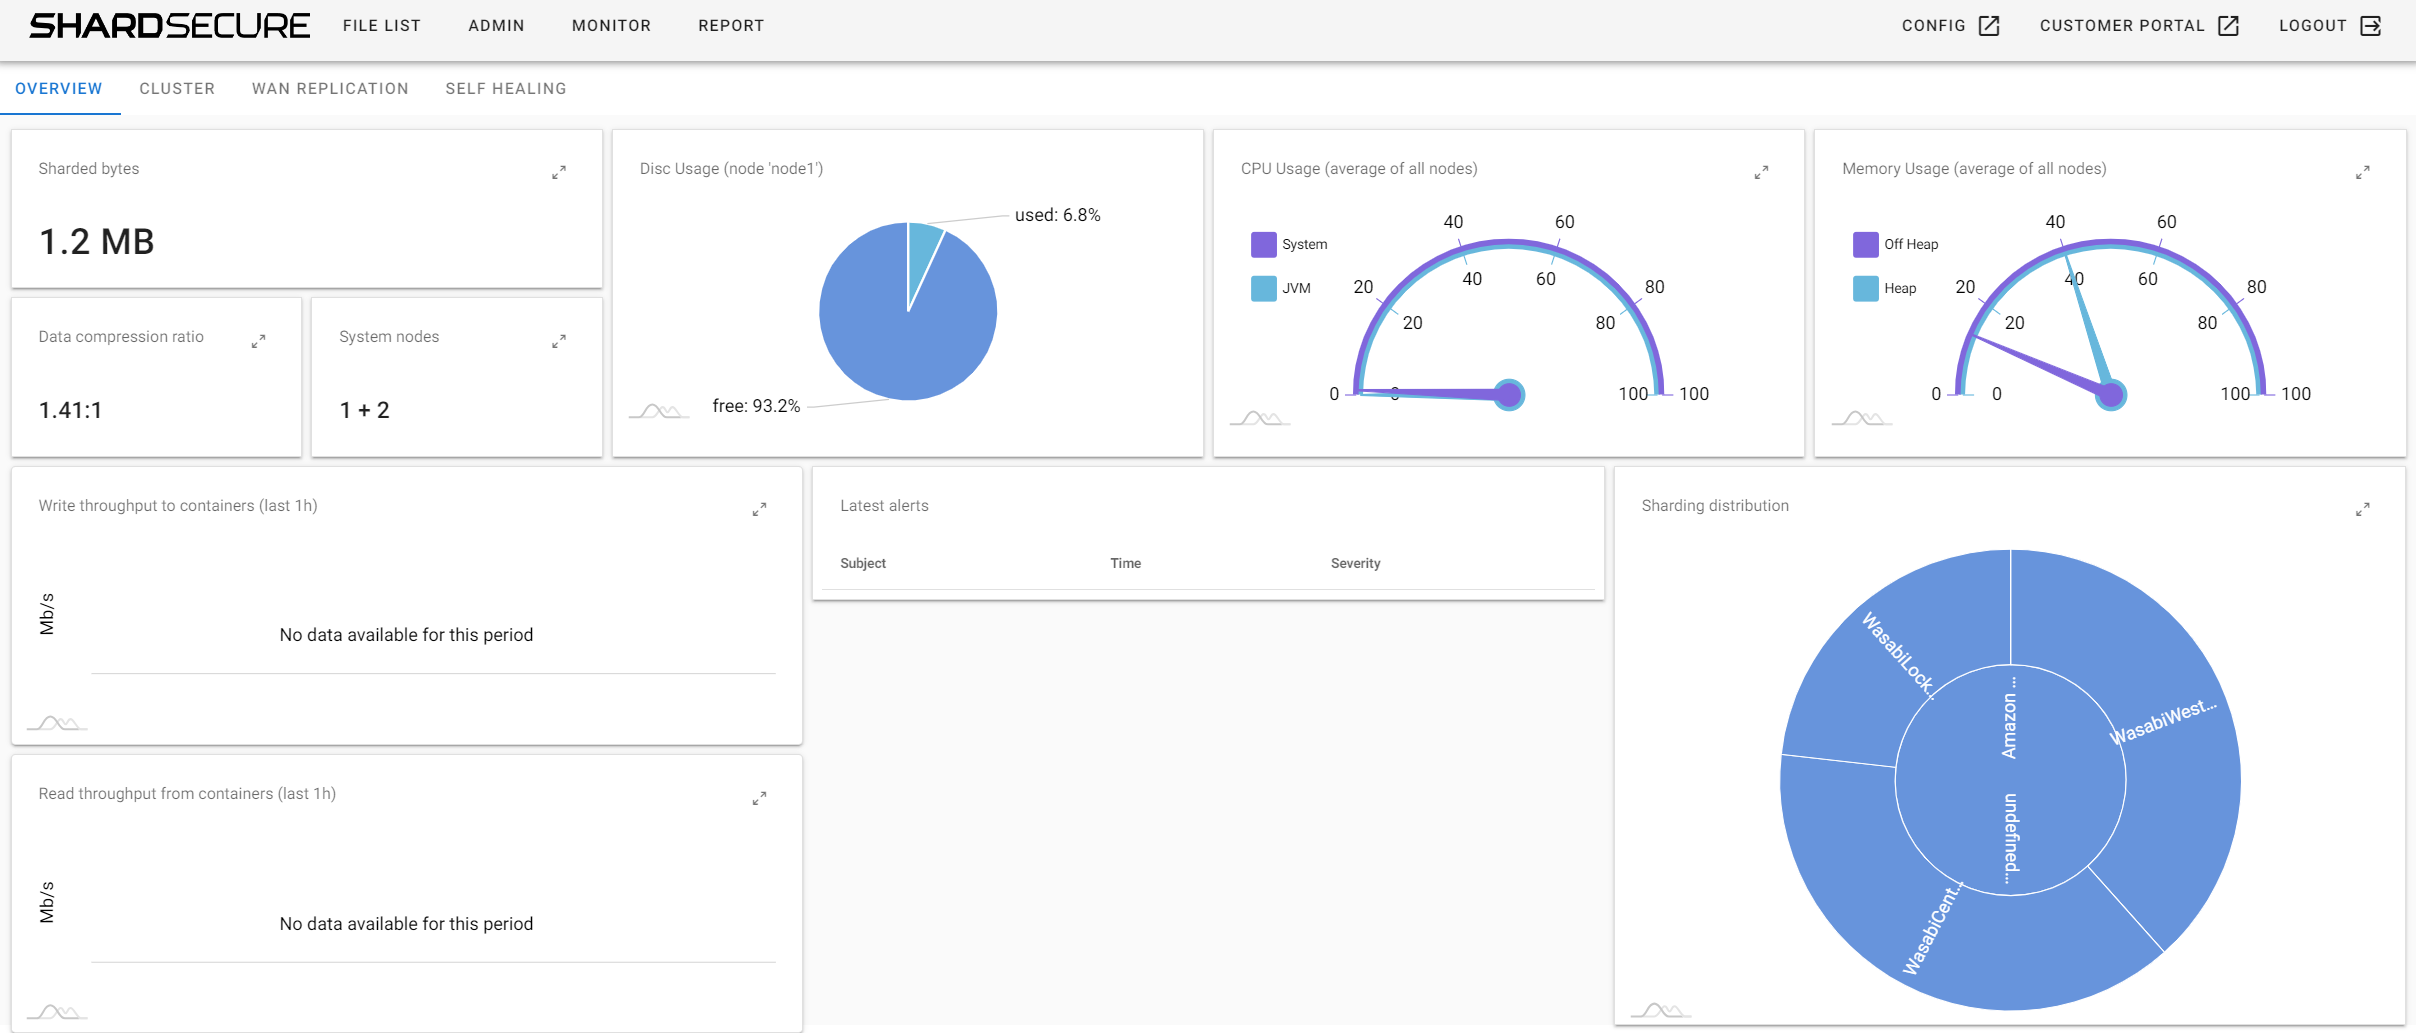
9. Monitor and Reporting
9.1 To see an overview of your Cluster and monitor the resources click on the "Monitor" tab on the top row.
9.2 To see or review any reporting you must first run the Report Generator task.
9.3 Click on "Admin" and then click on "Scheduled Tasks"
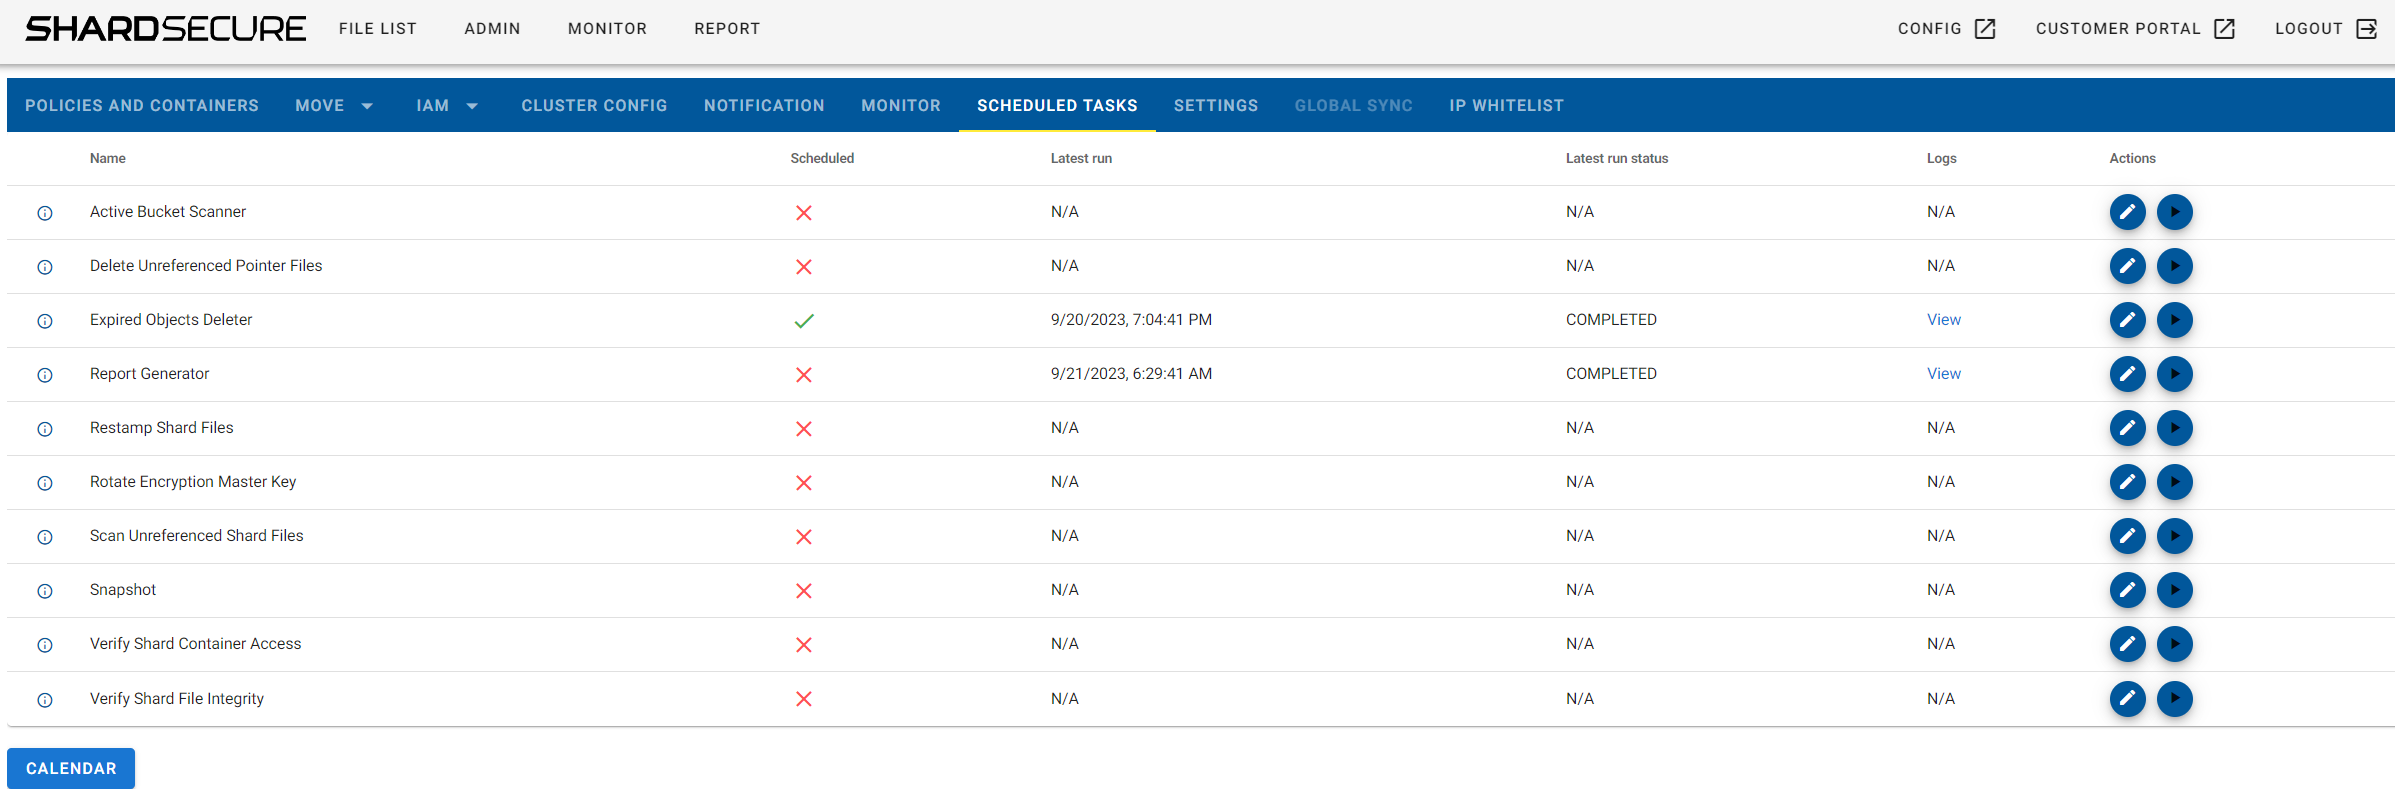
9.4 Click on the "Play" button for the Report Generator task to force the job to run now. The report will compile and then become available to review in the "Report" section.
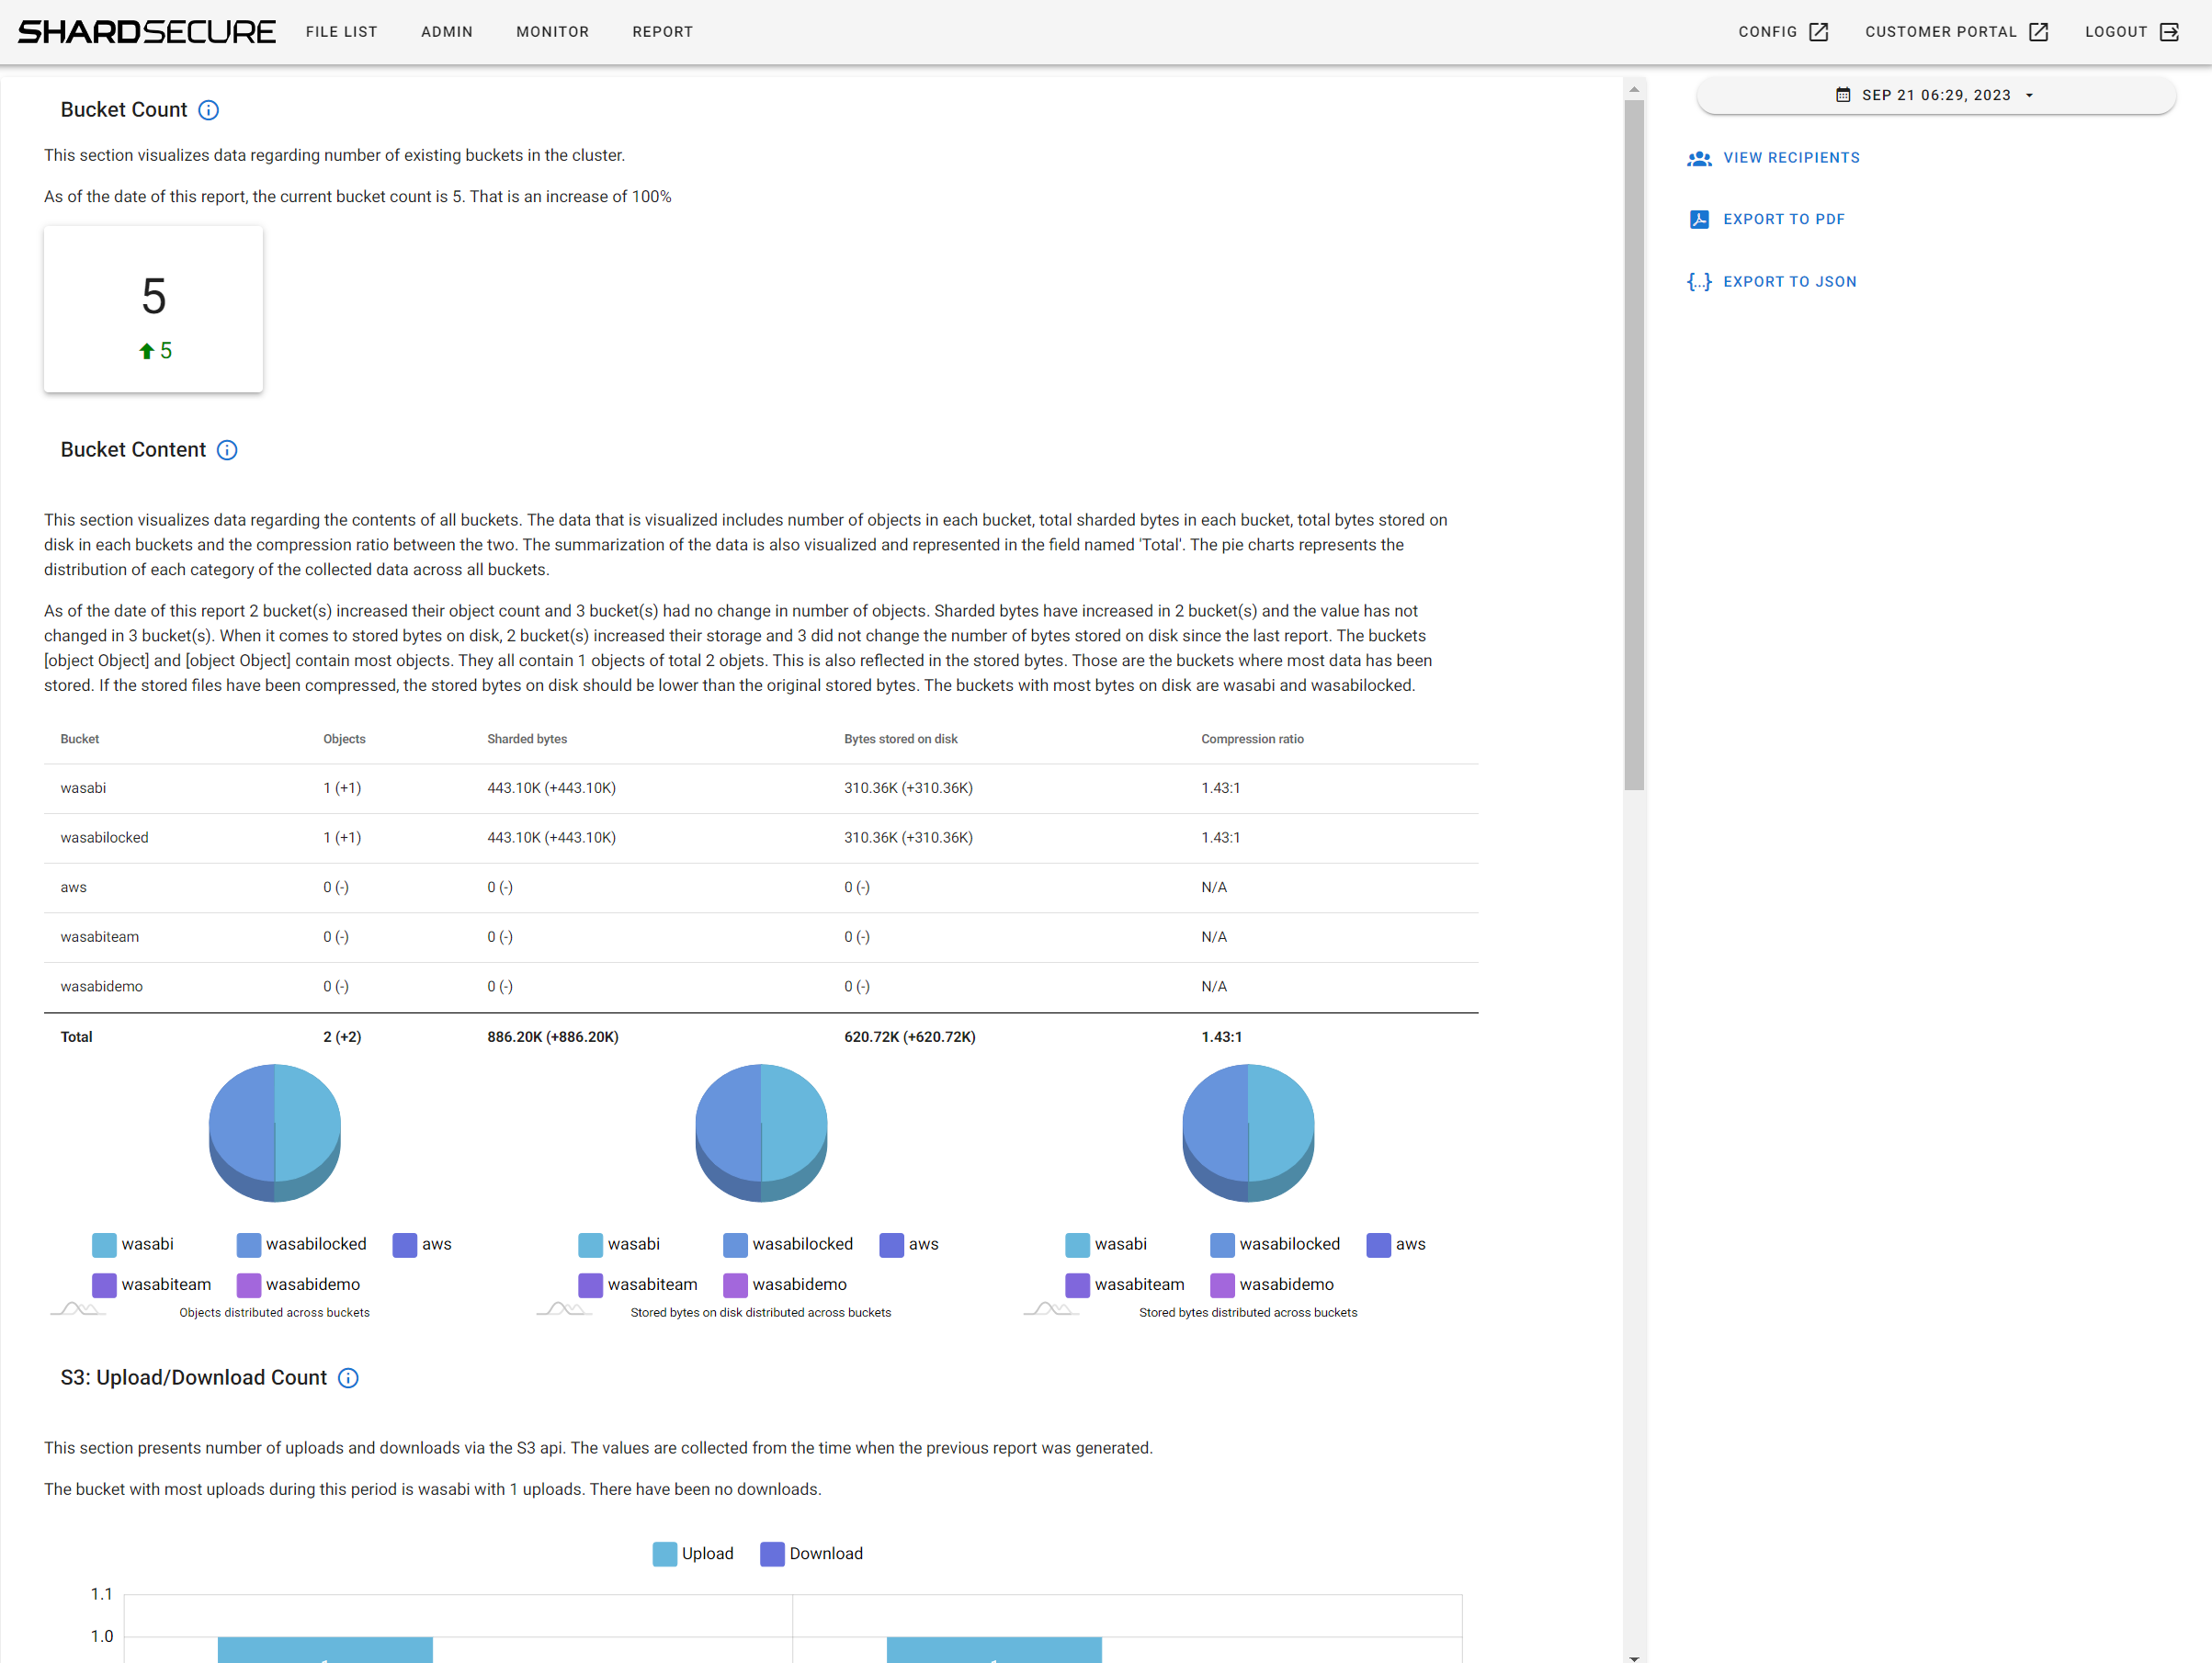
9.5 Once available if you click on "Report" you will now see the latest report being displayed.
For support or questions, contact ShardSecure at support@shardsecure.com