WSC installs as a plugin within the XProtect application and operates within the XProtect Management client. Additionally, to prepare Milestone XProtect for use with WSC, you may want to verify that their WSC system meets the following requirements for your recording server, as described below.
Requirements
Milestone XProtect VMS software Version 25.1 and earlier
Internet upload speed at least 25% more than total camera ingests to disk. To quickly estimate your required internet speed, use the “1/5 rule of thumb.” If you know the average bitrate of all your cameras, multiply the total recording bitrate x 1.5 (allows for read back and fluctuations).
For example:
173 Mbps x 1.5 = ~250 Mbps
If you know the current storage requirements for a given retention period, multiply #GB / #days x .15
For example:
350 GB per day = 350 x.15 = ~50Mbps
100TB per month = 100 x1024 x.15 ÷ 30 = ~500 MbpsAccess to the Wasabi service endpoint.
Firewall Ports TCP 443, 8536, 8537 open.
If using a proxy server, contact Wasabi support for additional instructions.
Verifying the Recording Server Storage Settings
Before installing WSC for use with Milestone XProtect, be sure that you have enabled the correct retention period and database size settings. To do so, follow the steps below.
If you need to decommission an Archive volume without losing data, be sure that the retention time on the Recording storage is at least as long as the current Archive volume. Until a full Archive period has been met, some of the archive data will continue to come from the current Archive. Once a full archive period has passed, the Archive volume can be decommissioned, as all latest “archive” data is now coming from the cloud.
Prior to installing WSC, be sure that your recording server is able to record. Your recording server can be recording live camera data while installing WSC, as it will not affect operations.
WSC operates directly on your recording storage. When using Disaster Recovery (DR), this gives you the best possible recovery. If you require that your Milestone Recording Server be configured with an archive, you can use WSC for either the recording storage or the archive, or, for both of them.
Connect and configure your Recording storage (and, optionally, your archive) according to Milestone’s guidelines.
Close the Milestone XProtect Management Client application.
Reopen the application to refresh the settings.
Click Recording Servers on the site navigation.
.png)
Highlight your recording server from the list.
.png)
Select the Storage tab.
.png)
Double-click the Recording location to open the Storage and Recording Settings dialog.
Enter the Retention time.
Be sure to set the retention time to include the total camera data in which to retain on your volume(s). The retention time should account for both on-premise and cloud storage. This setting is global and determines when data will be deleted locally and in the cloud. For example, if you set a 90-day retention time, regardless of where the data actually is, Milestone XProtect will delete it. As Milestone XProtect deletes the local files, WSC will then delete the associated data in the cloud. Select how much data stays on the local drive and in nearline (hot) cloud storage using WSC.
Enter the Maximum size.
By default, this will mirror the on-premise hard drive size. This size should include both local and cloud storage. You must update this size to include the expected amount of cloud storage being used. For example, if you have a 5 TB hard drive and you purchased 25 TBs of Wasabi cloud storage, set the size to 30 TBs (30,000 GBs).
Once complete, click OK.
.png)
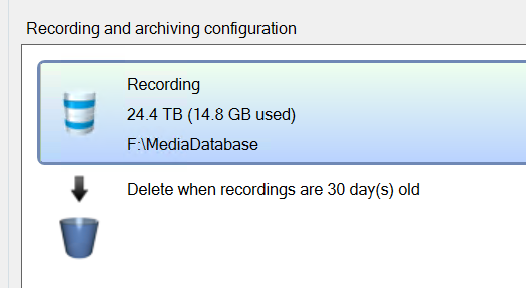
Notice the increased size of the recording server, as shown below.