On the Users panel, click on a user to review and/or edit. The User panel is displayed. For example:

This panel shows the user name and path. It also includes:
ARN—Amazon Resource Name for the user
Creation Date—Date/time when the user was created
Account ID—Identification for the account in which the user is associated
Active—Toggle to set a sub-user account as active or inactive
MFA Status—Indication of whether or not multi-factor authentication (MFA) is enabled for the user
Require MFA—Toggle to set a requirement that the user enable MFA
You can click ![]() to copy the ARN or Account ID to the clipboard.
to copy the ARN or Account ID to the clipboard.
The panel also includes five options:
Active
You can set a sub-user account as active or inactive.
To make the sub-user account active, slide the option to the right. The word "Yes" is displayed, and the slide option is purple: 
When the sub-user account is inactive, the word "No" is displayed, and the slide option is gray: 
If you change the status, click Update to confirm.
Require MFA
You can require that the user enable multi-factor authentication (MFA) when they enter the Console or authenticate a CLI session for the first time. This encourages users to adopt safer online practices.
To require the sub-user to enable MFA, slide the option to the right. The word "On" is displayed, and the slide option is purple:  When the sub-user account is inactive, the word "Off" is displayed, and the slide option is gray:
If you change the status, click Update to confirm.
When Require MFA is turned on, the system automatically applies the WasabiRequireMFA policy to the sub-user. This policy enforces MFA by denying all S3 and IAM operations unless the user is authenticated with MFA.
If access keys associated with the sub-user are used without an MFA-authenticated session, all API requests will be denied. Many third-party applications rely only on access keys and do not support MFA, so authentication attempts from those applications will fail when this policy is attached.
Since the issue often occurs during the List All Buckets operation and the failing action is s3:ListAllMyBuckets with an explicit deny, you can troubleshoot using the AWS CLI. For example, attempting to list buckets or access a specific bucket can help determine if list operations are failing due to an explicit deny.
aws s3 ls --endpoint-url="https://s3.wasabisys.com" --profile "wasabi"

An error occurred (AccessDenied) when calling the ListBuckets operation: User: arn:aws:iam::100000XXXXXX:user/sub-user is not authorized to perform: s3:ListAllMyBuckets on resource: arn:aws:s3::: with an explicit deny
For this reason, you should attach this policy only to sub-users who access the Console or use CLI sessions authenticated with MFA. If a sub-user uses access keys for third-party applications that do not support MFA, remove the policy to prevent access from being blocked.
If a sub-user only requires programmatic access via access keys for third-party applications that do not support MFA, Wasabi recommends that you remove the sub-user’s Console access and do not enable Require MFA to avoid impacting access. To deny Console access, refer to the Change Password option (Denying Console Access).
Assigned Groups
Open the Assigned Groups drop-down on the user panel. The groups to which the user is associated are displayed. In this example, the user is associated with two groups: test-engineers and software-developers.

To associate the user with additional groups:
Click in the Search Groups area.

Select from the groups listed. (If the list of groups is long, you can begin to type characters in the group name.)
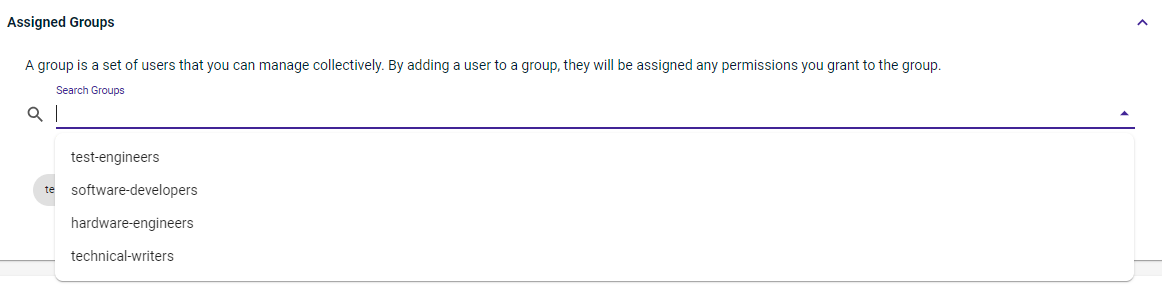
As soon as you select a group, it is displayed and associated with the user.

To remove an association, click ![]() for the group.
for the group.
Change Password
Open the Change Password drop-down on the user panel.
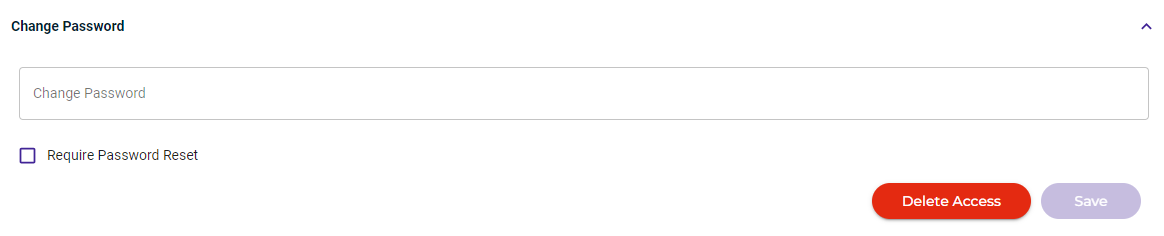
To change the user’s password:
Click in the Change Password area.
Enter a new password that follows the password policy settings. As you enter a password, you can click
 to show the password characters. Once you click outside the Change Password area, the Show tools will no longer be available.
If you want to require the user to reset the password, check the Require Password Reset option.
Click Save.
Denying Console Access
You can also use this tool to disable the user’s access to the Console. To do so, click Delete Access. To reinstate access, you need to assign a password.
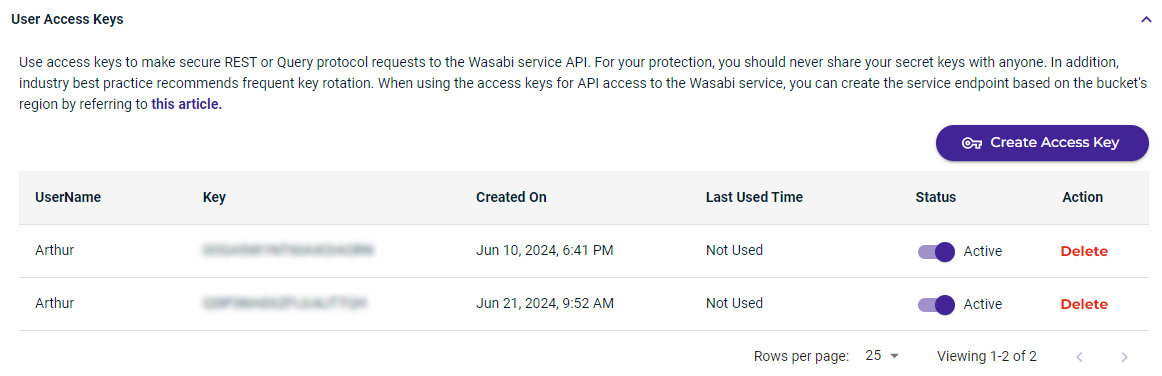
User Access Keys
Open the User Access Keys drop-down on the user panel. In this example, sub-user Arthur has a user access key defined:
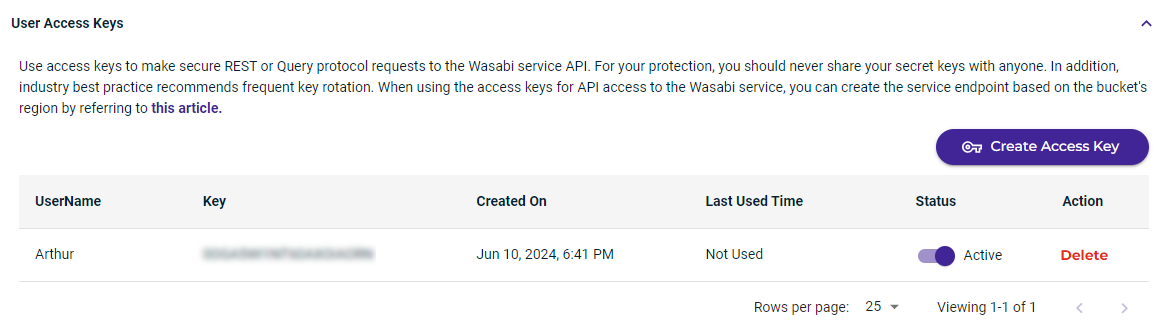
You can create a new access key, change its status, or delete an existing access key, as described below.
Creating an Access Key for a User
Click Create Access Key. A unique access key for the user is displayed. For example:
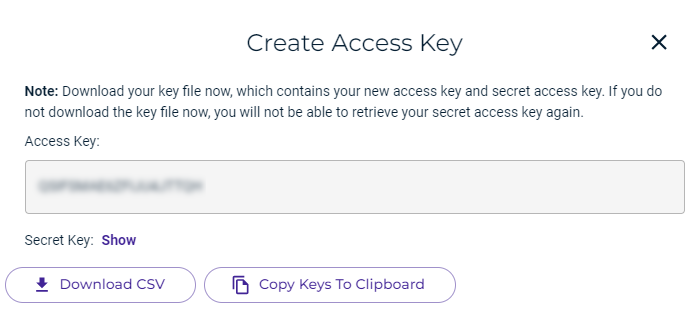
To show the Secret Key, click the Show link. For example:
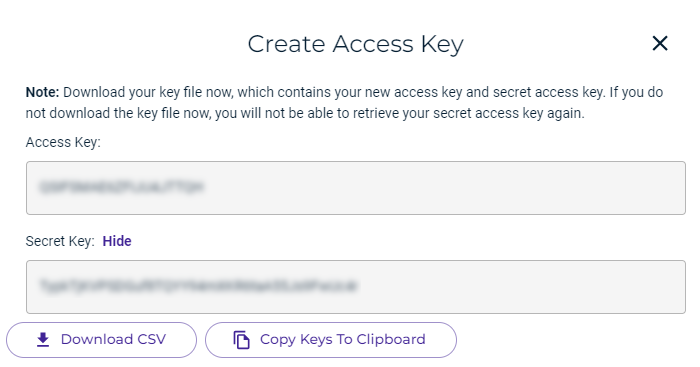
Be sure to copy these keys and store them in a safe place. Notice that two buttons are provided to conveniently download the keys in a CSV file or copy the keys to the clipboard (and then paste them into a file to save).
After saving the keys, click X. The access key is displayed. For example:
Changing the Status of an Access Key
You can change the status of an access key from Active to Inactive.
To make the access key active, slide the option to the right. The slide option is purple: 
When the access key is inactive, the option is gray: 
Deleting an Access Key
Click Delete to the right of the access key you want to delete.
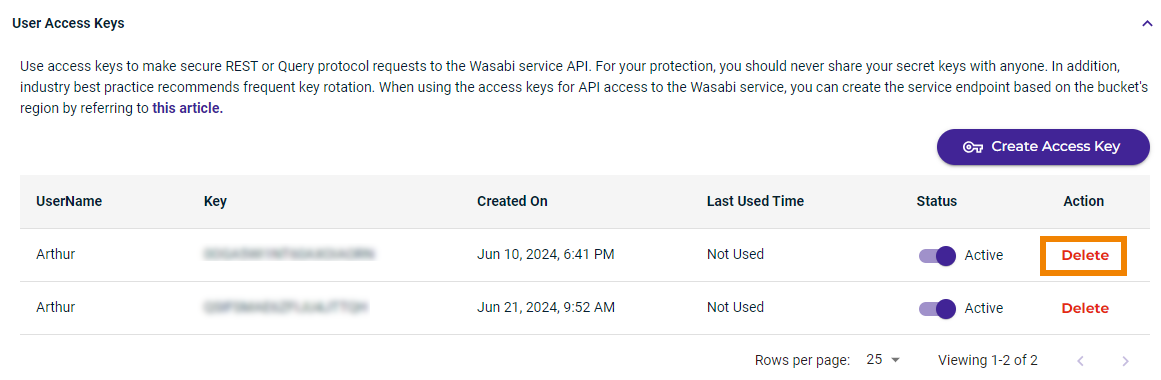
A message asks if you want to delete the access key. Click Delete to remove the key.

MFA Settings
Open the MFA Settings drop-down on the user panel. Refer to the description of Multi-Factor Authentication (MFA) Settings.
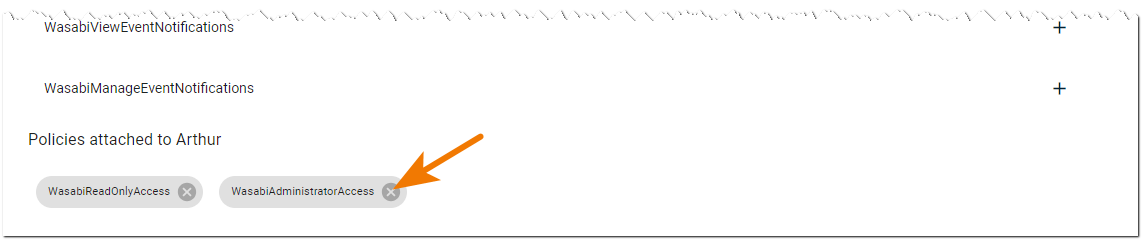
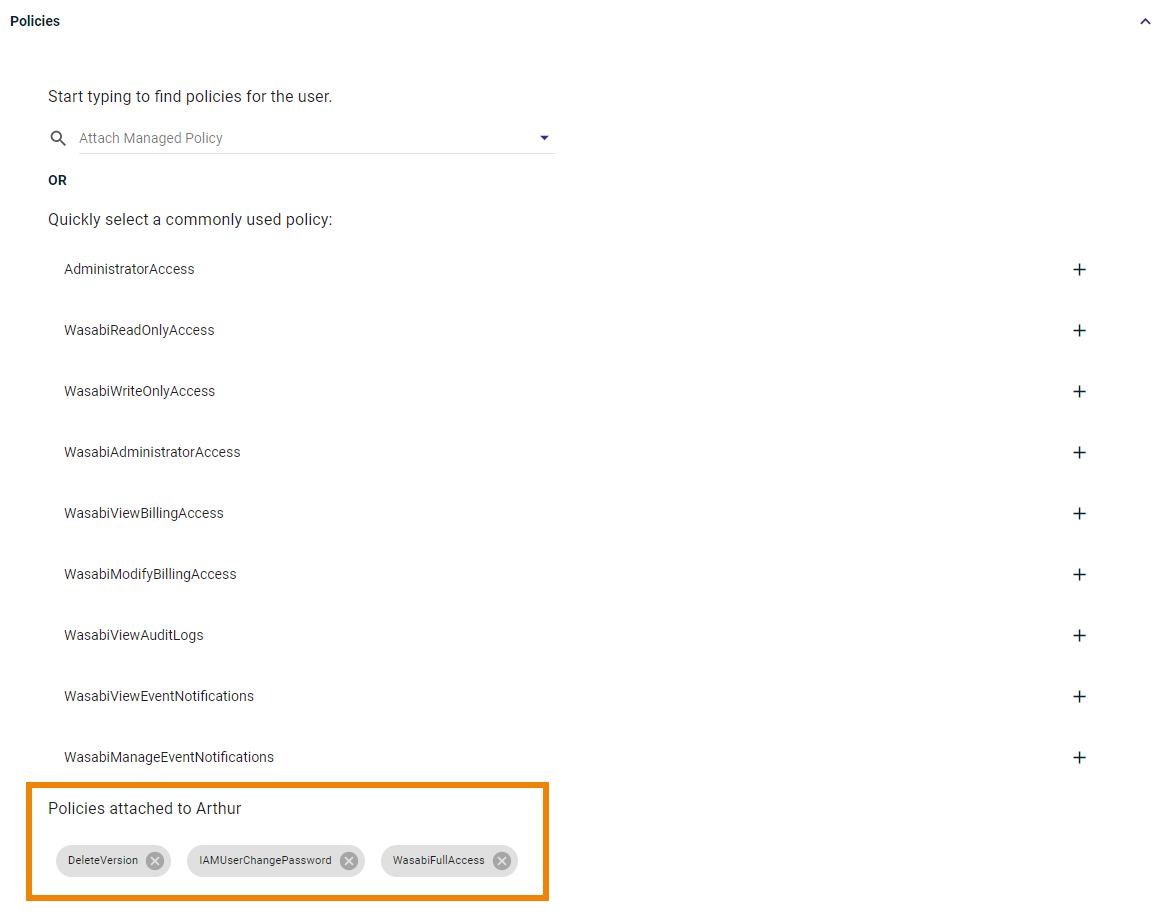
Policies
You can associate policies with a user. And, you can remove a policy from a user. (Refer to Policies for more information about policies.)
Associating a Policy With a User
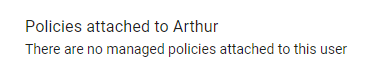
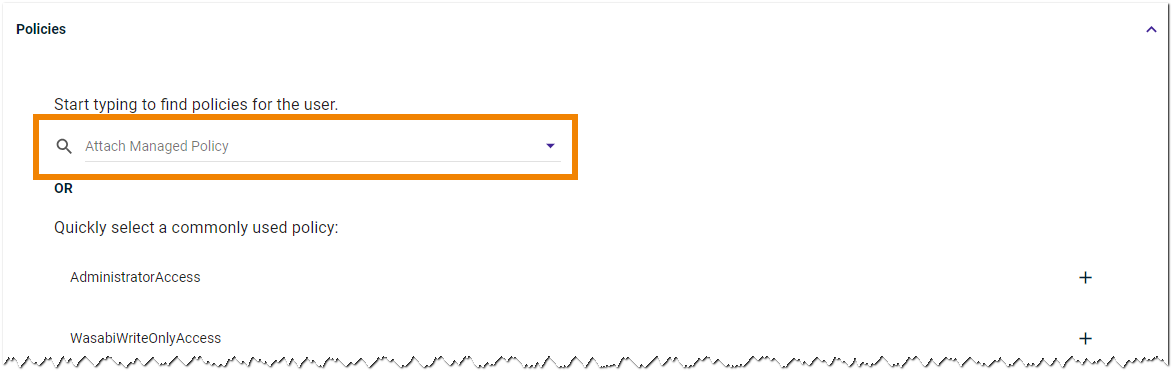
Click the Policies drop-down. The Policies list is displayed, and assigned policies are shown.
If no policies are currently attached, the area appears as:
You can attach a policy to the user in two ways:
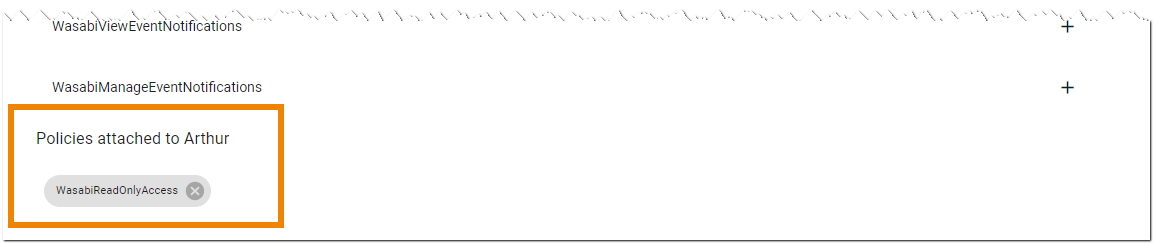
If you see the desired policy in the list, select it by clicking the + to the right of the policy name. For example, you can select WasabiReadOnlyAccess:
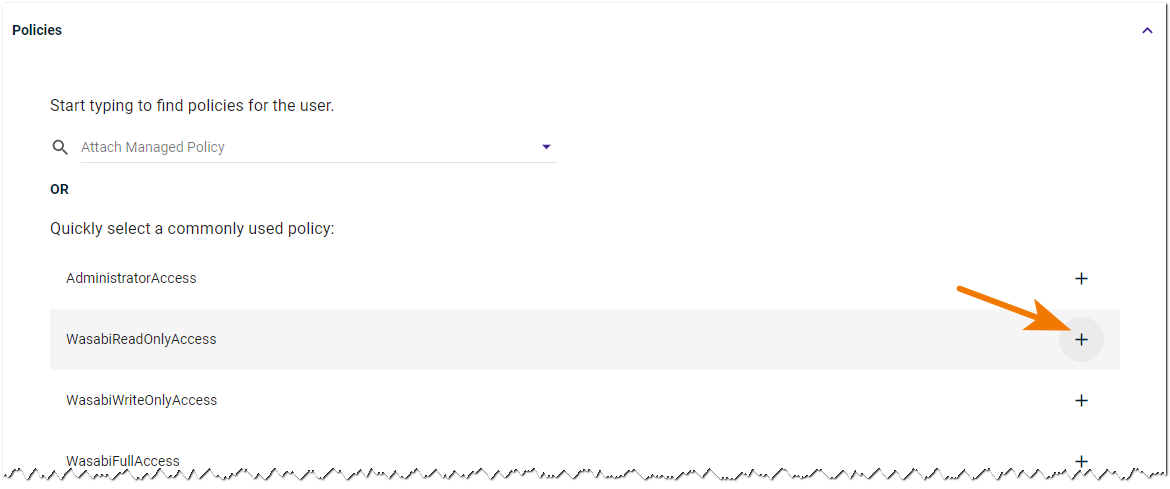
As soon as you click +, the policy is added to the Assigned Policies area:
If you do not see the desired policy in the list, you can search for it. Click in the Attached Managed Policy area:
When you click, a list of available policies is displayed.
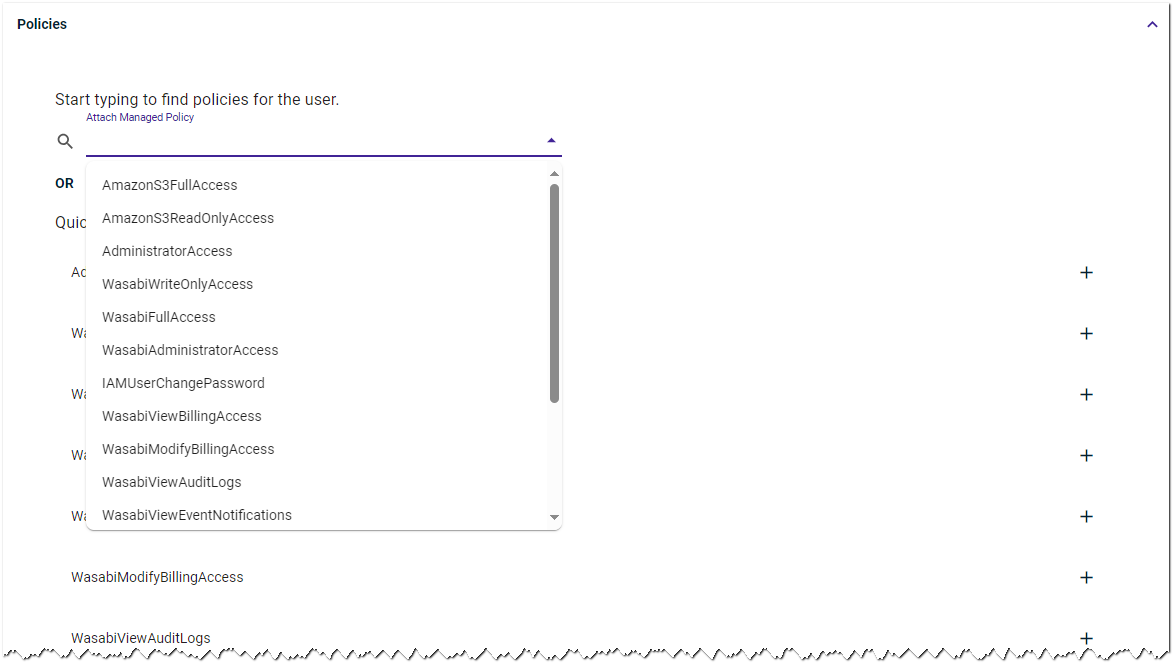
Select a policy from the list. As soon as you select, the policy is displayed in the Assigned Policies area. In this example, the DeleteVersion policy was selected:
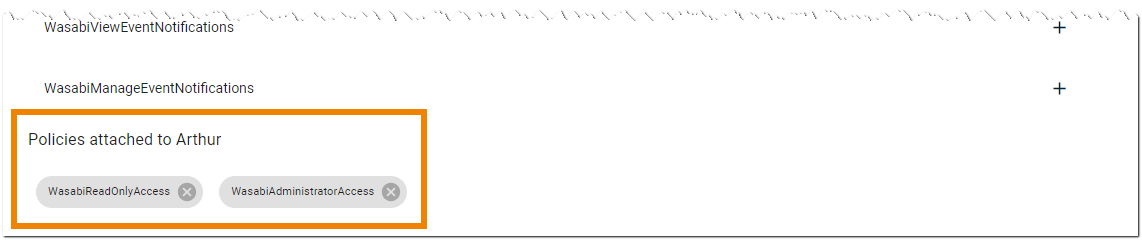
As shown above, the attached policies are listed at the bottom of the panel.
Removing a Policy From a User
Click ![]() for the policy.
for the policy.