System for Cross-domain Identity Management (SCIM) is an open standard that simplifies the management of user identities in cloud-based applications and services. SCIM is commonly used to automate the provisioning (creation) and de-provisioning (deletion) user accounts across different systems. This is particularly important in scenarios where a user's identity needs to be synchronized across multiple platforms.
Users provisioned with Wasabi Account Control Management SCIM can log in to WACM only through SSO.
SCIM Supported Features
The following features are supported for your SCIM integration:
Create users
Update user attributes
Deactivate users
Setting Up SCIM Provisioning in Okta
You can use either of the following methods to configure Okta for the WACM SCIM app:
Connecting WACM SCIM to Okta (Preconfigured), below
Connecting WACM SCIM to Okta (Preconfigured)
This section provides the preconfigured method for connecting the WACM SCIM app to Okta.
Create an Okta SCIM Integration
Sign in to Okta with administrative credentials.
Click Admin in the upper-right corner of the page.
Click the Applications tab, then click Applications in the sidebar.
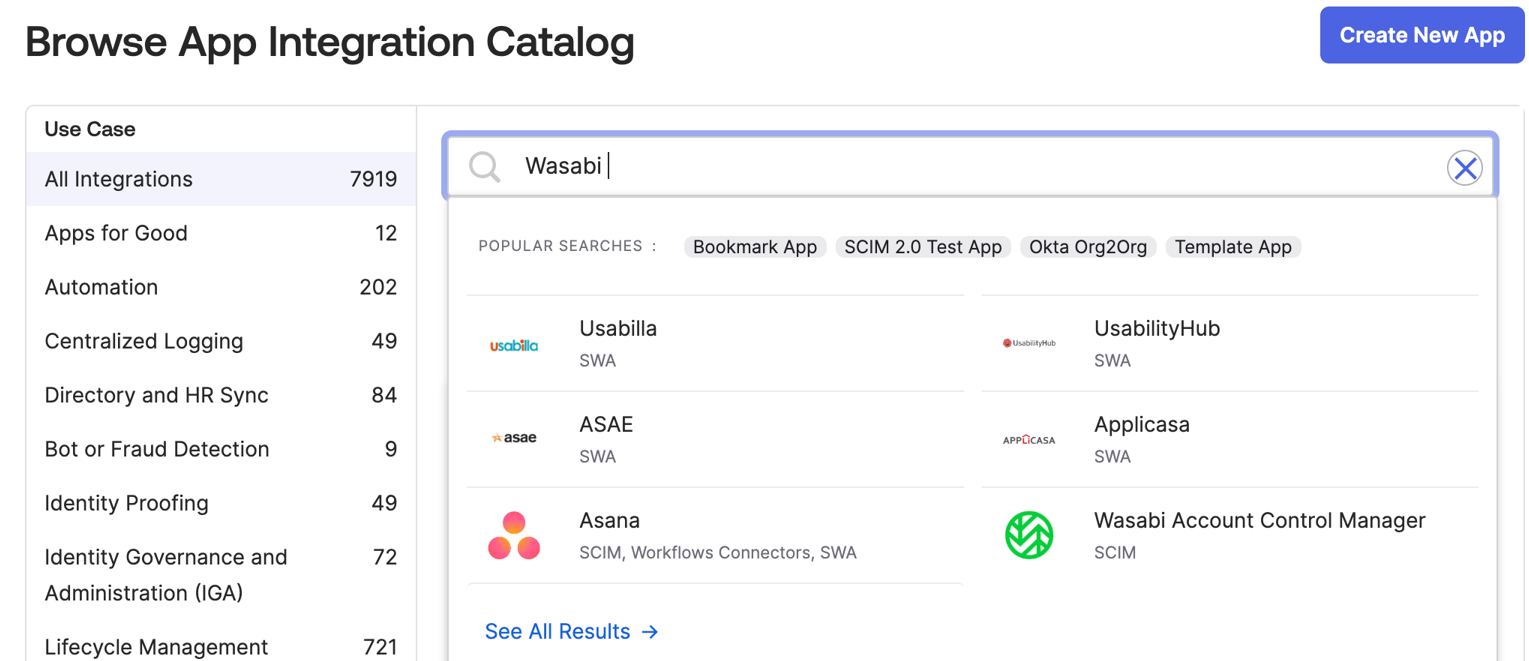
Click Browse App Catalog where you will select the previously configured WACM SCIM app.
Select All Integrations under Use Case.
Enter Wasabi in the Search bar, then click the Wasabi Account Control Manager SCIM application tile.
Click the General Settings tab, enter a name for the application, and then fill in the other required fields.
Click Done.
Configure SCIM Provisioning
Click the Provisioning tab.
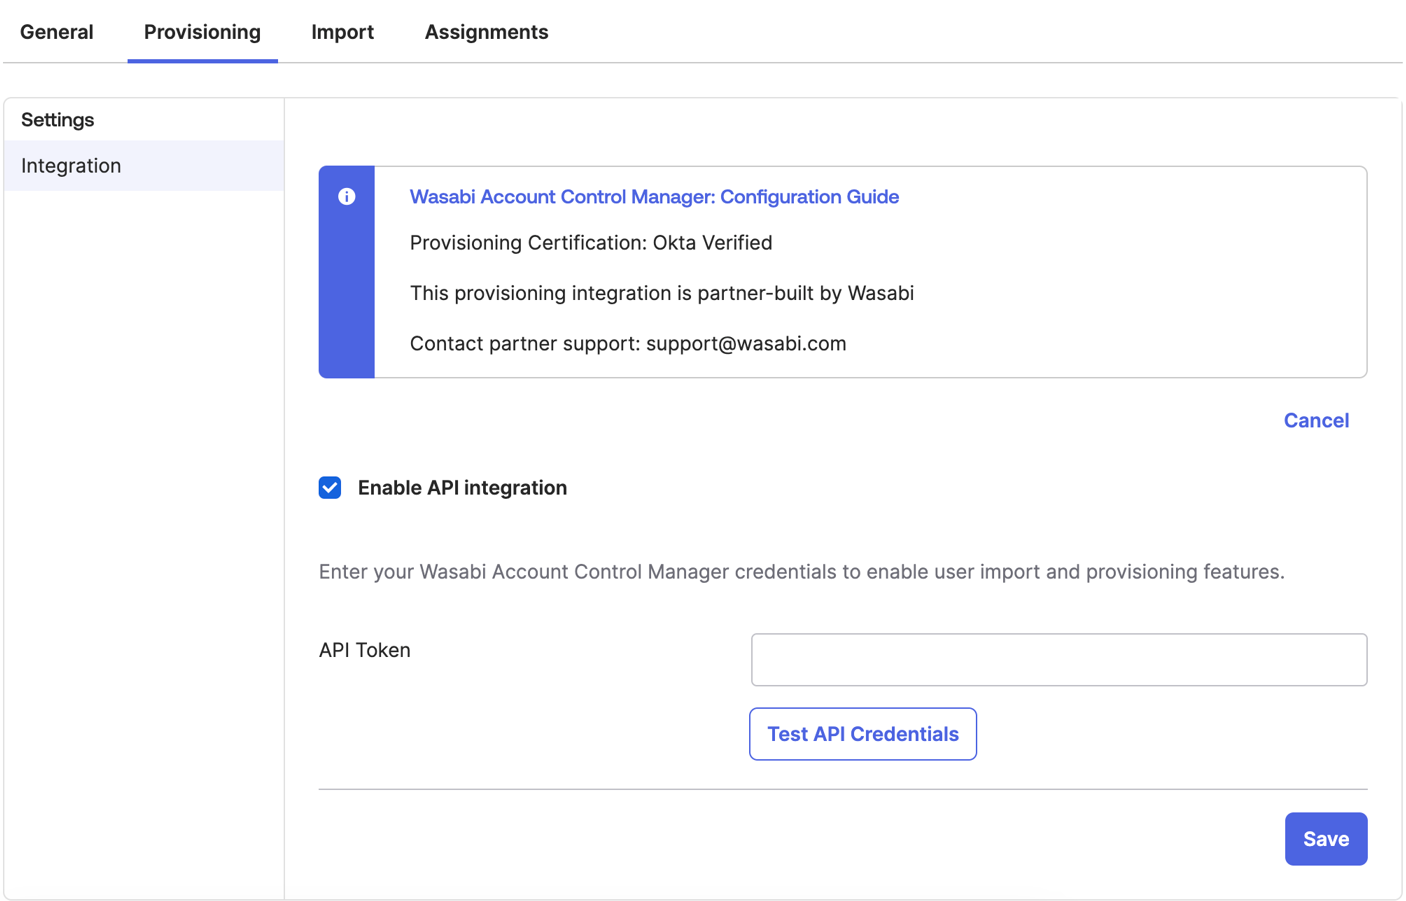
Under Settings in the sidebar click Integration, then click Configure API Integration.
Check the Enable API Integration box.
In the API Token field, enter the token used to access your SCIM implementation. Based on this token, WACM will create new users originating from the SCIM app for the appropriate accounts. See Generate a WACM SCIM Token.
Click Test API Credentials to verify that the token is set up correctly.
Click Save.
Configure Okta Integration
Under the Applications tab, click the Provisioning tab on your Okta integration page.
Under Settings in the sidebar, click To App.
Click Edit at the top right.
Check each Enable box to select the user provisioning options.
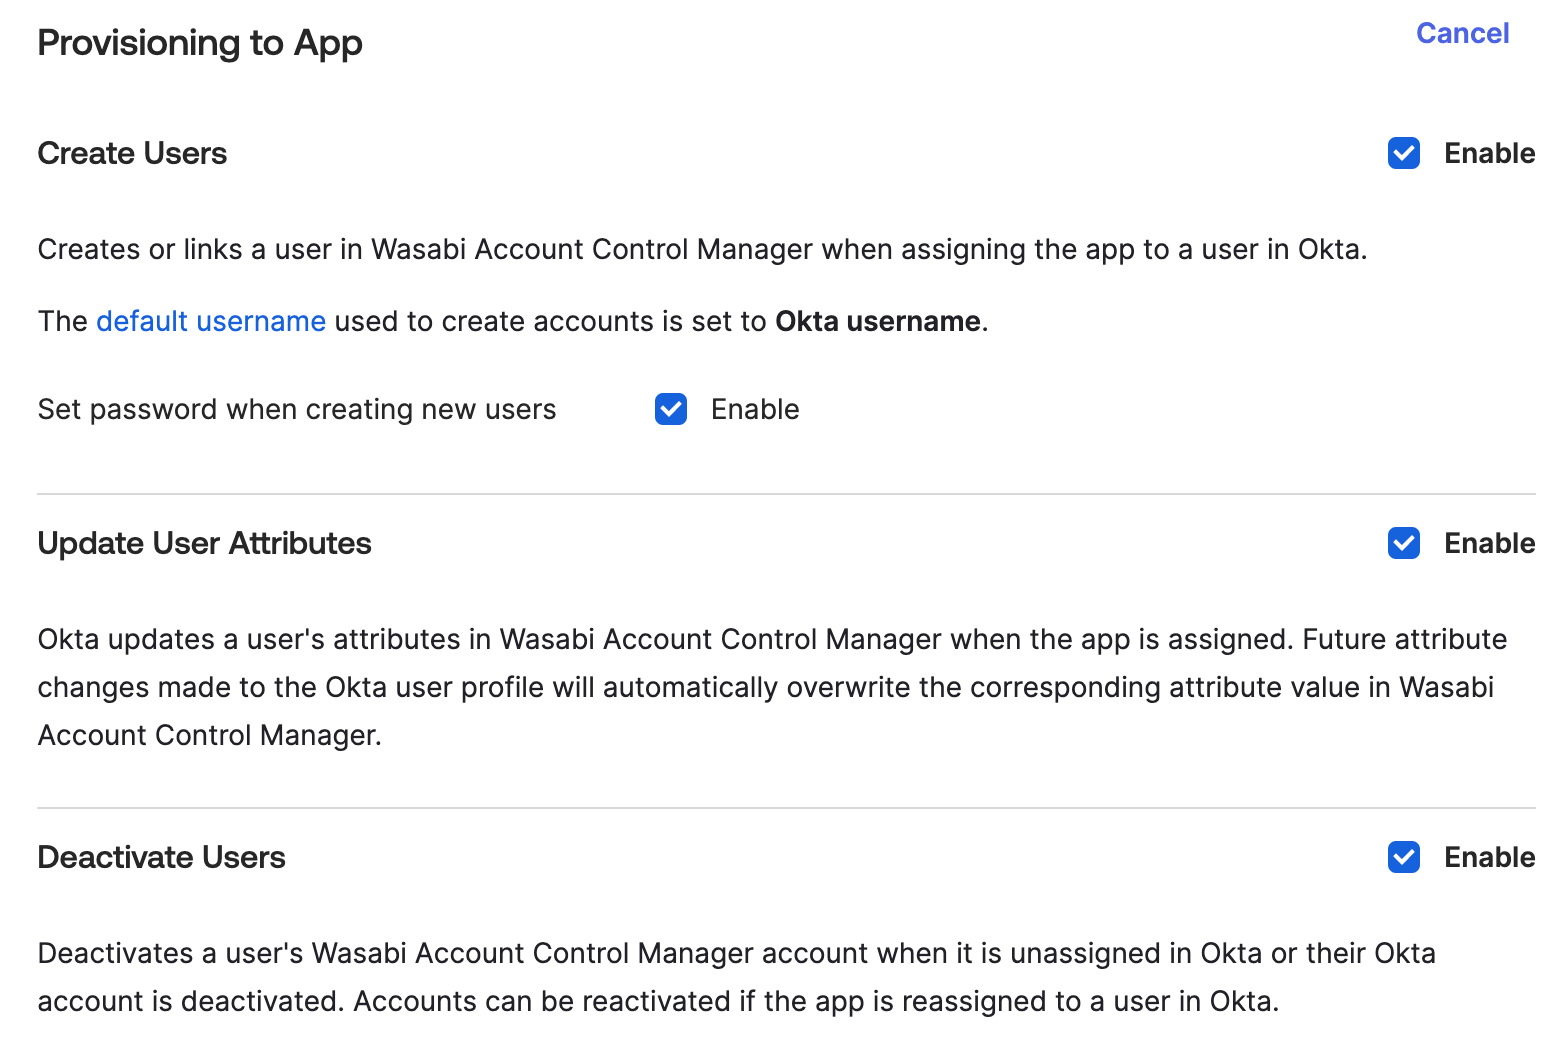
Click Save.
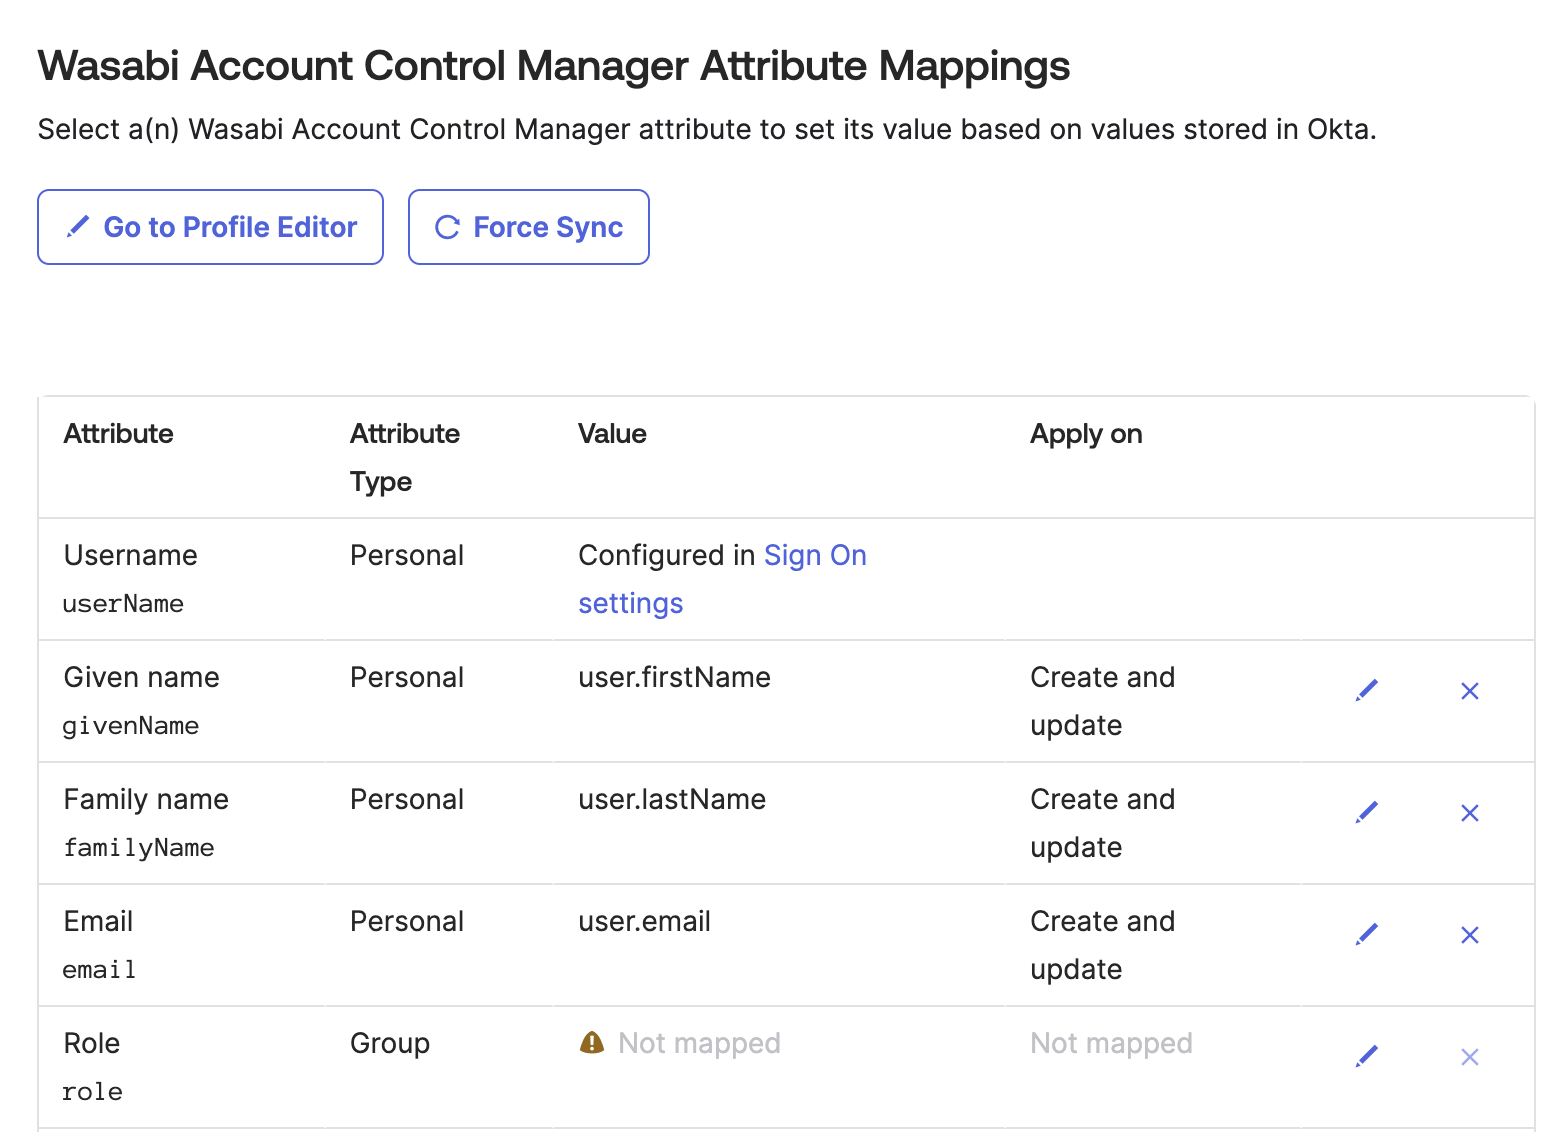
Map User Attributes
Attribute mapping for WACM SCIM is done automatically. Follow these steps to view Wasabi Account Control Manager Attribute Mappings.
Under the Applications tab, click the Provisioning tab.
Under the Settings in the sidebar, Click To App.
Scroll down to the Attribute Mappings section to view the Wasabi Account Control Manager Attribute Mappings.
Continue to the section Manage User Assignments and Roles Using Groups.
Connecting WACM SCIM to Okta (Manually)
This section provides the manual method for connecting to the WACM SCIM app to Okta.
Create an Okta SCIM Integration
Sign in to Okta with administrative credentials.
Click Admin in the upper-right corner of the page.
Click the Applications tab, then click Applications in the sidebar.
Select a version of SCIM depending on the version of SCIM supported by your server. When using only SCIM, the type of application must be SWA (Secure Web Authentication).
Click Done.
Configure SCIM Provisioning
Under the Settings sidebar, click To App.
Click Edit at the top right.
Enable the SCIM Provisioning option to activate SCIM capabilities.
Click Save.
Configure Okta Integration
In Application Settings, click the Provisioning tab. The SCIM connection settings are displayed under Settings.
Select Integration in the left panel and click Edit.
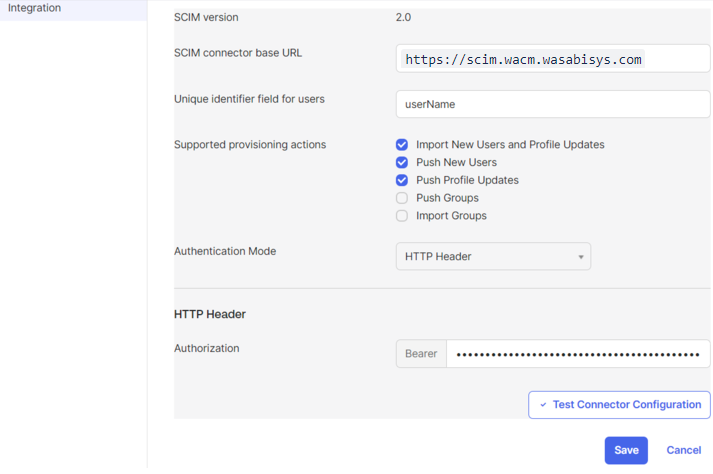
Enter the SCIM connector base URL: https://scim.wacm.wasabisys.com
Enter the Unique Identifier field for users on your SCIM server.
Under the Supported provisioning actions, choose the provisioning actions supported by your SCIM server:
Import New Users and Profile Updates—Allows Okta to import new users from your platform.
Push New Users—Permits your platform to push new user information to Okta.
Push Profile Updates—Enables your platform to push updates to user profiles in Okta.
Choose the Authentication Mode: HTTP Header
When adding new users to the app or to the groups that belong to the app using SCIM protocol, API calls will be made to the SCIM Server and every API call will contain the specified Authorization token.Generate a token in the Account tab (found in the user's profile).
Use the generated token to add/update/delete a user.
In the HTTP Header section in the Authorization: Bearer field, enter {YOUR_AUTH_TOKEN}
Define the HTTP Header used for authorization. This typically involves specifying the type of authorization (for example, Bearer) and providing the necessary authentication token or credentials.Click Save.
Map User Attributes
Okta uses the Profile Editor to map specific user attributes from the Wasabi Account Control Manager application.
Go to the Applications section and select the Wasabi Account Control Manager application to customize user attributes.
Navigate to Provisioning, under Settings in the sidebar, then select To App.
Click Go To Profile Editor and locate the section displaying the selected application's user attributes.
Click Mappings. The mapping attributes are used to provision users with access to our platform.
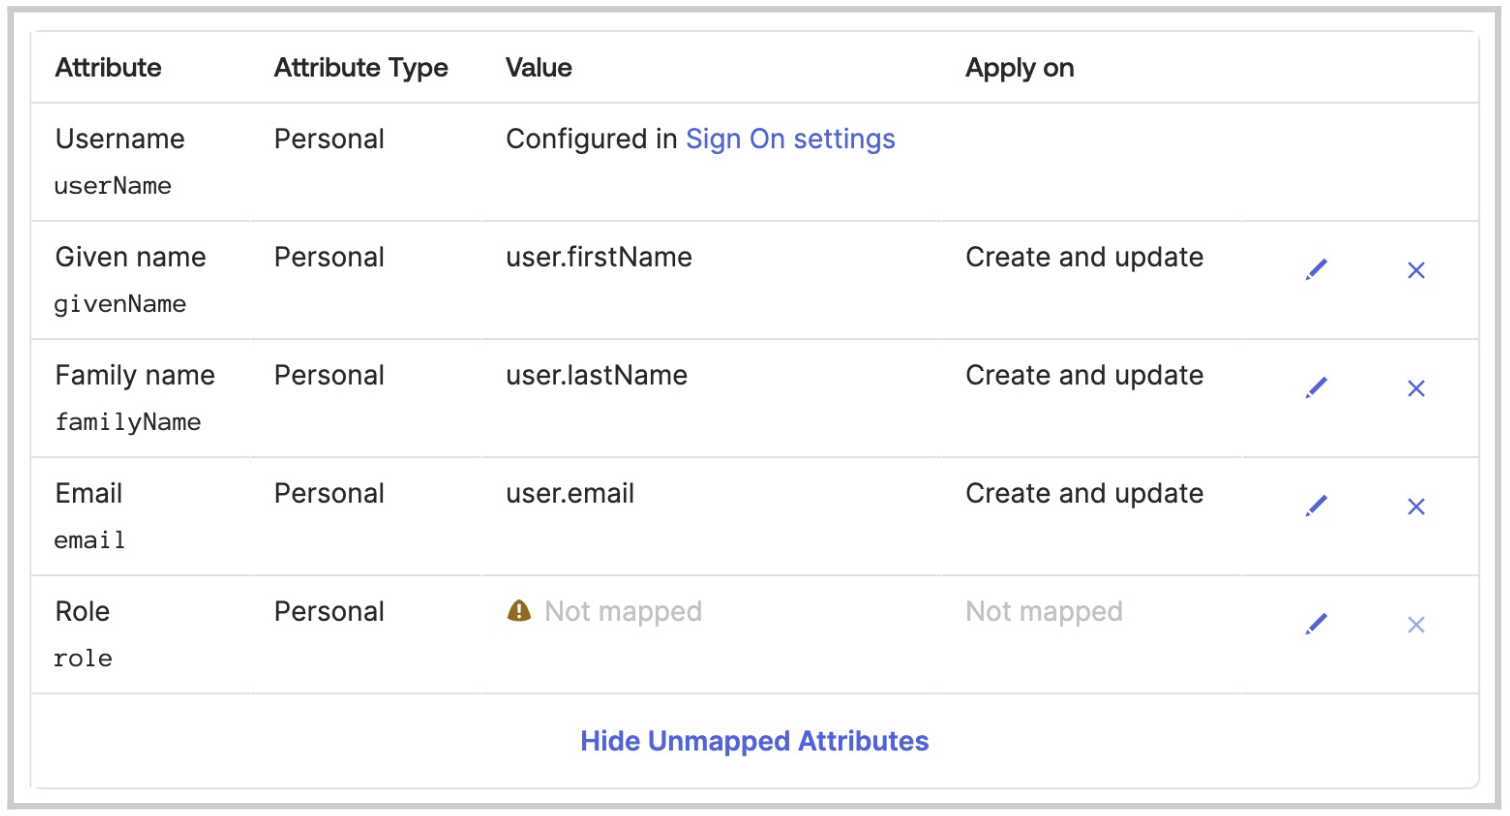
Remove all mappings, except the following:
appuser.givenName
appuser.familyName
appuser.email
Click Save Mappings.
Click Add Attribute and add the Role attribute.
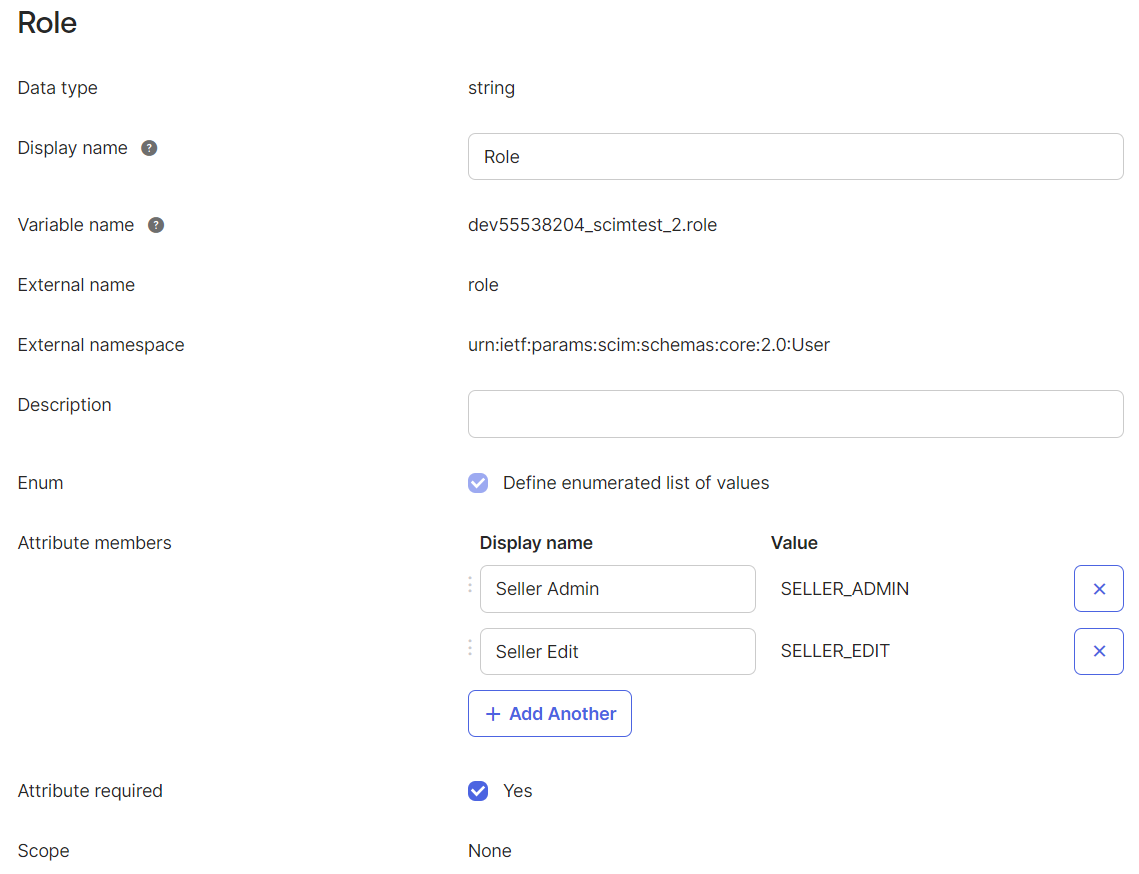
Verify the Data type is string.
Enter the Display name: Role.
Verify the Variable name.
Verify the External name is role.
Verify the External namespace is urn:ietf:params:scim:schemas:core:2.0:user
Enter a Description for the role.
Check the Enum box Define enumerated list of values.
Check the Attribute required box Yes.
In Attribute members, click Add Another and enter the Display name and Value for all role attributes listed here:
Display Name | Value |
|---|---|
Governance Plus Admin | DISTRIBUTOR_PLUS_ADMIN |
Governance Plus Staff | DISTRIBUTOR_PLUS_STAFF |
Governance Plus Staff (Lite) | DISTRIBUTOR_PLUS_STAFF_LITE |
Governance Plus Viewer | DISTRIBUTOR_PLUS_VIEWER |
Governance Admin | DISTRIBUTOR_ADMIN |
Governance Staff | DISTRIBUTOR_STAFF |
Governance Viewer | DISTRIBUTOR_VIEWER |
Channel Account Admin | CHANNEL_ACCOUNT_ADMIN |
Chanel Account Staff | CHANNEL_ACCOUNT_STAFF |
Channel Account Staff (Lite) | CHANNEL_ACCOUNT_STAFF_LITE |
Channel Account Viewer | CHANNEL_ACCOUNT_VIEWER |
Control Account Admin | RESELLER_ADMIN |
Control Account Staff | RESELLER_STAFF |
Control Account Staff (Lite) | RESELLER_STAFF_LITE |
Control Account Viewer | RESELLER_VIEWER |
Finally, your attributes should look like this:

Manage User Assignments and Roles Using Groups
You can manually assign an individual user to a group.
Individual User Assignment
For individual users, the role must be assigned directly to each user profile. This approach is suitable when there are specific role assignments unique to each user.
Group-Based User Assignment
Create Groups—Rather than assigning roles individually, create groups within your identity management platform. These groups can be named based on their roles or responsibilities (for example, Admins, Editors, and so on).
Assign Roles to Groups—Assign roles to the created groups. This means specifying the role attribute at the group level rather than at the individual user level.
Group-Based Provisioning—Users added to these groups will inherit the roles assigned to the group. This group-based approach streamlines user management, especially when multiple users share the same role.
Generate a WACM SCIM Token
Sign in to the Wasabi Account Control Manager application and select My Profile. The Profile page is displayed.
Click the Account tab.
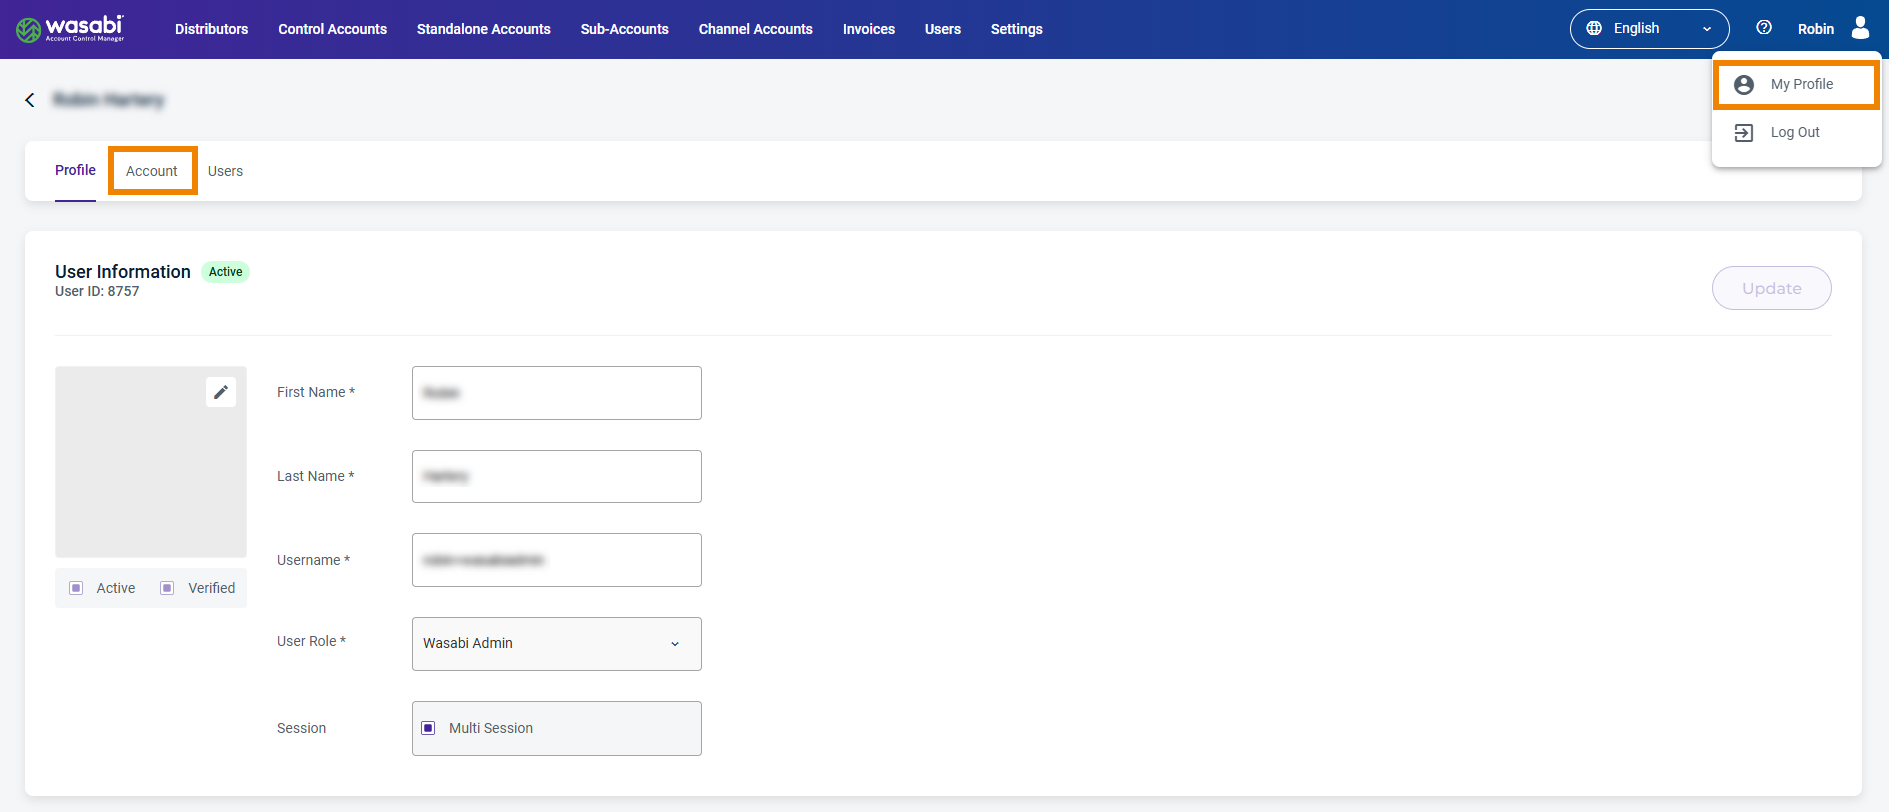
Scroll down to the SCIM Token section.
Click Generate Token. Based on this token, WACM will create new users originating from the SCIM app for the appropriate accounts. This is the token used in provisioning.
