WACM allows distributors to create branded standalone account sign-up forms, each with a unique URL that can be shared directly with customers.
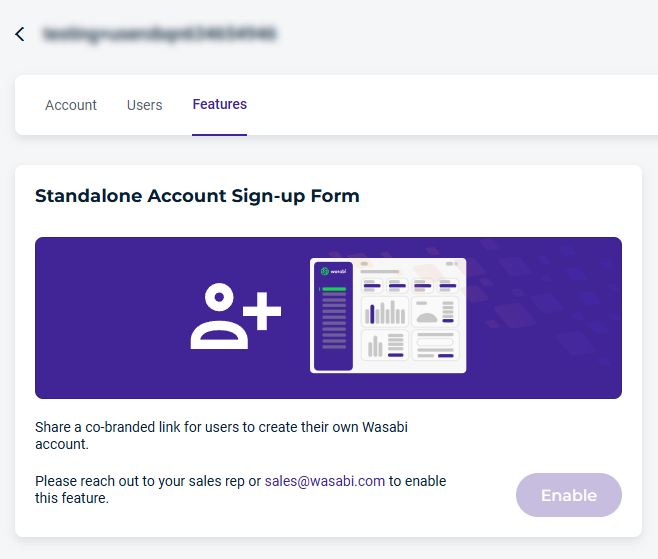
The WACM Standalone Account Sign-Up Form is available upon request for all WACM Governance Account users. This self-service feature allows distributors to expand their reach and refer new customers with a streamlined, hands-off approach. To enable this feature, contact Wasabi Sales.
The WACM Standalone Account Sign-Up Form:
Includes your branding alongside Wasabi’s for a co-branded experience
Is fully hosted and maintained by Wasabi
Can be easily shared using your unique URL
Sign in to the Governance Account as Admin.
Click the Features tab. The Standalone Account Sign-up form is displayed.

Contact your Wasabi Sales representative to enable this feature. Once the feature is enabled, click Enable to open the sign-up form.
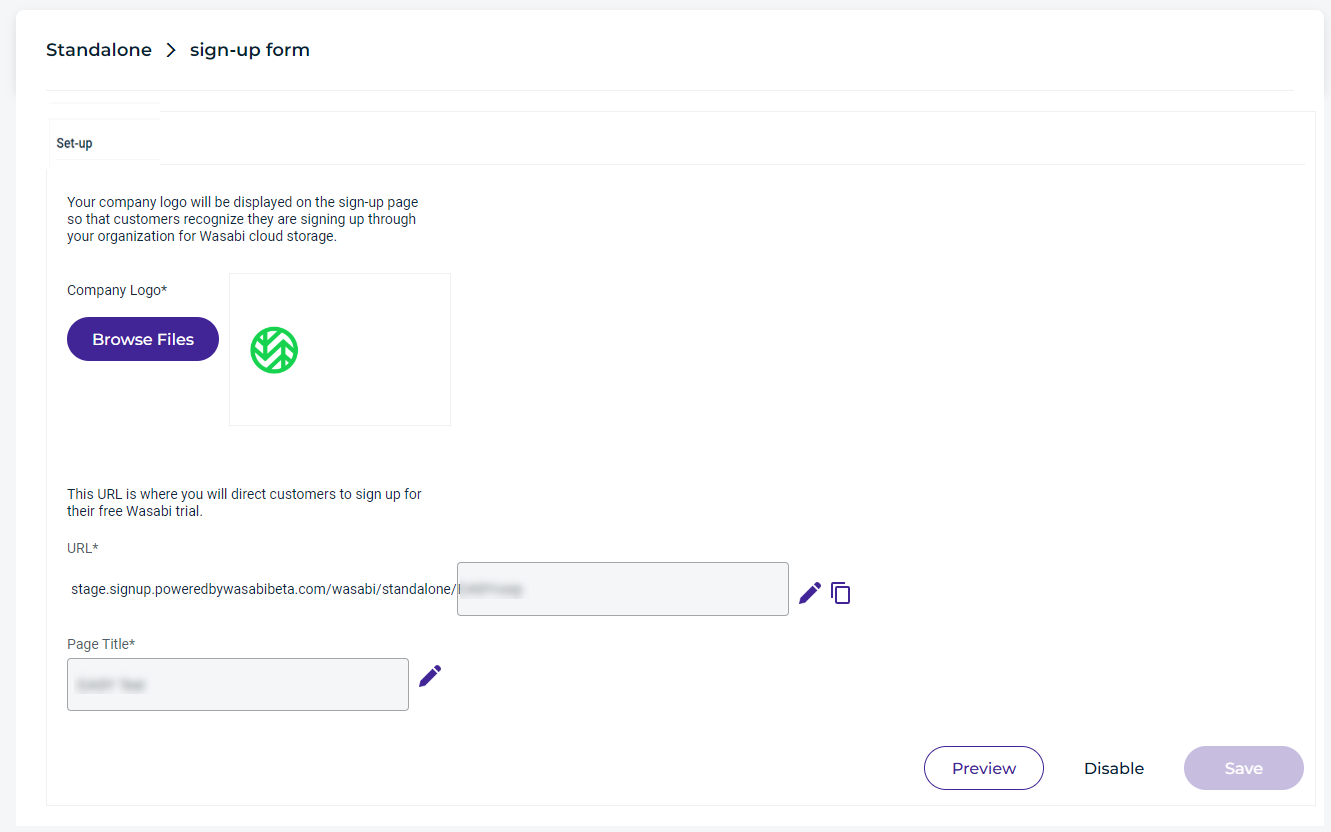
Provide setup information, including your company logo, URL to direct your customer to sign up for a trial account, and the page title.

The following information is required:
Company Logo—Browse files to locate your company logo (maximum file size is 1 MB).
URL—The URL where the partner will direct the sign-up form to be sent to the customer/user for their free Wasabi trial.
Page Title—A custom title/product name for the sign-up page.
Click Save.
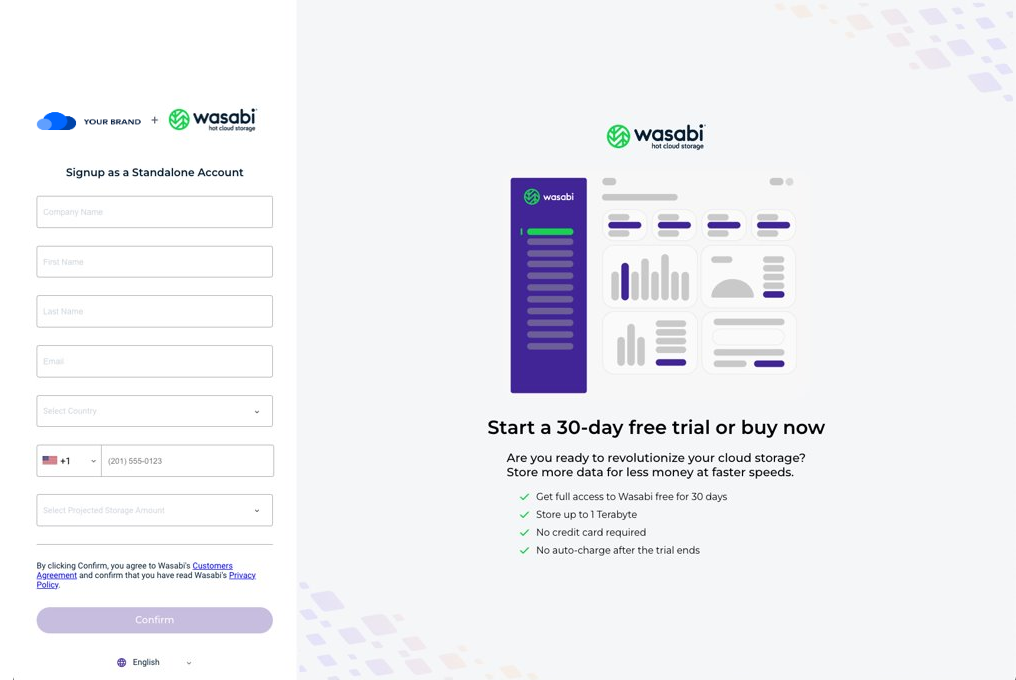
Once the account is approved, the customer will receive the Standalone Account sign-up form to complete.
The following information is required:
Company Name—User's company name.
First Name—User's first name
Last Name—User's last name
Email—User's email
Country—Country where the user is located
Phone—User's phone
Projected Storage Amount—Select the projected storage amount from the drop-down
Language—Select a language from the drop-down
Click Confirm.
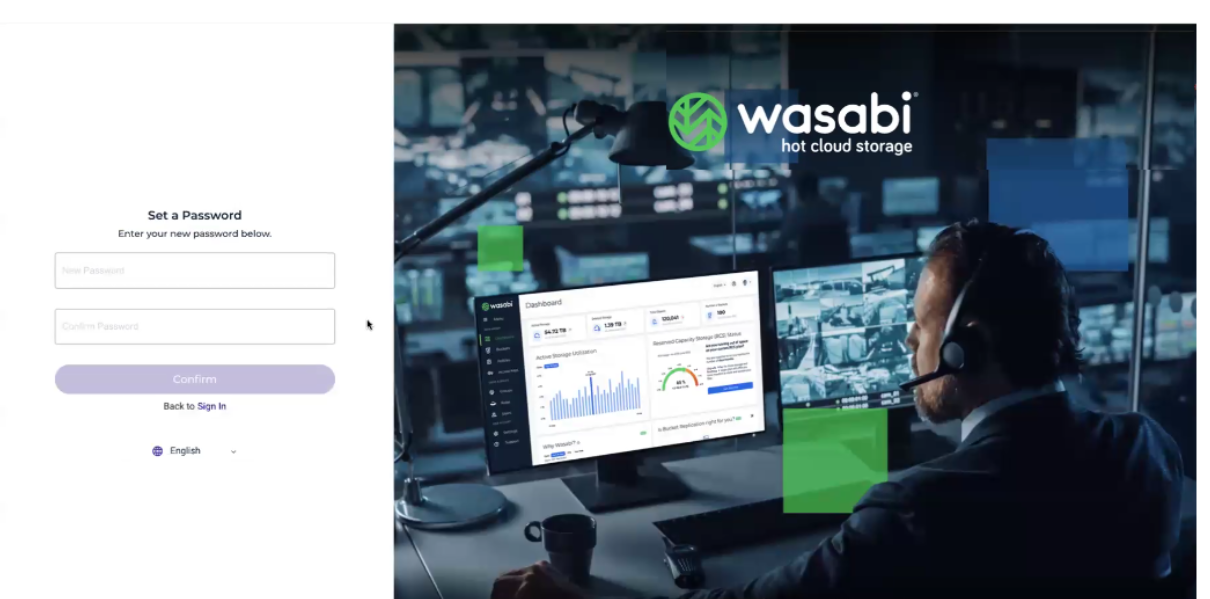
A set password form is sent to the user via email to set the password for their Wasabi console account. Click Confirm.

Once the account setup is completed, you will see the account listed under Standalone Accounts.
