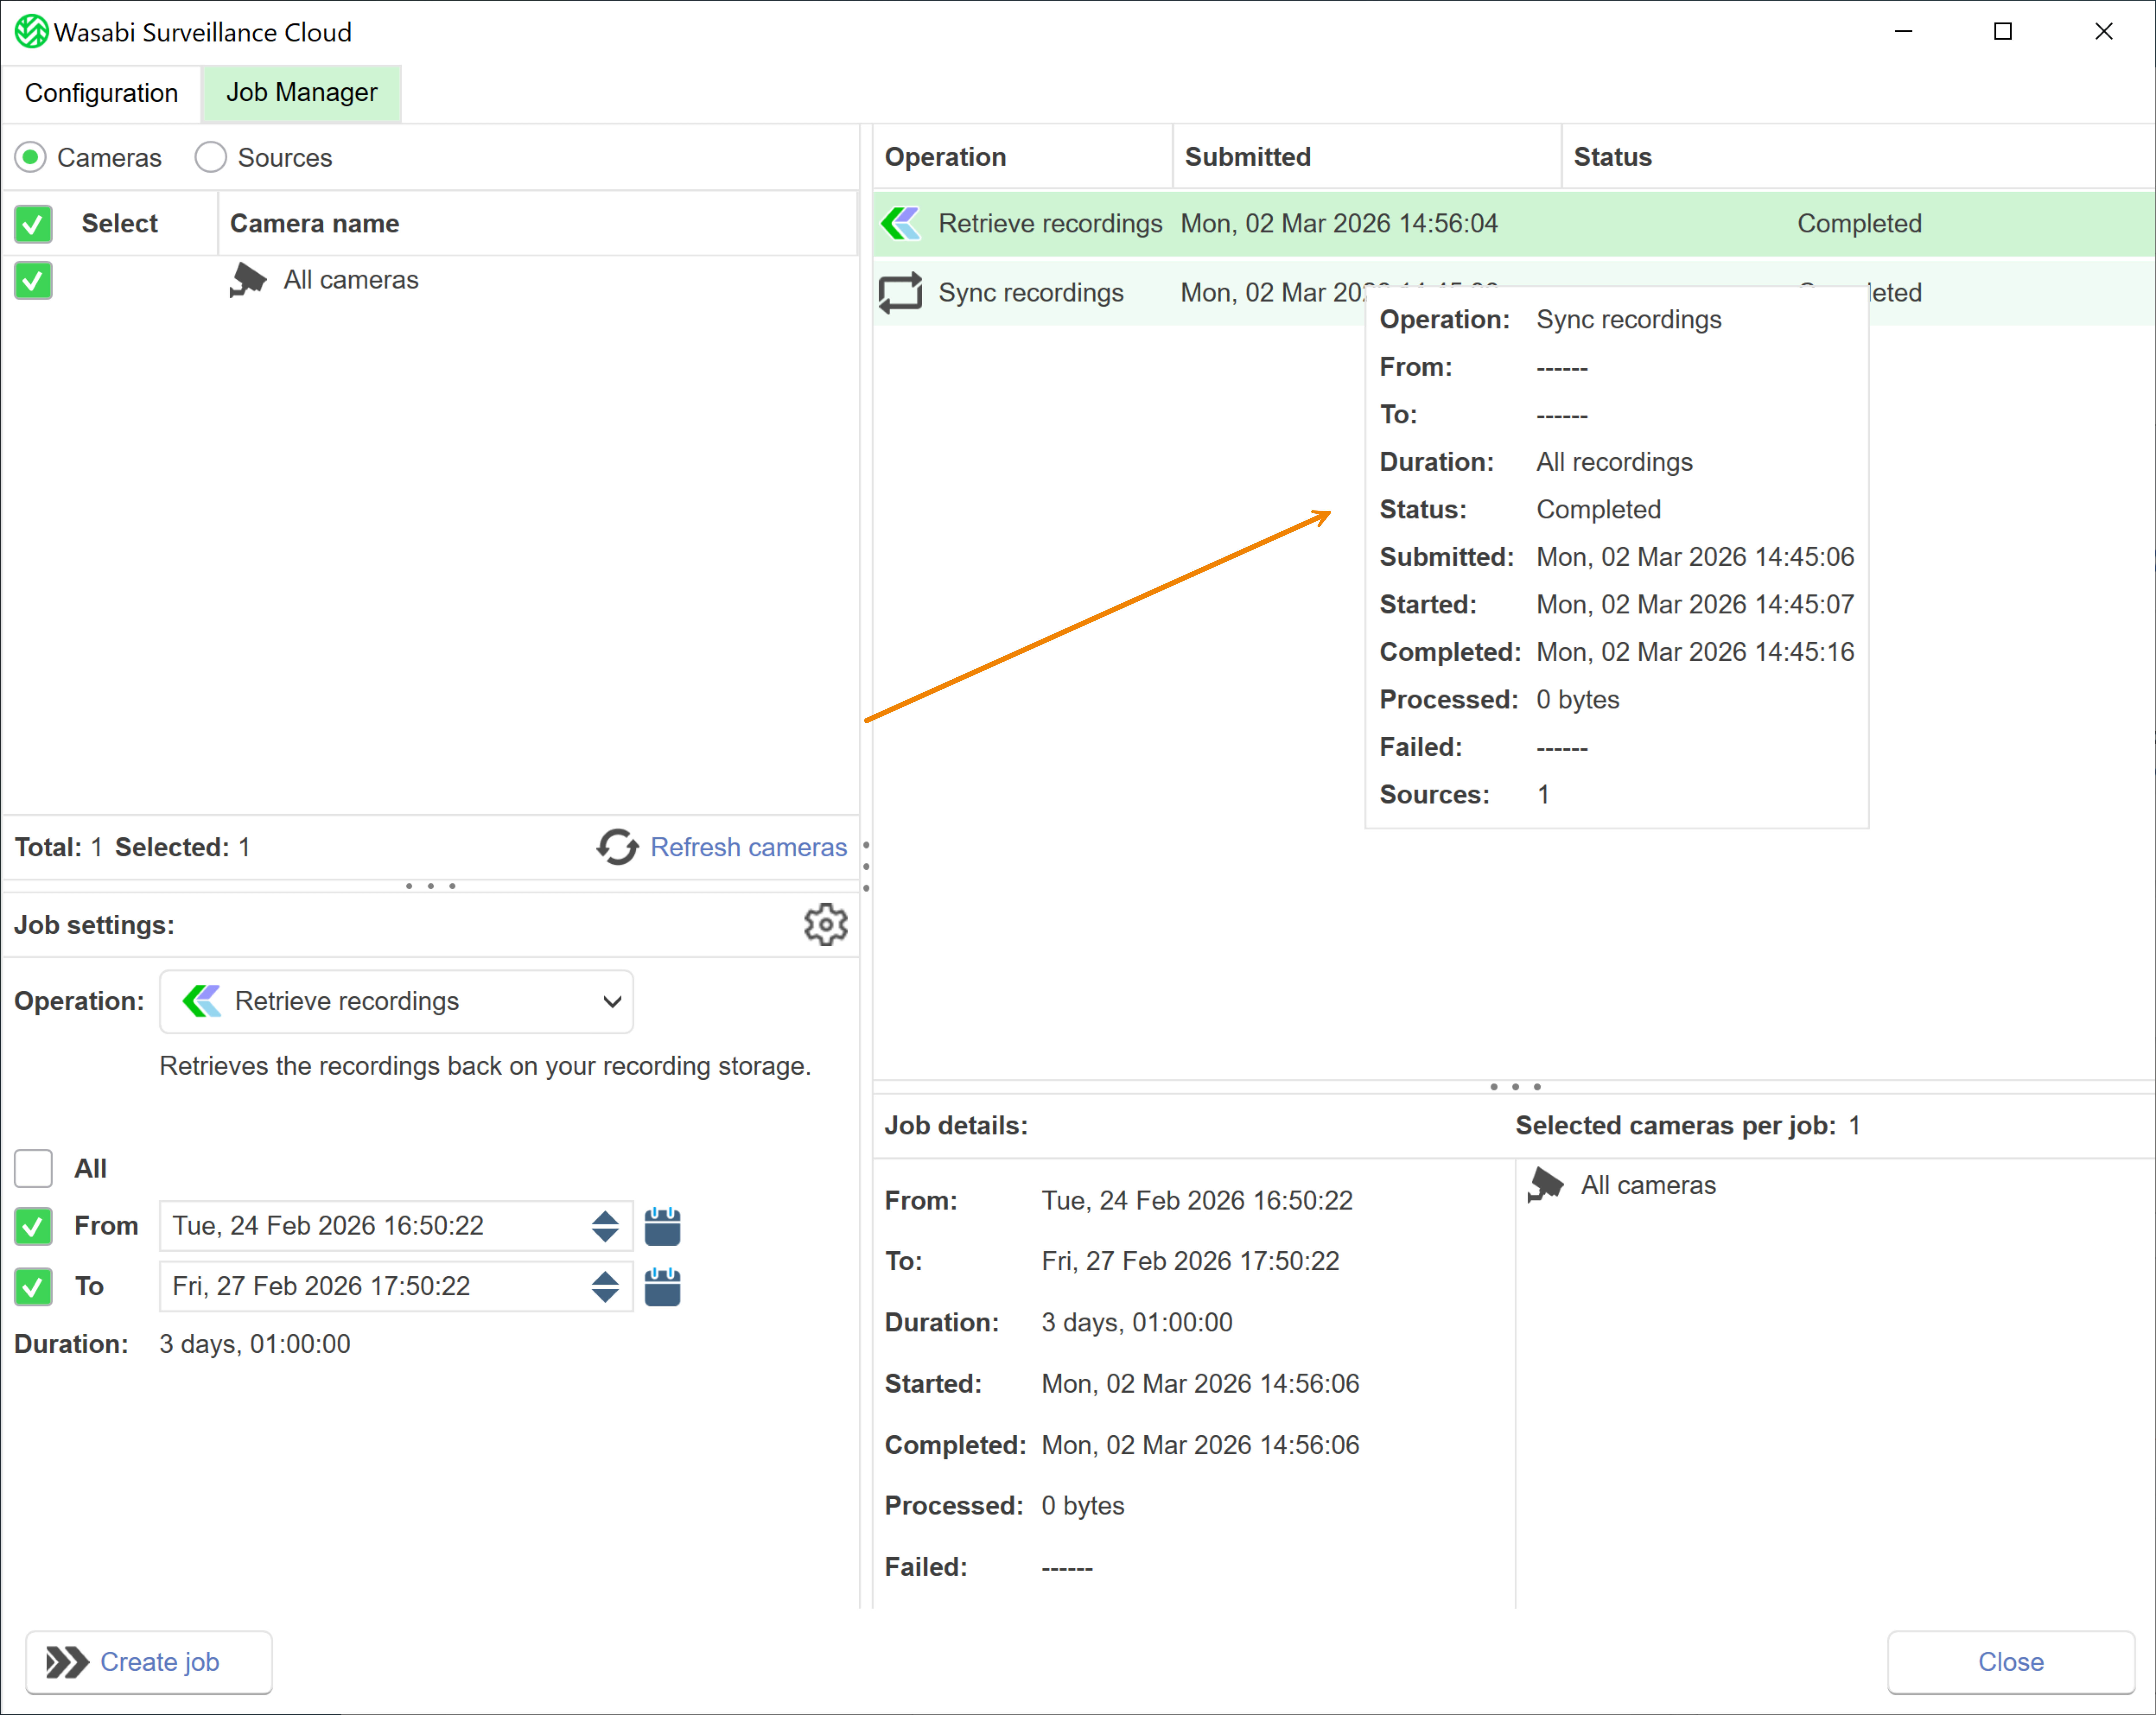
The Job Manager is used to schedule, monitor, and control data movement between local VMS storage (source) and WSC cloud storage (target). Jobs can be scheduled to efficiently sync recordings, retrieve data, and reclaim local storage space.
You can create jobs based on the following operations.
Retrieve recordings—Retrieves recording(s) from the cloud by downloading data (that was reclaimed locally) back onto local storage. This job populates stub files with data.
Offline recordings—Reclaims the space of a replicated file and frees up space on the local source by moving the recording(s) to the cloud. If the file was not replicated before running the job, WSC replicates the file before reclaiming space.
Sync recordings—Synchronizes recording(s) on the source with the target by importing data from the cloud bucket to the local source. A sync job is useful for populating the data on the local source that is paired with a bucket with existing data.
You can create a job to test specific scenarios and perform date-driven, folder-specific, and camera-specific operations. Additionally, you can use the Job Manager when a large operation must be performed (such as downloading data in bulk for a specified period or reclaiming space for data) or to rehydrate data from the storage tier. For more details on creating a job, refer to Job Manager: Creating a Job.
VMS Supported for Use With the Job Manager
All VMS are supported for use with the Job Manager. Depending on your VMS, you can create jobs based on all camera(s), specific cameras, and/or source(s).
If using any of the following VMS, you can perform both camera-based (such as section cameras with camera devices) and source-based operations. For these VMS, an enhanced msxpsvc feature can parse individual cameras.
Avigilon
Genetec
Milestone
Valerus VMS
Viewing Job Details
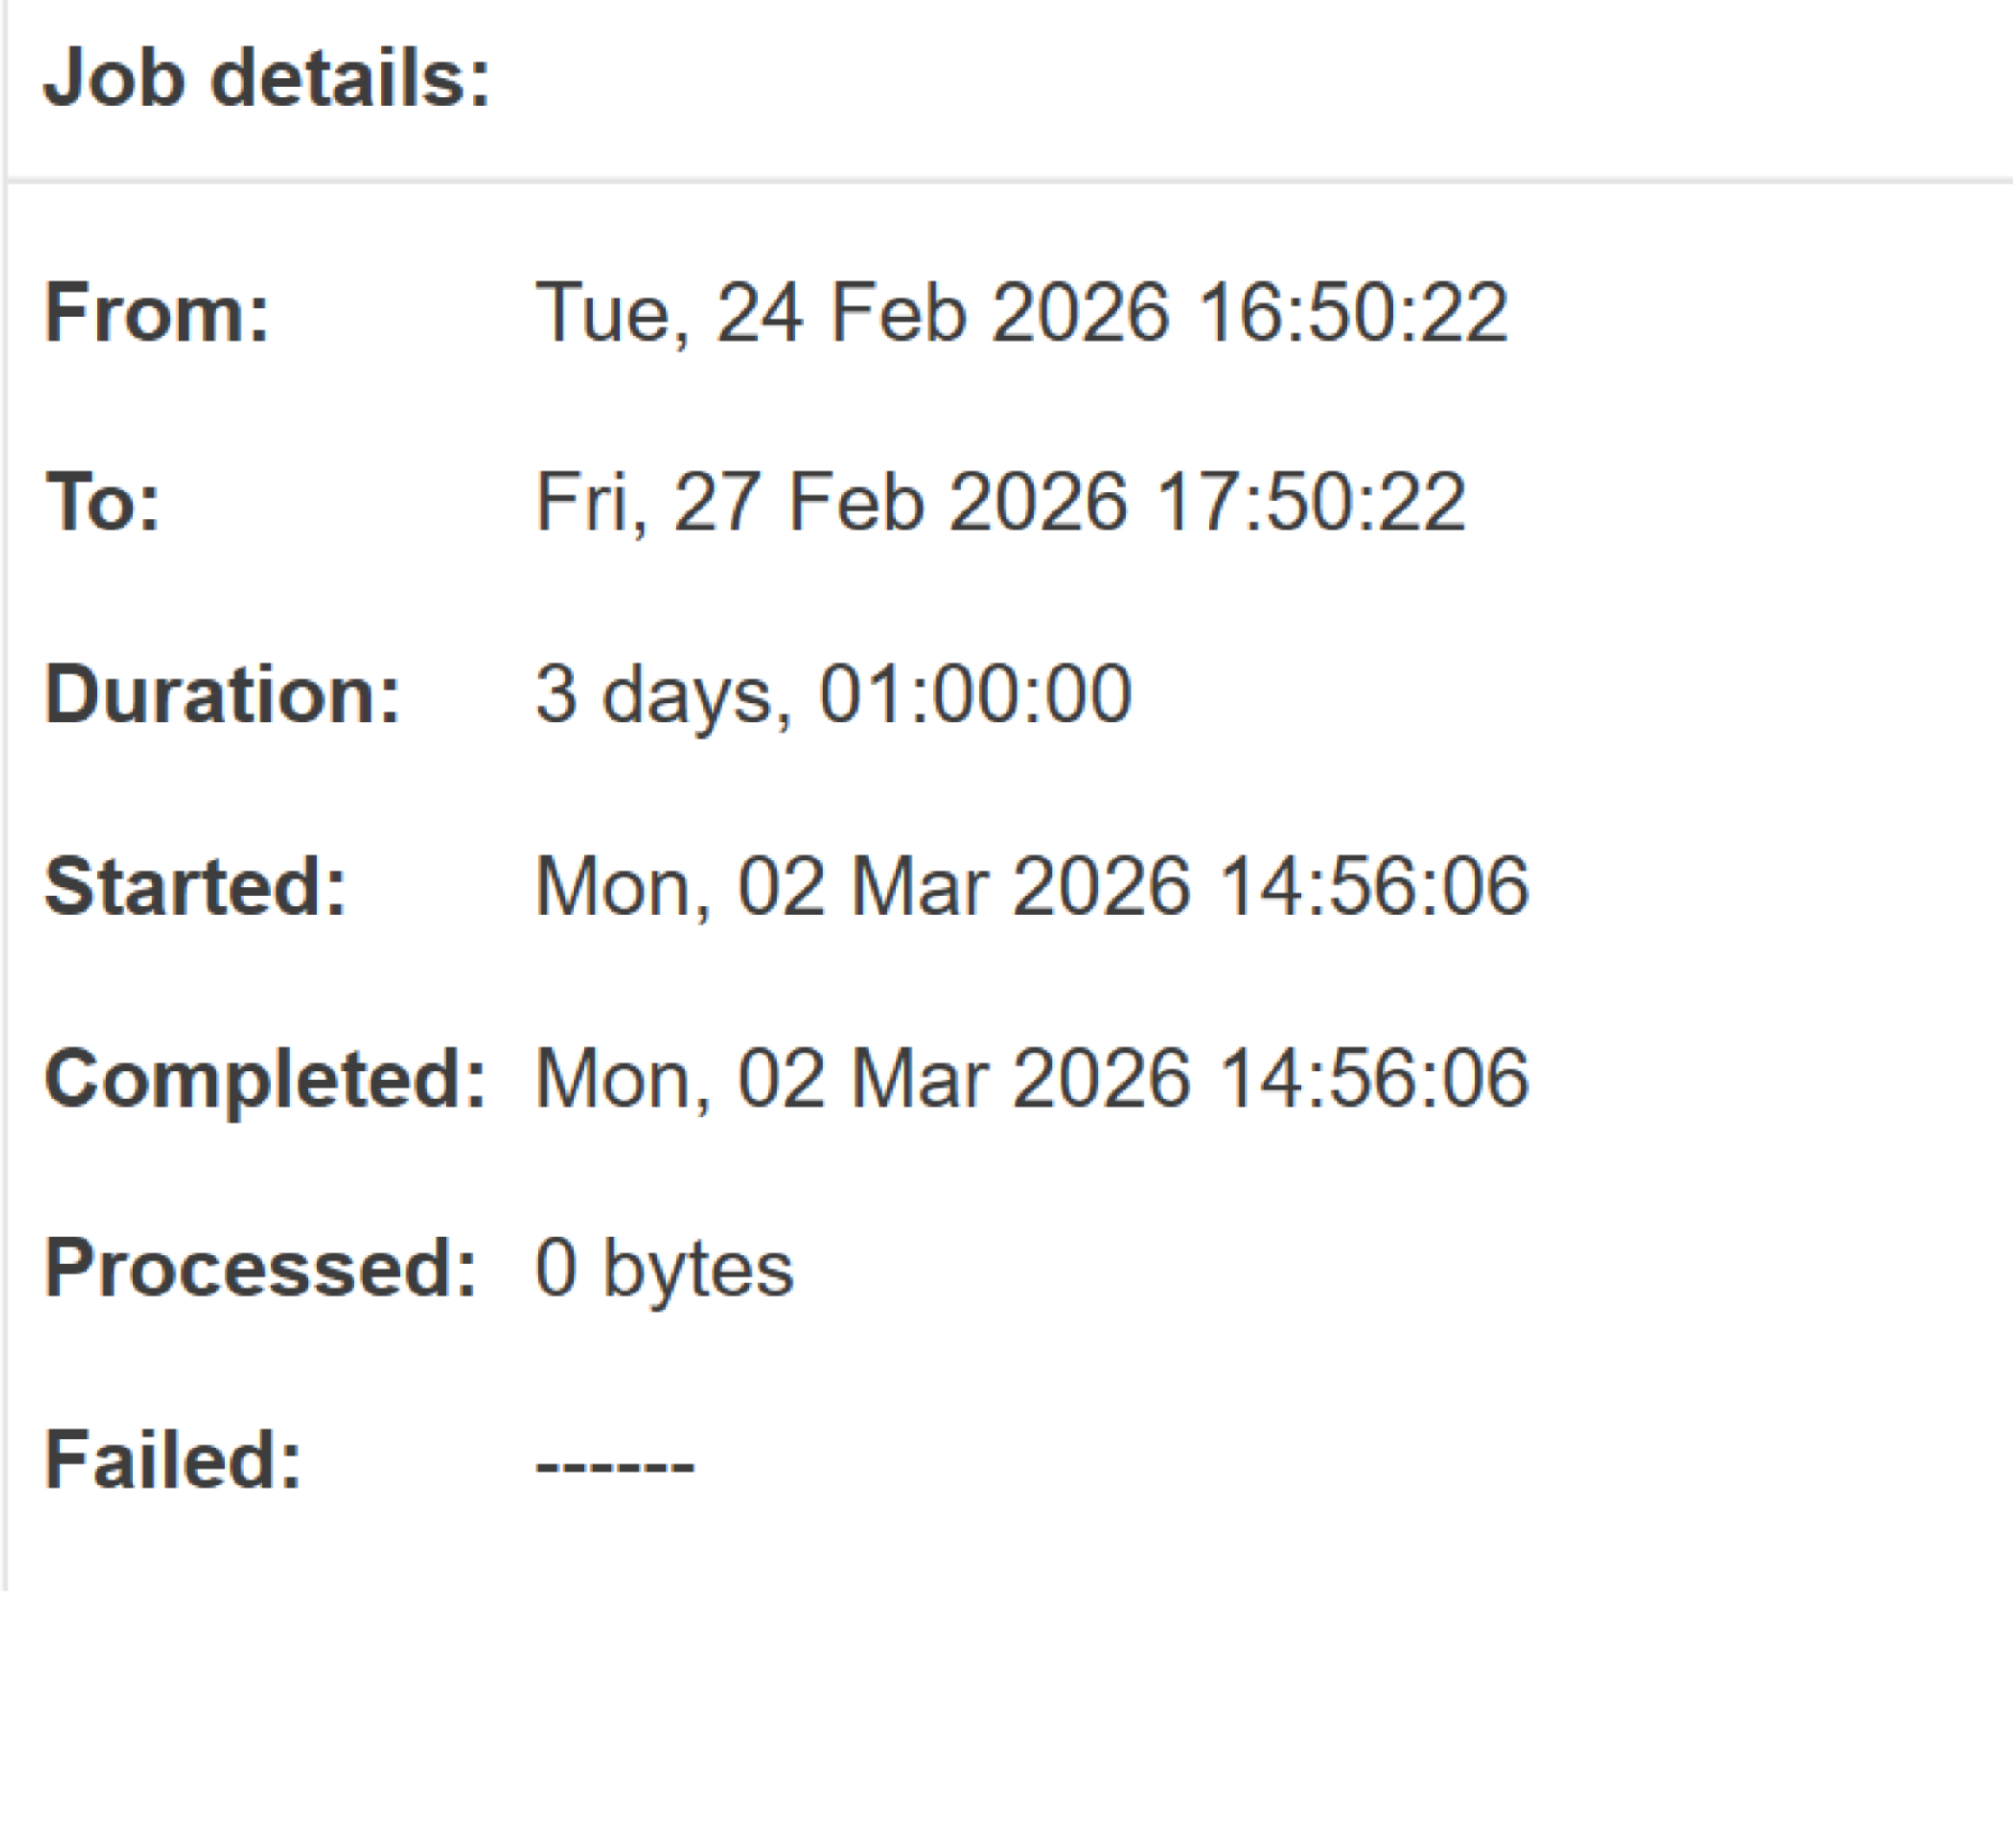
Once you have created a job, the Job details panel reports the following details.
From—Data beginning from the selected date is included in the job.
To—Data up to the selected date is included in the job.
Duration—Amount of time (days/hours) between the configured date range, if applicable.
Started—Date and time that the job began.
Completed—Date and time that the job finished.
Processed—Total amount of data processed in the job.
Failed—Files that failed to process. The status of an operation is shown under the Status column in the upper right panel. If part of the job failed to complete, the status will report Completed. However, the Job details panel will report the number of failed files. For additional details about a failed job, refer to the log information in the Windows Event Viewer.
Optionally, you can view job details by hovering over the job listed in the upper right panel.
Using Job Settings
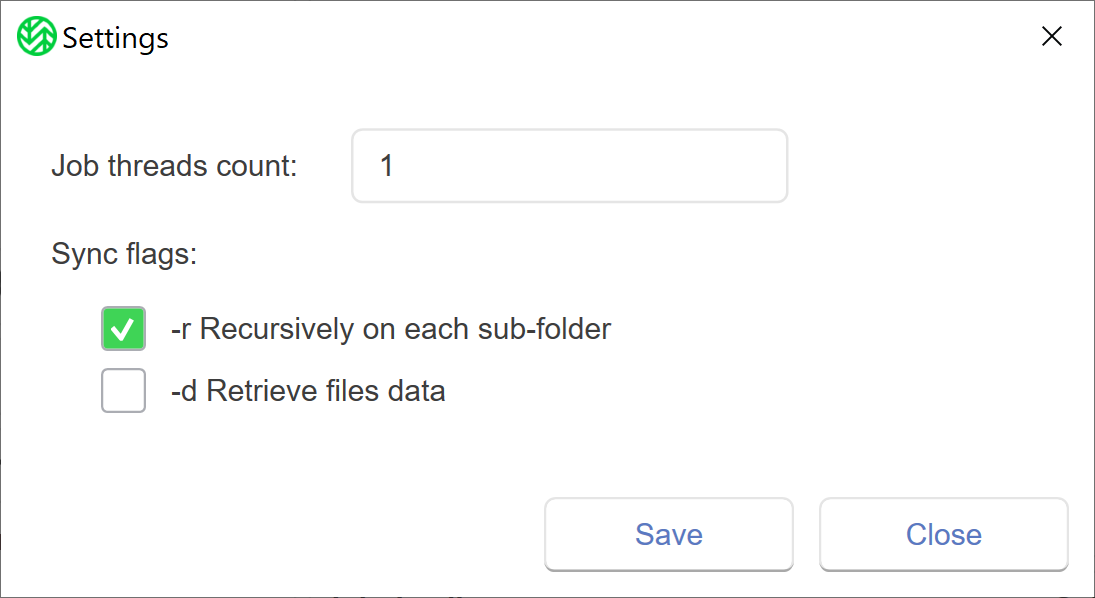
The Job Manager enables you to configure the following, optional job settings.
Job threads count—(min: 1 max: 100) The Job Manager’s capacity to process simultaneous tasks.
-r Recursively on each sub-folder—Retain the nested hierarchy (sync recursively) for the mapped source folder with the bucket in WSC.
-d Retrieve files data—Hydrate the data locally from the data available in the bucket.
Any updates to the Job threads count in the Job Manager will take precedence over the WSC client performance (uploading and downloading data). Depending on the infrastructure, 2–100 thread counts can be used. However, Wasabi recommends using between 4–12 thread counts. For best performance, the threads count should not exceed 10.