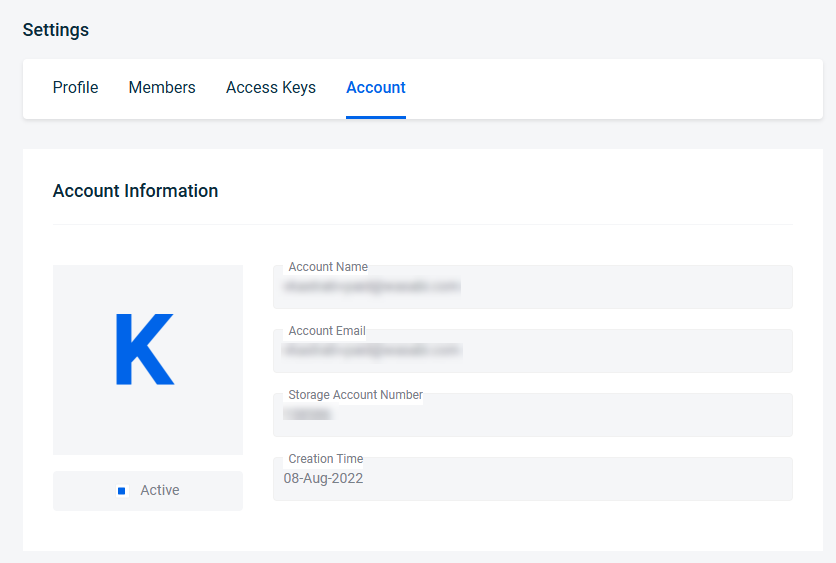
Custom Cloud Console members can manage their Account Information settings by enabling and configuring their SSO identity.
Click Settings under the Profile in the right corner. The Profile page is displayed.
Click the Account tab.
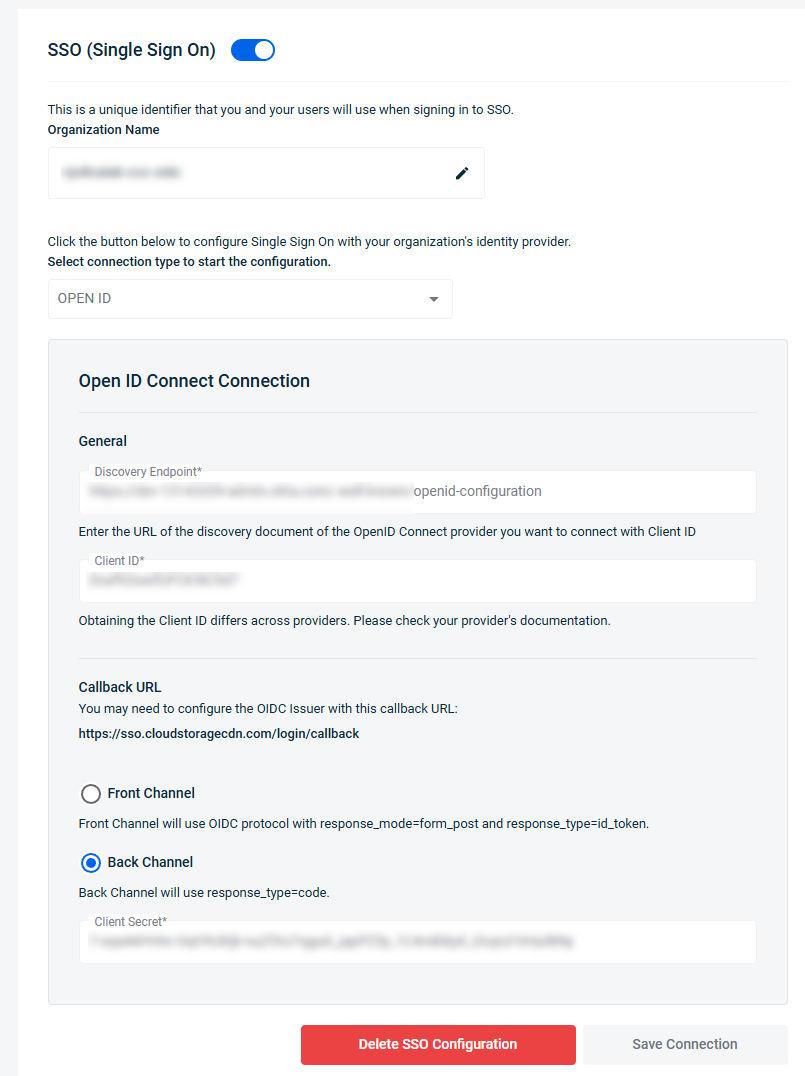
Scroll down to the SSO (Single Sign On) section.
Optionally, update the Organization Name. This is a unique identifier used to sign in to SSO.
Select the authorization protocol Open ID Connect or SAML in the Select connection type section. In this example, Open ID was selected.
Enter the URL to connect with the Client Id in the Discovery Endpoint field.
Enter the Client Id.
Configure the OIDC Issuer in the Callback URL, if necessary.
Select the Front Channel or Back Channel response type option.
Click Save Connection.