Before configuring XProtect for use with Wasabi Surveillance Cloud (WSC), be sure that you have reviewed the recording server storage requirements in Milestone XProtect With Wasabi. Once reviewed, enable disaster recovery and storage extension (extension), as described below.
The instructions below describe an initial configuration of Milestone XProtect.
Prerequisites
Milestone XProtect software installed
Wasabi Surveillance Cloud (WCS) plugin installed
Wasabi account credentials:
Internet connectivity between the Milestone XProtect server and Wasabi Cloud
Admin access to the XProtect Management Client
Enabling Disaster Recovery
As a Milestone XProtect user, you must enable/disable Disaster Recovery both in the VMS and in Wasabi Surveillance Cloud (WSC). For instructions on enabling/disabling this feature in WSC, refer to Enabling/Disabling Disaster Recovery in the Product Guide for Wasabi Surveillance Cloud.
In the Milestone XProtect Management Client, navigate to Wasabi Surveillance Cloud and click Disaster Recovery.
(1).png)
Click Enable.
In the Wasabi Surveillance Cloud Target dialog, enter your bucket credentials:
Server URL — Use the appropriate server URL as defined in Service URLs for Wasabi's Storage Regions.
Access Key & Secret Key — By default, a WSC user-specific access and secret key will be auto-populated into the Access and Secret Key fields. To use the Root Account key, you must log in to your Wasabi Console account to retrieve those keys.

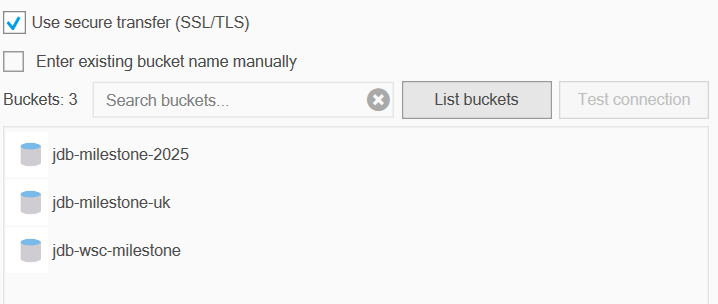
Optionally, to connect a bucket manually, select the checkbox to Enter existing bucket name manually.
In the Bucket name field, enter a pre-existing bucket name.
Optionally, display your existing bucket options and click List buckets.
Select a bucket from the list.
Click OK.
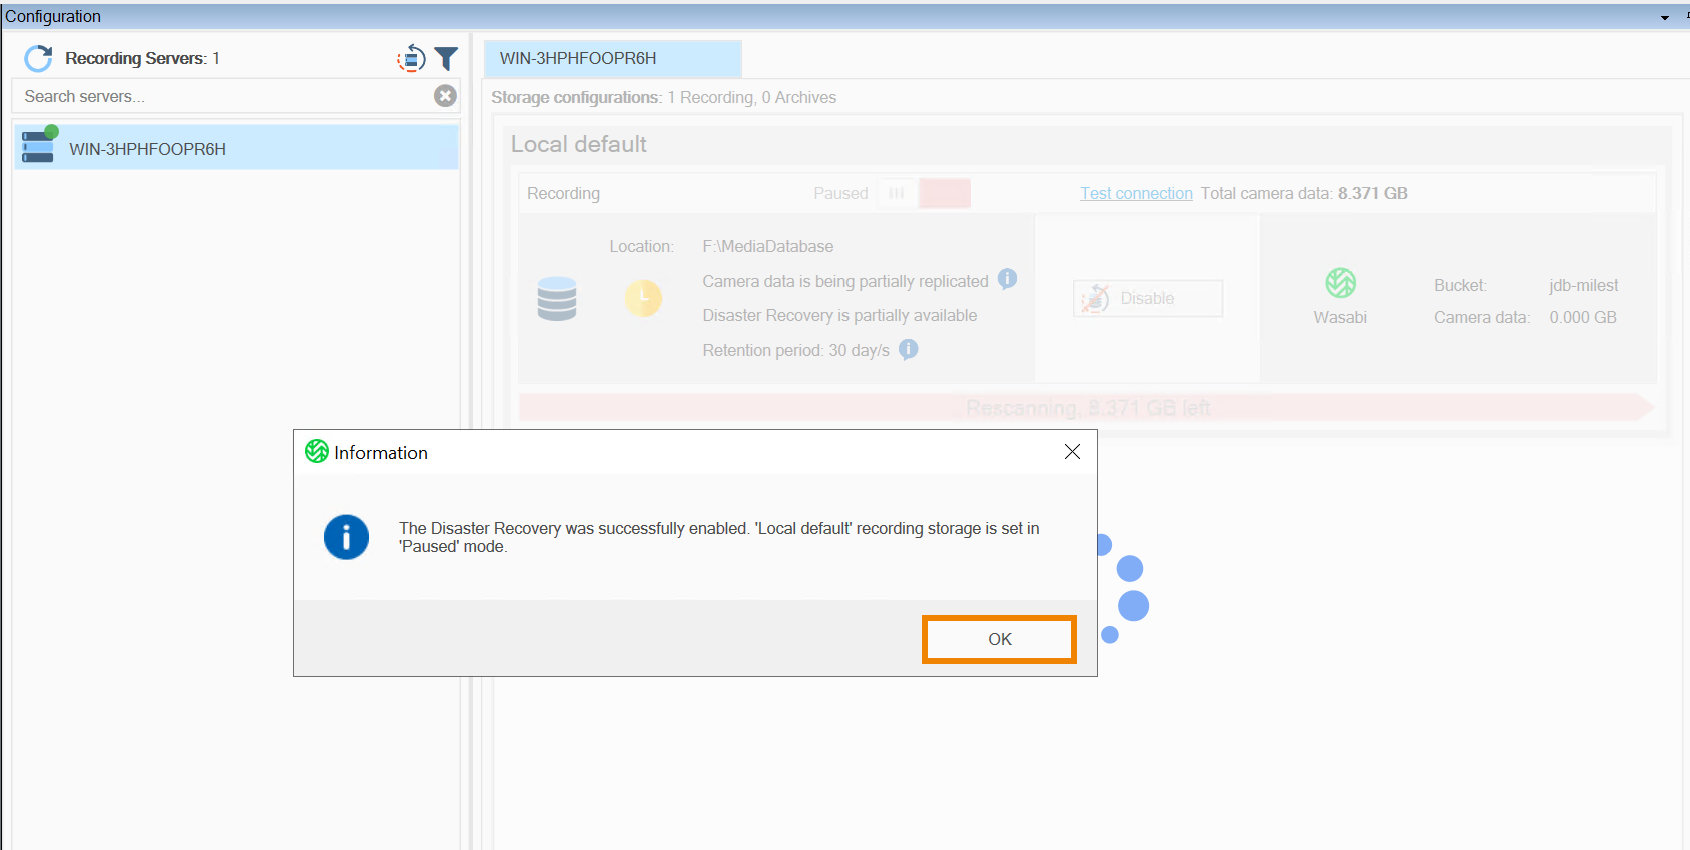
A message will confirm that Disaster Recovery was successfully enabled. By default, the Local default recording storage is paused. Your data will not begin replicating until the system is set to Running mode. Click OK.
Click the Paused slider to set the feature to Running mode.
.png)
A message will confirm the changes. Click Yes.
.png)
WSC will begin to scan and mirror every object in the "MediaDatabase" recording server location and replicate an identical copy of the on-premises video data to your Wasabi bucket. This may take several minutes, depending on the number of cameras and files being managed.
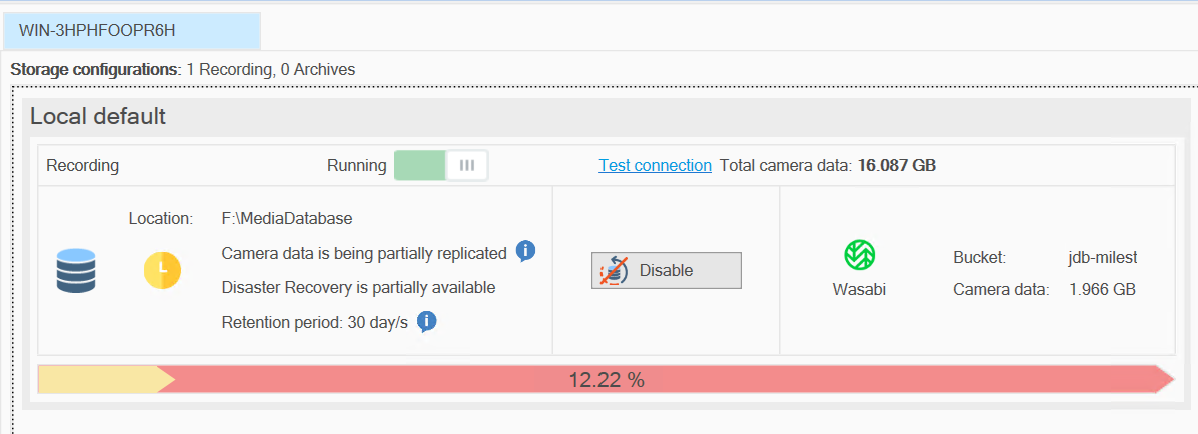
Once the system has scanned the entire folder and replicated all data, the progress bar will remain at 99%, as shown below.
.png)
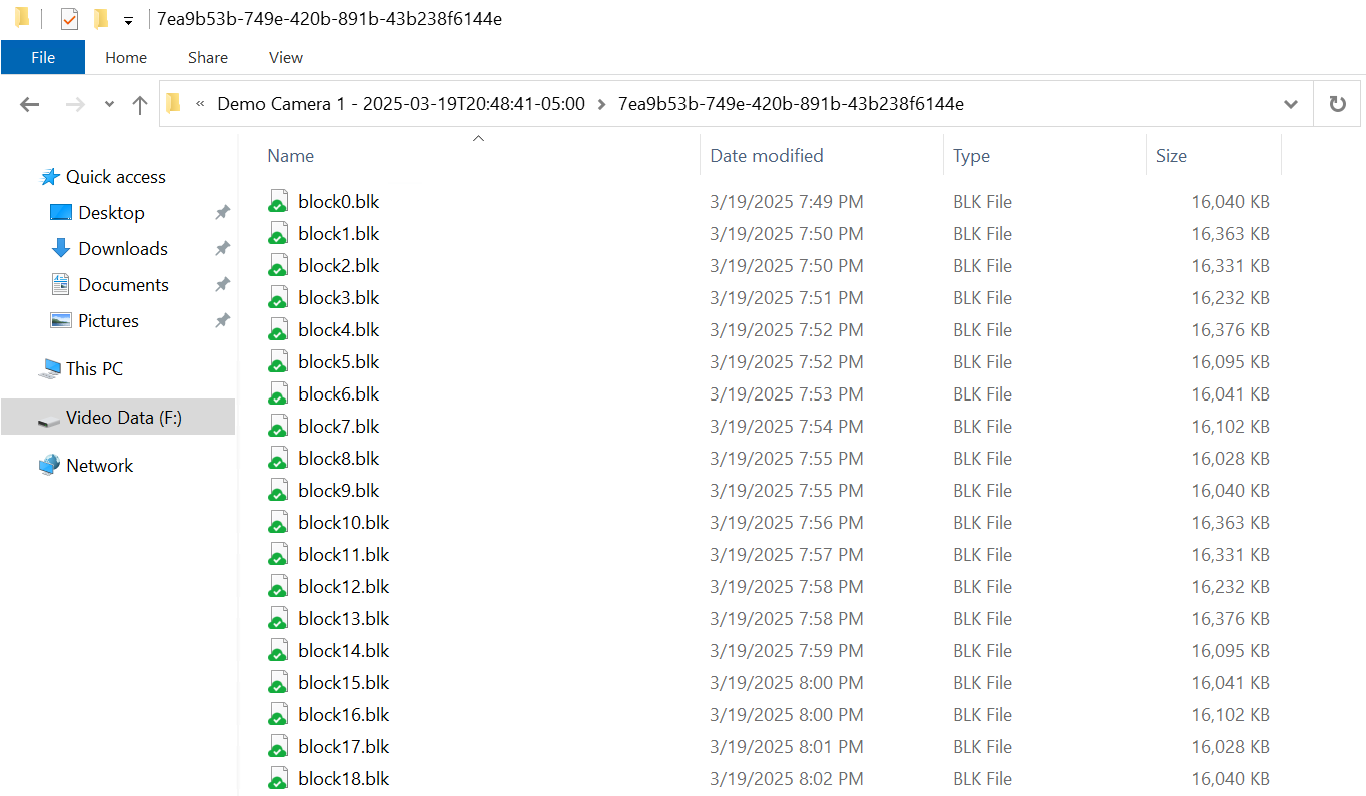
To verify that the data is being replicated, open the Windows File Explorer and navigate to the path of your recording server. You will notice green Wasabi Cloud icons on each file. This indicates that those files are protected and replicated to your Wasabi bucket.
Verifying Internet Connectivity and Performance
Efficient performance monitoring is essential to ensure the smooth operation of XProtect when integrated with WSC. Using the Task Manager, you can verify that video archiving and cloud transfers are running efficiently.
Open Task Manager on the XProtect recording server to see how fast WSC can upload to the cloud.
Select the Performance tab.
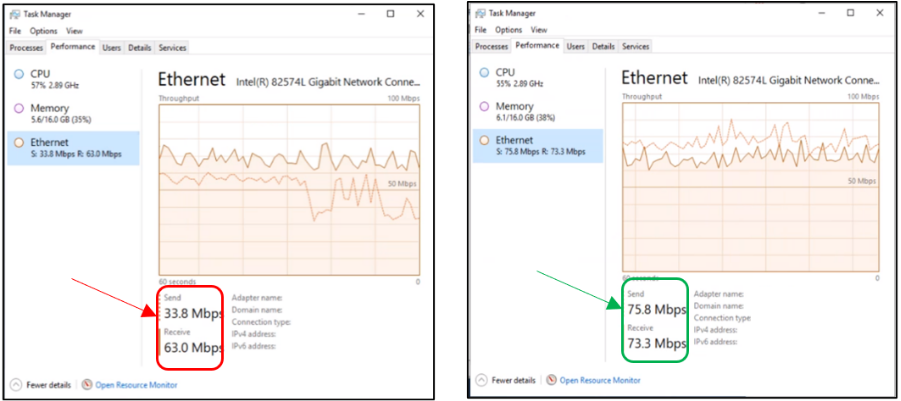
Select Ethernet. Unless other processes are running in the background, the Receive shows the incoming camera data while the Send shows the rate at which WSC is uploading to the cloud. On average, Send should be no less than Receive.
Below, the example on the left shows a problematic situation where Send bandwidth is less than Receive. This means that WSC is not able to keep up with the incoming data flow.
In the example on the right, WSC is not keeping up. In this case, 25% headroom would be desirable (showing about 12%). The percentage of uploaded camera data is expected to continue increasing and eventually stabilize at around 99%.
Enabling Storage Extension
Milestone XProtect storage extension framework allows you to integrate external or cloud-based storage platforms directly into the VMS architecture. When the WSC extension is enabled, XProtect can offload or replicate recorded video data from on-premises drives to Wasabi’s cloud storage.
Before enabling the extension, it is best practice first to enable disaster recovery (DR).
As a Milestone XProtect user, you must enable/disable Storage Extension both in the VMS and in Wasabi Surveillance Cloud (WSC). For instructions on enabling/disabling this feature in WSC, refer to Enabling Storage Extension in the Product Guide for Wasabi Surveillance Cloud.
In the Milestone XProtect Management Client, navigate to Wasabi Surveillance Cloud and click Extension.
Click Enable.
If Disaster Recovery is already enabled, the bucket field credentials will be pre-populated.
.png)
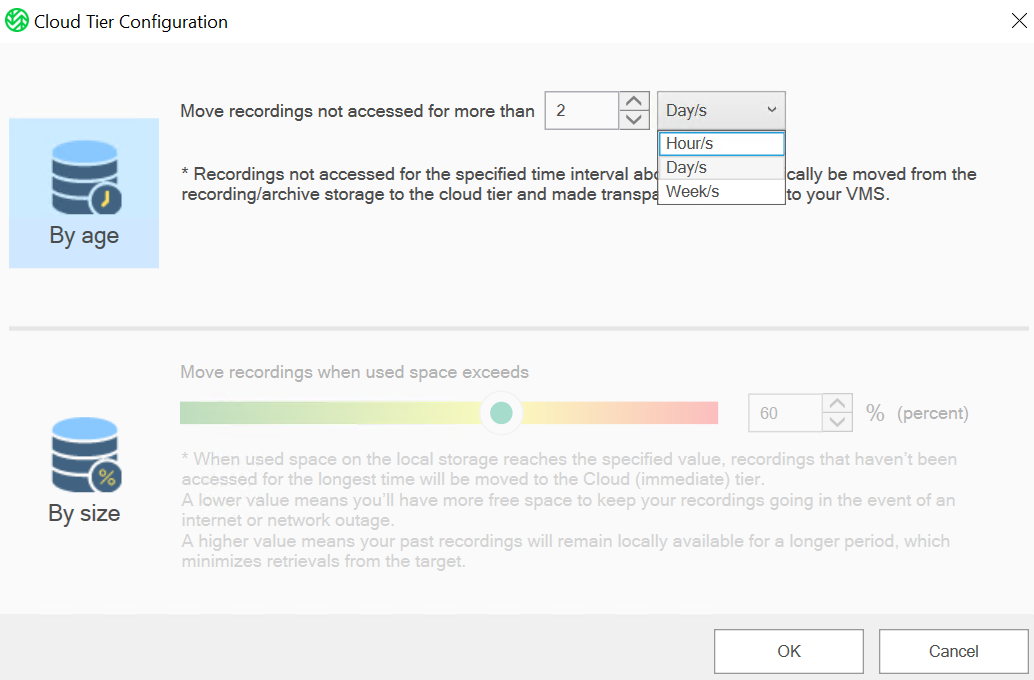
The Cloud Tier Configuration dialog will appear. Tiering allows you to automatically move video data from one storage location to another based on the age or the size of the recordings. Select one of the following options:
By Age moves recordings not accessed for more than a specified time period.
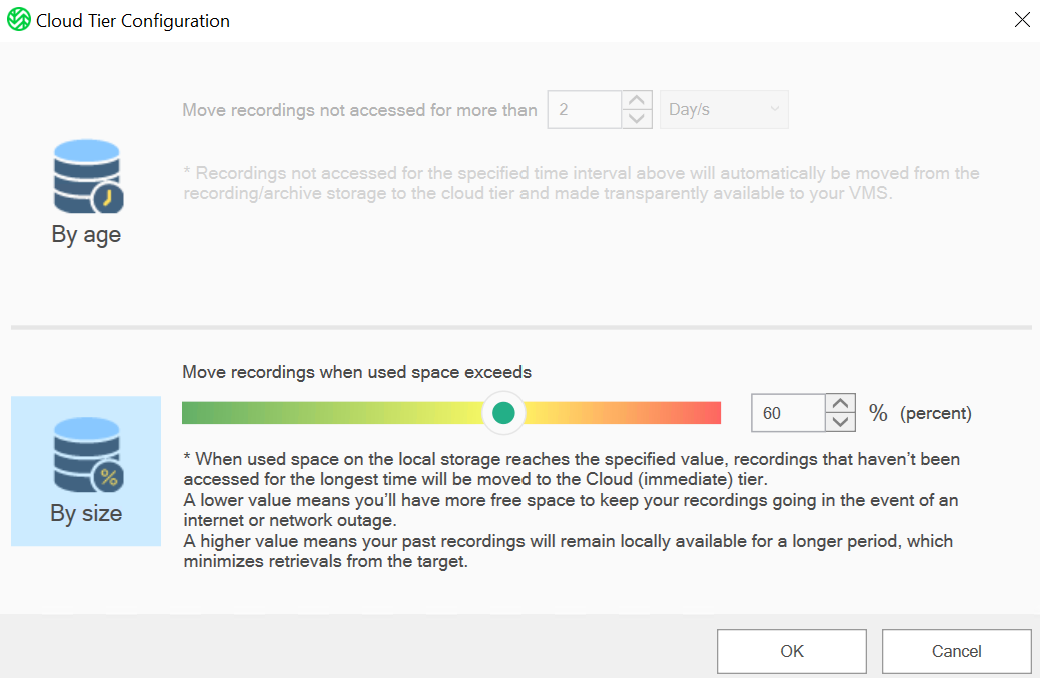
By Size moves recordings when space on the local storage exceeds a specified value.
To tier By Age, click the drop-down. Select a number and a unit of time. When you “tier by age,” you define how long video remains on local storage before being transferred to the cloud. For example:
Selecting “7 days” means any video older than 7 days will automatically be archived to Wasabi Cloud storage.
Click OK.
Optionally, to tier By Size, enter a number in the percentage field. When you “tier by size,” you manage when video data is moved to Wasabi Cloud based on the amount of storage used, rather than the age of the recordings.
For example: Selecting “80%” means once local storage reaches 80% of its capacity, XProtect will automatically begin transferring older recordings to Wasabi Cloud.
Click OK.
A message will confirm that the Cloud Tier (Storage Extension) was successfully enabled and that the recording storage will be set to Paused mode. Click OK.
.png)
Click the Paused slider to set the feature to the Running mode.
(1).png)
A message will request that you confirm those changes. Click Yes.
.png)
The data will automatically begin to tier to Wasabi Cloud when it meets the configured Age or Size.
.png)
Verifying Files are Tiered to Wasabi
After you have configured the Storage Extension, verify that the files were successfully moved to Wasabi Cloud by following the steps below.
Open a Windows File Explorer window.
Navigate to your recording server path.
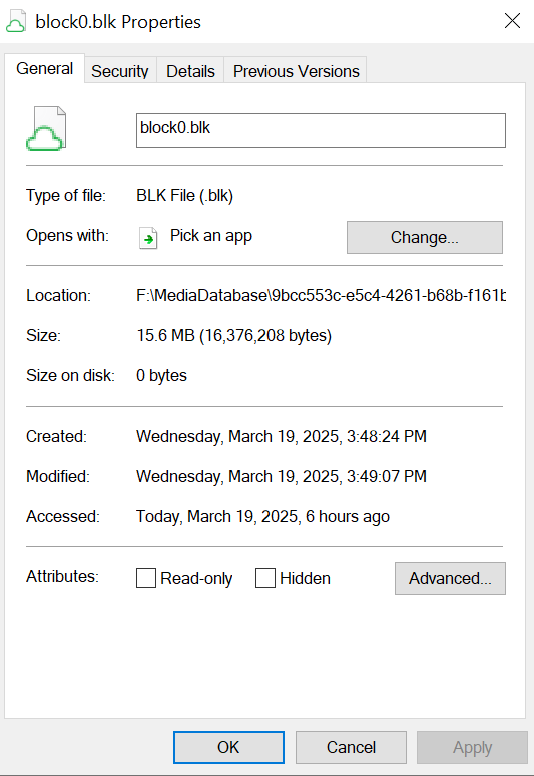
When Storage Extension is enabled, you will notice the
 to the left of each file. This indicates that the files are now 0 byte stub files and the data has been moved to Wasabi.
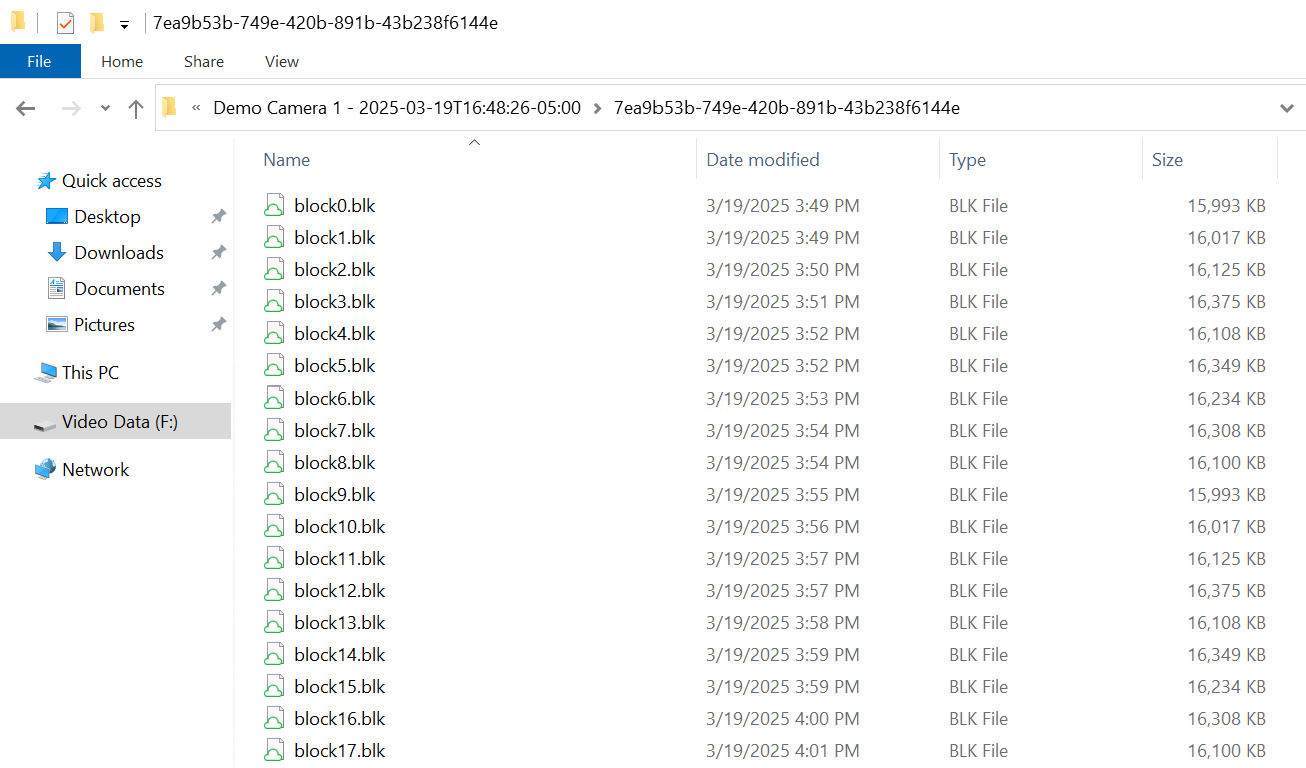
Right-click a file to check its details. Select Properties. Notice the difference in both Size and Size on Disk, as shown below.
Pairing Your VMS With a Target
Continue by Pairing a VMS With a Target.